Tiki Central / Tiki Carving
Conga....Wisconsin stuff!
Pages: 1 2 3 4 5 6 7 8 9 10 11 12 13 14 15 16 17 18 19 20 21 22 23 24 25 26 27 28 29 30 31 32 33 34 35 36 37 38 39 40 41 42 43 44 45 46 47 48 49 50 51 2,403 replies
|
C

congatiki
Posted
posted
on
Tue, Apr 12, 2011 5:56 PM
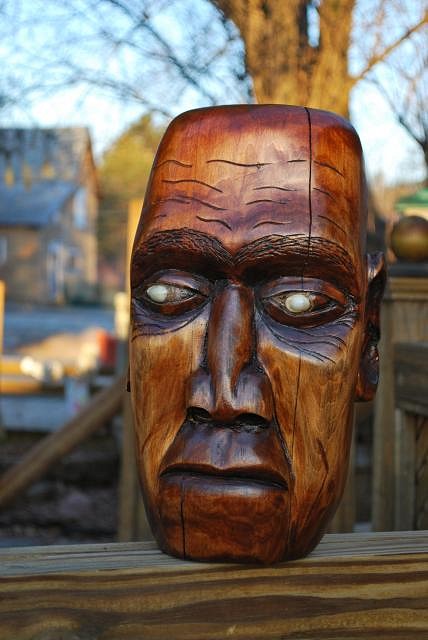
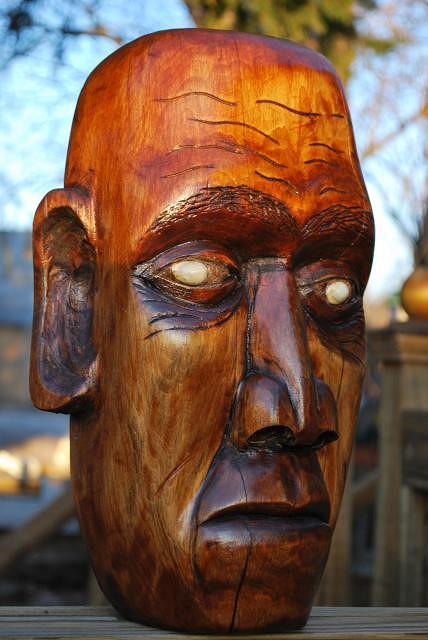
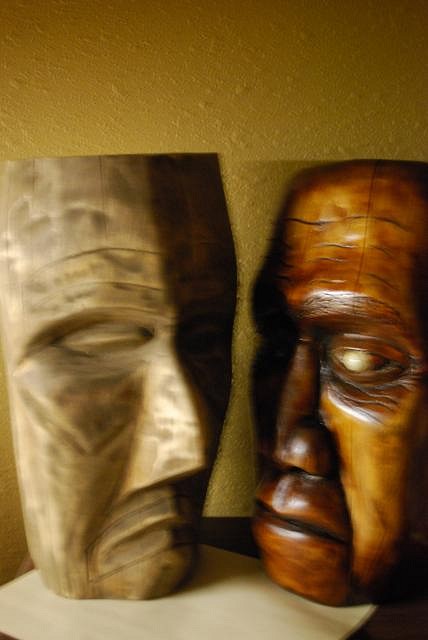
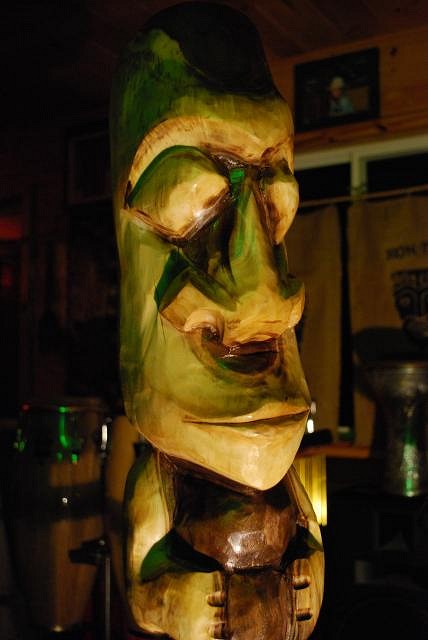
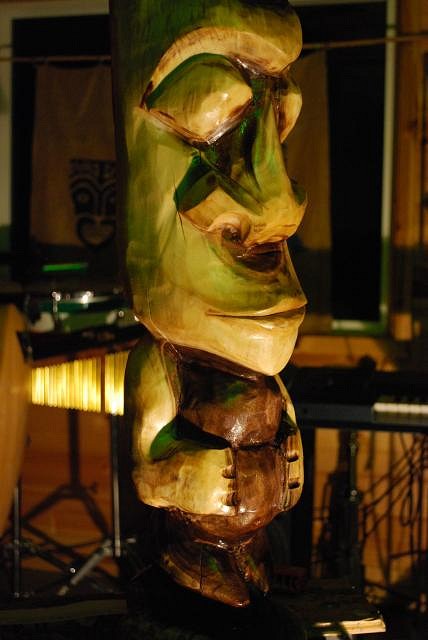
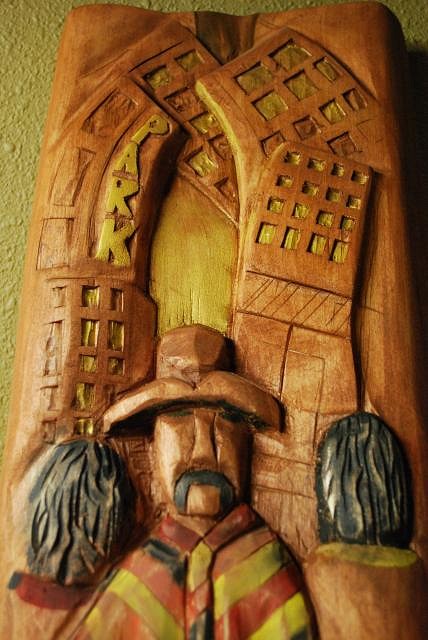
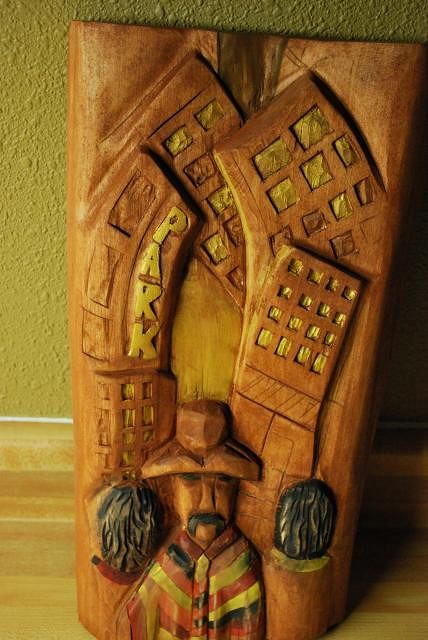
Thanks Benz and Chimp, and everyone who popped in. And I finally finished something. |
|
GP

Grand Poobah
Posted
posted
on
Tue, Apr 12, 2011 6:34 PM
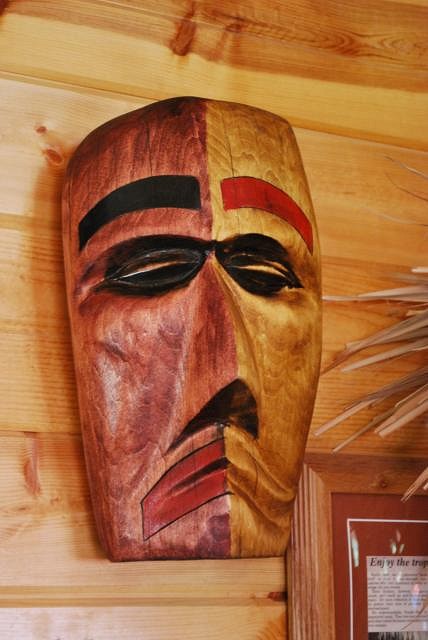
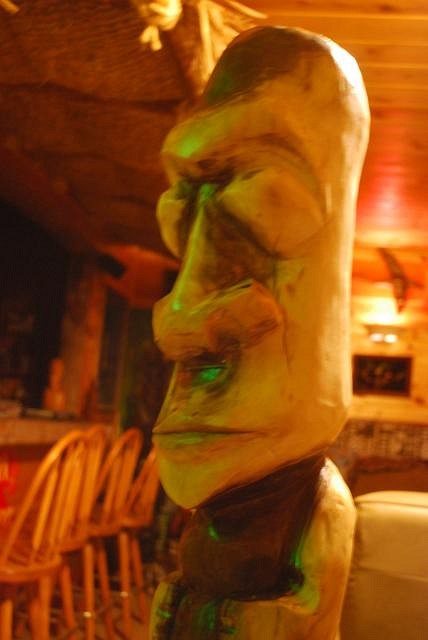
those detail are amazing! all of the wrinkles and the eyebrows as well as the stain, especially how it seems to get darker in areas that would normally be darker! |
|
A

amate
Posted
posted
on
Fri, Apr 15, 2011 1:25 PM
Yes, I like the stain too. It enhances the grain without covering it up. I would be interested in knowing what shade/finishing techniques you used. (Only if you care to share it.) |
|
M

McTiki
Posted
posted
on
Fri, Apr 15, 2011 1:58 PM
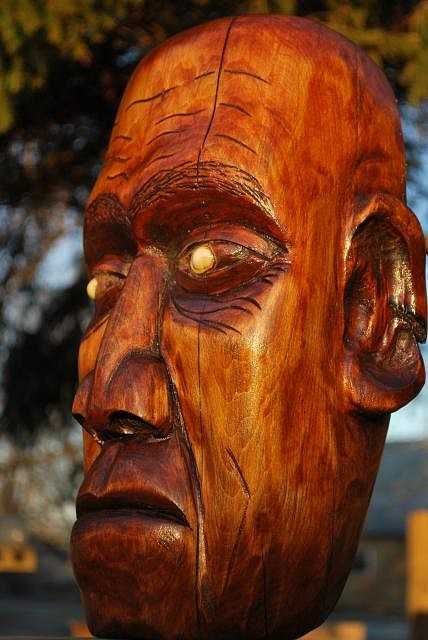
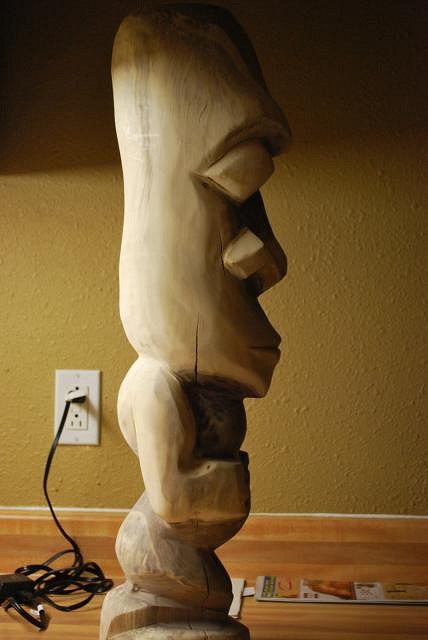
Man Conga, this one is showing your carving maturity level fo sho! Very nice piece indeed. Basswood is supposed to be a dream to carve on. I have an Avacado in the works and it is very keen to details. Mahalo McTiki |
|
C
congatiki
Posted
posted
on
Fri, Apr 15, 2011 8:40 PM
Greetings Poobah, Amate and McTiki, appreciate your nice compliments about the latest carve. On this carving I started with a coat of a stain called "special walnut"...which was a little more The stain/sand/stain/sand/stain process gives the finished produce a "glassy" look that is At any rate...I appreciate all positive comments...they keep me going when I wonder what it all |
|
S

seeksurf
Posted
posted
on
Sun, Apr 17, 2011 10:52 PM
This fella turned out fantastic! Congrats. |
|
S

surfintiki
Posted
posted
on
Mon, Apr 18, 2011 9:56 AM
Wow! Nice nice work! I don't think I'll ever get to doing a face. |
|
T

TheBigT
Posted
posted
on
Mon, Apr 18, 2011 12:03 PM
Fantastic piece of art, Conga! Killer job. I love it. I also find our staining method interesting. I see your pics where you have sanded after a coat of stain but left places where the stain is still fairly untouched. How long are you waiting between coats for the stain to dry (or how long is it taking, rather)? You can actually stain right over an existing coat of stain. The linseed oil will finally cure, but the wait may be a while. Are you finding it slow to dry when you coat over the patches with a lot of the pre-existing stain still left? I'm assuming you're using oil based stain? |
|
C
congatiki
Posted
posted
on
Mon, Apr 18, 2011 2:52 PM
Many thanks Seeksurf, Surfintiki and BigT, you guys do great work |
|
T
TheBigT
Posted
posted
on
Tue, Apr 19, 2011 8:04 PM
Not at all. We might as well trade some useful knowledge every once in a while in between all the 'at a boys. :lol: It sounds like you're creating your own "wood conditioner" method by sanding away most of the stain, leaving some in. You're right I don't think I'd want to use that method on a large piece. I can just imagine the pile of sandpaper it would take... |
|
C
congatiki
Posted
posted
on
Wed, Apr 20, 2011 7:25 PM
That would take too much sandpaper and sanding Big T. |
|
S
seeksurf
Posted
posted
on
Thu, May 5, 2011 7:36 PM
No, I think you are the expert stain man myself. |
|
C
congatiki
Posted
posted
on
Fri, May 6, 2011 3:54 AM
Thanks for the little "bump" Mr. Seeks. |
|
M
McTiki
Posted
posted
on
Fri, May 6, 2011 12:18 PM
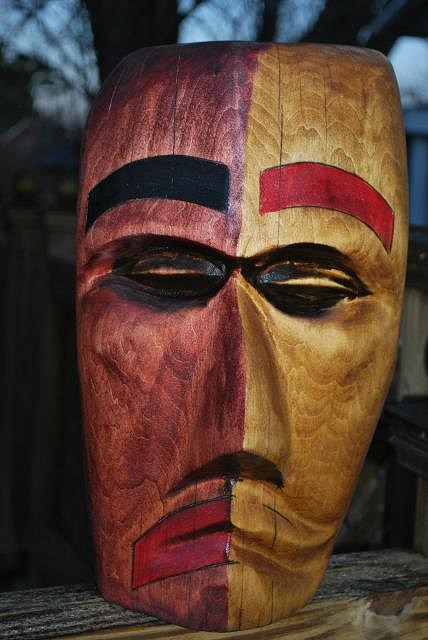
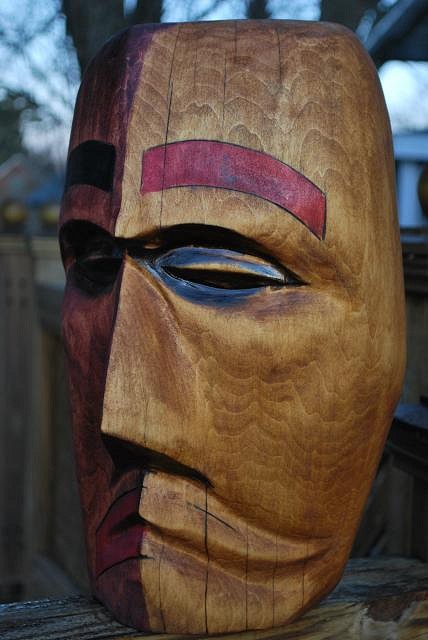
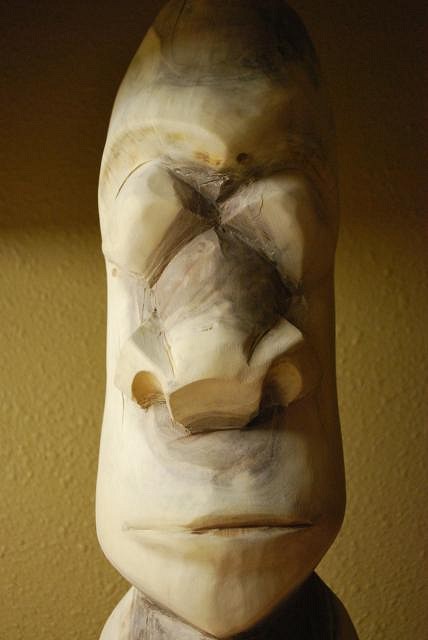
Conga, the grain you have sanded is just popping. I love this concept of two in one. beautiful piece sir. Thank you for sharing. Mahalo McTiki |
|
A
amate
Posted
posted
on
Sun, May 8, 2011 11:39 AM
You have a nack for capturing the primitive even with the satin finish. That primitive spirit is why I enjoy your work. Keep em' coming! |
|
F

finkdaddy
Posted
posted
on
Sun, May 15, 2011 6:54 AM
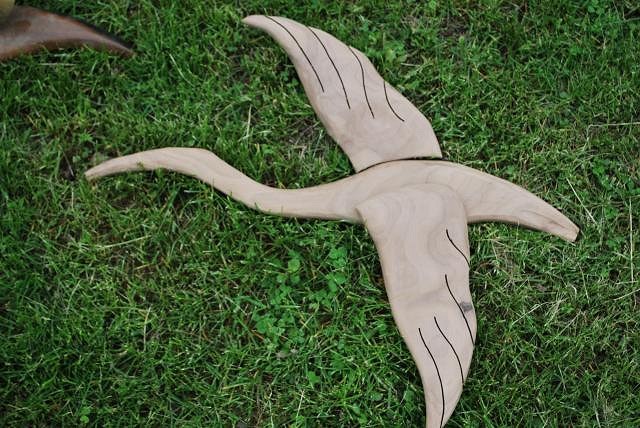
Conga, those are looking amazing! I love the facial features on that last piece! You're style has really become pronounced and unique. I can't wait to see more! ps, what's going on with our weather?!?! |
|
C
congatiki
Posted
posted
on
Mon, May 30, 2011 3:34 PM
Many thanks McTiki, Amate, and my old friend Finkdaddy. Your kind words are always appreciated, |
|
T
TheBigT
Posted
posted
on
Tue, May 31, 2011 12:16 PM
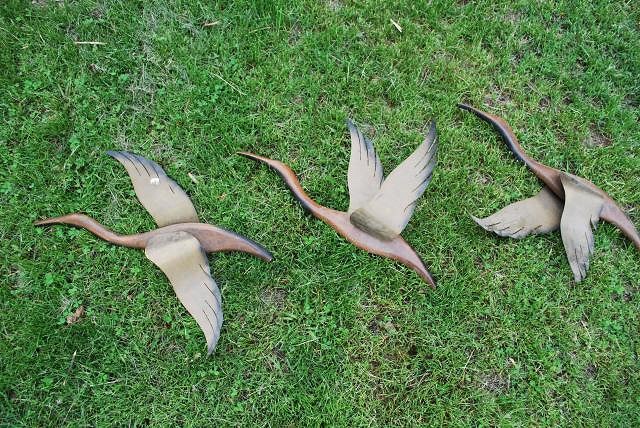
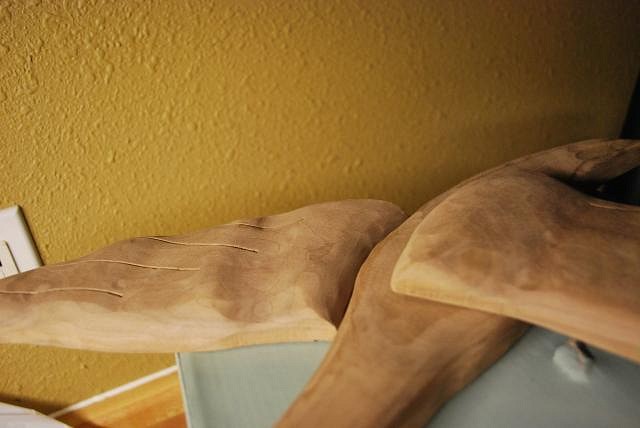
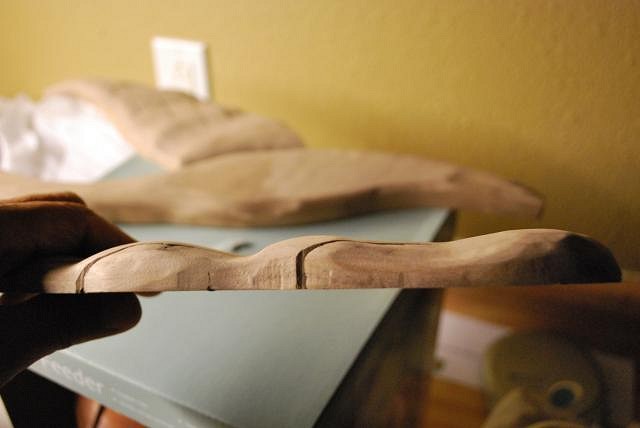
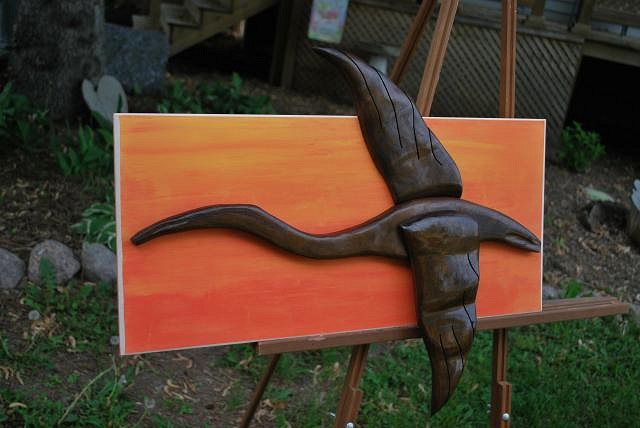
I like those. Did you steam the wings to shape them? My grandparents had the pink flamingos on the wall. Man I hated those.. |
|
A
amate
Posted
posted
on
Thu, Jun 2, 2011 3:38 PM
yeah... how did you do those wings? |
|
T

tikigodz
Posted
posted
on
Thu, Jun 2, 2011 9:14 PM
Yup wings r nice! |
|
C
congatiki
Posted
posted
on
Fri, Jun 3, 2011 3:46 AM
Hi guys....thanks for looking over here! |
|
TBBMT

tiki beat by marcus thorn
Posted
posted
on
Tue, Jun 7, 2011 1:48 AM
keep up the good work |
|
C
congatiki
Posted
posted
on
Sun, Jun 12, 2011 3:35 PM
Thank you Marcus, nice to have you stop in at Conga's Corner. Your work is inspiring and |
|
L

laojia
Posted
posted
on
Sun, Jun 12, 2011 11:56 PM
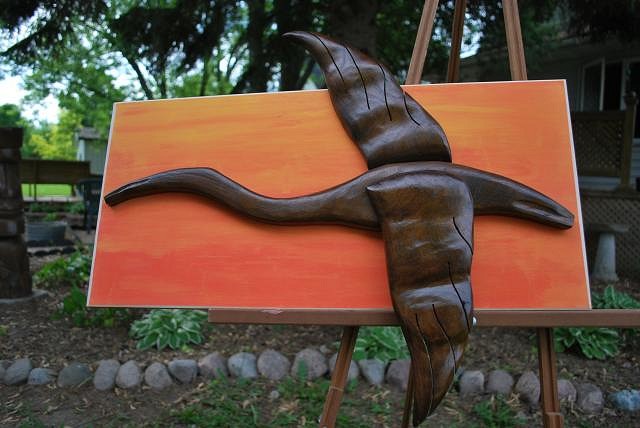
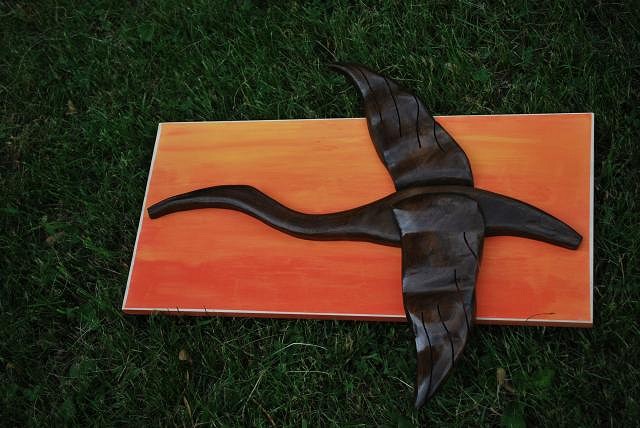
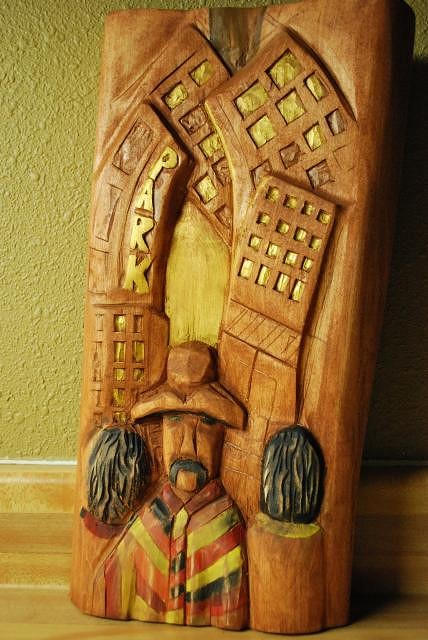
Sure! A fun and nice project! I myself started a series of frames with carving, smaller than your, I like the idea of "out of area", when the carving go more far the frame, that you give to this painting/carving. Waiting for the others! J. |
|
B

Benzart
Posted
posted
on
Sun, Jul 10, 2011 6:09 AM
YES, I Enjoy, Nice stuff Drumbeater! |
|
T
TheBigT
Posted
posted
on
Sun, Jul 10, 2011 8:22 AM
very cool! Where did the other ones go?? |
|
C
congatiki
Posted
posted
on
Mon, Jul 11, 2011 6:54 AM
Many thanks Jerome...Benzo...and BigT. I did get a couple of nice big pieces of basswood. Living |
|
L
laojia
Posted
posted
on
Mon, Jul 18, 2011 12:09 AM
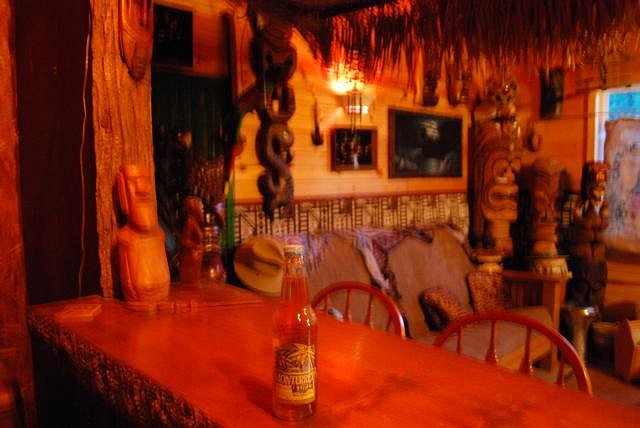
A Beer Central??? |
|
C
congatiki
Posted
posted
on
Mon, Jul 18, 2011 7:02 PM
Not "BEER CENTRAL" Jerome.... |
|
A
amate
Posted
posted
on
Tue, Jul 19, 2011 3:51 PM
Beer Central... I'm in!!! where do I sign up? :D |
|
BB

Bruddah Bear
Posted
posted
on
Tue, Jul 19, 2011 5:27 PM
Yay! I'm A TIKI!! Guess that'll give Chuck Tatum Is Tiki a run for his money.
Great carves, Conga Bear [ Edited by: Brudda Bear 2011-07-19 17:32 ] |
|
C
congatiki
Posted
posted
on
Mon, Sep 19, 2011 5:08 PM
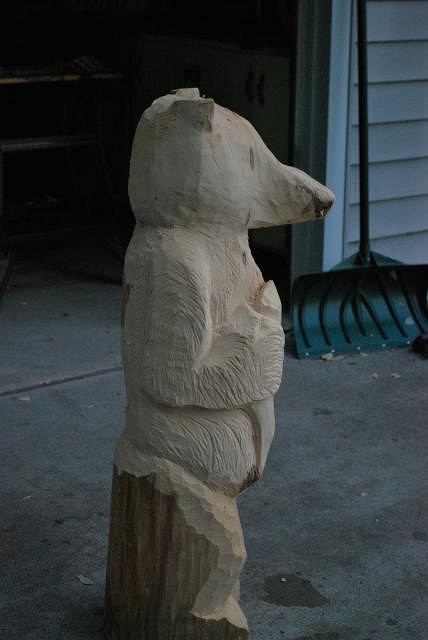
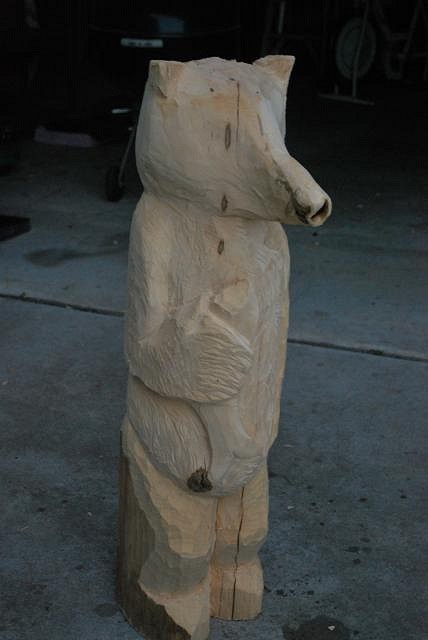
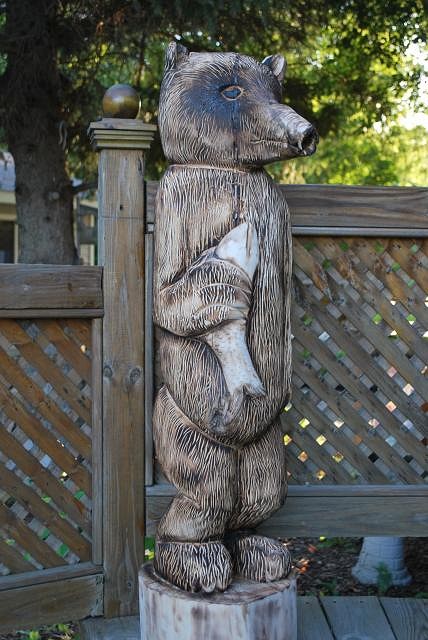
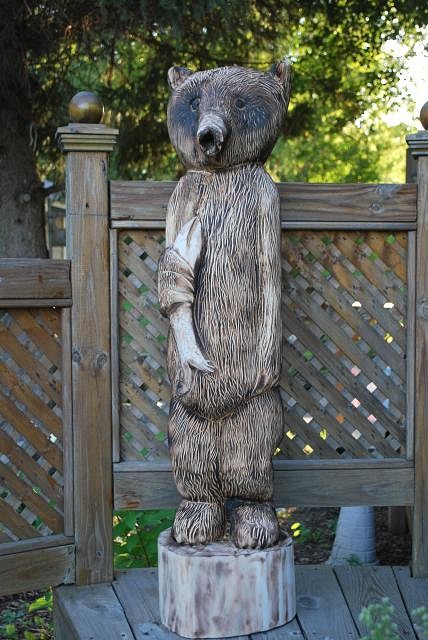
Hey everyone, Conga lives in the wild jungles of northern Wisconsin. Just about time |
|
P

pjc5150
Posted
posted
on
Mon, Sep 19, 2011 7:46 PM
wow! I'm really stoked that you posted this...because I have 2 different people who want bears! That's a great bar man...well done! |
|
T
TheBigT
Posted
posted
on
Mon, Sep 19, 2011 8:06 PM
Hey Conga, love him! How tall is he?? He looked pretty short at first. But now it looks like he's all grown up! Nice job. Love the texture/fur. He's great just as he is, but yeah, a PNG fish and a tikified base and I think you would have bonafide TikiBear! |
|
A
amate
Posted
posted
on
Thu, Sep 22, 2011 3:19 PM
Just put a grass skirt on him and he'll be fine :D |
|
B
Benzart
Posted
posted
on
Fri, Sep 23, 2011 12:51 PM
Birds are a Natural for you Conga, You both beat to different drums, for you any drum for the birds their beating wings must set something off in your head
|
|
C
congatiki
Posted
posted
on
Fri, Sep 23, 2011 1:31 PM
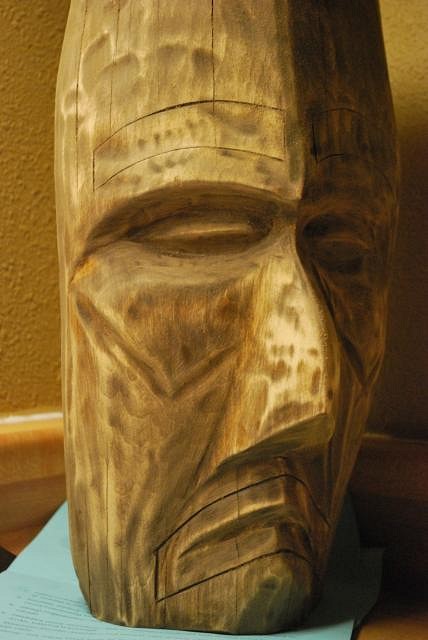
The chisel community has been posting some pretty cool stuff, so I'm a little hesitant to I am working on a chunk of black walnut and it's pretty wierd, very dark in the center [ Edited by: congatiki 2011-11-15 18:11 ] |
|
C
congatiki
Posted
posted
on
Tue, Nov 15, 2011 6:15 PM
edit for accidental post [ Edited by: congatiki 2011-11-15 18:15 ] |
|
T
TheBigT
Posted
posted
on
Wed, Nov 16, 2011 8:49 AM
ooh, me likey. Glad to see u back with some new stuff conga. I like the shadow test to. I think I've seen you do that before but probably didnt sink in as to how useful that might be getting a carve to really stand out. Thanks! |
|
A
amate
Posted
posted
on
Fri, Nov 18, 2011 4:20 PM
I thought "wierd" is why we are all here!! I'll give him an A+ on the shadow test. |
|
C
congatiki
Posted
posted
on
Fri, Nov 18, 2011 7:21 PM
Thanks Amate and BigT, good to be finding a little time to knock out a carving again. Seems |
|
P

Polynesiac
Posted
posted
on
Sat, Nov 19, 2011 8:04 AM
Conga! glad to see you're still at it too! The sunset bird carving is excellent - and I think it's good to go outside you comfort zone with carving, not only with tiki designs (which you do ALL the time), but with other types of carvings - like your bear and bird. You have to keep it interesting and fun! Booth of those carvings demonstrate that and were most likely challenging for you, but turned out FANTASTIC! Really liking the new guy - I'm looking forward to seeing where he goes! That shadow test is a good idea! I'll try that on my next big guy - I'm still not all that good at getting perfect symmetry |
|
A
amate
Posted
posted
on
Sat, Nov 19, 2011 5:07 PM
Not that there's anything wrong with carving bears and eagles. It's a funny thing...back when I was carving animals, very few people were interested. Now that I'm carving tikis, everyone seems to be requesting animals. Go figure. |
|
B
Benzart
Posted
posted
on
Wed, Nov 23, 2011 3:55 AM
Cool looking Weirdness Conga and Beautiful hunk of walnut. Glad to see you hacking away! Happy Thanksgiving. |
|
C
congatiki
Posted
posted
on
Wed, Nov 23, 2011 4:32 PM
Hi Ben...Polynesiac...Amate...and everyone. Happy Thanksgiving from the never-ending |
|
C

Clarita
Posted
posted
on
Sat, Dec 17, 2011 6:36 AM
Hey Conga, what a handsome guy you have there :) so , did you finish him yet? |
|
C
congatiki
Posted
posted
on
Mon, Dec 26, 2011 5:04 PM
hi Clarita, nice to see you again. Merry Christmas to all. |
|
S
surfintiki
Posted
posted
on
Mon, Dec 26, 2011 6:40 PM
Ha! Nice! Do you always use such short names?!!! |


Pages: 1 2 3 4 5 6 7 8 9 10 11 12 13 14 15 16 17 18 19 20 21 22 23 24 25 26 27 28 29 30 31 32 33 34 35 36 37 38 39 40 41 42 43 44 45 46 47 48 49 50 51 2403 replies