M

MadDogMike
Grand Member (8 years)
The Anvil of the Sun
Joined: Mar 30, 2008
Posts: 10861
|
M
Kinny, did we skip from Art Lesson #1 to Lesson #4? The last tutorial was simple enough even I could do it. This latest one calls for art supplies I can't get down at the WalMart. :lol:
|
TSA

Joined: Aug 31, 2006
Posts: 3978
|
TSA
Thanks Kenny for the step by step!
I LOVE to see the artistic process!
and now I wanna do a skeleton night marcher dude too!!!!
Also big mahalo for coming to da art show. I LOVE U MAN!
Brado~
|
C

Joined: Sep 26, 2006
Posts: 1301
|
C
Oh thanks for the tutorial, now is so easy to make a painting like one of yours, NOT!
Can you make one, on how to have crazy amazing talent like you? thanks :)
|
LLT

Joined: Jun 12, 2006
Posts: 7763
|
LLT
ANDY!
DEKOOOOOOOONING!
:)
Ernie!
Thanks man!
Ask and ye shall receive...
my money's on Namor!
:)
On 2010-03-12 18:16, MadDogMike wrote:
Kinny, did we skip from Art Lesson #1 to Lesson #4? The last tutorial was simple enough even I could do it. This latest one calls for art supplies I can't get down at the WalMart. :lol:
MadDoug...
:lol:
Here's the SECRET...
the better the art supplies
the better the work...
better art supplies equals knocking out the glitches
Once you hit a certain level then it's time to UP it a bit
and give back to the work what it has given to you...
just a natural progression...
so.... some of the supplies i will reveal
you may have to special order online or somethin...
Brad!
YOU are the Step-by-Step master!
always learning from YOUR progressions!
an honor being your friend
and growing in talent together!
missin you already..
On 2010-03-13 17:31, Clarita wrote:
Oh thanks for the tutorial, now is so easy to make a painting like one of yours, NOT!
Can you make one, on how to have crazy amazing talent like you? thanks :)
Clarita!
Gracias!
you are TOO SWEET!
These just document how this specific artist does it..
i hope it shows people how to get started
some rudimentary bits and pieces
to use as a foundation for building upon!
Everyone has different talents-points-of-views-upbringings
strengths and weaknesses...
Not sure what needs to gel with what to get the artist type...
it seems like no specific formula has been deciphered for that!
There are so many different artists of different temperments and times...
BUT!
there are a number of good books about the creative urge and how genius often
borders on subtle forms of madness
"the Fire inside"
or achieving the incredible because of HOW they dealt with their obstacles
"Churchill's black dog and Kafka's mice"
So try those two books,Clarita,as a start
not sure ,offhand,who the authors are
and if they have a Spanish translation
if not,just read Diego Rivera's autobiography
or Dali's "Secret Life of Salvador Dali"
or his "50 Secrets of magic Craftsmanship"
that will show you the strange concoctions of their lives and styles and art
and may help your exploration of the artist within ...
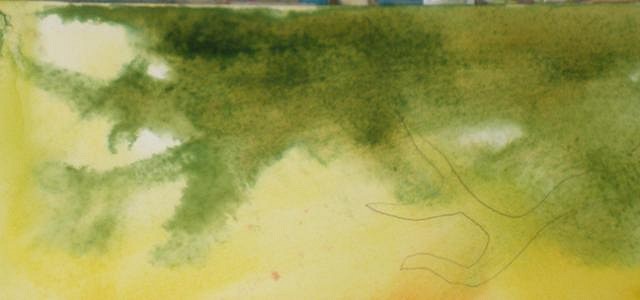
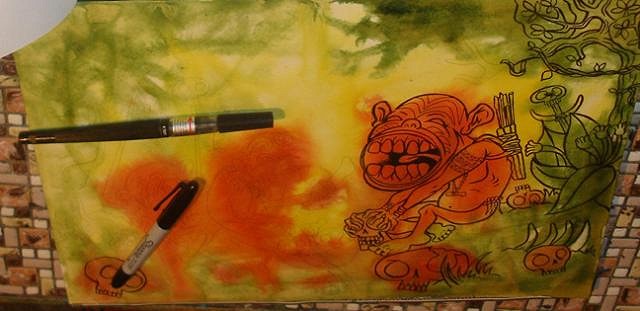
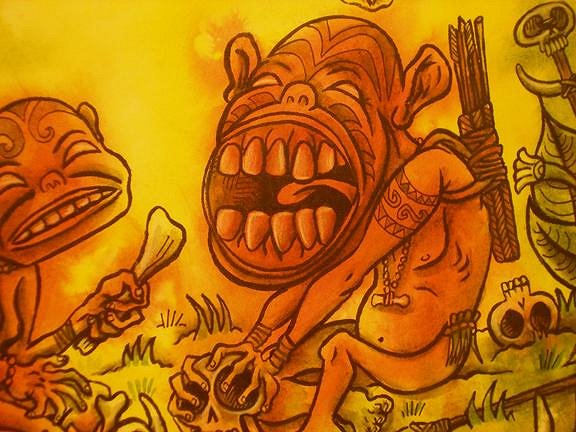
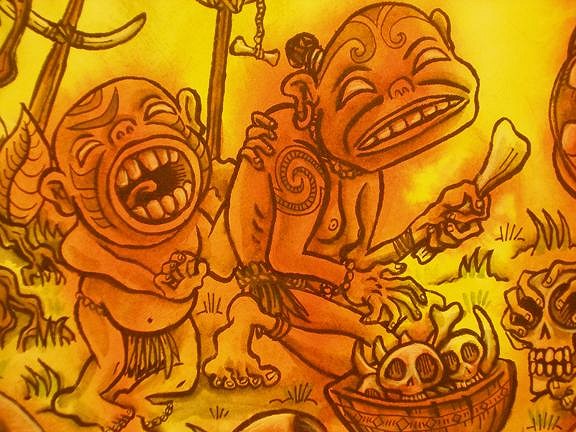
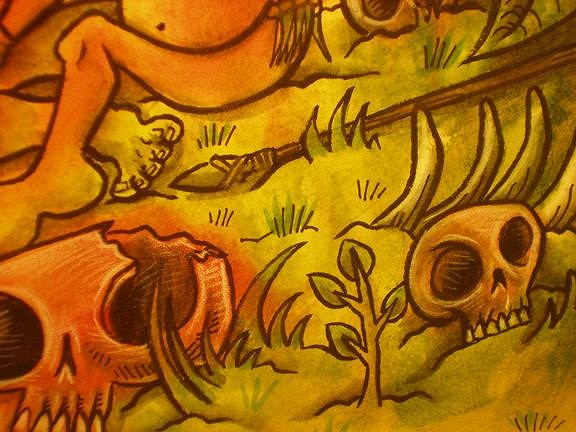
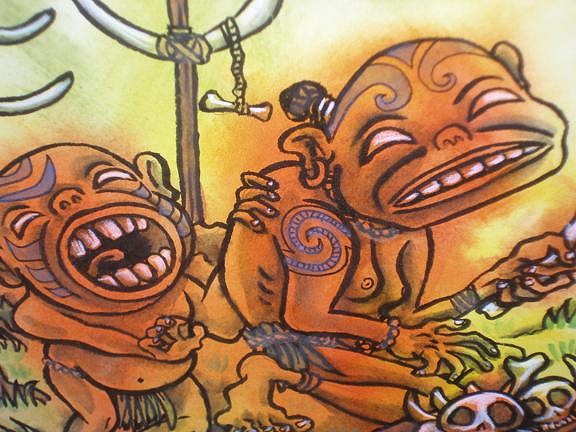
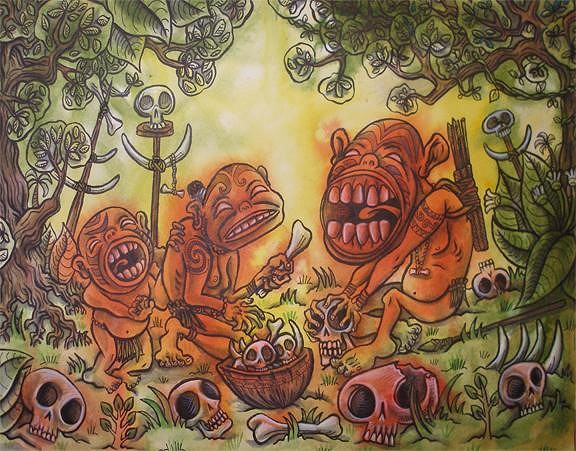
Here's another step-by-step
on how to create a "Cannibal Family"
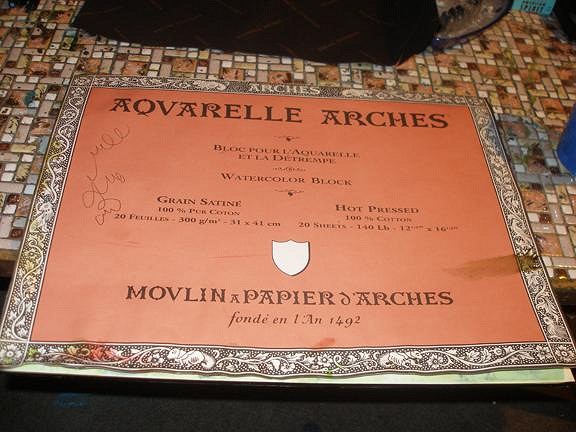
it all starts with watercolor paper
i use Aquarelle Hot-pressed (which means smooth-no tooth)
Cold-Pressed has that familiar deckled watercolor paper texture..
Just remember HOT like an iron PRESSED...
For this one,
the paper was wetted with water
and then ink was just splashed around
as something took form
I'd brush it around a bit more
bring it to life gesturally
like you were looking at a scene
with squinted eyes....
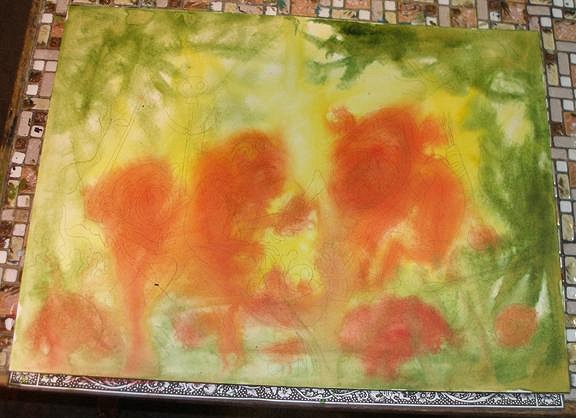
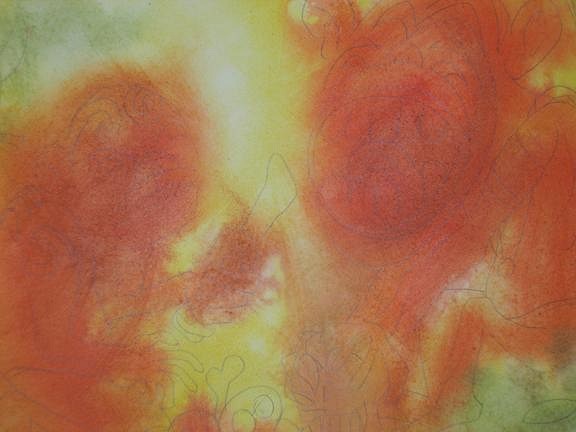
after it dries
lightly sketch the figures and landscape in to create a faint guide
of the scene and characters
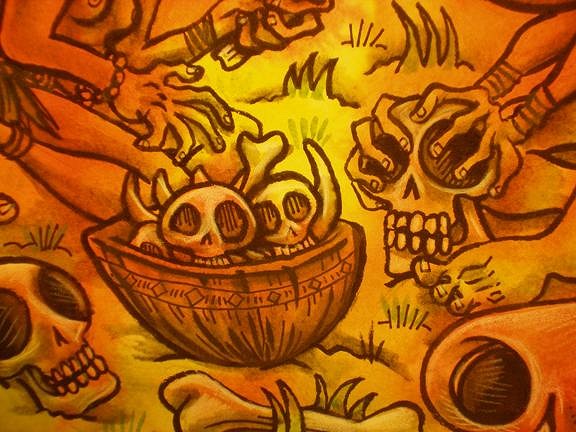
Not wanting to fudge this up
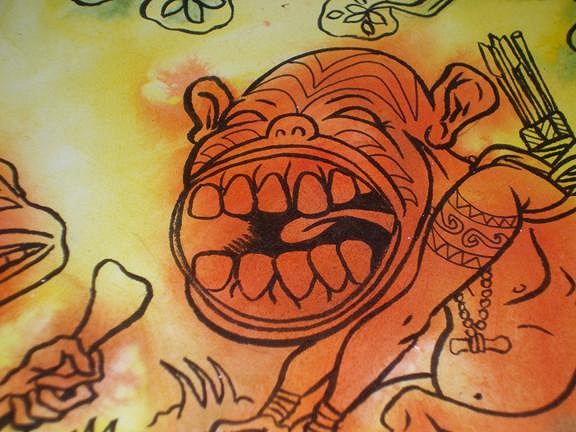
a quick ink study of certain elements is required...
the paw
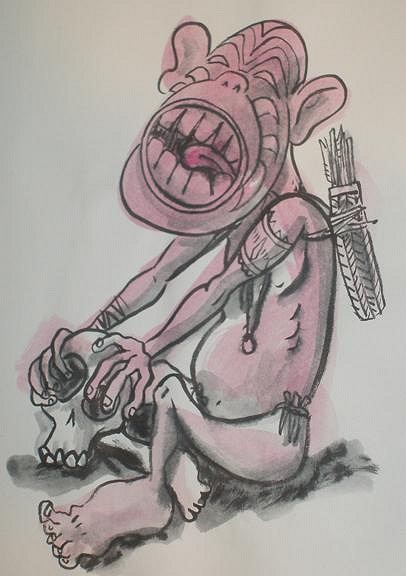
the maw

and junior

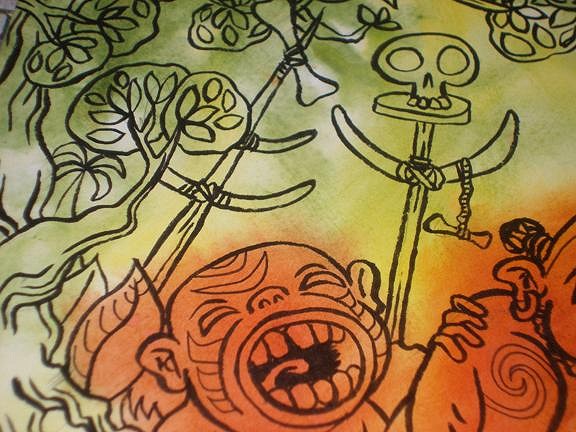
and lest we forget the jungle..
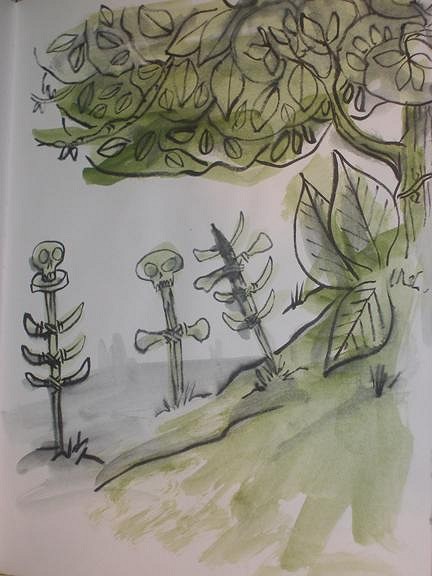
and,of course,the object of the family's concern..
the food bowl
now for the initial outline inked brushstrokes...
i use a Pentel brush pen
as well as a few others
one even has a disposable ink cartridge you can get in packs of 10 or 12
anyways...it's easier than dipping and brushing all day long!
and the Pentel ones take to the paper and bleeds well....
as we shall see later....
Between the lightly penciled form and the sketchbook study
it's time for da initial inking in....
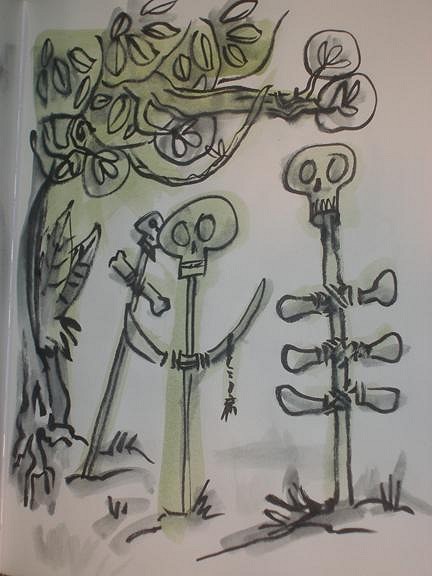
after all the ink's dried
you can lightly erase away all those pencil marks
DO IT NOW
cause once the blending starts
your pencil marks will be trapped under a light glazing of ink...

and DONE with the outlining!
this next step is a mix of things
first off
it's lightly wetting a paintbrush-not too big
and "pulling" the black from the outlines and making them blend into shadows
more water-more darker shadow (and out of control water!)
so always have a piece of towel on hand..
the less water-the slower the road....
and remember....if you expect perfection
forget it!
disguising mistakes is something no one can teach you
it's all about thinking on your feet
and reacting quickly....
and the unsuccessful rescues
are the ones you'll remember the best.....
also grabbed a finepoint sharpie and started to add little details
the feathers in the paw's darts
the weaving of his basket
the leaves in the tree....
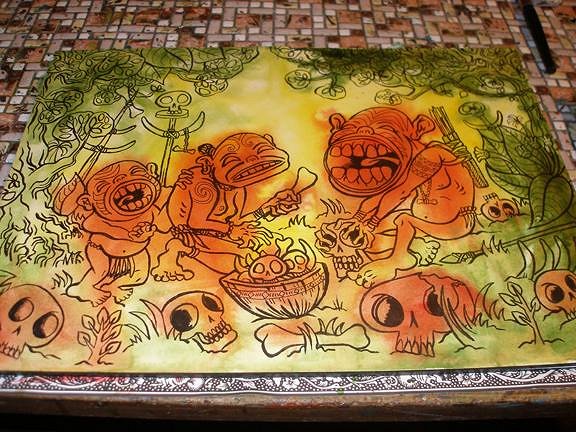
it's the blending that puts the piece into its own world
that gives it life and a world....

a little bit of watercolor here and there to color in things
and some white pencil for hilights and eyes and nails and bones
some green watercolor in some leaves
some brown on some wooden stakes or bowls and trees
all those little things develop the black and white drawing...
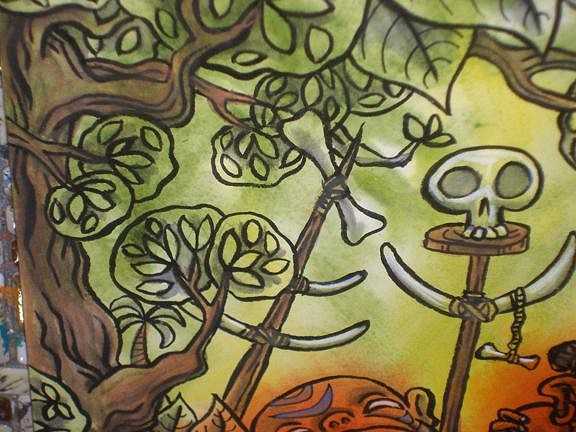
also some blue in the family's tattoos...
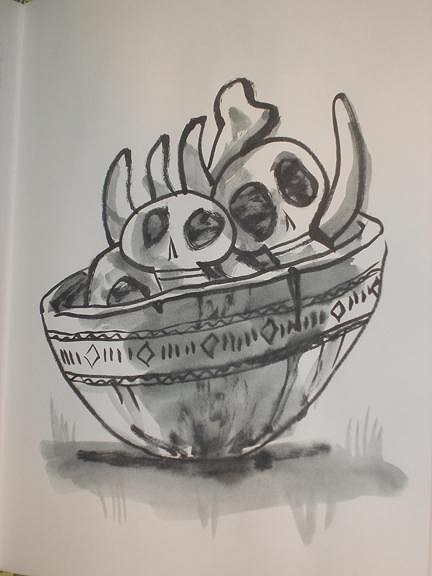
having the ink colored paper to work ONTO
gives you an initial palette to work from
and establishes a mood for the piece
in this case the muggy shade of jungle morning..
and the finished piece..
"the cannibal's family"
ink and sharpie and colored pencil on Watercolor paper
i hope these incoherent babblings
inspire you to
create some art on your own
to discover strange new art techniques
to boldly go where no artist has gone before!
|
LLT
Joined: Jun 12, 2006
Posts: 7763
|
LLT
Oh aren't you LUCKY?
Got time to show you how to do a bleachpen/ink drawerin!
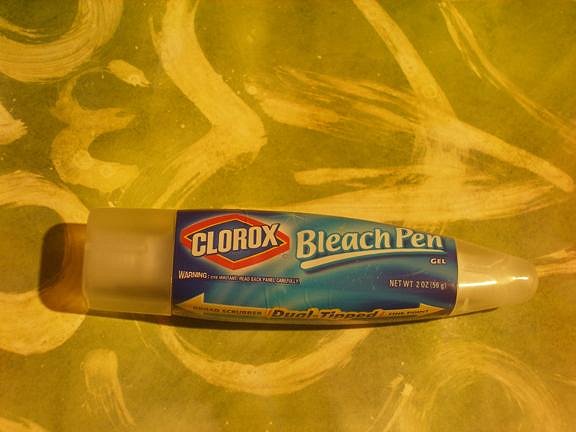
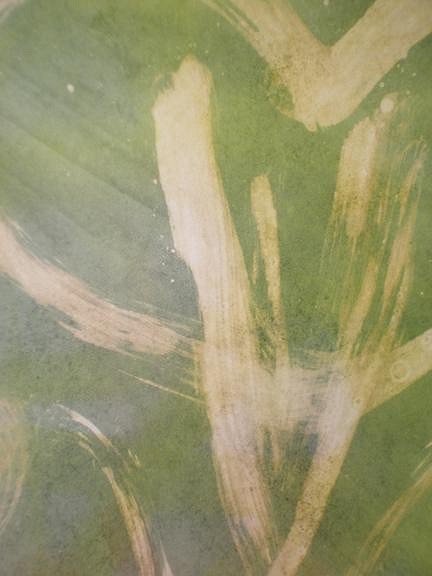
same paper as before...
covered the surface with yellow and olive
let it dry
and then....
grabbed one of these....
it has 2 tips
1 is fine
1 is all scrubby and brushy!
that's the end we're using today...
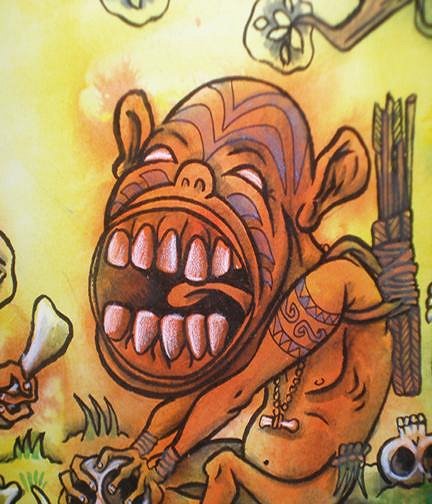
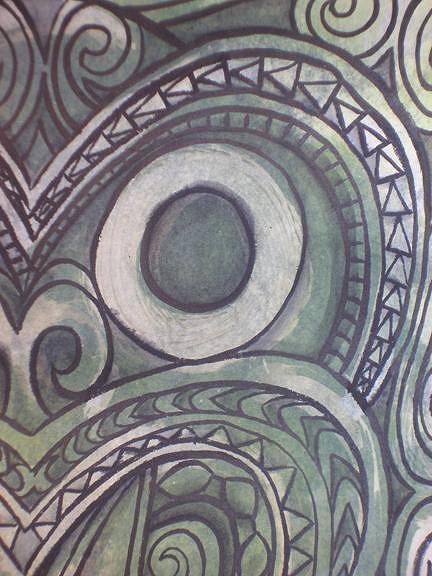
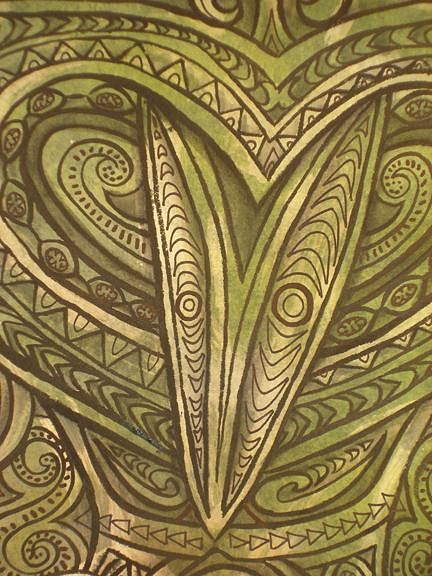
Scrub out a Hei-Tiki,a Manaia,whatever you like,just do it fast and messy!
like this!
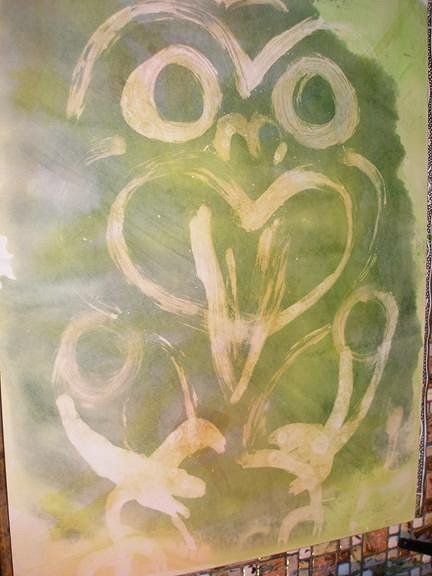
here's a closeup to show y'alls HOW messy!
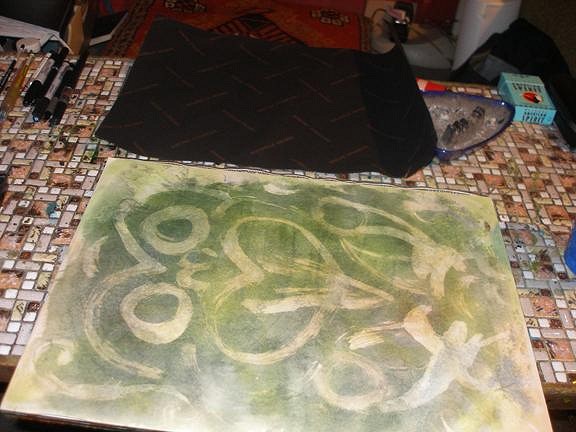
then, after washing off the bleach pen
while the paper is still wet
i grab a piece of black paper
(that comes with every pack of Aquarelle paper)
it's like the protective sheet over the actual paper...
and press it onto the wet page
to tone down the ink of the page AND the bleach a lil
it dulls it down a tad.....
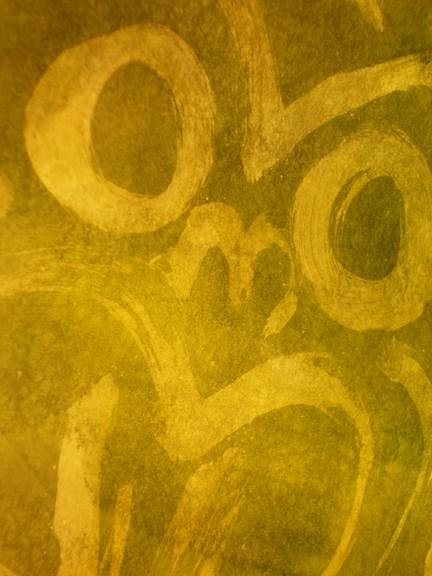
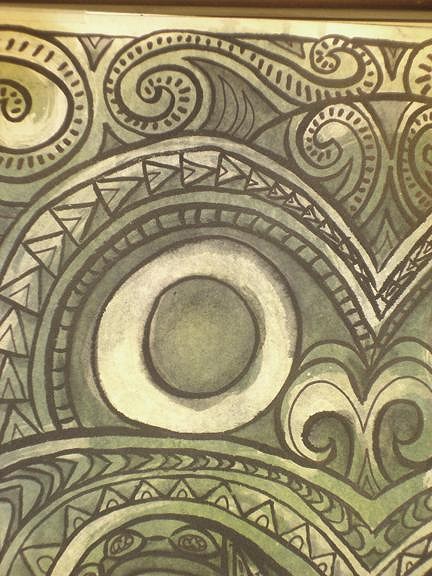
here's a closeup to show you how it not only dusts down the image
but also creates yet another texture of interest to play with!
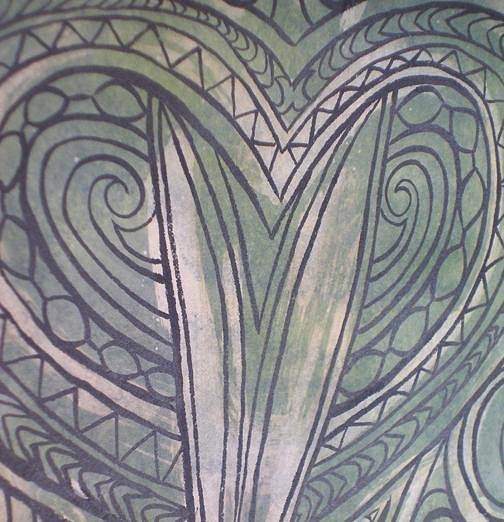
next step....the Pentel brush pen!
my good friend this week!

This guy is used for thick and thin outlines
the bigger details of the drawing....

here's some close-up areas to take a gander at...

aaaaaaaand DONE!
ready for the next step....
which is creating some shadows
to bring the middle guy forward and the background to go into...
well,the background!
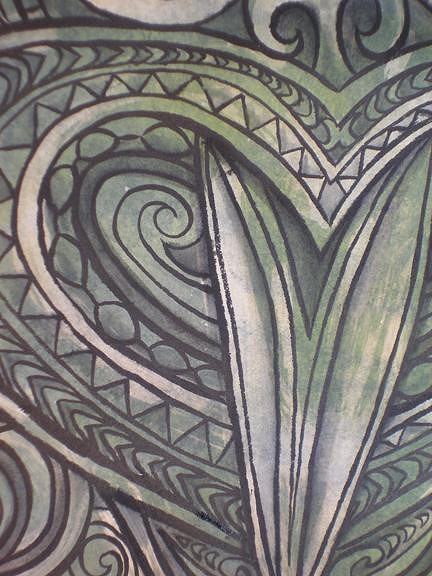
you can see how,by simply wetting a brush with water
how it "picks" up the ink and spreads it
and blends into a delightful shadow!
after all that dries
you will need a finepoint and regular sharpie marker
this will be used for the ULTRA-DETAIL of this piece
it can also be used to crosshatch shadows and texture into a drawing
but this one is going to have enough already!
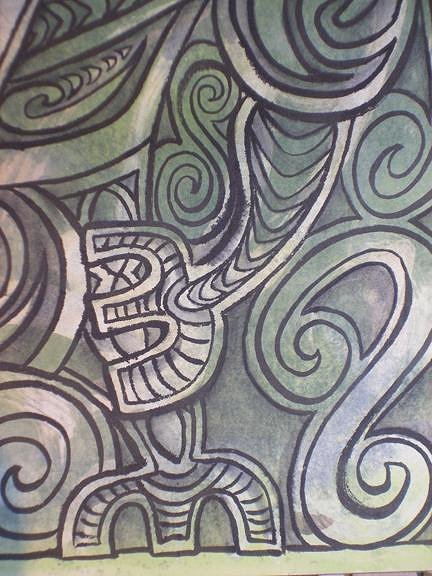
Here's some detail in the tongue...
giving it an almost eye-like appearance!
it's always good to have a reference book handy
you don't want to wander TOO far from the original intent...
Here's some torso/leg/arm/hand action
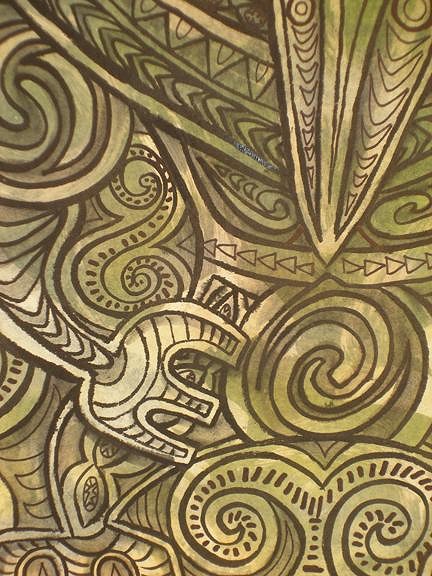
and the detail around the eye..
Didn't bother with hi-lights or extra shading
because the viewer would be distracted by the movement of the
decorative elements already in the drawing...
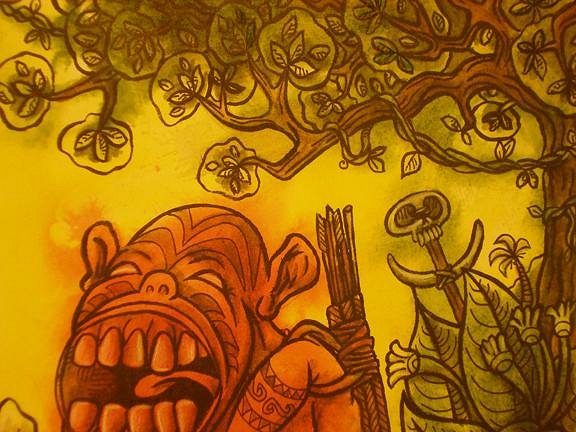
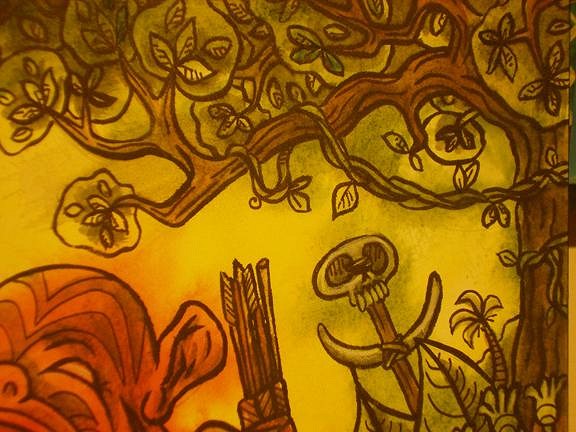
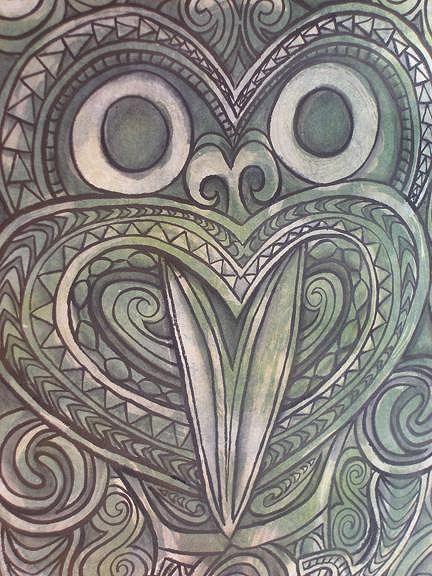
So there you have it......
"Maori"
ink,bleachpen and sharpie on Aquarelle watercolor paper
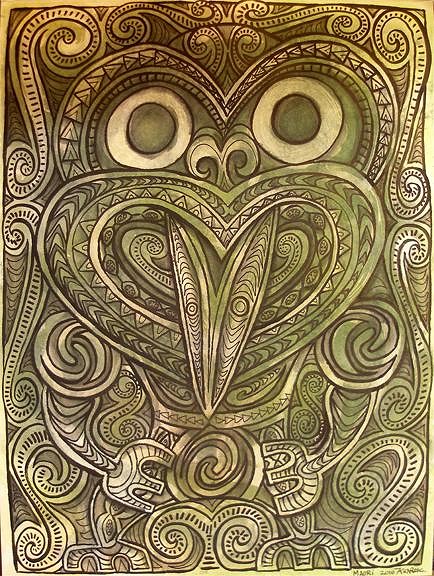
Have a fine evening!
|
H

hewey
Tiki Socialite
Sydney, Australia
Joined: Sep 14, 2004
Posts: 4283
|
H
Great step by steps Kinny! :D :D :D :D
|
M
MadDogMike
Grand Member (8 years)
The Anvil of the Sun
Joined: Mar 30, 2008
Posts: 10861
|
M
Kinny, you're an art MONSTER!!! So much more info than my little brain can process.
you can lightly erase away all those pencil marks
DO IT NOW
cause once the blending starts
your pencil marks will be trapped under a light glazing of ink...
We ceramicists* know that pencil marks are no problem, they'll burn out at 1800 degrees :D
*2 years ago I couldn't even spell ceramicists and now I am one (but I'm still not sure I spelled it right :lol: )
|
B

Benzart
Member
Port Saint Lucie, Florida
Joined: Jan 09, 2004
Posts: 10397
|
B
Kinny, This is wht I get for no visiting this side more often,, with your lessons I could have been coloring my stick people by now. The Mad scientist of color mixing an laying it down,,, You are too much Sir!
|
RH

Joined: Mar 07, 2008
Posts: 1013
|
RH
I really dig how you started with the bleach pen - what a great way to get a piece rollin'.
|
F

flynny
Tiki Socialite
Devon, UK
Joined: Jun 19, 2006
Posts: 275
|
F
Hi Kinny
Just ordered some stuff to have a go, keep the tutorials coming
Best Regards
Flynny
|
B

BigToe
Tiki Socialite
Southern California
Joined: Nov 07, 2006
Posts: 758
|
B
AMAZING to see how the madness becomes MAGIC!!! MASTERFUL use of the media!
|
BT

Joined: Aug 28, 2008
Posts: 391
|
BT
Great stuff as usual.
I've done a bit of watercolor in the past so without pics I just thought I'd throw in some ideas for textures for anyone who wants to try.
Alot of things can have cool effects on watercolors, just gotta play around and see what they do, experiment some.
tissue- wad up some (snot) tissue papers and splot the wet paint in the sky for clouds (it'll suck some of the water paint off the paper). tight wads will big bigger thick clouds, loose wads will be thinner wispy clouds.
Salt- big grainy salt, sprinkled onto wet paint will make cool star bursts. Let paint dry then brush off the salt. Stars, glitter on shiny things like metal.
knife/paint brush end - once paint is dried you can scrape white lines in (you scrape paint off the paper). Good for highlights.
toothbrush - wet paint on tooth brush, then aim brush at painting and 'stroke' it with your thumb. It'll make cool splatters. Maybe good for gravel...
that's all I can think of for now.
|
B

beadtiki
Tiki Socialite
Bothell, Washington
Joined: Aug 24, 2007
Posts: 930
|
B
Completely mind-boggling - as a non-drawer I can't even FATHOM this! I LOVE the tutorials because they give me an insight to "building" the paintings but I don't have the ability myself. I would love to see more attempts from others who CAN draw - like MadDogMike's attempt (which was pretty darn good in MY opinion!) However, give me a picture and I'll convert it into a beaded tapestry! Thanks for sharing!
|
K

Joined: Oct 05, 2005
Posts: 1401
|
K
great stuff, kinny! now i know exactly how to create my own masterpieces. i'll never buy another ruzic again! hahahahaha! oh wait, i can't draw a straight line and i definitely don't have your creative genius/madness! i guess that won't work. thanks for letting us get on your bus, ken "kesey" ruzic.
the bus came by and i got on, that's when it all began,
there was clownboy kinny at the wheel of the bus to never ever land.
 
edited to change cowboy to clownboy. i couldn't resist.:)
[ Edited by: kingstiedye 2010-03-19 12:59 ]
|
H

Joined: Dec 28, 2005
Posts: 1689
|
H
|
P

pdrake
Tiki Socialite
las vegas
Joined: Jan 13, 2006
Posts: 1771
|
P
you know, those are pretty cool. i'm always amazed at what artists find to utilize for the creative process. it seems there's nothing out of bounds. i've used some pretty strange stuff, too. i wonder if there's some type of forum or online community like "weird art tools and techniques central"?
|
A

Joined: Sep 27, 2004
Posts: 2434
|
A
On 2010-03-19 15:19, pdrake wrote:
i wonder if there's some type of forum or online community like "weird art tools and techniques central"?
http://www.wetcanvas.com
|
F
flynny
Tiki Socialite
Devon, UK
Joined: Jun 19, 2006
Posts: 275
|
F
Kinny
You mention "Ink" in your tutorials is this watercolour or real ink, forgive my humble Devonian ignorance.
Flynny
|
P

Joined: Jan 29, 2004
Posts: 2099
|
P
LLT - there is one step that you forgot...and that is the MAD TALENT that you have. I don't know anyone who can turn out amazing, detailed art like you do in the amount of time that you do it in!
These step by steps are excellent! They're great at introducing a know nothing about 2d art (like myself) to the tools and how to use them.
You rock.
|
LLT
Joined: Jun 12, 2006
Posts: 7763
|
LLT
ALOHA!
TIME FOR ANOTHER STEP-BY-STEP!
but first.....
On 2010-03-14 21:51, hewey wrote:
Great step by steps Kinny! :D :D :D :D
Thank you Hewey...Perhaps you've noticed the PNG influence these past few years..
That PNG Folktales Book you kindly sent a few years back
really sparked something..
Thanks Mang! and thanks for organizing so many great swaps!
On 2010-03-14 22:09, MadDogMike wrote:
Kinny, you're an art MONSTER!!! So much more info than my little brain can process.
you can lightly erase away all those pencil marks
DO IT NOW
cause once the blending starts
your pencil marks will be trapped under a light glazing of ink...
We ceramicists* know that pencil marks are no problem, they'll burn out at 1800 degrees :D
*2 years ago I couldn't even spell ceramicists and now I am one (but I'm still not sure I spelled it right :lol: )
Ceramics involve a kiln...
With painting and drawing you gotta erase the pencil marks
or if it's a water-soluble pencil,you can wash it off with water...
Totally stoked you know how to spell ceramicist..
it'll come in handy
especially since you is one!
Thanks for the visit!
On 2010-03-15 03:07, Benzart wrote:
Kinny, This is what I get for not visiting this side more often,, with your lessons I could have been coloring my stick people by now. The Mad scientist of color mixing an laying it down,,, You are too much Sir!
Thanks Benz!
and PLEEEEZ! stick with the 3-D
I am but a student of the 2nd Dimension
You have conquered an additional one!
Move forward onward and upward,my friend!
and thank you for soooo much!
:)
On 2010-03-15 16:36, Robb Hamel wrote:
I really dig how you started with the bleach pen - what a great way to get a piece rollin'.
Hey Robb!
i wonder if bleachpen would work on black velvet?
Hmmmmmmmmm...
Eagerly awaiting your next creation!
On 2010-03-16 01:44, flynny wrote:
Hi Kinny
Just ordered some stuff to have a go, keep the tutorials coming
Kinny
You mention "Ink" in your tutorials is this watercolour or real ink, forgive my humble Devonian ignorance.
Hey Flynny!
Right On!
Part of an artist's responsibility to Society is to inform and inspire...
to take them elsewhere
into a world of mystery and spirit..
But do not forget....
An artist's responsibility to Art is to practice our craft every day
Derive Joy from it whenever possible
Inspire fellow artists
and to examine,study,and expand upon
(and hopefully improve)
earlier Artistic style and theory...
and yes...that is INK
if it's watercolor, i will say so...
Winsor Newton and Dr. Martin(Martens) INKS not the shoe guy!
Dr. Martins also sells watercolours in a jar with a dropper
but i prefer the ink...
can't wait to see what you do with this technique...
On 2010-03-19 08:37, BigToe wrote:
AMAZING to see how the madness becomes MAGIC!!! MASTERFUL use of the media!
Whatever...
Get off the computer,Toe!
every second on here
steals a BigToe painting from the Earth!
On 2010-03-19 09:07, Badd Tiki wrote:
Great stuff as usual.
I've done a bit of watercolor in the past so without pics I just thought I'd throw in some ideas for textures for anyone who wants to try.
Alot of things can have cool effects on watercolors, just gotta play around and see what they do, experiment some.
tissue- wad up some (snot) tissue papers and splat the wet paint in the sky for clouds (it'll suck some of the water paint off the paper). tight wads will big bigger thick clouds, loose wads will be thinner wispy clouds.
Salt- big grainy salt, sprinkled onto wet paint will make cool star bursts. Let paint dry then brush off the salt. Stars, glitter on shiny things like metal.
knife/paint brush end - once paint is dried you can scrape white lines in (you scrape paint off the paper). Good for highlights.
toothbrush - wet paint on tooth brush, then aim brush at painting and 'stroke' it with your thumb. It'll make cool splatters. Maybe good for gravel...
that's all I can think of for now.
Hey Badd!
Thanks for adding those helpful additions!
SEA SALT works the best for the salt technique...
A paper towel will last longer than a tissue
especially if there's lots of ink on the surface...
and don't forget the "spray the ink thru a straw" one as well...
And for the knifepoint technique of scraping
ya GOTTA use a heavy paper
and a paperclip,exacto blade,and needle also makes great textures when scraping off ink..
The only problem i have is if you go back over the work
it changes the texture and picks up a lot more of the color in the scraped areas...
which can be used to wonderful advantage...
On 2010-03-19 10:19, beadtiki wrote:
Completely mind-boggling - as a non-drawer I can't even FATHOM this! I LOVE the tutorials because they give me an insight to "building" the paintings but I don't have the ability myself. I would love to see more attempts from others who CAN draw - like MadDogMike's attempt (which was pretty darn good in MY opinion!) However, give me a picture and I'll convert it into a beaded tapestry! Thanks for sharing!
Why thank you regan!
It's always interesting to see how anything is made...
Like a Delacroix...just stare at one
and try to fathom
what was added last...
why that stroke over there?
Was it all planned?
was it all instinct?
Ah! to get a step-by-step of a Delacroix..
sigh....
On 2010-03-19 12:54, kingstiedye wrote:
great stuff, kinny! now i know exactly how to create my own masterpieces. I'll never buy another ruzic again! hahahahaha! oh wait, i can't draw a straight line and i definitely don't have your creative genius/madness! i guess that won't work. thanks for letting us get on your bus, ken "kesey" ruzic.
the bus came by and i got on, that's when it all began,
there was clownboy kinny at the wheel of the bus to never ever land.
KTD!
Great to see you around here lately...
As for not being able to draw a straight line
Never hurts to try..
the only reason you can't
is because your brain sez you can't
free your mind and yo ass will follow...
Your genius and eye are honed in
as shown by your collection
it's just talking to your hand
and figuring out a way to let it talk to your eye
and especially your brain
because that's where "sight" happens
the eyes just pick up a frequency
and the brain translates it
and the heart..
don't forget the heart
that's what adds the ZING to a piece....
and also...also
creative genius/madness is not necessary ...
it's just a schtick that fascinates people...
:wink:
On 2010-03-19 15:08, hodadhank wrote:
Lookin good!
Why thank you kind Sir!
You're pretty handsome yourself
you old devil....
:)
On 2010-03-19 15:19, pdrake wrote:
you know, those are pretty cool. i'm always amazed at what artists find to utilize for the creative process. it seems there's nothing out of bounds. i've used some pretty strange stuff, too. i wonder if there's some type of forum or online community like "weird art tools and techniques central"?
See below perry!
and thanks for visiting!
the funnest part of being an artist
is to become a child and just take a leap
into the vastness
to take a risk
"fortune favors those who dare"
On 2010-03-20 13:51, AlohaStation wrote:
On 2010-03-19 15:19, pdrake wrote:
i wonder if there's some type of forum or online community like "weird art tools and techniques central"?
http://www.wetcanvas.com
Thanks Pal!
OOOH! They even have a gouache section!
you are a beautiful person,Tom....
On 2010-03-23 15:34, Polynesiac wrote:
LLT - there is one step that you forgot...and that is the MAD TALENT that you have. I don't know anyone who can turn out amazing, detailed art like you do in the amount of time that you do it in!
These step by steps are excellent! They're great at introducing a know nothing about 2d art (like myself) to the tools and how to use them.
You rock.
It's soooo funny how you 3-D guys are soooo amazed at 2-D techniques!
We 2-Ders feel the same way about you 3-Ders!
It's just such a wonderful thing to be able to mash around with you
and all the other talented kooks on here!
What a blessing!
Well, in order to spare those who JUST want to see the Step-by-steps...I will put that on a separate post.......
Thank you all for visiting and participating and enlightening me
hopefully we can bottle all this creative energy someday
and distribute some to everyone!
:)
|
G

GROG
Grand Member (1 year)
Tujunga
Joined: Jun 21, 2006
Posts: 7283
|
G
On 2010-03-27 11:26, little lost tiki wrote:
ALOHA!
creative genius/madness is not necessary ...
it's just a schtick that fascinates people...
:wink:
You've got creative genius/madness coming out your ass, so that must mean you have a schtick up your ass.
|
LLT
Joined: Jun 12, 2006
Posts: 7763
|
LLT
Ernie!
SHHHHHHHHHH!
the grown-ups are talking...
|
LLT
Joined: Jun 12, 2006
Posts: 7763
|
LLT
OOOOOkay!
Step-by-step comin atcha
in a Cold-Blooded fashion!
You're gonna need
a sheet of masonite
some brushes
some cel vinyl paint
or acrylic-but it will be a harder road...
and an adventuresome spirit!
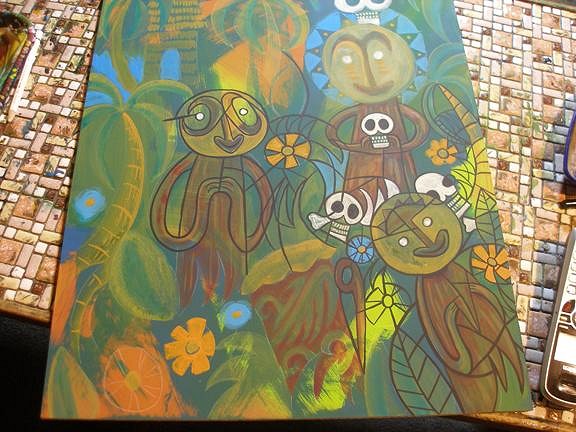
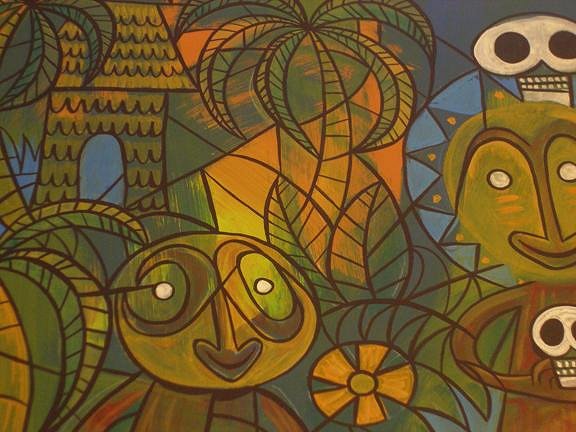
Today we'll be tackling one of them abstract styled pieces
and show ya all the thought and work
that goes into one...
first...the fun part..
just lay down some colors you like
brush em all around
don't let the paint GLOP in area
that will create a BUMP on the surface...
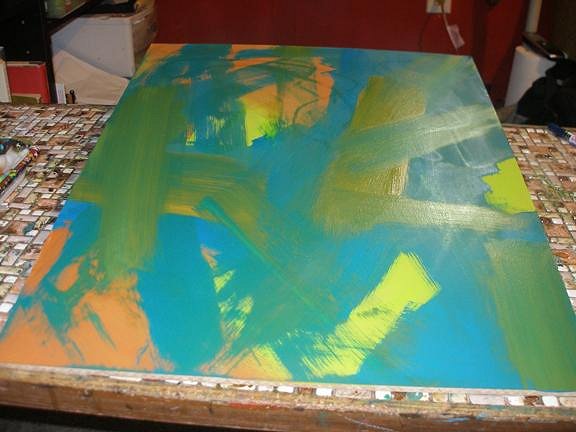
allow time to dry...
the fun part is you can work on 3-4 of these surfaces
so as not to waste any paint
but also to allow the other one(s) to dry....
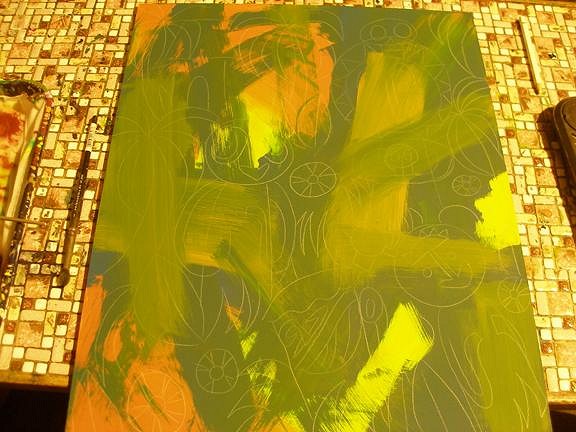
see what the colors and shapes suggest to YOU
and sketch it out lightly on the surface with a watercolor/water-soluble pencil...
white is usually the best color
as it contrasts the most with the colors used in the piece.....
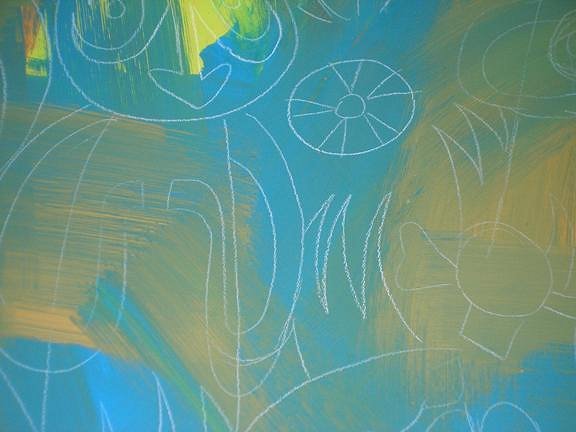
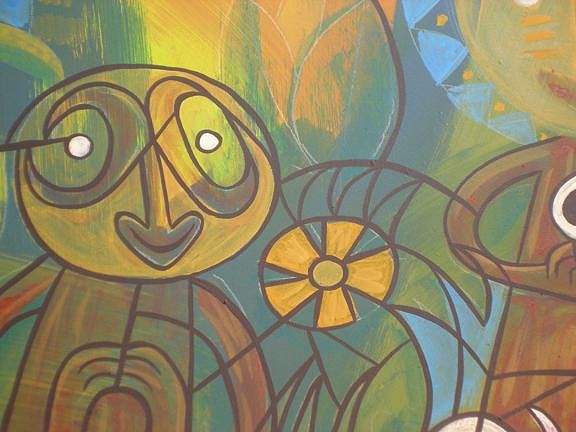
Here's a closeup..
now just LIGHTLY sketch this out
this is to give you a guide where to add any additional colors..
Here it is with some color added to areas..
it always helps during this phase to balance with color
what is not balance compositionally
kind of a compositional balancing act....
with these abstracts
it's all about quick thinking and fast instinct
during these early stages..
later it gets more technical..

NOTE:
if you start a piece and it appears finished after a certain stage
or you like how it looks at a certain stage
STOP!
go to the next piece
that one might just be perfect where it is.....
Here is the white areas and a little bit more colored in...
CLOSEUP!
after the fills
you can reinforce shadows
add a color where it's needed
introduce a new color
etc...
You can still see the water-soluble white pencil markings on there..
those wipe off with....WATER.
Didja notice the PNG Babalu drum in the foreground?
:)
After you've gotten it to a point where 75% of the color is where you want it to be
it's time for the BLACKLINE!
This is the funnest part
because
half is containment and outlines of objects
and the other half is following a line where it goes..
it the line leads....follow
if you hesitate,it will show....
believe you me
it will show!
You can go where thou wilt
with your lines
you can go totally abstract
you can just do a few lines
or a whole bunch!
I prefer to outline something
then see how it "fits" into the painting
I then start thickening lines in areas for shadows and add subtle little fills or highlights from the ground colors provided..
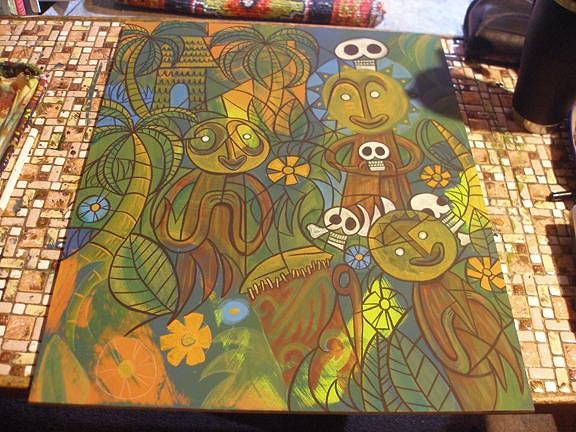
Like So!
and parts of the painting appear more pictorial than other ,more abstracted areas..
Then more highlights
more tints of color and.......
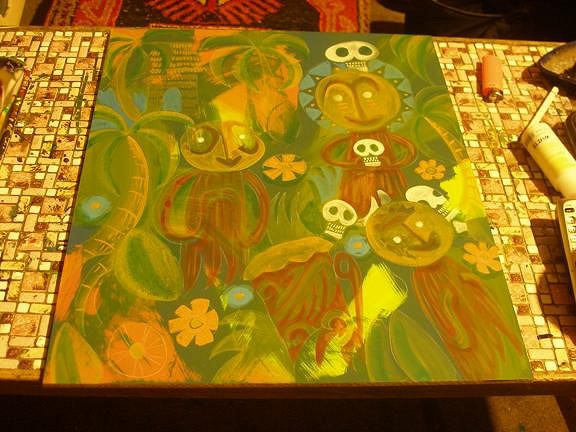
IT"S DONE!
"the Headhunter Village"
Cel Vinyl on masonite
private collection

There you have it!
Hope you had as much fun as I did!
:)
Thanks fer visitin!
|
G
GROG
Grand Member (1 year)
Tujunga
Joined: Jun 21, 2006
Posts: 7283
|
G
On 2010-03-27 12:02, little lost tiki wrote:
Ernie!
SHHHHHHHHHH!
the grown-ups are talking...
Oops! GROG was wrong. It's a STICK up your ass.
 GROG GROG
Get better soon Tiki-Kate.
[ Edited by: GROG 2010-03-27 15:01 ]
|
Z

zerostreet
Tiki Socialite
http://www.zerostreet.com
Joined: Feb 06, 2010
Posts: 2411
|
Z
Excellent work LLT! Love it! and thanks for the step-by-step!
|
H
hewey
Tiki Socialite
Sydney, Australia
Joined: Sep 14, 2004
Posts: 4283
|
H
Another awesome piece mate. I knew that PNG book was going to a place where it would be more valued :D
|
LLT
Joined: Jun 12, 2006
Posts: 7763
|
LLT
On 2010-03-27 12:44, GROG wrote:
On 2010-03-27 12:02, little lost tiki wrote:
Ernie!
SHHHHHHHHHH!
the grown-ups are talking...
Oops! GROG was wrong. It's a STICK up your ass
Sounds like SOMEBODY has a BEE in their BONNET...
Thankszero and hewey!!!
Now let's see what YOU ALL do with these techniques......
|
M
MadDogMike
Grand Member (8 years)
The Anvil of the Sun
Joined: Mar 30, 2008
Posts: 10861
|
M
Very nice Ken! What size is that Masonite? :D
PS - Thanks for the B'day wishes for my wifey :)
|
B
beadtiki
Tiki Socialite
Bothell, Washington
Joined: Aug 24, 2007
Posts: 930
|
B
I had no idea how EASY that would be! I jest because I'm jealous! SO cool. How long does one of those take from start to finish? In NORMAL speed - not KENNY speed! :wink:
|
M

Joined: Mar 12, 2009
Posts: 459
|
M
Awesome Kenny!!!!!!!!!!!!!!!!

I love It!
|
T

Joined: Aug 19, 2006
Posts: 374
|
T
|
TSA
Joined: Aug 31, 2006
Posts: 3978
|
TSA
!
Thanks for posting the step by step!
Very cool!
Double sweet!
|
T

Joined: Mar 26, 2010
Posts: 154
|
T
Ken,
I can't tell you enough how inspiring you are! I have been going back to page 1 and working through this topic (it's taking me days) and all I can say is AMAZING! What an incredible way to catalog and share with us lesser folks your progression over the past few years.... insane.
I'm really digging this last piece... I enjoy putting some color down and coming back and looking/listening for what is about to be birthed... I find it a very fluid adventure! Great stuff.... did I mention how inspiring you are? :)
A couple quick questions for an inspired wannabe like me: I see you mention sealant often... what type of sealant do you use? is it the same regardless of what media you are using (ink, wc, acrylic, paint pens, etc?)? is it the same regardless of what surface you are painting (wood, masonite, wc paper, whatever else you find, etc)?
also, do you suggest a particular way to prepare a found wood piece before painting it? I keep bumping into pieces that scream "paint me" at my local thrifts... I pick them up and have just been hanging onto them, but I see pictures in them :) Also, what type of paints do you suggest for these?
Here's an example of a piece I picked up for $1... can't you see those little tiki faces wanting to get out?
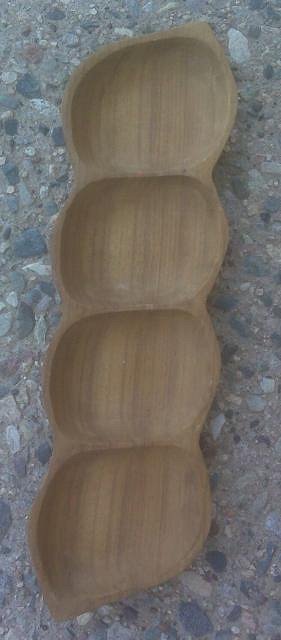
If this isn't the 'right' place to ask these questions, just let me knew. I'm new here to TC and wasn't sure if this was ok to ask here or not...
Thanks, Ken! You rock...
Oh, one final question: when are you coming to Scottsdale to share your art? I would love to meet you and be able to pick up a little something like you do at the parking lot shows out there... :) Let me know if you are ever coming this way...
Peace,
Jason <
|
T
teaKEY
Tiki Socialite
The thumb !
Joined: Nov 09, 2004
Posts: 3687
|
T
Looks just like Superman icecream YUM
|
LLT
Joined: Jun 12, 2006
Posts: 7763
|
LLT
On 2010-03-27 20:37, MadDogMike wrote:
What size is that Masonite? :D
16x20
courtesy of le monkeyman...
On 2010-03-27 23:28, beadtiki wrote:
How long does one of those take from start to finish?
In NORMAL speed - not KENNY speed! :wink:
Normal Speed? kenny Speed?
it's all relative...
i think this one took a lil over 2 nights of work
studio evenings usually run from around 7pm til midnight-ish...
that's 5 hours x 2
Now you gotta subtract
smoking
more smoking
making coffee
stopping to read
or stare off in space
prepping some other boards for the painting after that
bathroom
eating dinner
becoming engrossed with the David Icke lecture on the telly
phonecalls...
A lot of it is multi-tasking
smoking/painting/talking on the phone
so i would venture to say 6-7 hours
including drying times....
mp-Thanks man!
These guys would totally get along with those PNG KOBRAS of yours!
TikiLizard-your enthusiasm is boundless.thank you!
TikiShark!
Bradley! Goin BIG on your new canvas i see!
Righteous!
Gonna see you in September!
On 2010-03-28 13:56, TikiDaye wrote:
Ken,
A couple quick questions for an inspired wannabe like me: I see you mention sealant often... what type of sealant do you use? is it the same regardless of what media you are using (ink, wc, acrylic, paint pens, etc?)? is it the same regardless of what surface you are painting (wood, masonite, wc paper, whatever else you find, etc)?
Sealants.... there are a million different answers for a million different mediums....
for gouache and ink-a matte spray fixative will do-brushing it on will ruin your surface
smear it....
(sidenote:I did once paint some bisque mugs with gouache and actually poured the sealant onto the surface and lightly spread it (a little area at a time)
that gave them a juicy surface not otherwise possible...
BUT I WOULD NOT RECOMMEND THAT TO ANYONE-it's a pain!)
for acrylic-spray or brush-on-either
for paintpen-brush is better
the sprays sometimes don't react well to the oil-based paintpen...
Your surface is the same story
mostly depends on what is on TOP of that surface
ALWAYS TEST!
and once you get a piece done
then you can figger out a sealant
UV protection is always good for inks and gouache
acrylics are pretty lightfast-if you get semi-quality ones....
On 2010-03-28 13:56, TikiDaye also wrote:
also, do you suggest a particular way to prepare a found wood piece before painting it? I keep bumping into pieces that scream "paint me" at my local thrifts... I pick them up and have just been hanging onto them, but I see pictures in them :) Also, what type of paints do you suggest for these?
Here's an example of a piece I picked up for $1... can't you see those little tiki faces wanting to get out?
Monkeypods are the bomb!
I prefer mixing gouache with gesso
then going over the design with gouache-nice and gritty smooth creamy,it is!
seal with a spray!
if you just wanna go for it
i suggest acrylic or cel vinyl paint
just clean the wood first!
Oh, one final question: when are you coming to Scottsdale to share your art? I would love to meet you and be able to pick up a little something like you do at the parking lot shows out there... :) Let me know if you are ever coming this way...
I'll be in Arizona at the KonTiki next month
http://www.tikicentral.com/viewtopic.php?topic=34980&forum=4&start=0&155
in about 2 weeks!
how far is Tuscon from Scottsdale?
i'll just be bringing some clearview folders full of drawings for sale
paintings are too much hassle to fit in the car,so i won't be bringing any
unless someone wants a specific one...
That's gonna be one cramped roadtrip
especially with Giant DougHorne and Fat Jeff BTD!
:lol:
teaks-toooootally Superman icecream!
|
KVT

Joined: Mar 01, 2008
Posts: 758
|
KVT
Awww, you are just rawkin out the good stuff again (still)! I have some stuff for you and need to come by.... do you still use colored tissue paper?
|
TSA
Joined: Aug 31, 2006
Posts: 3978
|
TSA
Love your break down of "art time"!
I do all that too!
Well, I also take some time to stare in horror at the half finished work and wonder if it's too late for me to get a real job somewhere... like Burger King.
Big Aloha!
I'd LOVE to see you in Sept!
Brado~
|
T
Joined: Mar 26, 2010
Posts: 154
|
T
Thanks for the info on the sealant... I will have to play around with those suggestions...
As for Tucson, it's a couple hours south of Scottsdale. I saw that the KonTiki was throwing a bash in April... the only problem I run into is that I am a minister, so Sunday is my big work day, bright and early...
Maybe I can sneak down and say hello and check things out and then leave at a decent hour to get back up to Scottsdale...? Gonna have to see about that though...
Thanks again... looking forward to what comes pouring out of that wild mind of yours next and ends up on paper!
Peace,
Jason <
|
LLT
Joined: Jun 12, 2006
Posts: 7763
|
LLT
Hey Kiki!
YUP! Still using that colored tissue paper!
why?
you holdin?
:)
C'mon down to the studio fer a visit sometime!
I'll show you some secret projects!
On 2010-03-29 18:41, Tiki Shark Art wrote:
Love your break down of "art time"!
I do all that too!
Well, I also take some time to stare in horror at the half finished work and wonder if it's too late for me to get a real job somewhere... like Burger King.
Brad!
i didn't want to crush all those folks just getting into the art scene..
Didn't want to reveal the utter wreck of a life
us artists have to bear everyday..
from creative Berlin Walls
to having to mingle with less advanced beings....
you DO have a real job... and it's art
and it's your DESTINY,my friend!
Jason,
Good luck with the sealants..
Have a few horror stories of reading the label
but applying too much spray and having the piece "melt" and "mush"
TEST FIRST and you should be fine!
And as for the Kon-Tiki..
it would be great to meet you
but i understand
you've got a flock to teach
and that is a much more important deal right there!
If our paths don't cross then we'll meet up some other time in the future..
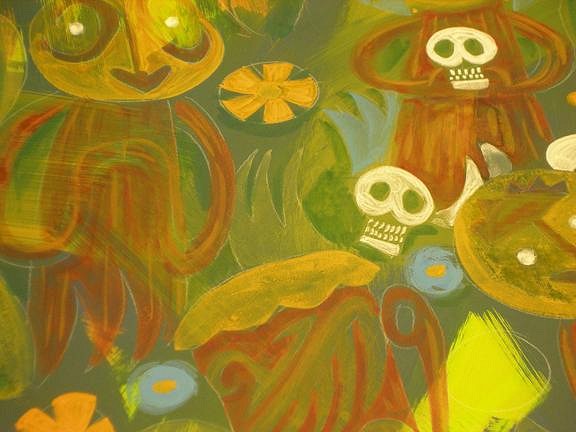
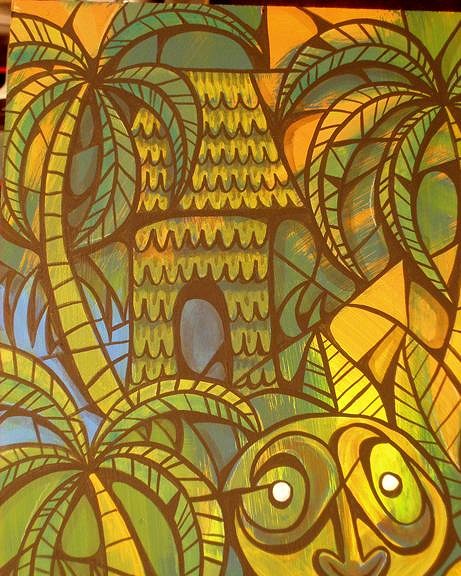
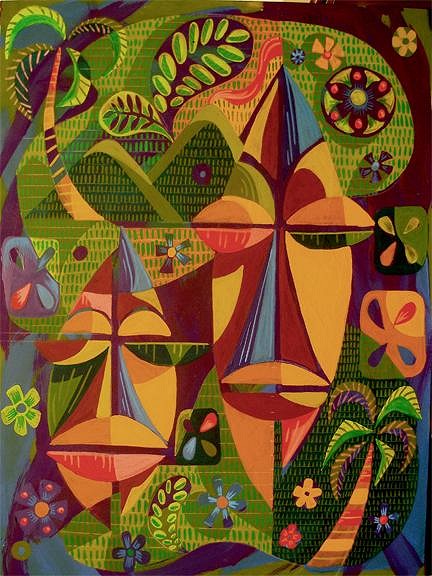
SNEAK PEEK!
didn't do a step-by-step on this because it was
all about the colors and shapes and textures
and trying to achieve a light source
and shadows
and stylize it all to flow together
and to make sure there was A LOT of colors
and that they all got along
etc.
etc.
etc.
So here it is so far...
30% -40% finished
it may be radically different when it's finished...
don't even have a title yet....
|
4

Joined: Aug 03, 2004
Posts: 2004
|
4
Damn Ken, I love it the way it is! Nice vibrant colors!
|
M
Joined: Mar 12, 2009
Posts: 459
|
M
I love it the way it is too!!! GOOOOOOOOLD!!!!!
|
T
Joined: Mar 26, 2010
Posts: 154
|
T
Ken,
Loving this new one (of course, I love them all!)
...I especially like that palm tree in the lower right hand corner, the way it pops off that patterned background... fantastic!
peace,
Jason <
|
G
GROG
Grand Member (1 year)
Tujunga
Joined: Jun 21, 2006
Posts: 7283
|
G
It's finished. Don't do anything else to it.
|
BT
Joined: Aug 28, 2008
Posts: 391
|
BT
I dig how the masks are reflections of each other, but at the same time they aren't. Nice touch.
|
B
beadtiki
Tiki Socialite
Bothell, Washington
Joined: Aug 24, 2007
Posts: 930
|
B
Picaso ain't got nothing on you! I like the more vibrant colors - a bit of a departure from your more muted tones of late (which I ALSO like - don't get me wrong!). I wouldn't change a thing - but what do I know?! I'm not the artist!
|
M

Joined: Aug 18, 2009
Posts: 214
|
M
I am in awe of your awesomeness!
|
TSA
Joined: Aug 31, 2006
Posts: 3978
|
TSA
Kenny, I am super-duper-amazed at your super-duper-amazingness!
|
T

Joined: Apr 10, 2007
Posts: 528
|
T
|