Tiki Central / Other Crafts
Tiki-On-A-Budget
Pages: 1 2 3 4 5 6 7 8 343 replies
|
A

arobinson19
Posted
posted
on
Sat, Mar 21, 2009 7:25 AM
i know the closest place to get anything tiki is at the mon kou restaurant, or possibly the Christmas tree shop.but every once and a while i come across something good. i plan on going to savers this weekend to look for some stuff.ill have to post what i find. |
|
T

TIKIVILLE
Posted
posted
on
Mon, Mar 23, 2009 11:33 AM
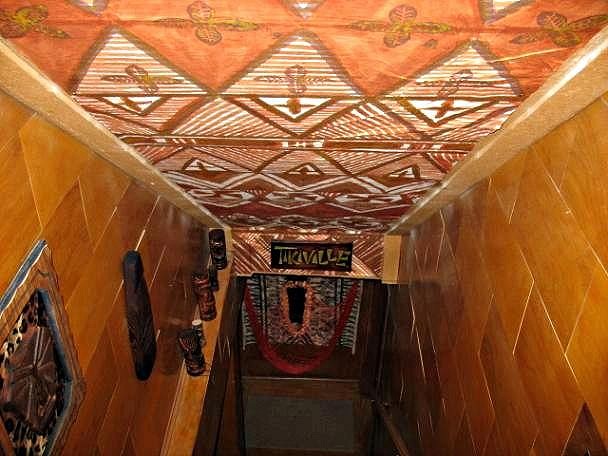
I'll post this here as well, the total cost of this piece was 12 dollars! |
|
P

Polynesiac
Posted
posted
on
Mon, Mar 23, 2009 12:20 PM
nice job tikiville! It turned out really nice! (and affordable!) Howland did something similar, but instead of on paper - he painted his walls tapa style! Here's a link to his awesome DIY home bar: check out his "how to" shots throughout - great ideas in there! great ideas in this thread too! |
|
T
TIKIVILLE
Posted
posted
on
Mon, Mar 23, 2009 2:00 PM
yup he has some amazing ideas there! |
|
D

dcman
Posted
posted
on
Sun, Apr 26, 2009 6:15 PM
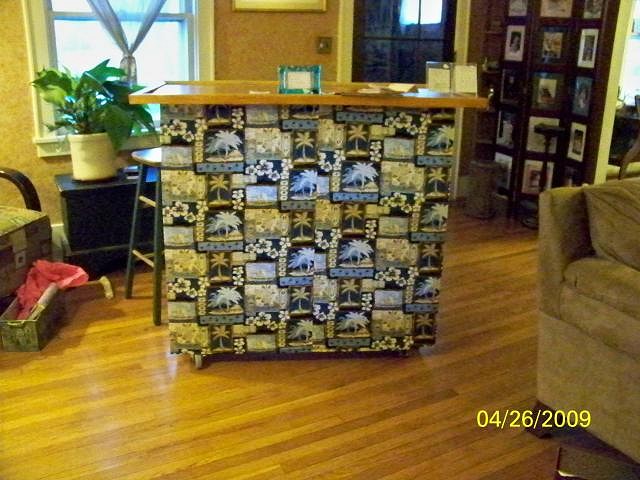
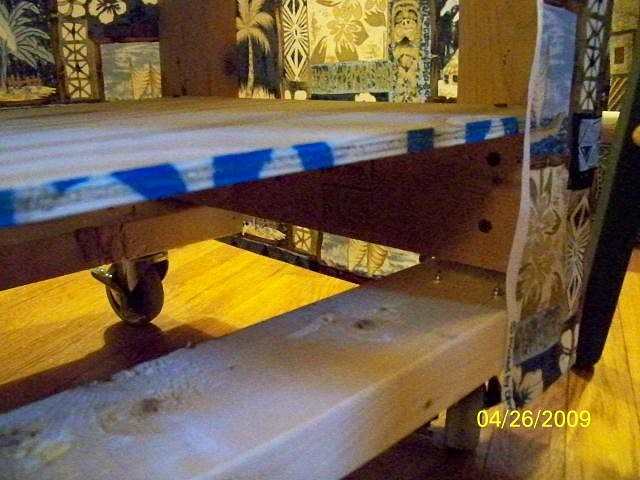
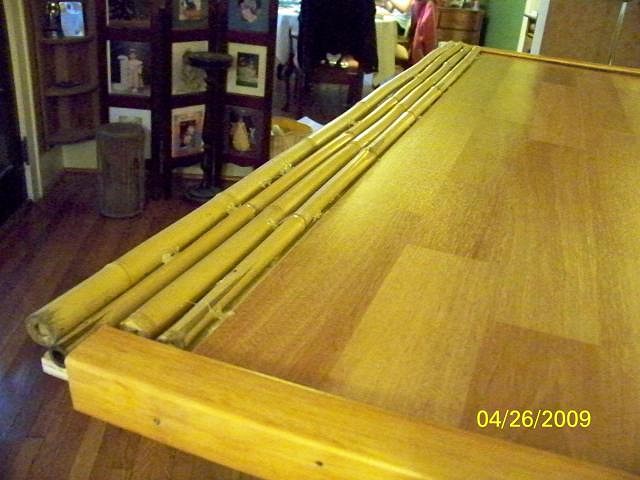
How to build a tiki bar on a budget - this is what it looks like. This is a relatively easy project, and took me several days, working 1-3 hours a day. It goes VERY quickly if you get your wood pre-cut and stain your trim ahead of time:
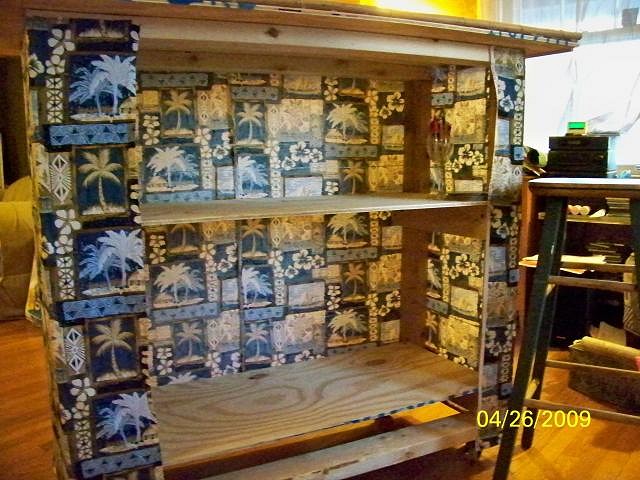
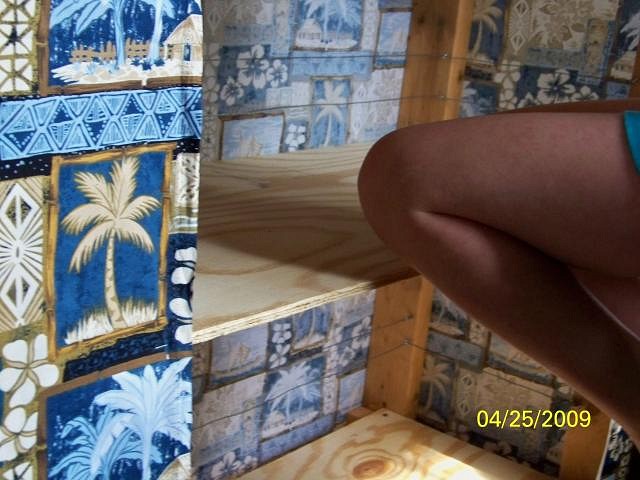
Here is is from the back. Notice that basically the tiki bar is a box on wheels. It's basic shape is made with 2 rectangles created with 2x4 lumber, one that makes up the front face of the bar and one that makes up the back face. horizontal lengths (top and bottom) - 42 inches these rectangles are then attached with 2 2x4s on each side to connect the boxes and to brace them. One at the bottom, one around 20 inches up from the bottom. Your bracing 2x4x determine the depth of your bar, I chose 18 inch braces (and thus 18 inch shelves), because I felt this provided good stability without making bar so deep I would lose things in it. Again, make sure your connectors are long enough to go through both pieces of wood. I used screws for this. On the top of the bracing 2x4s, I put my two plywood shelves, which are 38 x 18 to make them fit perfectly. Screw these into the top of your bracing 2x4s.
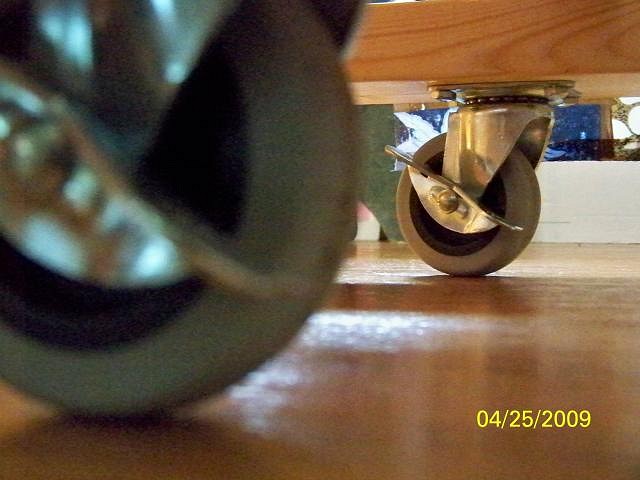
I used 3-inch casters, which are solid enough to hold up to the weight of the bar. I connected these to my bottom 2x4 with 5 -2inch lag bolts for each caster (20 lag bolts total). Don't cheap out your casters or skimp on your connectors, this is the part of your bar that takes ALL the weight and cheap casters will break and too short or too small connectors will rip out of the wood.
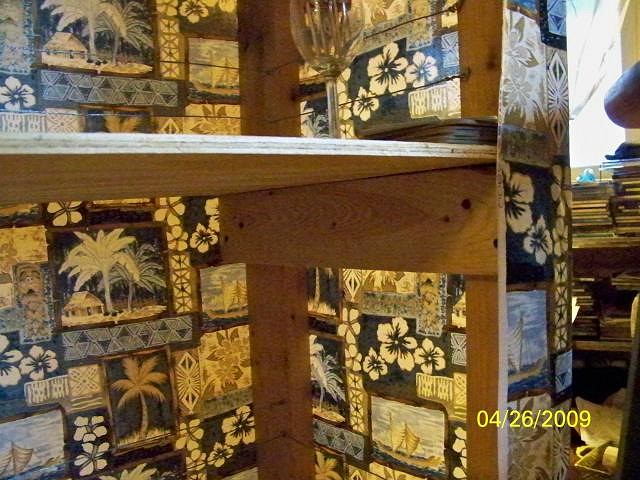
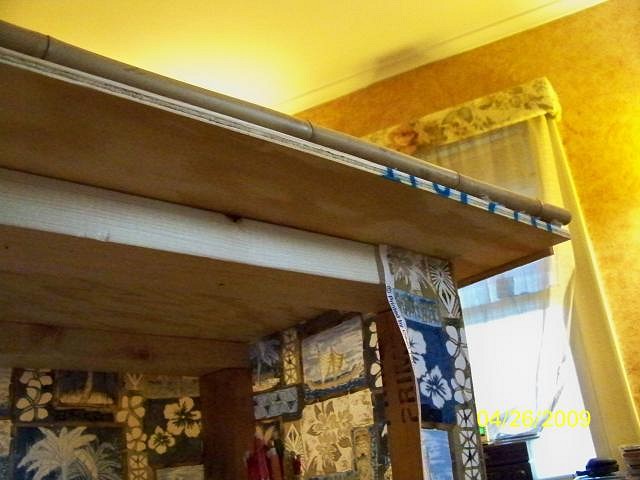
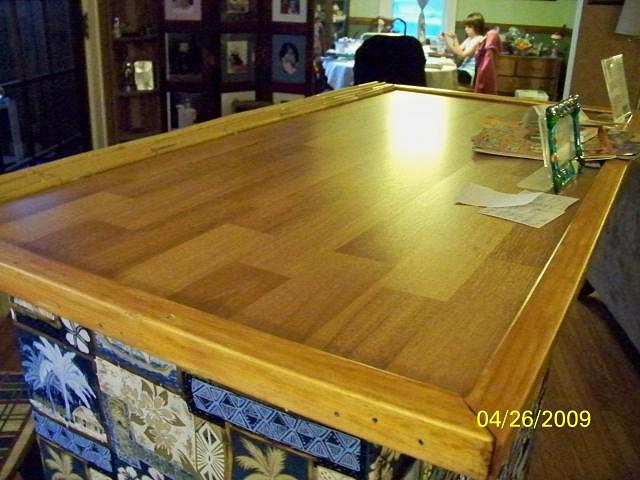
My bartop is made up of 3 sheets of leftover laminate flooring. You can use laminate flooring, leftover hardwood flooring, whatever you want. It's hard to give correct measurements here, because your plywood base size is determined by the size of your bar material. Given that I didn't want to bother with cutting my laminate, I based my plywood size on the size of my material. I made a plywood base, slightly larger than the flooring/bartop, so that there is maybe 1/4 inch extra plywood on all 4 sides. My plywood base is around 48 x 26, which I think is about perfect. The laminate actually floats, and is held in place by the trim, which overlaps at the top of the laminate (horizontally) and over the side of the plywood (vertically). The trim was actually the most expensive part of my project, and was a special "L" shaped trim that most home stores (Lowes, Home Depot) sell by the linear foot. I screwed the plywood into the top of my "box" (be sure to center this correctly), placed my laminate on top of the plywood, centered it, and then attached the trim with finishing nails. I only trimmed 3 sides of my bar, and hot-glued several strips of bamboo in as my rear bumper (I had to make sure to leave a few extra inches of plywood to do this. I think the bamboo makes the bar unique, but you could simply trim the whole bar if you wanted).
I then used some leftover picture hanging wire and and eye screws (or whatever they're called) to make a railing on the inside of the bar, on the sides and front, 2 rows at maybe 3 and 5 inches above each of the two shelves. Then I stapled fabric around the sides and front of the bar. My wife kindly sewed 2 pieces of fabric together to make it fit.
And your bar is done! Cost: 2x4 studs, 96 inch lengths, 2.11 apiece - $8.44 total price if everything was bought new- slightly less than $150.00 You can dramatically lower the price by using whatever leftover material you have laying around. I never counted it all up exactly, but I doubt I paid over 75 additional dollars for materials, as I simply used my extra "stuff". This is a flexible design that can be altered easily, so you can put your own spin on it with a minimum of effort. You don't need to put in the casters (just increase your vertical lengths by 3 inches to get the same height), but I like the option of being able to move the bar from room to room and it's still fairly stable. Just be careful not to make your bar so wide that it can't fit through doorways. Tip #1 - A no-brainer way to level the bar is to build the 4 rectangles, then screw in the casters. Then, with the caster wheels on the floor and a friend to hold them vertical, screw in the braces. That way, all 4 caster are leveled and on the floor when you make the box. Tip #2 - If you don't have a table or circular saw, most home stores will cut your large wood pieces for you. Mine did the first 2 cuts for free, then 50-cents for each cut after that. Tip #3 - Most home stores almost always have laminate or hardwood clearance items laying around. You and several buddies could split the cost of a box for your bartop, the stain, and for the plywood. If none of you have a miter box for cutting the trim, you could split the cost of a cheap one (maybe $20) Tip #4 - Most likely, you have leftover 2x4s, the picture hanging materials and some of the connectors you need laying around. Tip #5 - Most fabric stores run serious sales and offer online coupons. Good luck! dcman [ Edited by: dcman 2009-04-26 18:37 ] [ Edited by: dcman 2009-04-26 18:43 ] [ Edited by: dcman 2009-04-27 03:26 ] |
|
JA

Johnny Atomic
Posted
posted
on
Mon, Apr 27, 2009 5:37 PM
Very nice. I like yours better than mine. Here's mine. Spent about $300 so far... http://www.tikicentral.com/viewtopic.php?topic=32086&forum=18&16 |
|
BTP

blindy the pirate
Posted
posted
on
Thu, Apr 30, 2009 1:22 PM
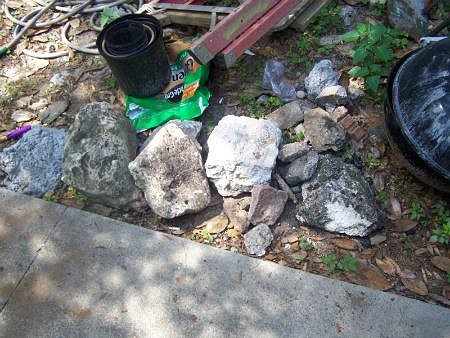
Now that spring is here, keep an eye out for stuff other people are throwing away. Lately, I've been looking for rocks and cinder blocks. I really don't want to pay for rocks and it played off for me today when I came across these someone set out to the curb for trash day:
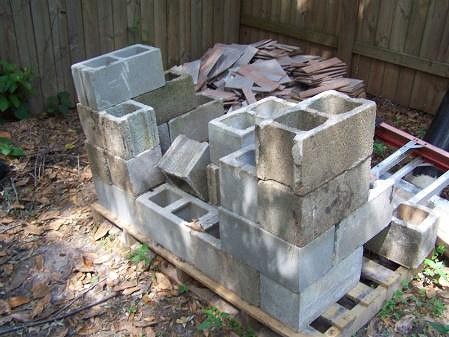
I haven't decided what I'm going to build with the cinder blocks yet. Maybe an outdoor fire place for the winter or building up a waterfall. But it seems that everybody is getting rid of cinder blocks right now. It has only been about a month since I started looking for them and this is what I got:
Total cost so far: $0.00. I also find quite a bit of tiki torches people throw out and usually it is just the bamboo that is bad. The canisters and wicks are usually fine and can be used in home made torches. |
|
UJ

Unkle John
Posted
posted
on
Tue, May 12, 2009 8:30 AM
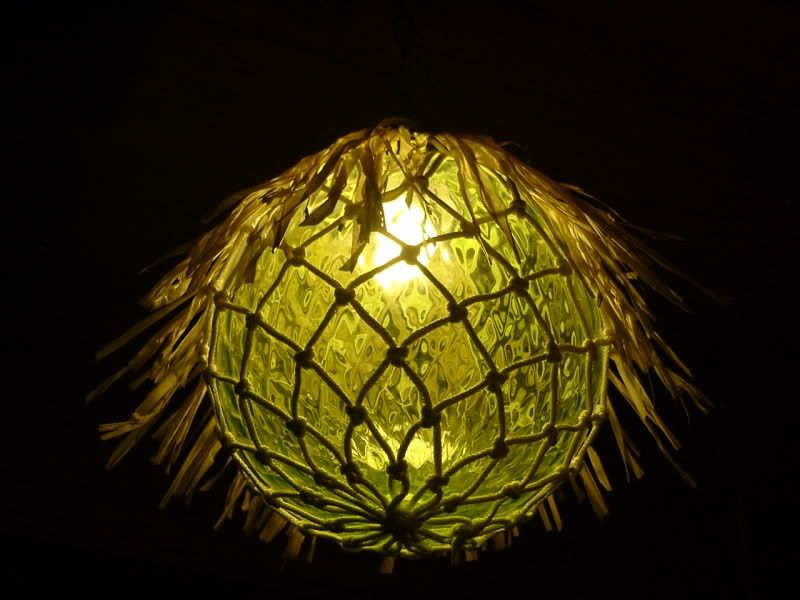
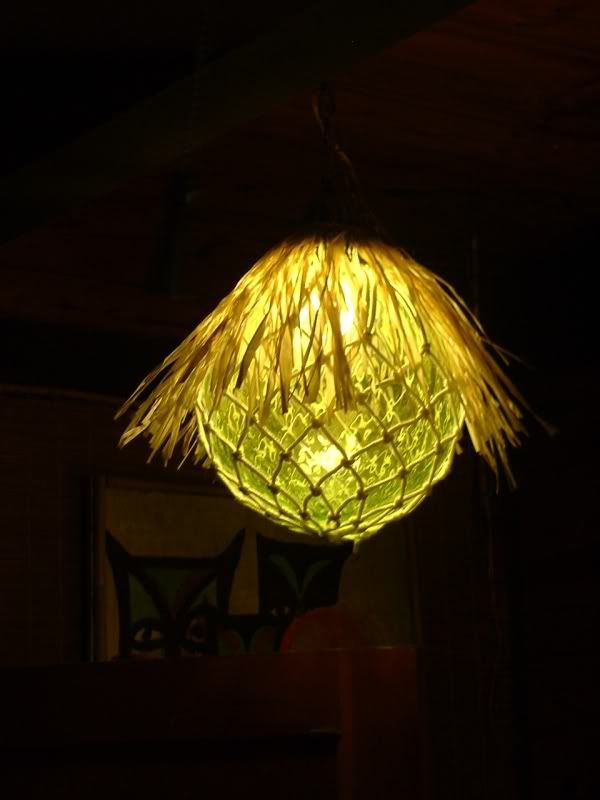
I picked up a 70's swag lamp at a thrift store for a song, but I mainly wanted it because the globe was round and perfect for my project. I then picked up a cotton basketball net and a new swag lamp kit. I was originally going to wrap the top part of the lamp (that held the socket)with a similar rope. Now as I write this I realize that I didn't do a step, but it's not crucial, I can dismantle the lamp and do this: stain the rope. I was thinking of a tea stain to give the rope a used and dirty look. Well, my project just sat on the side and after I constructed it, I realized that it just didn't look right. Then one night at Trader Vic's I spied this lamp (with the raffia shade):
So with some left over grass railing skirt wrapped around the top, I came up with this.
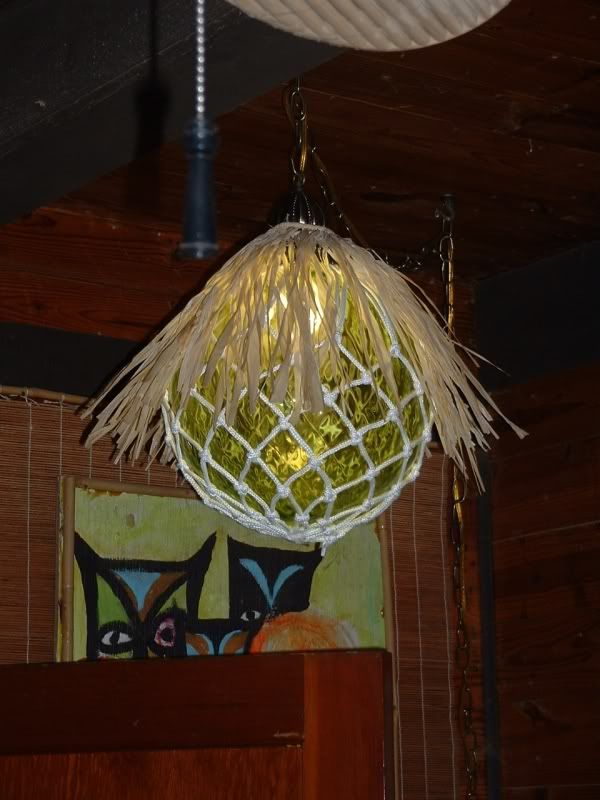
And here is one with the flash so you can see how the globe topper is wrapped. I uses twisty ties to secure them. I also have a 40w CFL in it, I think it gets too bright so I might switch down to a lower watt.
I don't think it's perfect just yet, I think I can wrap the grass skirt better and maybe add another "ring" around it to see if that thickens up the shade. But you get the jist and see that it's easy to make a false globe float lamp. It depends on the make of the glass (mine is wavy) but if you get a clear enough globe (and big enough around) you could possibly put a puffer lamp inside. |
|
UJ
Unkle John
Posted
posted
on
Thu, Jun 11, 2009 9:50 AM
bumpity-bump |
|
MPP

Mr. Pupu Pants
Posted
posted
on
Thu, Jun 11, 2009 11:30 AM
Really cool, John. Have you also thought about frosting the globe? Might look cool if you frost it on the inside (then you'd still get the reflective highlights from the ripples on the outside of the globe while softening the actual illumination. Or you could add other sealife (instead of puffer fish) inside the globe. A few strategically placed starfish could look really cool too. Or you could leave it as it is because it's really cool. :) |
|
UJ
Unkle John
Posted
posted
on
Sat, Jun 13, 2009 10:20 AM
I thought about frosting it. It's easy to take a part if I want to do that. I have been thinking of a puffer, but worried that it won't be visible enough inside to tell what it is. |
|
BBS

Beach Bum Scott
Posted
posted
on
Sat, Jun 13, 2009 10:35 PM
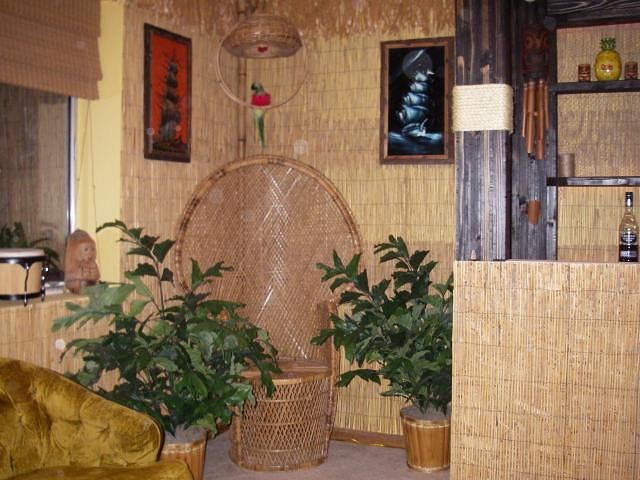
Here is my budget corner, other than the swag kit everything was found at thrift stores.
Plants were a big one that I split 5.00. Oh yea I did all the basement walls for less than 80.00, the most expensive thing in the room was the thatch on the bar roof... Just the lamp A link to the basement build [ Edited by: Beach Bum Scott 2009-06-13 22:36 ] |
|
T

tikigik
Posted
posted
on
Wed, Jun 17, 2009 6:58 PM
You're talking about the mats with the hibiscus trim (four colors: orange, pink, light blue & purple), right? |
|
G

geedavee
Posted
posted
on
Wed, Nov 18, 2009 5:31 PM
Bump. Too much great stuff. |
|
UT

uncle trav
Posted
posted
on
Sat, Mar 6, 2010 4:26 PM
Time for a bit of a bump. Big Lots has bamboo. Comes in twelve pieces per bag in five foot pieces. That's sixty feet. Sizes range about a half inch diameter, some bigger some smaller. Five bucks a bag. For those of us in bamboo deficient areas and on a small budget this could go a long way on a small project. |
|
BK

Big Kahuna
Posted
posted
on
Sat, Mar 6, 2010 4:51 PM
Thanks for the heads up, Trav. There's a Big Lots in the town I work in. I'll have to check it out Monday. Most of their "Tiki" stuff is pretty lame, although, I did pick up one of the Pele statues a coupla years ago. |
|
B

beadtiki
Posted
posted
on
Sun, Mar 7, 2010 1:21 AM
Thanks for the info UT - I've had some ideas running around my head and no $$ and no bamboo! I'll check it out. |
|
UR

USAF Retired
Posted
posted
on
Mon, May 31, 2010 8:17 AM
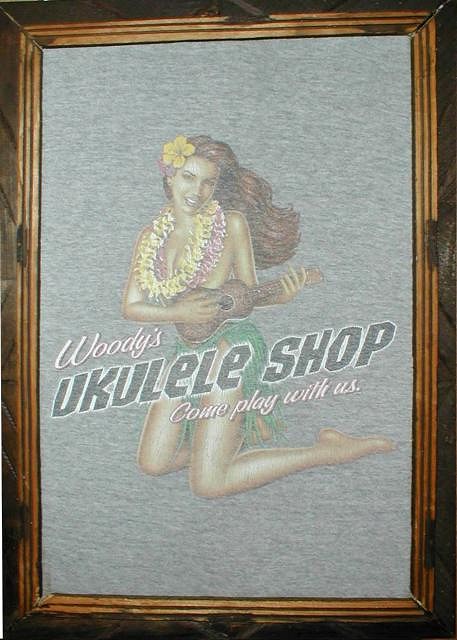
I bought this T shirt in Hawaii several years ago and decided to do something with it before the image was completely gone. I bought a very bad velvet painting at Goodwill for $1, took it apart, streched and stapled the shirt over the velvet and then reinstalled the frame.... I really wish the grey fabric was black , but doubt I could dye it without ruining the image.
|
|
D
dcman
Posted
posted
on
Sun, Aug 8, 2010 3:41 PM
-bump- |
|
Q

Quasimodo57
Posted
posted
on
Sun, Aug 29, 2010 11:09 PM
Wow...some pretty creative ideas for a tiki bar on a budget! I am impressed! |
|
E

ErkNoLikeFire
Posted
posted
on
Thu, Sep 2, 2010 11:36 PM
Just a question. I picked up some clearance plastic tiki cups from party city and am planning on turning them into mounted lights for by bar. I want to do a grey wash or stain on them to tone down the plastic look but still have a visible glow from within. I thought about a thinned out dark wood stain as a wash and they spray it with a sealant but am not sure how well that would work. Any suggestions on what to use? |
|
UT
uncle trav
Posted
posted
on
Sun, Sep 5, 2010 5:40 AM
Hey Erk. You could try amber shellac. I'd test it out first on an extra piece that you have. The more coats the warmer the glow. You can find it at the big box stores in the stain department. |
|
E
ErkNoLikeFire
Posted
posted
on
Sun, Sep 5, 2010 4:27 PM
Thank you! I'll give it a try. |
|
UJ
Unkle John
Posted
posted
on
Thu, Oct 7, 2010 7:51 AM
Erk, any progress on this? I'm interested in seeing this. |
|
F

freddiefreelance
Posted
posted
on
Thu, Oct 7, 2010 12:48 PM
Erk, there are special plastic paints from Krylon & Rustoleum, as well as paints for plastic models like Testors. Try googling "weathering plastic model" for tips on dry brushing, washes, and sealing. |
|
E
ErkNoLikeFire
Posted
posted
on
Thu, Oct 7, 2010 7:07 PM
I looked in to amber shellac but the only way I could get some was too purchase a 1/2 gallon for $17 so I passed. I will look into Testors. Thanks! |
|
L

liltikichef
Posted
posted
on
Sun, Dec 19, 2010 12:01 AM
Hi! I've been following TC for awhile but this is my first post. I'm not very crafty but I did do some bedside tables for my tiki bedroom that came out pretty well. Took 2 of those round endtables from like walmart or like place (about $9 for table and $5 for glass top) I took some pages from old calendars I had saved and glued/taped them to the top in a collage. On the other one I found some fabric I liked and covered the top, using hot glue. Then I took some of the grass skirts you can pick up at any party store (the adult size) and hotglued around the edge. I trimmed the raffia so it just touched the floor. Place glass top on to protect the pictures/fabric. I don't think it turned out too bad for my first attempt at making something myself. This idea can easily be personalized to fit any theme or changed out. All I had were beach scenes which aren't too tiki, but it's apparent anything would work. I'll post a few pics as soon as my computer lets me download from my camera (we're having another spat :) ) |
|
W

woofmutt
Posted
posted
on
Fri, Jan 28, 2011 10:10 AM
Posted 1/9/11 by MadDogMike in his thread ** MadDog Mike's Platterful of Pupule**
Once again: This is a project by MadDog Mike |
|
W
woofmutt
Posted
posted
on
Tue, Apr 5, 2011 8:28 AM
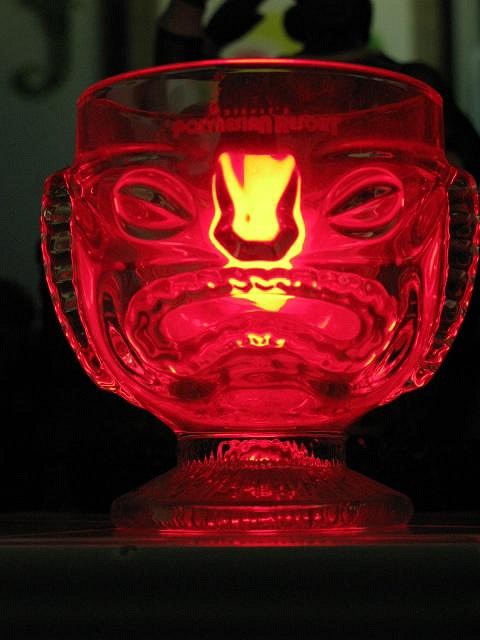
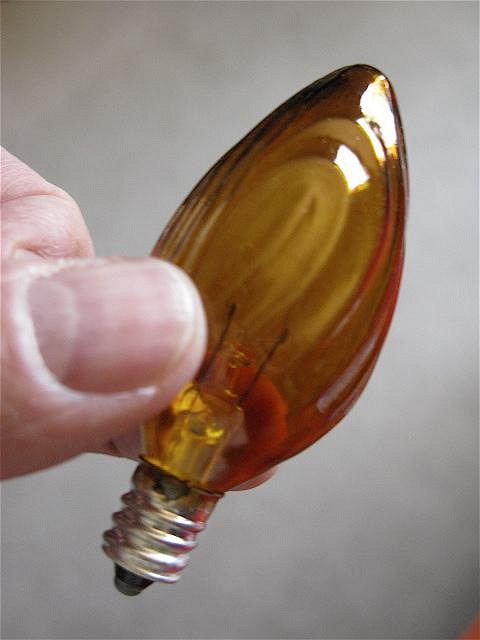
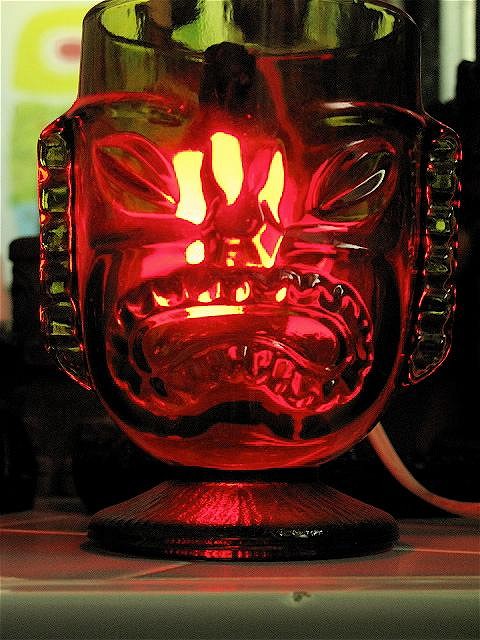
*In the thread It's a glass yes, but is it a mug or a bowl? Finally a definitive answer.in the Collecting Tiki forum bigbrotiki posted some really great lighting tips and examples. Below is bigbrotiki's post.* As a lighting cameraman my philosophy is always that the actors and objects should look like they are glowing from the INSIDE, not like light is being thrown on them. The same goes for Tiki Lounge lighting in my mind: Everything should GLOW softly! Like the Beachcomber lamps on the ceiling. I started with my SMALL, CLEAR Disneyworld goblet, by using a red, frosted X-mas light bulb:
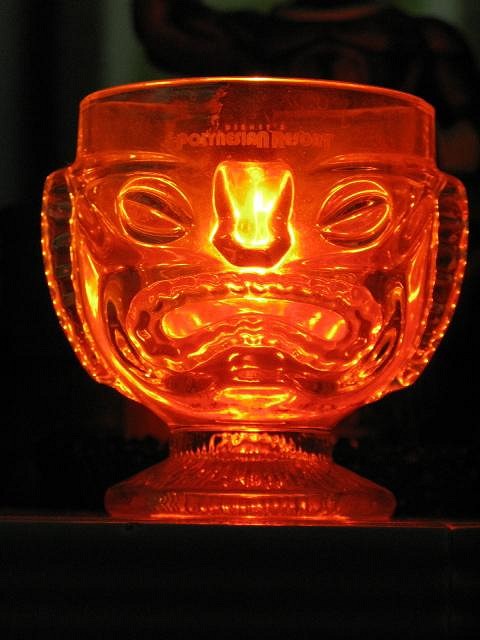
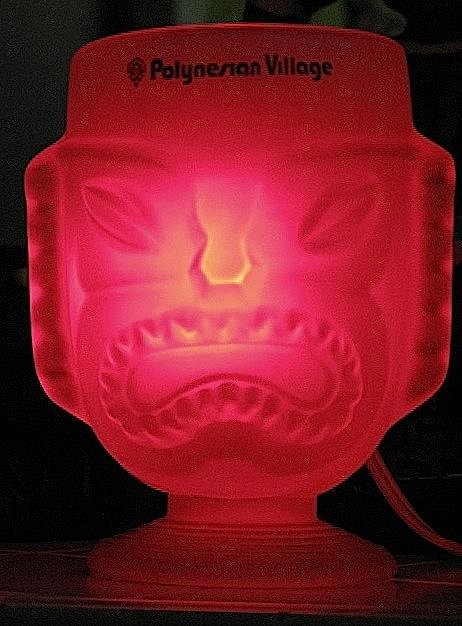
Conventional lighting wisdom tells you that to get a glow, softer (frosted) light sources are better, but when I used a CLEAR amber bulb in the same clear glass: ...the harder light was refracting in the edges and corners of the molded glass much more effectively, giving me a better rendition of the outlines of the mask! The same proved to be true for the BIG, FROSTED Disneyworld goblet. Here's a frosted, purple bulb:
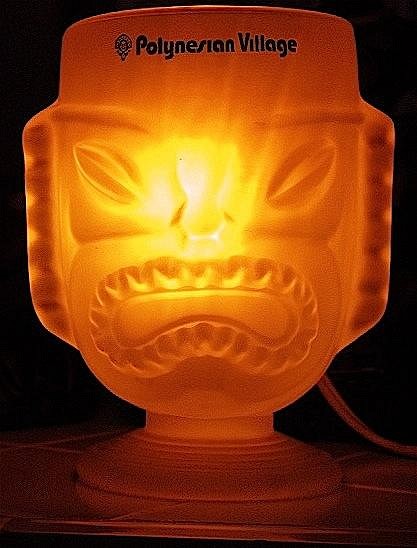
...and here an amber clear bulb:
You should be able to still get some colored TUNGSTEN light bulbs at your local hardware store.
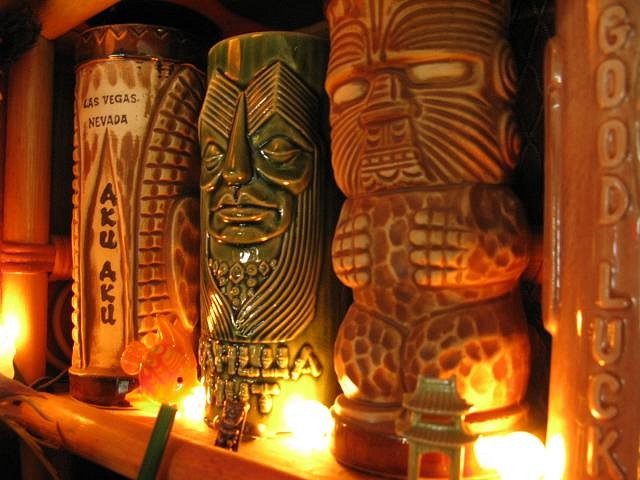
For all other mugs, I like using X-mas light strings for my collection -but not like this!:
The cords have to be hidden, and the bulbs should work like foot lights on a stage:
My favorite X-mas string bulbs have these PEARL bulbs:
When not lit, they look like South Sea pearls lying around! :D Originally posted by bigbrotiki in the thread It's a glass yes, but is it a mug or a bowl? Finally a definitive answer. |
|
F

Fugu
Posted
posted
on
Wed, Oct 5, 2011 5:20 AM
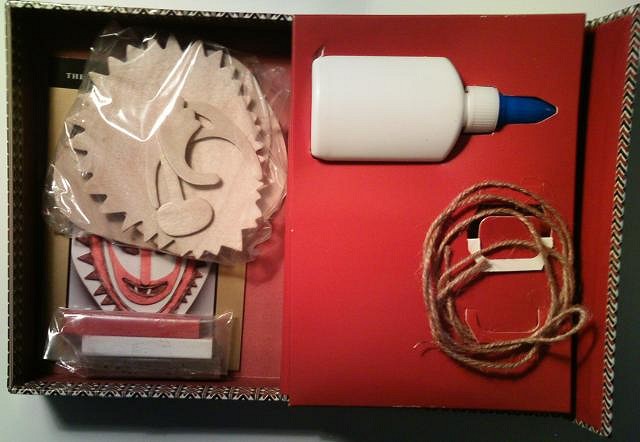
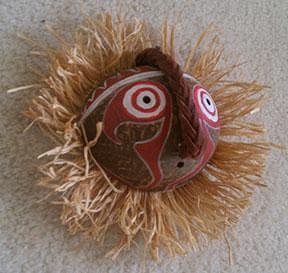
Eharo mask for under $10. I have no idea how well this turns out, but I thought it had potential and might be of interest. |
|
M

meega
Posted
posted
on
Sat, Oct 15, 2011 9:28 AM
Curiosity got the best of me, and for less that $10 I ordered one of these mask kits. If you are looking for an impressive wall-hanging - this isn't for you. That said if you are looking for some craft ideas this isn't that bad. The down-side is that the finished piece is only about 4-1/2" tall. It looks like it could be a nice little addition to your collection, but unless your walls are bare......not a standout. It's pro-side is that can give you some ideas as to how to do your own designs. This kit is made from balsa wood, some jute cord for trim, white glue(Elmer's), and a few pieces colored chalk. Although wood would be the best, I could see similar results with cardboard, Foam-core, etc. There are other ideas like this in this thread that are worth checking out as well. |
|
D

danlovestikis
Posted
posted
on
Sat, Oct 15, 2011 9:39 AM
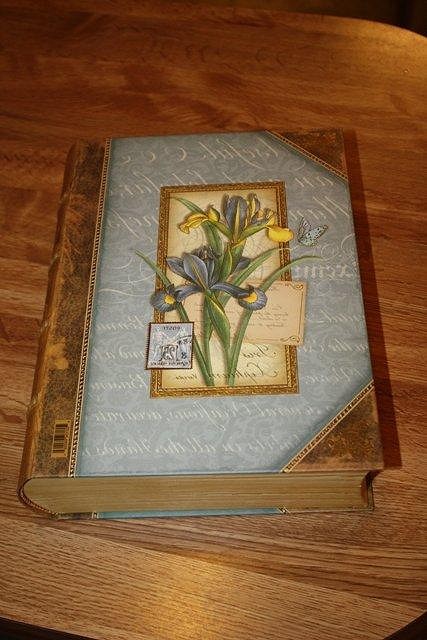
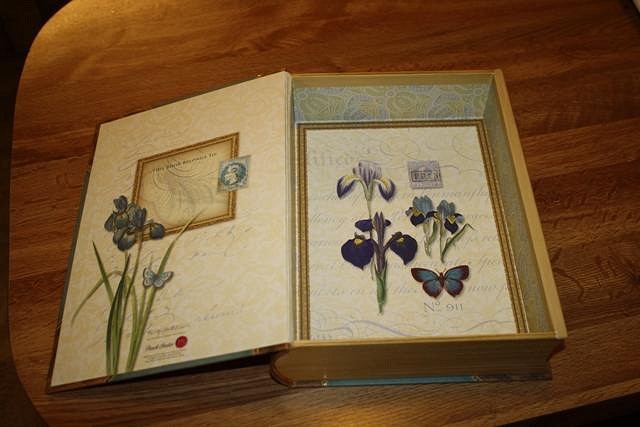
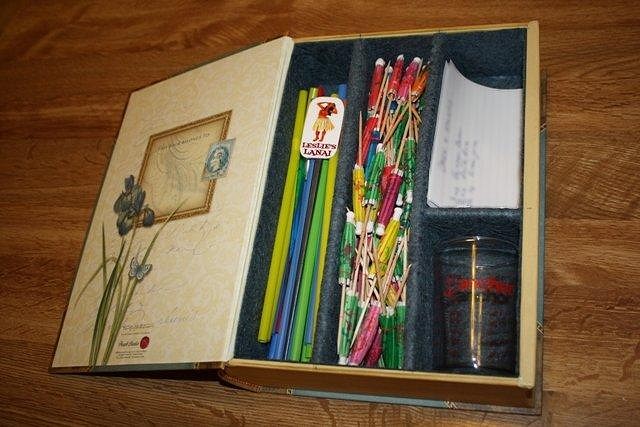
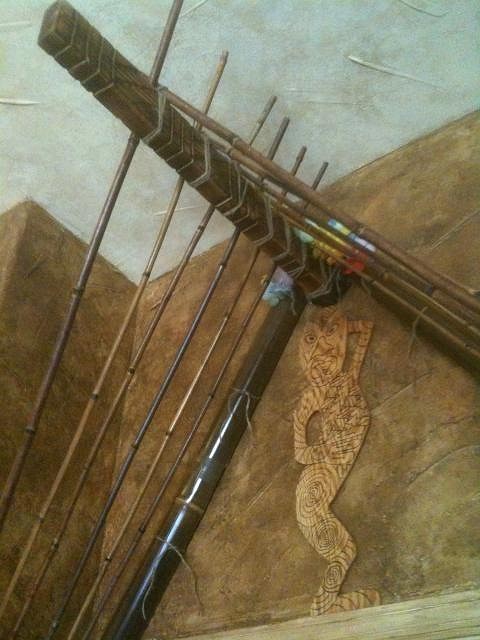
Fun thread, we looked at every page. The fan you show has a Marquesas macrame bead on the handle. We have a bunch of those and that's the best use we have seen. Framing cards of events works well too. Good ideas, thank you, Wendy |
|
V

VampiressRN
Posted
posted
on
Sun, Jul 1, 2012 4:43 PM
Time for summer projects. I'm going to use that leopard print fabric idea on my old lava lamp. Share Share Share |
|
F
Fugu
Posted
posted
on
Tue, Jul 24, 2012 12:05 PM
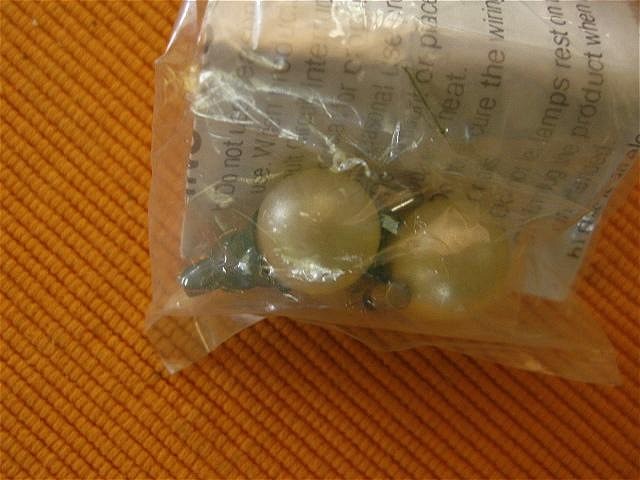
New Guinea Style Coconut Mask for under $10: Materials:
|
|
M

MadDogMike
Posted
posted
on
Tue, Jul 24, 2012 1:48 PM
Very cool idea Fugu, I'm gonna make me one of those. Thanks! |
|
M
MadDogMike
Posted
posted
on
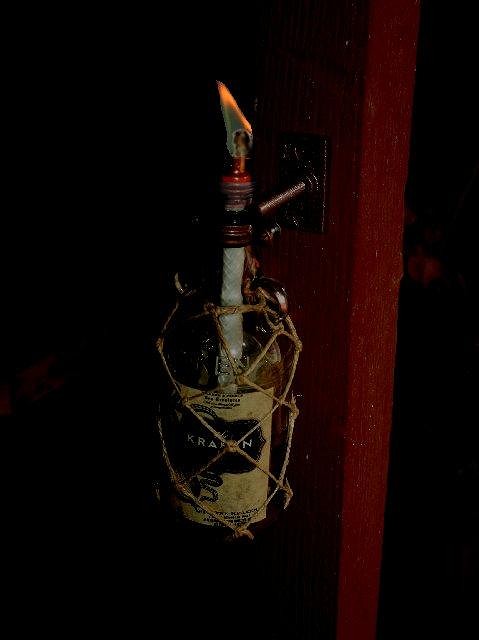
Mon, Aug 6, 2012 9:04 PM
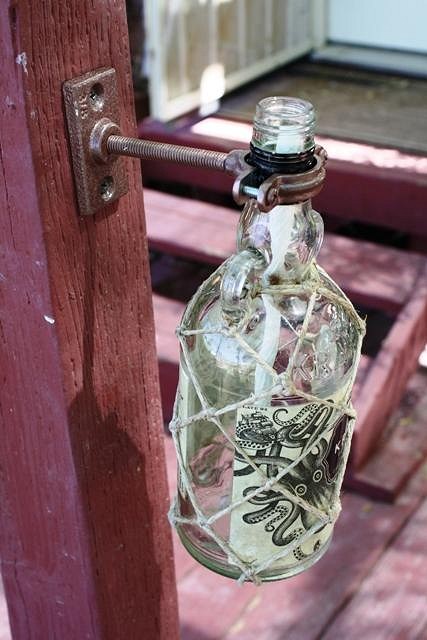
Quick, simple, and cheap (about $5) - my kinda project. I used a Kraken rum bottle that I netted. The first 2 pictures are missing the copper coupling that holds the wick My Lowe's had the split ring (bottle holder) in copper but only had the mounting flange in iron, so I spray painted it hammered vintage copper. If you could find both parts in copper, you could cover the threaded rod in a short piece of copper pipe ~ it would all weather to a nice patina. |
|
F
Fugu
Posted
posted
on
Tue, Aug 7, 2012 4:44 PM
Love the Kraken lantern! Very cool idea. |
|
ATP

Atomic Tiki Punk
Posted
posted
on
Tue, Aug 7, 2012 5:29 PM
Mike, let me know if you need help in the future making more of those Kraken Lamps |
|
HT

Hale Tiki
Posted
posted
on
Thu, Sep 27, 2012 12:17 PM
I'm really digging this thread. When I get to work full force on the bar, I'll have quite a bit to contribute! Thanks for what all I've seen so far. |
|
M
MadDogMike
Posted
posted
on
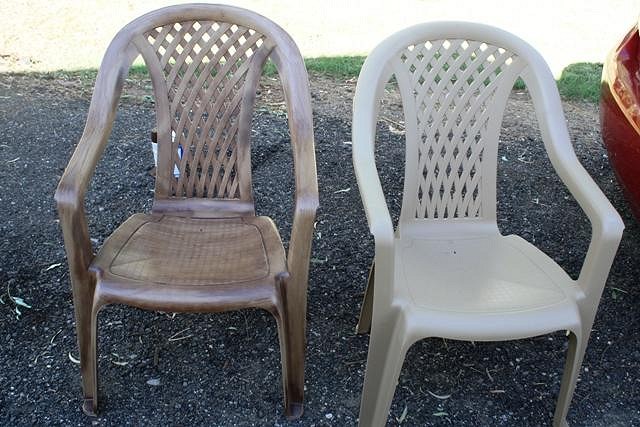
Sun, Sep 1, 2013 2:11 PM
Seating is important for an outdoor tiki area. Plastic/resin patio furniture is readily available, inexpensive, durable, comfortable, and BORING!!!! |
|
BB

Bruddah Bear
Posted
posted
on
Sun, Sep 1, 2013 3:12 PM
Mike, I would experiment with a wood tone base coat then brush on a wood grain pattern, like furniture refinishers do sometimes. The question is which would work better, a light base coat and dark highlights, or dark base coat and light highlights? Dry-brush or wet-brush technique? The biggest problem I imagine would be getting a paint to actually adhere to the plastic chair and not eventually flake off. I'm thinking if anyone can come up with a solution, it's you. You're so crafty. :D |
|
LL

Limbo Lizard
Posted
posted
on
Sun, Sep 1, 2013 5:10 PM
And, Mike, before you invite your guest to have a seat in your spiffy new faux-wood stained plastic patio set, you might ought to sit in them, yourself, in some old white pants and shirt. Just sayin'... |
|
M
MadDogMike
Posted
posted
on
Mon, Sep 2, 2013 8:46 AM
Bear, thanks for the encouragement
Not sure I can call this a success yet but I'll keep working on it, right now it just looks dirty :lol:. Chairs are cheap ($11) so I bought an extra to play with. I knew getting paint to stick to plastic would be difficult so I got Krylon Fusion spray which is supposed to be formulated for plastic, I started with a tan chair. I tried a few methods; Krylon recently introduced Fusion brush on paint for plastic, maybe I could thin it and brush it on. I'll need to see if I can find it in my area. In the meantine, I will touch this chair up a bit, let it dry and use it for a month or two to see what happens. |
|
TGT

The Granite Tiki
Posted
posted
on
Mon, Sep 2, 2013 10:41 AM
It looks better. Maybe do the fake lattice portion in a lighter khaki to make it look like real rattan thatch on a darker chair. |
|
M
MadDogMike
Posted
posted
on
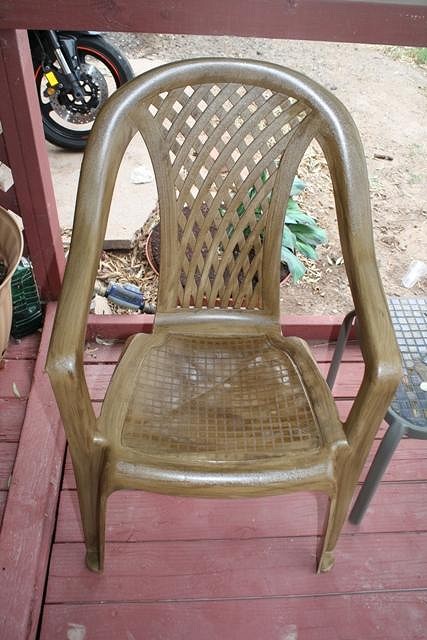
Mon, Sep 2, 2013 4:25 PM
I have taken an ubiquitous $11 plastic chair and turned it into a work of art! Well, maybe not :lol:
|
|
H

hang10tiki
Posted
posted
on
Mon, Sep 2, 2013 5:26 PM
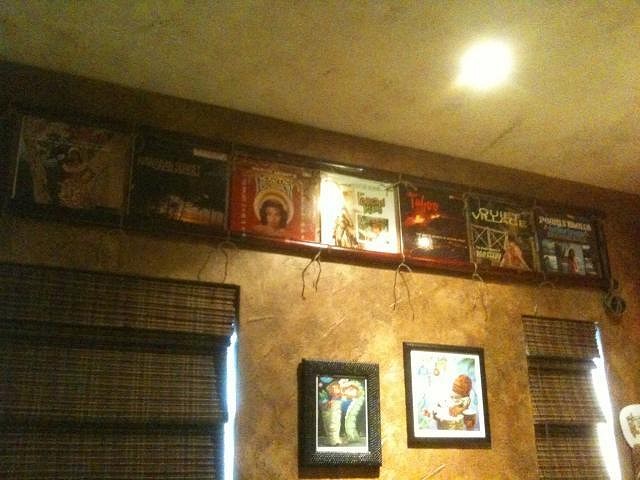
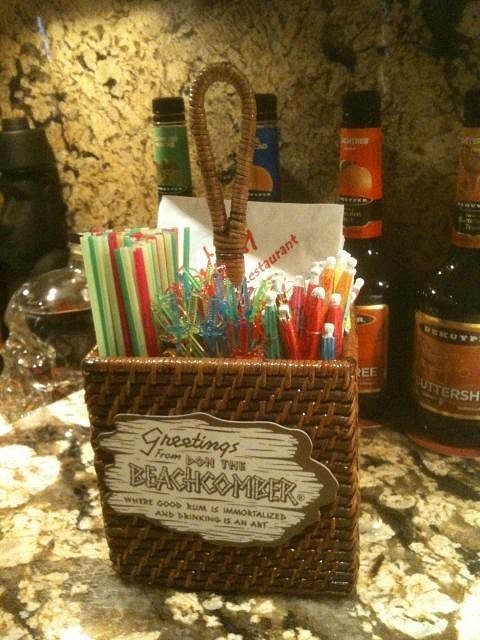
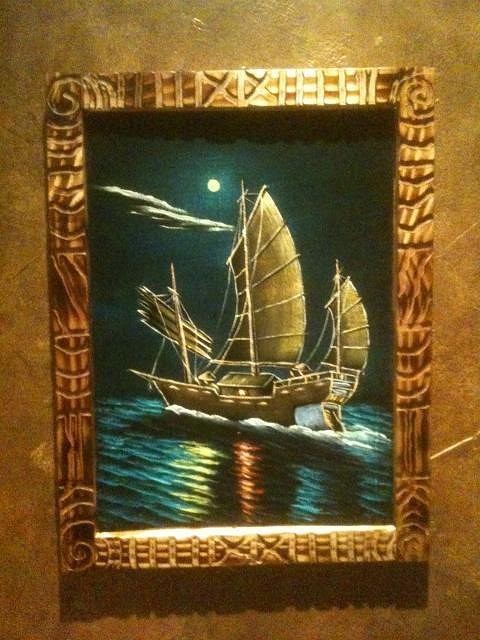
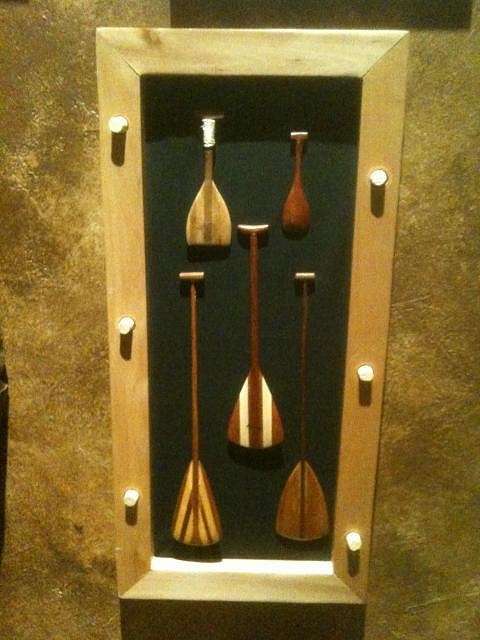
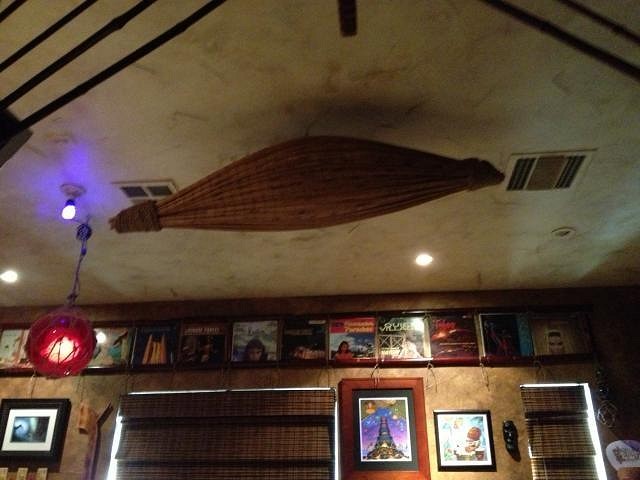
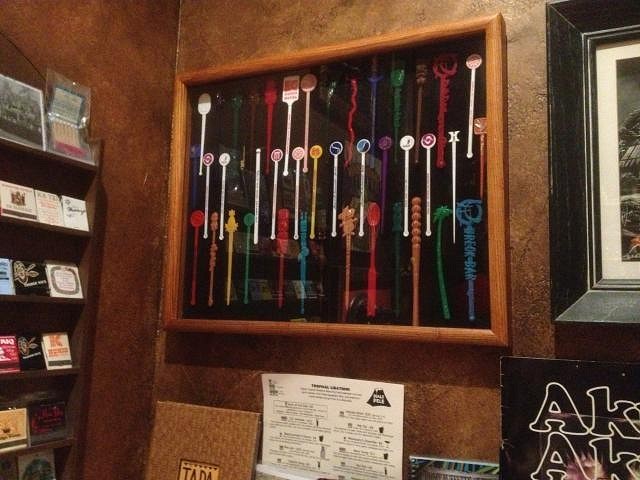
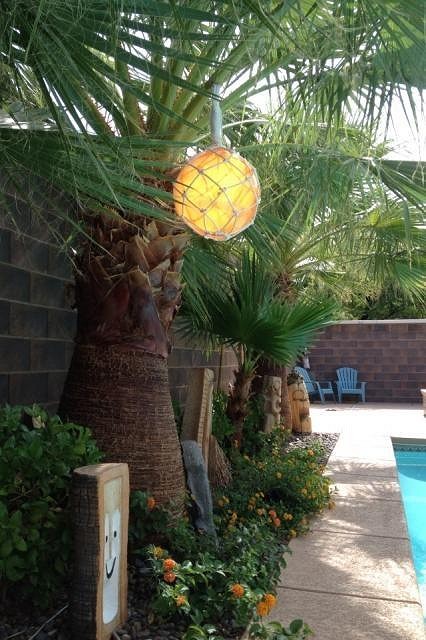
Lots of great stuff here. Wall display for records Bar caddy Above door thing :) Frame Paddle display (shoe rack end and corks) Menu shelf Fish trap Stir stick display Float net (outdoor by pool, so I used a kids toy ball) :) All the how to instructions on my home bar post Keep them coming... Mike, did u let the chair dry before u sat in it? |
|
HT
Hale Tiki
Posted
posted
on
Mon, Sep 2, 2013 8:21 PM
Hang10tiki: You may have just solved a problem of mine. Ahhhhhhh, thank you so much!!! |
|
H
hang10tiki
Posted
posted
on
Tue, Sep 3, 2013 7:42 AM
Hale- what are ya going to make? Go Steelers :) Jon |