Pages: 1 2 3 4 5 6 7 8 369 replies
|
H

hang10tiki
Posted
posted
on
Mon, Nov 4, 2013 7:40 PM
Love it |
|
W

WaikikianMoeKele
Posted
posted
on
Tue, Nov 5, 2013 6:34 PM
with all your very small friends! :P |
|
UT

uncle trav
Posted
posted
on
Sat, Dec 21, 2013 5:14 AM
Thanks for all of the kind comments on my little builds. I am amazed at the amount of views this page has received. I don't pump these out very often and really appreciate all of the input on my projects. It is fun turning a bunch of paper, balsa wood and bamboo cooking skewers into a bit of fantasy that can fit on a bookshelf. Thanks again for making my huts something that I enjoy building and sharing with everyone. |
|
UT
uncle trav
Posted
posted
on
Tue, Apr 1, 2014 12:24 PM
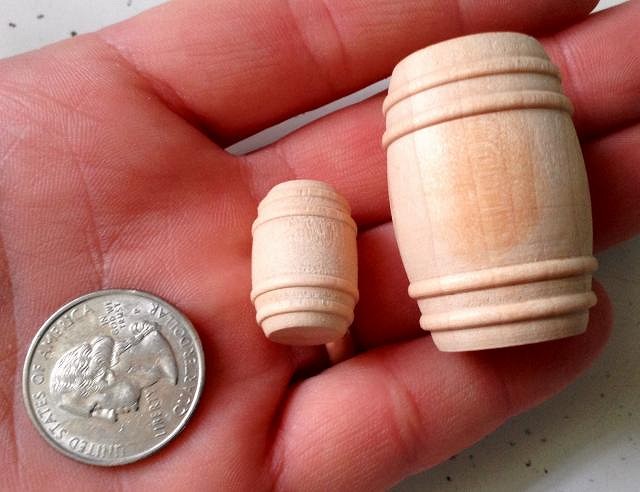
I found some larger barrel shapes this weekend. They may come in handy due to the larger size. |
|
UT
uncle trav
Posted
posted
on
Fri, Apr 11, 2014 1:33 PM
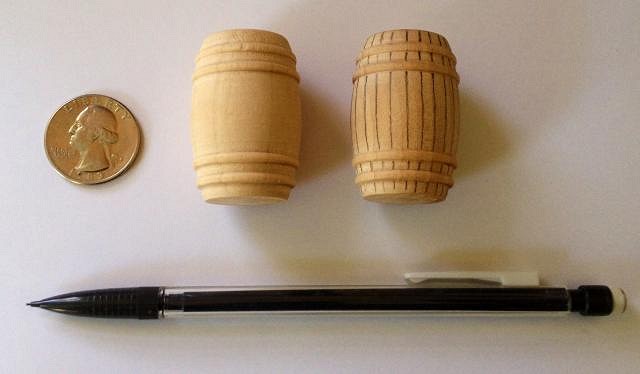
I'm starting to layout the detail work on the larger barrel shape that I found. I have an idea for a new miniature that will be a bit of a departure from my previous builds. Something new to try that will be another learn as I go project. It will be an on again off again build as the weather is finally getting nice here in Kzoo. After a record year of just under eleven feet of snow the shoveling is over but the yard is a wreck :D Thanks for taking a look.
"Anyone who has ever seen them is thereafter haunted as if by a feverish dream" Karl Woermann [ Edited by: uncle trav 2014-04-11 18:30 ] |
|
H
hang10tiki
Posted
posted
on
Fri, Apr 11, 2014 5:36 PM
Go UnKle Go...... |
|
PP

Pele Paul
Posted
posted
on
Mon, Jun 2, 2014 9:18 AM
OMG this is the greatest thread ever!!!! my GF found this and cant get over how detailed your work is!!! super cool!!! |
|
UT
uncle trav
Posted
posted
on
Tue, Jun 3, 2014 4:25 PM
Thank you for the compliment. I have a bunch of fun building these. That are mainly a cold weather project because the weather here now is perfect for outdoors projects. Thanks again! |
|
E

EPCOTExplorer
Posted
posted
on
Tue, Jun 3, 2014 5:54 PM
This is the coolest. Nice work. Sorry to hear you lost your job, but this is certainly a great way to pass the time and de-stress. :) |
|
T

TikiG
Posted
posted
on
Tue, Jul 1, 2014 1:30 PM
Great! |
|
UT
uncle trav
Posted
posted
on
Sat, Nov 15, 2014 2:36 PM
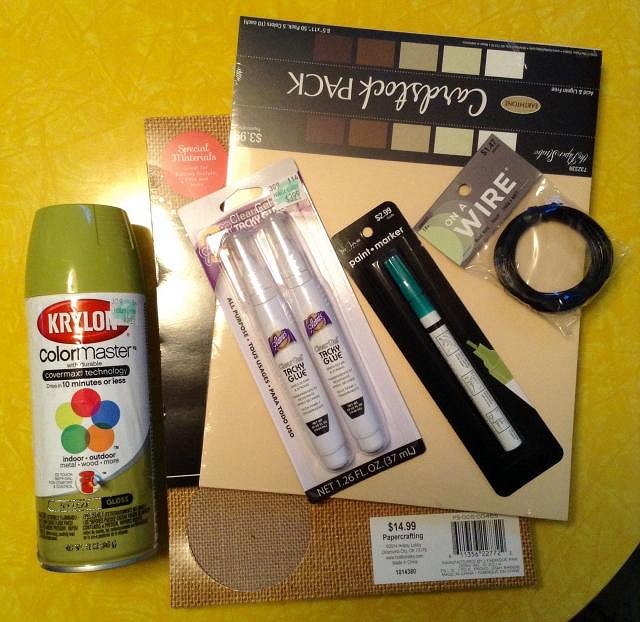
Looks like the snow is here to stay in the tropical atoll of Kalamazoo. Thirteen degrees this morning. Let's just say that it was mighty fresh out. I picked up some supplies and have some fresh ideas to try out. Hopefully it will be something a bit different but as with all of my other huts this one will be a learning project for some new techniques. Thanks for taking a look. |
|
D

danlovestikis
Posted
posted
on
Sat, Nov 15, 2014 8:35 PM
So glad to have you back. I love your creations. I'll be watching you!!! Remember the song? Wendy |
|
UT
uncle trav
Posted
posted
on
Sun, Nov 16, 2014 7:31 AM
Thanks Wendy! Winter is long and cold here so it is the perfect time to work on these projects. I'm going to try my hand at some diorama features. I haven't tried that before so it will be fun to test some new ideas. |
|
H
hang10tiki
Posted
posted
on
Sun, Nov 16, 2014 8:55 AM
U rock bruddah... |
|
D
danlovestikis
Posted
posted
on
Sun, Nov 16, 2014 10:21 PM
uncle trav that would be so over the top with the sizes required. WOW, I hope it works out. Wendy |
|
M

MadDogMike
Posted
posted
on
Mon, Nov 17, 2014 12:28 PM
Looking forward to new stuff from you Trav. (Sorry about the 13 degrees :( ) |
|
T
TikiG
Posted
posted
on
Mon, Nov 17, 2014 3:15 PM
Yes! Uncle Trav back at his workbench! I can't wait to see some progress pics of some of your new ideas - inspire us please! |
|
UT
uncle trav
Posted
posted
on
Wed, Nov 19, 2014 4:17 PM
Thanks everyone. As always this will be a gradual process. This is the start of an attempt at diorama foliage. I'll post some progress pics as I go.
"Anyone who has ever seen them is thereafter haunted as if by a feverish dream" Karl Woermann [ Edited by: uncle trav 2014-11-19 16:55 ] |
|
UT
uncle trav
Posted
posted
on
Sat, Jan 3, 2015 4:34 PM
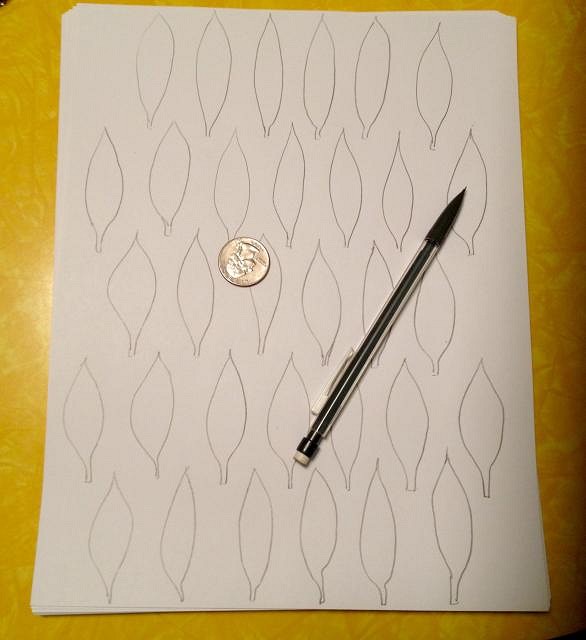
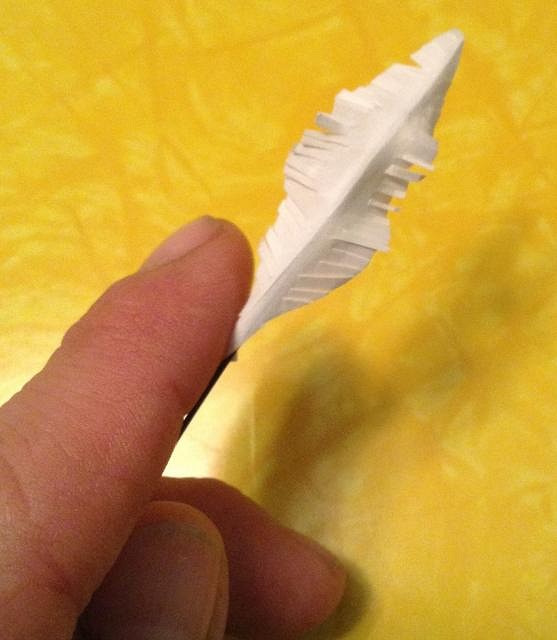
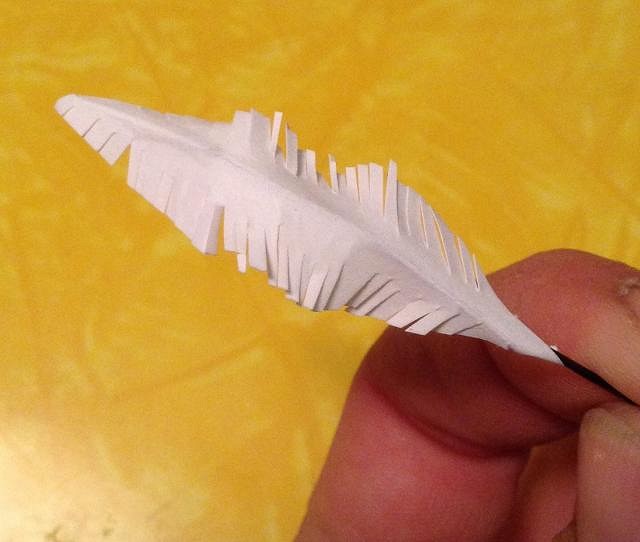
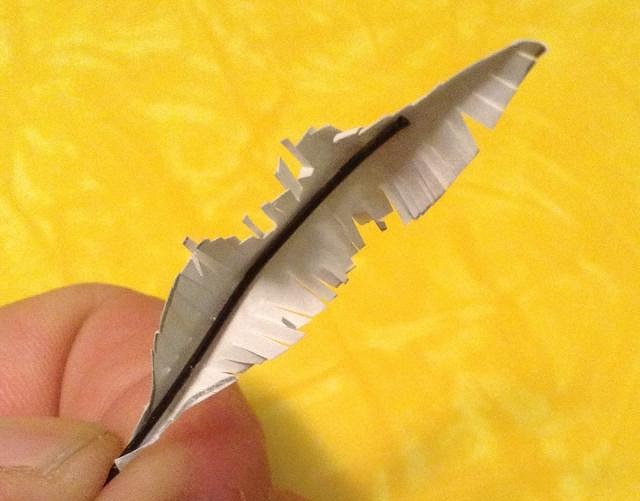
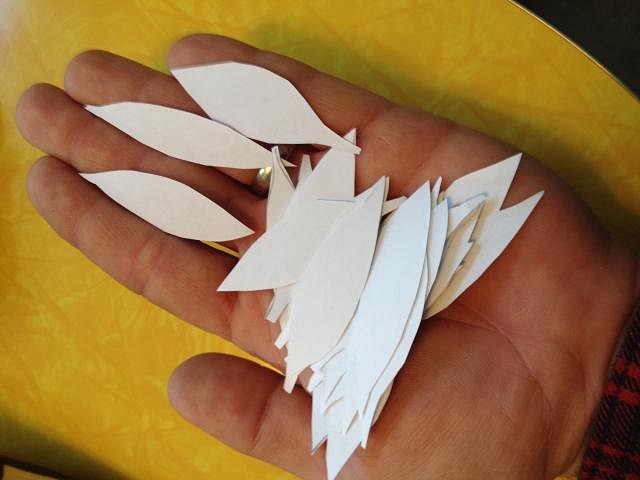
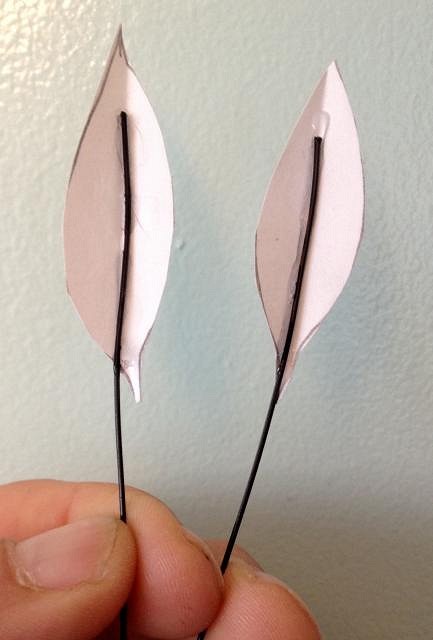
Messing around with some techniques for my new diorama. Here is my first attempt at making foliage leaves. This is the first one. I need to paint and detail it to see how it will turn out. If it works out I'll make about thirty more to form a tree. Tons of tiny cuts after the shapes are glued to a very thin wire so they can be formed to different shapes. I thought I'd give a try at making the foliage instead of buying it from a hobby store.
|
|
UT
uncle trav
Posted
posted
on
Sat, Jan 3, 2015 4:42 PM
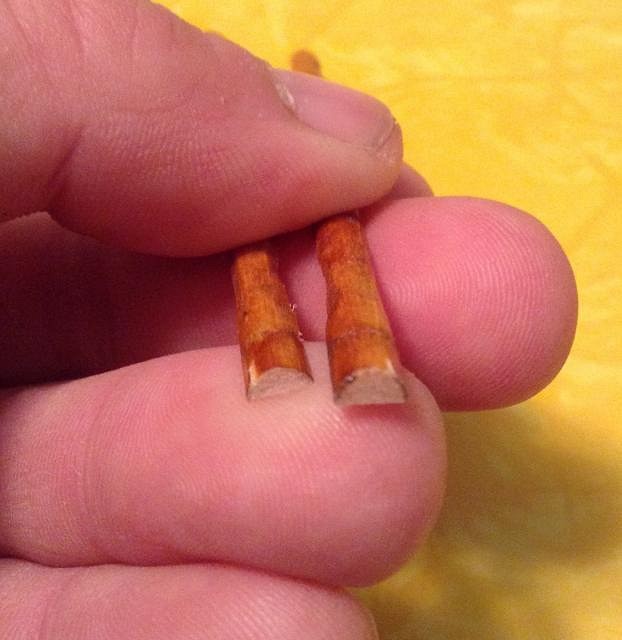
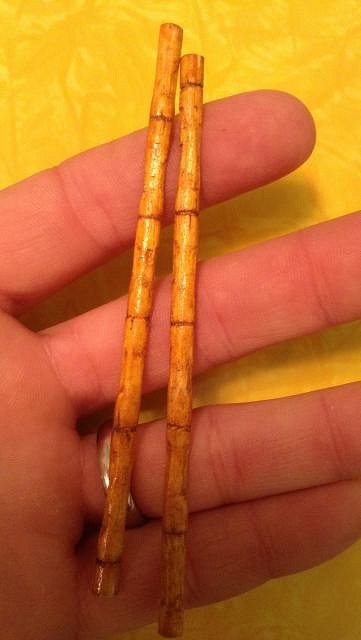
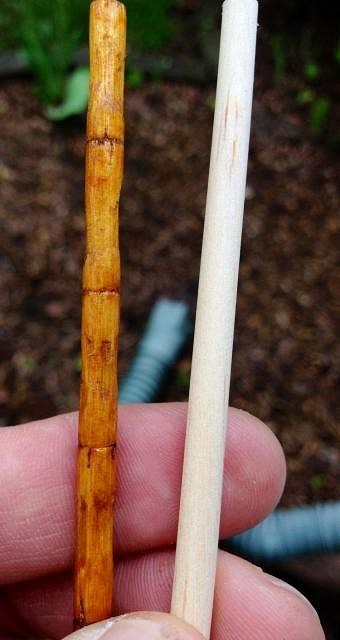
Next up hand made mini split bamboo. A mainstay of Tiki architecture. These flats will be used for walls and trim. In my other builds I have used full round pieces of real bamboo detailed wth segments I made with micro wire cutters. These are wood dowels carved and split to look like real bamboo.
|
|
H
hang10tiki
Posted
posted
on
Sat, Jan 3, 2015 6:44 PM
I like watching the master at work... |
|
UT
uncle trav
Posted
posted
on
Sun, Jan 4, 2015 6:21 AM
LOL. Thank you sir. I'm no master just a guy trying to escape the daily grind in miniature :D here are a couple more progress pics.
|
|
M
MadDogMike
Posted
posted
on
Sun, Jan 4, 2015 6:22 PM
I always enjoy your work Trav! Just a dumb question - wouldn't it be easier to start with various green papers instead of white when making foliage? |
|
UT
uncle trav
Posted
posted
on
Sat, Mar 5, 2016 6:49 AM
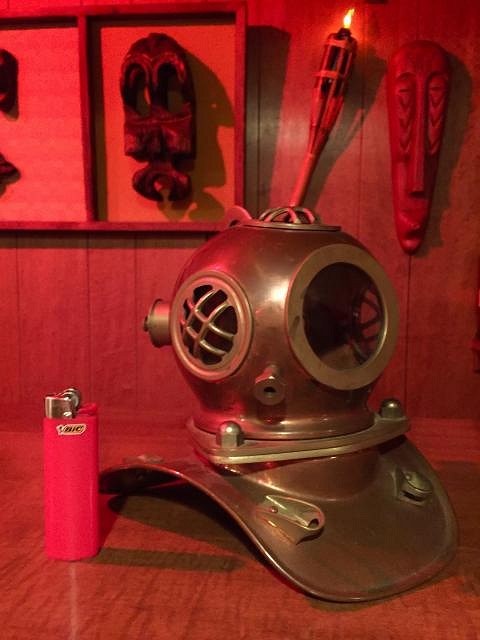
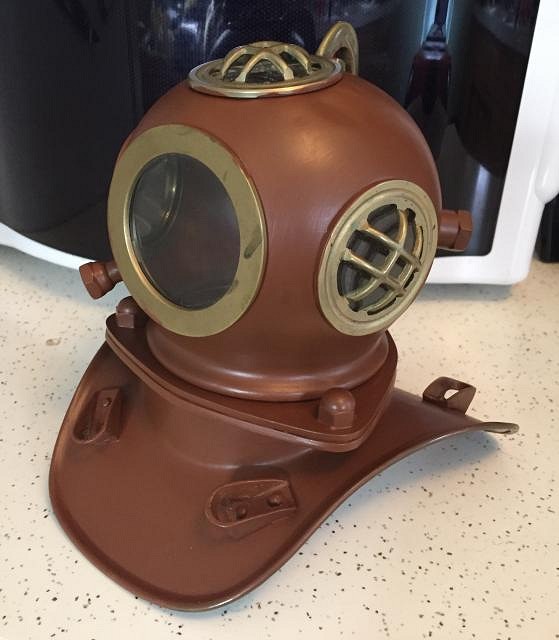
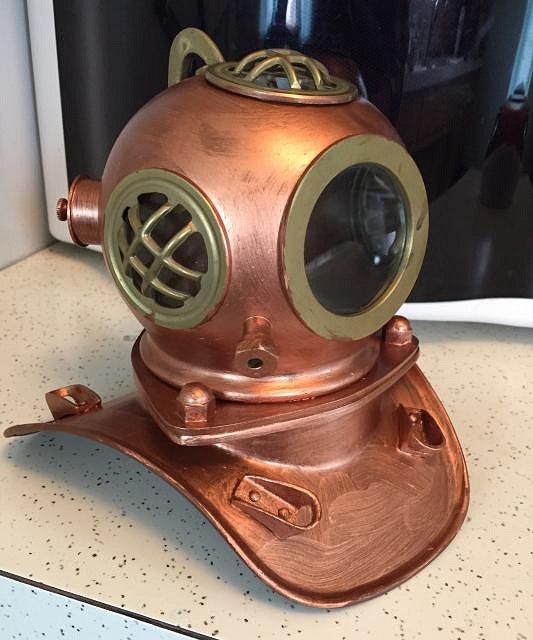
Well it's been a year since my last post on this thread. The diorama has been put on the backburner for now. A while back I found a nice miniature copper diving helmet for my home bar. I was just going to put it on the shelf and then I got inspired by the posts of tikiskip to turn the helmet into a small hanging lamp or maybe a table lamp. The first part of the process will be to age the copper to a nice patina. The wiring will be the easy part. I will post some pics of how it turns out. "Anyone who has ever seen them is thereafter haunted as if by a feverish dream" Karl Woermann [ Edited by: uncle trav 2016-03-05 06:50 ] |
|
H
hang10tiki
Posted
posted
on
Sat, Mar 5, 2016 7:00 AM
He's back |
|
T

tikiskip
Posted
posted
on
Sat, Mar 5, 2016 10:44 AM
Those make cool lights. I found a real one at a estate sale and had to wait all day for it, well when it Man you can't get a new small remake for cheap these days. That looks like a nice one. |
|
UT
uncle trav
Posted
posted
on
Sat, Mar 5, 2016 2:15 PM
Thanks guys. I'm trying to decide which way to go with the patina. I could use various colors of water based paint and a topcoat sealer. I could go with the household cleaner and lemon juice route. Or I could go with the commercially made reactive paint way. Seems they all have pros and cons. |
|
T
tikiskip
Posted
posted
on
Sat, Mar 5, 2016 4:07 PM
Trav I say go natural as you can. That's why copper is so great, that color you get by just waiting. |
|
M
MadDogMike
Posted
posted
on
Sat, Mar 5, 2016 5:38 PM
I agree that paint seems like a temporary choice. Commercial or home made reactive chemicals will probably give a more permanent result. Always love watching your projects Trav. |
|
UT
uncle trav
Posted
posted
on
Sat, Mar 5, 2016 5:49 PM
Thanks for the input. I'm a sheet metal worker by trade and have worked with copper from time to time. The copper I usually install is new so the aging and patina take time. I have read of how to achieve both a blue and a green patina on copper but I'm not sure if I can get both on the same piece. Like all of my projects it will be a learning process which I enjoy. |
|
UT
uncle trav
Posted
posted
on
Wed, Mar 9, 2016 2:21 PM
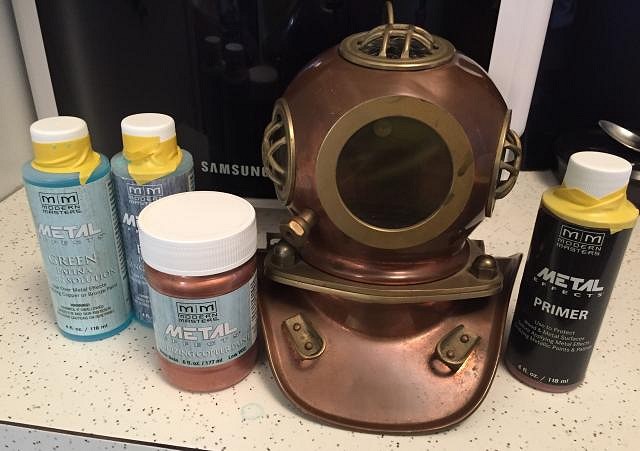
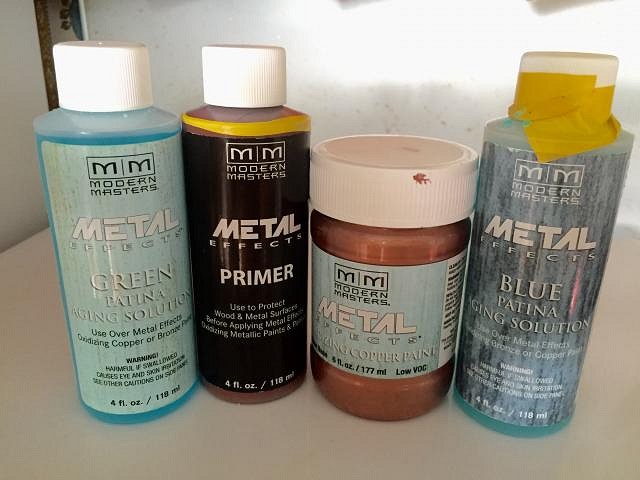
Well I have decided to go with a commercial reactive paint system. The cooper paint actually contains copper dust which when treated with the aging agent will oxidize the metal to create a patina. I bought both the green and blue patinas so this should be interesting. The first step was removing the old clear protective lacquer from the brass and copper to get it ready for the primer paint and activator. I used lacquer thinner and some elbow grease. |
|
T
tikiskip
Posted
posted
on
Wed, Mar 9, 2016 4:08 PM
This will be a good one. Will post a picture of the light I put up outside years ago. |
|
D
danlovestikis
Posted
posted
on
Wed, Mar 9, 2016 7:43 PM
Everything you do is so worth watching. This is something I didn't even know existed. I saw when you found this at the thrift shop with so many wonderful mugs. Now you are going to make it even more wonderful. How fun, Wendy |
|
TM

Tipsy McStagger
Posted
posted
on
Thu, Mar 10, 2016 9:37 AM
Beautiful work on those tiki huts !! Real old school tech. Love em !! |
|
TM
Tipsy McStagger
Posted
posted
on
Thu, Mar 10, 2016 10:06 AM
Beautiful work on those tiki huts !! Real old school tech. Love em !! |
|
H
hang10tiki
Posted
posted
on
Thu, Mar 10, 2016 2:14 PM
Alright |
|
UT
uncle trav
Posted
posted
on
Fri, Mar 11, 2016 5:28 AM
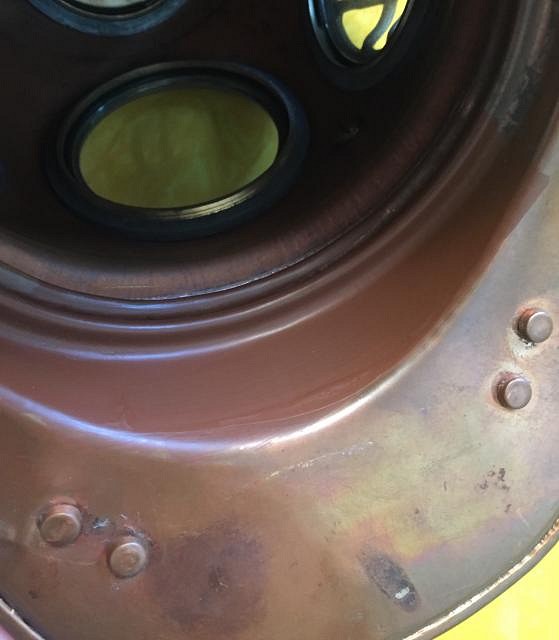
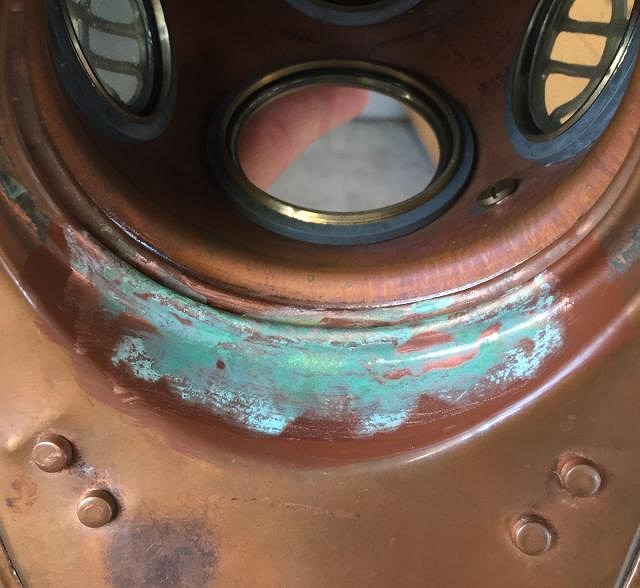
Thanks everyone!! I have done a test on the underside of the helmet and the patina looks like it will work well. After stripping the lacquer off the helmet I applied two coats of primer to the test area. Following the instructions I let the primer dry overnight. Next I applied a coat of the copper oxidizing paint and let that dry. The last step was to apply another coat of the copper paint and while it is still wet apply the green oxidizing solution. I dabbed the solution on with a small sponge to add some texture. The green patina started to appear in about ten minutes. I'm pretty happy the effect so far on the test area.
|
|
UT
uncle trav
Posted
posted
on
Sat, Mar 12, 2016 6:06 AM
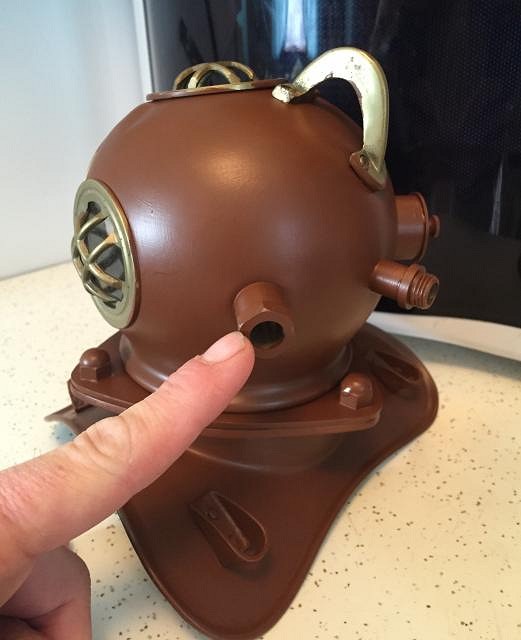
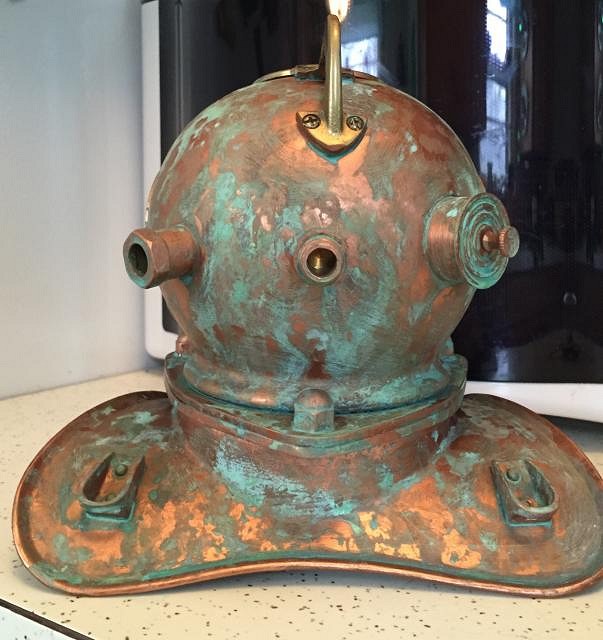
I have the mini helmet primed and ready for the copper reactive paint. I will do the brass parts with a mixture of the blue and green patinas as these would naturally age with different colors. I have done some reading on theses paints and folks have stated that the finish has lasted as long as seven years outdoors and still looks good. Mine will be indoors of course. When done the finish is stable and does not rub off when touched and seems to be a good product. The helmet has a small brass fitting on the back that is perfect for the wiring to pass through for the bulb socket. It also has a handy brass loop on top which I will use to hang the lamp. Fun little project so far.
|
|
T
tikiskip
Posted
posted
on
Sat, Mar 12, 2016 8:26 AM
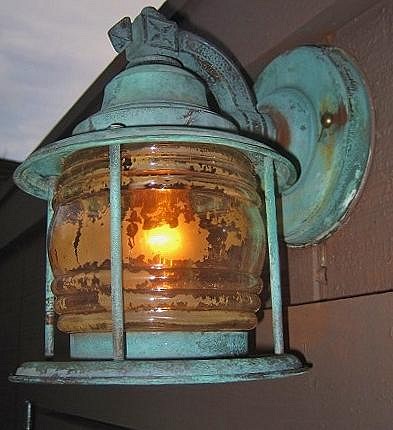
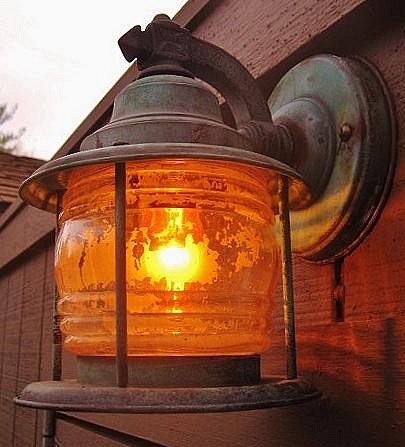
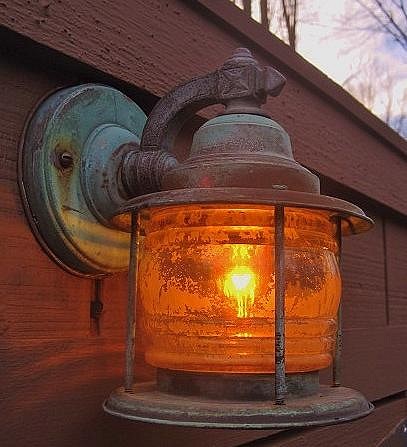
Here's my light outside Trav. The globe was sprayed with glass frosting and then put outside for say two years. |
|
UT
uncle trav
Posted
posted
on
Sat, Mar 12, 2016 10:03 AM
Thanks for the pics skip. I like that glass treatment. That's what I'm shooting for. I suppose my Michigan weather would age the hell out of the helmet if I hung it outside but I'm taking the quick way out :D |
|
UT
uncle trav
Posted
posted
on
Sun, Mar 13, 2016 5:46 AM
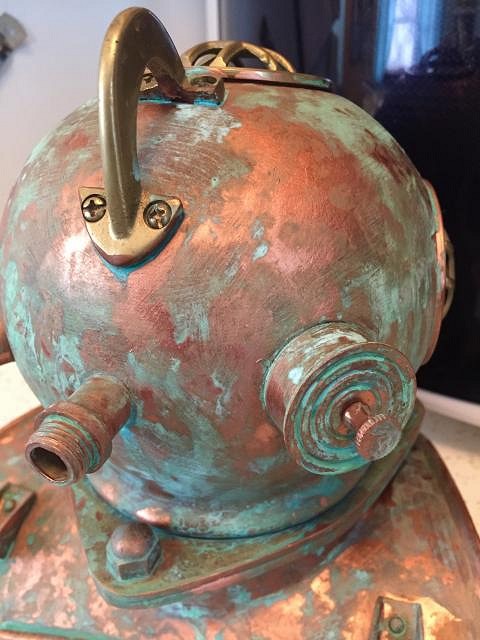
I have applied the first coat of the copper reactive paint. The next step is another coat of copper paint and the oxidizing solution. No turning back now.
|
|
M
MadDogMike
Posted
posted
on
Sun, Mar 13, 2016 8:32 AM
Lookin' good Trav! |
|
UT
uncle trav
Posted
posted
on
Sun, Mar 13, 2016 10:39 AM
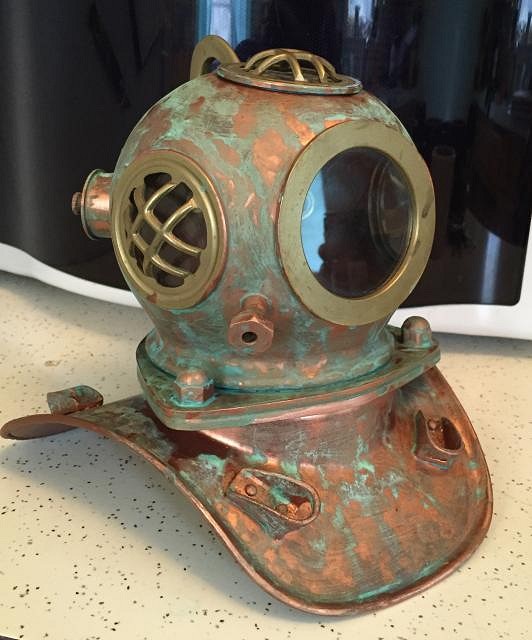
Thanks Mike. Here is the first attempt at the patina. I think it is looking ok.
|
|
H
hang10tiki
Posted
posted
on
Sun, Mar 13, 2016 7:51 PM
Lookin good sir |
|
H

hiltiki
Posted
posted
on
Mon, Mar 14, 2016 10:20 AM
Love your step by step experiment. Would like to try this once I get hold of a diving helmet. |
|
UT
uncle trav
Posted
posted
on
Tue, Mar 29, 2016 2:00 PM
We'll work has been taking a toll on my fun time so progress has been slow on the diving helmet lamp. I was able to pick up a few items for the electrical wiring this weekend. I am going with a C-7 bulb and socket that should work out well. I will post some more progress photos soon. Thanks for taking a look!
|
|
M
MadDogMike
Posted
posted
on
Tue, Mar 29, 2016 2:27 PM
Hey Trav, that patina turned out AWESOME!!! |
|
T
tikiskip
Posted
posted
on
Sun, Apr 10, 2016 5:15 AM
So is this light done? |