Tiki Central / Home Tiki Bars
Sunken Studios (formerly The Treasure Island Room)
|
MAM

mike and marie
Posted
posted
on
Tue, Aug 17, 2010 3:06 PM
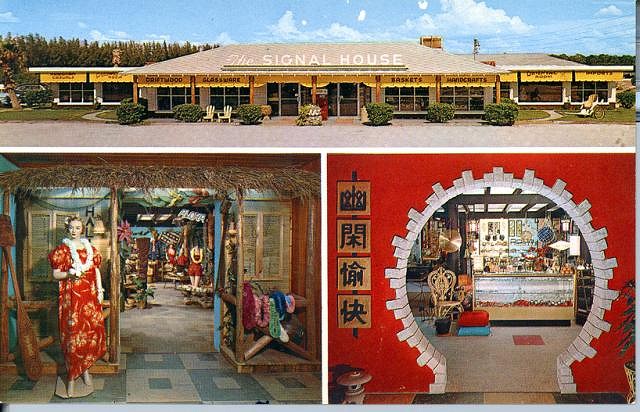
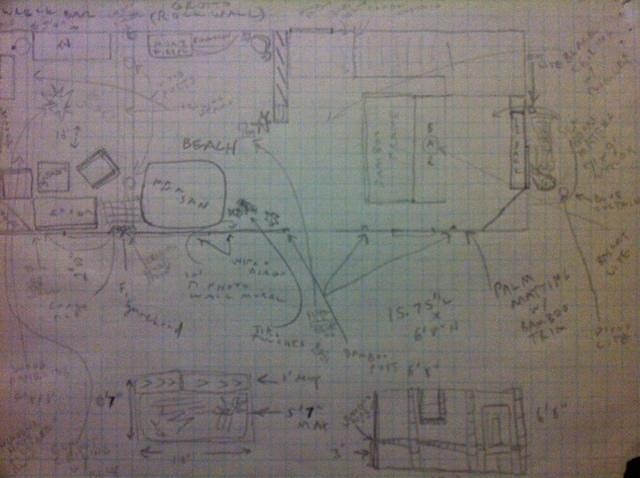
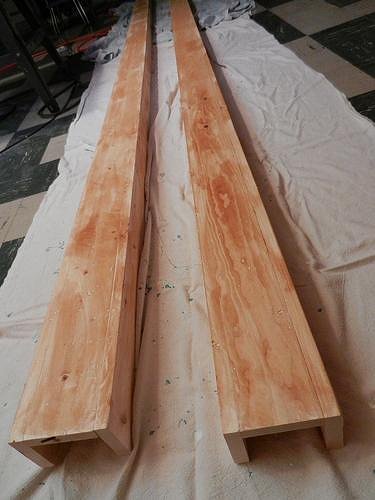
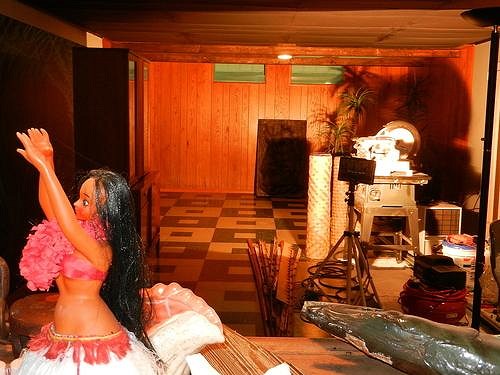
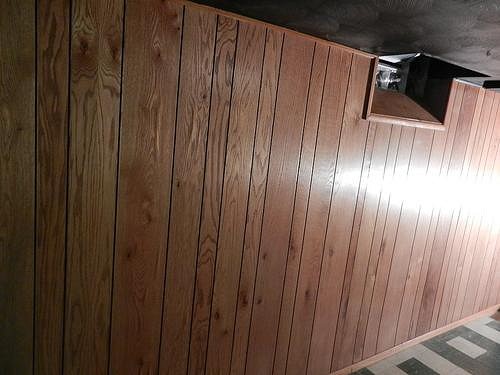
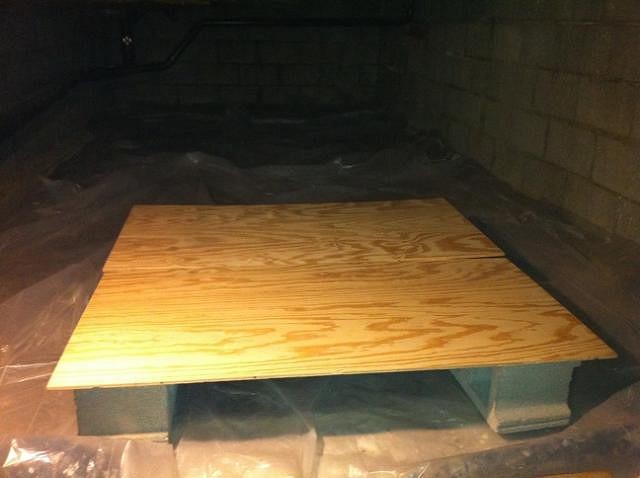
We've enjoyed lurking here for a long time, seeing so many great projects come to life and cheering them on ... notably and in recent memory Hula Sue's and the Pao Pao Hut. And to that last one, I admit to being completely skeptical at first, and was progressively more convinced (and blown away!) as the thread commenced ... so it's in that spirit that we're finally motivated to make a post about our own ongoing tiki saga, the building of the Treasure Island Room. We figure we should be documenting this somewhere, and since we'll undoubtedly need help or input on various parts of what has become a maddening all-consuming and impossible-sounding project, this is the place! And we have to start all this by saying that the name itself is a misnomer of sorts. We knew when we first undertook the project that this was going to be the name -- it's named after the city of Treasure Island, Florida, which until fairly recently was an absolute mecca of classic mid-century modern architecture. We were very involved in trying to save it, but after a bitter and protracted battle, and despite some awesome media coverage leading to the city getting quite a few generous offers of assistance, the cause was basically lost. (There's still a few great landmarks there today, but it's only a shadow of what it was in 2004 ... which was when the whole two-mile strip looked basically like the best of 1964!) But as the name applies to the tiki here, it's a misnomer because it's no longer merely a 'room' -- the project has ballooned into taking up a little more than a floor of the house! We've been occupied with other rooms and restoration projects here so all of our tiki has been tucked away in storage, but this summer we've put our full attention to getting the TI Room in place -- even to the point of missing the Hukilau (we were painting tapa cloth that weekend instead). At first the idea was to create a respectable and suitably vintage tiki bar that would be home for our collection of mugs, art, and artifacts from all these lost places that we love ... but as we came up with more places and ideas for must-have "tributes" that we'd absolutely have to do, the project quickly spun out of our control ... maybe over the top ... and then as we decided that all of this was entirely within the realm of physical possibility, we decided to just go with it. Might as well lay out our full intentions here on this first post to not only hold ourselves up to it in the coming months (gulp) but also solicit advice and ideas from the rest of you guys, since there's obviously a lot of first-class tikifying talent on here. The current floorplan includes little "tributes" of all our favorite places, like the Mai-Kai, Tiki Gardens, the Tiki-Ti, the Tonga Hut and so on ... including a rock grotto with a fountain and real working moai fireplace replica from the Kahiki (and eventually, a tropical thunderstorm with rain, thunder and lightning); a dining room area that will be a ship's galley replica of the Wreck Bar, with "underwater" portholes and a hole in the ship's ceiling; a life-sized mermaid diorama behind the bar as our tribute to the Wreck Bar (and the setting of one of the best films of all time, Mako, The Jaws of Death), the gals of Weeki Wachee and the mermaids of hotel bars like 2 Fathoms Down; an "outdoor" area with fiber optic star ceiling, photo wall mural of Treasure Island, and a mini dance floor with the green and beige flooring of the Polynesian Room at the Signal House; a nautical bar with varnished & scalloped pine as it appeared at the Careless Navigator (and probably a hundred other nautical-themed bars!); an outdoor "beach" area with shuffleboard court, grill, and tiki bar; a miniature replica of The Surf of Treasure Island (the best of Treasure Island's lost motels) with a mural and one of its "spider leg" beams, plus a motel "living room area" containing the only known actual piece of The Surf in existence; and other details like the Sheraton Kon-Tiki's Samoan wall art, the Hala Kahiki's bamboo overhang, and probably too many things I'm forgetting. (Haven't even mentioned the Bahooka, Don the Beachcomber, Damon's, Old Tony's ... it's out of hand!) We're actually moving quite along in the project (although the critical path checklist still looks like it's for conducting a moon landing and not a home renovation). Parts of the floor plan are recognizable now, but we figured that if we're posting here we should start at the sordid beginning ... so here's a couple of the earliest shots that show what we had to work with -- sorry for the poor quality but at the time we weren't thinking of documenting it anywhere. This is the family room and what looks like a cheerless "dungeon" (and it's actually not totally "before" because it's already stripped to the bare concrete).
In the "beach" room where the shuffleboard court will go, one of the first things we did was epoxy the floor to look like a sandy beach:
[ Edited by: mike and marie 2012-10-07 15:12 ] [ Edited by: mike and marie 2018-01-19 10:43 ] [ Edited by mike and marie on 2022-09-06 17:25:10 ] |
|
BB

Bongo Bungalow
Posted
posted
on
Tue, Aug 17, 2010 3:39 PM
Your plans sound ambitious and ya gotta like that. And... I like your sandy floor. |
|
MAM
mike and marie
Posted
posted
on
Thu, Aug 19, 2010 7:46 PM
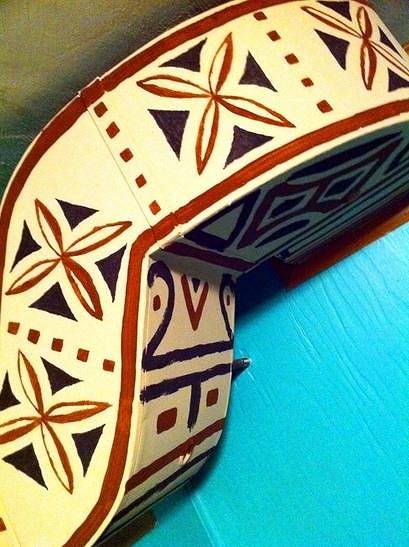
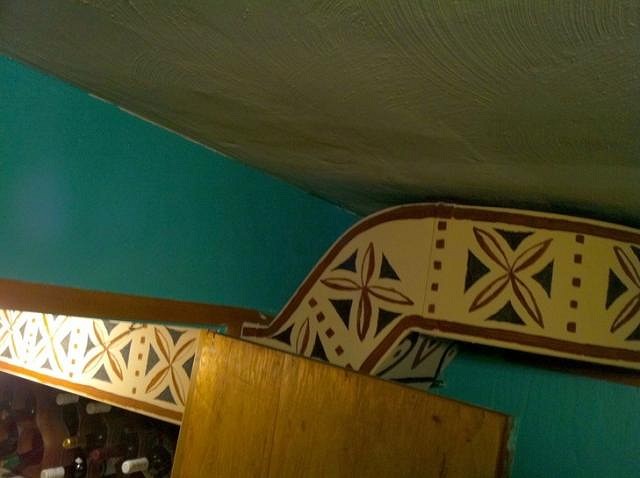
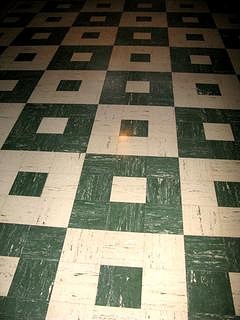
Thanks ... looking forward to getting advice, feedback and input here as we go! Some more updates: The dance / bar floor is ready now: It's the same as from the Polynesian Room in the old Signal House in St. Pete (near TI). See the lower left corner: Some exposed ducts behind the main bar were turned into Samoan tapa. The pattern? It is believed to be authentic ... as found on ancient menus from Stephen Crane's Sheraton Kon-Tiki Ports!
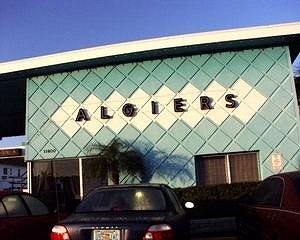
It extends into the wine cellar: The seablue color on the side wall was matched from the exterior of TI's Algiers Motel:
Question: the tapa pattern is latex and tempera painted on the ducts over a layer of primer. Is there anything we should put over it to help preserve it? |
|
MPP

Mr. Pupu Pants
Posted
posted
on
Fri, Aug 20, 2010 9:55 PM
Hi Guys, |
|
BK

Big Kahuna
Posted
posted
on
Sat, Aug 21, 2010 12:12 PM
I'm diggin' it! |
|
M

mrsmiley
Posted
posted
on
Tue, Aug 24, 2010 1:05 AM
I have a tiki shirt I am selling that says Treasure Island and TIki island on it. What size are you? |
|
V

VampiressRN
Posted
posted
on
Mon, Aug 30, 2010 6:34 PM
Great ideas!!! Those floors are fabulous and the duct is genius. Keep up the great work. :wink: |
|
K

kahalakruzer
Posted
posted
on
Sat, Sep 4, 2010 3:51 PM
Those ducts look great! I'm not sure what you would have to use to seal latex paint, but if you put a sepia/amber/light brown tint into the clearcoat, it would make that print look even cooler...in my opinion obviously. Regardless, looks nice. |
|
L9

Lodge 9
Posted
posted
on
Sun, Sep 5, 2010 4:57 AM
You can use waterbase polyureathane to seal and protect it, its usually crystal clear, so it wont change the color, I would use a satin finish. do a test spot to make sure you like it. |
|
MAM
mike and marie
Posted
posted
on
Fri, May 6, 2011 8:47 AM
All right, it's been too long away from the tiki ohana here! Ironically we've been out photographing tiki bars all over the place ... and making progress on the TI Room. Lots of progress! Thanks everyone for the comments so far. We'll try a touch of sepia tint (or maybe even amber shellac?) in the clearcoat to seal the ducts. Yes, they were all handpainted ... the images were taken from a vintage menu from the Sheraton Kon-Tiki. Marie drew them to size, Mike copied them onto cardboard templates, and then we both painted with that. The star ceiling is done, the Wreck Bar room is already "underwater" and nearly done, we're thinking mai-tais by late June. We'll post some longish updates, with photos, in a few days. And Mr. Smiley, this is a little late, but we're L and M respectively! |
|
P

Polly
Posted
posted
on
Mon, May 23, 2011 6:04 PM
Amazing place! |
|
MAM
mike and marie
Posted
posted
on
Mon, Sep 24, 2012 7:58 PM
All right, done a lot in the past year and a half. One half of the basement is almost finished, the other half is getting there. We have some questions for the resident experts but first we should probably start where we left off in 2010... First some serious blueprinting was in order so we knew how everything would fit in. We opted for the main bar with the mermaid show and a second 'outdoor' tiki bar in the beach area:
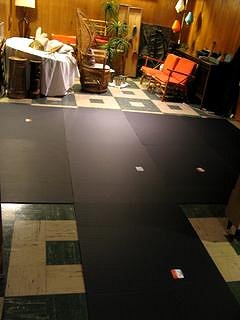
Dance floor is done (all the carpet removed, tile washed and waxed with Futura):
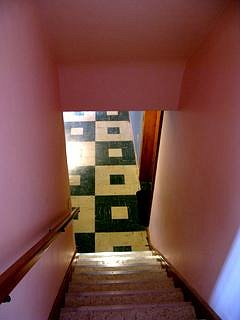
The hallway down restored to its original conchshell pink, brown speckle tiles on the steps:
[ Edited by: mike and marie 2012-09-24 21:14 ] |
|
MAM
mike and marie
Posted
posted
on
Mon, Sep 24, 2012 8:03 PM
Once the floors were done we were able to put some of the bar area in place. This is not the best pic but the low cabinet behind the bar has sliding glass doors in front and is for bar books and some glassware. We also fit a corner cabinet on the right. Both pieces are about the same vintage. The bar itself was part of the house but needed serious restoration (more on that soon). The open hatch on the wall in the back is the future underwater mermaid show area.
|
|
MAM
mike and marie
Posted
posted
on
Mon, Sep 24, 2012 8:35 PM
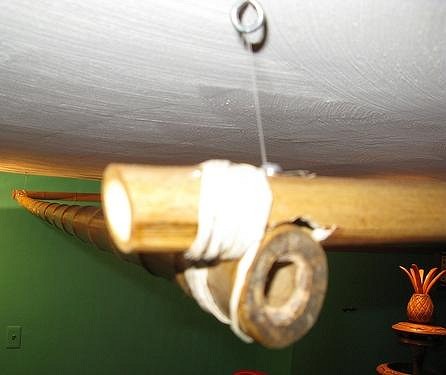
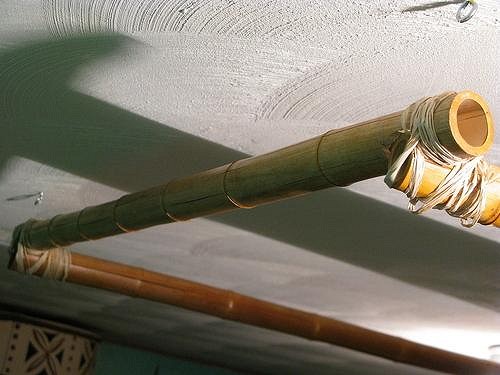
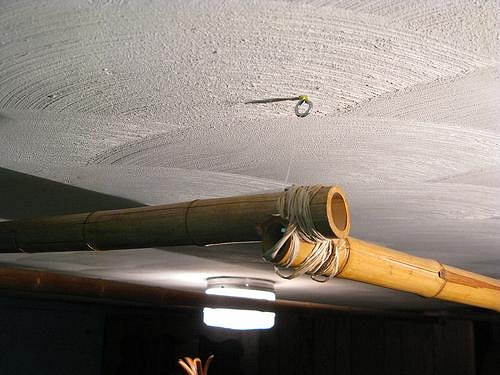
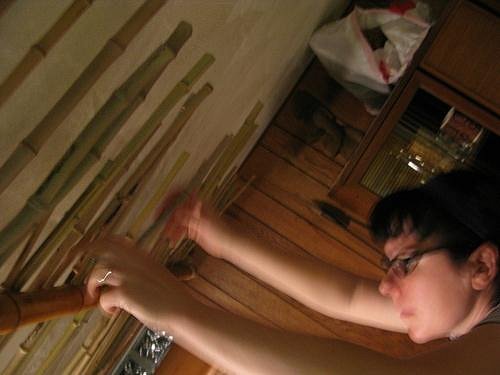
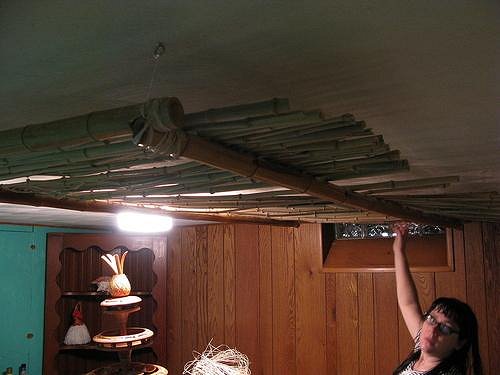
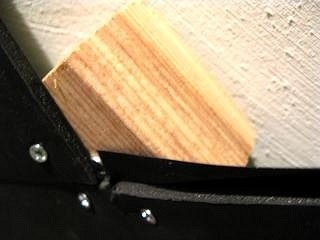
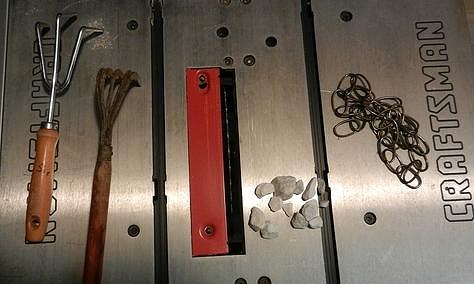
Early on, we knew we had to get some bamboo. This is a tiki bar, right? A neighbor down the street had a backyard jungle of it and was more than happy to let us harvest all we needed ... and then some ... for our quixotic adventure. In the end, we wound up with enough live plants to make a little backyard jungle of our own. The stuff grows like grass! Wait, it is grass! This was fine for all the small decorative stuff and for the bamboo pieces that will fill the overhang above the bar. But we needed some big pieces, too, and for that we found some well weathered stuff in a back corner of a local nursery, where gauging by what was left of the dot matrix price tags this was out there since at least the second term of the Reagan administration. They had to figure out what they would charge us (or with a smile offer to pay us to take it off the premises) and let's just say that in the end we were all happy:
A few good scrubbings with wood deck cleaner turned it from white to brown ... and when it dried we saw that it had been completely restored to its blonde-yellow glory! The difference was amazing. Then some Cabot's for good measure and we let it sit for a few days before working on it. Built a simple frame out of four of the long pieces by carving out slots on the ends for the pieces to fit together without sliding (which were then secured with screws) and the corners tied with raffia. Applied a light coat or two for finishing wax to the whole frame to give it that hard shine. Hung it on the ceiling over the bar with eyelets at just enough of an incline so that the individual bamboo pieces of the frame would hang down but not fall out:
Now with the overhang done, the concept proven (the final design uses a lot more bamboo and wire, not the nylon here in the pics), it was time to take it all down and put it away so that the ceiling above the bar could be painted black!
[ Edited by: mike and marie 2012-09-24 20:42 ] |
|
MAM
mike and marie
Posted
posted
on
Mon, Sep 24, 2012 9:00 PM
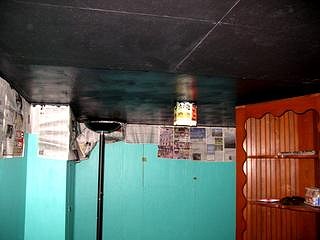
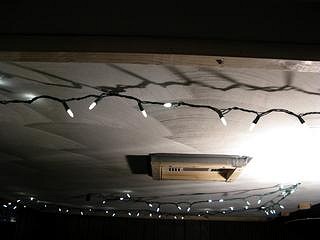
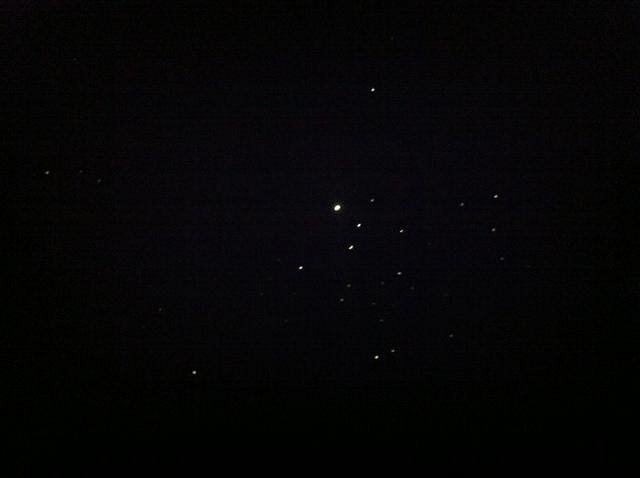
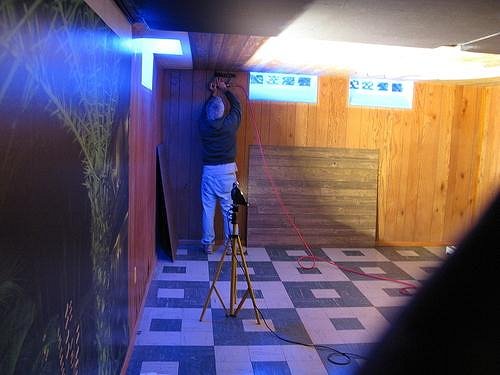
The star ceiling above the dance floor was a challenge. We felt that this area absolutely had to have some kind of realistic star effect, but all the fiber optic systems we saw were too bulky for the space we had or they required a drop ceiling. For a while we just thought about painting the whole ceiling black and then hanging coarsely woven burlap above it, but were concerned that if we did it wrong it would look like you were standing under a big mosquito net. We kept coming back to fiber optics because they looked the most realstic, but no matter what we looked into we saw it just wouldn't work. It seemed almost like the star ceiling wasn't going to happen. That is, until we looked into LED and did some thinking ... so we eventually decided to make our own. First, out came one of the ceiling lights and we put an outlet on that switch:
We mapped out a frame for the ceiling area using lightweight thin black posterboard:
Drew plumb lines on the ceiling for the frame:
Attached the frame to the ceiling with toggle bolts, wrapping around existing ductwork and vents:
Then mounted LED string lighting on the ceiling inside the frame area, plugging into the ceiling outlets:
Secured all boards to framework,
made 10,000 pinholes,
turned out the lights and looked up:
[ Edited by: mike and marie 2012-09-24 21:06 ] |
|
FT

forgotten tikiman
Posted
posted
on
Mon, Sep 24, 2012 9:07 PM
Thats a great idea. Looking really cool :D. |
|
MAM
mike and marie
Posted
posted
on
Mon, Sep 24, 2012 9:09 PM
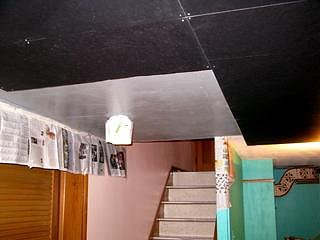
Thanks tikiman! Next we painted the ceiling grey in the little vestibule area at the bottom of the stairs. There's a doorway to the 'beach' here ... but more on that to come.
[ Edited by: mike and marie 2012-09-24 21:09 ] |
|
Q

Q-tiki
Posted
posted
on
Tue, Sep 25, 2012 8:28 PM
I love how much effort you guys are putting into the floors and ceiling! The "star" effect looks great. Keep up the good work and mahalo for taking the time to post your progress. Cheers and Aloha!! |
|
MAM
mike and marie
Posted
posted
on
Sat, Sep 29, 2012 8:28 PM
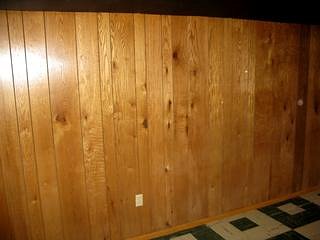
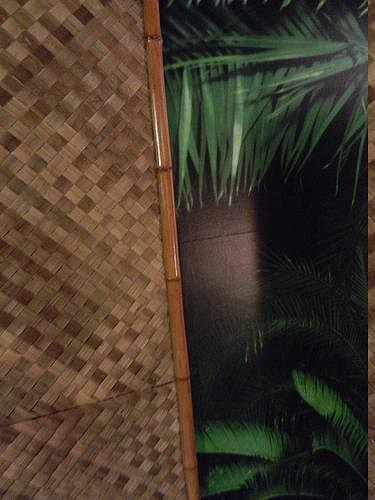
Next step were the walls in the "outdoor" dance area: the plan is to do a giant wall mural of Treasure Island on one side and a rock grotto on the other. The walls were originally paneled:
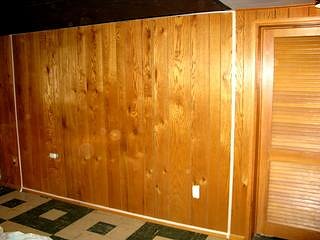
So we measured and taped out out the areas
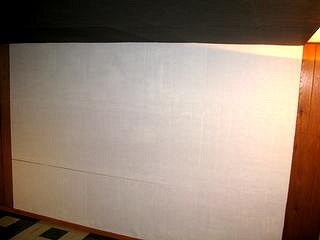
filled the gaps in the paneling, applied primer and wallpaper liner
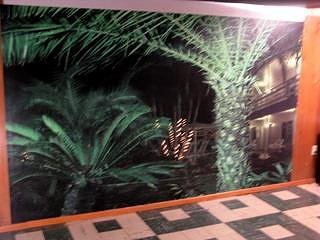
hung the mural on one side
(this is a night shot taken in the back courtyard at Arvilla, one of the mid-century motels in Treasure Island) to prep for the rock grotto area on the opposite wall, we painted it grey
|
|
MAM
mike and marie
Posted
posted
on
Sat, Sep 29, 2012 8:37 PM
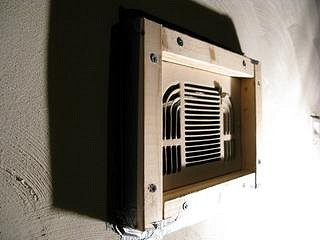
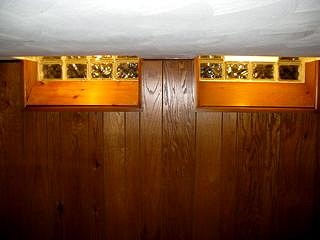
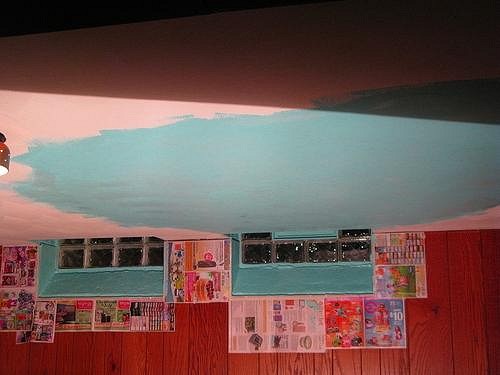
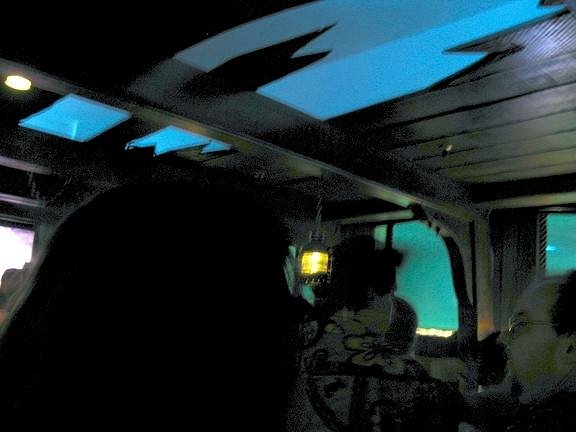
Then it was time to start work on the Wreck Bar area. First consideration was lighting -- we wanted to achieve the underwater, sunken ship effect of having realistic looking portholes giving off watery light. There were several small, recessed windows near the ceiling that we knew could eventually become the portholes:
so we installed lights inside of them at the ceiling level,
so the lights are hidden from view
and yet shine down into the room.
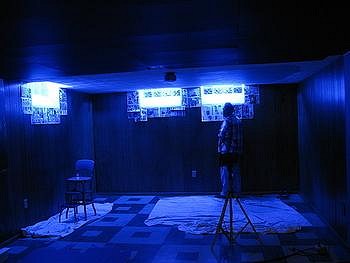
Blue fluorescents made the right glow:
|
|
MAM
mike and marie
Posted
posted
on
Sat, Sep 29, 2012 8:59 PM
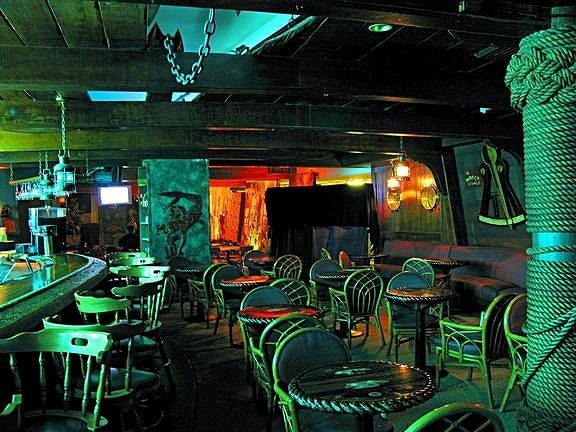
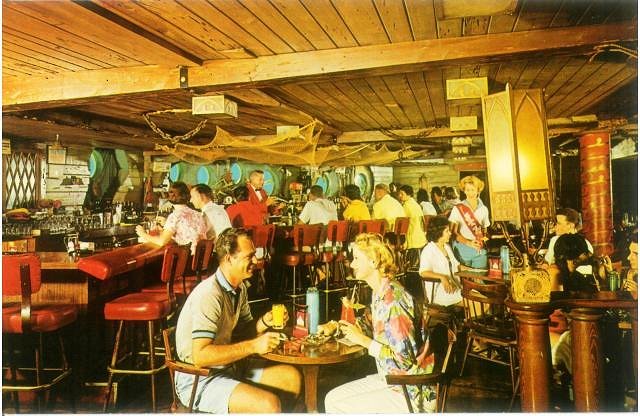
It's necessary for a quick diversion before going further. There were actually two Wreck Bars, both within an hour or so of each other. The first was Bob Gill's at the Yankee Clipper in Ft Lauderdale:
Possibly hoping to copy the success of that one, a slightly different (but similar) Wreck Bar was one of the featured rooms at the Castways in Miami Beach:
(Notice the same chains in the ceiling, but instead of a "wreck" hole there's an addition of fishnet.) Both of them are great (or in the case of the WB at the Castaways, was great as it was ultimately wrecked and bulldozed in the 80s), but are a little different. The Yankee Clipper Wreck Bar (YC WB) has larger windows to the pool directly behind the bar and is set up for the mermaid shows that continue to this day (hi Marina!); at the Castaways, the portholes were smaller but the actual bar seemed just a tad bigger and had a nice feel as well. We wanted to capture elements of both in our Wreck Bar. We matched the color of the overhead "water" in the Ft Lauderdale Wreck Bar and painted all the window wells as well as the ceiling area where we'd reproduce the hole:
[ Edited by: mike and marie 2012-09-30 12:38 ] |
|
T

Tabu
Posted
posted
on
Sun, Sep 30, 2012 8:39 AM
Love your attention to historic detail. I have very fond memories of Treasure Island and St. Pete's Beach from family trips in the 70's. I bet a lot of the amazing mid century signs and motels are long gone. Thanks for posting your progress shots. |
|
TE

tiki eye
Posted
posted
on
Sun, Sep 30, 2012 10:24 AM
this is getting interesting, sure hope to see more. |
|
MAM
mike and marie
Posted
posted
on
Sun, Sep 30, 2012 12:26 PM
Tabu, yes, sadly, too much of what made it Treasure Island is gone. Lots of McCondos now. The really sad part is that it was relatively preserved well into the 2000s and impressed the heck out of anyone who saw it. It could have been to Mid-Century Modern what Miami became in the 70s to Art Deco, but there just wasn't enough local interest. (If you happen to unearth any photos or anything from your own trips there, we'd love to see them!) [ Edited by: mike and marie 2012-09-30 12:50 ] |
|
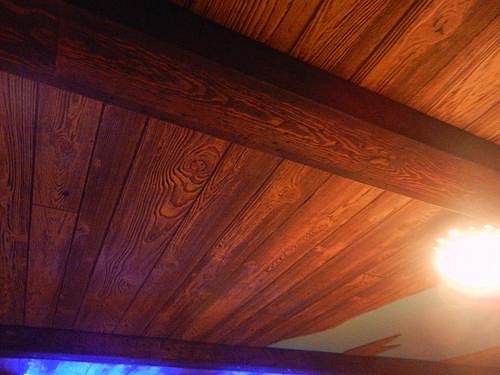
MAM
mike and marie
Posted
posted
on
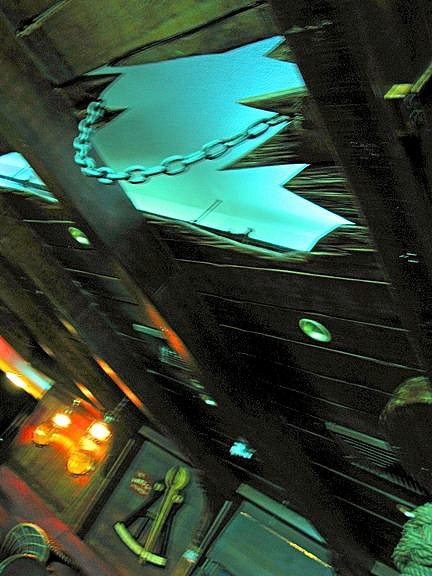
Sun, Sep 30, 2012 12:49 PM
Both Wreck Bars have wood plank ceilings and beams. The WB at the Castaways had a much lighter wood than what we see today at the Yankee Clipper, but the YC WB had undergone a few changes in the look and finish of the wood over the years, as we were able to discover through postcards and old live record albums. This is about the oldest one we've found so far, and the wood has a much more rustic, unfinished look than the dark beams of the YC WB as it exists today:
Ultimately we decided to go with the lighter color ceiling of the Castaways WB and the darker beams of the YC WB as it exists today. And of course the hole from the Yankee Clipper, which meant a few research trips to get the shape right:
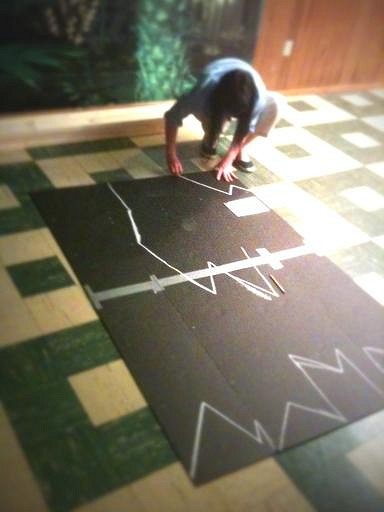
After going from photo to paper, we took the freehand drawing and scaled it to size and drew it with chalk on posterboard as a template:
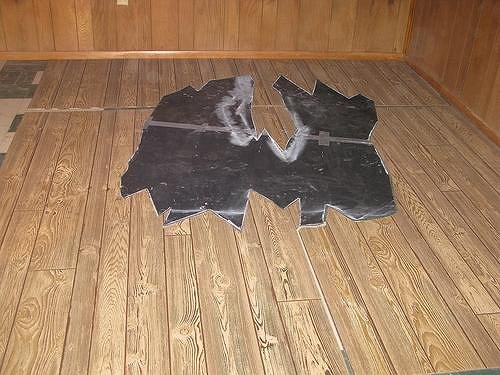
Then we were able to transfer the shape to the paneling that was to be the ceiling:
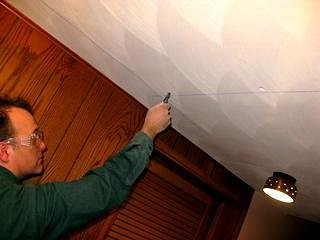
After tracing the pattern to the panels we used a jigsaw to cut it to shape. Then all the ceiling panels were nailed to the ceiling with liquid nails plus the help of Crabby Joe and his pneumatic nail gun:
|
|
V
VampiressRN
Posted
posted
on
Sun, Sep 30, 2012 6:12 PM
Wow....love the realistic approach on that ceiling...looking forward to seeing it finished. |
|
MAM
mike and marie
Posted
posted
on
Tue, Oct 9, 2012 7:27 PM
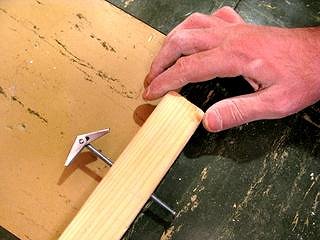
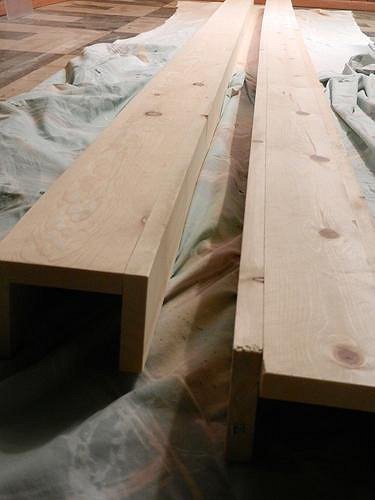
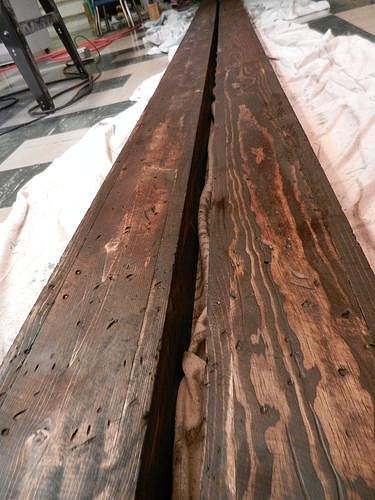
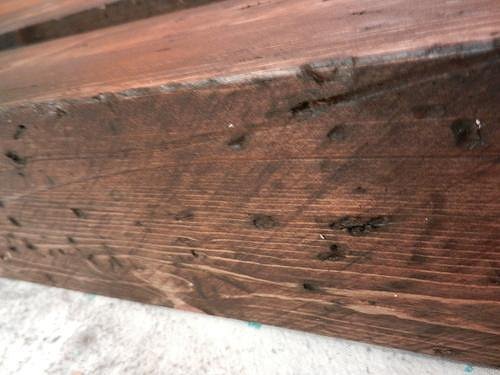
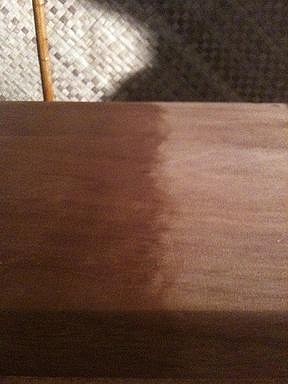
With all the ceiling in place the next step was the ceiling beams. We modeled them after the darker beams of the Ft Lauderdale Wreck Bar and the first step was to construct them out of standard lumber, measured to fit across the room and holding the sides together with nails and wood glue:
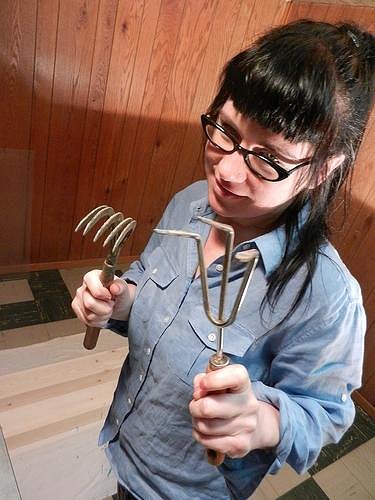
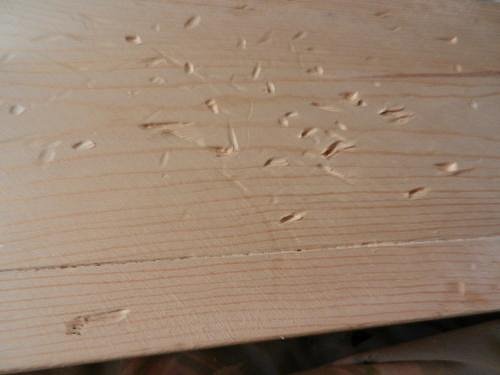
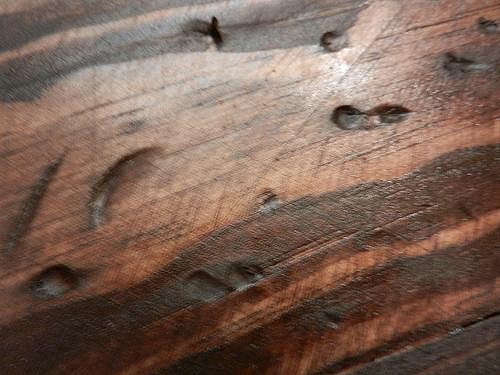
Then we had to distress it and make it look like it was part of a shipwreck. The operating table had all the necessary tools:
ready to begin:
already the first signs of distress:
once we did that to all the beams we poured a little strong, cold coffee on it and rubbed it in for color:
We repeated the whole process three, four, five times. Lots of scrapes and nicks and pounding and when we took breaks we rubbed the coffee into the wood. Finally we gave it all a coat of rub-on polyurethane stain:
Then after that dried we did even more damage to the wood, then gave it a second stain. Finally the wood started to look right:
|
|
T

tikilongbeach
Posted
posted
on
Wed, Oct 10, 2012 6:35 PM
Really cool looking space. I like your antiquing technic on the beams. |
|
M

Monkeyman
Posted
posted
on
Thu, Oct 11, 2012 9:36 AM
Nice Distressing. Just Beat It.... |
|
L

littlegiles
Posted
posted
on
Thu, Oct 11, 2012 4:47 PM
Love what you got going on there. I'm ready for updates already. :) Keep up the great work.
|
|
L

LoriLovesTiki
Posted
posted
on
Thu, Oct 11, 2012 6:27 PM
Looking good. Love those beams! |
|
MAM
mike and marie
Posted
posted
on
Sun, Oct 21, 2012 7:43 PM
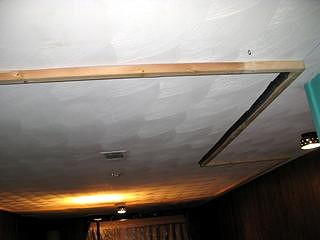
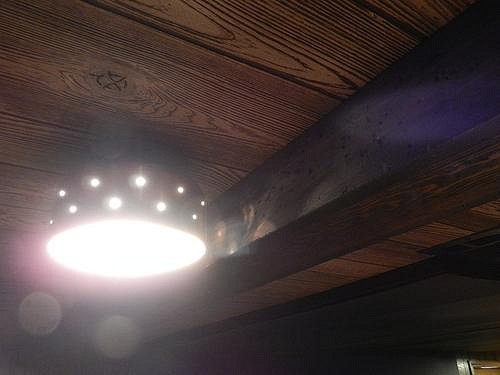
Thanks for the encouragement ... finally getting a chance to post some more updates. Here's how the beams look once installed on the shipwreck ceiling:
the original vintage light fixtures reminded us of lighting in old nautical restaurants:
A ground-eye view of the wreck hole with one of the beams going across it, as modeled after the Fort Lauderdale Wreck Bar:
|
|
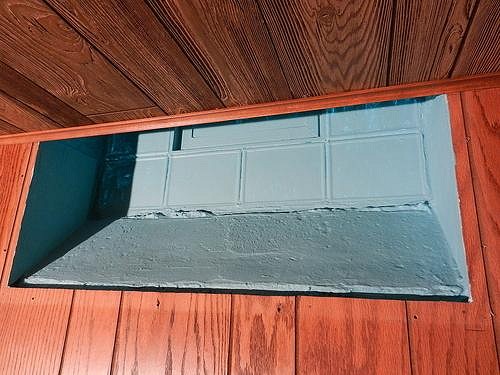
MAM
mike and marie
Posted
posted
on
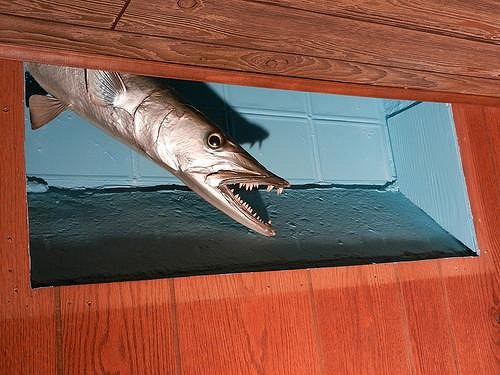
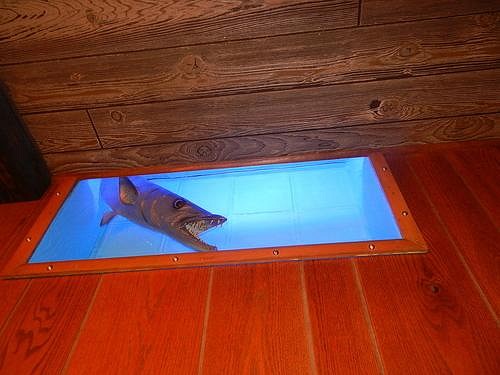
Sun, Oct 21, 2012 7:50 PM
The next step was to finish the portholes. We ended up painting the windows and the window wells with the ceiling color matched from the Wreck Bar's 'water':
For fun, we mounted a vintage barracuda in one of them:
Closed them up with plexiglas and used brass eyelets and screws on the trim for a nautical look:
|
|
MAM
mike and marie
Posted
posted
on
Sun, Oct 21, 2012 8:01 PM
Then it was time to move our attention to the tiki hut area, which at this point was still chaotic:
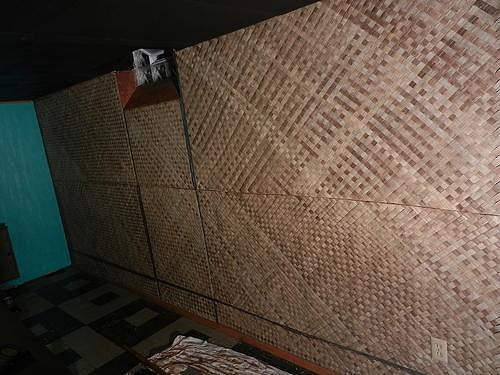
Now that the ceiling there was painted black and the hut was in place, the next thing to do was to replace the paneled wall in this area with something more tiki:
Glued up some lauhala matting, imported from Chicago (specifically, the Hawaiian shop at the Hala Kahiki!):
Then came the bamboo trim and wainscotting:
The bar itself was a whole new project... [ Edited by: mike and marie 2012-10-22 17:06 ] |
|
L
littlegiles
Posted
posted
on
Mon, Oct 22, 2012 3:51 PM
WOW! Looking great. Love the Baracuda looking through the window. It really gives it a sense of being underwater. Loving the updates.
|
|
MAM
mike and marie
Posted
posted
on
Mon, Oct 22, 2012 5:50 PM
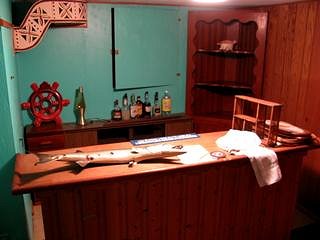
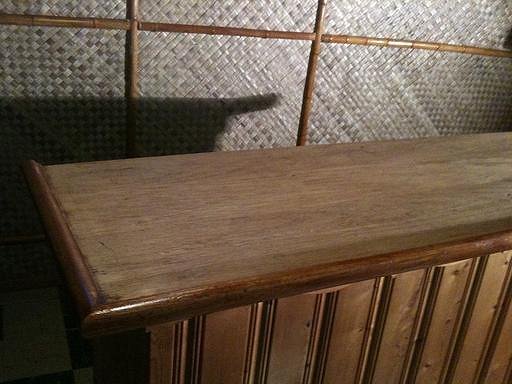
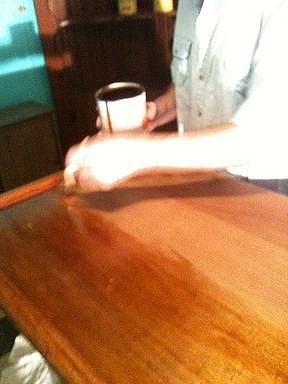
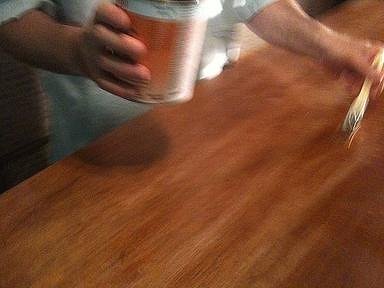
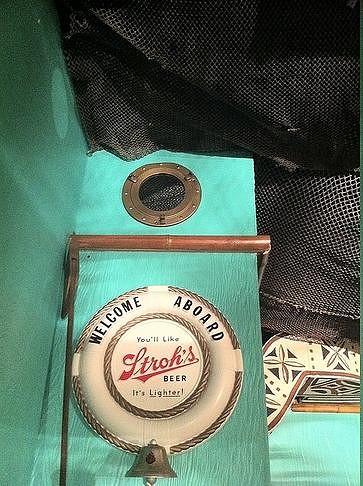
Thanks Dale. The bar in the tiki hut was another big project because our goal was to match the bar from the old Careless Navigator in Treasure Island, aka Exhibit A:
To get there took 17 sandings and coats of various types, from orange shellac to varnish and stains, to more false paths and restainings and resandings...
But after a few days we got it ... the pic of the Careless Navigator (Scuttlebutt Lounge inset) is in the center here:
|
|
MAM
mike and marie
Posted
posted
on
Mon, Oct 22, 2012 5:55 PM
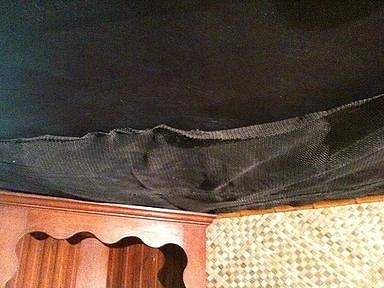
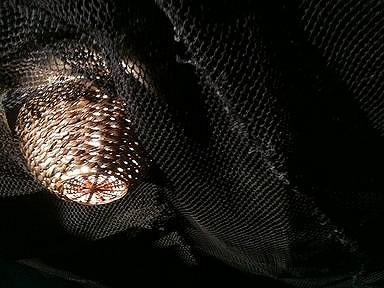
In the bar area inside the hut we hung fishnet on the ceiling a la Old Tony's, added some bamboo trim around the walls and used a basket to cover the light fixture:
|
|
MAM
mike and marie
Posted
posted
on
Mon, Oct 22, 2012 6:06 PM
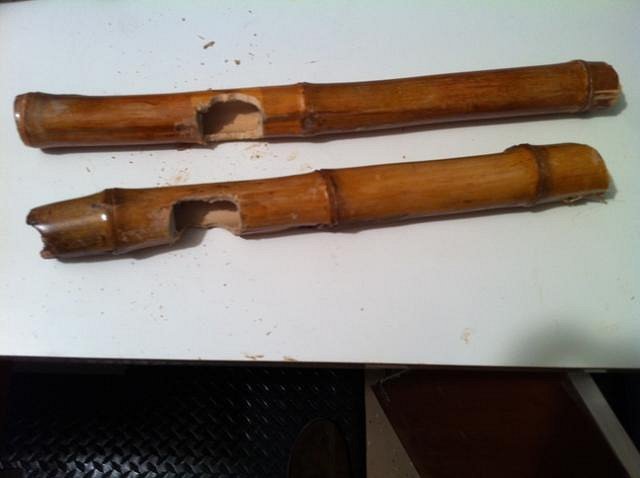
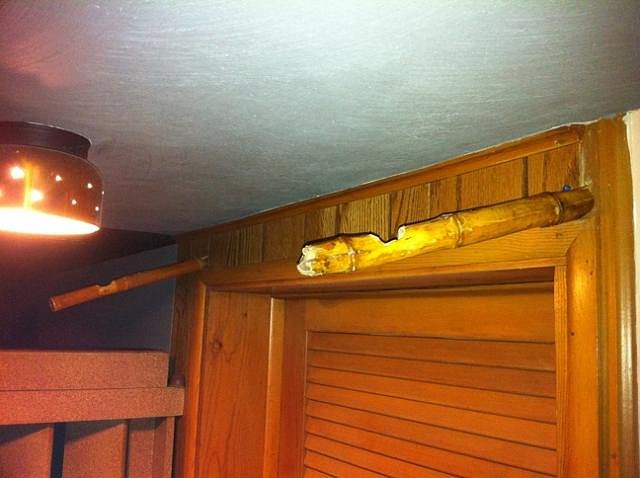
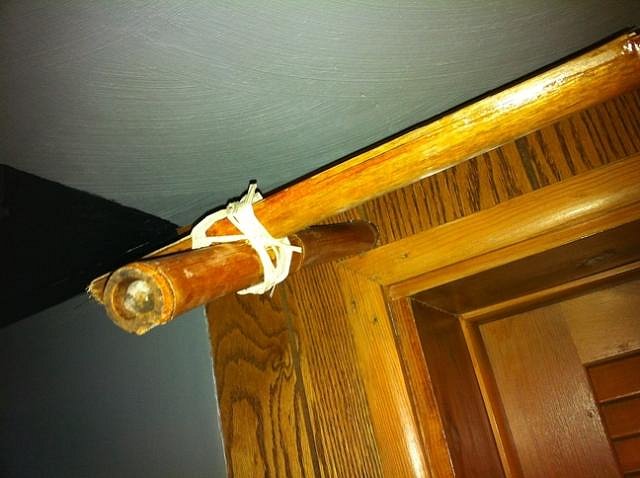
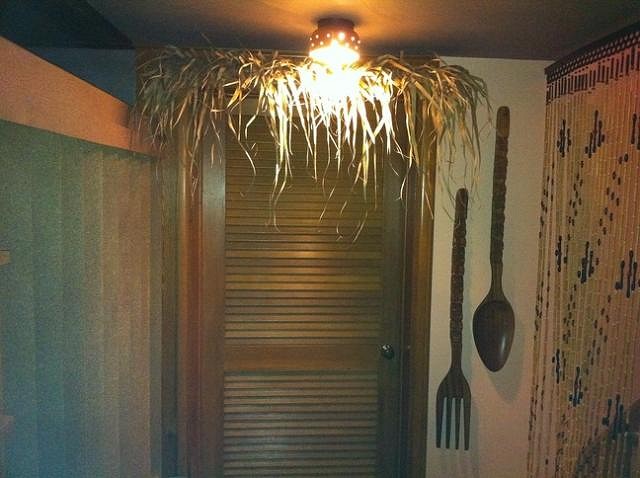
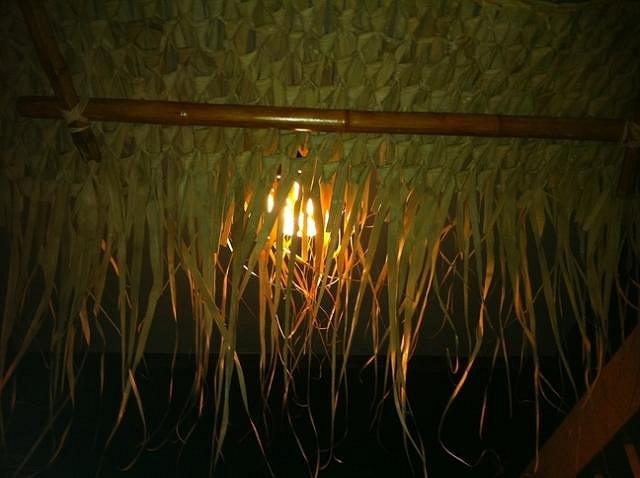
To make an awning over the door to the beach, we carved a few small pieces of bamboo:
mounted them above the doorway:
attached a long connecting piece to both with raffia:
then laid some raincape thatch on it:
(placement of the spoon and fork was inspired by the door handle of the Bahi Hut; the beaded curtain on the right is from Oceanic Arts)
[ Edited by: mike and marie 2012-10-22 18:20 ] |
|
V
VampiressRN
Posted
posted
on
Mon, Oct 22, 2012 8:35 PM
Love to see your ideas take flight...keep up the great work. |
|
D

danlovestikis
Posted
posted
on
Mon, Oct 22, 2012 9:09 PM
Wow, this is looking terrific, Wendy |
|
MAM
mike and marie
Posted
posted
on
Tue, Oct 23, 2012 5:54 PM
Thanks you two! We're posting some more pics tonight because we really want to get up to speed here so we can get to the other side ... and to an ever-growing list of questions and things to do! A few small details worth mentioning. Found a big piece of interesting driftwood while beachcombing that really did look like part of the wreckage of a ship, and after giving it a thick coat of poly seal we mounted it with L-brackets to the side entrance of the Wreck Bar:
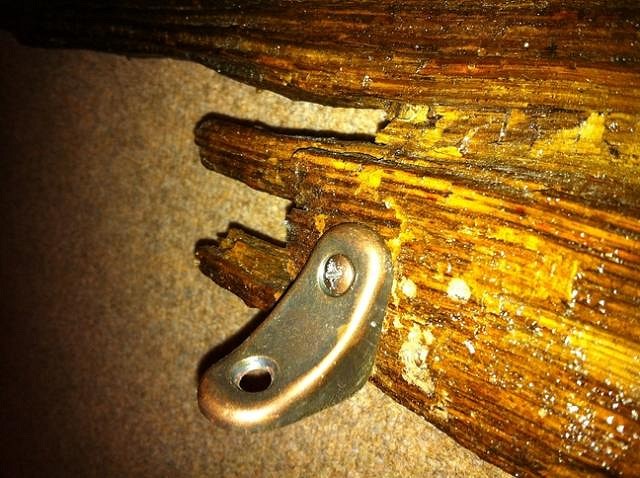
Mike had the idea to use part of an old stepladder to make it look like a ship ladder coming down from the ceiling ... plus, this would mean more much-needed surface area for "stuff" ... and what have you know, but the next day we saw someone throwing out the most beat up, trashed, weather worn broken down stepladder you've ever seen. In other words: perfect! It was already broken in half and weighed about two pounds because the wood was so rotten. So we carefully stained it and put on the poly, which is really what is probably holding it together. There were metal discs on the sides and we painted them to match the Witco stuff:
Then mounted it up from the ceiling and used the rungs to hold our Wreck Bar memorabilia:
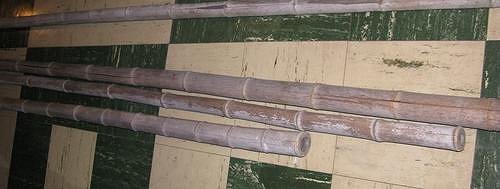
We knew we had to make some fake poles for the Wreck Bar, but the challenge was that we didn't want to ruin the floor when doing so. We took some large fence posts from the lumber yard and let them sit out in the garage for a month so that they would begin to warp. Then we painted them with the same greenish blue from behind the bar and more polyurethane. Then using some plumbing cap connectors and shins we were able to secure them very strongly to the ceiling, and covered the tops and bottoms with rope. Because they're so warped they're a little bit crooked and look like they're going to give way:
|
|
MAM
mike and marie
Posted
posted
on
Tue, Oct 23, 2012 6:14 PM
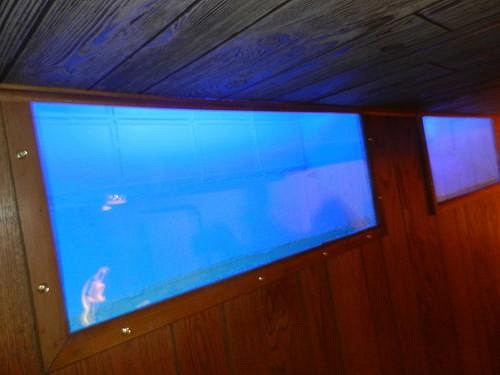
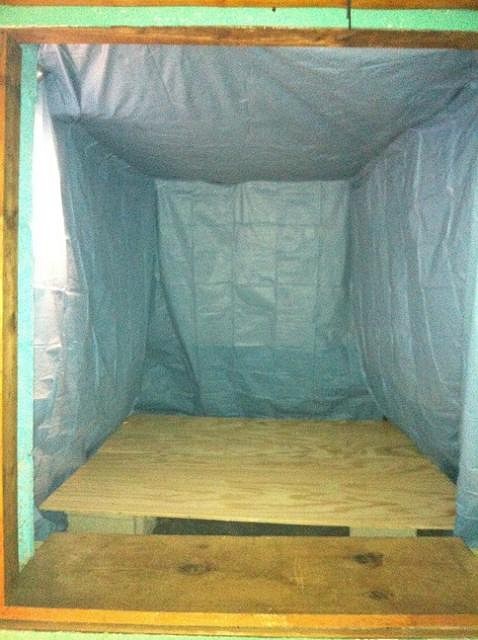
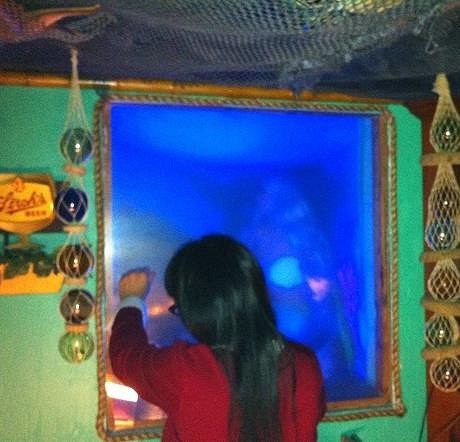
The next big step was to set up the 'live mermaid show' behind the bar. We set up the area by making a hole in the wall and putting down a platform that was low enough below the hole so that you couldn't see it from the bar:
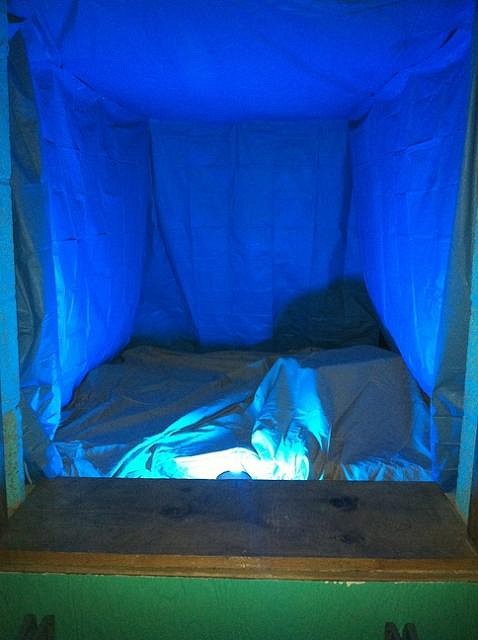
Then this whole area was put 'under water' with the aid of shower curtains of just the right watery shade:
But to make it look about two fathoms down required just the right lighting. This part took a lot of tweaking to get the light to have the same watery glow as the other portholes, but we eventually saw the light:
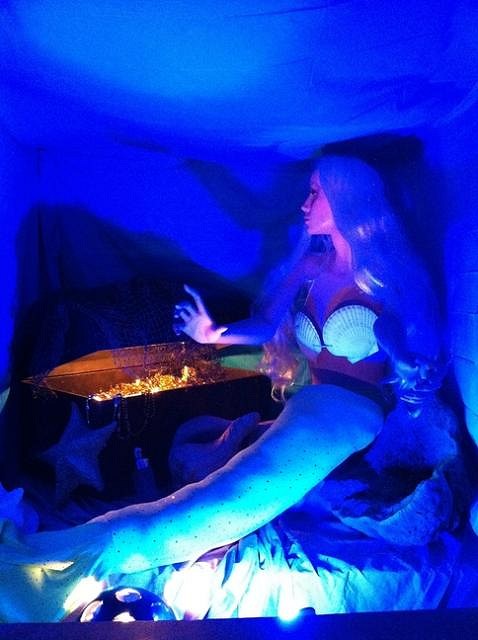
Now legend has it that Treasure Island, Florida had originally gotten its name from a buried treasure that was somewhere off its shore ... and we read how in the early 50s the group of developers who were known as The Rat Pack of Treasure Island had pulled a stunt where they had buried a huge sea chest not far from shore and made a big deal about unearthing it ... or maybe this happened in the 1940s ... and maybe we found the old sea chest, but in any event we had to set it up so that it would be right at home in there with the mermaid:
Then the mermaid herself -- we found one at a local prop store. She was a vintage store mannequin and we outfitted her with shells, fins, and wig. The homemade shell top:
The mermaid:
Then the hole was covered by a plexiglas porthole and mounted with the same brass nautical fixtures as the other portholes, and surrounded the edge with heavy nautical rope:
Before we turn on the lights for the show, here's the mermaid's view of the hut and bar area:
|
|
T
tikilongbeach
Posted
posted
on
Tue, Oct 23, 2012 6:32 PM
Wow, that really looks terrific! You two are doing a great job. If you're interested in more taxidermied fish I've seen piranha for sale online. |
|
T
Tabu
Posted
posted
on
Tue, Oct 23, 2012 7:08 PM
Careless Navigator. Thank you, I have been trying to remember the name of that place for a long time. On the way out kids got to pick a treat out of the treasure chest. Paper pirate hats and kid friendly grog bowls. |
|
Q
Q-tiki
Posted
posted
on
Tue, Oct 23, 2012 7:16 PM
Holy Merman balls!! You guys are really doing a great job! VERY creative ideas that you are implementing. Kudos to you both. Thanks so much for the continued posts. Cheers!! |
|
M

MadDogMike
Posted
posted
on
Tue, Oct 23, 2012 8:41 PM
Mike & Marie, this was the first time I had gotten a chance to go through your thread, I will be checking it frequently for progress. Such great ideas and great execution. I really like that you have seperate areas inspired by different vintage tiki bars. I admire that you are going to such great lengths to get it just right, I don't have the patience for that :lol: Favorites so far? I say the underwater areas ~ the mermaid, the barracuda, the lighting, the shower curtains (!?). I also think the starry night is brilliant (pun intended) |
|
T

tigertail777
Posted
posted
on
Sun, Oct 28, 2012 9:46 AM
I really cannot add much more than Mike, so I gotta just say ditto. :wink: I am really looking forwards to more in progress pictures I dig the major creativity and attention to historical detail you are putting into this. |
|
H

hang10tiki
Posted
posted
on
Mon, Oct 29, 2012 9:51 PM
Awesome pics |