Pages: 1 2 3 4 5 6 7 8 9 10 11 12 13 14 15 16 17 18 19 20 21 22 23 24 25 26 27 28 29 30 31 32 33 34 35 36 37 38 39 40 41 42 43 44 45 46 47 48 49 50 51 52 53 54 55 56 57 58 59 60 61 62 63 64 65 66 67 68 69 70 71 72 73 74 75 76 77 78 79 80 81 82 83 84 85 86 87 88 89 90 91 92 93 94 95 96 97 98 99 100 101 102 103 104 105 106 107 108 109 110 111 112 113 114 115 116 117 118 119 120 121 122 123 124 125 126 127 128 129 130 131 132 133 134 135 136 137 138 139 140 141 142 143 144 145 146 147 148 149 150 151 152 153 154 155 156 157 158 159 160 161 162 163 164 165 166 167 168 169 170 171 172 173 174 175 176 177 178 179 180 181 182 183 184 185 186 187 188 189 190 191 192 193 194 195 196 197 198 199 200 201 202 203 204 205 206 207 208 209 210 211 212 213 214 215 216 217 218 219 220 221 222 223 224 225 226 10,816 replies
|
B

bigbrotiki
Posted
posted
on
Fri, Mar 18, 2011 11:53 AM
What a fun family of Bob's, Wendy! Your pottery prolificness is awe-inspiring! I can't help but wonder how Alec Yuill Thornton and Bob Bryant would feel seeing the avalanche of creativity inspired by their creation. Baffled & amazed, most likely, but I am sure they would love it. :) |
|
V

VampiressRN
Posted
posted
on
Sat, Mar 19, 2011 5:48 AM
I like Shriner Bob & Decanter Bob...looking forward to seeing what they look like after the firing. |
|
D

danlovestikis
Posted
posted
on
Sat, Mar 19, 2011 2:44 PM
On 9 11 13 I checked and these links no longer work. Today GROG is having open heart surgery and our thoughts and hearts are with him. http://www.5min.com/Video/Polynesian-Art-Collections--Large-Artistic-Tikis-300996921 http://www.5min.com/Video/Polynesian-Art-Collections--Tiki-Frenzy-300996951 http://www.5min.com/Video/Polynesian-Art-Collections--The-Tiki-Room-300996973 Hi, I just found an old PBS show we did on our tiki collection has been put on u-tube with ads. LiddleLola provided me with the links. This show convinced me to grow my hair long! Swizzle thank you, yes I've been reading your mind! bigbrotiki, it is always an honor to her from you, thank you. I read your posts on the Tiki Bob history and found them very interesting. VampiressRN, I hope you are feeling well. If you are at the party tonight please say hi for us to the Sacramento Ohana. [ Edited by: danlovestikis 2011-03-19 17:38 ] [ Edited by: danlovestikis 2013-09-11 15:15 ] |
|
M

MadDogMike
Posted
posted
on
Sat, Mar 19, 2011 3:37 PM
Wendy, you forgot the 3rd video http://www.5min.com/Video/Polynesian-Art-Collections--The-Tiki-Room-300996973 (hopefully I got the right one) |
|
T

TikiKIrby
Posted
posted
on
Sat, Mar 19, 2011 4:16 PM
Wendy these Al's are awesome, I go back and forth on my favorite... I can't wait until they are out of the fire.. |
|
D
danlovestikis
Posted
posted
on
Sat, Mar 19, 2011 11:04 PM
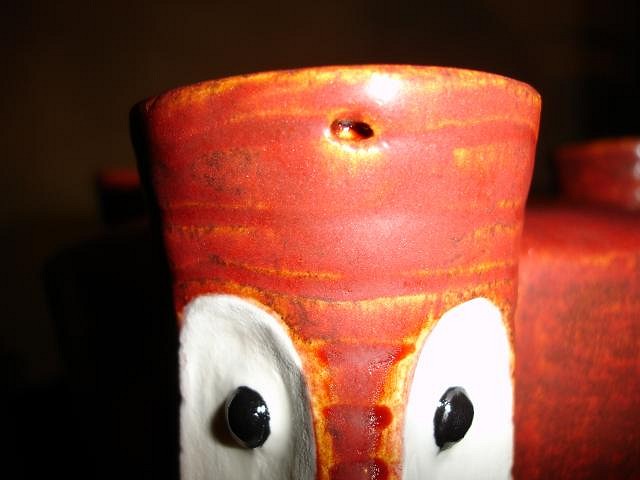
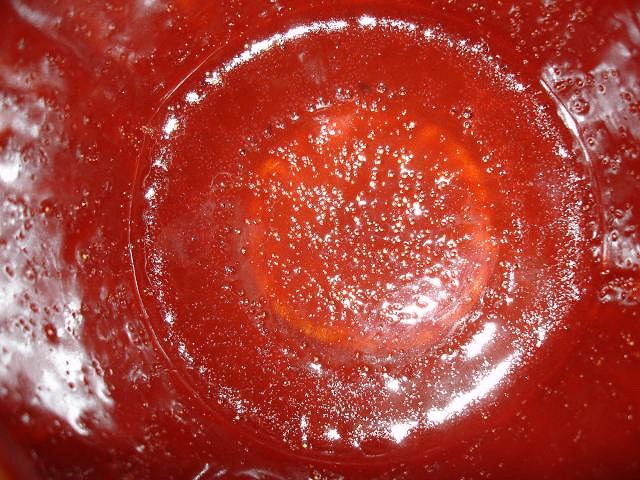
MDM thanks for finding our third video. I've added it to the other places here on TC Grog likes us to tease everyone cause he's such a tease. So here are the problems I need to deal with now that my work is out of the kiln. Overall I'm very happy with my Bob's but here's what's happened. Decanter Bob has one blind eye. I will cold paint both with enamel and bake them to make it set. Super Carved Bob has black in the depressions and there was just one spot that was darker, not bad but I wish it wasn't there. Shriner Bob has a glaze skip on the back of his hat, that's a bummer. Tiki Bob Bowl has a hole in one of his three heads. I can fill it with plaster and enamel paint it to match and bake it to set the enamel. The same Tiki Bob Bowl had too much glaze in the bottom and it boiled and bubbled and popped the bubbles. I won't try to fix this. South of the Boarder Bob and Peacenik Bob have no flaws. I worked for four hours today on the painting. Here is the next clue. He is an artist we all admire. I hope you are all having a great time tonight, Wendy |
|
T

Tobor64
Posted
posted
on
Sat, Mar 19, 2011 11:13 PM
I'm sure they still look great, Wendy. Can't wait to see all of them. |
|
G

GROG
Posted
posted
on
Sun, Mar 20, 2011 12:20 AM
The Shriner Bob and Super Carved Bob, can you just touch up the glaze and refire? |
|
M
MadDogMike
Posted
posted
on
Sun, Mar 20, 2011 7:44 AM
Yeah, what he said. Your Bob Bowl is probably not a piece for experimentation, but there is a fireable Duncan product called Patch-A-Tach. You would fill in the hole and fire it, then re-glaze the spot. One other option is calcined clay and glaze; take some of the clay you used and make it into little chips, let them dry, crush and screen them very fine, put the powder in a fired (but not glazed bowl) and fire it. Mix this fired powder into a paste with some of the glaze you used on the piece and fill the hole, then fire again. Since the powdered clay has been fired, it doesn't shrink, the glaze serves as a binder. You can dab a little glaze over the areas and fire again if you need to. I have used this method more than once to fix cracks. Good luck Wendy! |
|
D
danlovestikis
Posted
posted
on
Sun, Mar 20, 2011 12:35 PM
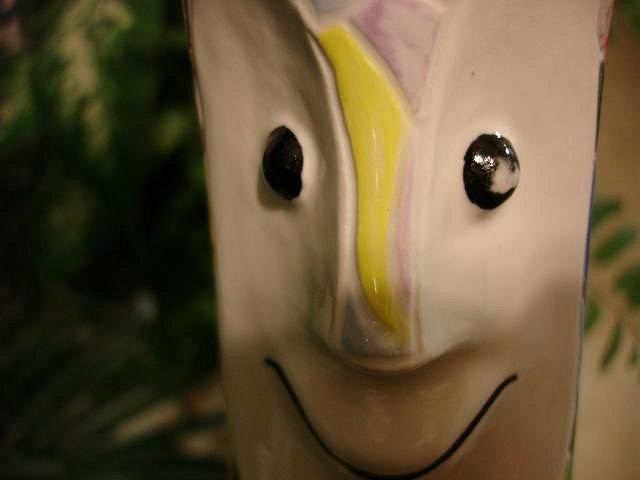
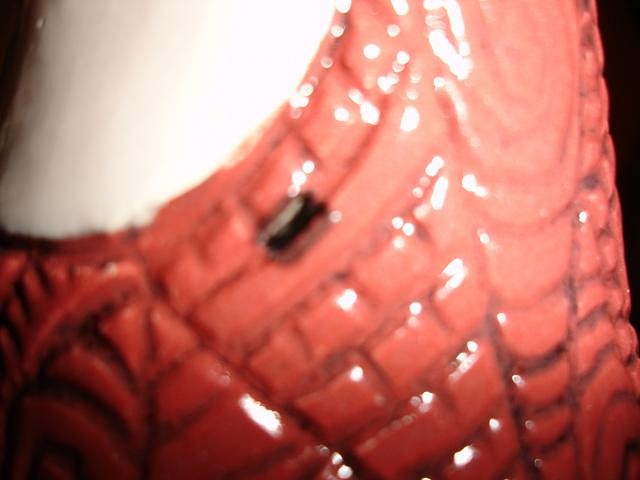
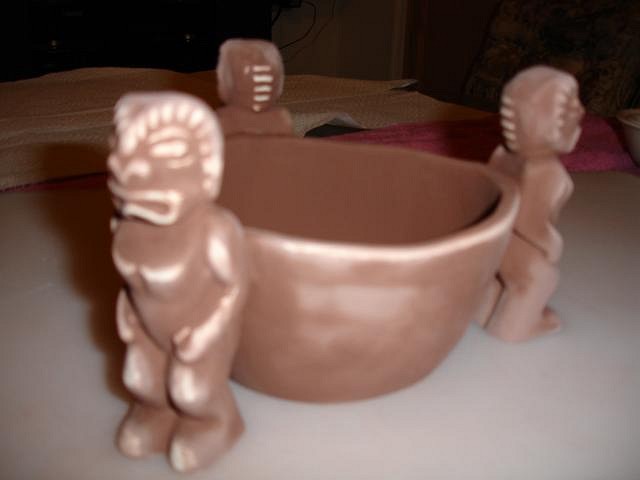
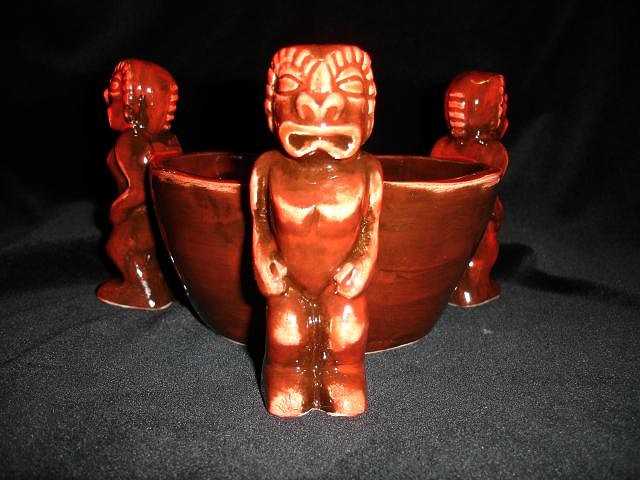
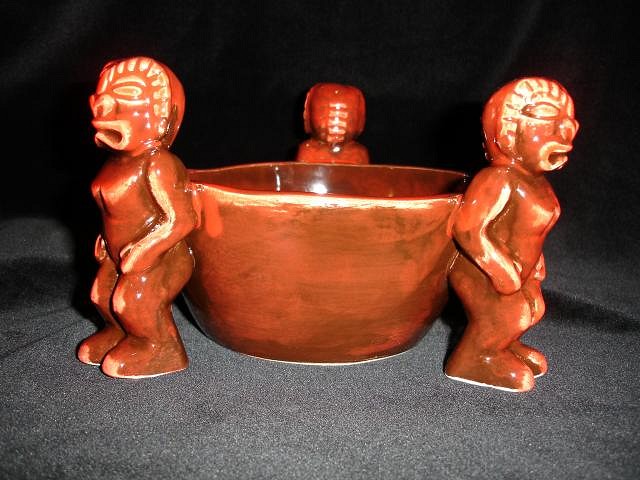
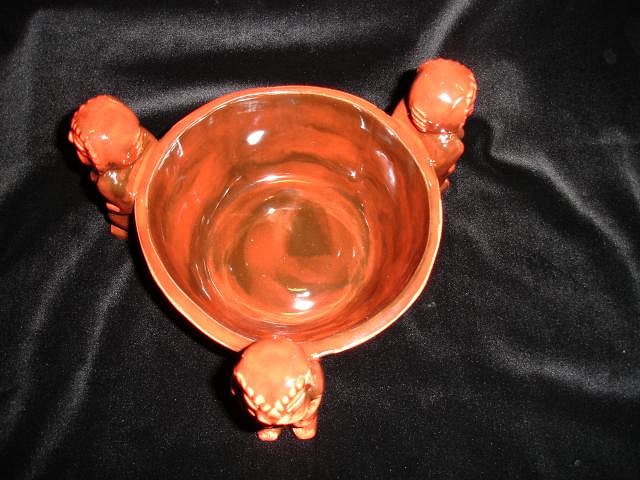
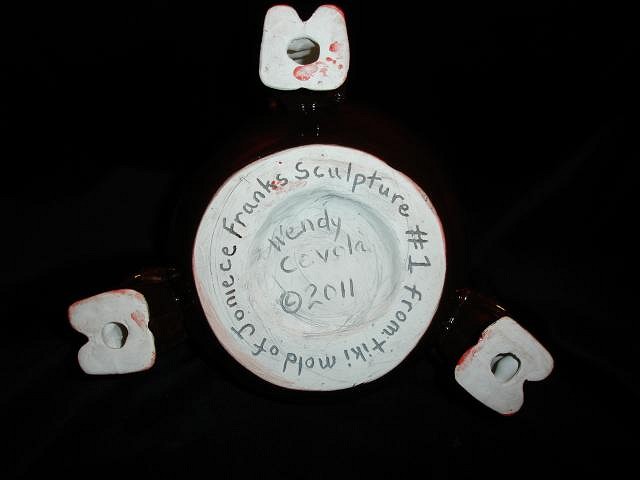
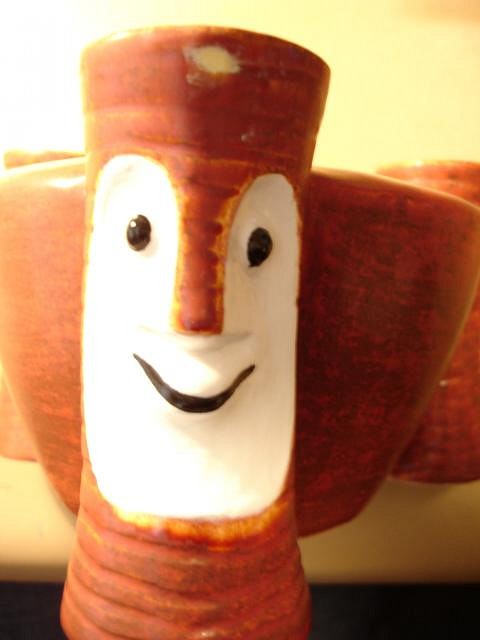
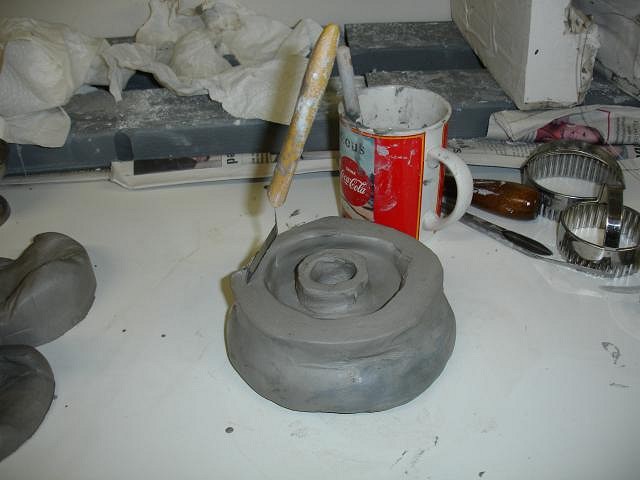
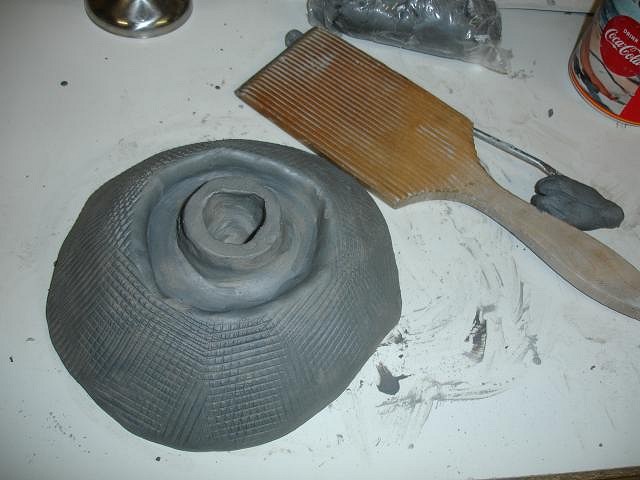
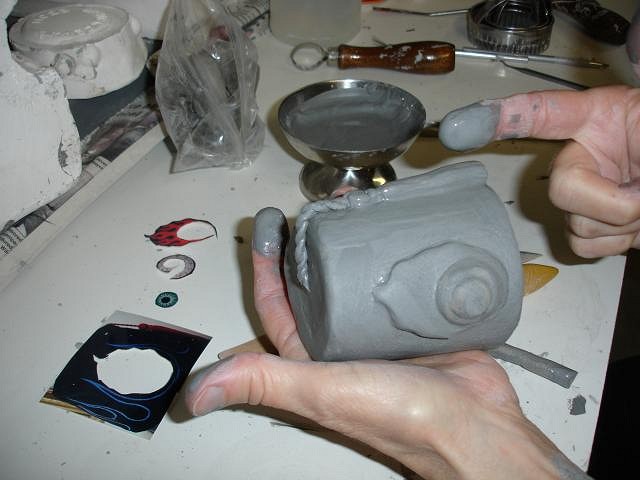
Torbor64, that's just what my husband said. His vintage mugs have defects too. Grog, I'll send you an image since we are keeping the finals for the big day. MDM, thank you for all the information. I'll refer to it in the future for use. I can retouch the Shriner the next time I glaze a load. I have a huge kiln and I only use it when it's full. The Shriner Hat was made too thick and it also has a defect inside that wouldn't photograph. Lessons learned. Don't make the clay or the glaze too thick. On page one of this thread I wrote the story of the little Frankoma tiki. I have now made the first bowl. I am forever indebted to Joniece Frank my dearest friend. I used our mold to cast a bowl. On the Tiki Bob bowl I left the rim. For this one I cut off the top. I attached the three tikis. After the bisque fire I glazed the entire bowl brown and then I wiped it back off the stand out areas. I then painted the bowl on those areas with a red glaze. The flash made the detail look white but it's really red.
I will never make one that could be confused with one produced in the Frankoma Factory. |
|
1

1961surf
Posted
posted
on
Sun, Mar 20, 2011 1:17 PM
Tiki bowl with looks absolutely incredible Wendy ! |
|
T
TikiKIrby
Posted
posted
on
Sun, Mar 20, 2011 6:18 PM
Geez Wendy, I'm convinced you have a team of Menehune's helping you out!!! The glazes look great, it's a tough call but I think the Bob bowl is my favorite (hole in the head and all, I mean if you are going to get a hole during firing that's a perfect spot!! :D) |
|
M
MadDogMike
Posted
posted
on
Sun, Mar 20, 2011 9:20 PM
Great Frankoma Bowl Wendy, looks wonderfully vintage. |
|
M

MauiTiki
Posted
posted
on
Mon, Mar 21, 2011 12:18 PM
Wendy, have you calculated how much it costs to fire up the kiln each time? My wife is very concerned about our electric bill if I buy a kiln. |
|
D
danlovestikis
Posted
posted
on
Mon, Mar 21, 2011 12:56 PM
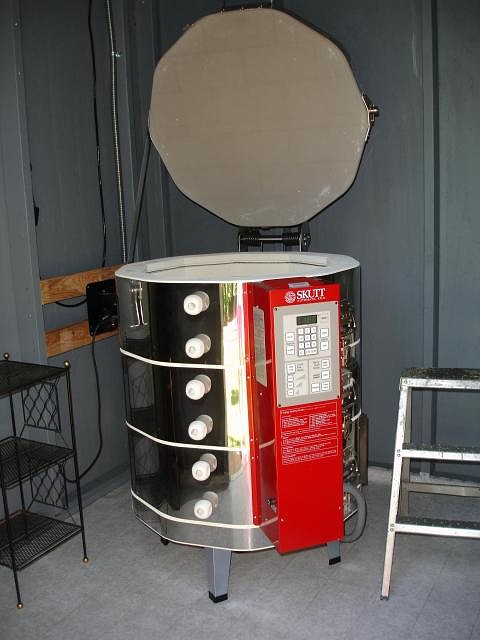
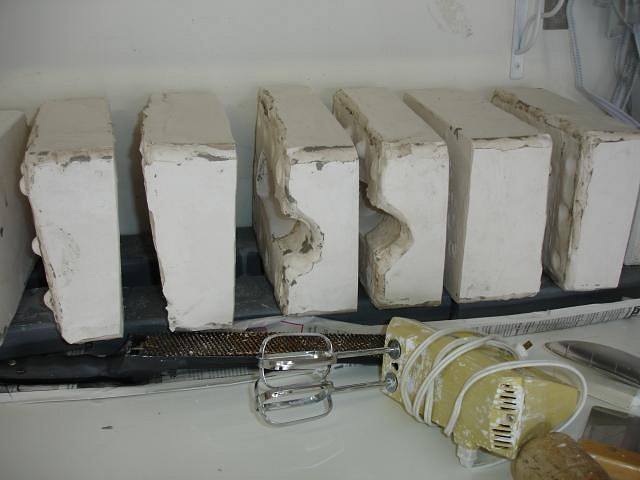
Hi Surf, thank you, are you ever coming here? Hi TikiKirby, you work hard too, I am looking forward to your glazing being done. Dan helps so much that it like having a full time helper. Hi MadDogMike, that was the idea. I wish I could do Frankoma glazes but they have lost them too. I'm experimenting to see how close I can come. I can do it with acrylic paints so that gives me a start. Hi MauiTiki,
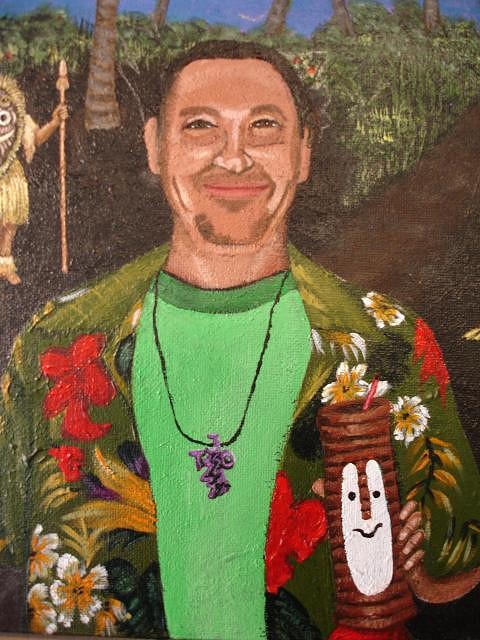
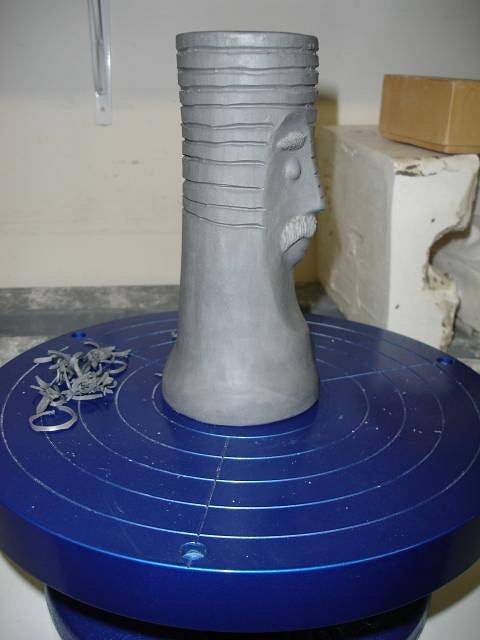
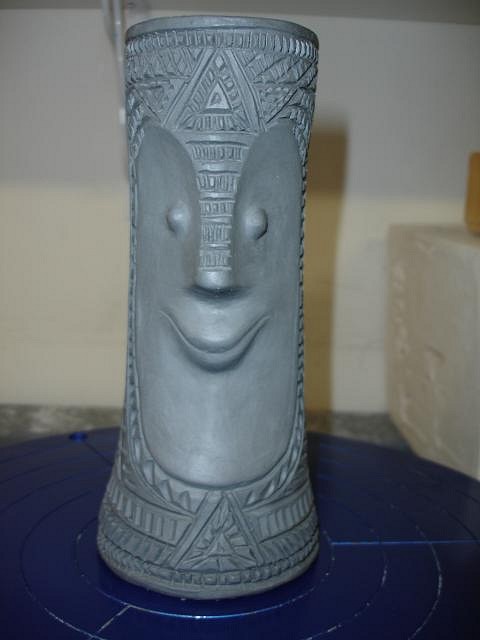
That's my kiln, it's very large. I need to do a lot of things every time I fire because it is expensive. In the winter I do the slow ramp of 12.5 hours and that costs around $30 if I do it at night when electricity is cheapest. If I need to dry out the glaze some before the ramp starts I do a 2 hour pre-heat and the slow ramp and that costs around $40 over night. Having a large kiln is good and bad. Good for large projects, I could do 24 Tiki Crates at a time, but bad if you need to touch up a few things and don't have other projects to add to the load. MadDogMike makes more ceramics than any one I know and he has a small kiln so he fires whenever he wants too. There is a lot of freedom in a smaller kiln. So maybe one right in the middle would work. Just figure out what your work load will be. It's really good to have your own kiln. Here is the last clue. See if you can tell who it is and then find the answer at the end of my gallery photos page 1. [ Edited by: danlovestikis 2011-03-21 14:44 ] |
|
M
MadDogMike
Posted
posted
on
Mon, Mar 21, 2011 8:27 PM
Great pic Wendy, looks just like him :lol:
I don't know if I make more ceramics than anyone but I'm sure I fire more often! I love my small kiln, I think I fired it 4 times last week. It's 11 inches in diameter and 9 inches deep, cost me less than a buck to fire it. The downside, of course, it that I have to be very careful how big I make my pieces and I have messed up on that a time or two. And I could never do a large scale production project like Wendy does or like Babalu & Squid |
|
B

Beachbumz
Posted
posted
on
Mon, Mar 21, 2011 8:52 PM
Wendy, I'm gonna say it's either Tiki Bob or Kinny! Let's go Kinny.. :wink: Very nice Wendy! [ Edited by: Beachbumz 2011-03-21 21:15 ] |
|
D
danlovestikis
Posted
posted
on
Mon, Mar 21, 2011 10:24 PM
Beachbumz you win now you have the honor of selling me a bowl, please!
This was written by Kinny on my Gallery Page, I didn't want to lose it in a long line of posts so I've added it here. Thank you little lost tiki, you inspire me! I am touched,honored,and mostly tickled http://www.kenruzic.com look for me on FB too! [ Edited by: danlovestikis 2011-03-23 09:23 ] |
|
D
danlovestikis
Posted
posted
on
Fri, Mar 25, 2011 9:40 AM
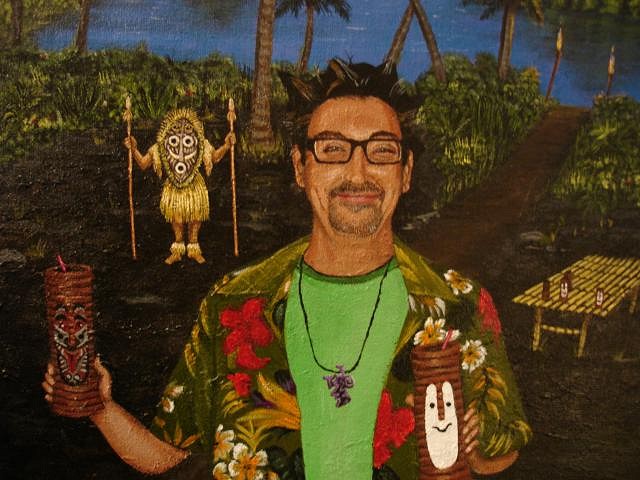
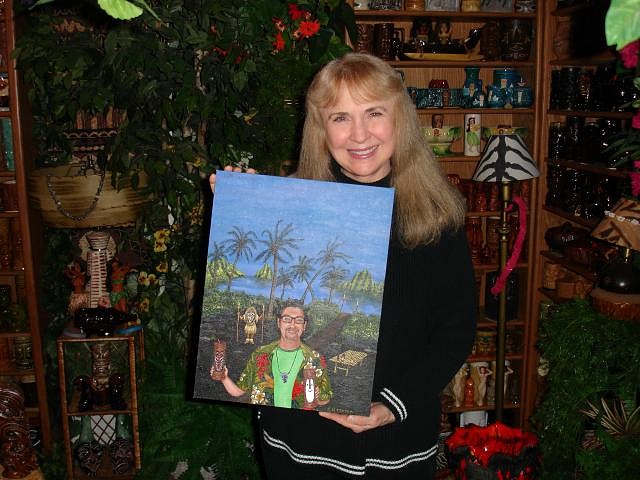
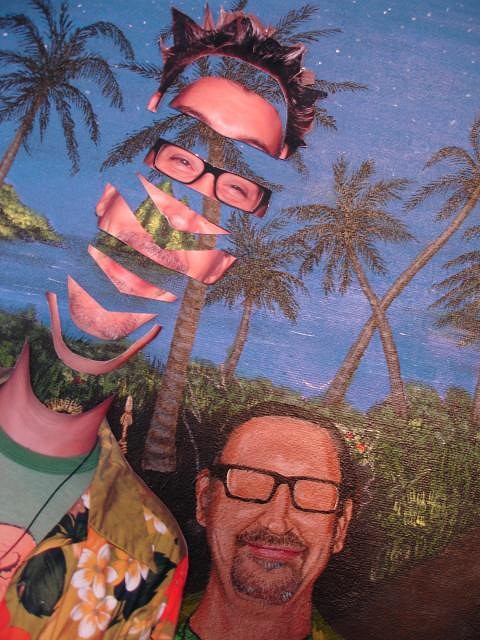
Kinny you touch my heart. I like painting something or someone that makes me smile, this painting did just that. You are so dear to all of us how could I resist. Thank you for all your kind words over so many years. Wendy
http://www.egcitizen.com/articles/2011/03/24/lifestyle/doc4d8bc08b9f43f270562584.txt
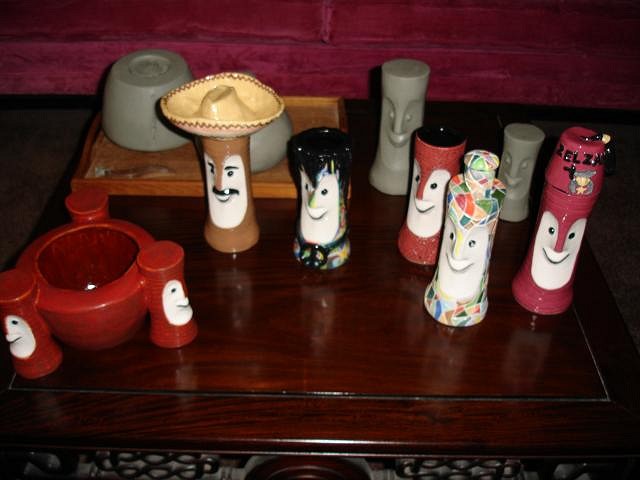
Here is a sneak peek at my Tiki Bob's for Monday's sale. |
|
P

pwest71
Posted
posted
on
Fri, Mar 25, 2011 12:51 PM
Awesome Wendy!! Congrats on the article, and it gave away a sneak peak on the Tiki Bob pieces, especially to those of us way over in the east...Keep up the great work. Paul |
|
D
danlovestikis
Posted
posted
on
Fri, Mar 25, 2011 5:16 PM
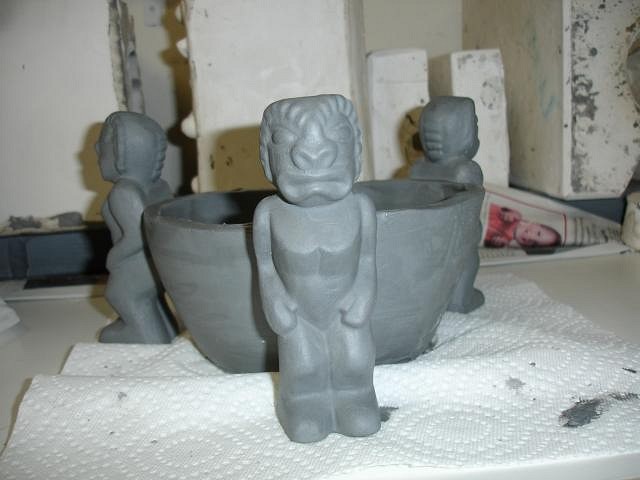
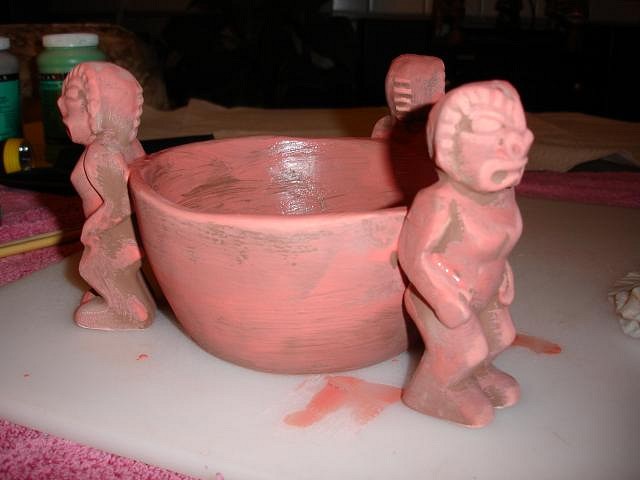
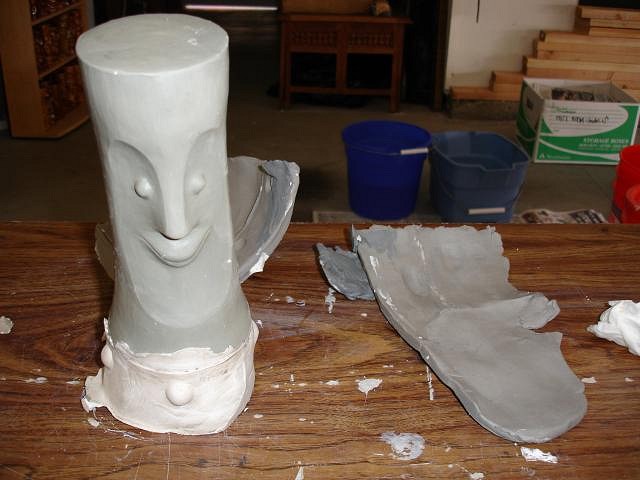
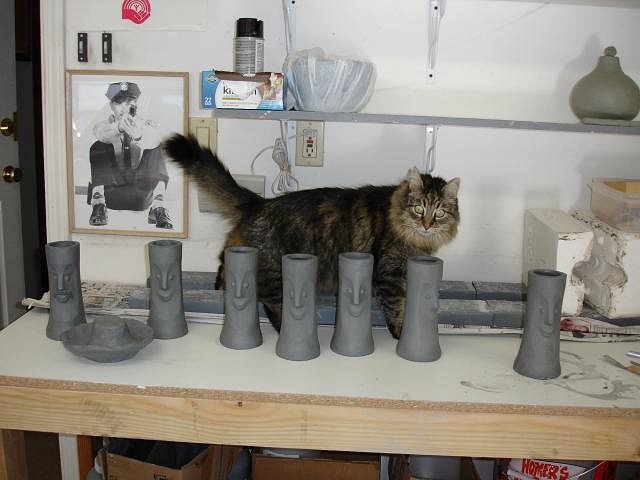
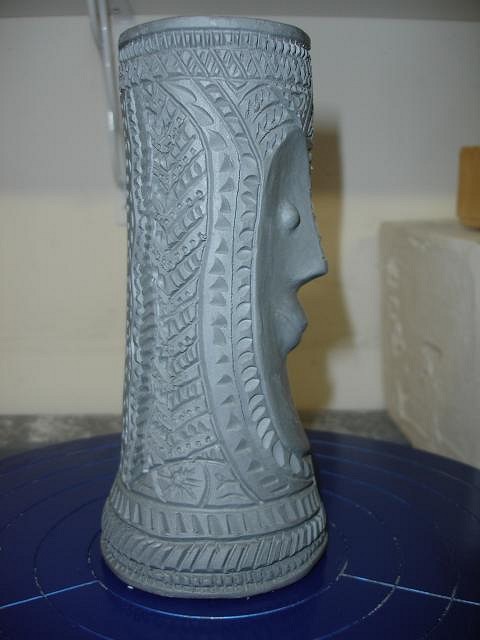
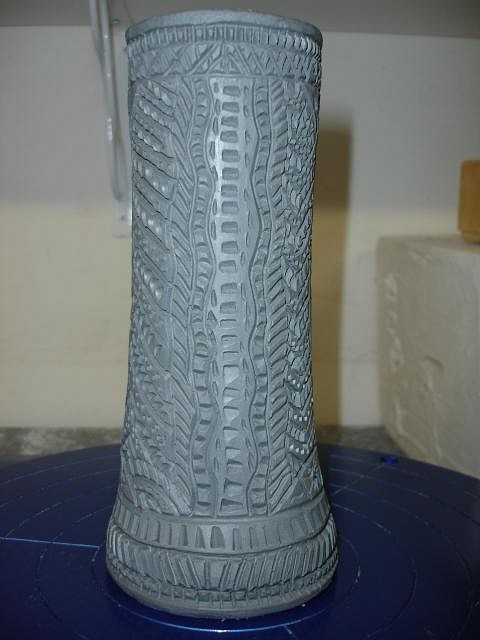
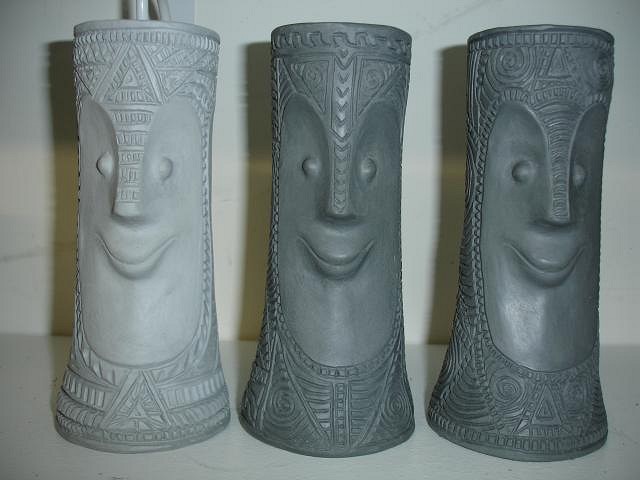
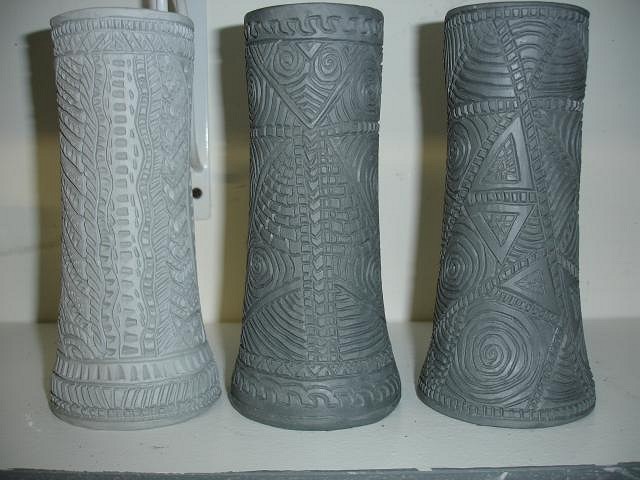
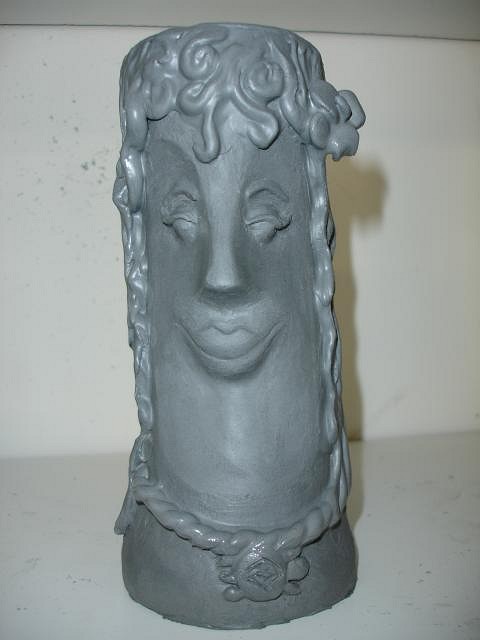
pwest71, they took 100 photos I didn't even think about them showing the Bobs before the sale. But I just noticed that Grog himself has shown his done Bobs and they are done well! Thank you for reading my article and writing, it makes it so much fun. Here's a distance shot just for you. The grey Bobs are the clay sculpture I did in clay and then molded.
I've decided that it's time to give up my best secret. This thread is all about teaching and learning art. I've had a lot of feedback on my painting of Kinny little lost tiki. Most were how did you get it so close. It's not easy but I have a trick that works really well. When the photo was all together I drew the outline. Then I paint the chin and with the cut out piece I check to make sure it is the right size. Then I put another section of the photo in place and paint below it then check again. Back and forth as the painting grows section by section. Back to Tiki Bob. I filled Tiki Bob Bowls hole in the head and painted it with enamel and baked it, the same with the Decanter Bobs eyes. So now I'm set for the show.
See ya at the show! Wendy |
|
Z

zerostreet
Posted
posted
on
Fri, Mar 25, 2011 6:22 PM
Wow! Very cool technique for achieving Kenny's likeness! Thanks for sharing that as well! Great painting! |
|
T
Tobor64
Posted
posted
on
Fri, Mar 25, 2011 7:15 PM
Tiki Roberto es muy guapo, senora. ¡Viva Tiki Bob! |
|
D
danlovestikis
Posted
posted
on
Mon, Mar 28, 2011 6:02 PM
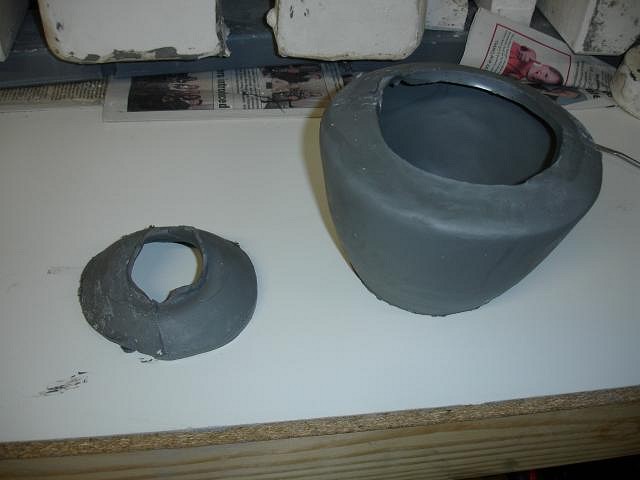
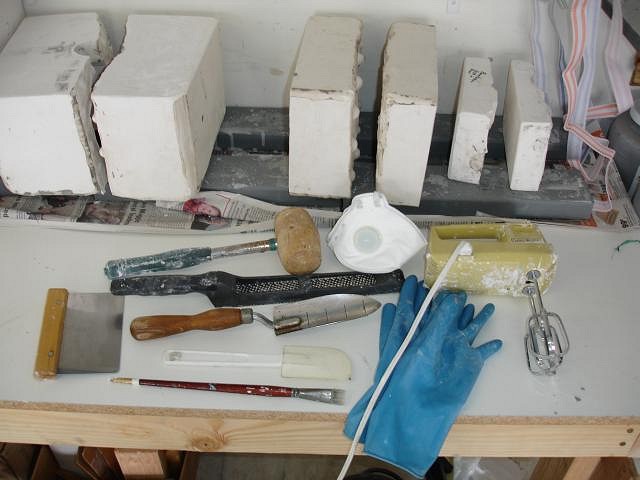
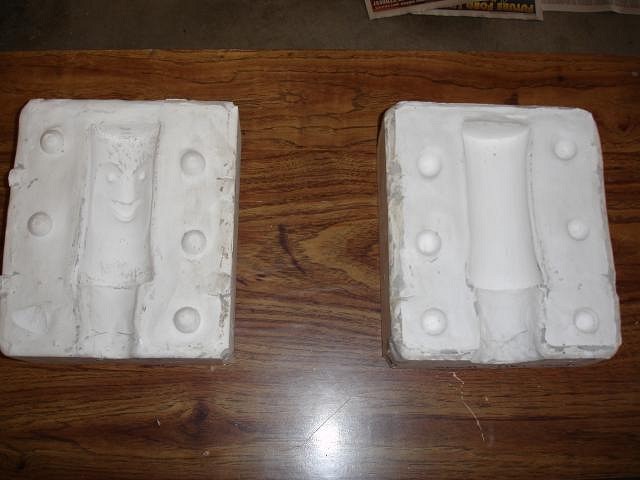
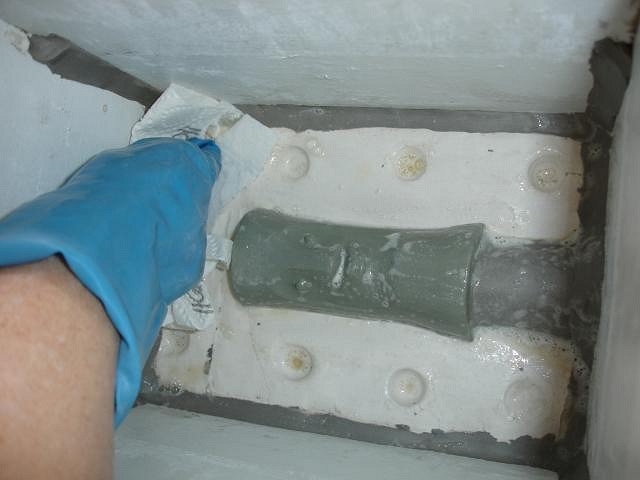
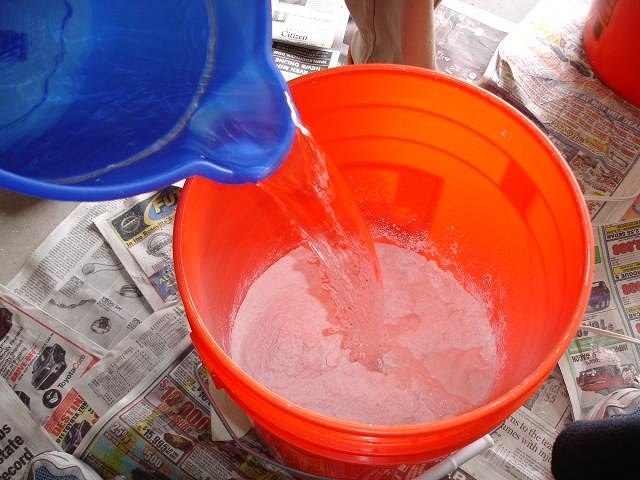
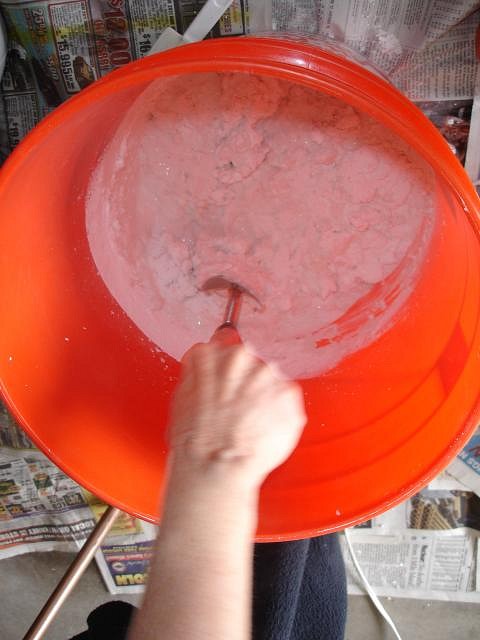
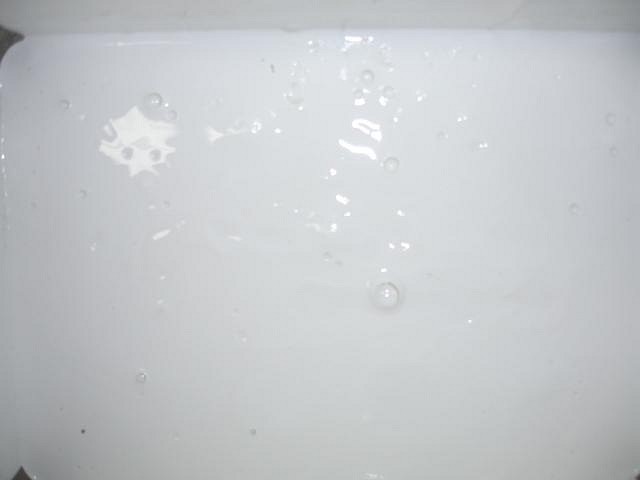
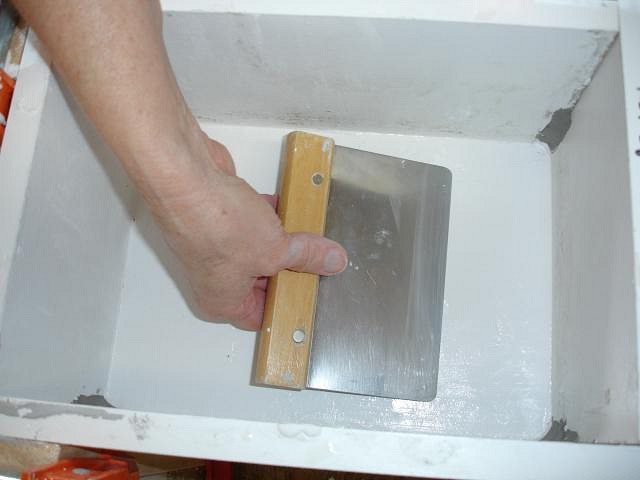
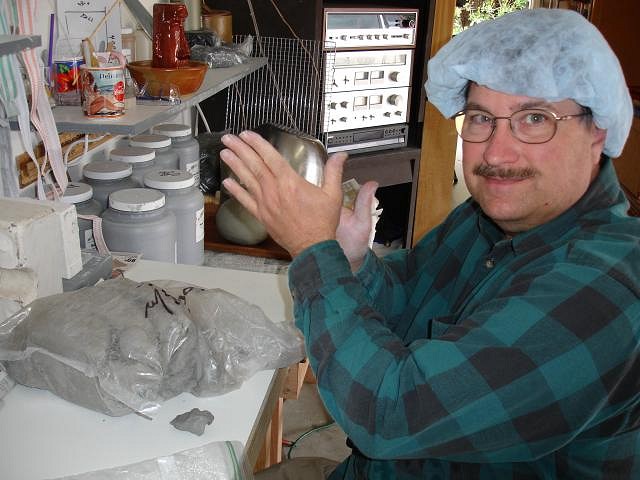
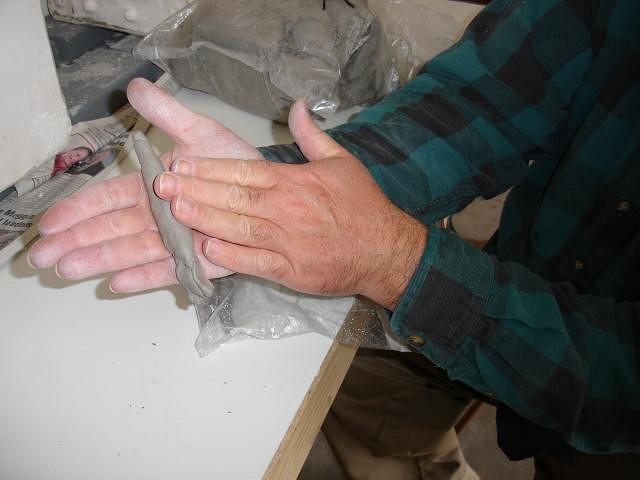
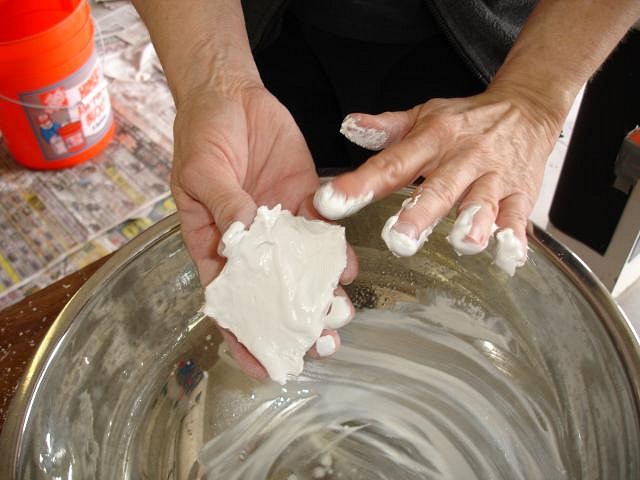
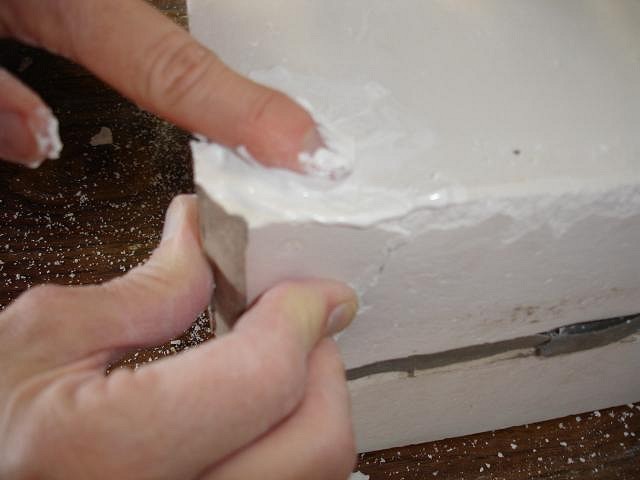
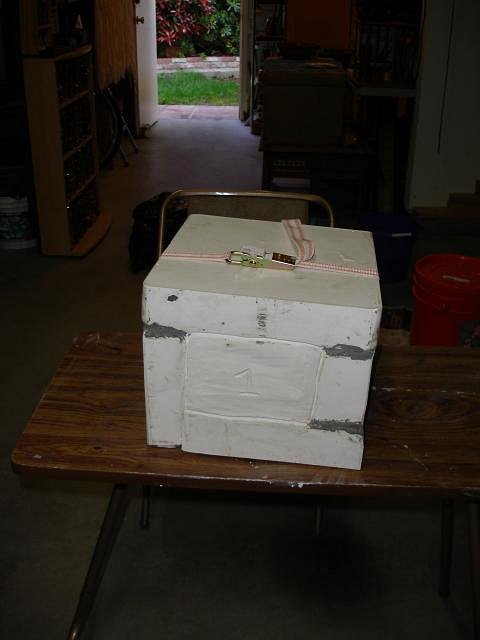
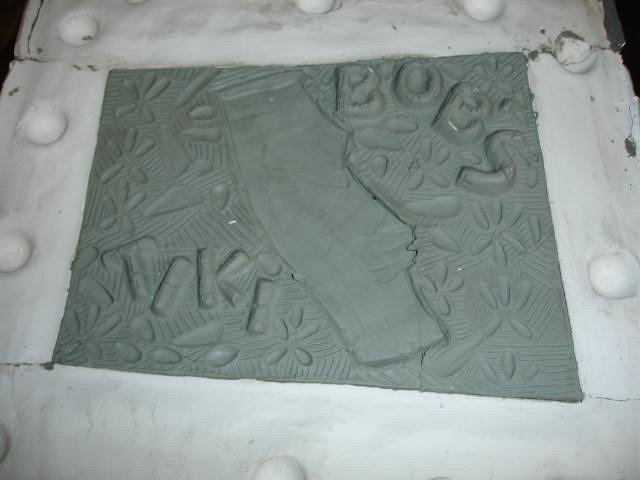
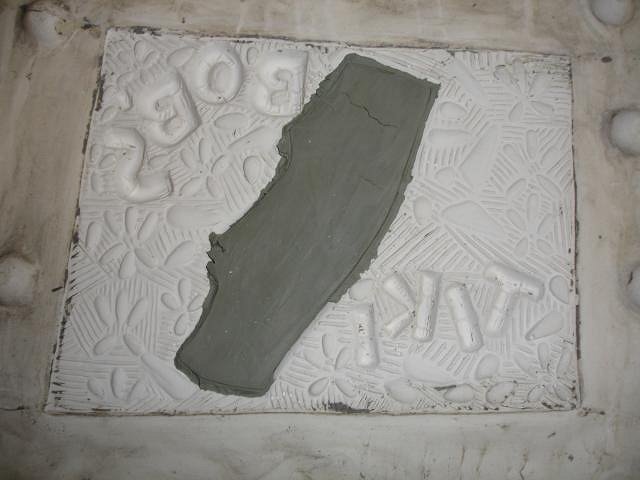
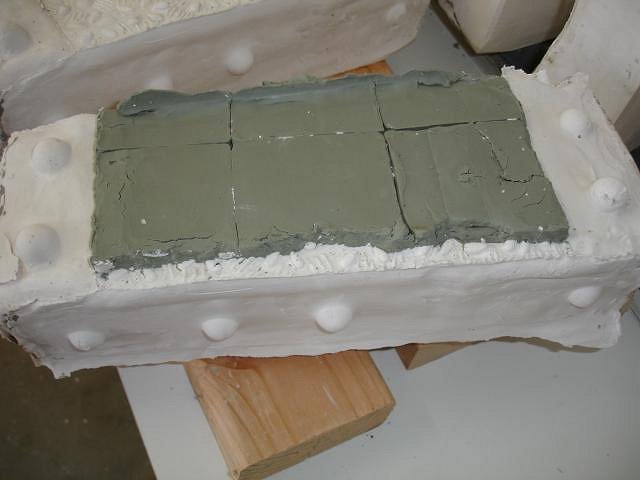
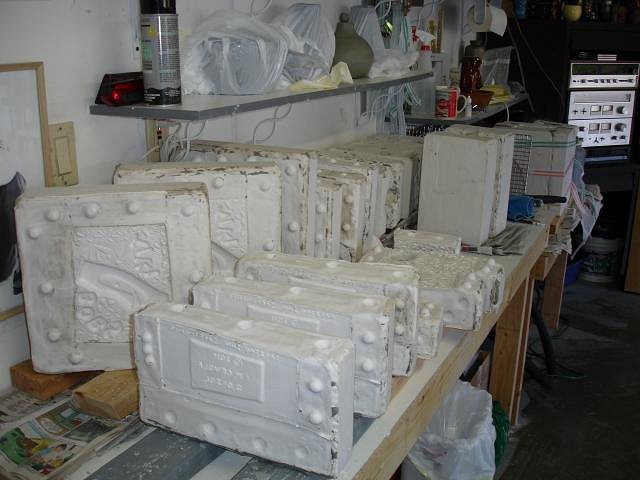
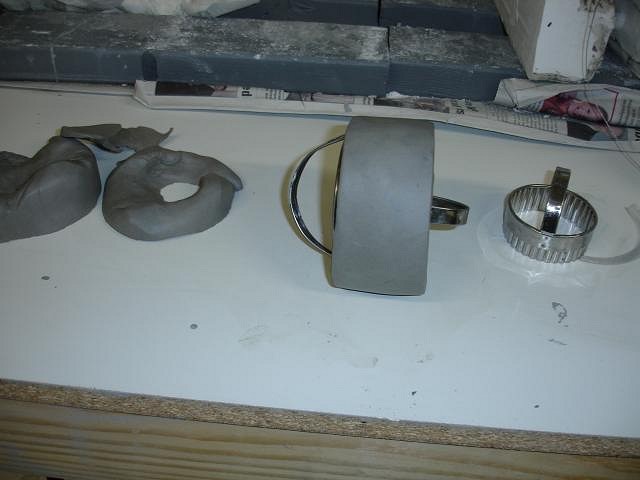
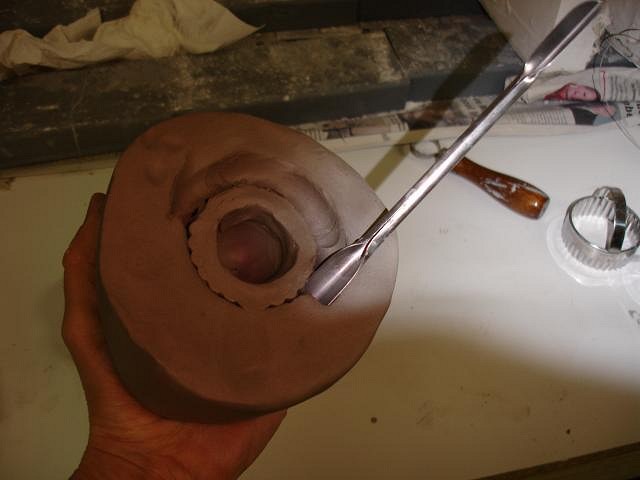
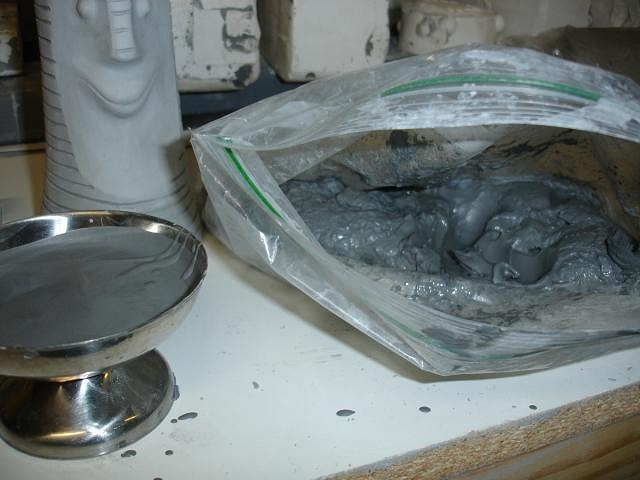
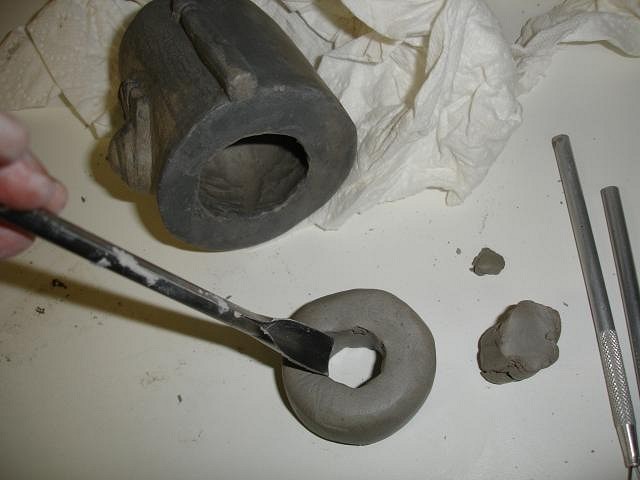
Thank you zerostreet and Torbor64, it is a good life when you have friends. Yesterday was another mold making day. We are getting much better. We didn't yell at each other a single time. The best part was looking at the size of the mold slab and being able to guess how much plaster to put in the bucket. Counting each scoop and remembering that number for all six slabs we made. Here are our helpful hints and our mistakes and corrections. I needed more molds to be able to make more Tiki Bob bowls (a shouldhavebeen bowl). We had made one mold but found that since the plaster was not uniformly thick around the entire tiki that top of the head was too thin if I didn't let the body be super thick. So I needed to make more molds but also correct that problem. I still had my original sculpture of Tiki Bob and I put him back into one side of the first mold. First I got out all of my favorite tools that work best for mixing plaster in a safe manner. Always wear a mask or the plaster dust will harden in your lungs. The top needed to be thicker. I added clay to the top of the existing mold. I boxed him up and added clay to prevent leakage. Mold soap dry with a paper towel and then do it again.
I have found that mixing the plaster with a large handled yard tool with a pointed tip is best. You can scrap the plaster out of the 90 degree angles. I mix it up really well. Next I use a kitchen blender to get rid of any clumps. I have Dan roll clay into snakes. I get a pile of them and use them in the box to prevent the leaks between the boards.
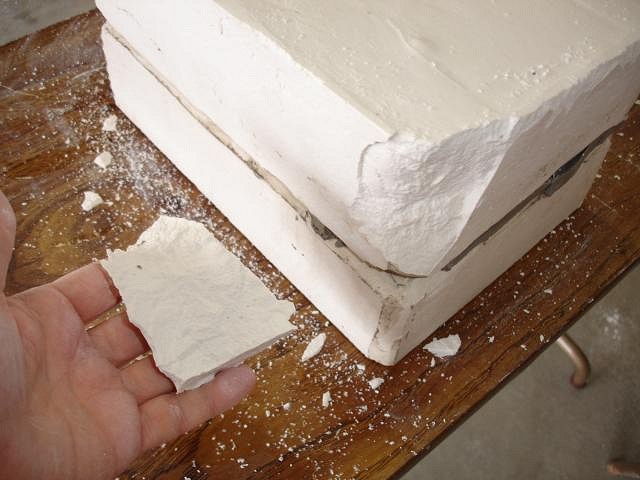
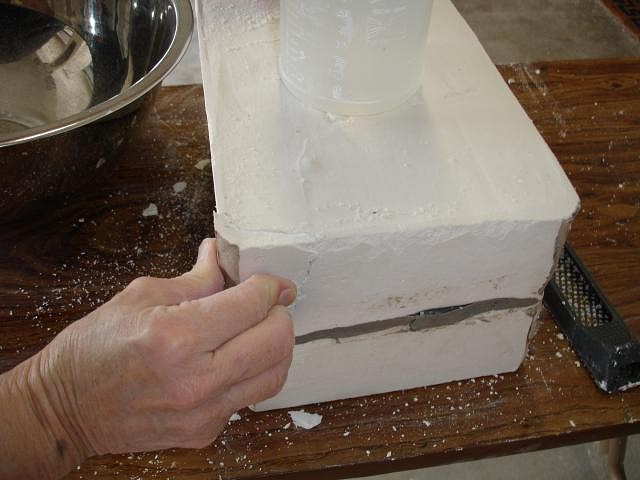
I opened the mold too soon and a corner came off. I just mixed a bit of plaster and put it on the piece. I stuck it back on and held it. Good as new. So fixing a mold can be done. Maybe I'll go add plater to the top of the first mold next. So we started with one mold and boxed it and poured one side. Took it apart and used the new piece to pour the other side. Took it apart so on until we had done 6 new sides = three complete molds. Thank goodness I remembered the mold soap had to be done each time. Clean up so you don't track dangerous dust into your home. If you have a question please feel free to ask, we can figure it out together since Dan and I are still learning this step by step. Cheers, Wendy |
|
W

WestADad
Posted
posted
on
Tue, Mar 29, 2011 5:41 AM
I never stop being amazed by you two. Simply amazing!! Looking forward to the next installement. Best, |
|
D
danlovestikis
Posted
posted
on
Wed, Mar 30, 2011 8:40 AM
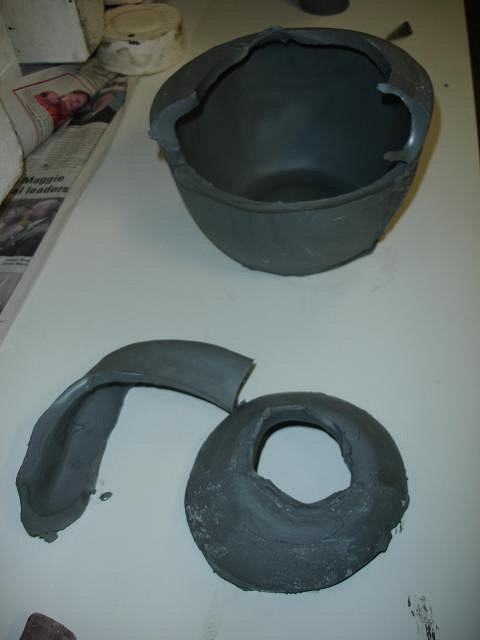
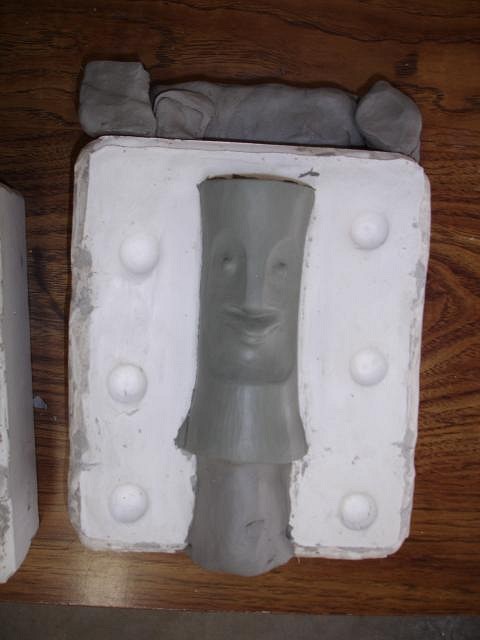
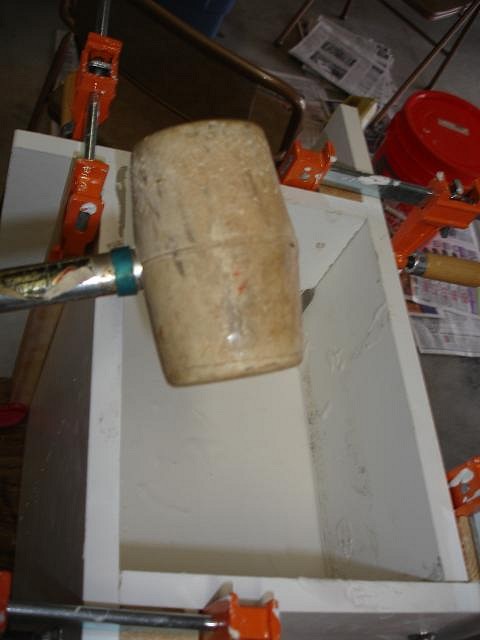
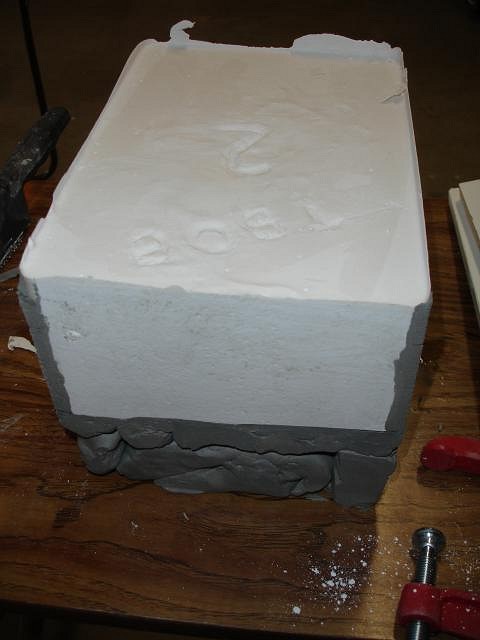
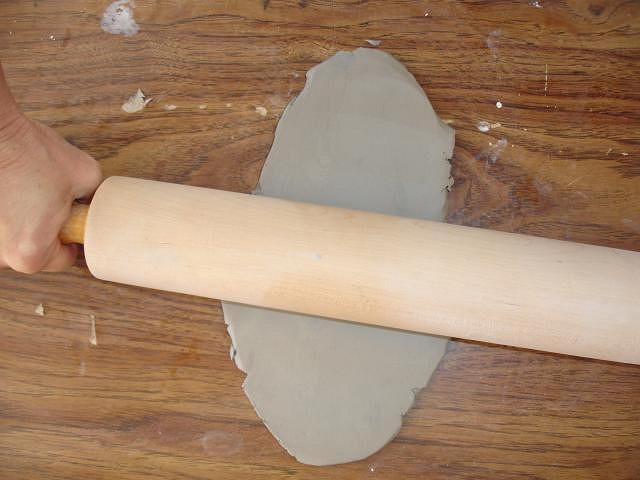
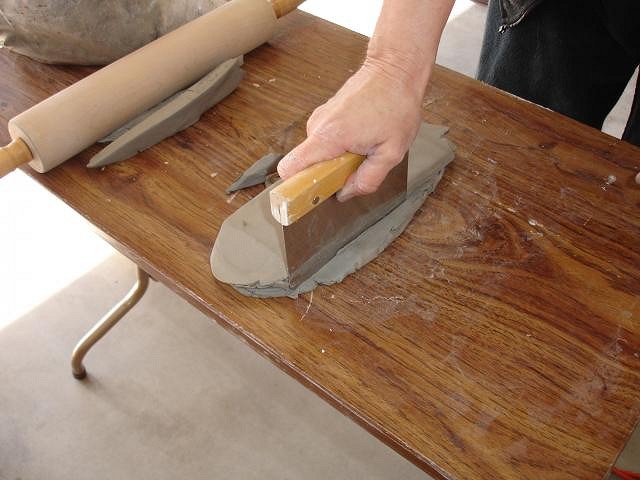
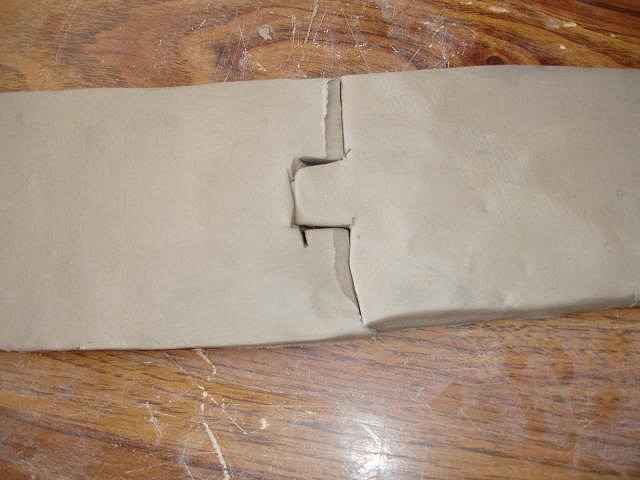
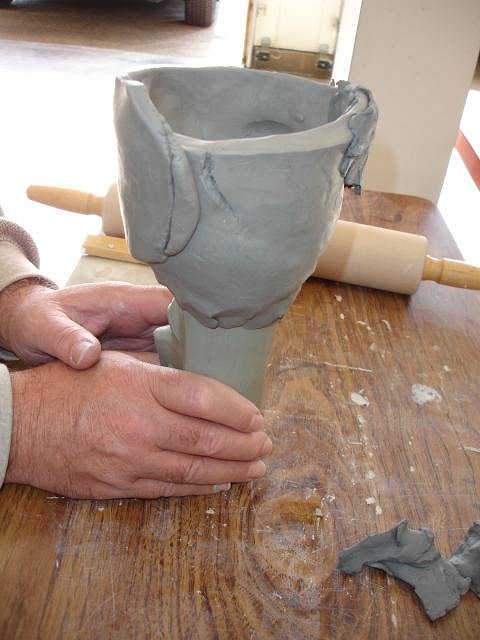
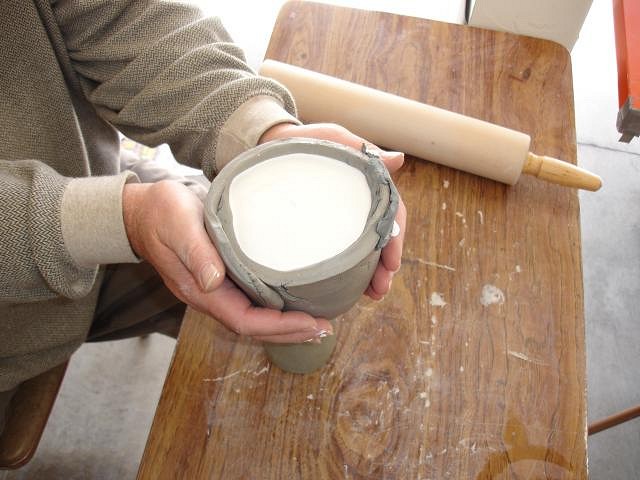
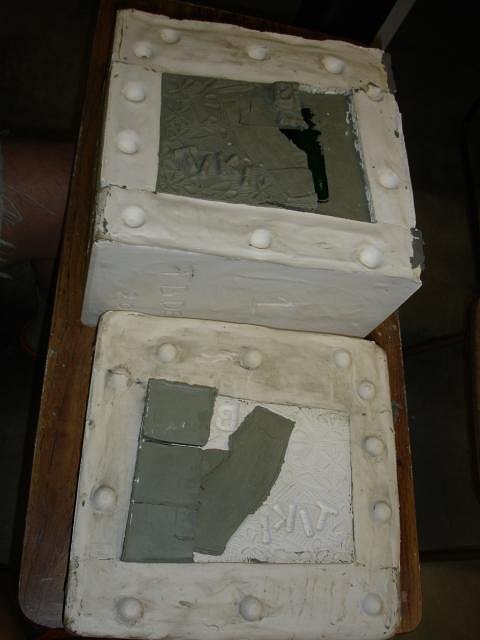
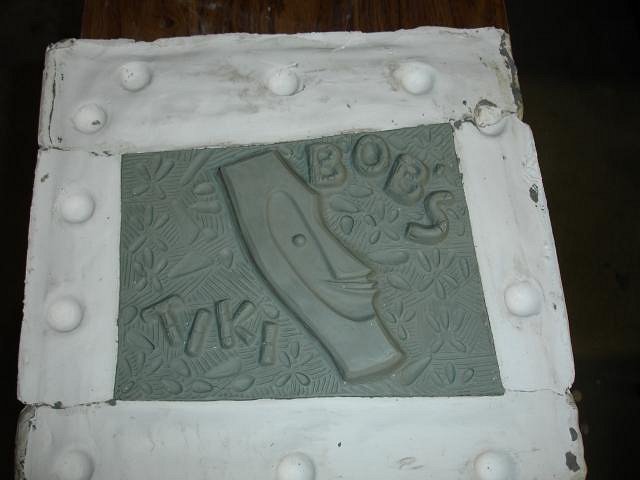
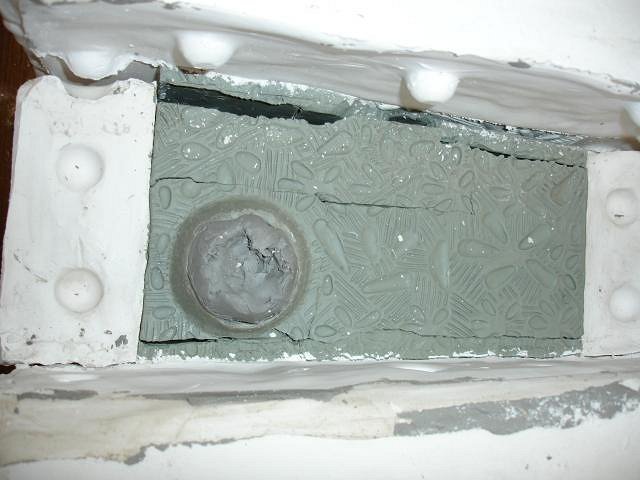
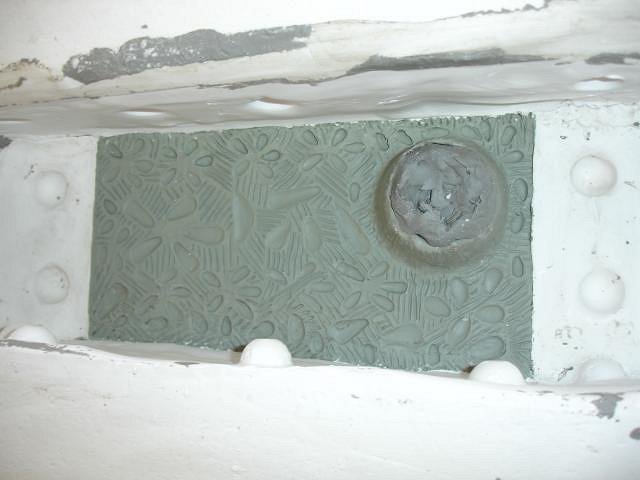
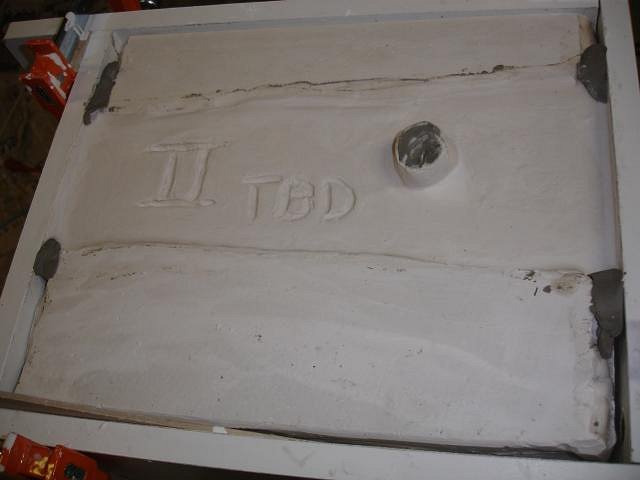
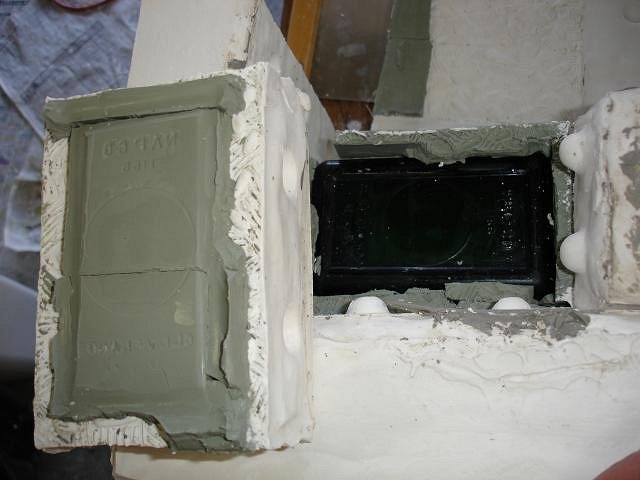
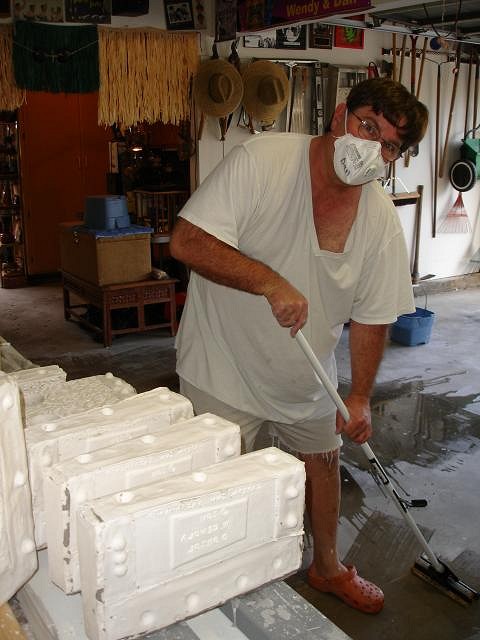
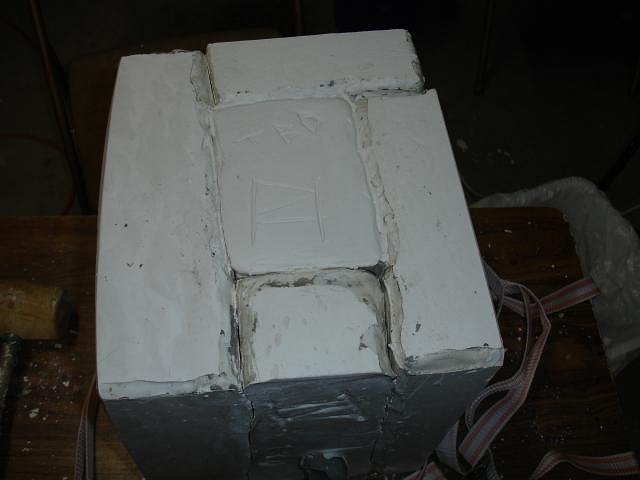
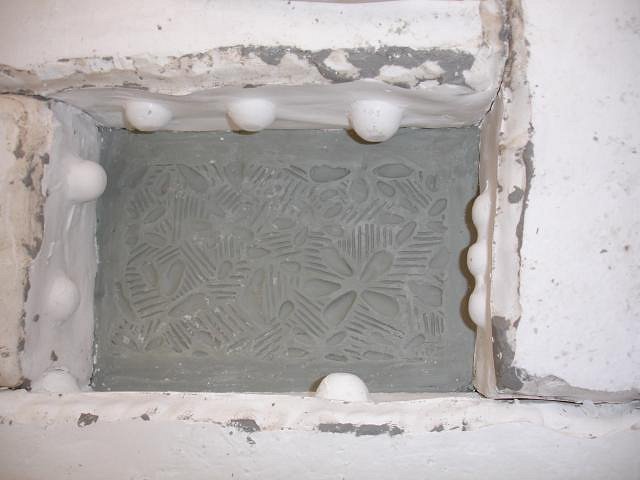
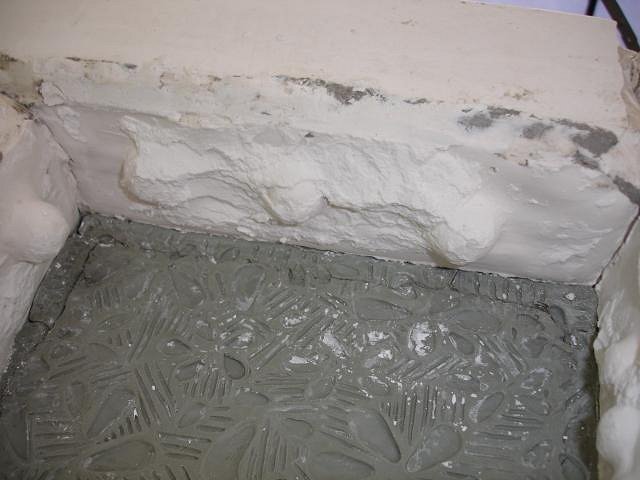
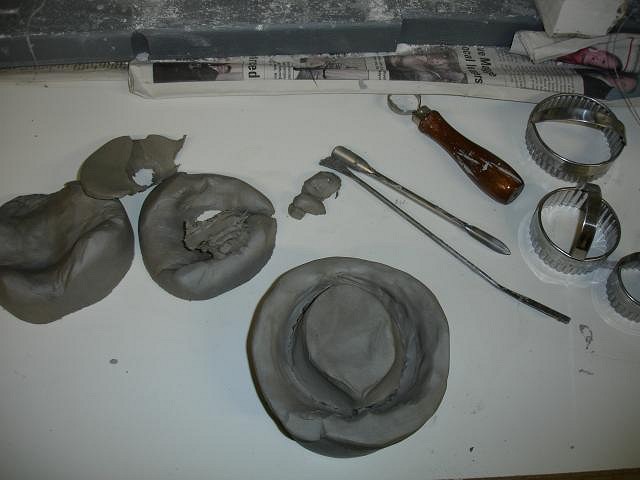
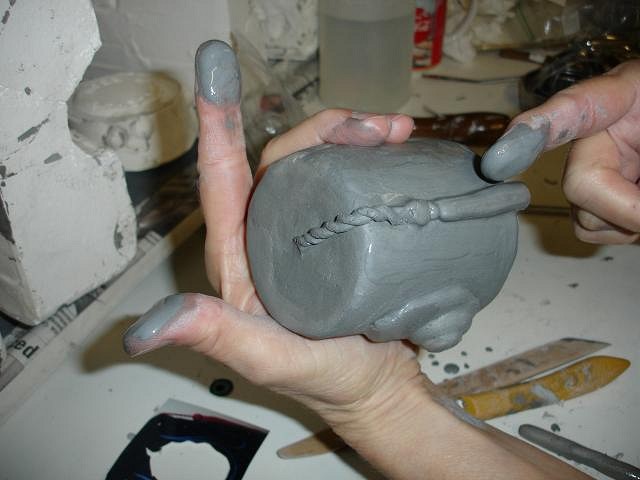
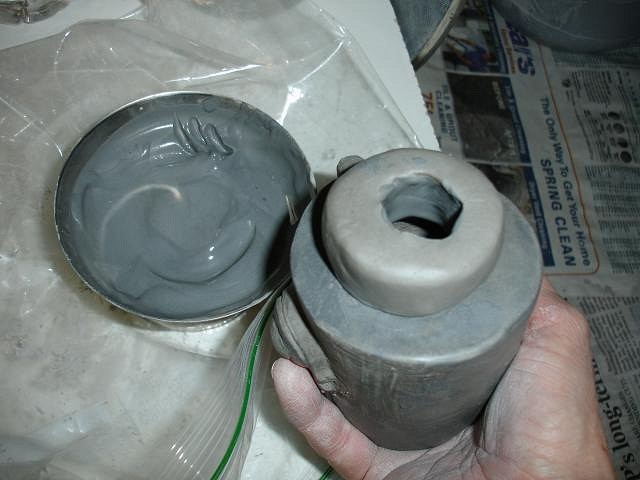
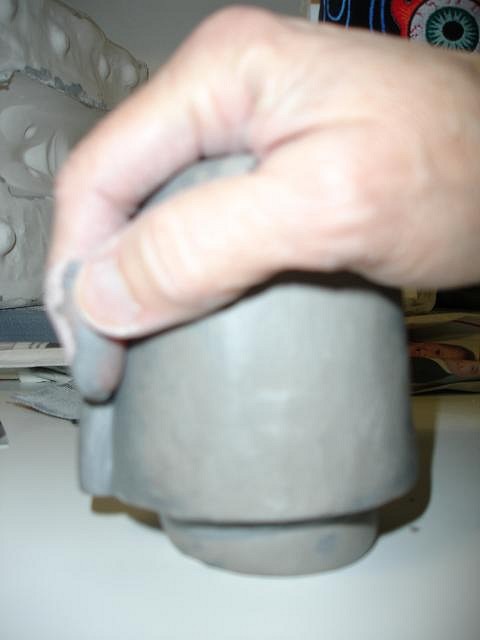
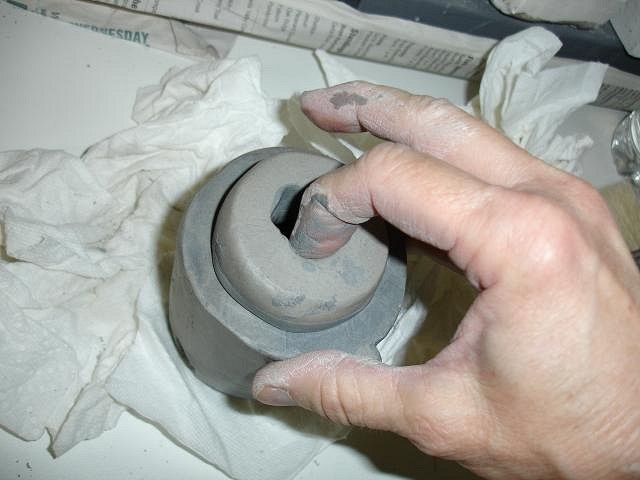
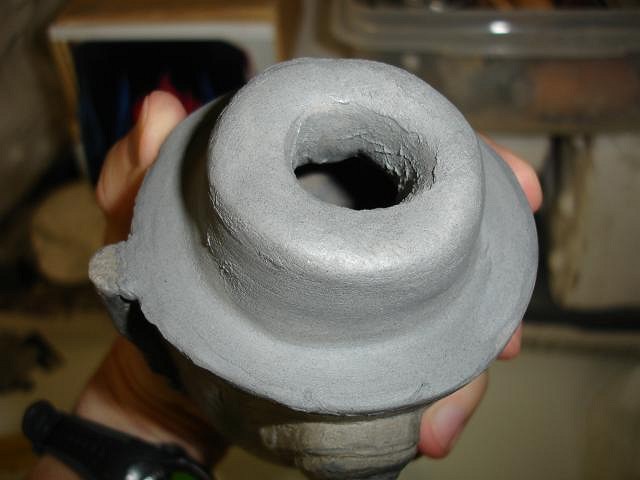
Thanks Cris, my nephew is a West and a dad so I always notice your TC name. Yesterday we made another Big Bob mold so I can work on my orders from Grog's Tiki Bob show. We started from scratch because I wanted to use Maui Tiki's technique. I'm not good at it yet but it worked. Here are some photos from our day. Rolling out the clay like cookie dough. Cutting it to the shape I need with one of my favorite tools. Making a lock before joining the two long pieces. It could have been better. Wrapped around the base of the sculpture of Tiki Bob. I used semi firm slip that I store in a baggie. It's the slip I cut off the top of poured tikis. It comes in handy for all sorts of repairs.
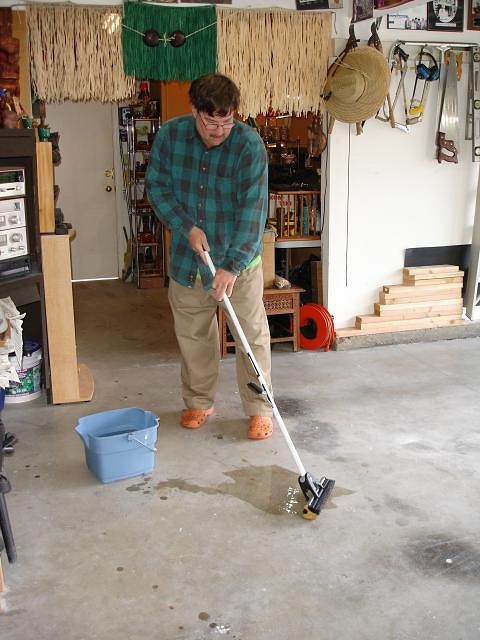
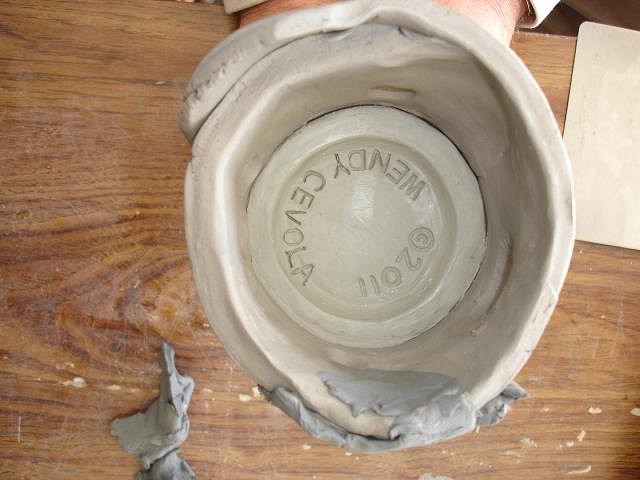
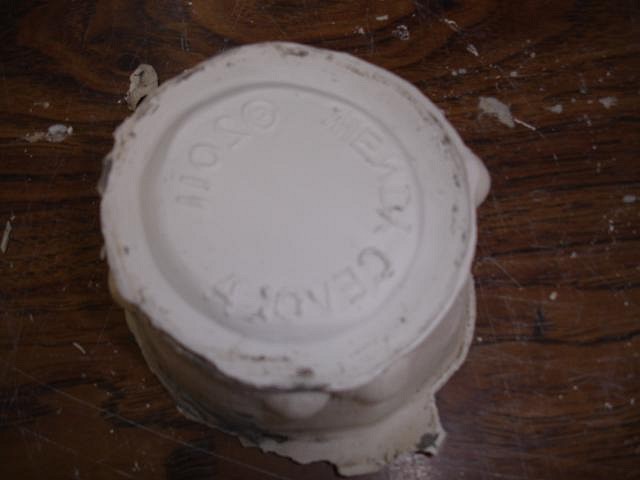
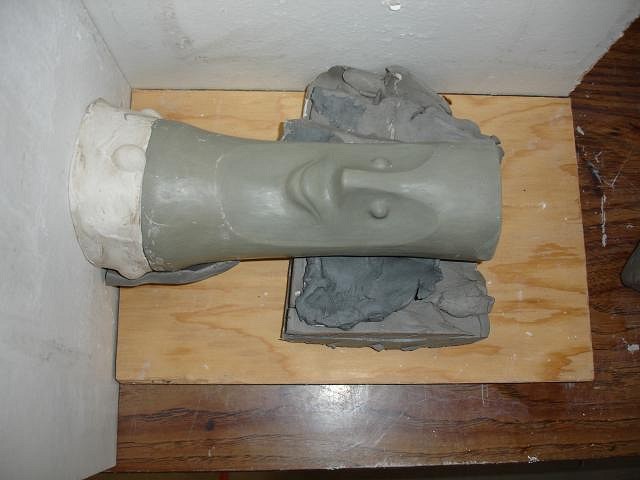
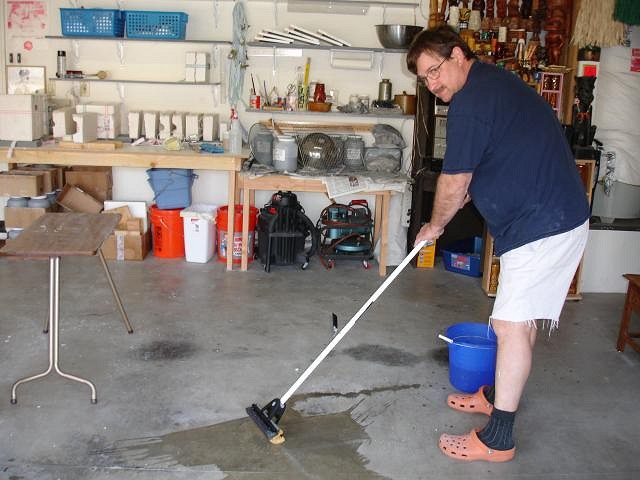
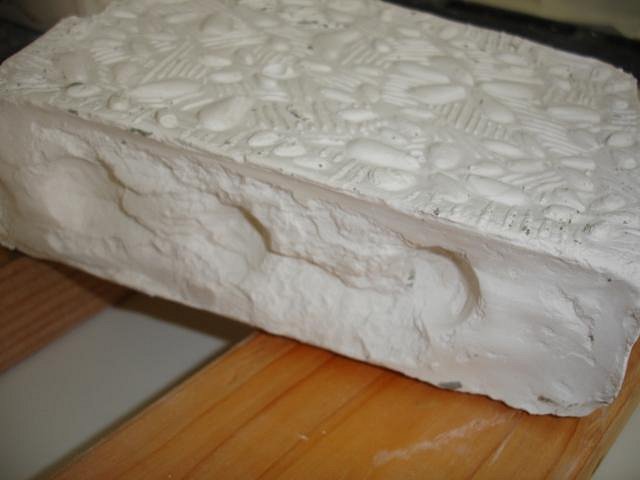
Inside I used a ball tool to press in some half domes for locks. Warning, you need to know where these should go so that the mold pieces can pull apart. Poured in the plaster and risked it coming loose by lifting and tapping it down on the table to get rid of bubbles. I continued to hold it just in case the clay let loose from the tiki. It held just fine. 30 minutes later the plaster was hot so I removed the clay to find the Leaning Tower of Bob. Even though we had tapped the bottom on the table we could tell the plaster wasn't level. I removed plaster where it had run along the tiki see previous photo and then I sanded the bottom until it was flat and didn't lean when sitting on the table. Preparing for the next phase. The new plaster bottom is tight to the board. Clay placed around the bottom half of the tiki. I made sure that there wasn't an undercut at the side of the tiki or at the bumps on the bottom plaster piece. Lots of mold soap applied wiped off and applied again and wiped lightly. Poured the plaster. 30 minutes later removed the sides and cleaned the mold half. Flipped it over and put the boards back on. Next I prepped for the third piece. I found that I couldn't get the boards to hold the plaster base to the bottom of the tiki. So I just put a couple of pieces of cardboard there until it was snug. It came apart easily, no undercuts. I never pour the plaster until I have checked every part of the tiki and previous pieces. It would be disaster if the mold couldn't come apart after all this work. I didn't post photos of every step here since I have in previous lessons. The molds will now be left to completely dry out before use so that they will last. These are the molds that we have made together. It really helps when two people work together to make the molds. Dan and his mop, our new family tradition. I forgot to say that using MauiTiki technique is the way to go. Far easier than how I made my first Big Bob bowl. Thank you for sharing. Thank you for following my thread, your comments make my day. Wendy [ Edited by: danlovestikis 2011-03-31 08:44 ] |
|
LLT

little lost tiki
Posted
posted
on
Wed, Mar 30, 2011 8:49 AM
Excellent Step-by step on the Bobs,Wendy! And what a great technique for reproducing portraits ! Hugs! Hugs! and Congratulations on this latest artistic explosion of yours!!! |
|
G
GROG
Posted
posted
on
Wed, Mar 30, 2011 9:30 AM
Hey, what a coincidence. GROG cut up all pictures GROG have of Kinny also. Then GROG burn them, and wizz on the ashes. |
|
D
danlovestikis
Posted
posted
on
Sat, Apr 2, 2011 8:44 PM
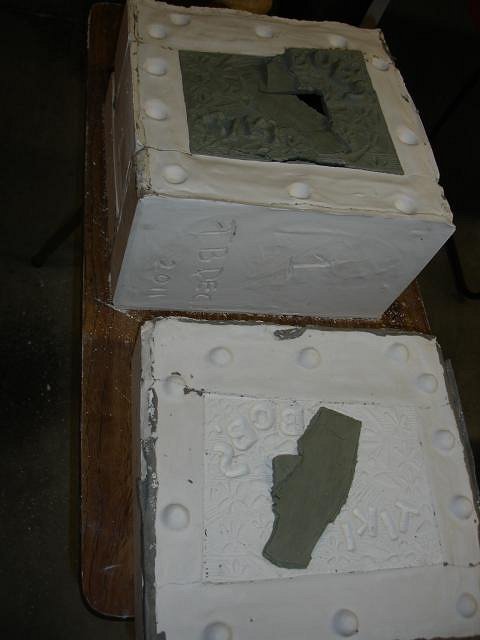
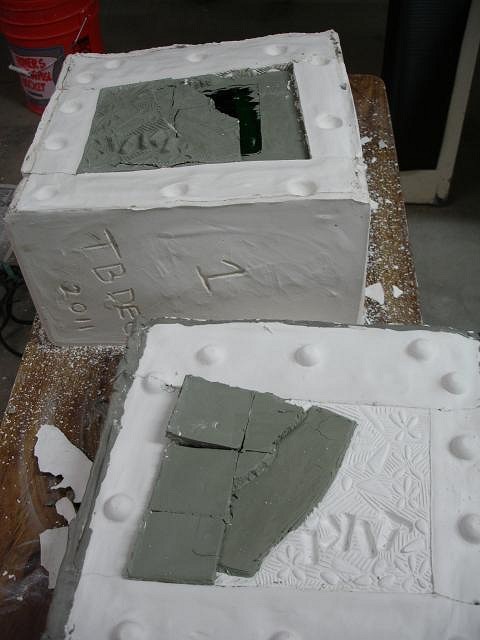
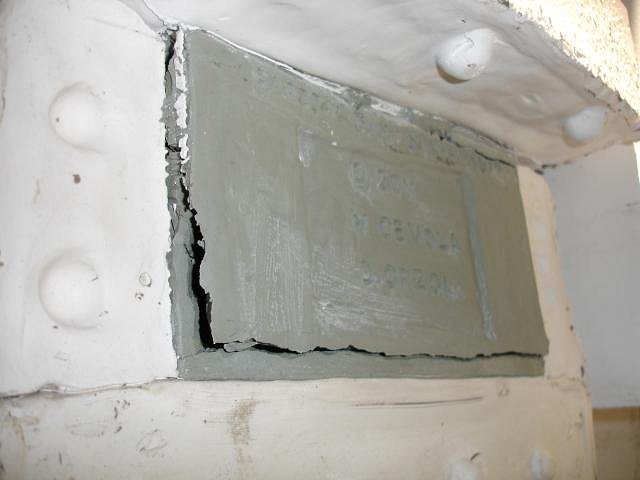
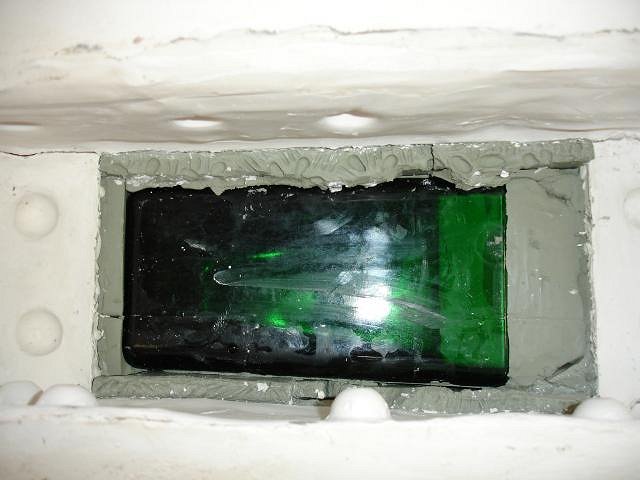
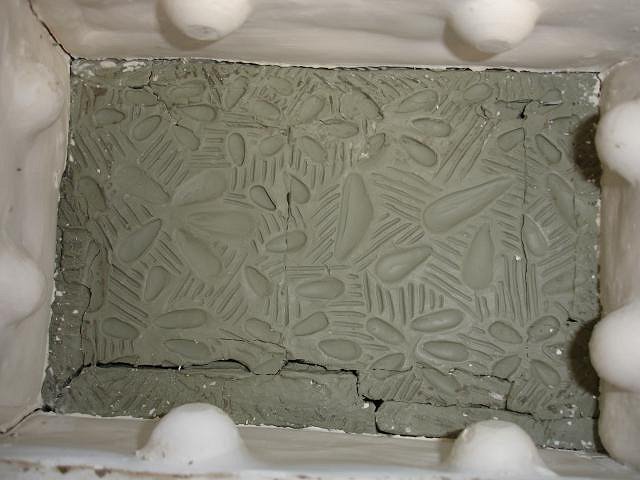
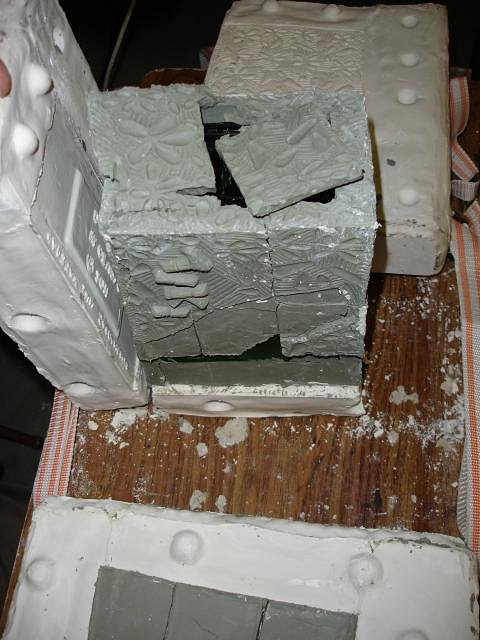
Even though Kinny deserves some sympathy after Grog's note I'm going to post some photos of the worst disaster I've had since starting my ceramics career last August. I need the sympathy. I have posted photos showing how I used a glass vase as a base for my clay when making the next Sacramento Crawl ceramic for 2011. I didn't have enough sculptures clay so I stretched it out by covering the vase. Huge mistake because I wanted to make multiple molds. If I was only making one mold no problem. More than one - horrors. Here's what happened. We were so happy to have made our first 6 piece mold. However we had not opened it because we were waiting for the day we could take off one piece and mold it three times before moving on to the next side. The clay would not hold to the glass. I'd take off the plaster section and the clay would break loose and part would stay stuck on the plaster. I would have to pry it loose and then put it together like a jigsaw puzzle. Then I had to smooth out the cracks and resculpt the design. To get the three molds. I had to do this entire process three times per side.
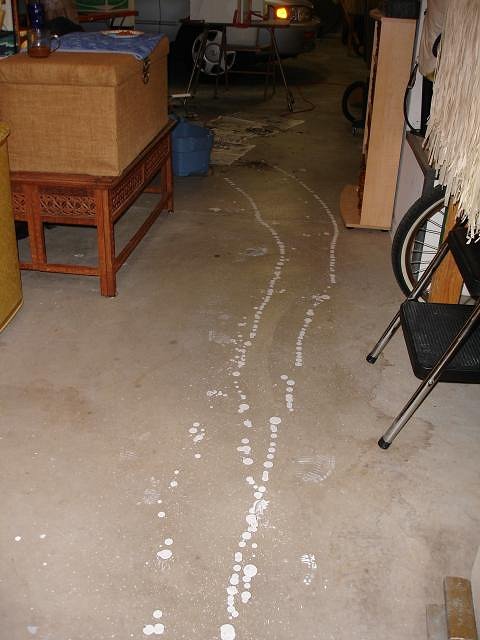
Of course our bucket cracked when we were mixing the plaster. Dan ran it outside leaving this trail behind. We just kept working. There was never a side that held.
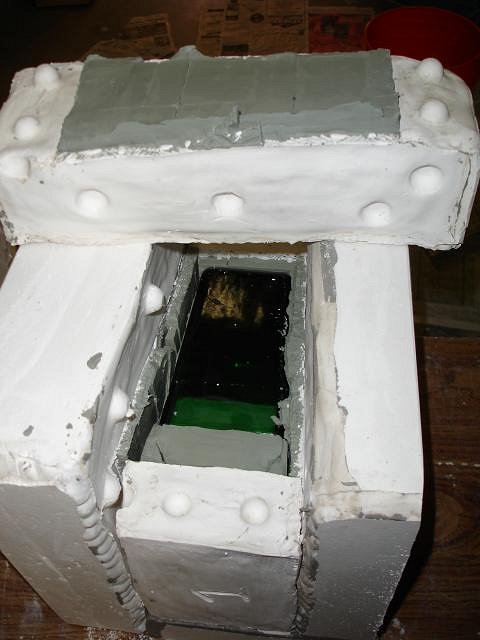
We had been at it from 7 am until 5:30 pm. Dan was able to get all the plaster trail off the garage floor, got to love that guy. By the end of the day we had four mold pieces for each of the four largest most complicated parts. What's left are the two smallest sides. 6 repair jobs and then we will have our four molds. Fingers crossed that they all work. Of course all of this happened on April Fools Day. Cheers, Wendy |
|
LLT
little lost tiki
Posted
posted
on
Sat, Apr 2, 2011 9:39 PM
What a Day! here's a great little quote for you and Dan concerning the molds at hand and perseverance .... "It's a little like wrestling a gorilla. You don't quit when you're tired. You quit when the gorilla is tired." Hats off to your bold sense of adventure AND bility to weather the storms when they happen! |
|
T
Tobor64
Posted
posted
on
Sat, Apr 2, 2011 9:44 PM
I'm sorry to hear about your difficulties, Wendy, but I know you & Dan will make it work. |
|
M
MauiTiki
Posted
posted
on
Mon, Apr 4, 2011 12:22 AM
Good to see you tried my technique. Don't judge it until you've pored a few. |
|
D
danlovestikis
Posted
posted
on
Mon, Apr 4, 2011 9:03 AM
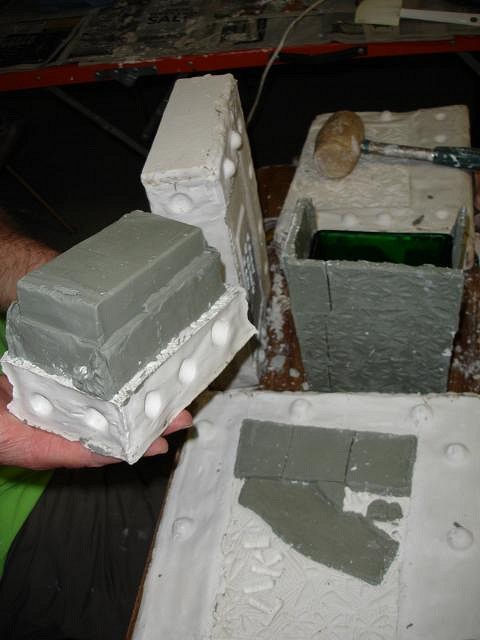
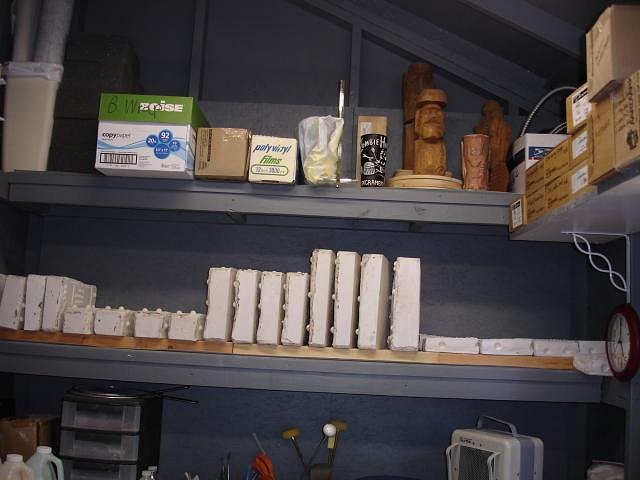
Hi Kinny, both the gorilla and we were tired at the end of that day. But we went back to work two days later and yippee, success! Thank you for always cheering us on. Hi Torbor64, thank you for your kind words. Also thank you for the computer information. When I can't lift a mold any more I'll head in that direction. Hi MauiTiki, I poured the first Big Tiki Bob from the mold using your technique. It was perfect, it didn't leak. I'm not going back to my technique because yours worked so well. I just have to think through the errors that I made. Thank you very much for sharing. Yesterday we finished the last pieces of the mold for the decanter. We had bumps along the way but we made it through and now I have four molds done. In two weeks when they are dry I'll pour and see if they leak or do well. Here's our work day. All we needed to do was make three more of the smallest piece on each end. Only 4 scoops of plaster. Unfortunately to remove that small piece all four sides had to be removed. Then all the sections of clay that came loose had to be put back in place to hold the top that needed to be molded. We poured the first one and it stuck and pulled the clay right out of the vase. I got it all put back together to pour the next one but I had to redo the sculpture first. Then on to the next one but it all pulled apart and the plaster stuck to one side. I didn't forget the mold soap but it stuck anyway. On this part I chiseled off the stuck plaster. I used three layers of mold soap wiping it off between after that and didn't run into any problems. We did make four of this side just in case the damaged one wouldn't work. Our work area in the garage. When we finished that last side we carried every piece out to the kiln shed where it will be left to dry. I'll be bisque firing some Tiki Bobs soon and that will heat the shed to 80 degrees. On the top shelf are wooden tikis started by my good friend Benzart. One day I will work on finishing them but right now they guard my shed. Thank you for checking out our progress, Wendy [ Edited by: danlovestikis 2011-04-04 15:28 ] |
|
M
MadDogMike
Posted
posted
on
Mon, Apr 4, 2011 4:15 PM
W&D you are mold-making fools!!! Sorry about the hassles but looks like perseverance triumphed! Looking forward to some grewat Tiki Bob decanters. |
|
T

teaKEY
Posted
posted
on
Mon, Apr 4, 2011 4:23 PM
our new family tradition. Carried over from page 15 |
|
D
danlovestikis
Posted
posted
on
Mon, Apr 4, 2011 4:51 PM
Hey teaKey, check out my carving thread for more Dan clean up photos. Thanks for the combined post I can't wait to show him! Hi MDM, you and I we never give up. Wendy [ Edited by: danlovestikis 2011-04-04 16:53 ] |
|
D
danlovestikis
Posted
posted
on
Tue, Apr 5, 2011 4:13 PM
Today was super fun. The temperature in the garage was sublime. My cat kept me company along with Dan who played Hawaiian war chants which echoed from his man cave. I worked on all of my Tiki Bob orders and enjoyed every hour. I'm trying to have them all prepped by Friday so they can dry. Hopefully early next week I can get them bisque fired. Cheers, Wendy 8am I completely finished the carving on ebtiki's Super Carved mug.
My last task was to form the base shape of the Fez hats. Just a great day. [ Edited by: danlovestikis 2011-04-05 16:35 ] |
|
W
WestADad
Posted
posted
on
Wed, Apr 6, 2011 7:30 AM
WOW! I just cant stop looking at the detail on the super carved Bob. Love your art Wendy! Chris |
|
Z

ZeroTiki
Posted
posted
on
Sat, Apr 9, 2011 9:42 AM
Someday I will be so used to seeing your awesome work that I will be used to it. ...Nah. I doubt it will ever happen. Too much coolness to get excited about! |
|
D
danlovestikis
Posted
posted
on
Sat, Apr 9, 2011 3:34 PM
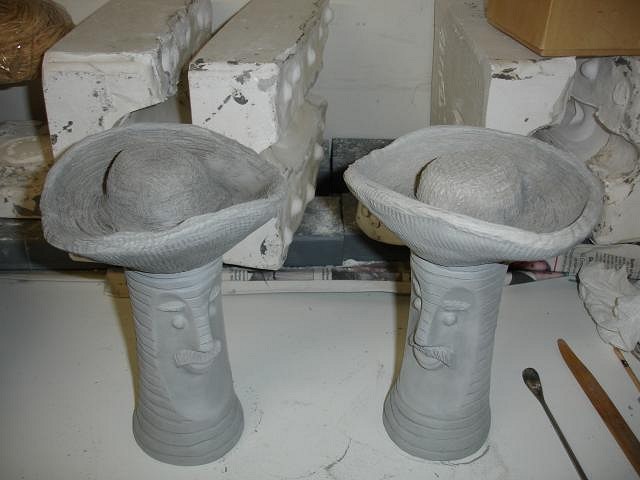
WestADad and zerotiki you just continue to keep me smiling. Thank you both very much. I've finished the three Super Carved Bobs and they are drying. Later today I'll post photos of the two Shriner Bobs in Progress. There is always something to do. (: Wendy
Also drying are the two South of the Border Bobs. As they dry I keep carving so that there will be room for glaze between the head and Sombrero. |
|
Z
ZeroTiki
Posted
posted
on
Sat, Apr 9, 2011 6:04 PM
You're quite right, by the way...they are super! |
|
D
danlovestikis
Posted
posted
on
Sat, Apr 9, 2011 9:31 PM
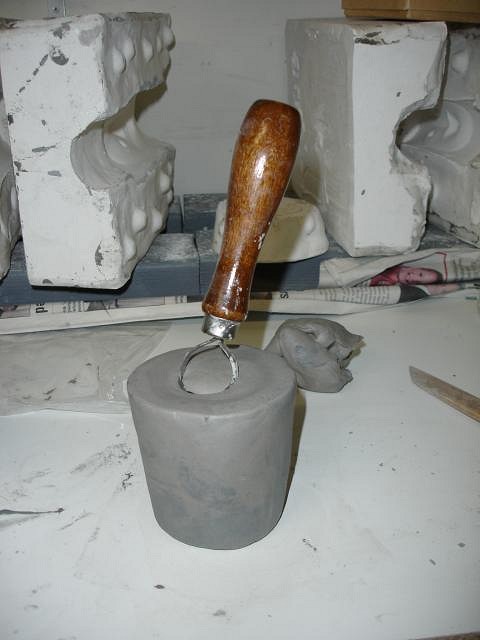
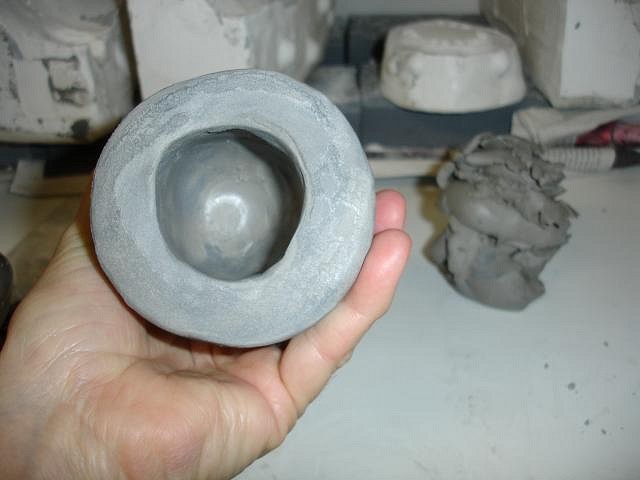
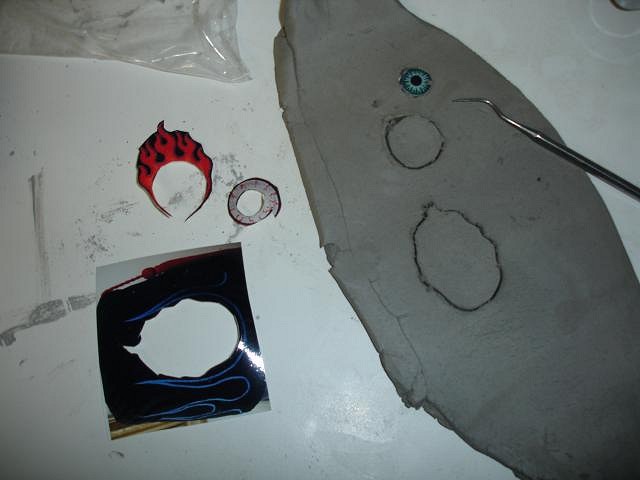
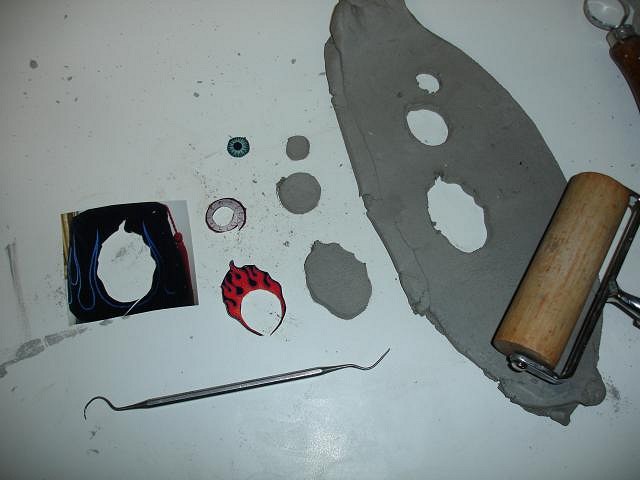
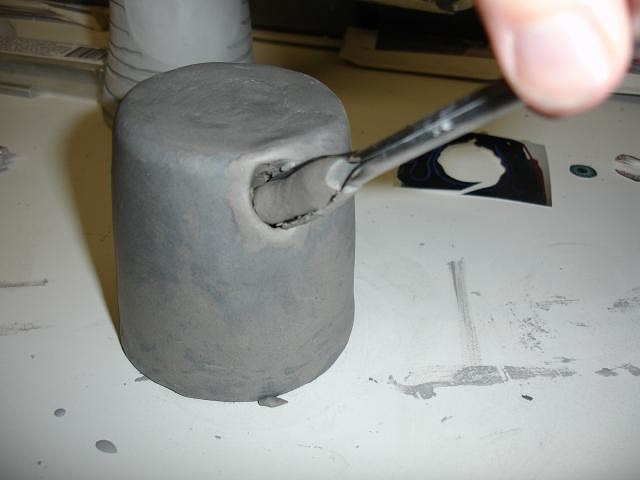
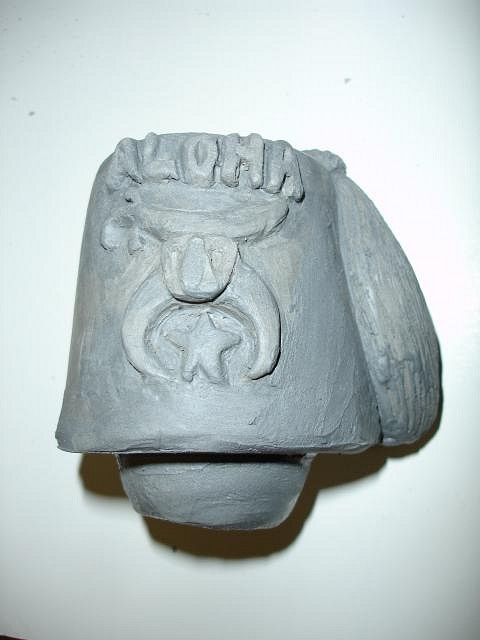
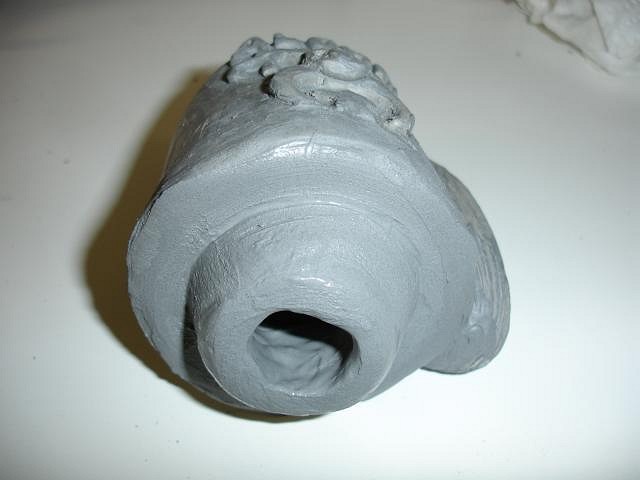
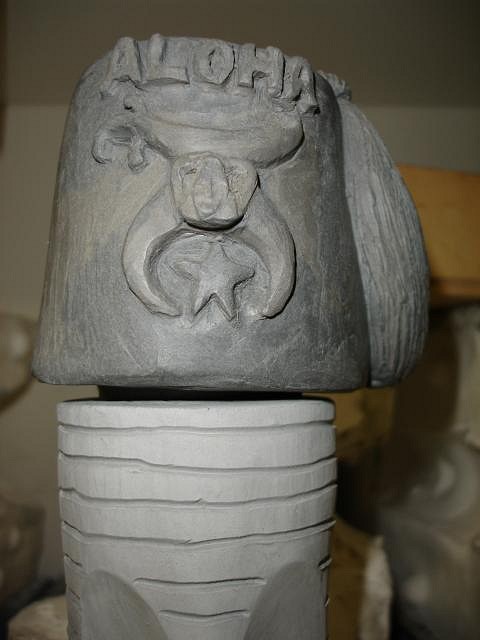
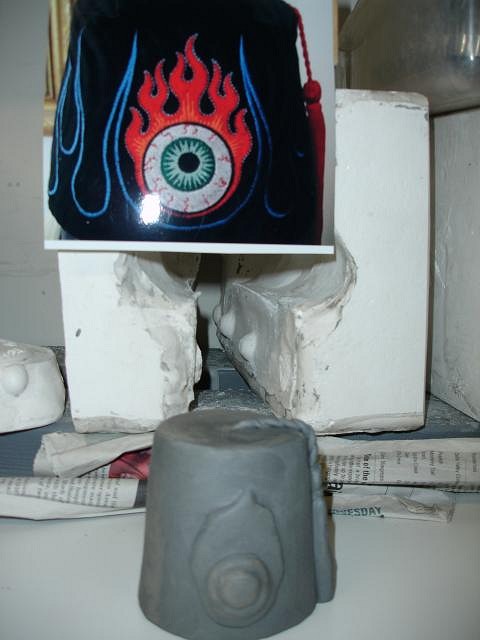
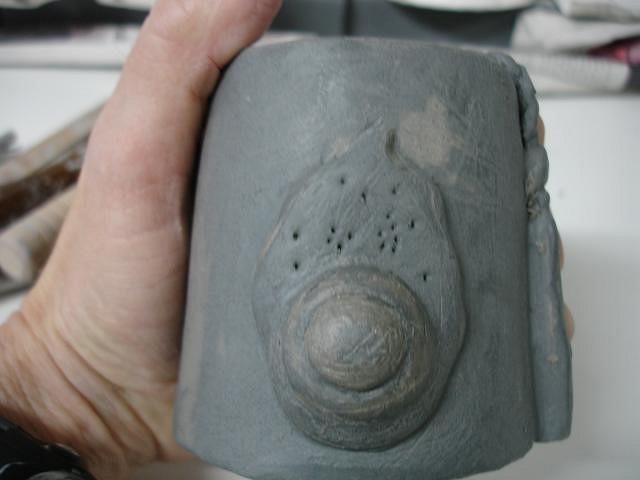
Hey zerotiki, congratulations on having a place to sell at Oasis 11. I do hope to see you there. You are Super, Wendy I am currently working on two Shriner Bob's. Here are some steps I've done in making the hats. This is the Cult Of The Eye Shriner Bob. I shaped the hat and removed clay from the inside. I like everything to be heavy so I left the walls thick. I rolled out some clay and cut up a photo of the symbol. I put the pieces on the clay and cut them out with a dental tool. I dipped the pieces in slip and stacked them. Once these are leather dry I can crave them flatter and add detail. I cut out the straw hole so I could position the symbol directly across on the front. I attached the symbol with slip and then I made the tassel and attached it with slip. The slip goes everywhere, top sides and bottom. It's the best glue. At the same time I've been working on the Aloha Shriner Bob. Here are some more steps. I always have a bag of slip that was cut away from poured pieces. I like it to be mushy to firm. I use it to build what I need. Here I have started to build the part of the hat that sit down into the opening of the mug so it will not slide off. I may even add to this. I figure that out as I go. Here's how it looked as I left it out to dry. I have a lot of fine tuning to go on each of these projects and when they are completely done and dried it will be time to bisque fire them. If you ever have questions I'd love to answer them to the best of my ability. Wendy |
|
G
GROG
Posted
posted
on
Sat, Apr 9, 2011 10:29 PM
Good stuff. Way to go Wendy! |
|
D
danlovestikis
Posted
posted
on
Mon, Apr 11, 2011 9:18 AM
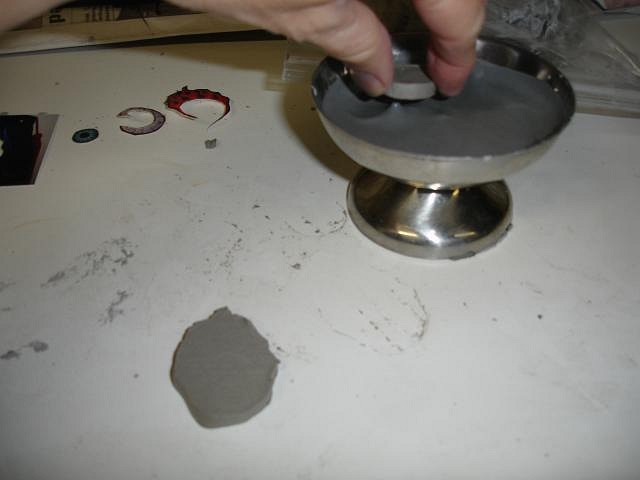
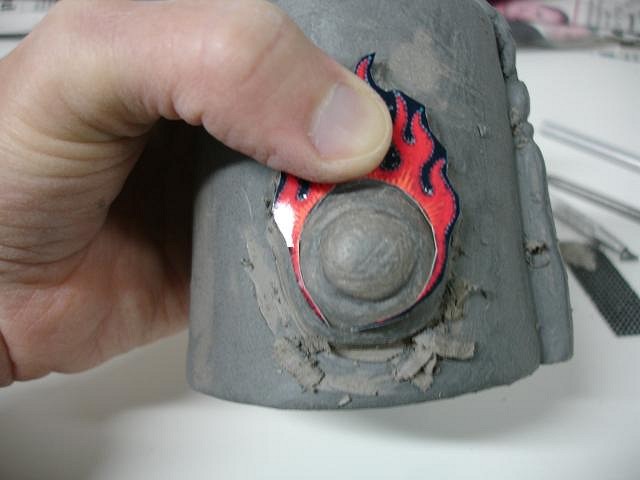
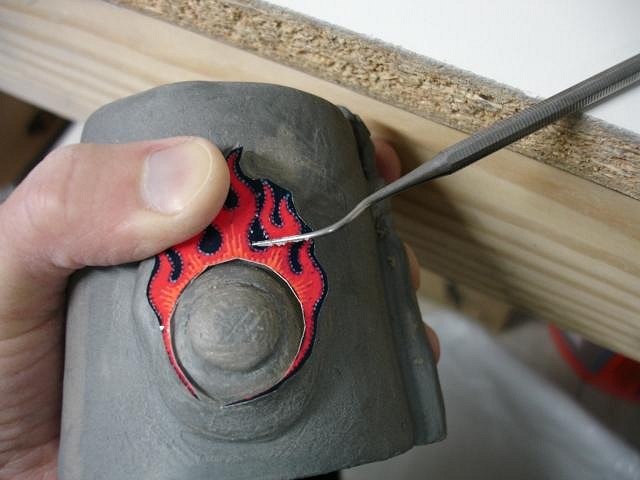
Thank you Grog, I owe you a hug at Oasis 11. I've further fine carved the Aloha Shriner. Now it is drying and shrinking. When that's done I'll be sanding and craving some more. I will make room for glaze between the mug and the hat. This is the Cult of the Eye design that I'm adding to the hat. I cut the photo to use to get the size just right. Using a sharp tipped tool I poke through the photo into the clay. The small dots help me to remove the clay to make the flames in the right shape. I've got a good start here. Now a better way to make the inner ring. I rolled a ball and flattened it. Then using a tool I cut out the center. I dipped it in slip and centered it on the hat. I pressed down to seal the two pieces together. I dip my finger into the slip and on the inside I rub the two parts together and make them smooth. Using slip I did the same on the outside. Smooth enough for now. When it's all dry I'll be sanding and craving more. Since the hat, ring and slip have different amounts of moisture I put the hat into a plastic bag so that it will dry slowly and they will equal out and not crack. I check on them on and off to make sure it's working. Thank you always for making the posting a fun thing to do, Wendy |
|
Z
ZeroTiki
Posted
posted
on
Mon, Apr 11, 2011 9:43 AM
That is gonna be awesome! |
|
D
danlovestikis
Posted
posted
on
Thu, Apr 14, 2011 2:25 PM
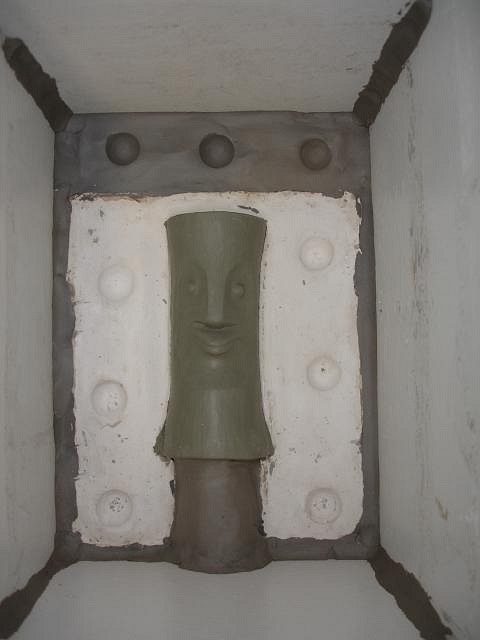
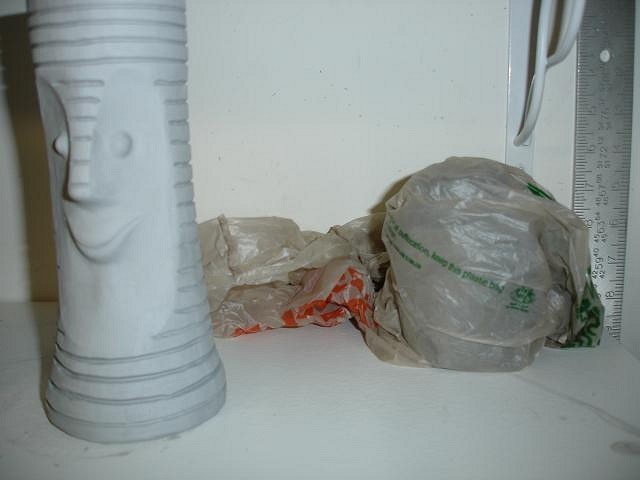
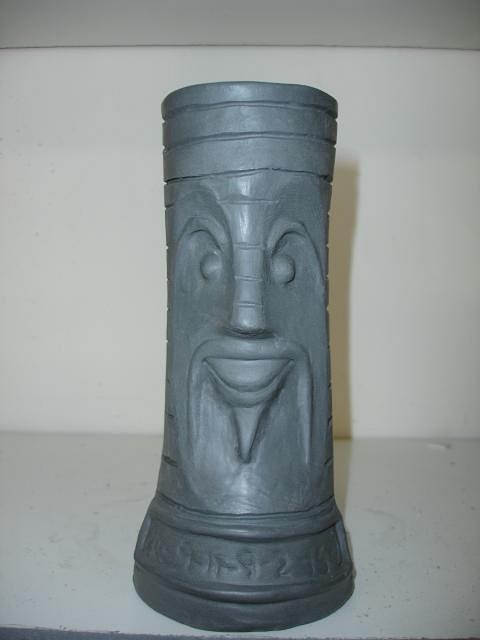
Thank you ZeroTiki. Since the Shriner Hats and Sombrero's are so thick and take forever to dry last week I finished off the last two Bobs that I had poured. They have been drying with the rest. I always have to fill my kiln up when I fire because it takes $30 to $40 worth of electricity. I'm hoping in a few more days they will be just right. Jail Bird Bob, his induction number 20-9-11-9--2-15-2 is a code we used as kids. What does it decipher as? His body will be black white black white as classic jail wear. Tiki Bobbie wearing her turtle necklace and is a lady. These photos were taken just after they were formed. Now it is time to start carving in the detail such as defining the numbers. Wendy [ Edited by: danlovestikis 2011-04-15 09:03 ] |
|
M

McTiki
Posted
posted
on
Thu, Apr 14, 2011 3:54 PM
Awesomeness Wendy & Dan! Incredible details! Thank you for sharing! Mahalo KooKoomonga Tribe! McTiki |
|
M
MadDogMike
Posted
posted
on
Thu, Apr 14, 2011 3:59 PM
Tiki Bobbie is way cool Wendy, love the hair! I'll see GROG this weekend, you want me to collect that hug for you? :lol: |


Pages: 1 2 3 4 5 6 7 8 9 10 11 12 13 14 15 16 17 18 19 20 21 22 23 24 25 26 27 28 29 30 31 32 33 34 35 36 37 38 39 40 41 42 43 44 45 46 47 48 49 50 51 52 53 54 55 56 57 58 59 60 61 62 63 64 65 66 67 68 69 70 71 72 73 74 75 76 77 78 79 80 81 82 83 84 85 86 87 88 89 90 91 92 93 94 95 96 97 98 99 100 101 102 103 104 105 106 107 108 109 110 111 112 113 114 115 116 117 118 119 120 121 122 123 124 125 126 127 128 129 130 131 132 133 134 135 136 137 138 139 140 141 142 143 144 145 146 147 148 149 150 151 152 153 154 155 156 157 158 159 160 161 162 163 164 165 166 167 168 169 170 171 172 173 174 175 176 177 178 179 180 181 182 183 184 185 186 187 188 189 190 191 192 193 194 195 196 197 198 199 200 201 202 203 204 205 206 207 208 209 210 211 212 213 214 215 216 217 218 219 220 221 222 223 224 225 226 10816 replies