Pages: 1 2 3 4 5 6 7 8 9 10 11 12 13 14 15 16 17 18 19 20 21 22 23 24 25 26 27 28 29 30 31 32 33 34 35 36 37 38 39 40 41 42 43 44 45 46 47 48 49 50 51 52 53 54 55 56 57 58 59 60 61 62 63 64 65 66 67 68 69 70 71 72 73 74 75 76 77 78 79 80 81 82 83 84 85 86 87 88 89 90 91 92 93 94 95 96 97 98 99 100 101 102 103 104 105 106 107 108 109 110 111 112 113 114 115 116 117 118 119 120 121 122 123 124 125 126 127 128 129 130 131 132 133 134 135 136 137 138 139 140 141 142 143 144 145 146 147 148 149 150 151 152 153 154 155 156 157 158 159 160 161 162 163 164 165 166 167 168 169 170 171 172 173 174 175 176 177 178 179 180 181 182 183 184 185 186 187 188 189 190 191 192 193 194 195 196 197 198 199 200 201 202 203 204 205 206 207 208 209 210 211 212 213 214 215 216 217 218 219 220 221 222 223 224 225 226 10,816 replies
|
H

hang10tiki
Posted
posted
on
Thu, May 12, 2016 5:15 PM
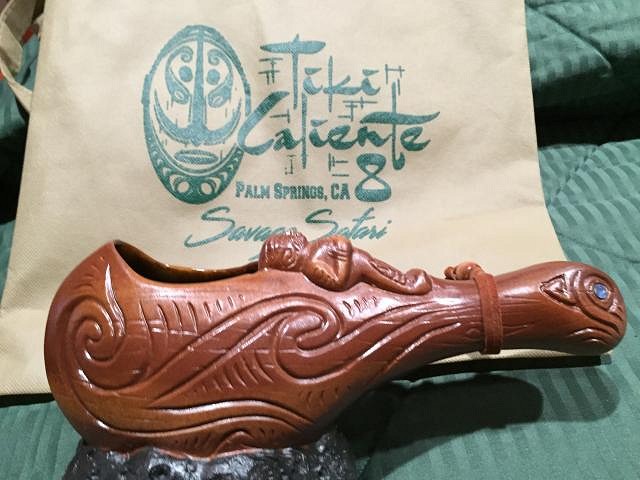
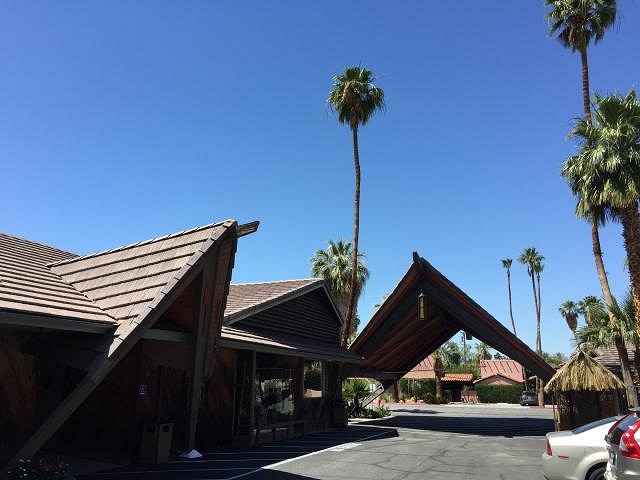
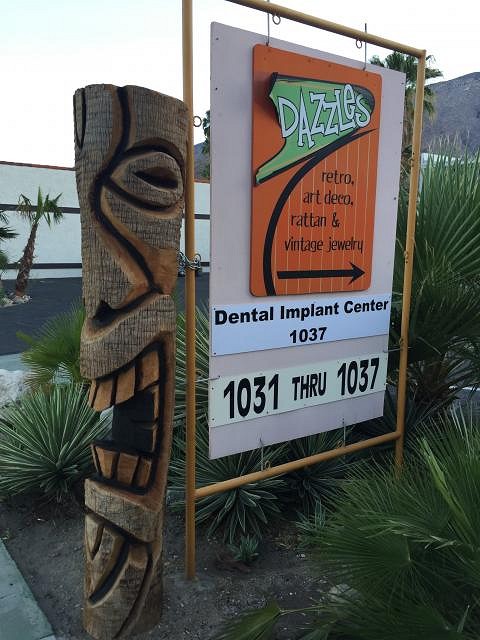
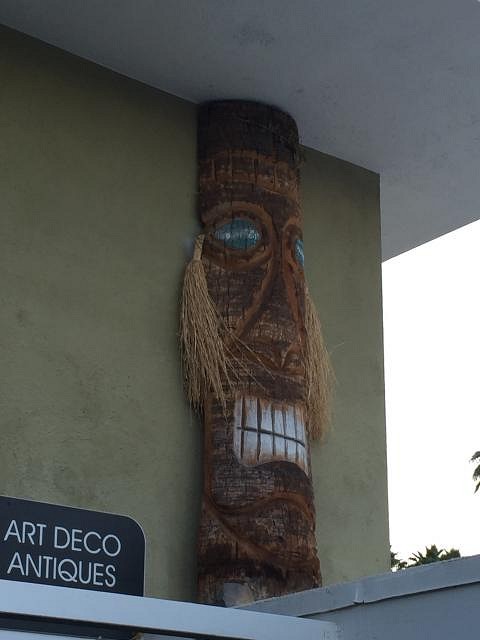
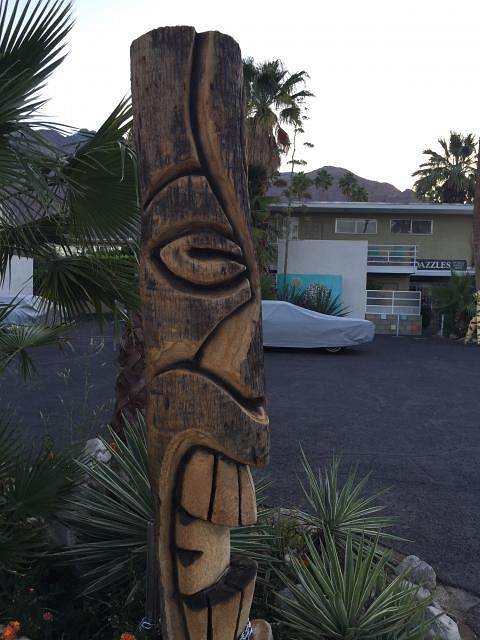
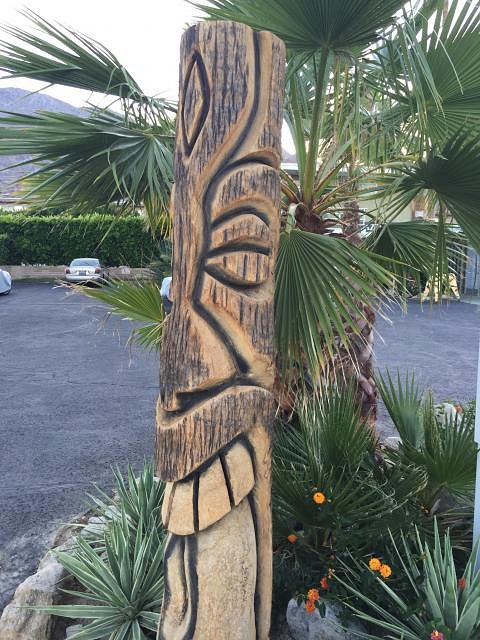
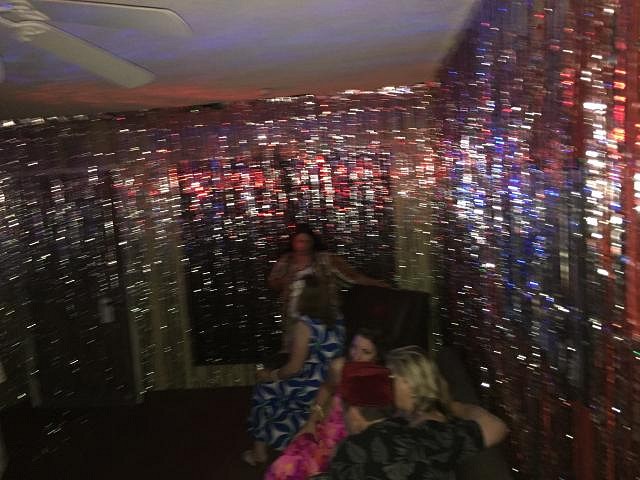
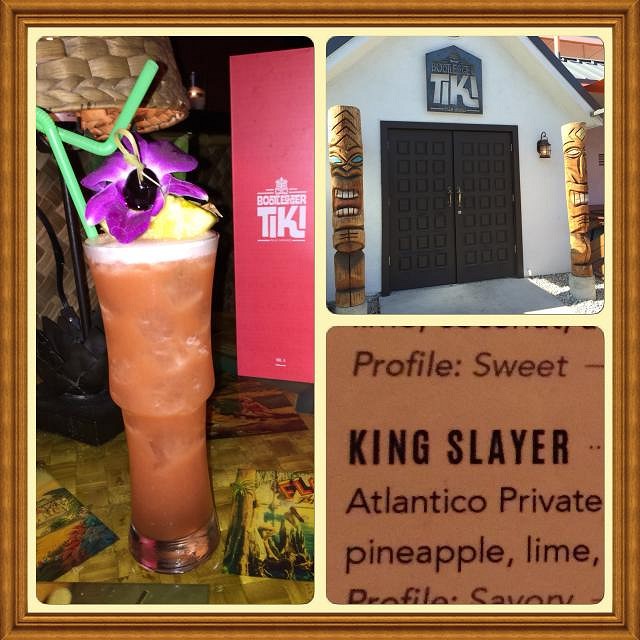
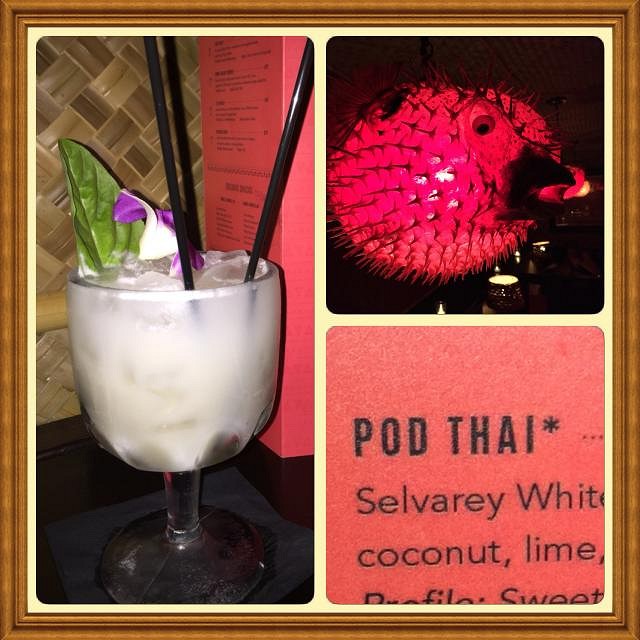
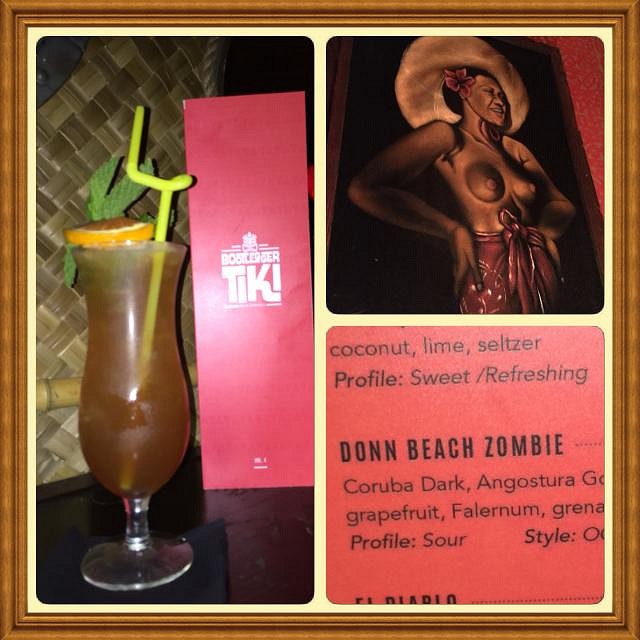
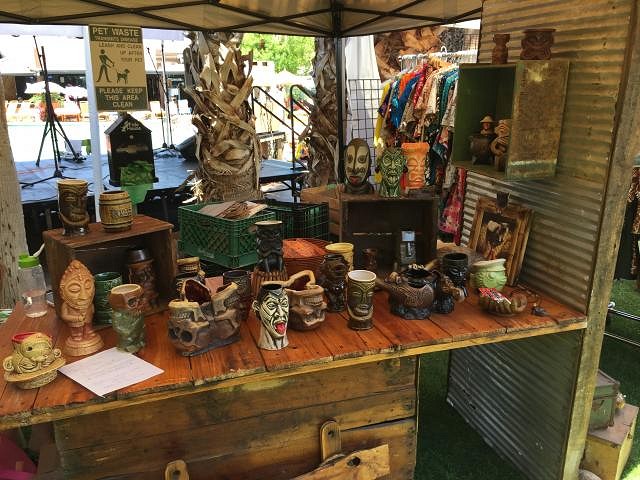
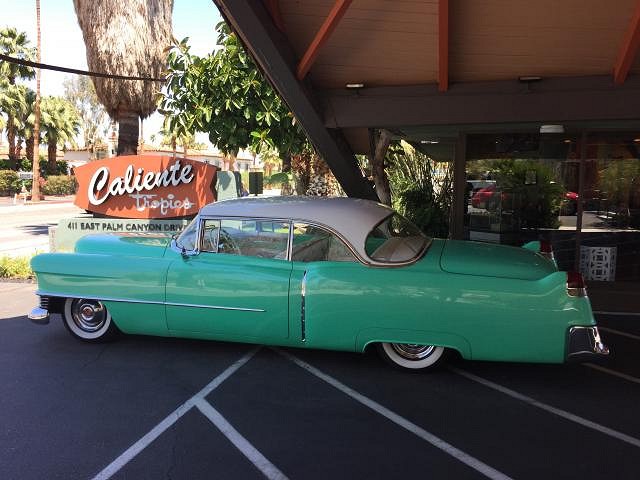
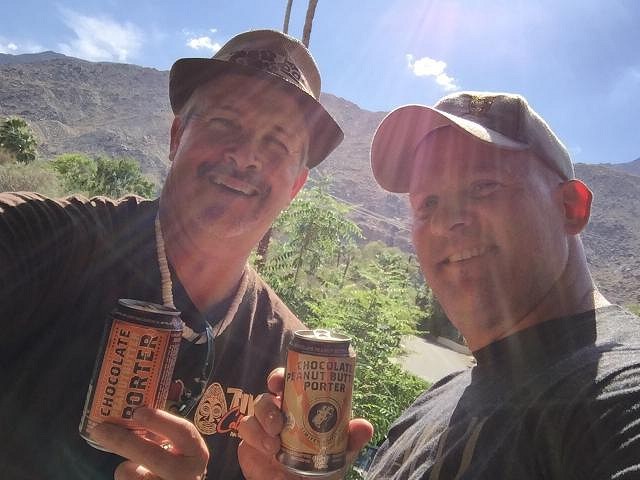
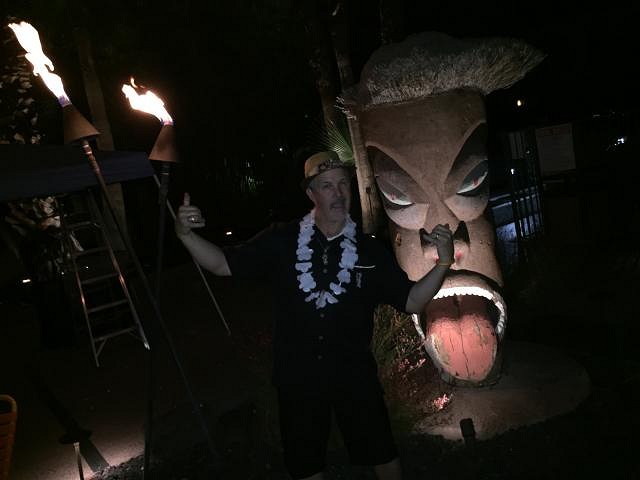
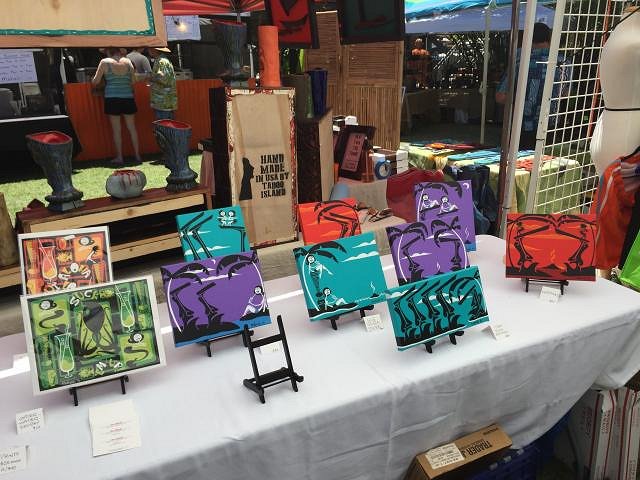
Love all the pics Road trip time
|
|
D

danlovestikis
Posted
posted
on
Thu, May 12, 2016 9:00 PM
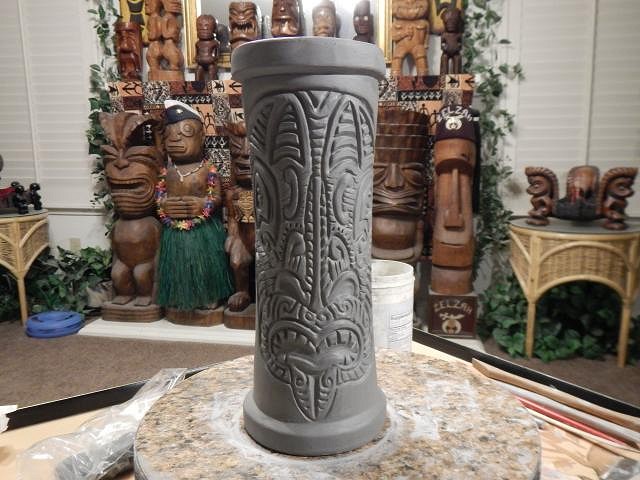
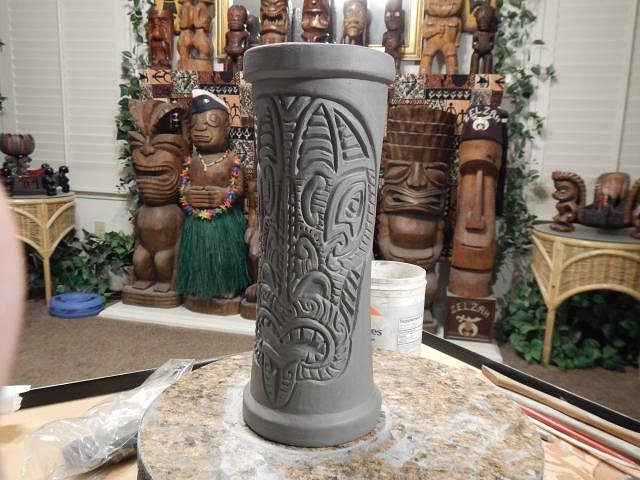
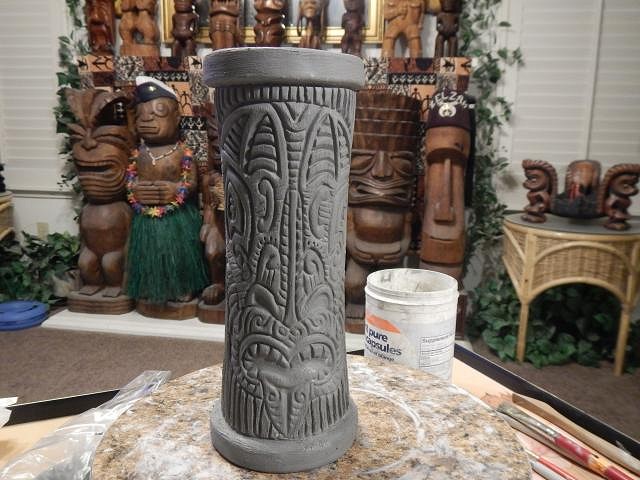
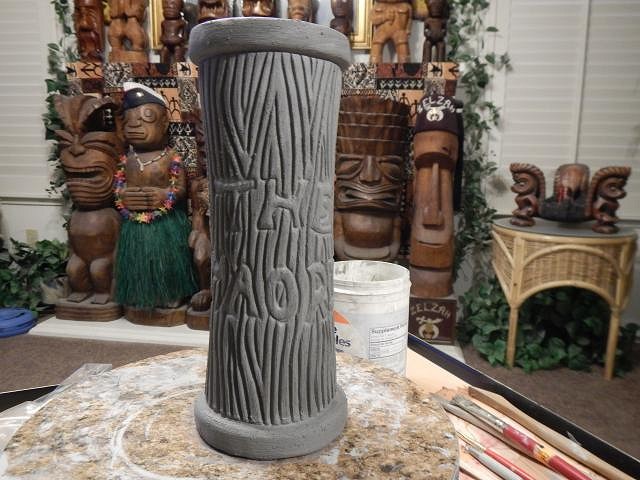
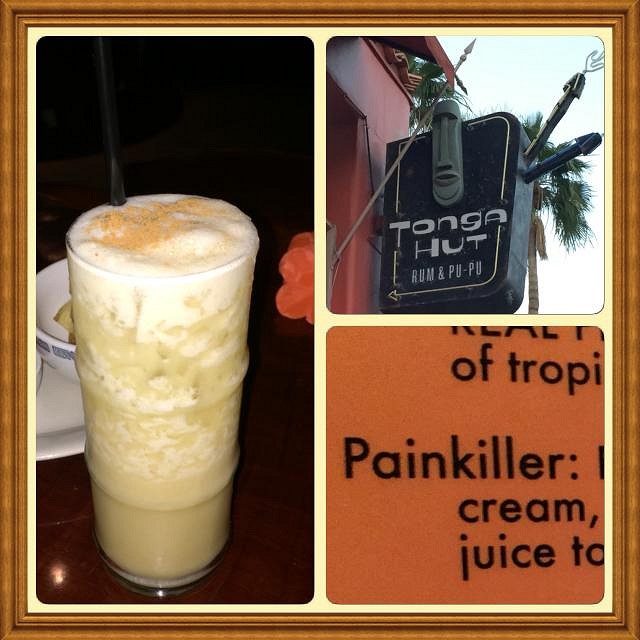
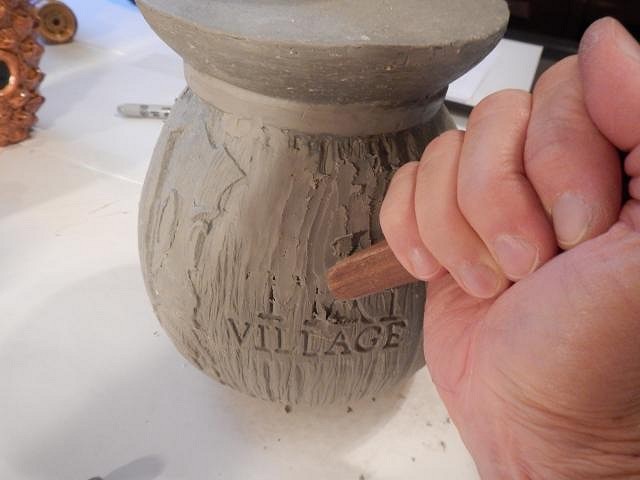
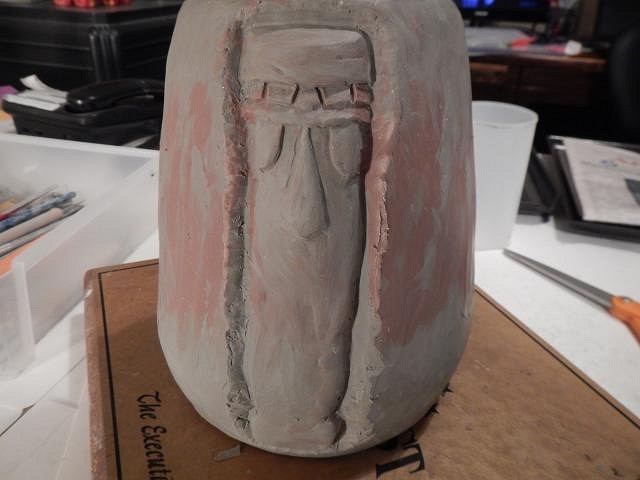
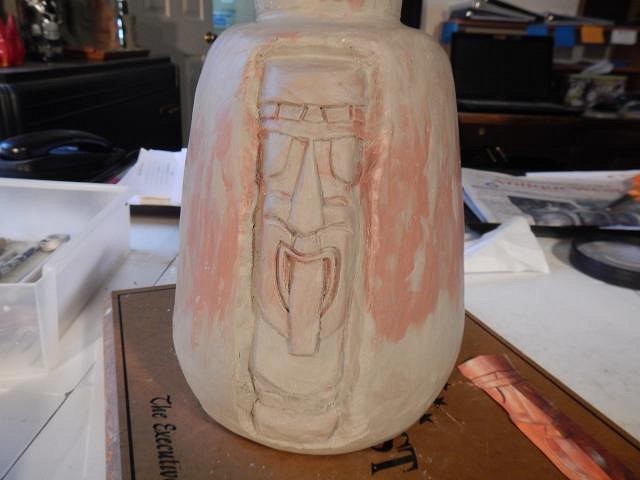
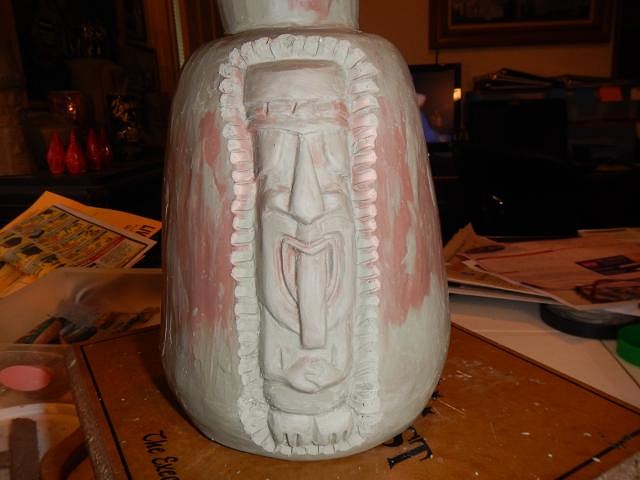
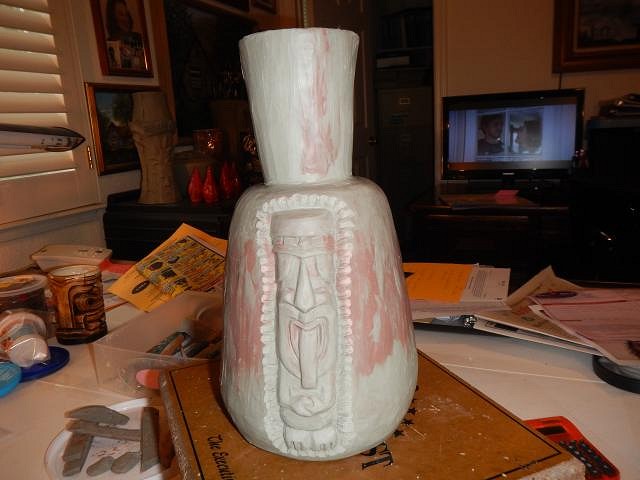
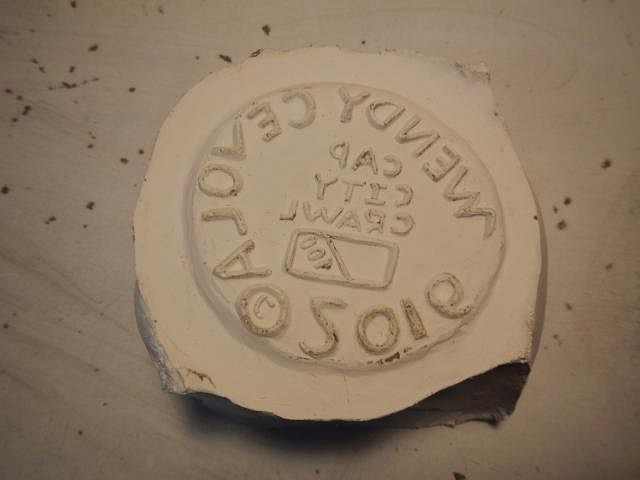
hang10tiki please continue to share photos while you play in Palm Springs. The Tonga Hut has one of my Hot Tub Hula Girls available for a drink. If you go there please snap a photo of her on the shelf if you see her or if someone is drinking from her coconut. ================================== For the Maori Swap due in August I decided carve a Maori head on a mug and on the back to carve THE MAORI as if it is a bar.
Done and drying. Cheers, Wendy |
|
H
hang10tiki
Posted
posted
on
Fri, May 13, 2016 12:15 AM
Love that mug Saw this to late Great Thursday
|
|
D
danlovestikis
Posted
posted
on
Fri, May 13, 2016 9:28 AM
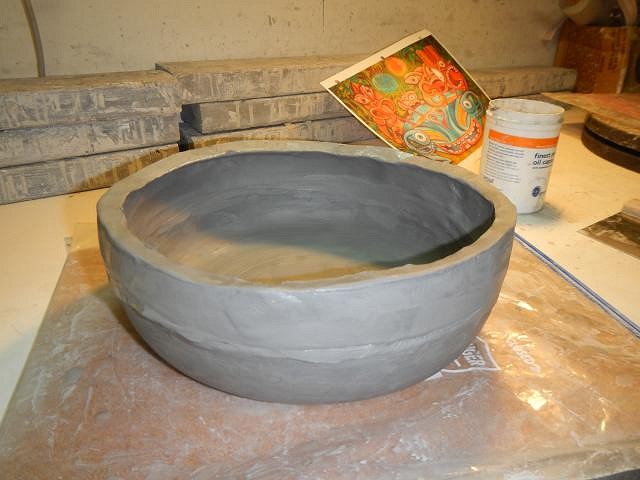
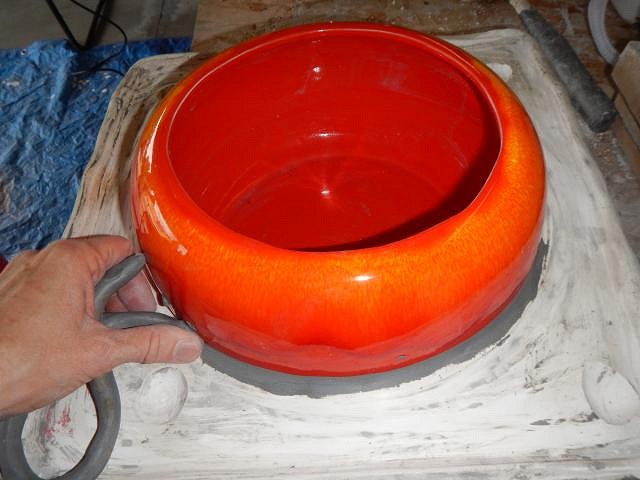
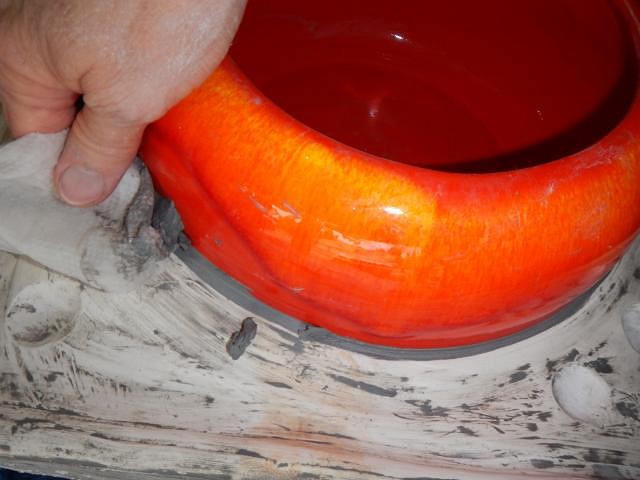
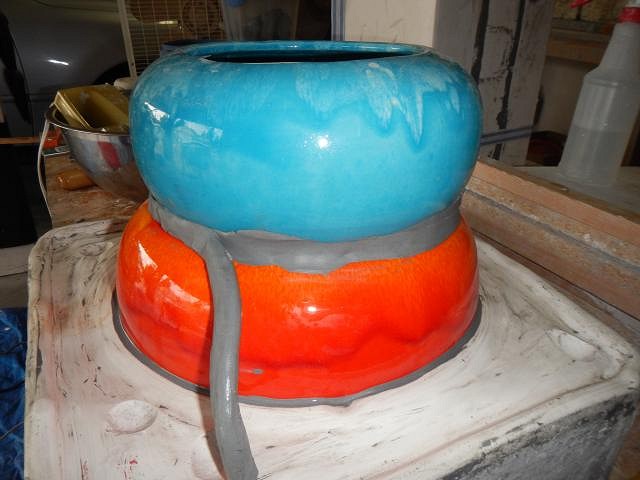
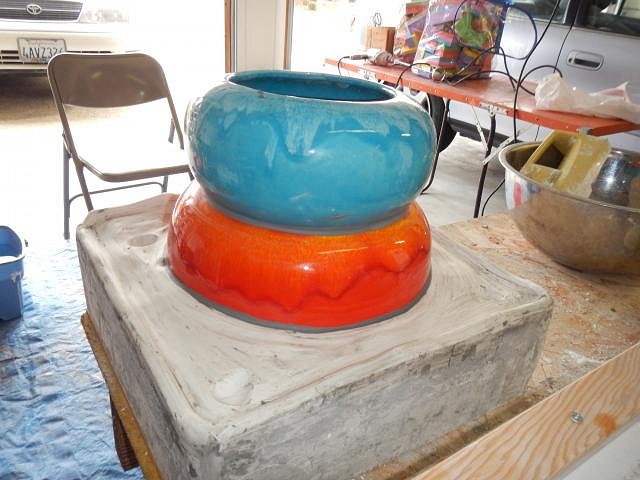
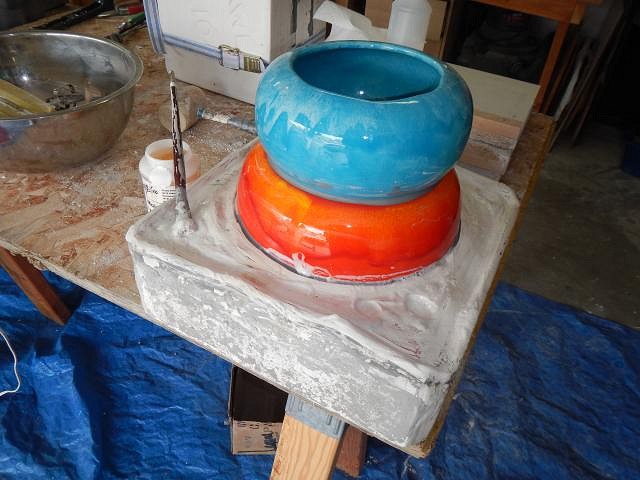
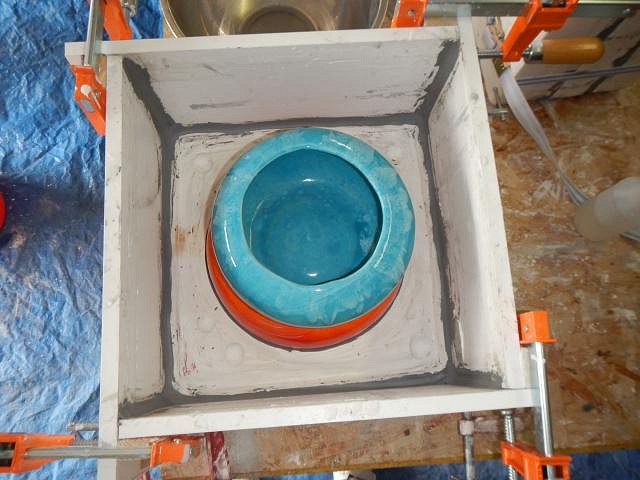
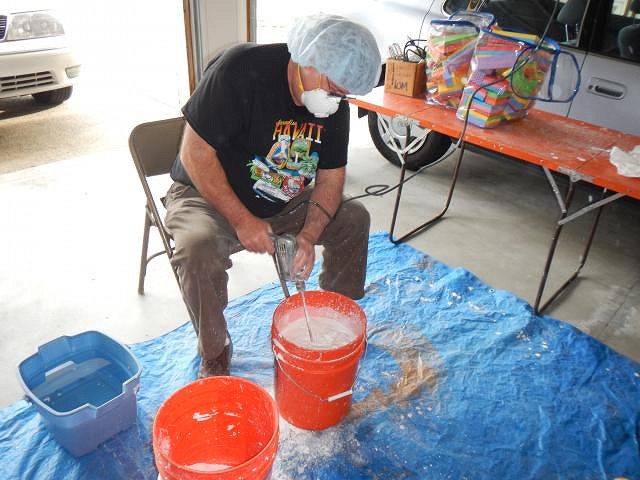
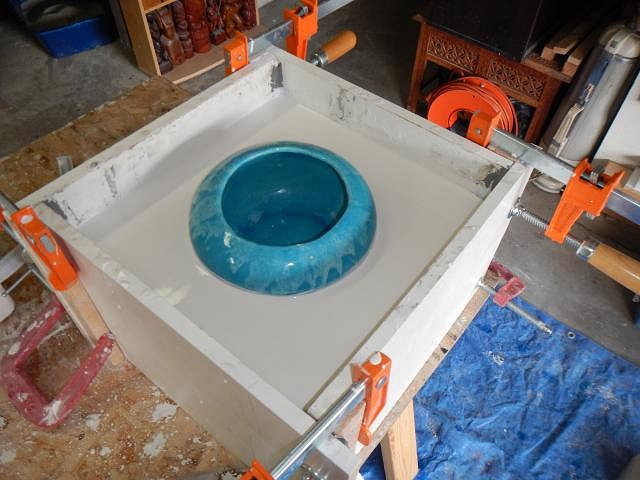
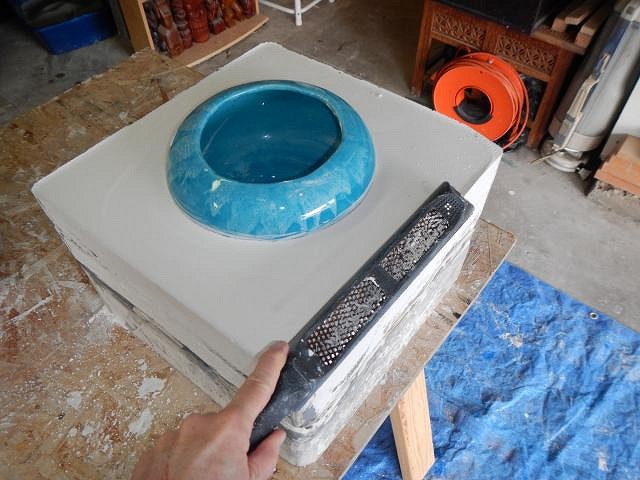
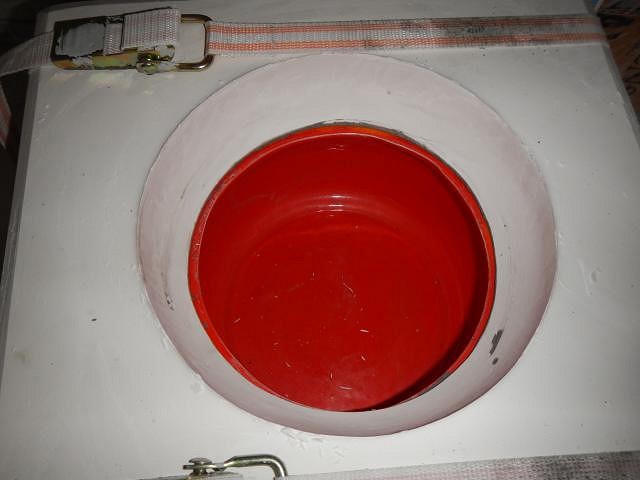
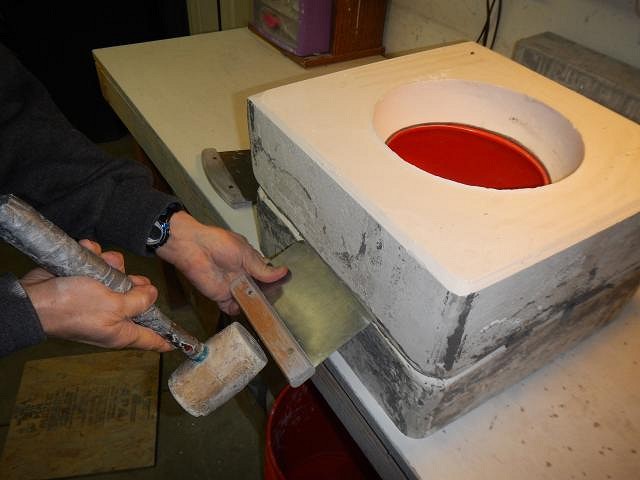
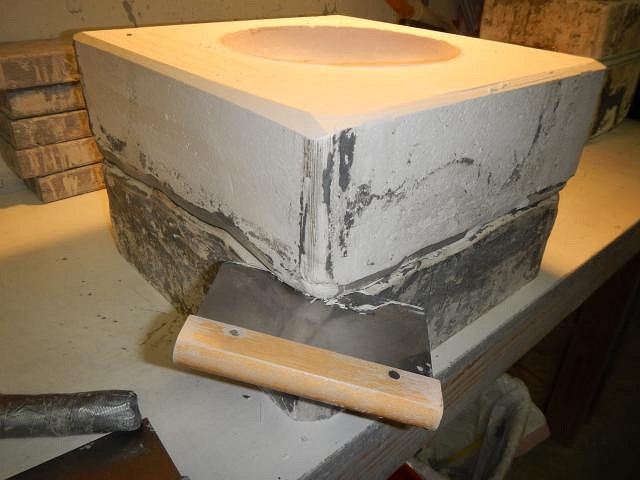
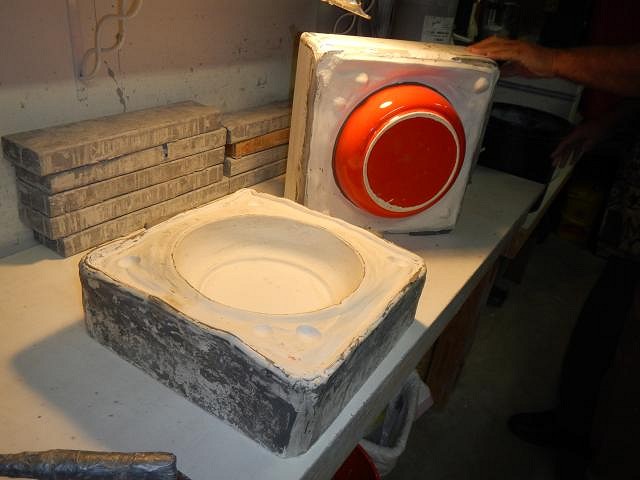
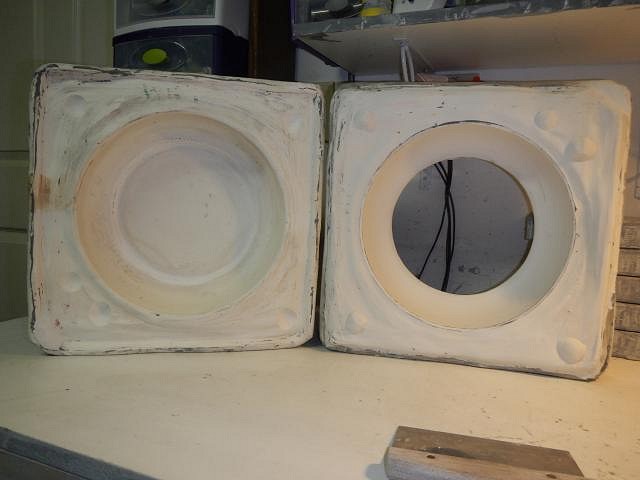
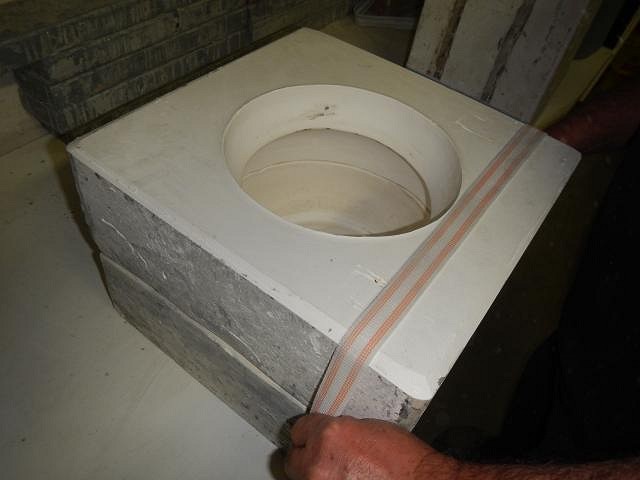
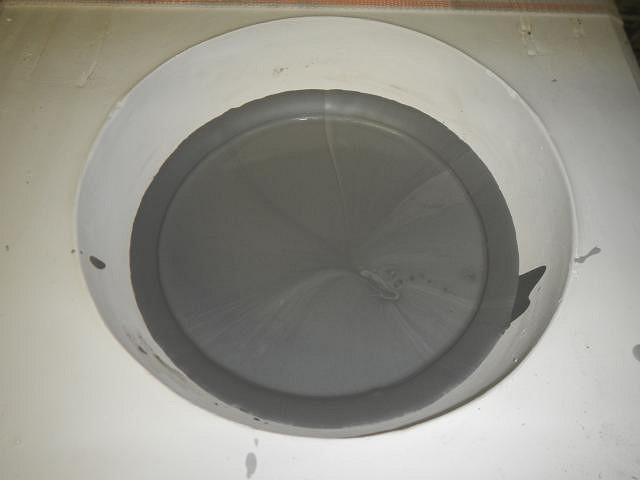
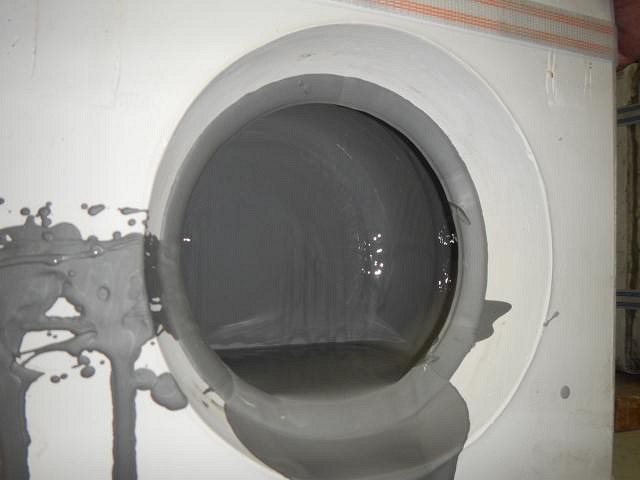
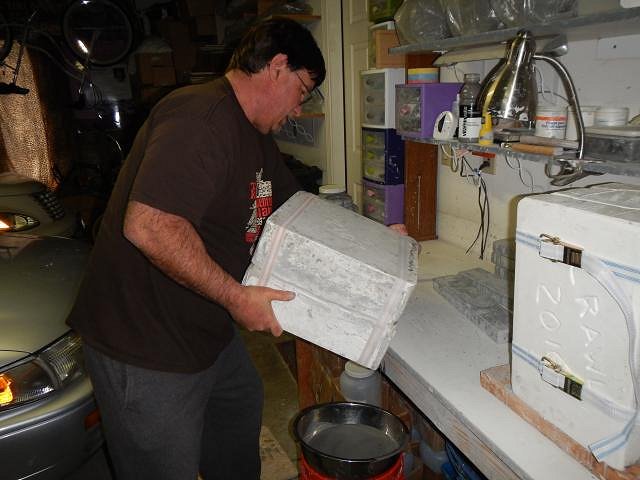
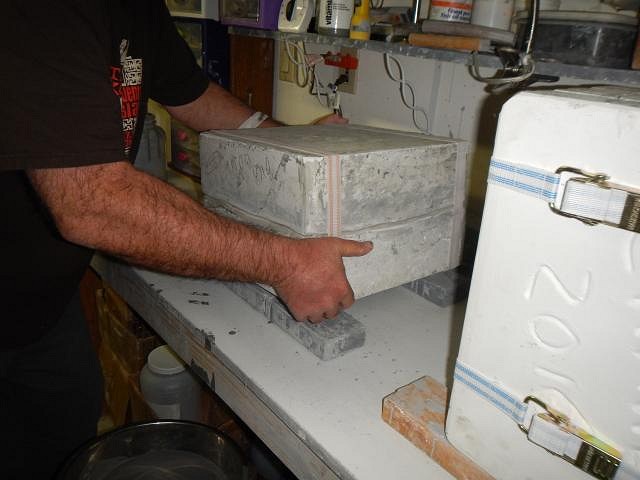
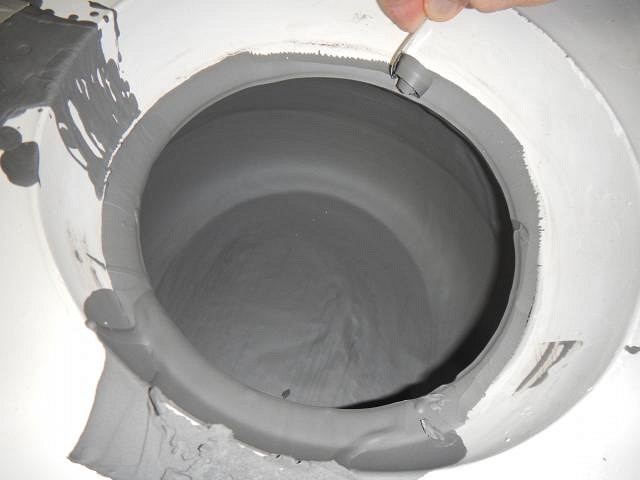
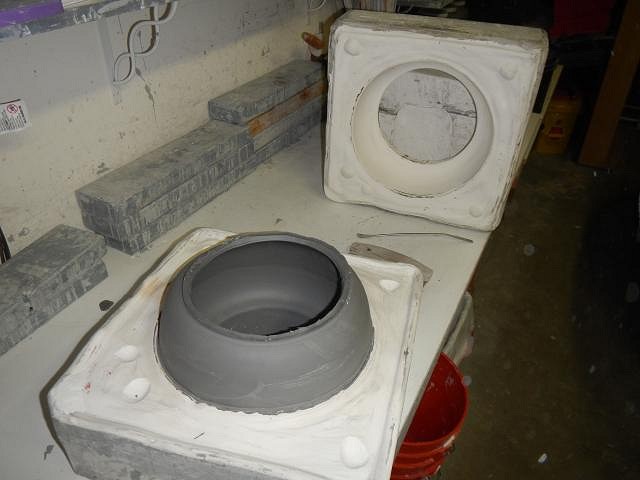
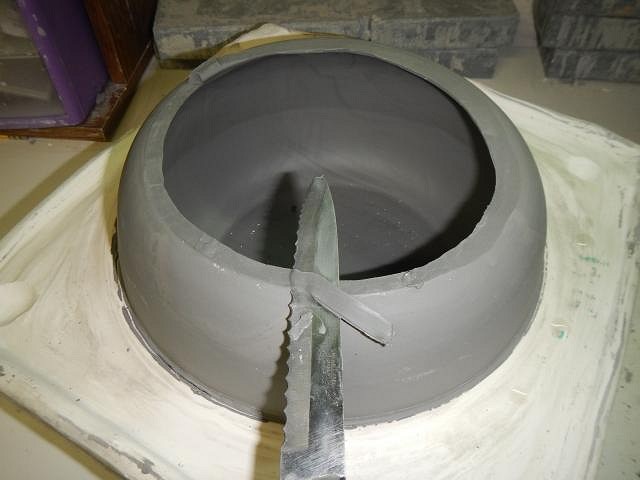
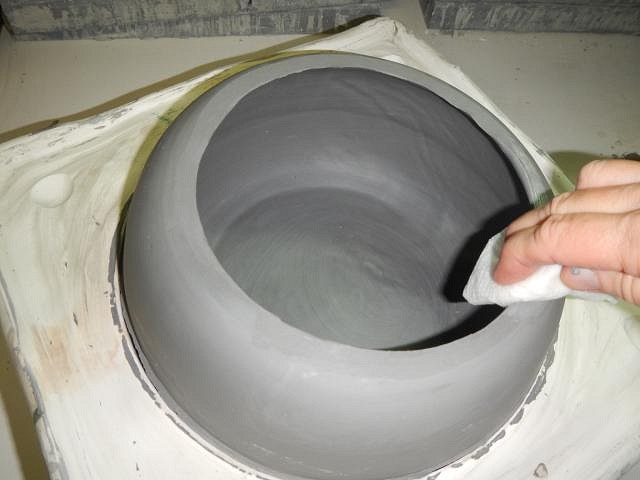
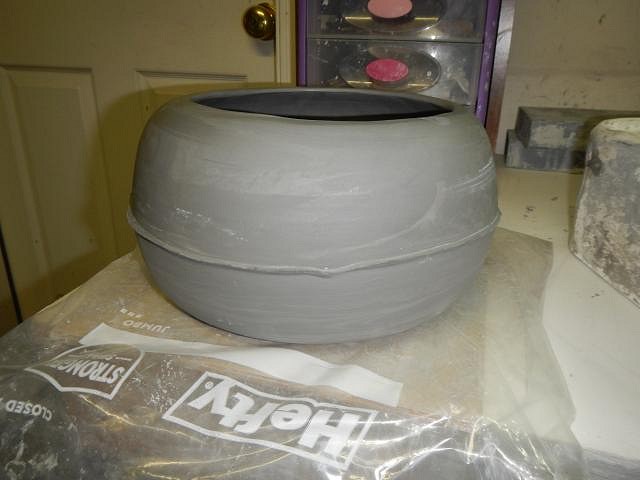
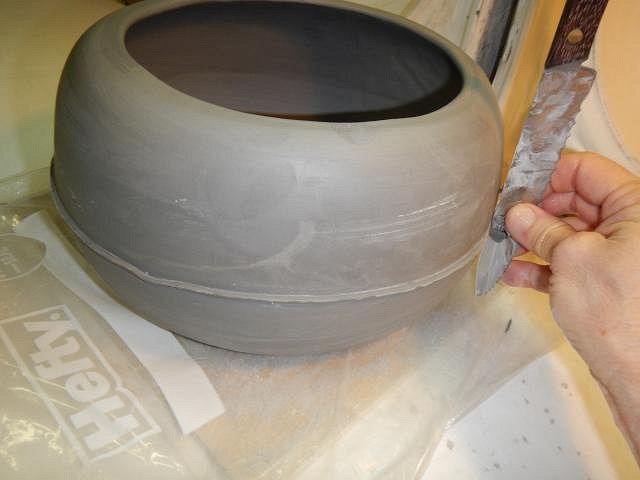
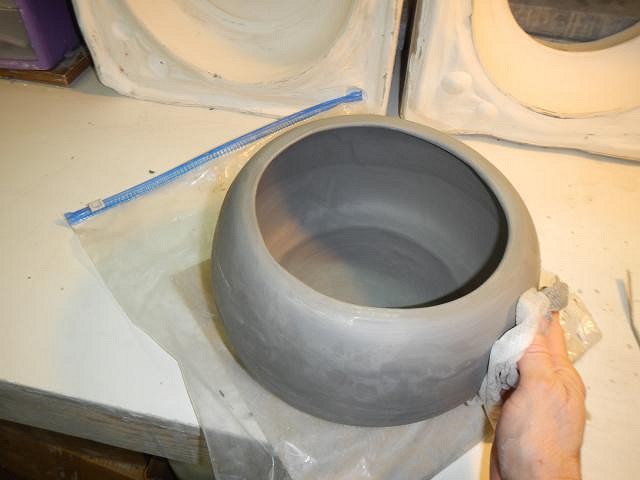
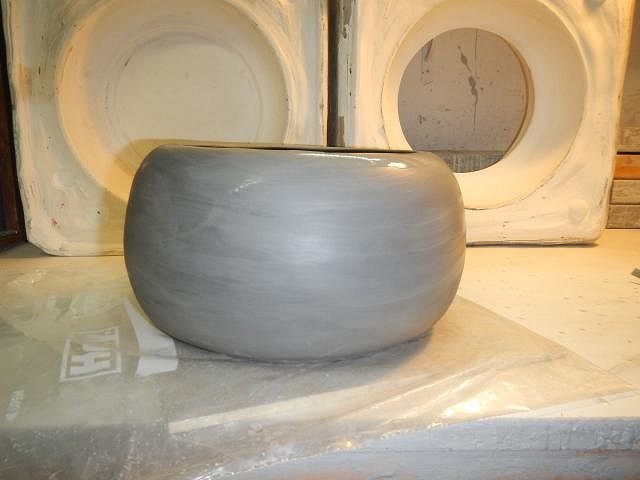
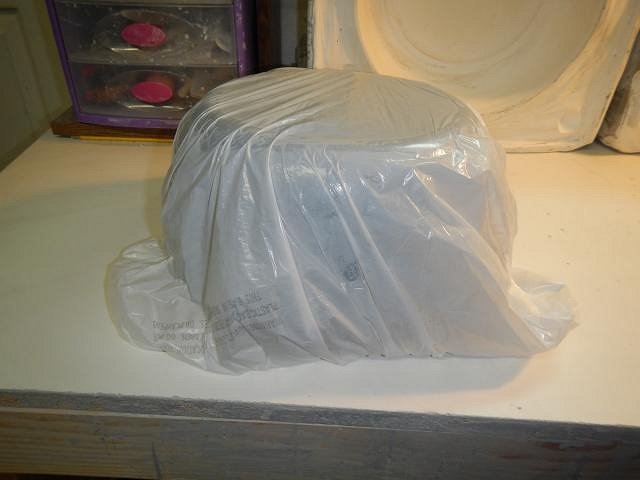
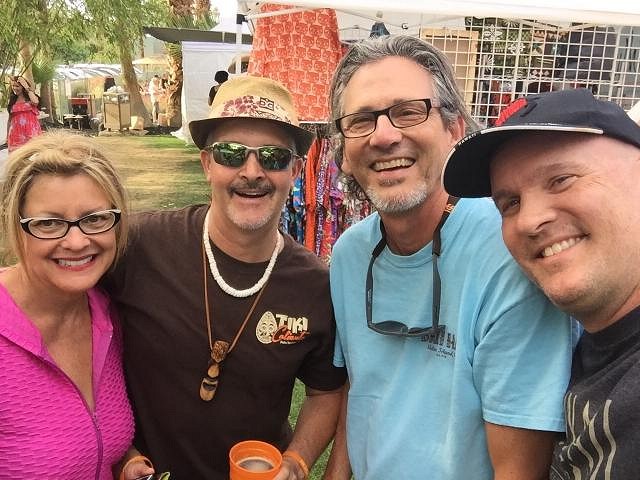
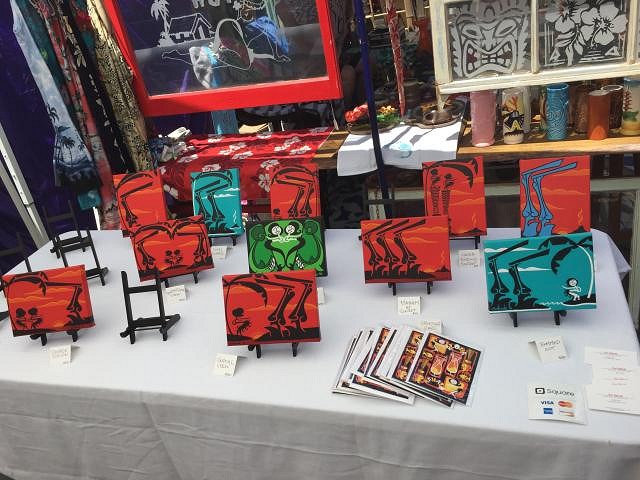
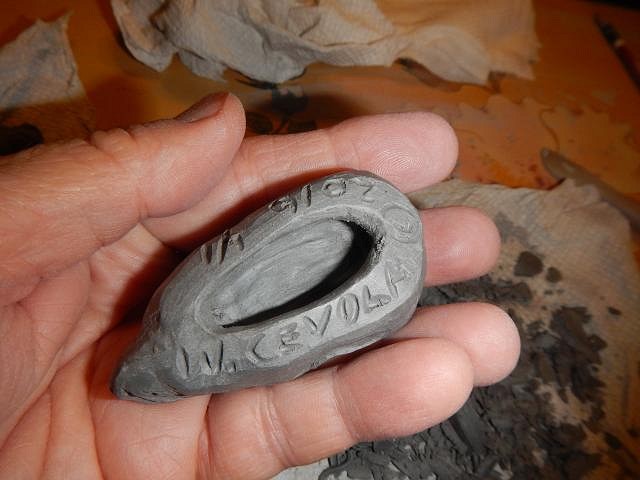
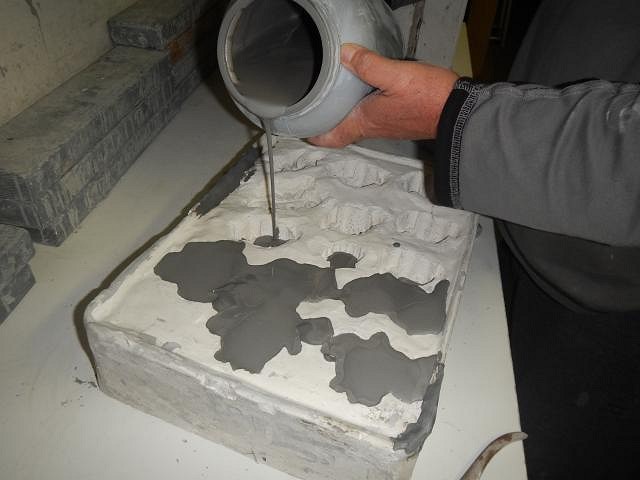
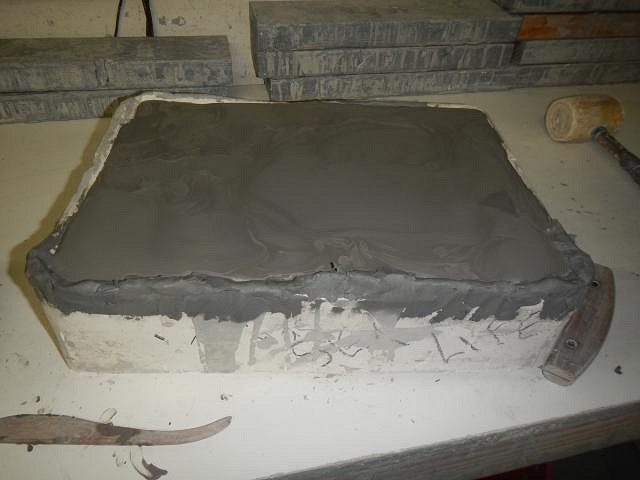
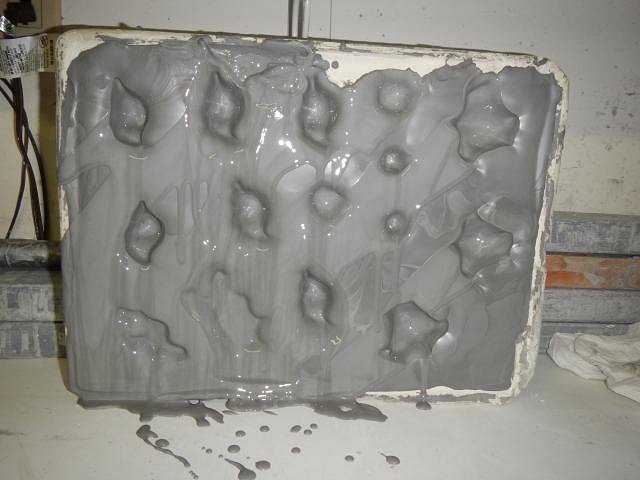
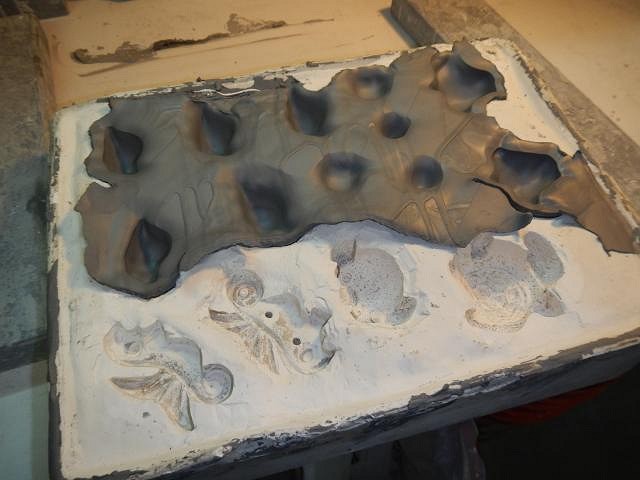
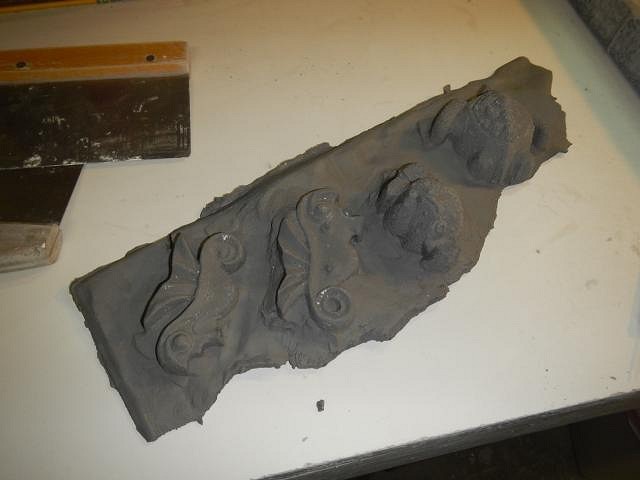
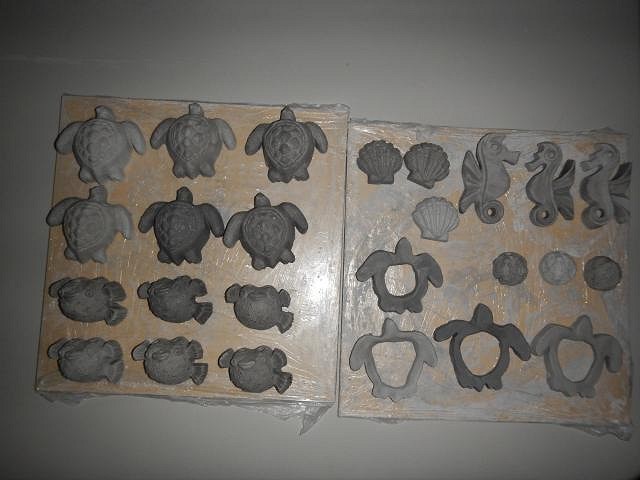
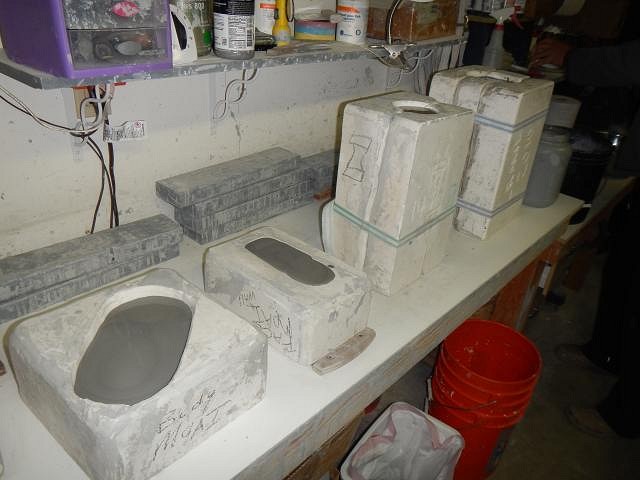
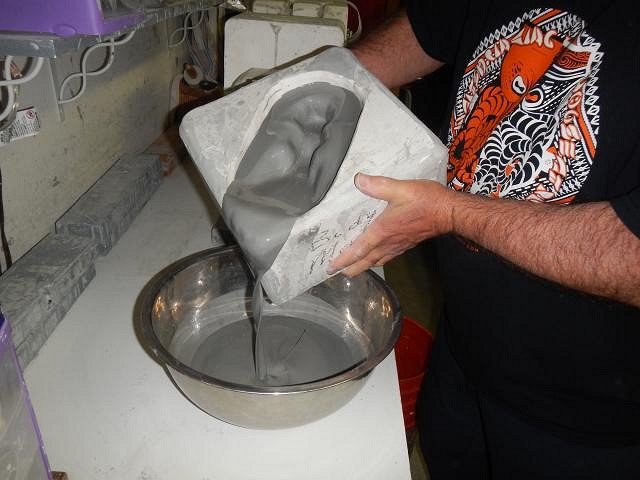
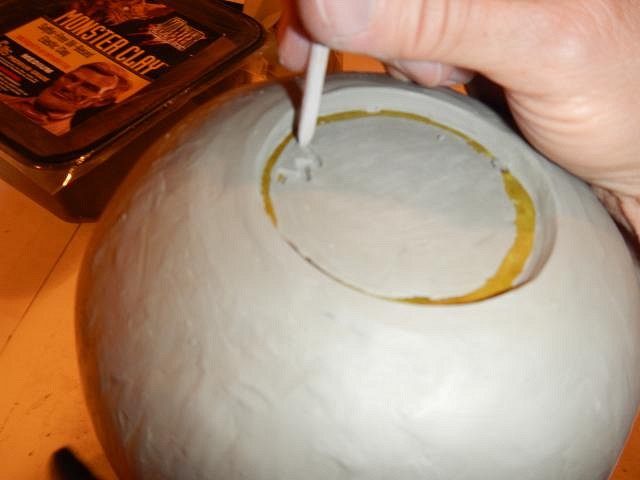
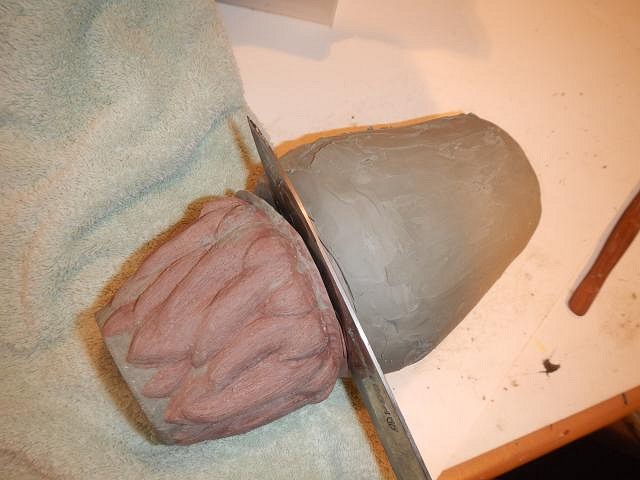
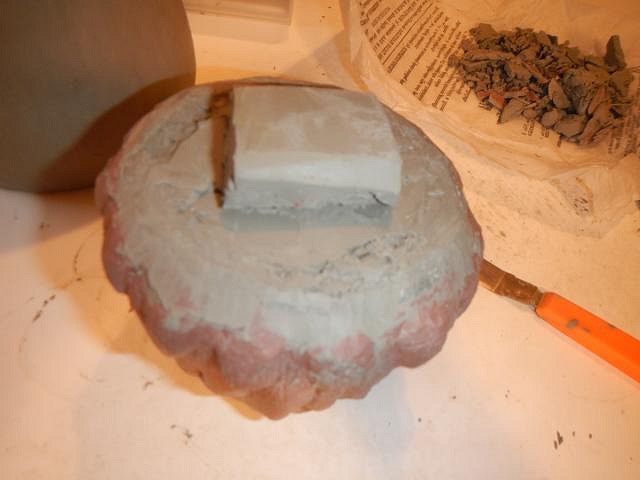
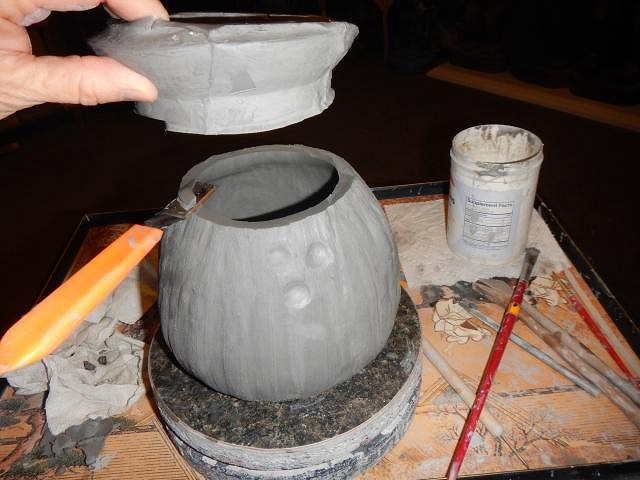
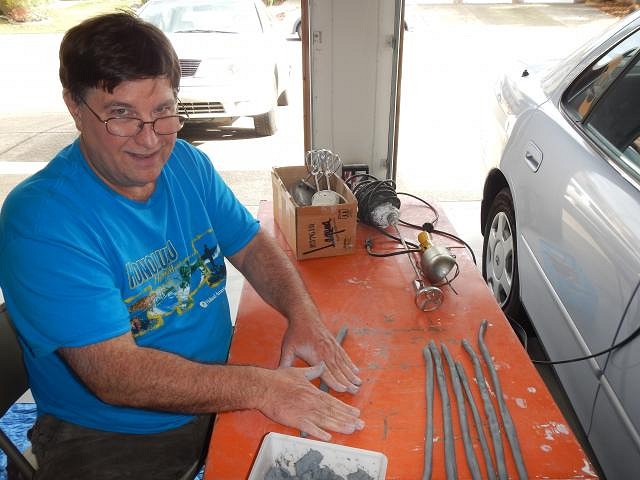
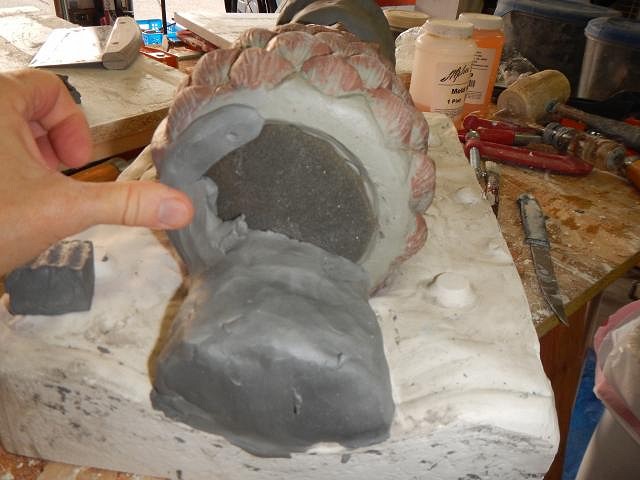
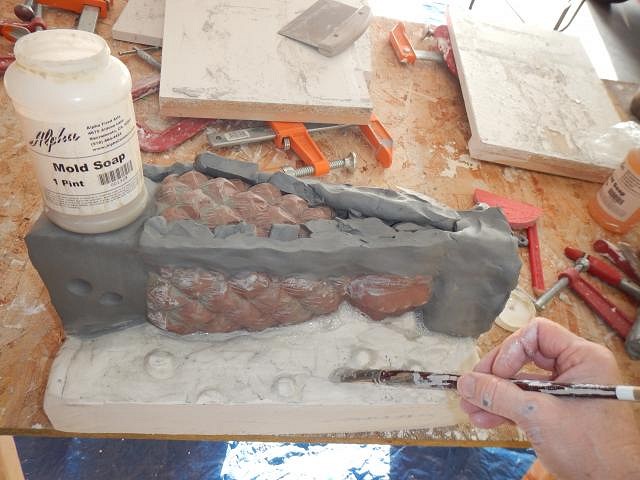
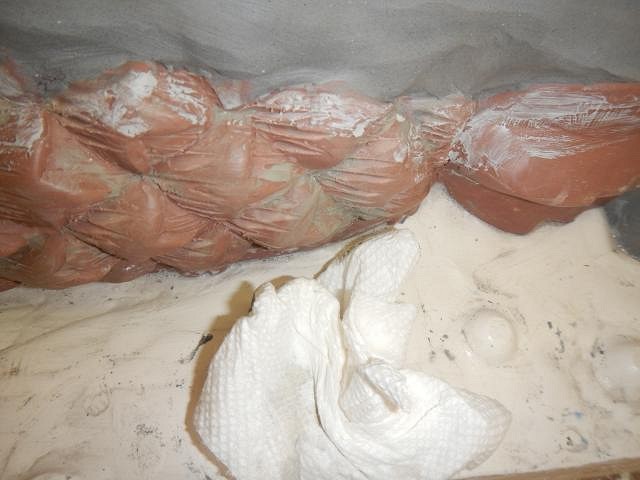
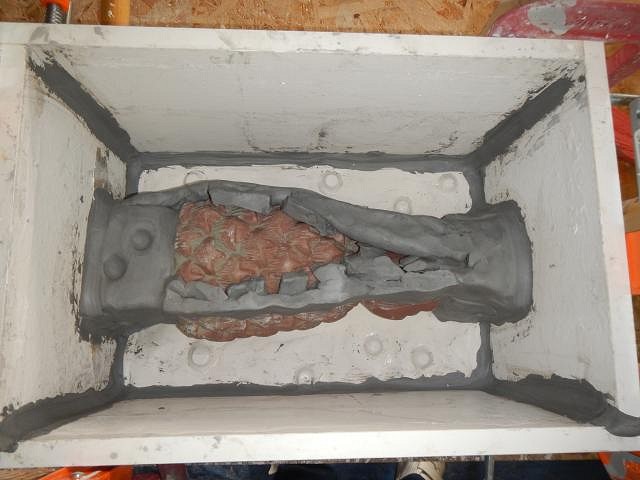
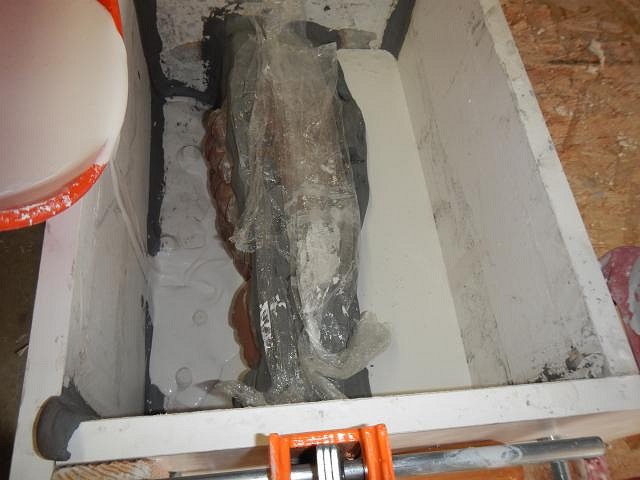
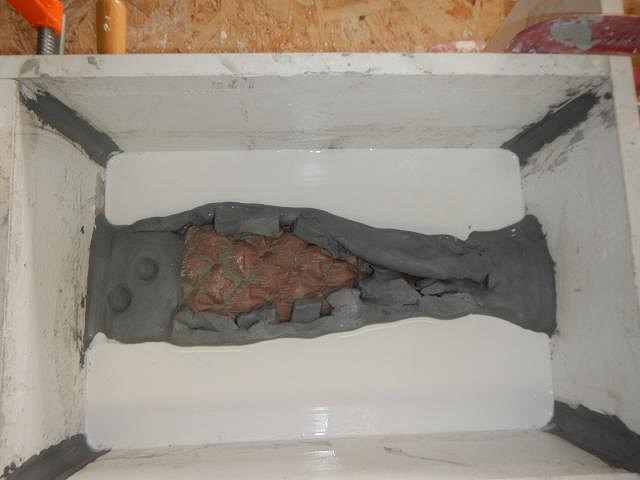
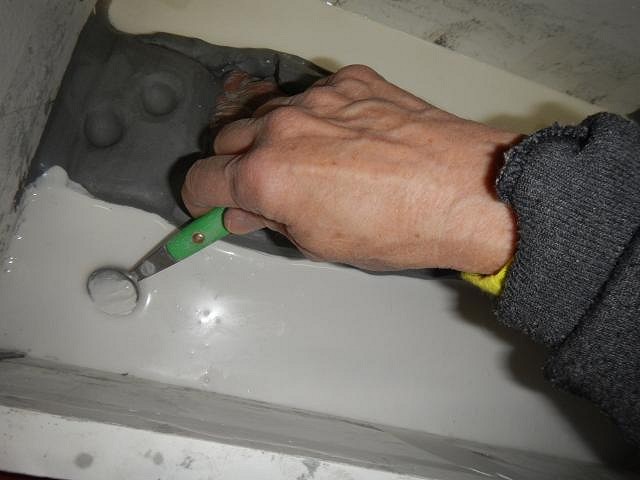
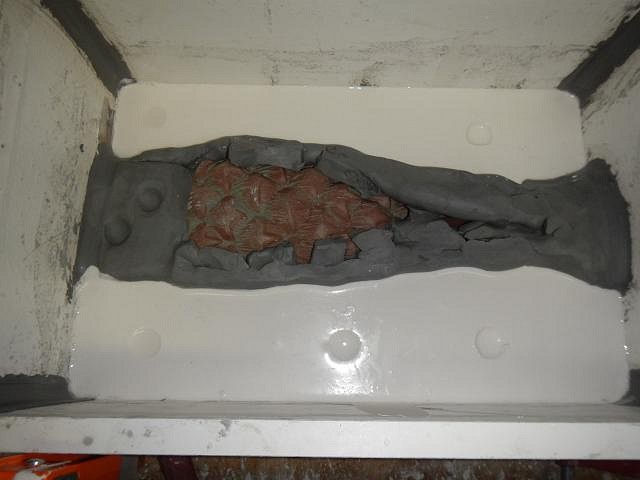
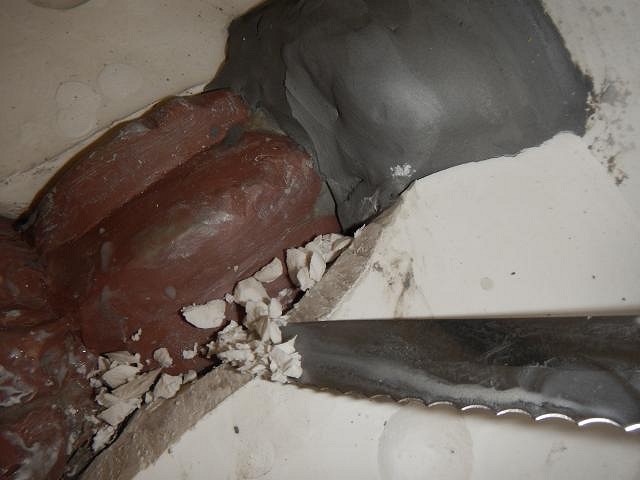
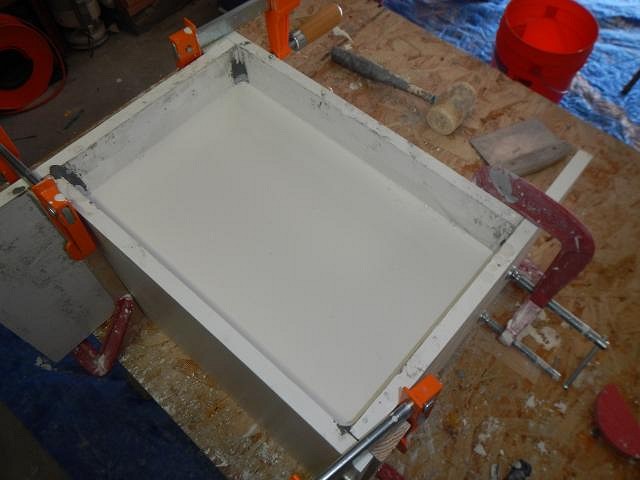
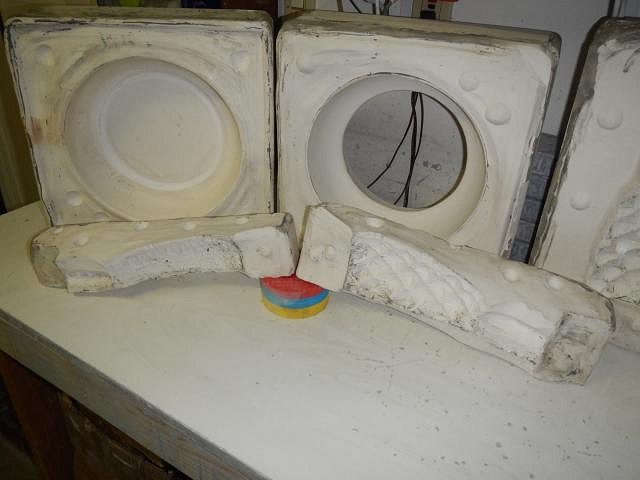
hang10tiki my heart aches to be there. Thank you for the photos and please keep them coming. I could see CY's unique tiki art. Say hi to him for us, please. ============================== It's FRIDAY THE 13TH. I think this is an extra fun day. Someday I'll make a mug for this day. I'm still sharing a few projects before I start showing the Sacramento Crawl mug. On the last Wish List I had to increase the depth of a bowl so I could make Jen Tiki' Wish come true. I took two tries before I succeeded. After a couple of weeks I got it done. Then I thought what if someone else wants a big bowl. I better get prepared. So here's what I did. I took the mold that I had made in the past and cut dips into it all the way around. These will lock in the new piece I am about to make. I had previously molded a vintage bowl I got at an antique sale. I put that bowl back in place. I didn't want any plaster to seep down the side of the bowl which would mess up the first mold piece so I put clay around the seam. Then using a wet paper towel I removed the excess. This also makes the seal better between the plaster and original bowl. Since I want to mold the entire bowl I needed a top to prevent the plaster from running over. So I added another vintage bowl to the top and ran clay around it. Then again I used a wet paper towel to remove the excess and to improve the seal. Next I did four coats of mold soap so that the two pieces wouldn't stick together. I paint it on, wait, then wipe it off. Then again, again and again. I put the box around the first mold piece. Then I sealed all of the cracks. That would be wherever any plaster could seep through. Both of us wore face masks to save our lungs. Plaster dust will turn into cement in your lungs if you don't wear a mask. Once the plaster was like buttermilk in consistency we poured it into the mold. An hour later the plaster was set up. I removed the box and rasped the edges smooth. Next I tugged on the top bowl and out it came. Plaster doesn't stick to super smooth surfaces that have been glazed. I put straps on and left the mold like this overnight. We were tired. The next day I took off the straps and used a salad chopper (one of my favorite workshop tools) to loosen the top mold piece. Oh Oh it didn't want to come apart. So I moved to the thicker corner. This time it worked. I separated the two pieces and then found that the red bowl was stuck. I got a towel and protected the bowl from my rubber mallet. Then with Dan there to catch I gave it a whack. Out it came. Now the two pieces are ready to dry for a couple of weeks with a fan blowing on them. Whenever we go into the garage we rotate the pieces. The days have passed and it is time to make a bowl. I strap the two pieces together and we filled it up. I let it sit for 2 hours. This was going to be a lot of slip to pour back out so I removed some with a soft Styrofoam cup. Dan does the heavy lifting. So he tilted it to pour out the rest. Even upside down. Then it was placed on two wood blocks and left upside down overnight. The next morning we turned it over. It was then that I realized that the clay at the top had to be removed so the mold piece could be taken off. Once that was down I took off the straps and then took off the top mold piece. I trimmed the top with a wet knife. Then I smoothed it with a wet paper towel. Next up I need to clean off this mold line. I used the back of the knife to scrap it off. Then I smoothed it with a wet paper towel. I new have a bowl that can be altered any way I want. It can be cut shorter for one Wish or left as is for another. I wrapped it in a bag until it is time to use it. It sure is nice when something works out. If only I'd had it in time for JenTiki's bowl. Cheers, Wendy |
|
H
hang10tiki
Posted
posted
on
Sat, May 14, 2016 1:58 PM
Dangggg Friday's fun
|
|
H
hang10tiki
Posted
posted
on
Sun, May 15, 2016 8:14 AM
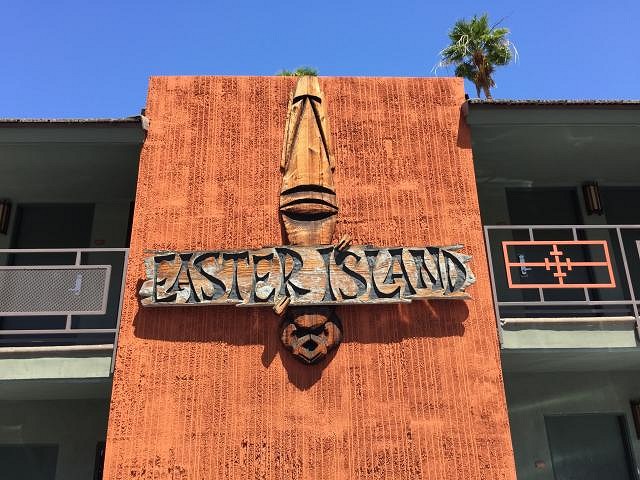
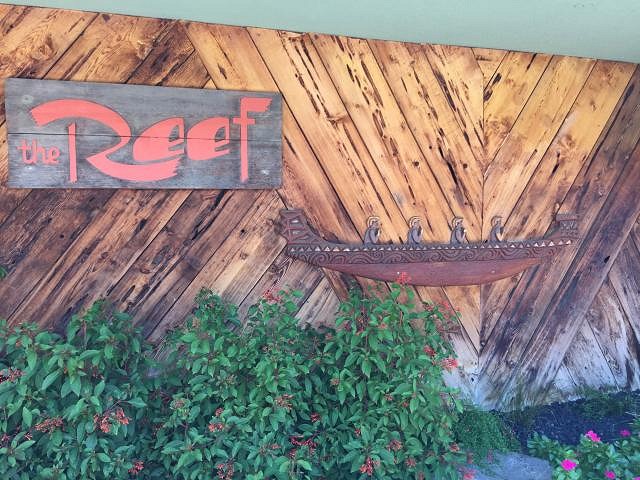
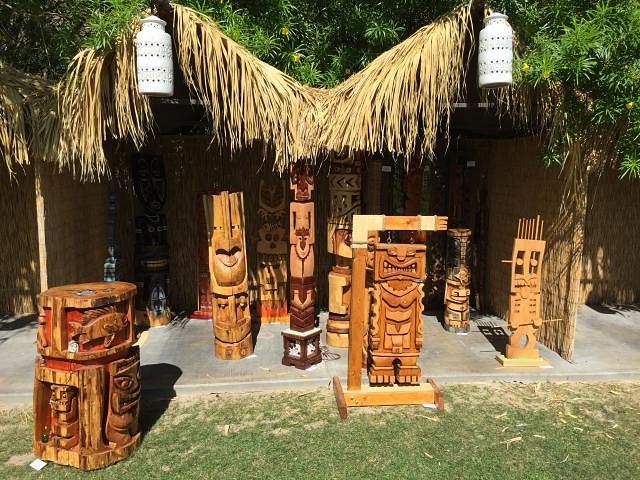
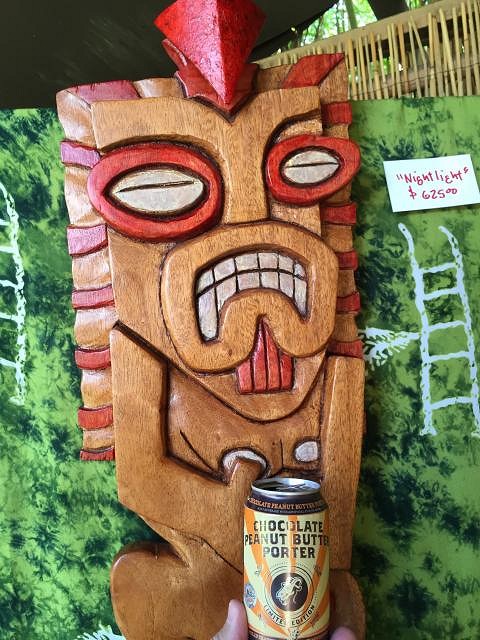
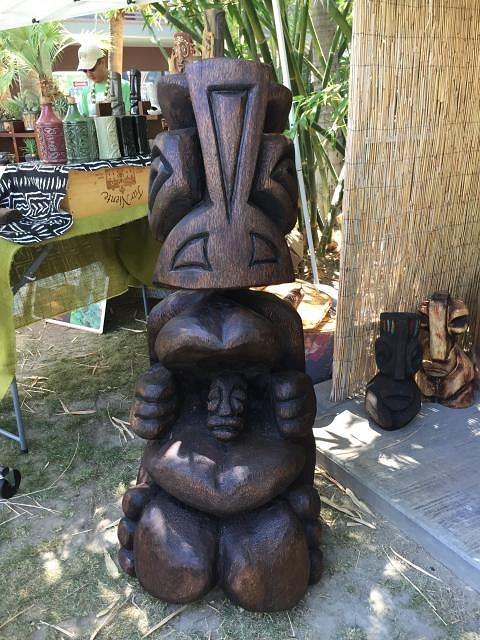
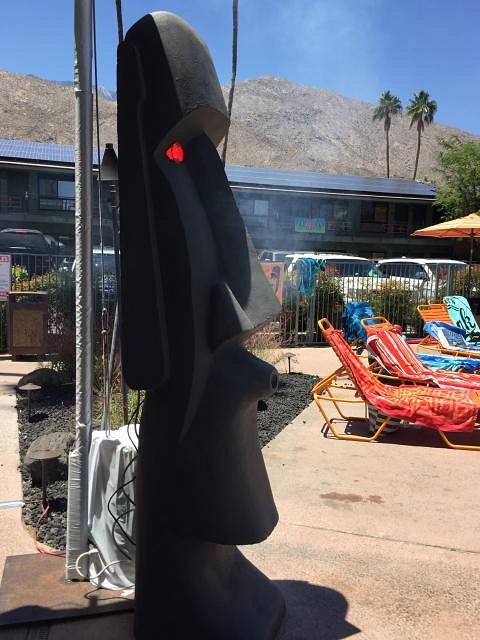
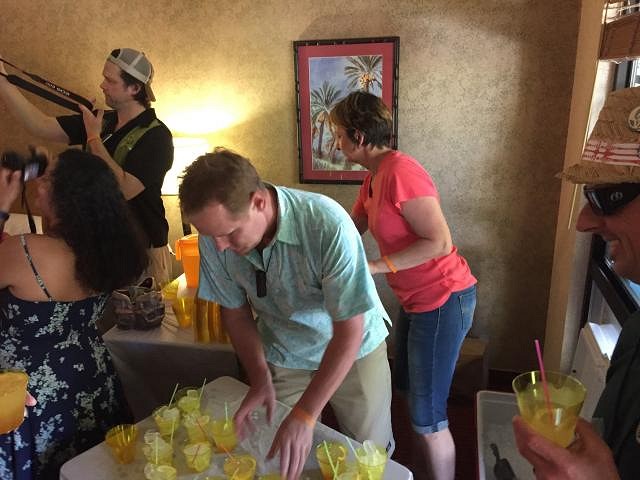
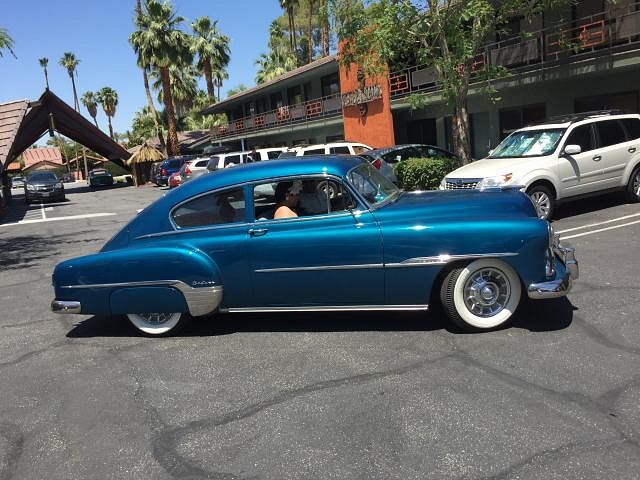
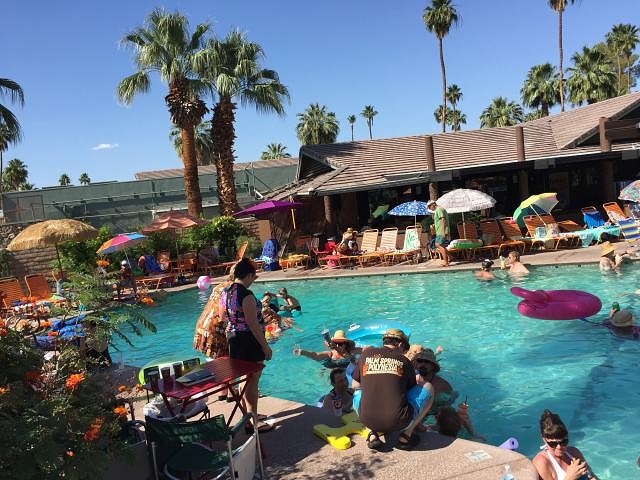
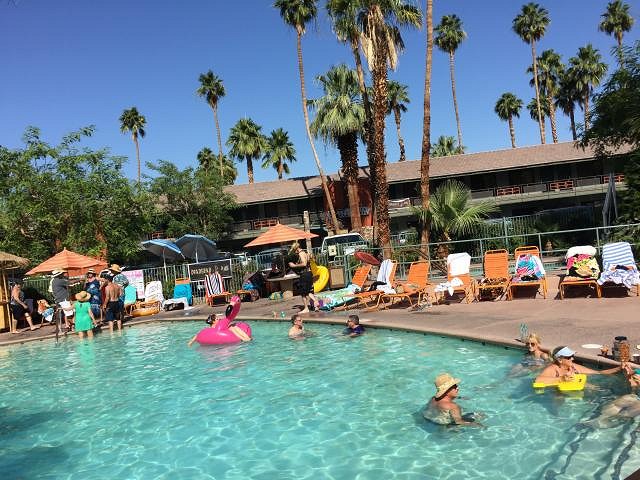
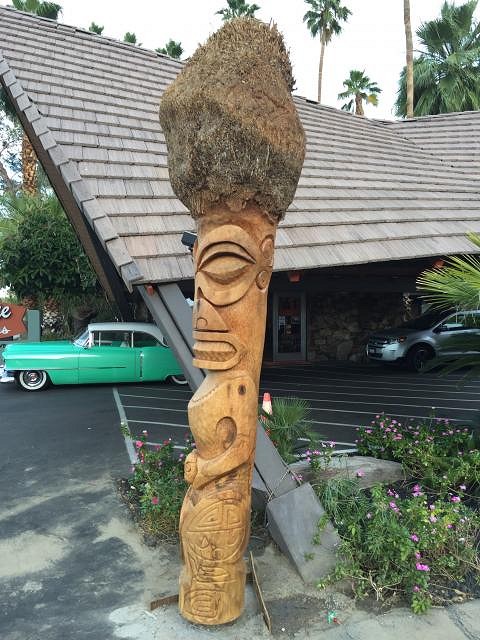
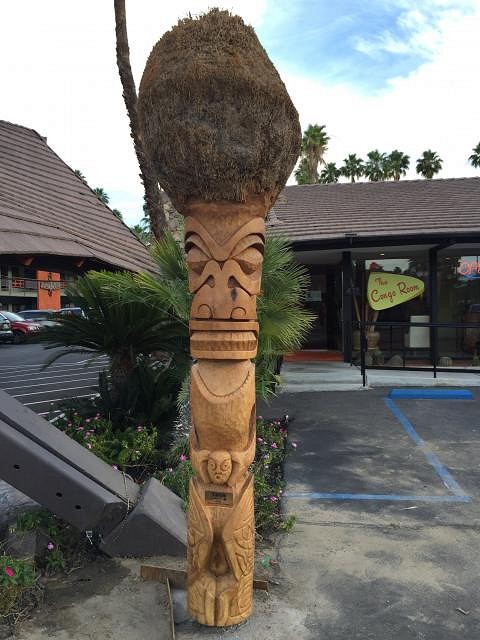
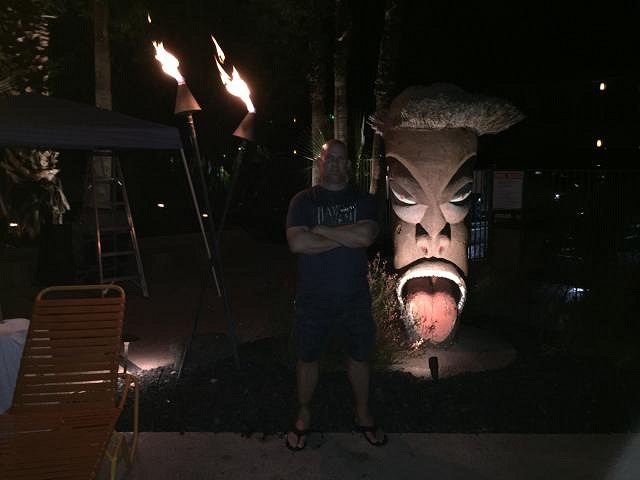
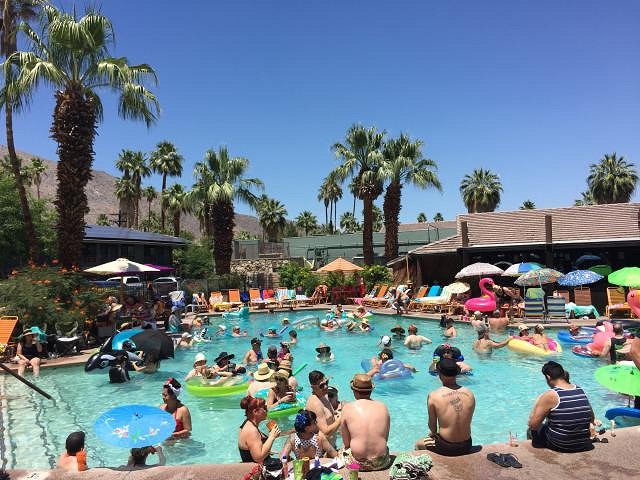
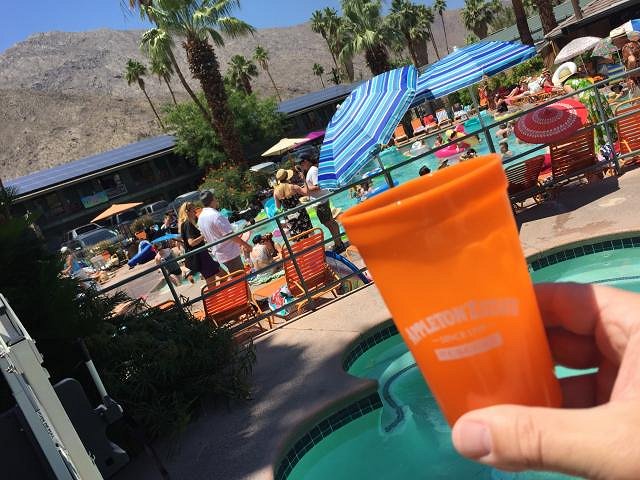
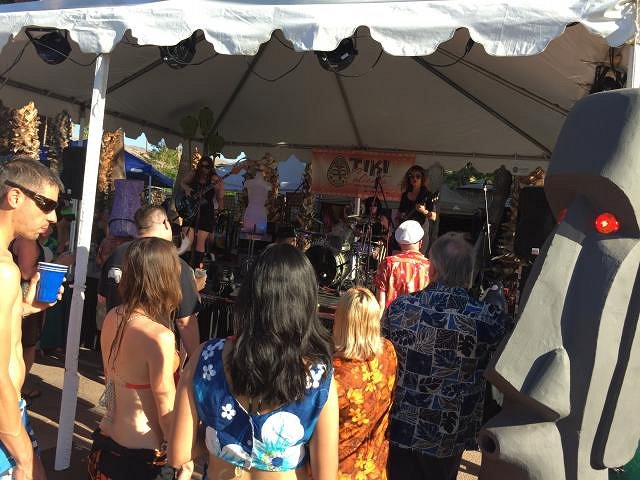
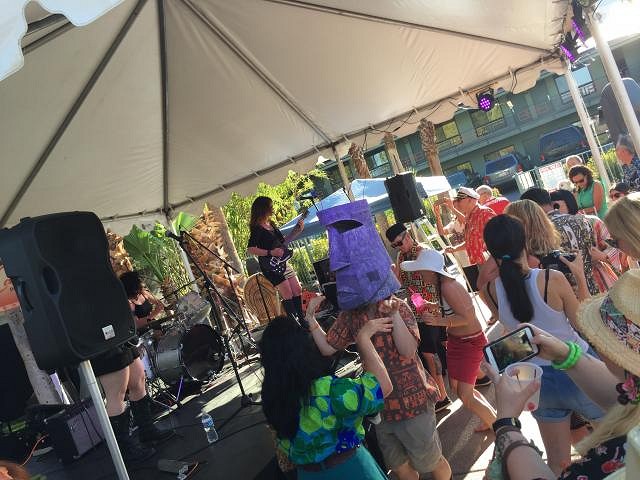
Wish you two were here Saturday pics
|
|
D
danlovestikis
Posted
posted
on
Sun, May 15, 2016 9:37 AM
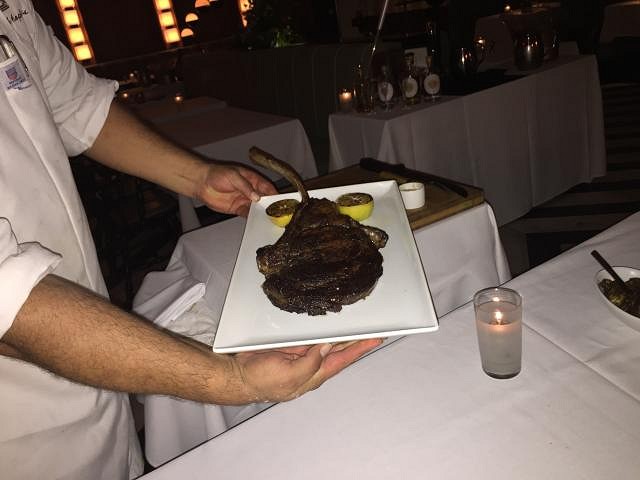
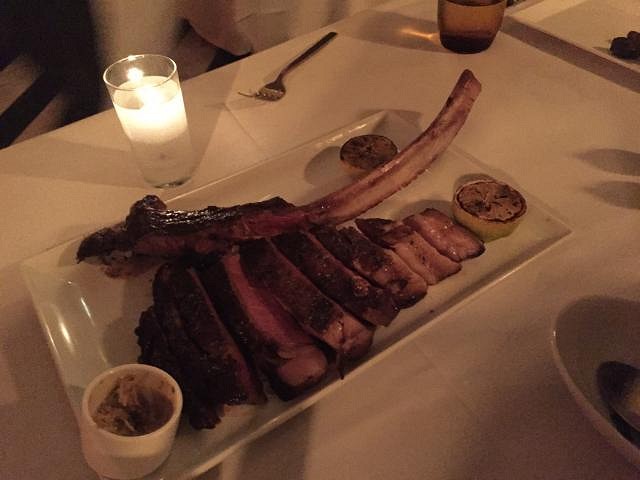
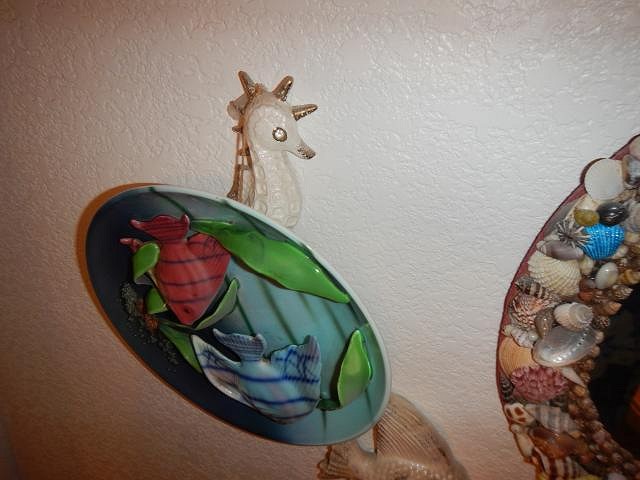
hang10tiki I do so wish we were there. Those a wonderful photos. Did you survive that meal? How is the temperature each day? Say hi to Tavarua Tiki aka Chris for me. ================================ I decided to wait to post about the Sacramento Crawl mug until Tiki Caliente is over and all my friends have come home. So here are catch up photos. My lucky day. A plate of fish fell off the wall but was saved when it hooked on a seahorse! I would have been so sad if that had taken them both down.
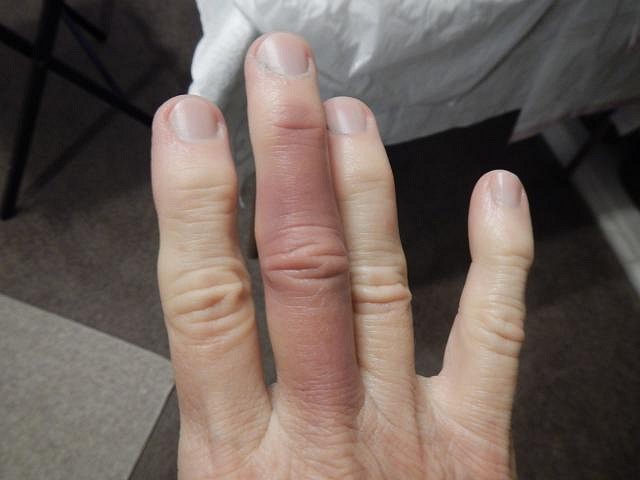
================================= First I slammed my finger in a closet door. Not too bad. Then I forgot and knocked on my neighbors door. That did it in. Ice took away the swelling and I was still able to work clay. ================================= My hero. He does the home care so I can work the clay.
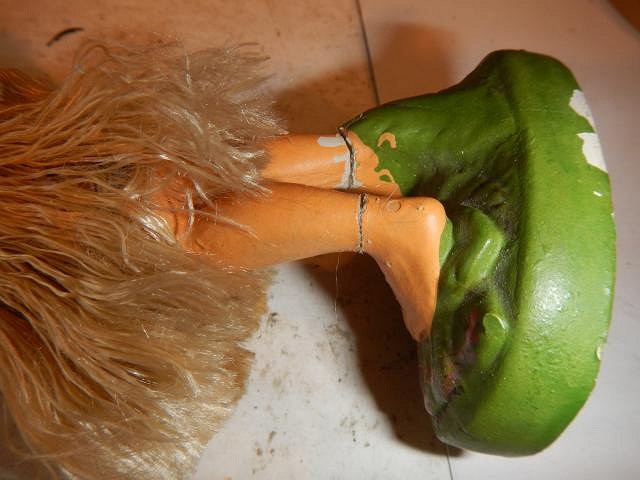
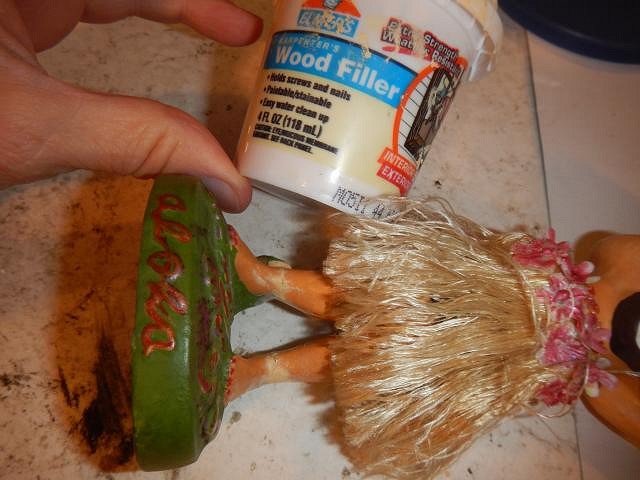
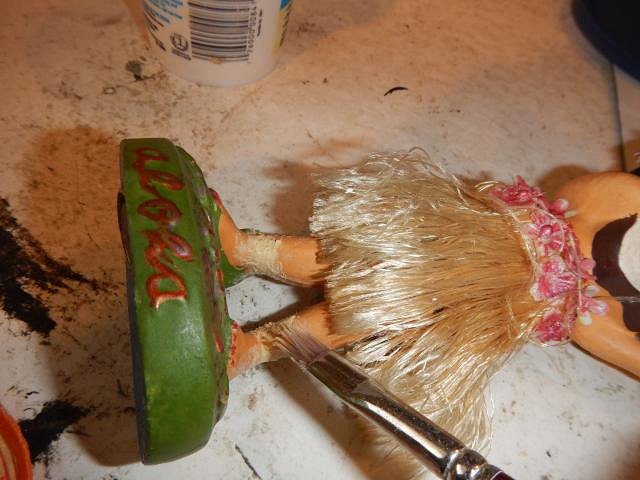
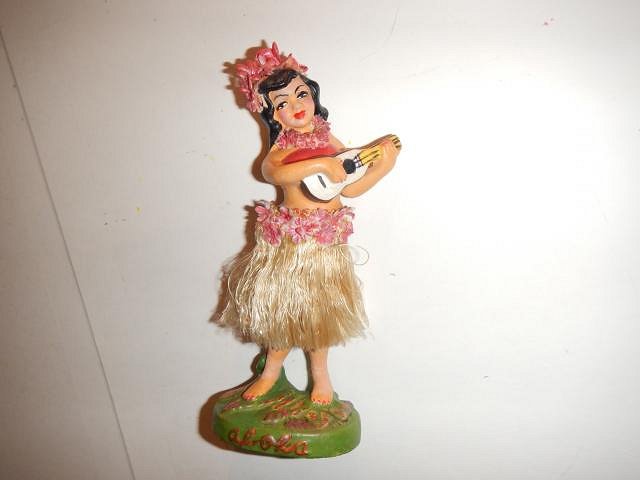
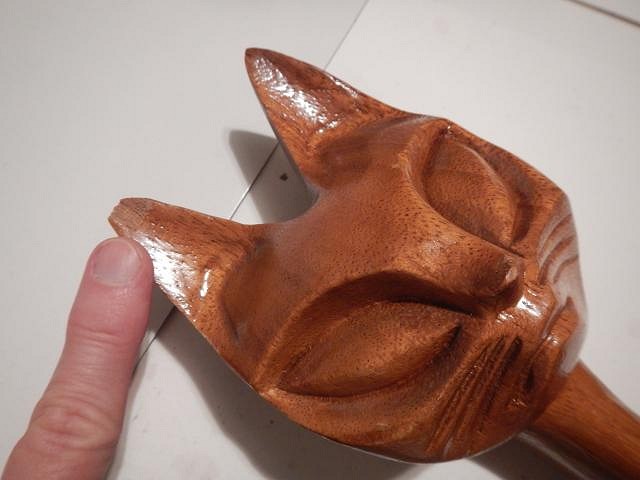
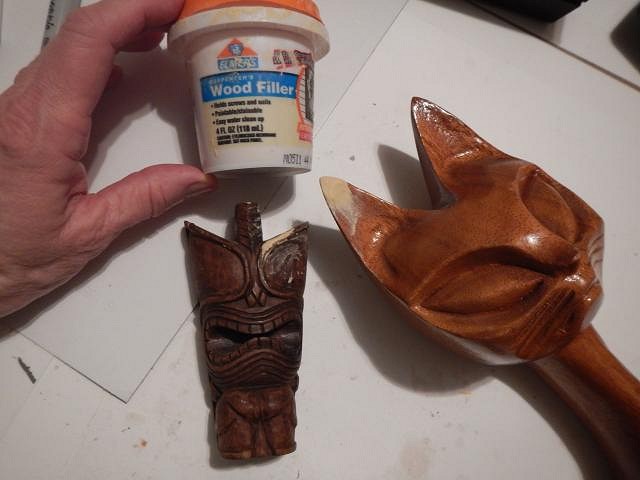
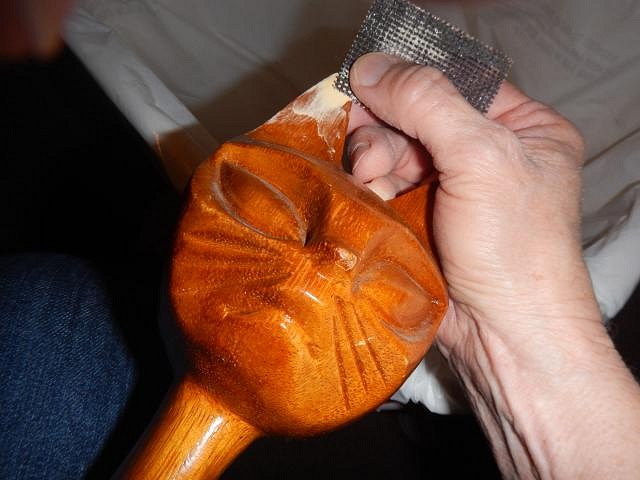
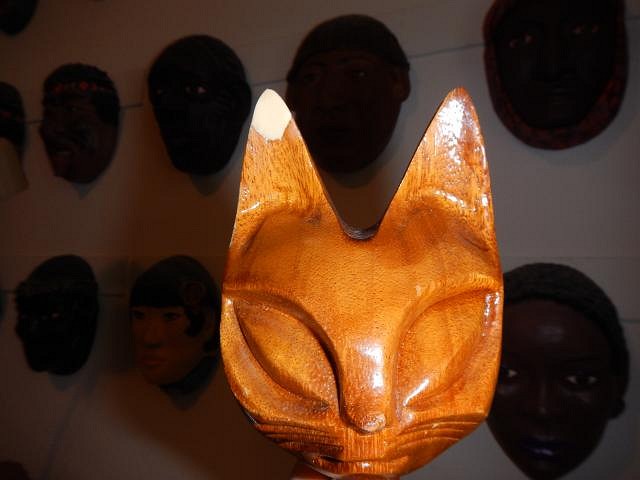
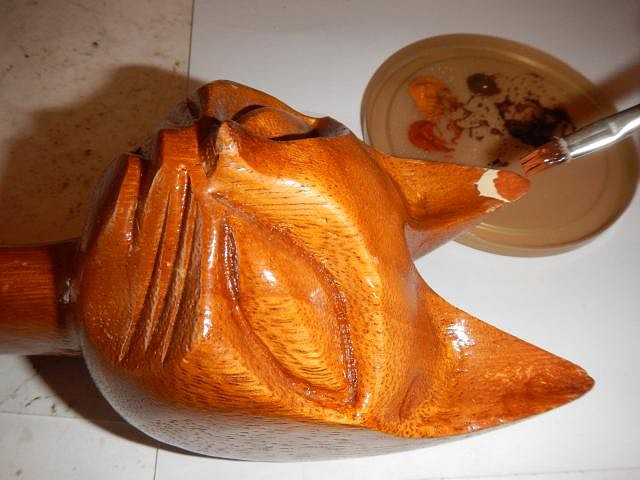
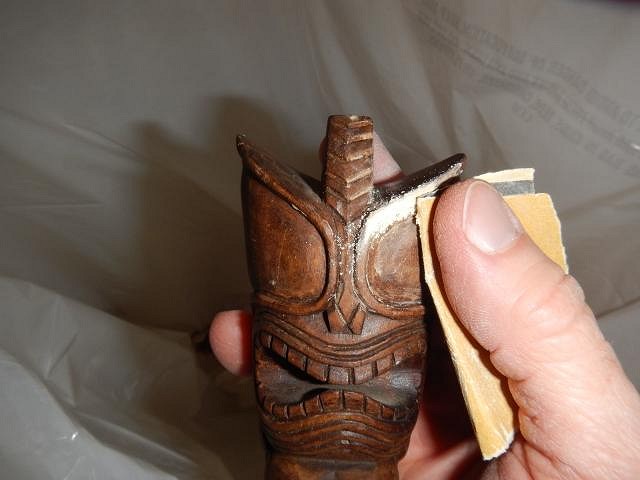
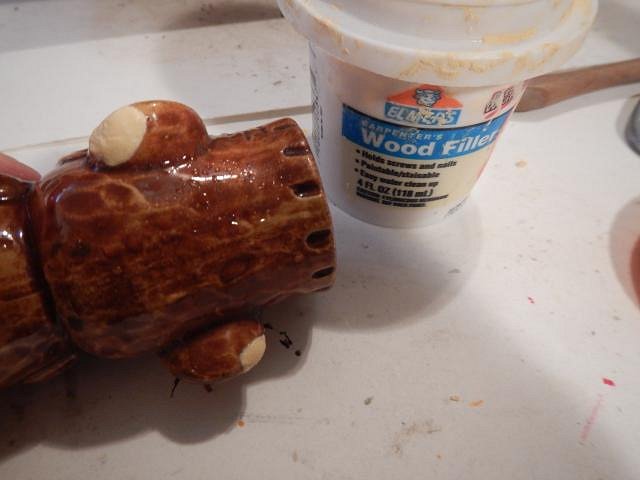
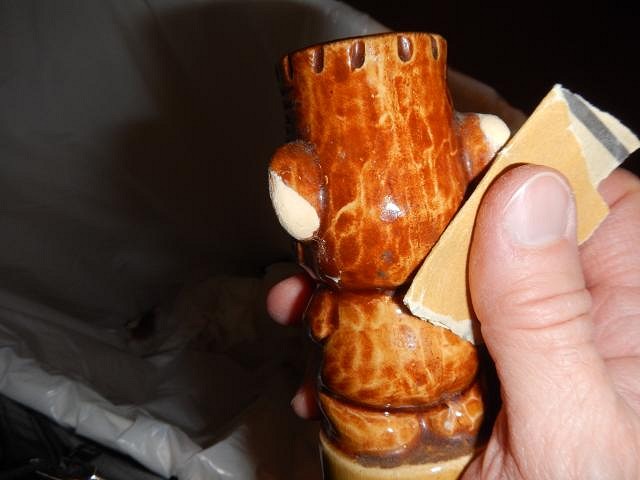
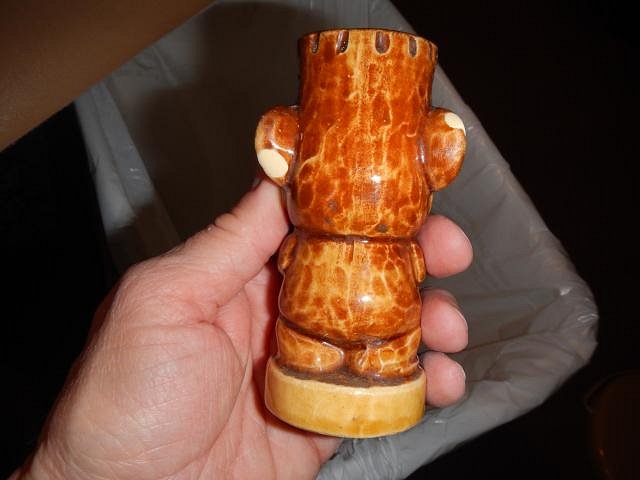
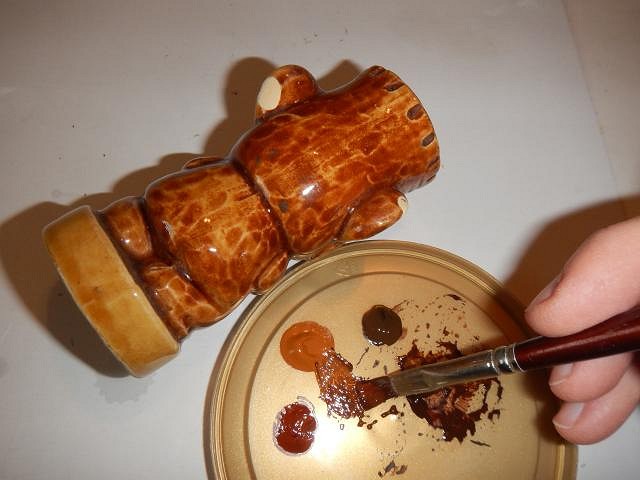
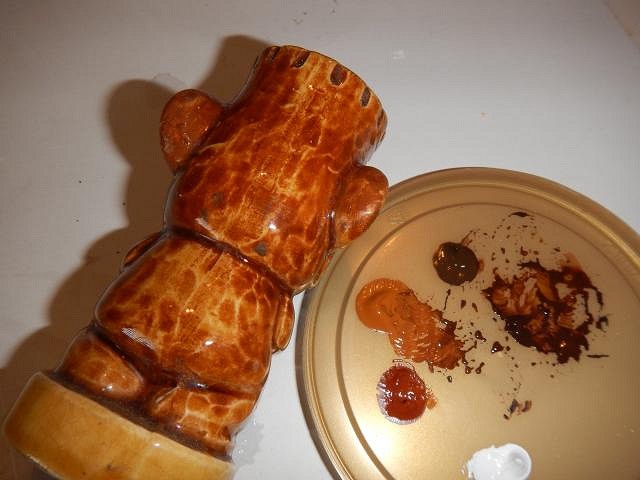
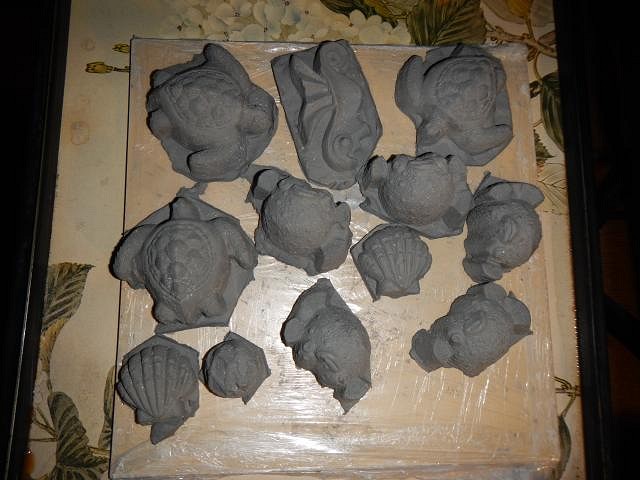
================================= Dan continues to be a bull in a china shop. Repairing things he's broken or mending things he bought that had chips is how this art career started. He asked me to fix this batch and then after I started working... he came back with more!
Elmer's shrinks a bit so a second coat is added then sanded when dry and then painted.
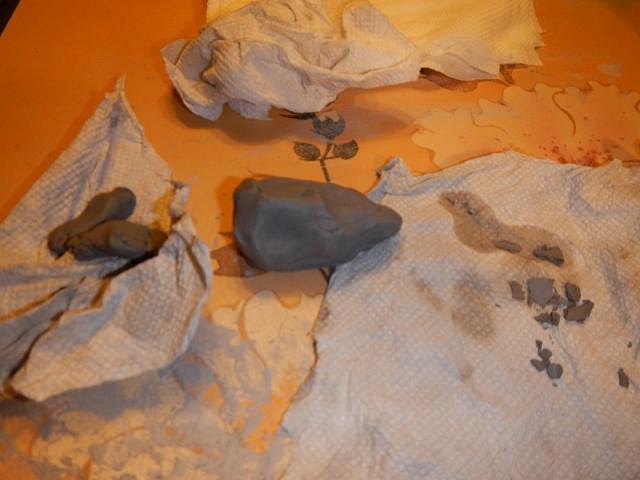
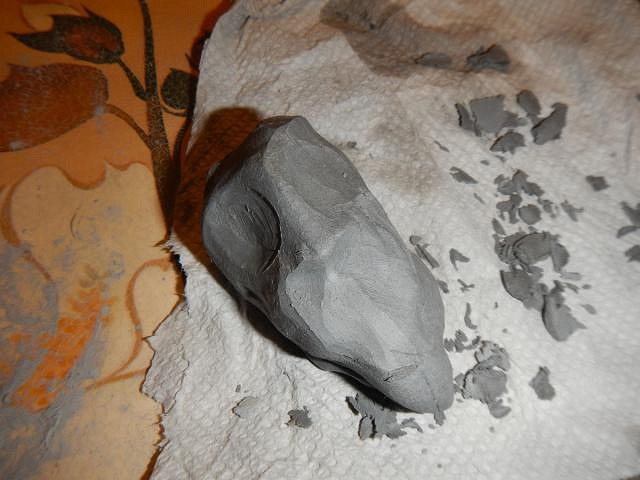
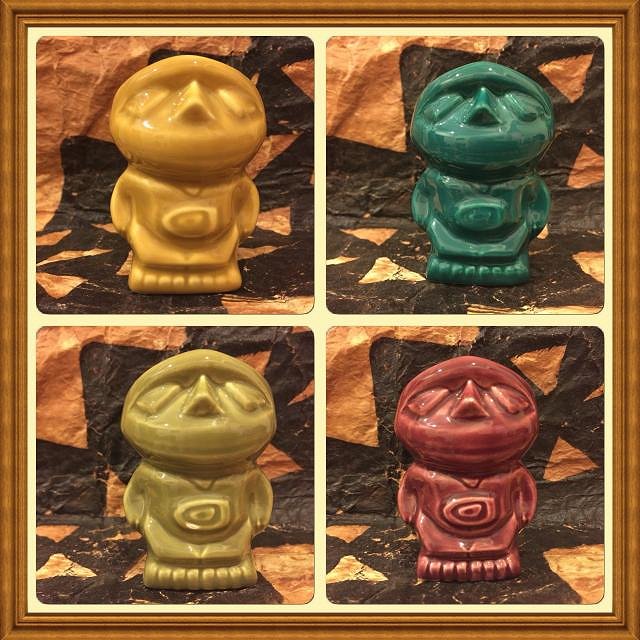
There are two more repairs that were just placed on my table. They will have to wait. ========================================== I've heard artists say that the clay spoke to them. Well it finally happened. I looked over at this lump of drying discarded clay and it asked me to save it. I started to carve. I hollowed out the back to prevent cracking. Here is my little tiki spirit. ================================ I've run out of necklaces so I decided to make some more.
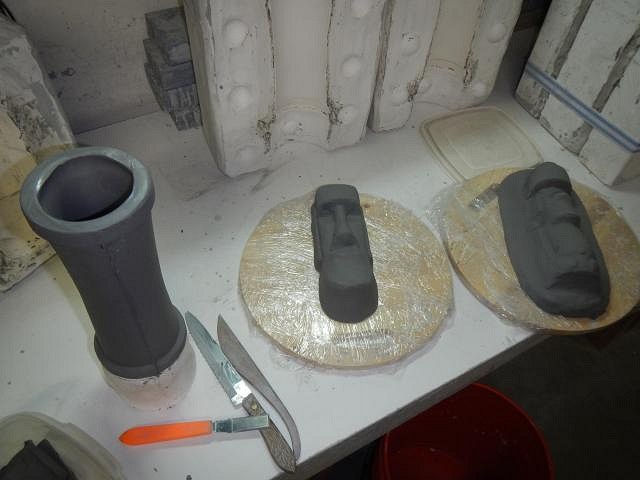
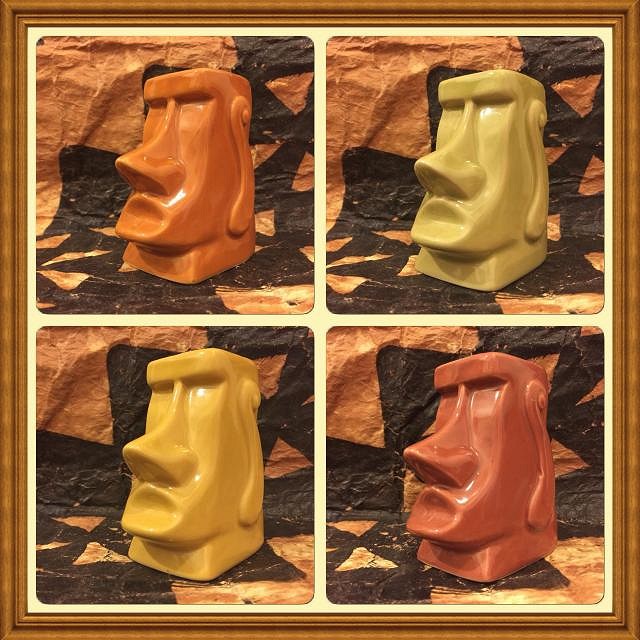
============================== Next I needed a few Moai wall hangings for our family room so we did those too.
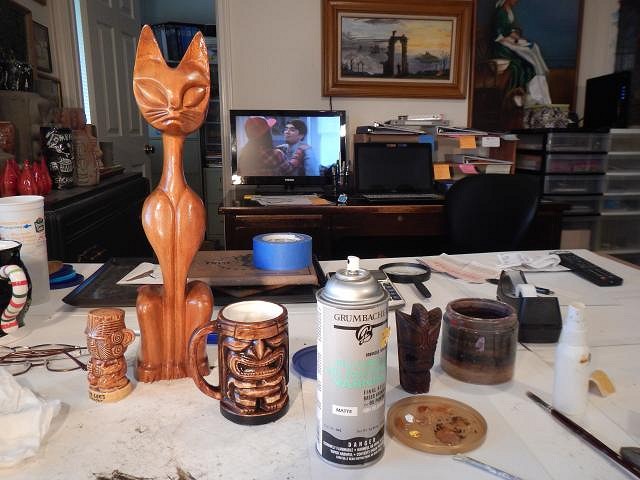
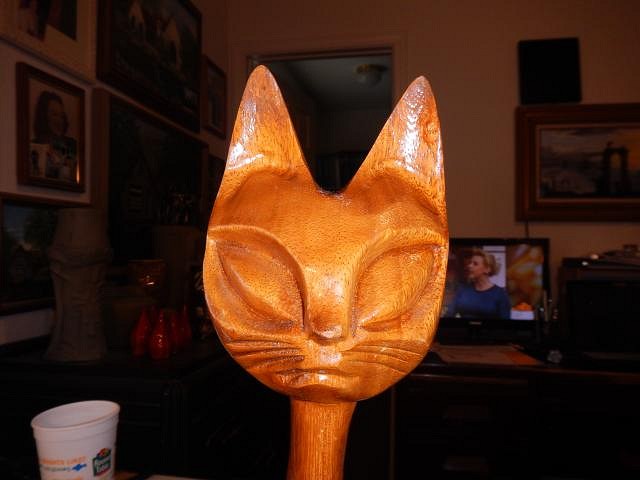
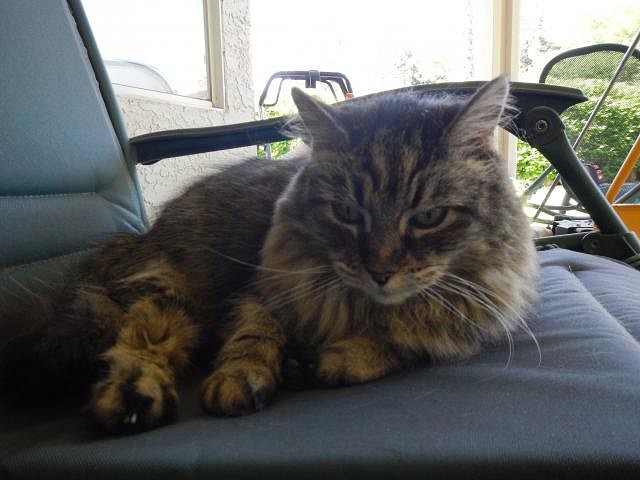
======================================== Now I'm all caught up posting misc. projects. I might as well show our rescue cat. We have had here since 1999. She was Fluffy and we named her Sherry but she responds to kitty kitty kitty.
That's all for now. I'm hoping hang10tiki will keep us up to date until he leave Tiki Caliente. Thank you hang10tiki. Cheers, Wendy |
|
H
hang10tiki
Posted
posted
on
Mon, May 16, 2016 9:16 AM
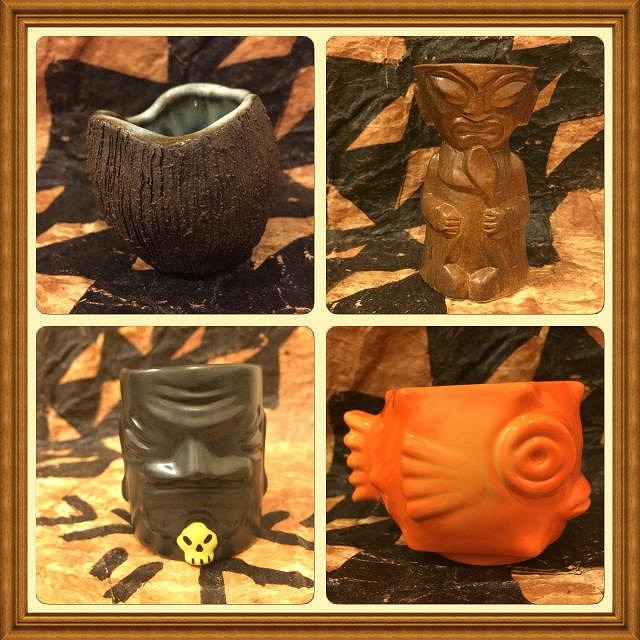
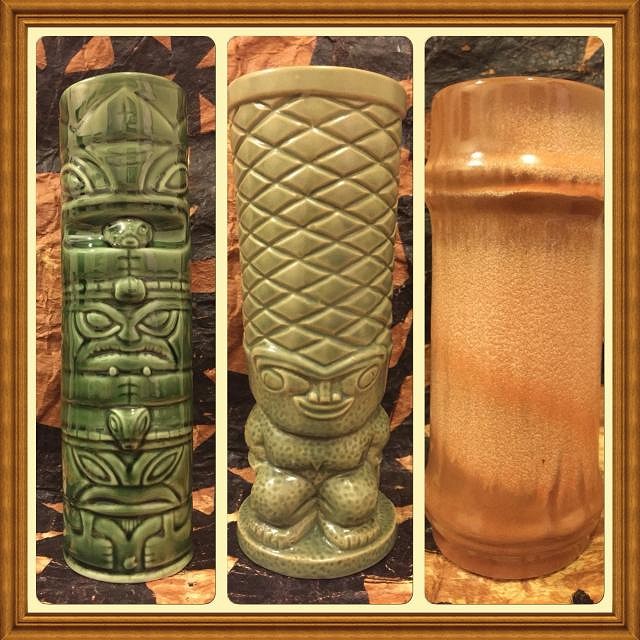
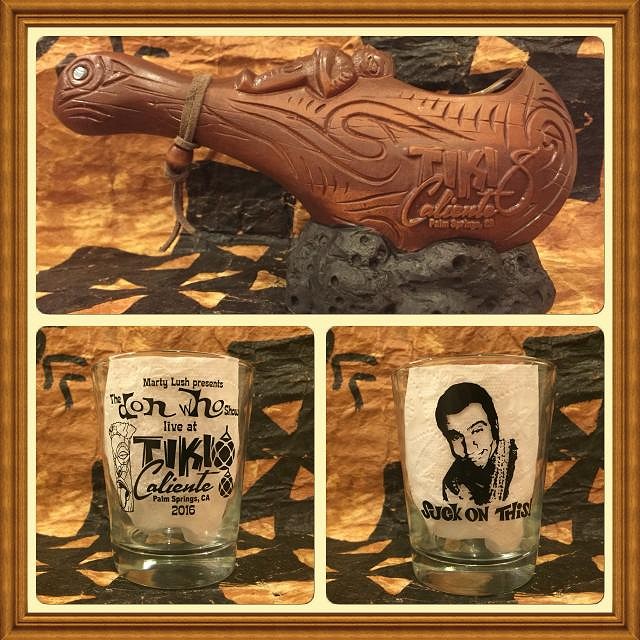
Wow Hope your finger is better Caliente was HOT 3 people split that huge meal, and took some home Looking forward to your updates and fun posts Brought back to much stuff from Caliente |
|
T

TikiAno
Posted
posted
on
Mon, May 16, 2016 9:35 AM
Wendy, you HAVE been busy! I think "repair shop" needs to be added to your list of other positions/ skills: Ceramic Artist, Mold Master, Watcher-of-the-Dan, and more. Love the big bowl, thanks for posting the step by steps. So you don't use any release/ soap on top of the high gloss glazed pieces when molding them? Huh. (I still have yet to take a go and mold making after that last disaster, ha!) Jon, thanks for posting pics from TC. I'm going to make it next year- too much work, and a son that has decided to go on strike from sleeping made it impossible to escape this weekend.... Love cy's work, as always, look forward to seeing more of it in person in August. |
|
D
danlovestikis
Posted
posted
on
Mon, May 16, 2016 4:23 PM
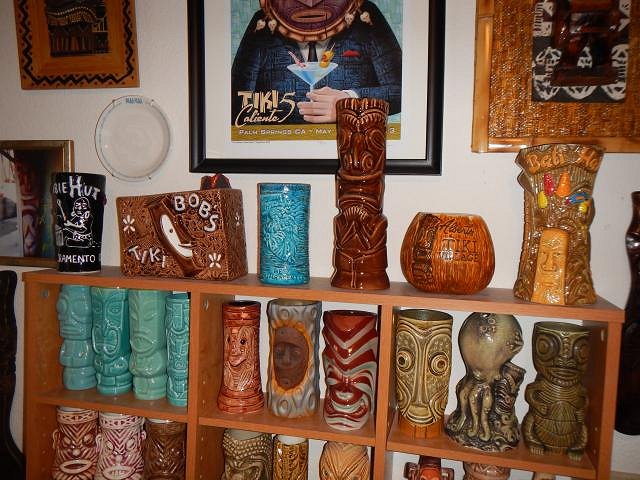
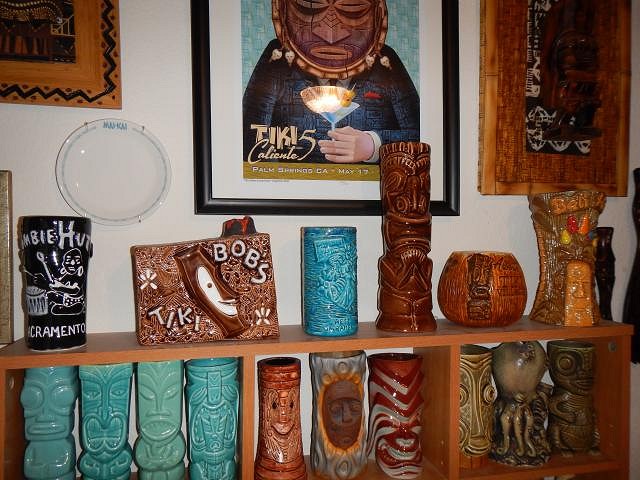
Tonight at 7PM I'll be trying to book at room for Tiki Oasis. I wish any of you who are doing the same good luck and best wishes. ======================== hang10tiki how about a photo of all your tiki treasure and some more event photos when you are rested up. Those you've posted were wonderful. TikiAno the more I do it the easier the molding gets. It is fun to have learned to do so many things. I don't know anything about raising babies so there you go. ======================== SACRAMENTO CRAWL MUG sign ups are open, just let me know if you want one and I'll put you on the list. The list will be on Page One of this thread. Here are the previous mugs 2010 -2015. Zombie Hut, Tiki Bob's, Hawaiian Hut, Coral Reef, Albert's Tiki Villiage and the Bali Hai.
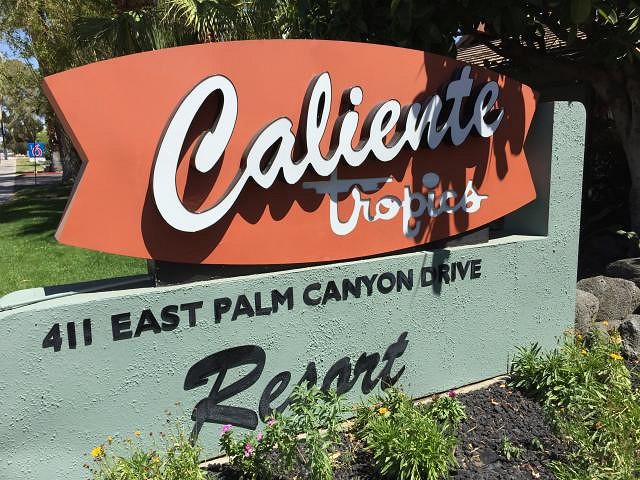
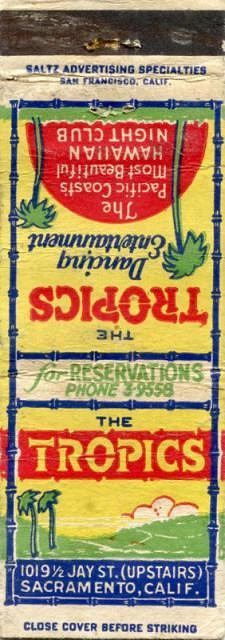
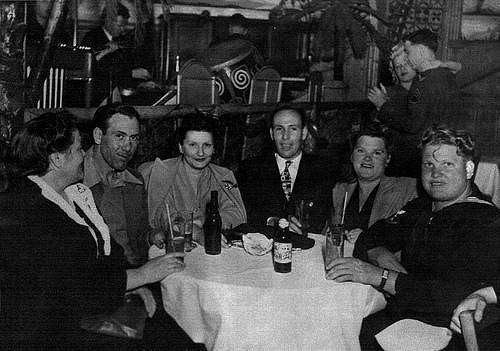
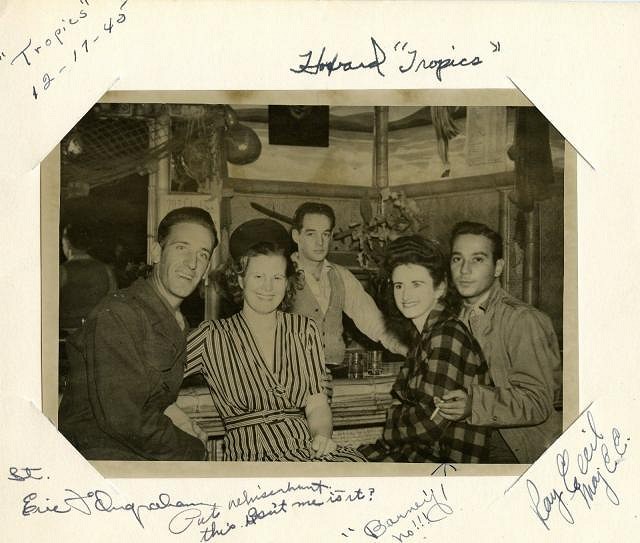
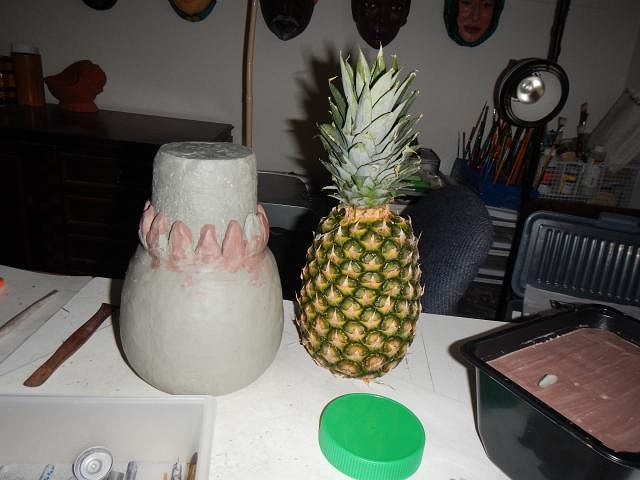
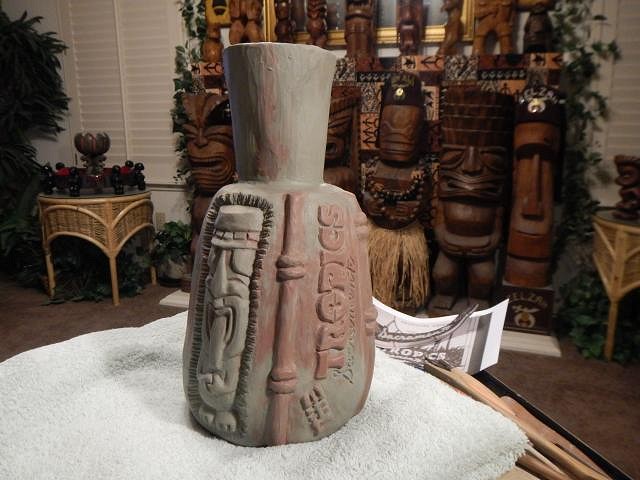
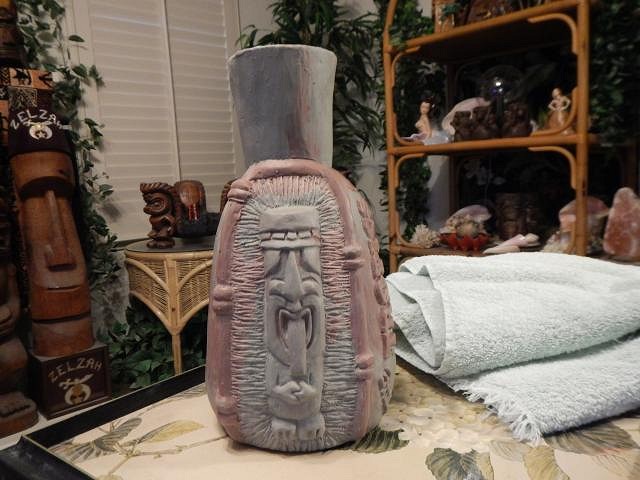
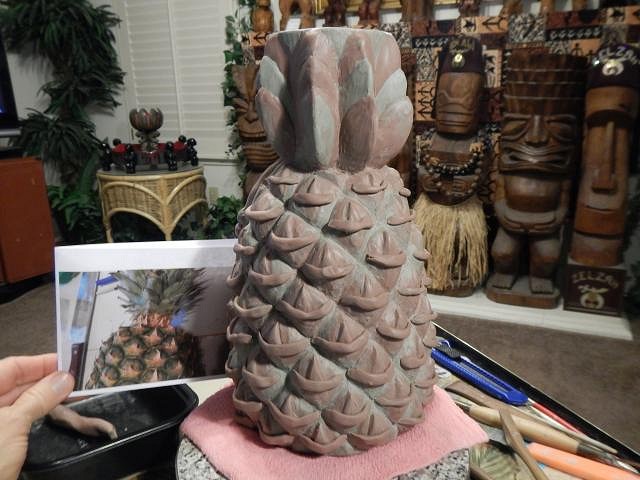
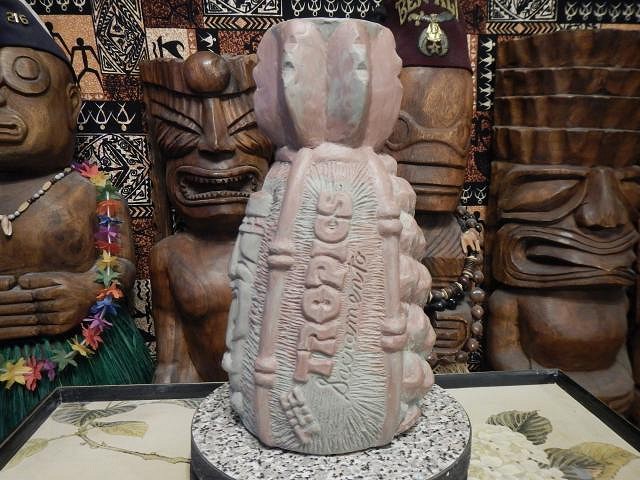
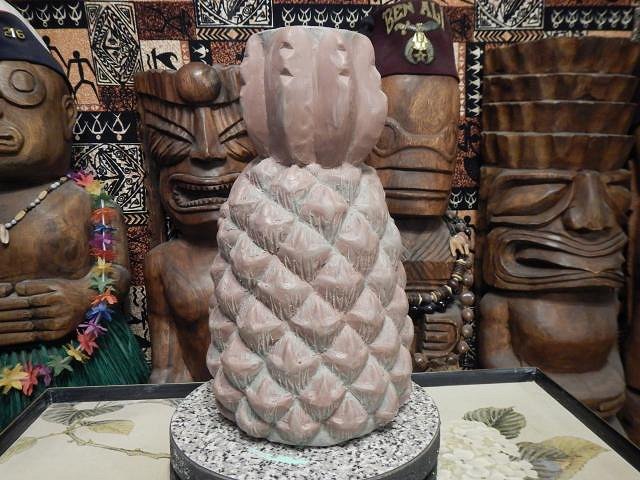
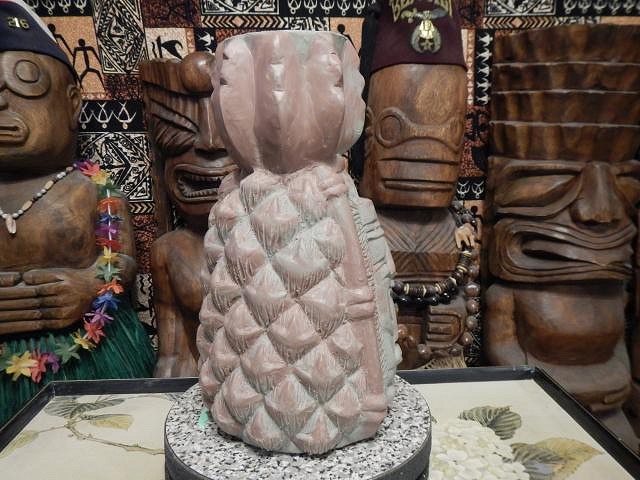
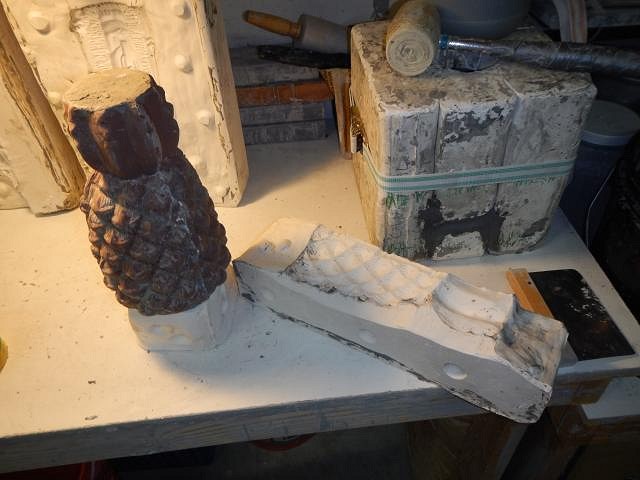
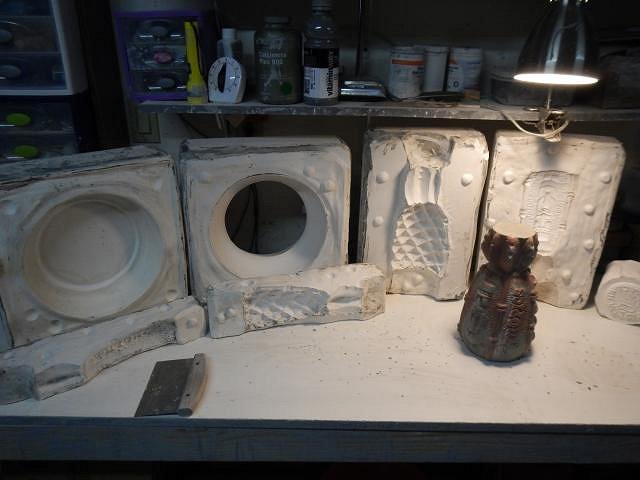
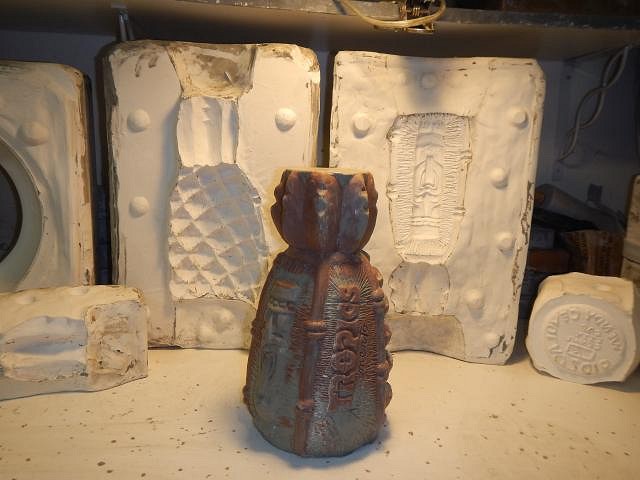
Each year I do a mug that is from a place that existed in the Sacramento, California area. I try to figure out a style that will work for each place. This year I will do a life size pineapple. This real one is my guide but of course I also use artistic license. The place I have chosen to represent this year is The Tropics. I have borrowed all these photos from the posts by atomicpear on Tiki Central. He made this mug possible. The photo souvenir says 1945 when I did research using the Sacramento Library there never was a placement of the phone number nor an add in the phone book. I think this place was short lived.
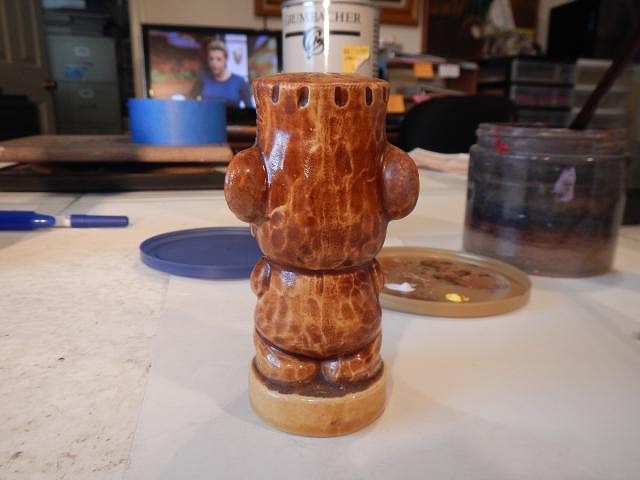
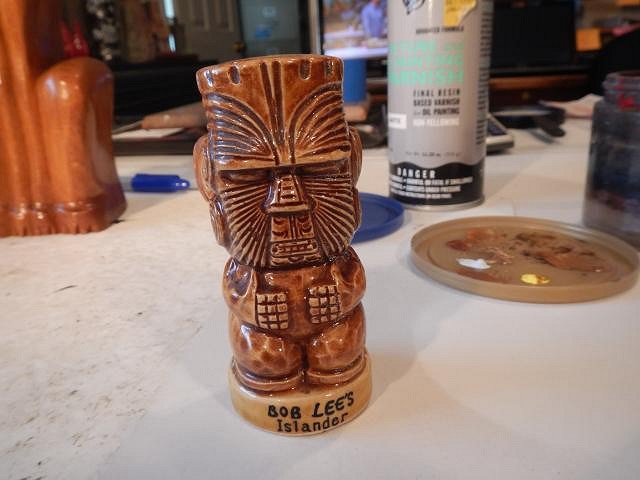
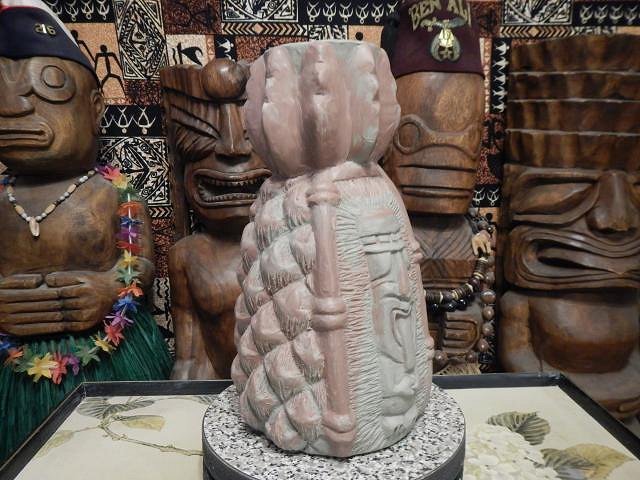
So I have the place, I have the design but I needed a tiki. One fell in our laps at the antique sale under the freeway in Sacramento. The man told us it was a decoration in a tiki bar in the 1940's I decided to believe him and to purchase it so I could put it on the pineapple mug. The next step will be to sculpt the mug. Cheers, Wendy PS I will also start the list on page one for those who sign up for a mug. [ Edited by: danlovestikis 2016-05-16 16:39 ] |
|
H
hang10tiki
Posted
posted
on
Mon, May 16, 2016 4:31 PM
:)
Worst sound ever, slurp of an empty tiki mug through my straw!!! [ Edited by: Hang10tiki 2016-05-16 19:25 ] |
|
PTD

Psycho Tiki D
Posted
posted
on
Mon, May 16, 2016 8:15 PM
Wendy, Did not see my name on the list. Please add me for one or a variation please. In fact, please add me to all of the crawl mug lists from now on? Thanks, love and hugs- PTD |
|
B

bobtiki
Posted
posted
on
Mon, May 16, 2016 9:08 PM
Wendy, I'm not caught up yet, but I just have to say thank you for so much detail on your process, and so many tips. This thread is amazing. I've started from the beginning, and I'm on page 53. Only 444 pages to go! My goal is to make at a custom mug for my home tiki space by the end of the year. Hopefully I'll be finished reading by then! :D |
|
BTH

Brenda's Tiki Hut
Posted
posted
on
Mon, May 16, 2016 9:13 PM
I'd like a mug, Wendy. Mahalo! |
|
E

ebtiki
Posted
posted
on
Tue, May 17, 2016 8:33 AM
Please add me to the Sac Crawl mug list, Wendy - many thanks! |
|
M

MaroneTiki
Posted
posted
on
Tue, May 17, 2016 8:47 AM
Hi Wendy! Please sign me up for a Sac Crawl Mug. Thanks |
|
W

Woodtiki
Posted
posted
on
Tue, May 17, 2016 8:48 AM
On the Sac crawl list, yessss! Loving all your stuff Wendy, that big bowl looks like it will be fun. Great job on the mold! |
|
D
danlovestikis
Posted
posted
on
Tue, May 17, 2016 8:54 AM
hang10tiki you for tiki treasure. I love the little Disney tikis. ================================ I will update the list on page one of this thread. Thank you. Bob Tiki my ability to make molds has gotten better over time. The Sacramento Crawl mug mold which I will be showing soon was the best one I've done so far. So use it as a guide for making your mold. Next up will be the sculpting. Remember NO undercuts. More photos later today. Wendy |
|
R

RVICTOR
Posted
posted
on
Tue, May 17, 2016 2:29 PM
Wendy, RVictor |
|
D
danlovestikis
Posted
posted
on
Tue, May 17, 2016 3:26 PM
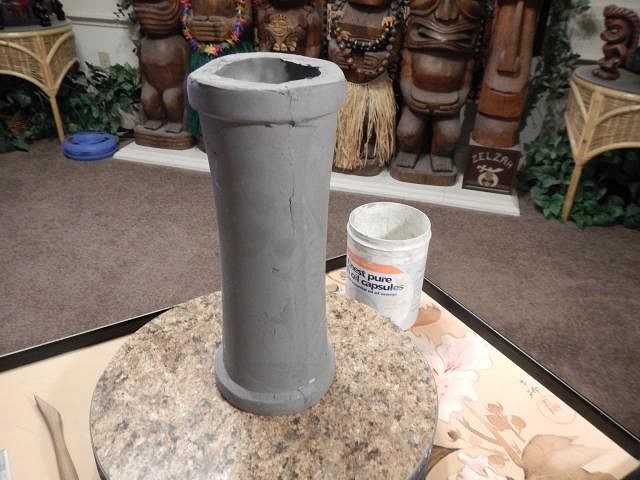
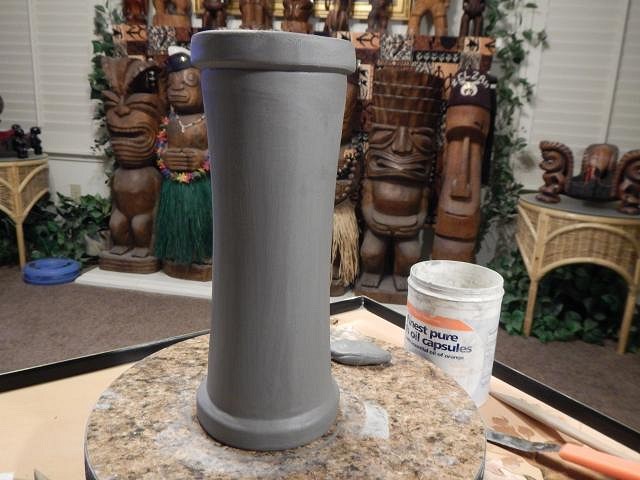
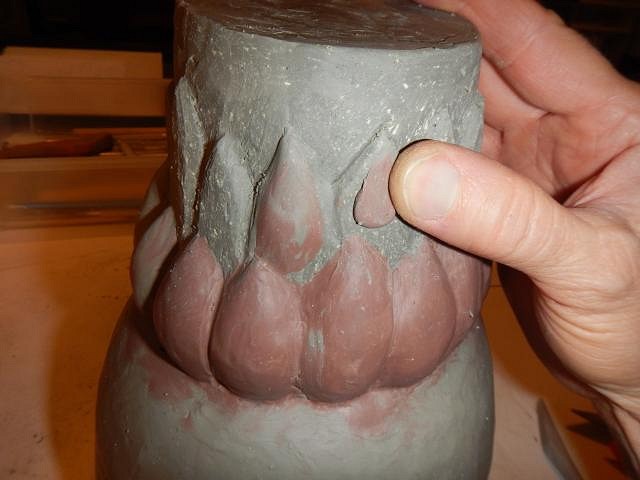
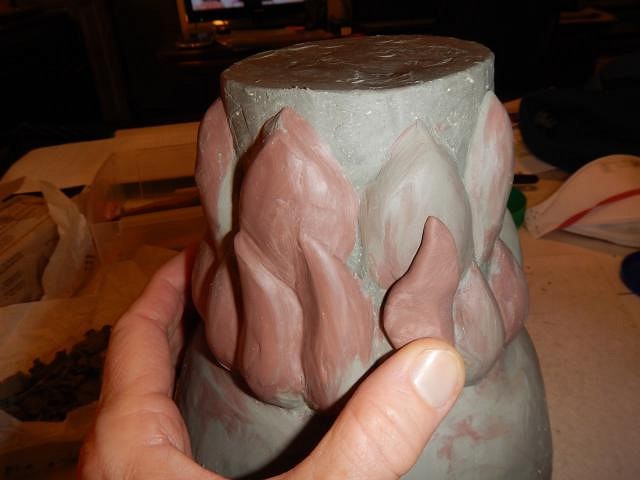
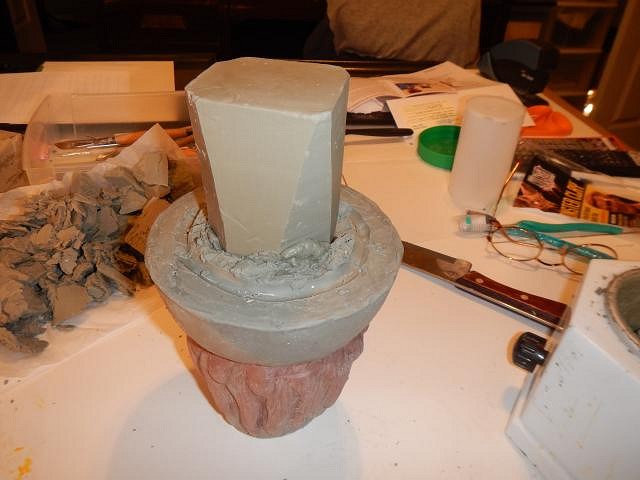
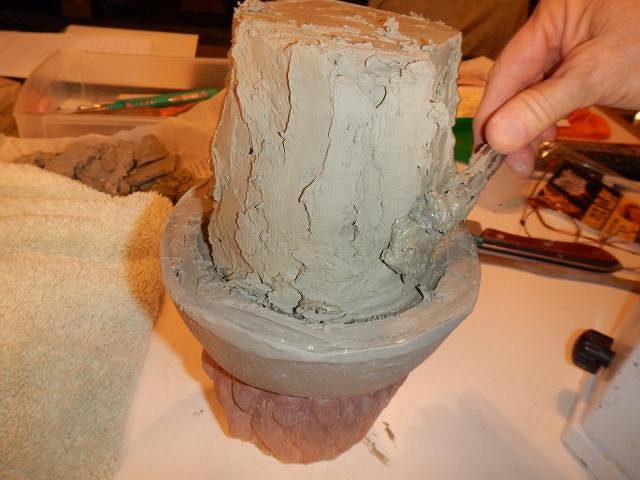
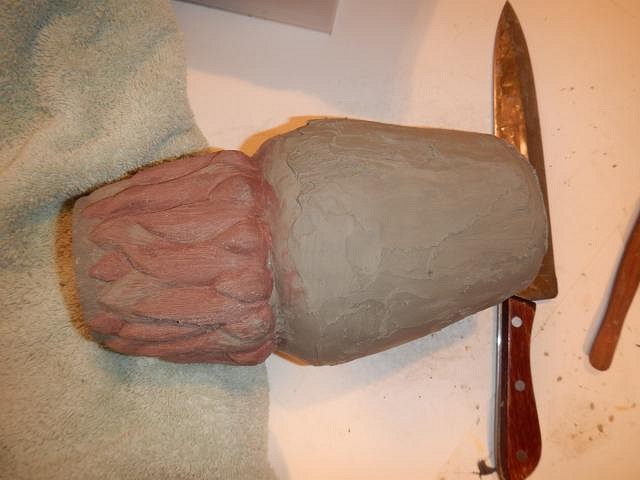
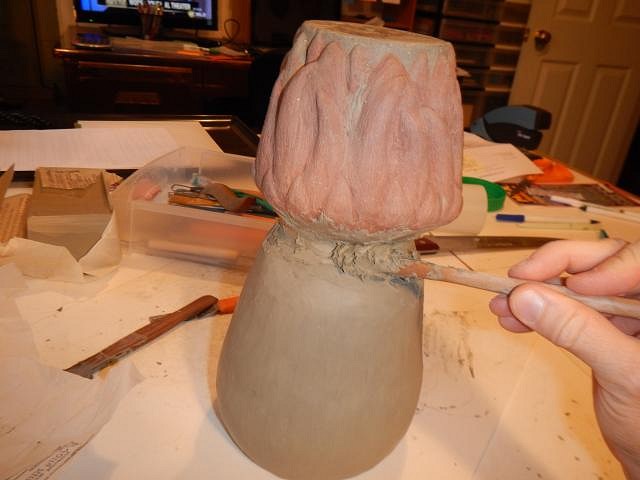
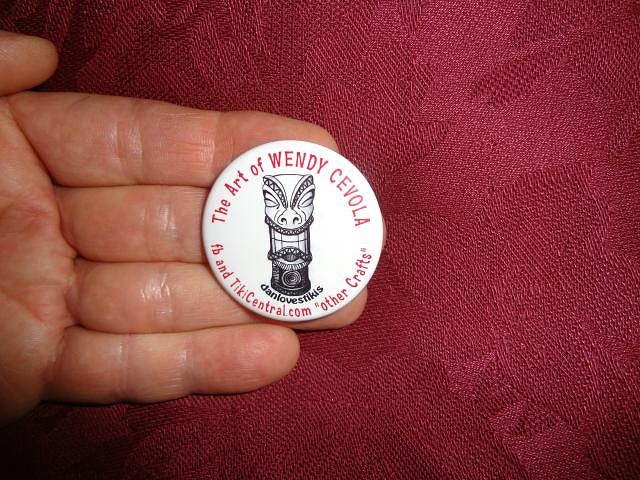
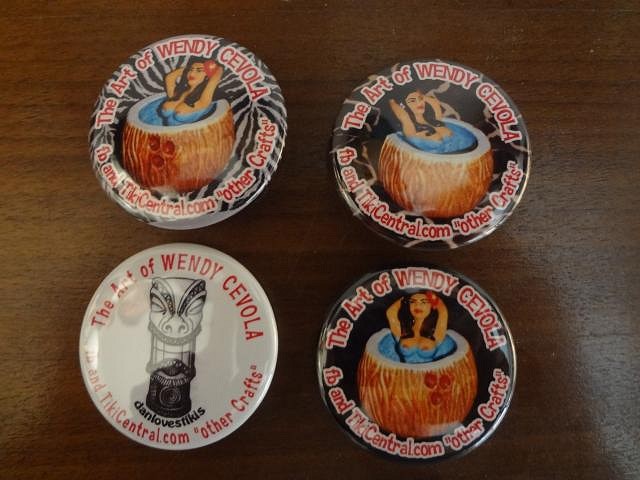
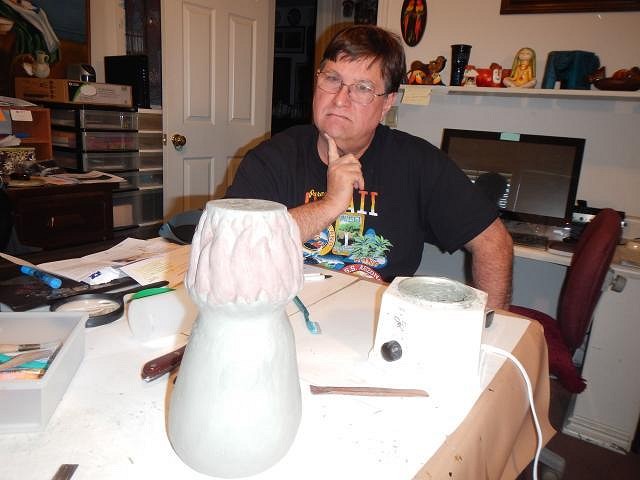
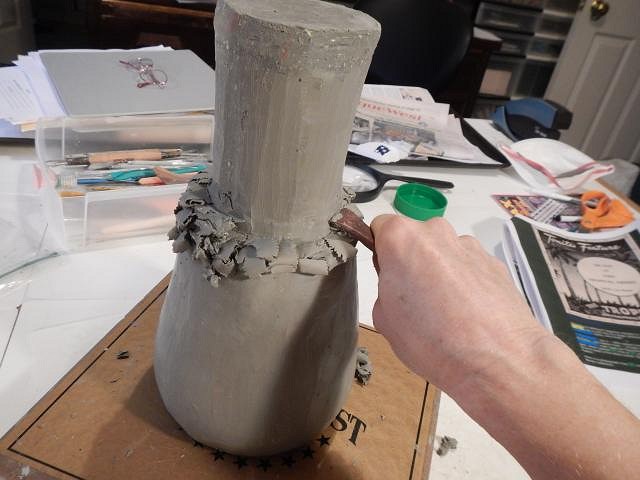
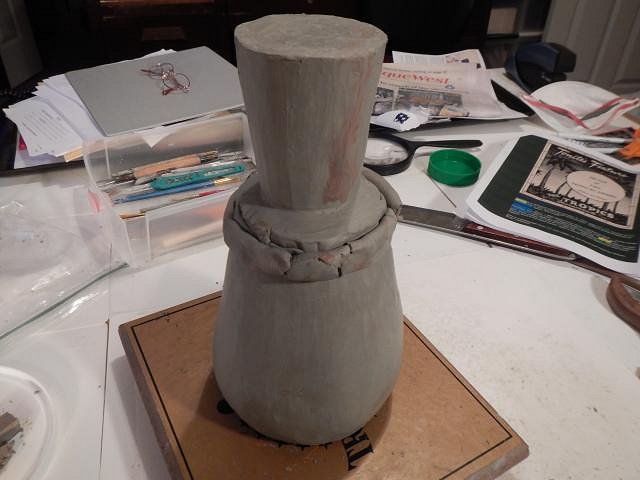
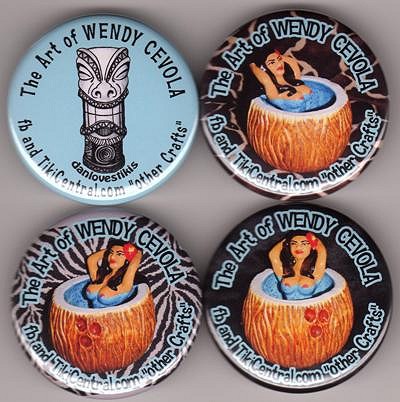
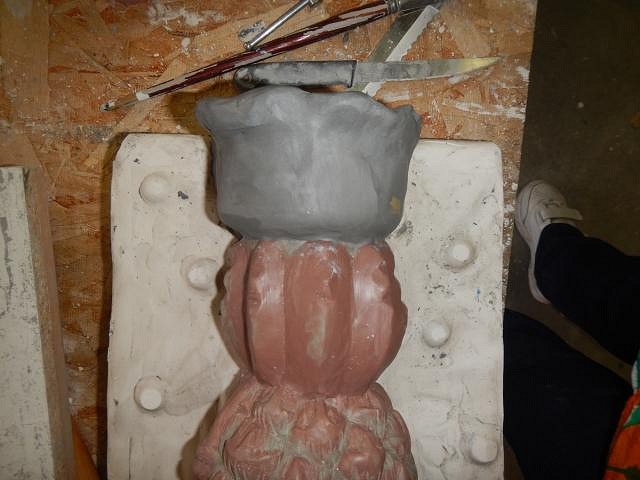
bobtiki that really pleases me. Those pages just sit there until someone has a desire to make a mug. I share everything because it was so hard to pry information out of artists. I think the more we all do the longer tiki will stay alive. Good for you and your desire to make a mug. You can start a thread here on "other crafts" and share your steps. We all would enjoy that. I post my mistakes too so you read those they won't happen for you. RVICTOR the Wish List is for anything. You think it up we'll get it done. That's the fun. Your first Wish Has been made four times and Dan has kept two of them. I like your ideas. Wish List 7 will start at the end of this year but anyone can send me their ideas at any time. I have a binder going already. ========================= SACRAMENTO CRAWL MUG. I WANTED TO MAKE A PINEAPPLE. I HAVE TO MAKE IT WORK WITH AN OPENING AT THE TOP. SO I WENT TO WORK USING SUPER HARD ROMO CLAY. I TOOK THE SCULPT THAT I HAD DONE FOR ALBERT'S TIKI VILLIAGE. I SMOOTHED IT OUT. ROMO CLAY IS HARD TO WORK WITH. I MELTED IT AND THEN TOOK THE SOFT CLAY AND ADDED IT TO THE SCULPT. I CUT SLABS AND ADDED THEM TO THE BASE. THE SCULPT NEEDS TO BE LARGER BECAUSE THE CAST MUGS SHRINK TWICE DURING PRODUCTION. I STARTED THE ADDITION OF LEAVES. I CHECKED IT AGAINST THE MODEL. WHAT SHOULD I DO? I DON'T WANT THE OPENING INTO THE MUG TO BE TOO SMALL. I KEPT GOING. I ADDED LEAVES. THEN I ADDED MORE LEAVES. DAYS ARE PASSING. I DECIDE TO TAKE A BREAK FROM THE TOP AND TO WORK ON THE BOTTOM. I WANT TO CARVE MY NAME ETC. HOWEVER THAT'S WHEN I REMEMBER THAT I HAD COVERED A BOWL. THAT'S A BIG PROBLEM. I COULD ADD MORE CLAY TO THE BOTTOM OR... SO I CUT IT IN HALF TO REMOVE THE BOWL AND JAR. I ADD A BRICK OF ROMO CLAY AND COVER IT WITH MORE MELTED ROMO CLAY. ONCE I GET TO THIS DONE THE PINEAPPLE LOOKS UPSIDE DOWN SO I CUT OFF THE TOP. I MADE A LOCK SO I COULD PUT IT FIRMLY ONTO THE OTHER END. I CALLED DAN INTO THE ROOM TO TELL ME WHAT HE THOUGHT. HE ASKED ME, "WHY ARE YOU PUTTING AN ARTICOKE ON THE TOP OF THE PINEAPPLE?" I LOVE THIS MAN. ===================================== My niece makes buttons. She made these for me. I plan to hand out the Hot Tub Hula Girl buttons at Tiki Oasis. You see me just ask for one. The white button I will hand out at the Sacramento Crawl.
She can put a photo and lettering of whatever your heart desires on a button. Different sizes and quantities are available. There are many less expensive options. She can be reached at [email protected] +++++++++++++++++++ Cheers, Wendy |
|
H
hang10tiki
Posted
posted
on
Tue, May 17, 2016 7:23 PM
Thanks Dan-0
Love all the work and thought you put into your mugs Put me in for the next wish list Cheers |
|
D
danlovestikis
Posted
posted
on
Wed, May 18, 2016 10:07 AM
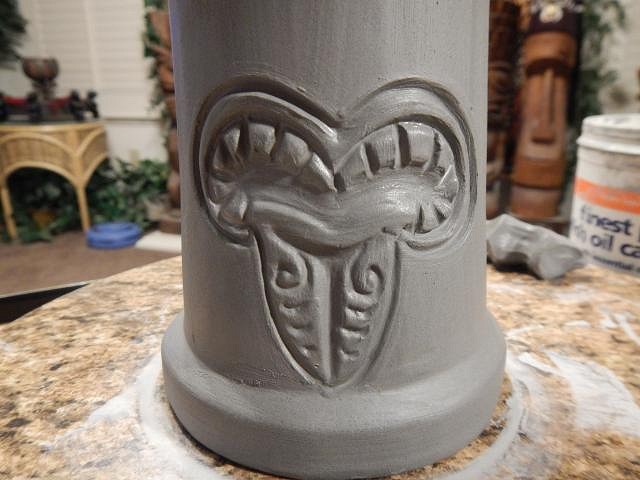
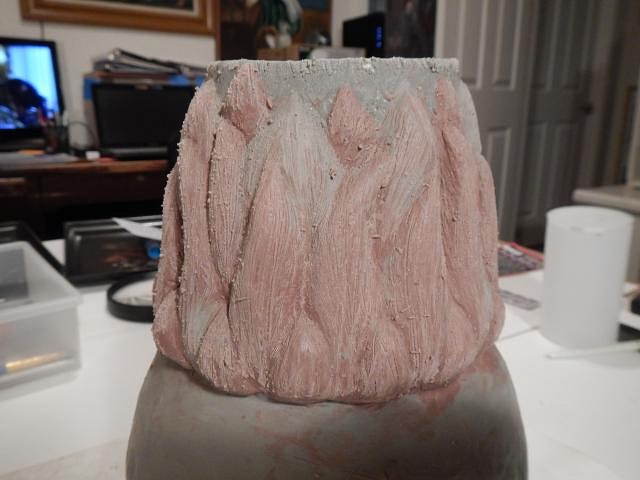
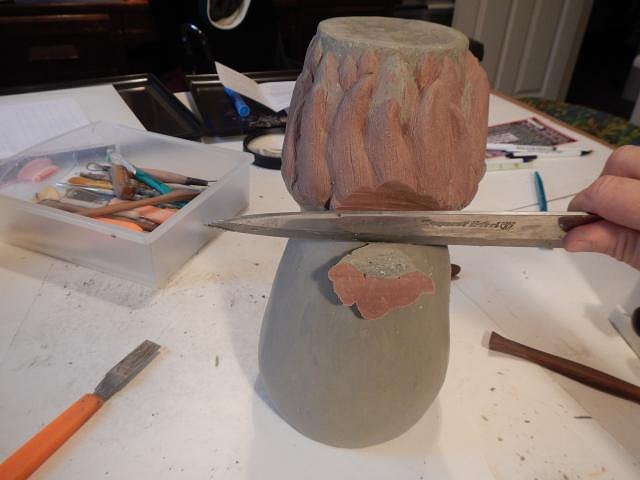
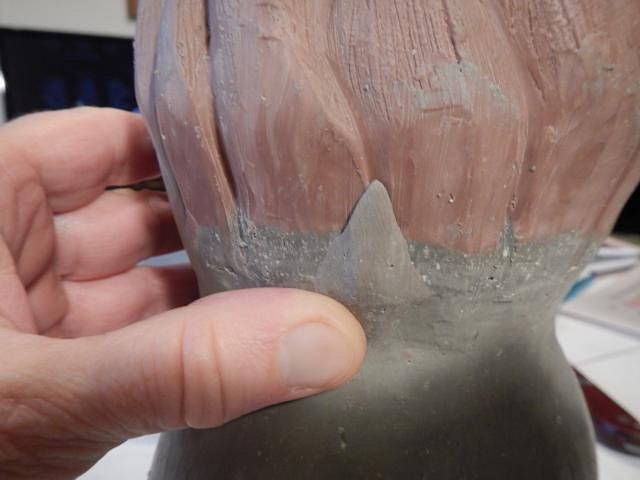
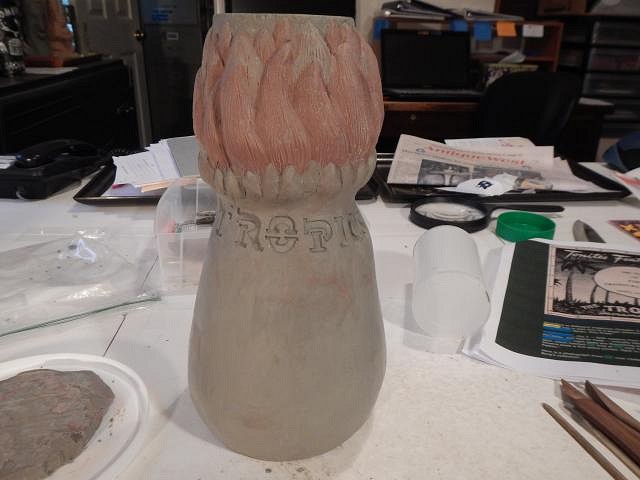
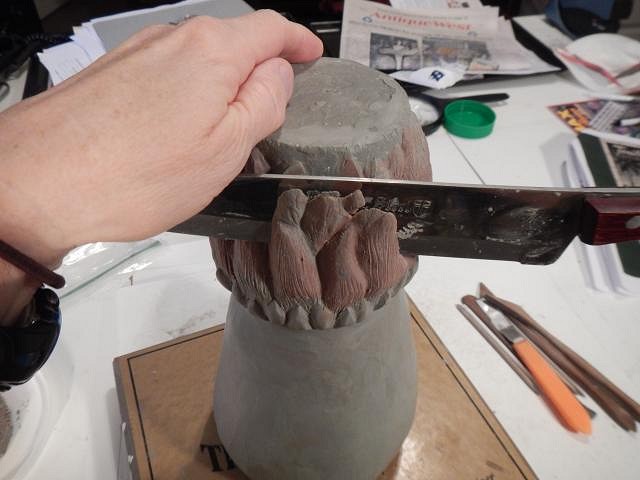
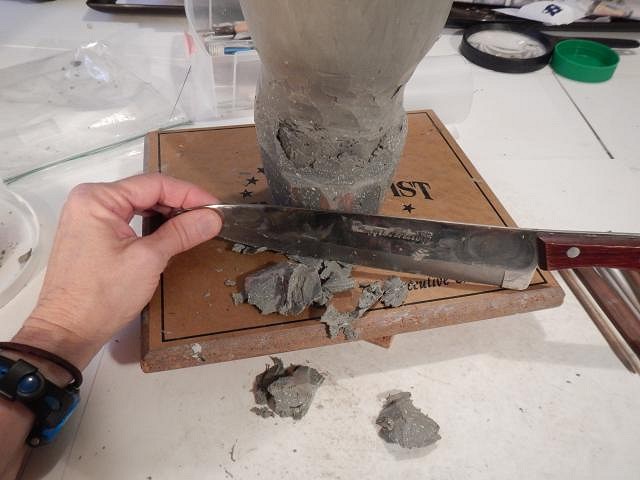
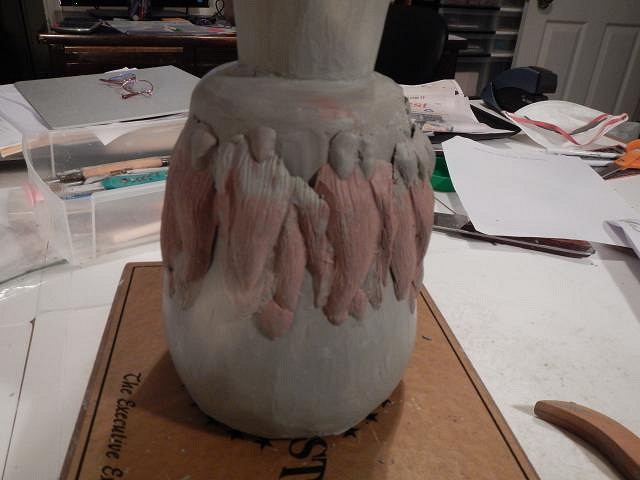
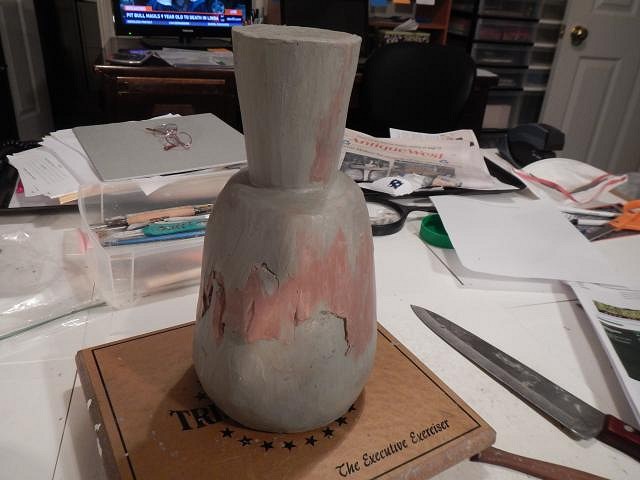
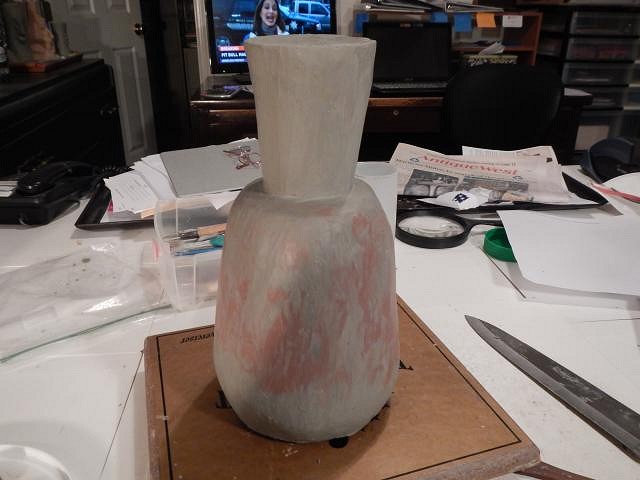
hang10tiki I have already printed all the photos of the tiki. I need you to send me a photo of the angle of the building you want on the mug. All this applies unless you have changed your request. Dan is a wonderful resource for critiques. I might have ended up with the artichoke if he hadn't been available. ============================== SACRAMENTO CRAWL MUG 2016 SO AFTER THE CRITIQUE I START TO WORK TO MAKE IT LESS AN ARTICHOKE. FIRST I CUT BACK THE NECK AND ADDED TINY LEAVES. NEXT I CARVED IN THE NAME OF THE TIKI BAR/RESTAURANT. THIS TIME I CRITIQUED IT MYSELF AND MY CRITIKI SAID THIS LOOKS LIKE GARBAGE. EVEN THE LETTERING WAS OFF. SLASH IT WITH THE KNIFE. SLASH IT AGAIN. SCRAPE THE TOP. ADD ROMO CLAY. USE UP THE LEAVES TO BUILD UP THE BOTTOM. KEEP SMOOTHING. NOW I HAVE A SHAPE I CAN WORK WITH. I'M HAPPY AT LAST. CHEERS, WENDY |
|
H
hang10tiki
Posted
posted
on
Wed, May 18, 2016 10:24 PM
|
|
TT

Trader Tom
Posted
posted
on
Wed, May 18, 2016 11:21 PM
I can't believe he's still alive after the artichoke comment! Maybe an artichoke mug could work, though...
I can't stand artichoke liqueur by itself, but I have seen people try to work it into Tropical/ Tiki cocktails. Check out the "Artichoke Hold" below: |
|
D
danlovestikis
Posted
posted
on
Thu, May 19, 2016 8:30 AM
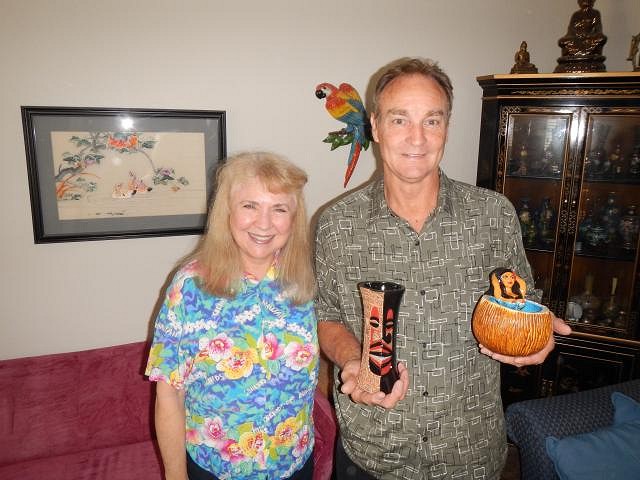
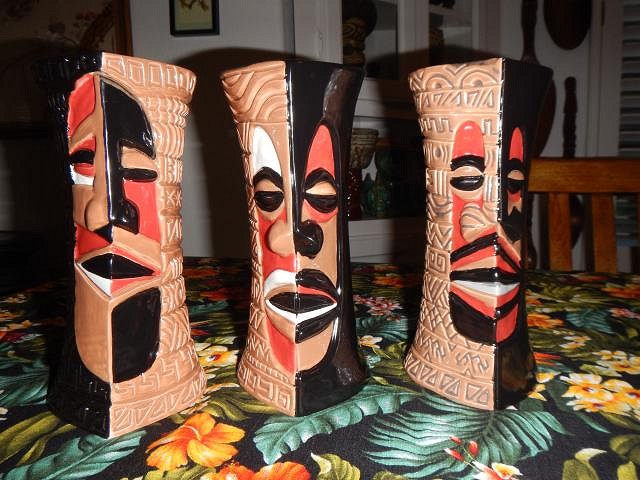
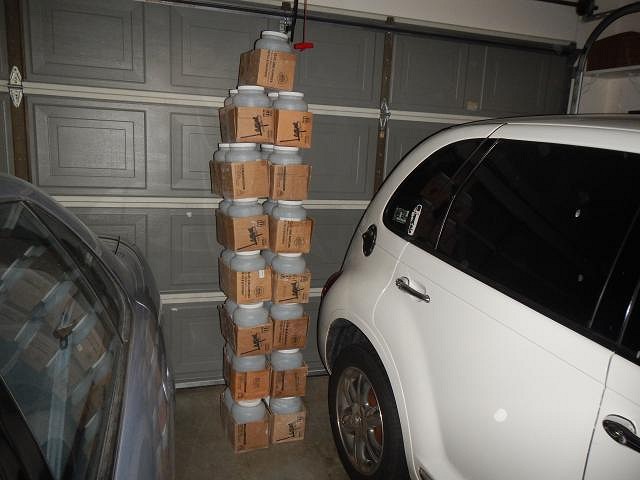
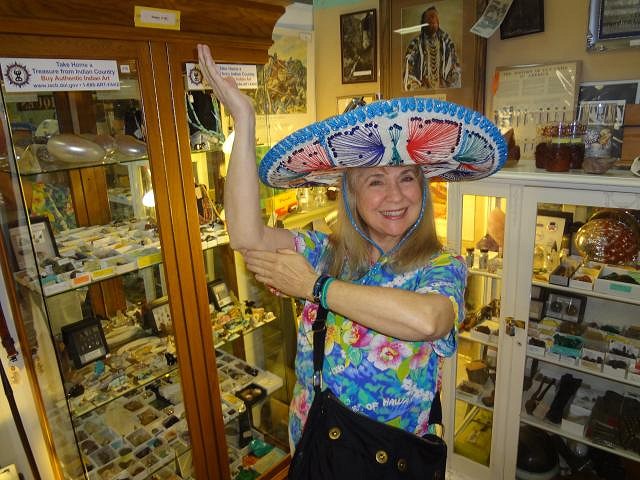
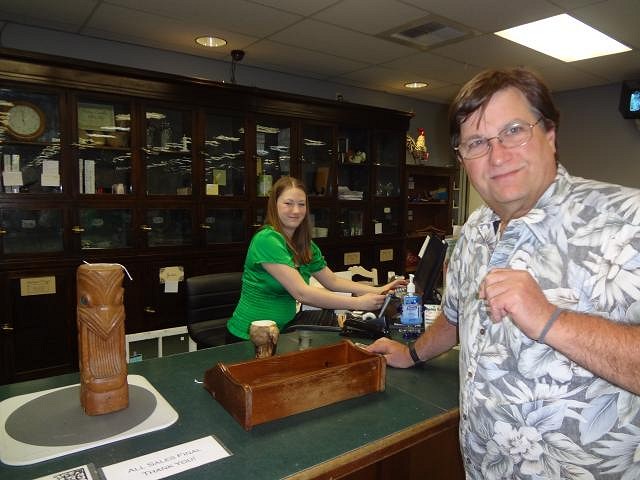
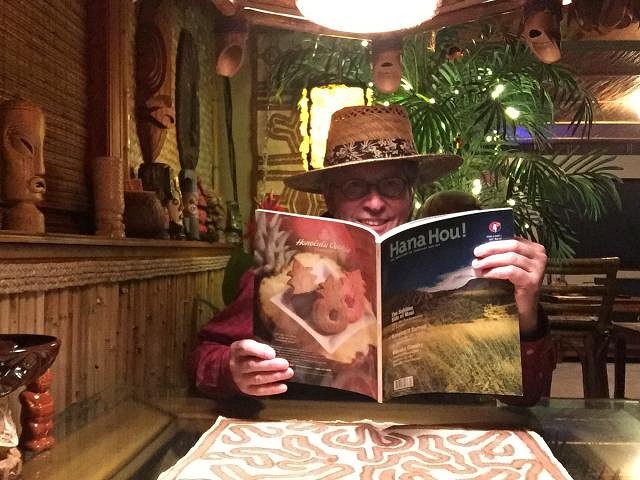
hang10tiki you came up with your own thumbs up like facebook only better. He's cute, must be based on you? Trader Tom I ask for Dan's opinion all the time. He has a good eye. He's a keeper so he'll always survive his comments. That's fun to know there is such a concoction from artichokes. =========================== Here are some catch up photos and then more on the crawl mug tonight. slowhandtikiman came by to pick up his Wishes. Dan got out his two Tiki Modern mugs so they could have a last look with them all together. #1 is with the designer RVICTOR Today we go to Alpha Fired Arts because I'm almost out of slip. 30 gallons jugs of slip now made into tiki art. This is the first set of buttons I'm having my niece make and then I am having her make some more using blue. sykoticbuttons@hotmail if you would like to have button made Dan and I went antiquing and he asked me to pose with this sombrero. He said it matched my Hawaiian shirt. Surprise he actually found a cool Maori tiki. Thank you for the visit, Wendy |
|
D
danlovestikis
Posted
posted
on
Thu, May 19, 2016 8:34 PM
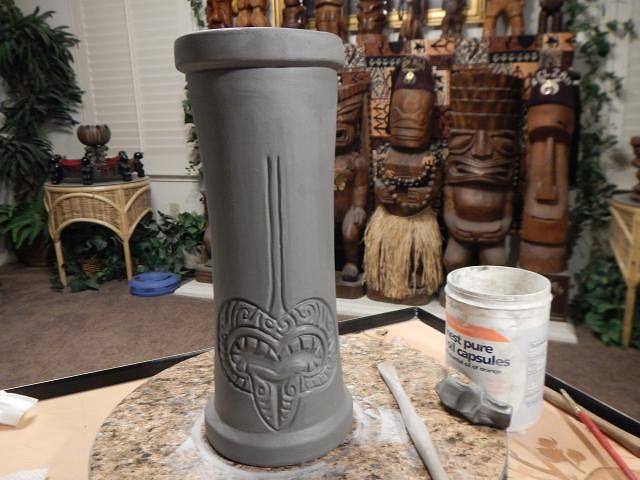
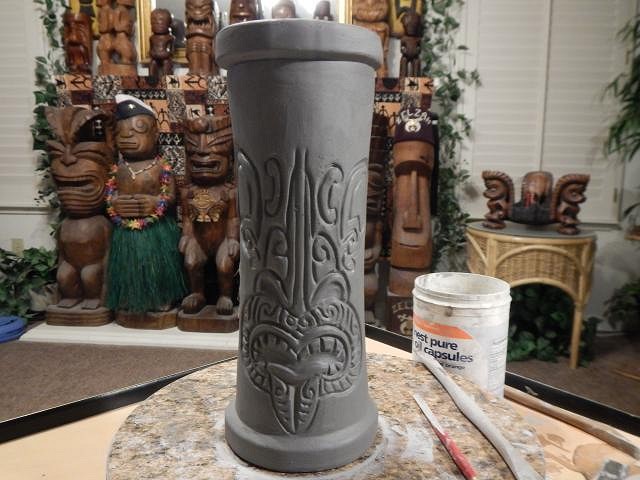
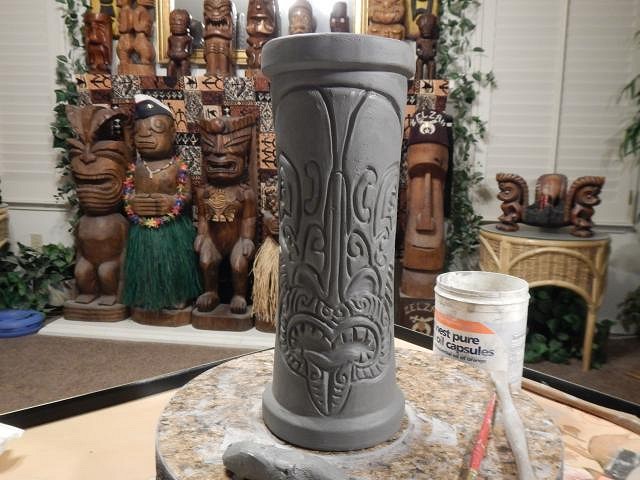
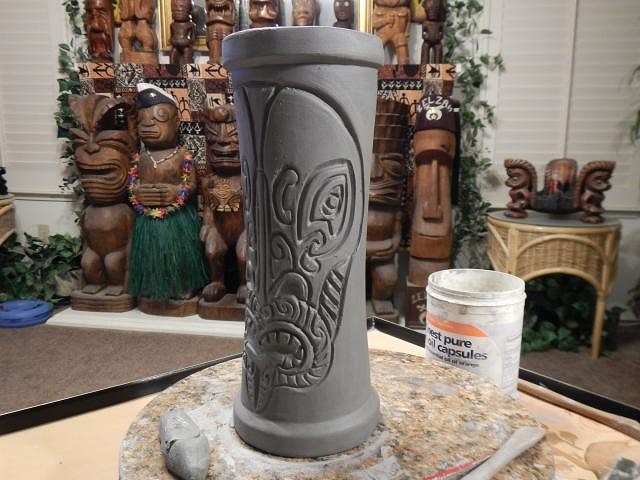
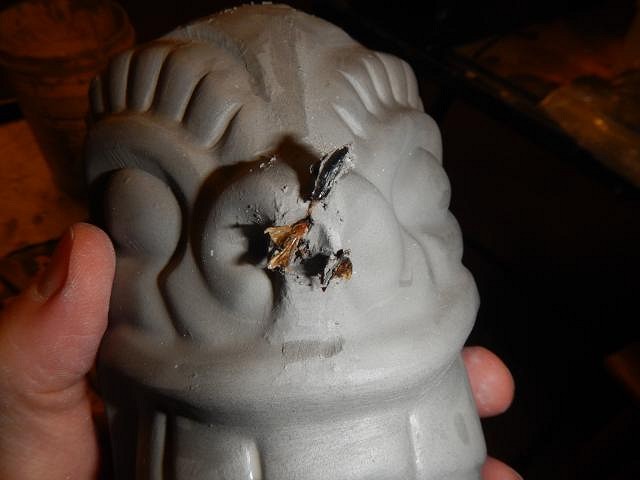
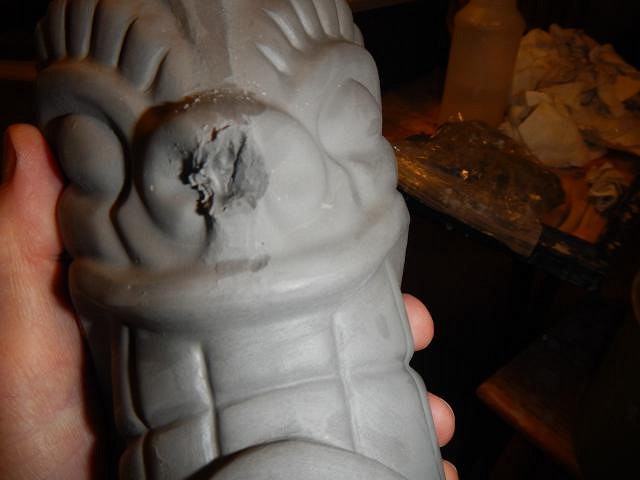
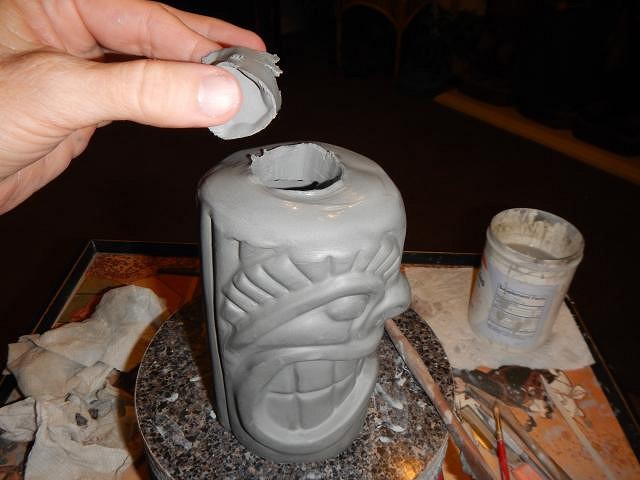
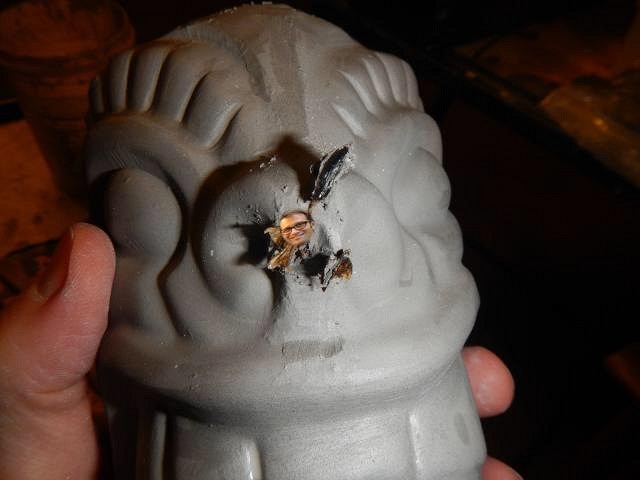
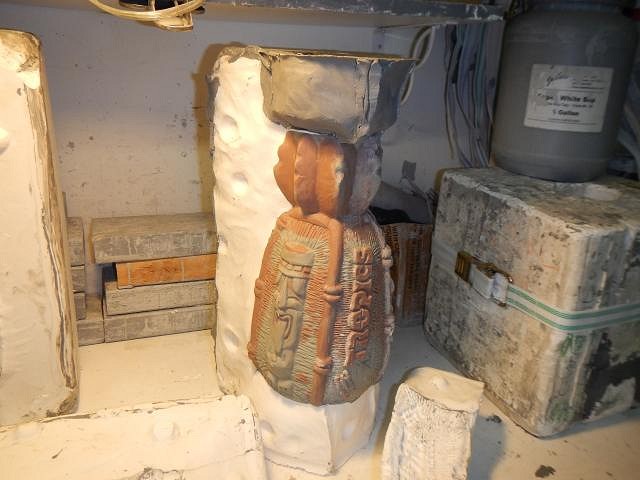
This has never happened to me before. I think I forgot to turn the mold over to get rid of debris before pouring in the slip. Out of the mold I took the War God. I have all these mold lines to remove. I see a tiny open spot on the bottom of the nose. All possible air bubbles must be removed. But this was like a horror movie. I start to dig and I get legs and wings and guts. So gross. I think I got it all out because if I didn't it will explode in the kiln. I filled the hole with clay and smoothed it nice and flat. To put on the top which will be a coconut I cut a hole. This will prevent an air pocket. The first goblets I made exploded. Now I'm prepping the coconut. I think I will have bug nightmares tonight. Cheers, Wendy |
|
T
TikiAno
Posted
posted
on
Fri, May 20, 2016 12:34 AM
I saw a resemblance...
Oh, this is more like it...
(Jon, posted with all due respect, of course, my friend). :) Excited about the progress of the new Crawl mug- always exciting to watch your next creation. Wow, I've heard about putting the lime in the coconut, but not about putting the fly in the War God. I guess there's a first time for everything. Too bad there wasn't a camera catching your reaction to finding the insect in your clay- whoa! Thanks for posting!! |
|
D
danlovestikis
Posted
posted
on
Fri, May 20, 2016 8:35 AM
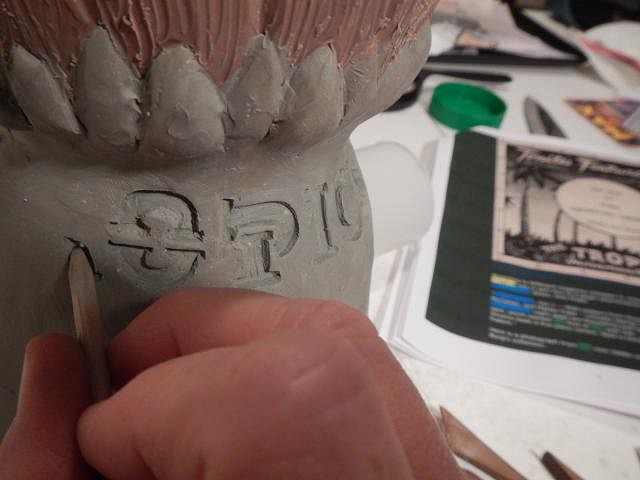
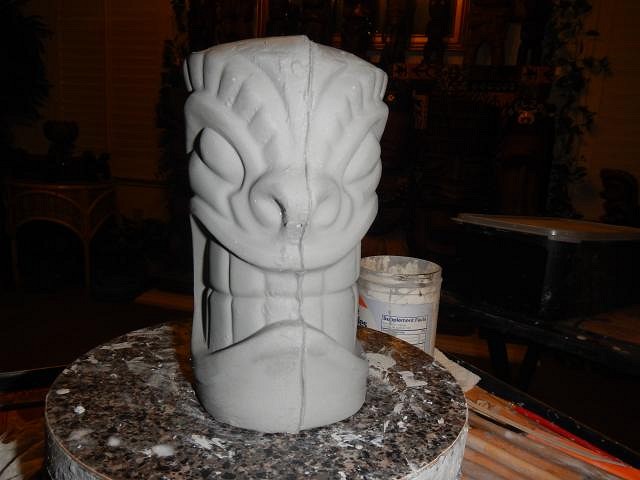
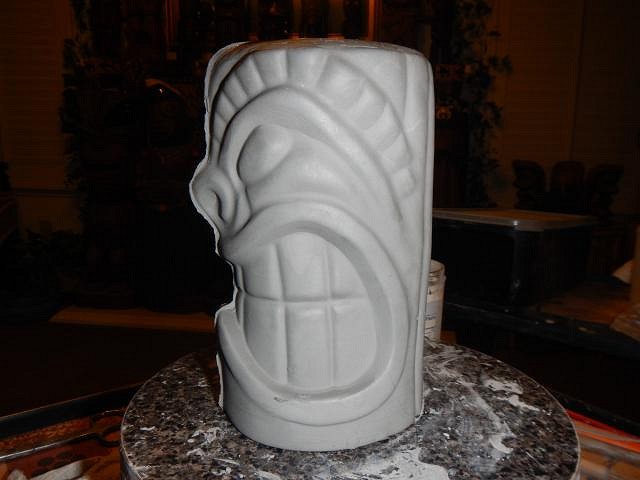
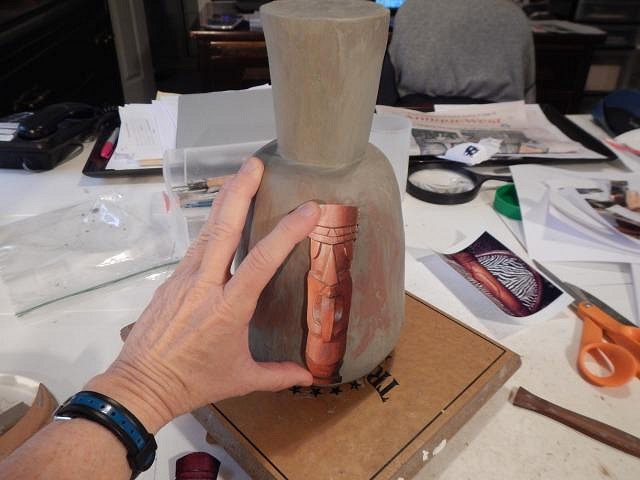
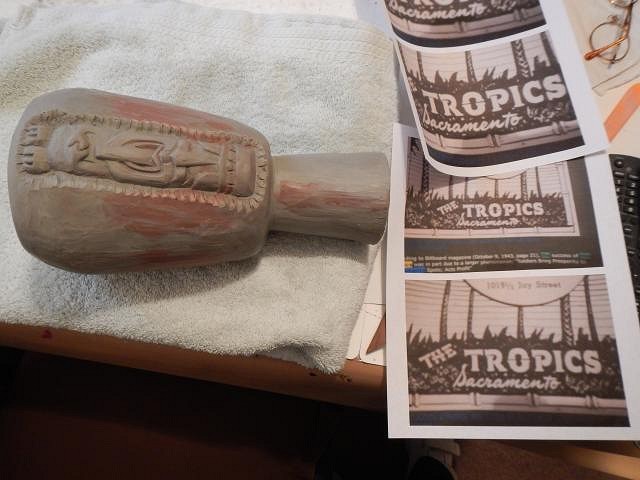
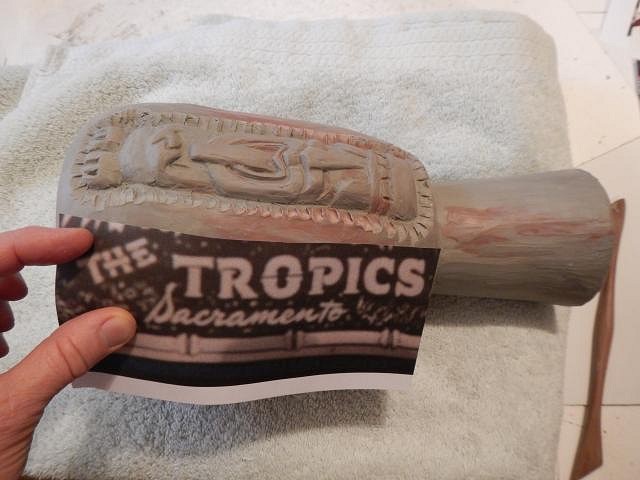
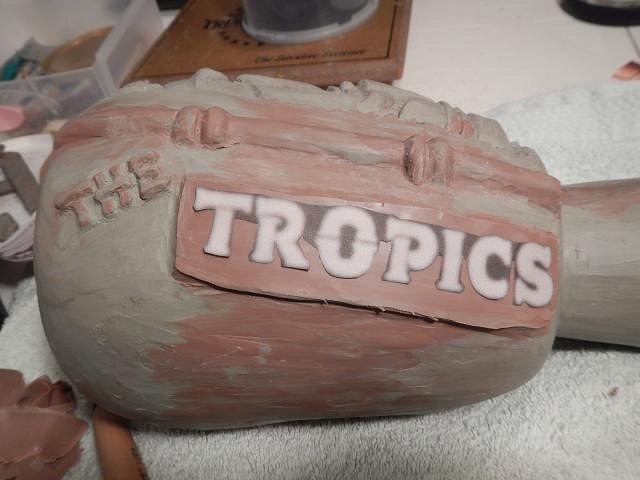
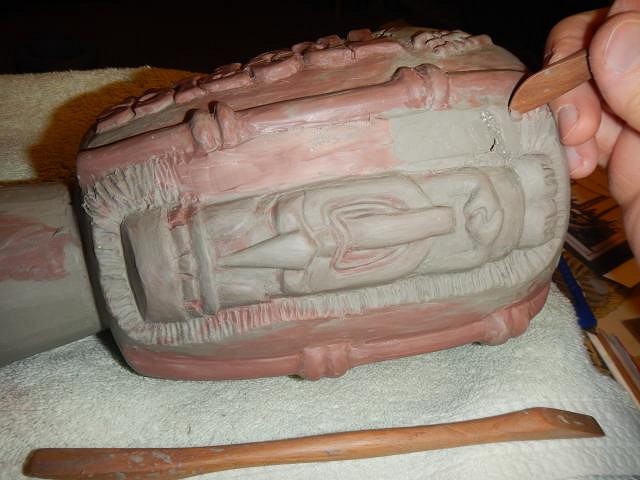
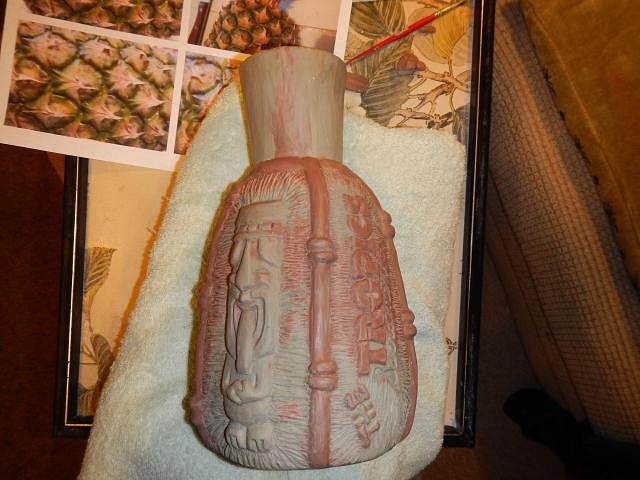
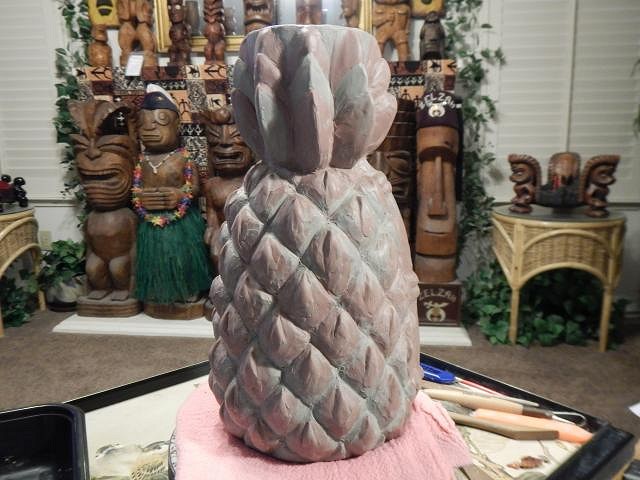
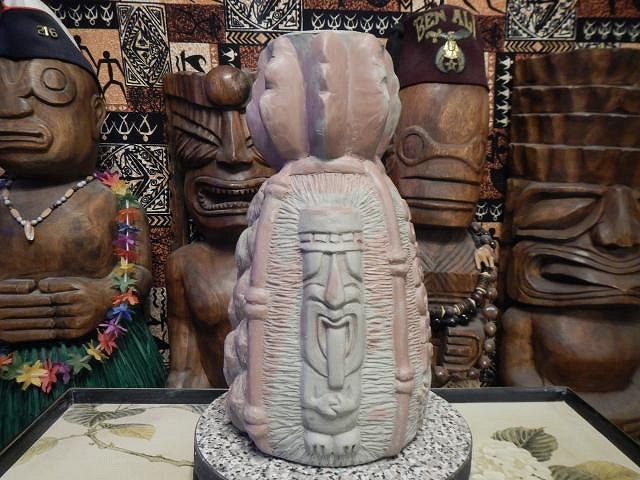
TikiAno that looks like the girl on the TV. Jon is as cut as a ... Jon! My reaction to the beetle was, yeeeeeeeeewh. I was glad that he wasn't moving. I think he died in the mold and that I forgot to check before pouring in the slip. =============================== SACRAMENTO CRAWL MUG. TIME TO LET THE TOP REST AND TO WORK ON THE TIKI. Working to replicate someone elses work is much harder than making your own. It would be wonderful if the person who carved this tiki back in the 1040's would see this and come forward to say "hey I did that". There was no name on the bottom. To get the proportions right I print out a few sizes of the photo until I find one that is just right to fit the sculpture. Then keeping it in place I cut through the clay to make an outline. Using the photo I begin to sculpt the tiki. I use wood tools and some metal cutting tools. It's taking shape! AT this time I decide to add some arms, hands and feet. It's done for now. I will come back to it later on as the overall design comes to me. Next it's time to figure out how I will do the name of the restaurant. Again I printed out many sizes of the name and then picked the one that fit best. I decided to make a bamboo trim around the tiki so I went to work on that part. Now the name will go below the bamboo. This will turn into a very detailed sculpt. More tomorrow. Wendy |
|
D
danlovestikis
Posted
posted
on
Sat, May 21, 2016 8:46 AM
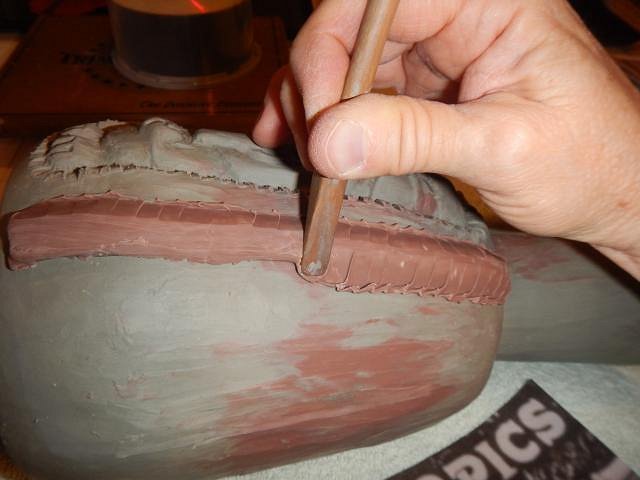
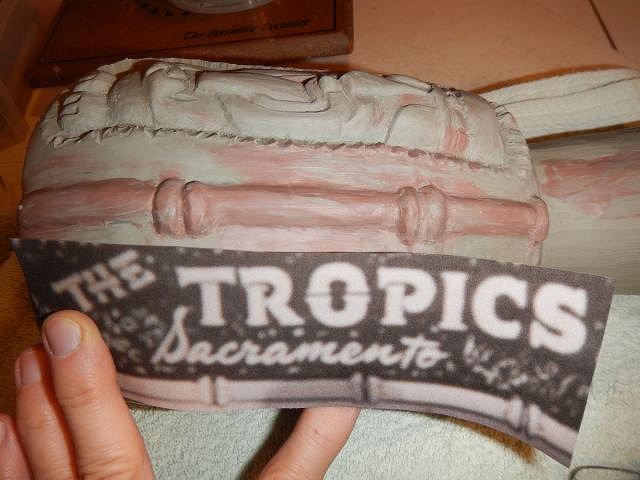
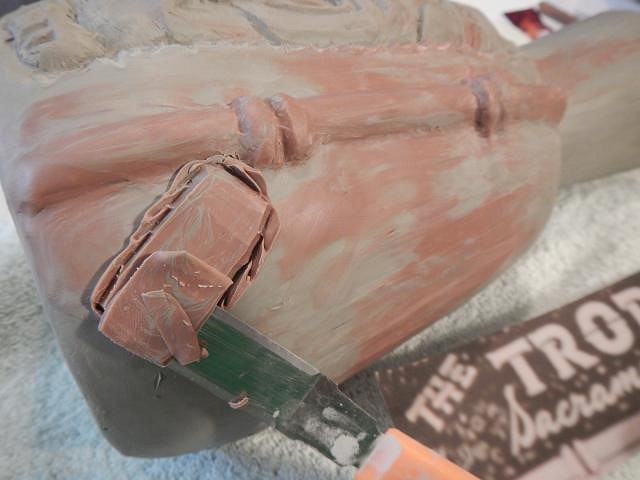
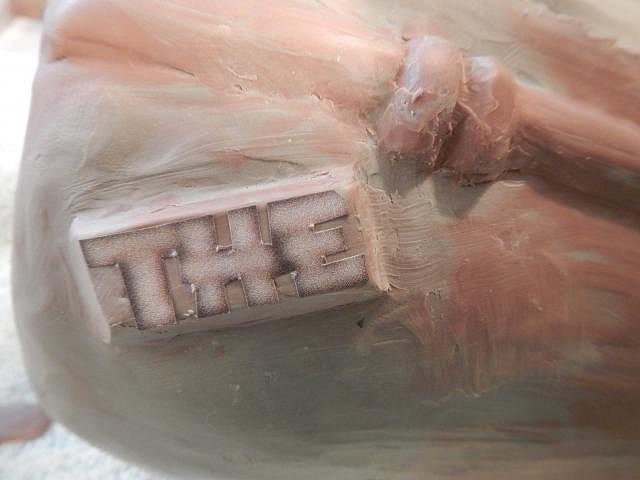
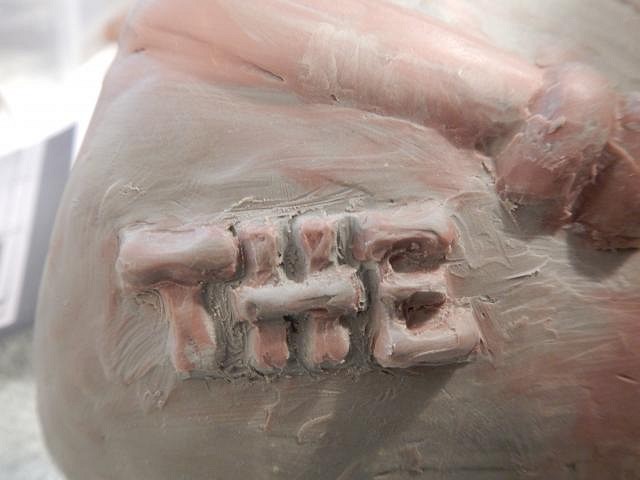
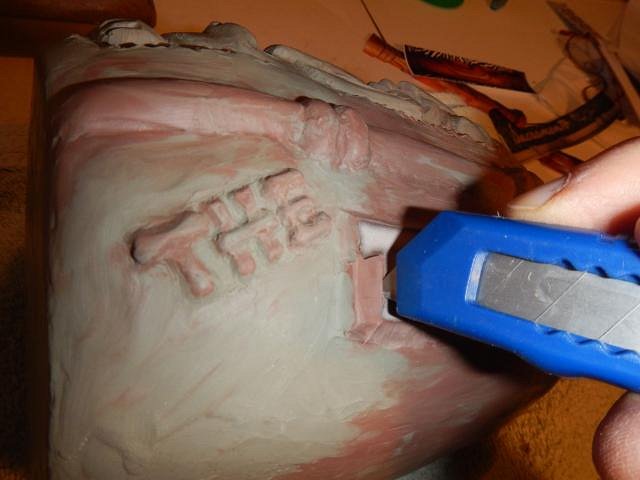
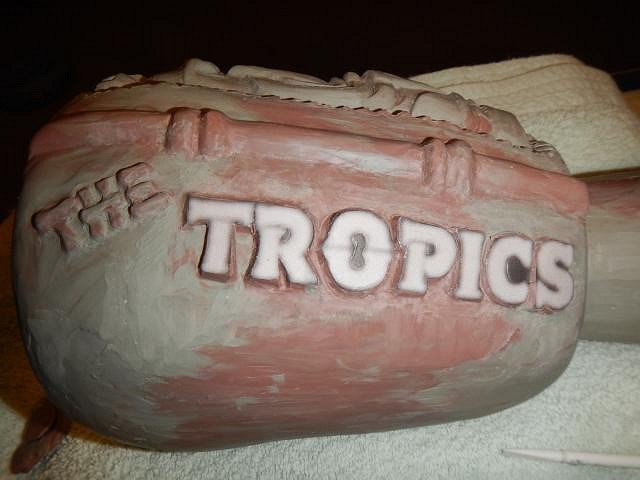
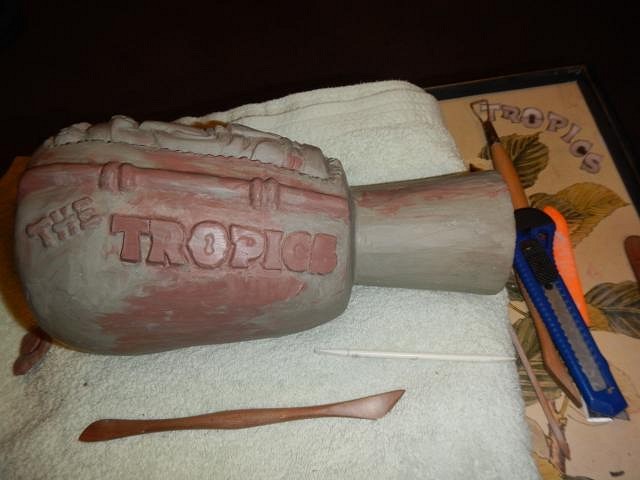
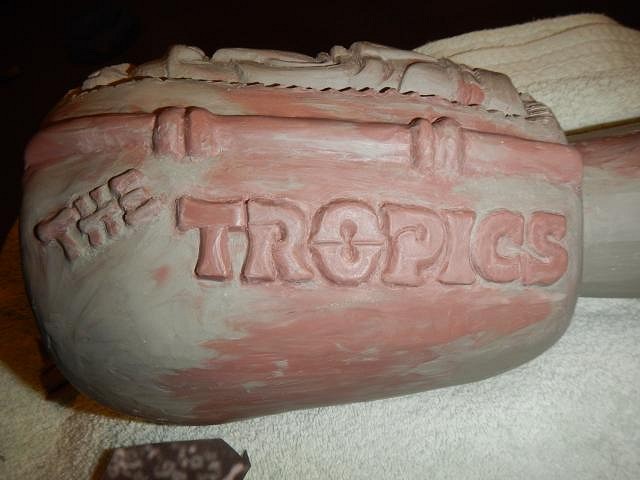
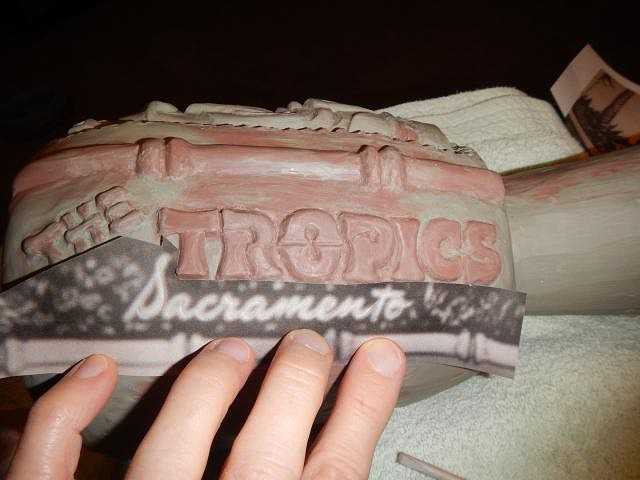
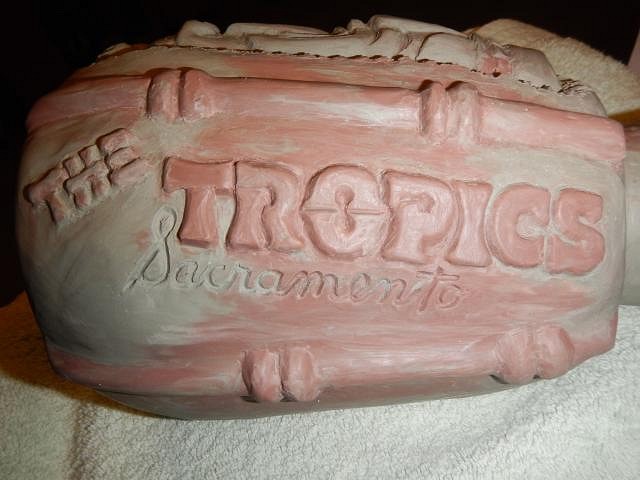
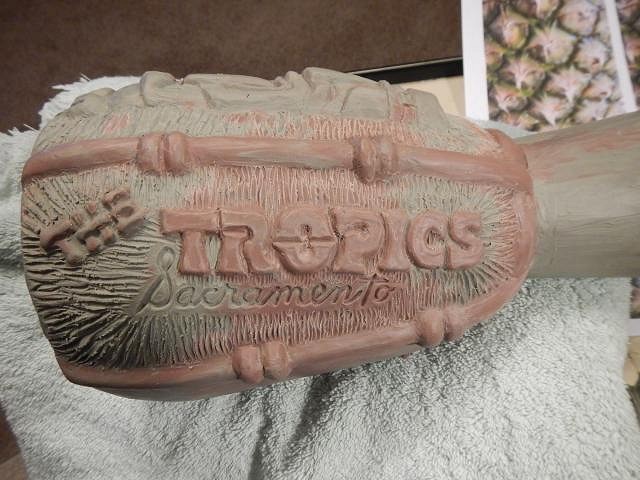
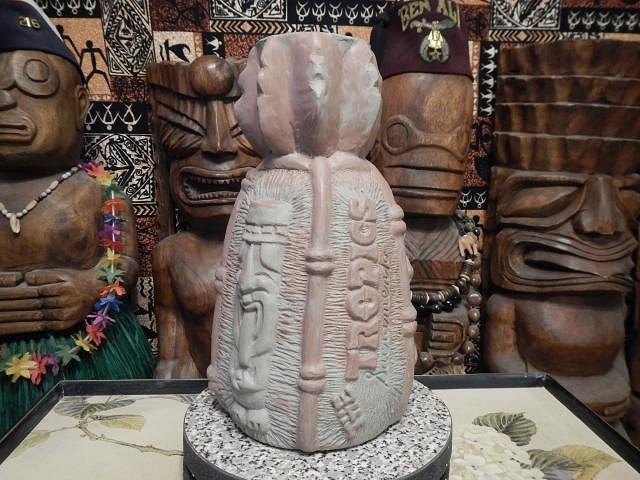
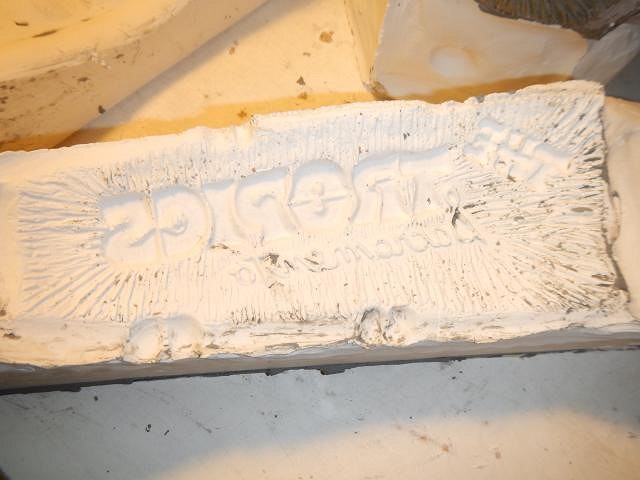
SACRAMENTO CRAWL MUG 2016 SIGN UP NOW! This is my best bargain, a huge mug for $85 plus shipping unless you attend the crawl. To have the wording be 3D I built a platform for the word THE. I used the paper to draw and outline and then I carved around it. Here it is roughed out. Now I will do the same with the large word TROPICS. In place. I use a sharp cutting tool to get through the paper and clay. I'm gone cutting and then I removed the paper and smoothed the clay. The tool that is in front is my favorite wooden tool for clay work. I have had it since the 1960's. Once in awhile I sand it to sharpen the edges. I've never found another one. I treasure this tool. You can find both ends separately just not together and in this hard wood. Done. Now I trace Sacramento. Then I carve it out and add the next band of bamboo just like in their ad. Here's 2/4ths of the pineapple started but not finished. There will be more steps to getting these areas finished. Now I'm getting past thinking of the artichoke. Wendy |
|
H
hang10tiki
Posted
posted
on
Sat, May 21, 2016 2:07 PM
Ano- good 1 Ano-
|
|
D
danlovestikis
Posted
posted
on
Sun, May 22, 2016 8:57 AM
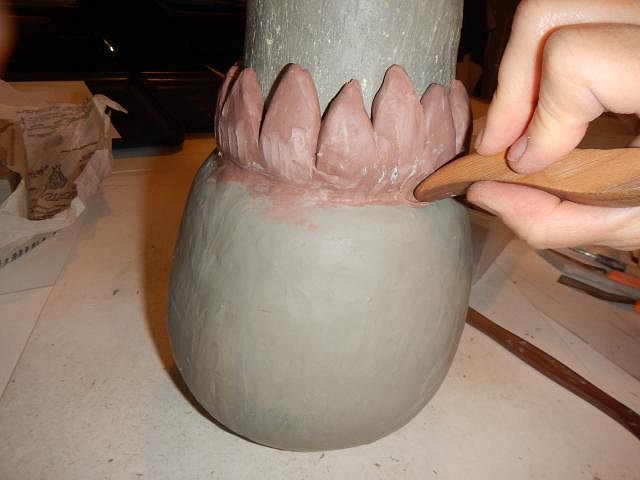
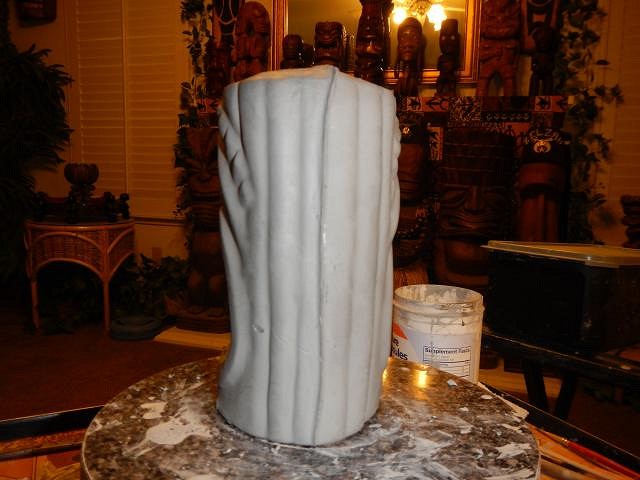
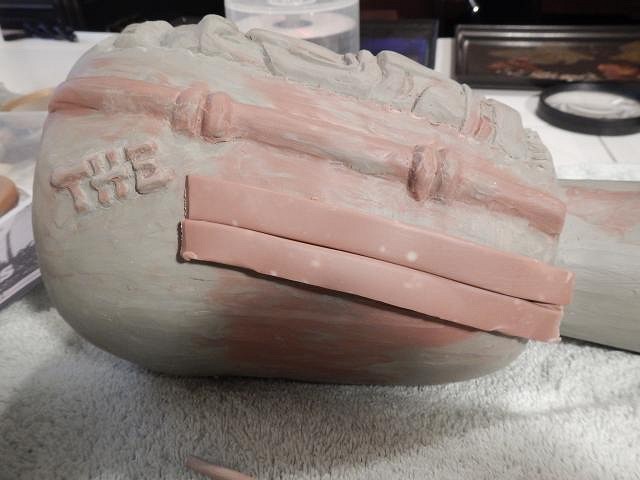
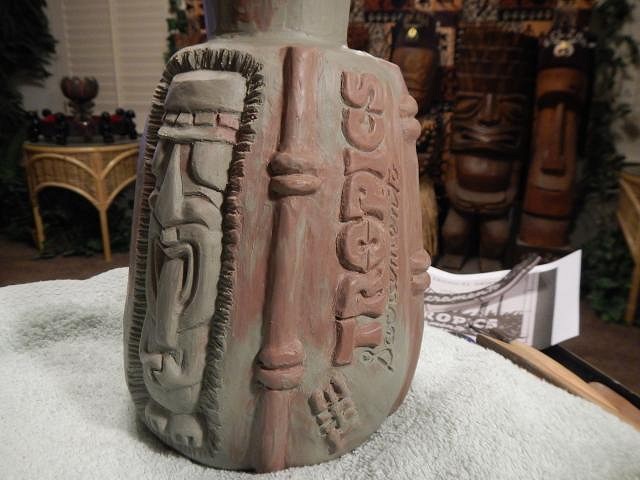
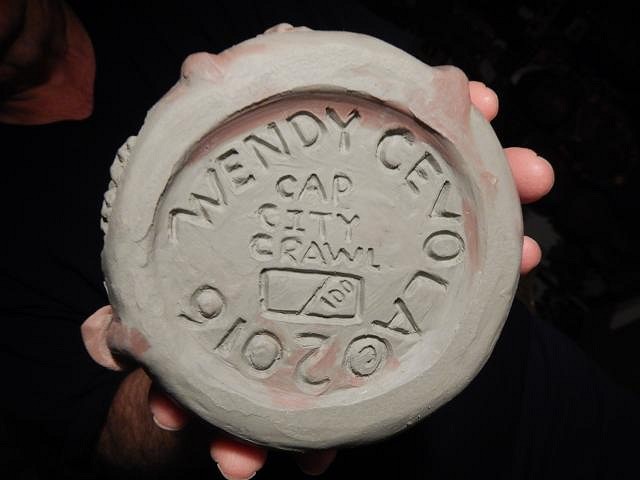
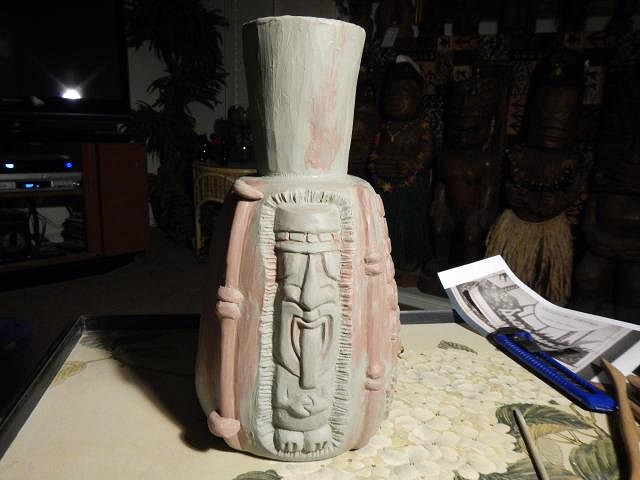
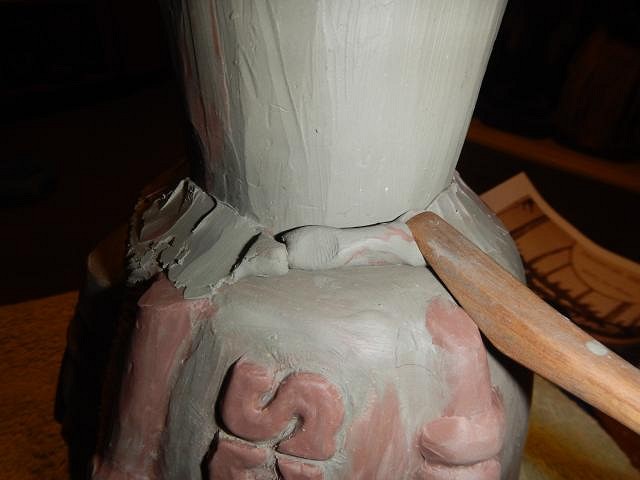
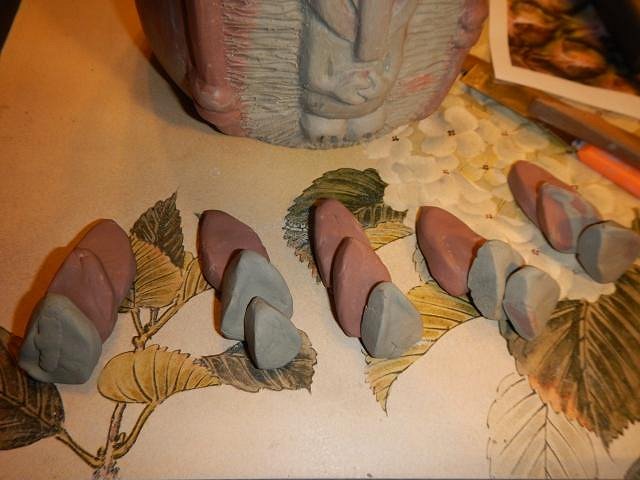
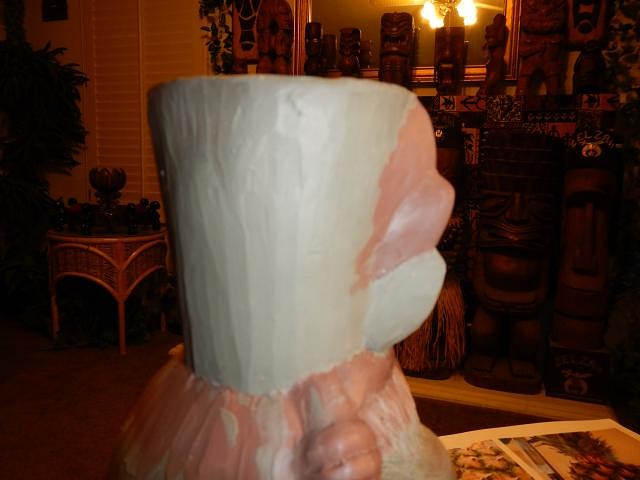
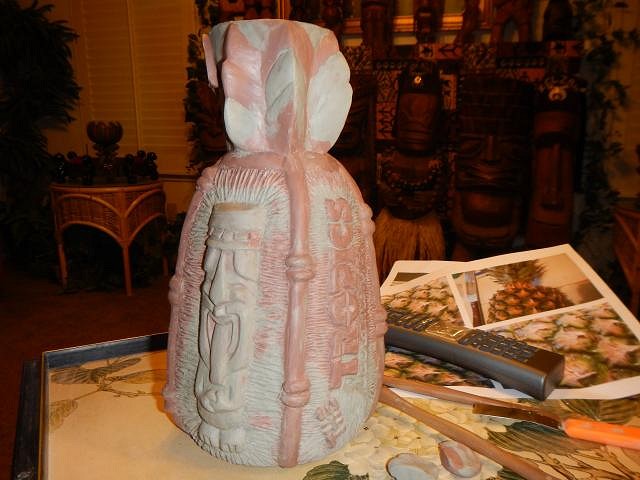
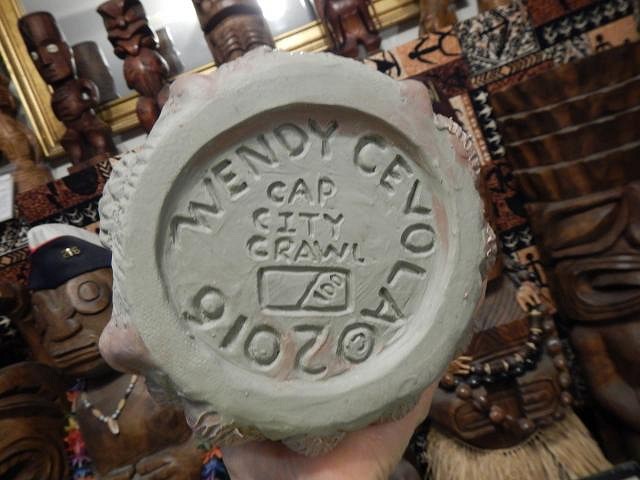
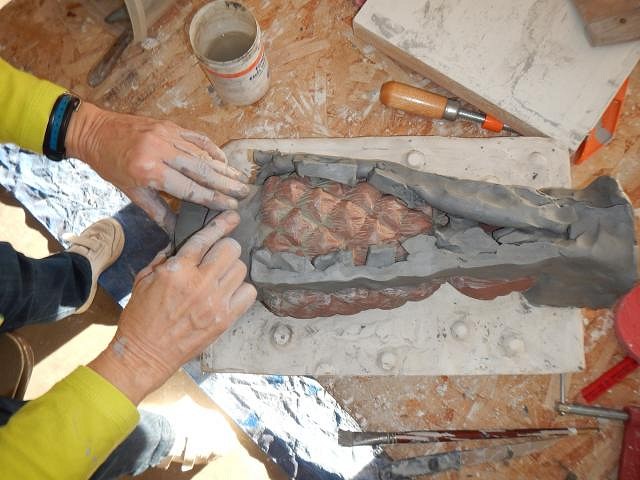
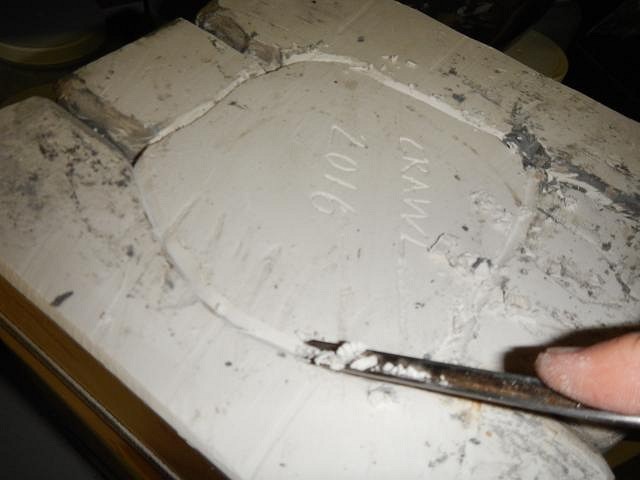
hang10tiki oh no. That's just too horrible to do to a friend. I remember the movie The Fly. I can honestly say this picture makes me shudder! =================================== SACRAMENTO CRAWL MUG more step by steps. I decided it was time to do the bottom. I am making 60 crawl mugs with another few glaze tests/artist proofs but I will not destroy the mold until I have used it 100 times. That way I can alter it for Wishes. Example: change the bar name, town, alter the tiki. So this year instead of just saying it I put /100 on the bottom. Next I added another strip of bamboo to the side of the tiki. This photo doesn't have the bamboo finished. I decided to do some "pineapple" texture around the tiki and lettering. Now I'm committed to glazing this inside area in yellow. I added more clay to the top and then I will add a bamboo strip. Tiki area is now done. The Tropics area is now done. Here's the completed side. Next I went to work on the top. I made enough pieces for the entire way around. Next I started to add them from the top down. I used my wood tool to smooth and to shape them. The top will NOT look like this. I have plans. After I cast these I will cut and hand form the clay into the shape I want it to be. One more large side to go...the pineapple side. Cheers, Wendy |
|
H
hang10tiki
Posted
posted
on
Sun, May 22, 2016 6:48 PM
This is a great step by step Wendy Just noticed
|
|
D
danlovestikis
Posted
posted
on
Mon, May 23, 2016 9:30 AM
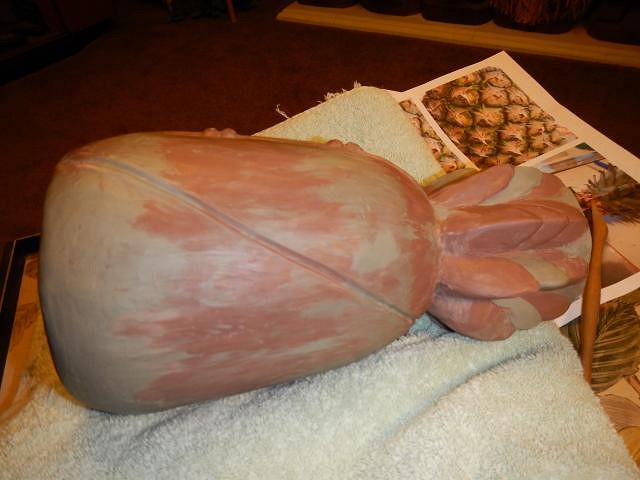
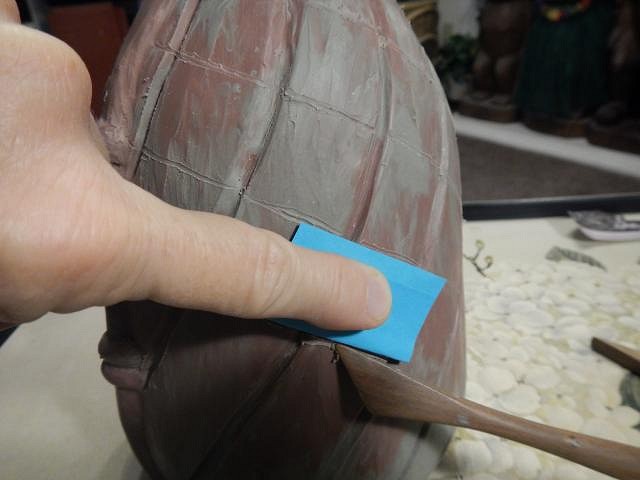
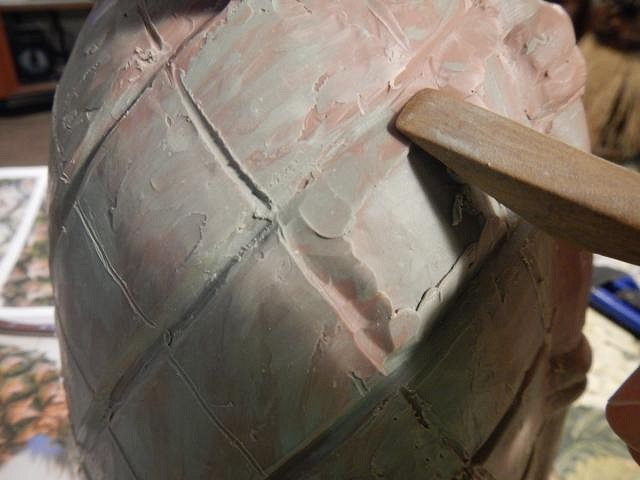
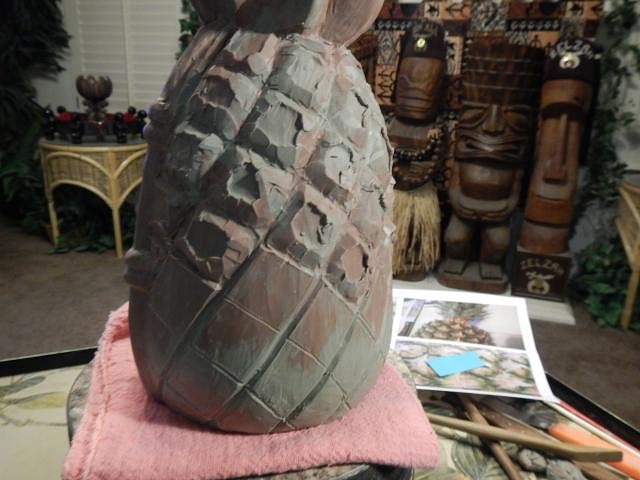
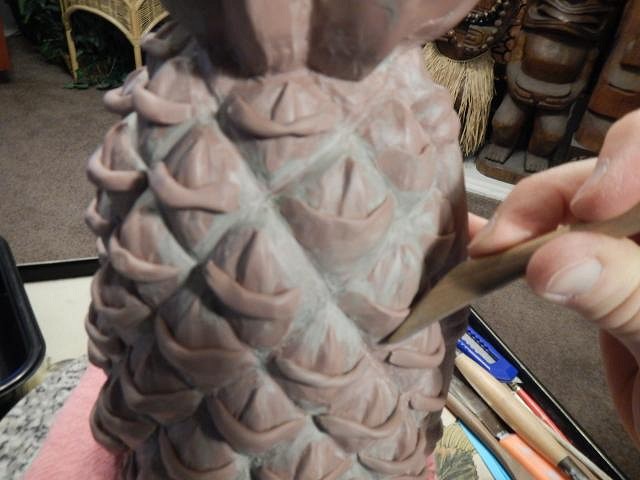
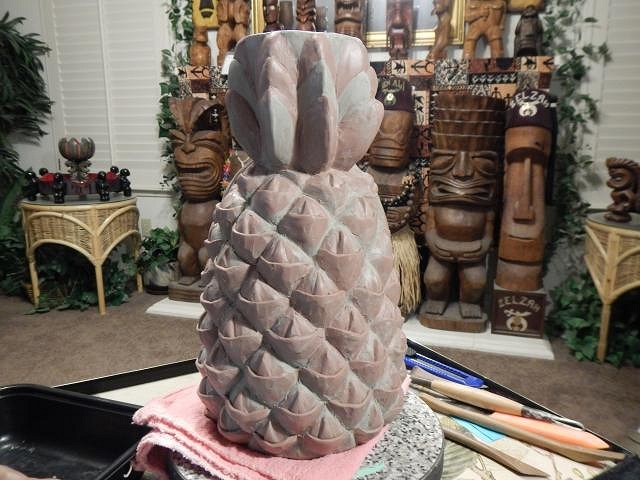
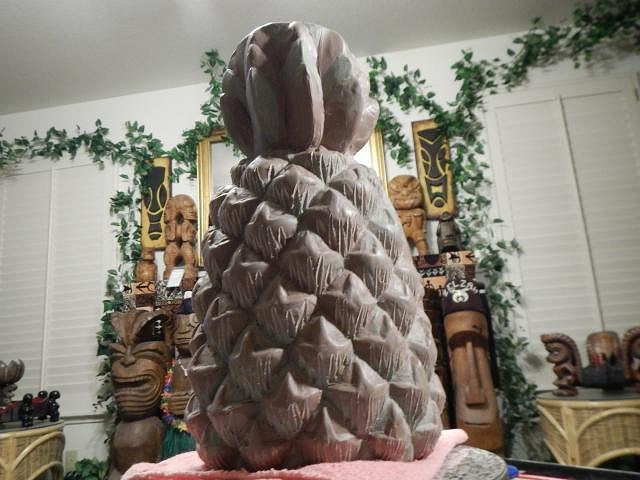
hang10tiki looks like we all have written a book. I get messages from those who have read it and are working on their first mugs. My goal achieved but I'm not ready to stop. I have so much more to share. ======================== SACRAMENTO CRAWL MUG 2016 THE SCULPTING FINISHES WITH THESE PHOTOS. Now it was time to start on the pineapple's surface. I did all the lines in one direction using a piece of paper. The I turned the paper and went back in the other direction. Done. Using this tool I started to work to bring in the side of each square.
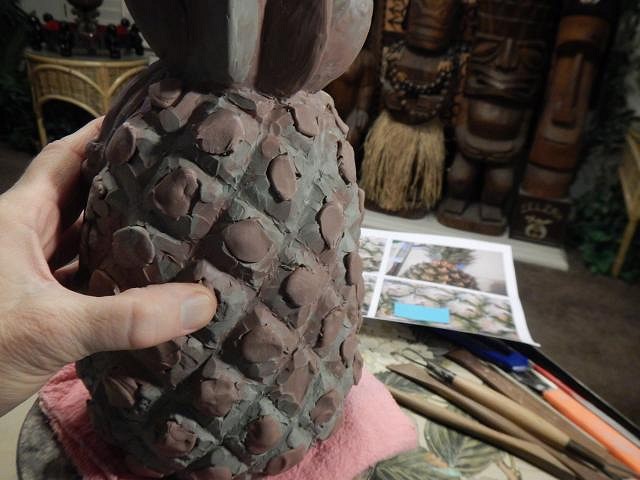
Next I filled them in with more clay and then smoothed it into a mound. Now I added more clay and shaped it.
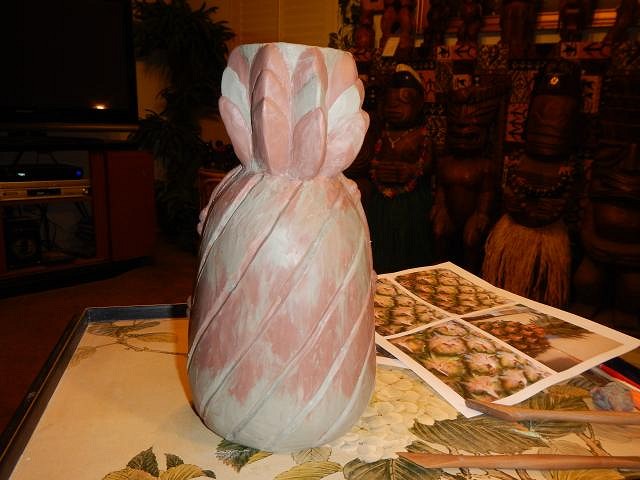
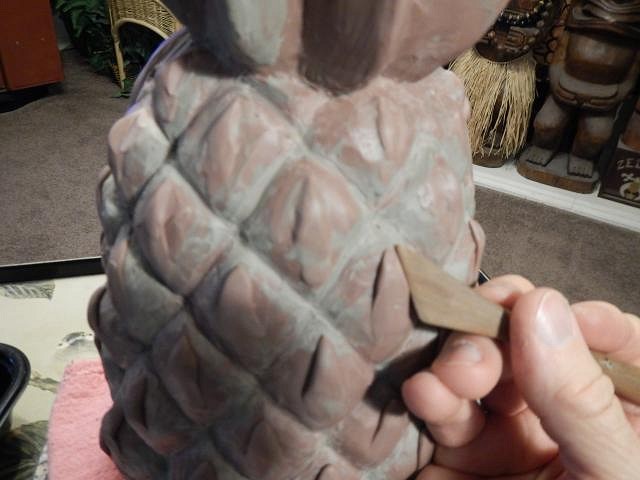
The last clay is added and shaped.
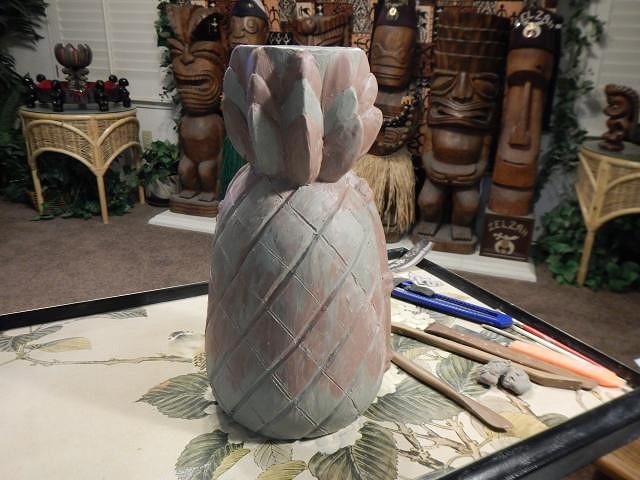
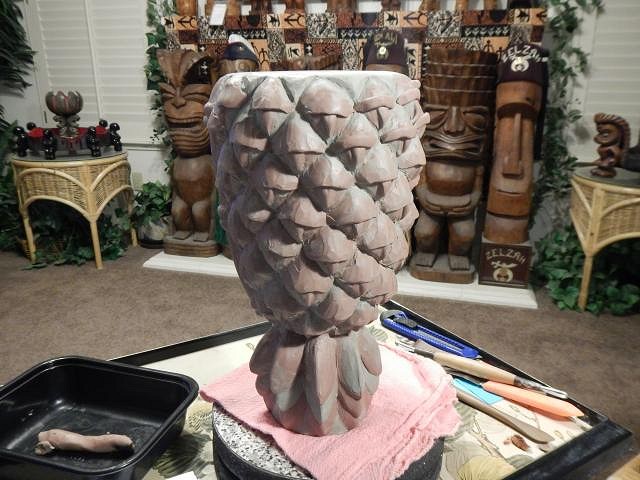
I also turn my sculpts upside down to finish them off. I make sure there are no areas where plaster can run in and lock when making the mold. I added texture to each area. I hope you think it looks like a pineapple from the backside. Here are all the sides completed. The top will greatly change once it is cast and I re-work it.
This is many days worth of work. My hands wouldn't tolerate working this hard clay for more than a couple of hours a day. It was great to get to this place and to know I can make the mold. That's going to be next. I guess you can see why I start in January to get the crawl mug finished by October. Cheers, Wendy |
|
MM

Moai Mike
Posted
posted
on
Mon, May 23, 2016 11:54 AM
Aloha, Wendy! I just to make sure I am on the list to get one of those beautiful crawl mugs! I thought I sent a message but I can't find the list to see if I am on it or not. Looking forward to seeing you and Dan at TO. We got a room at the Crown Plaza! |
|
H
hang10tiki
Posted
posted
on
Mon, May 23, 2016 4:06 PM
Wow Did I say wow |
|
M

MaukaHale
Posted
posted
on
Mon, May 23, 2016 9:30 PM
Wendy, You really made it work this time, that pineapple mug is another amazing piece of art. I finally found time to read your magazine from the guess the number of pictures contest.
[ Edited by: MaukaHale 2016-05-23 21:46 ] |
|
D
danlovestikis
Posted
posted
on
Tue, May 24, 2016 9:12 AM
Moai Mike thank you for calling that to my attention. You were on the paper list just after Tikitastic. I have now placed you in the proper spot right after his name. hang10tiki I love that reaction. That was one crazy hard sculpt. MaukaHale that's a wonderful photo. I've studied the room. Where are you? ========================= Back later. |
|
MM
Moai Mike
Posted
posted
on
Tue, May 24, 2016 10:22 AM
Thank you, Wendy! |
|
Z

zerostreet
Posted
posted
on
Tue, May 24, 2016 10:41 AM
Amazing detail on that mug Wendy! Great job! |
|
M
MaukaHale
Posted
posted
on
Tue, May 24, 2016 7:08 PM
Its my home tiki bar - "The Aloha Theater and Tiki Bar," http://www.tikicentral.com/viewtopic.php?topic=42941&forum=20&178 |
|
D
danlovestikis
Posted
posted
on
Tue, May 24, 2016 8:59 PM
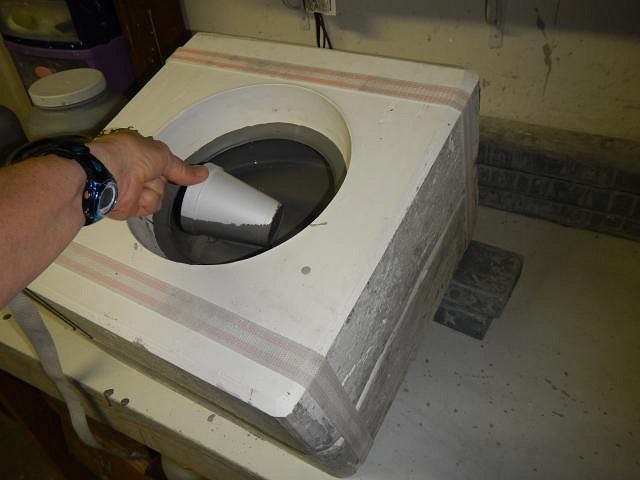
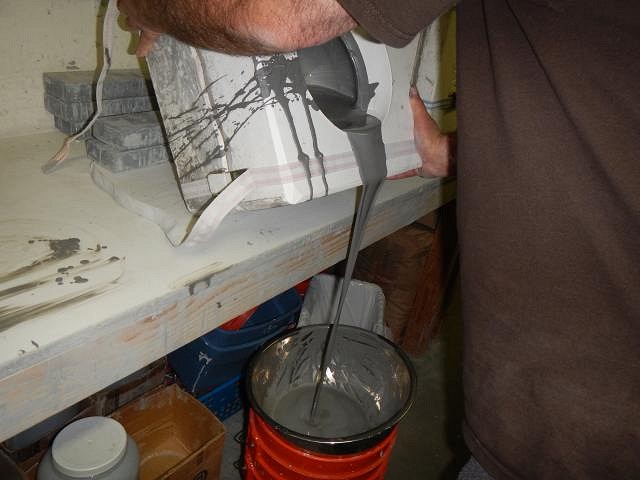
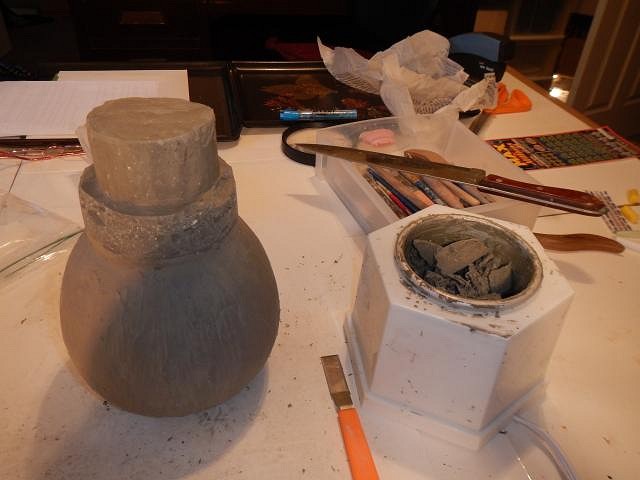
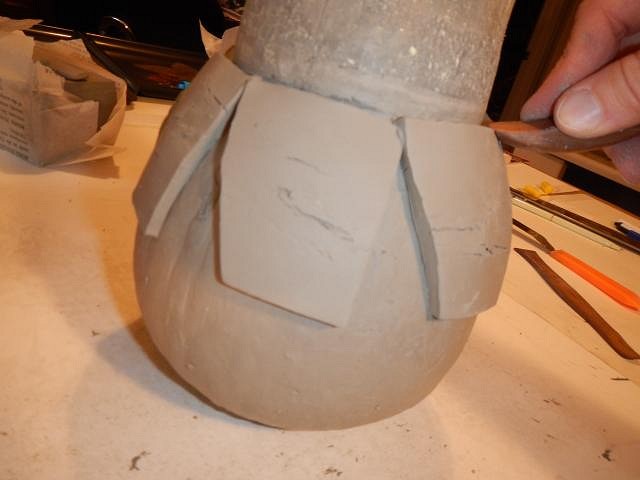
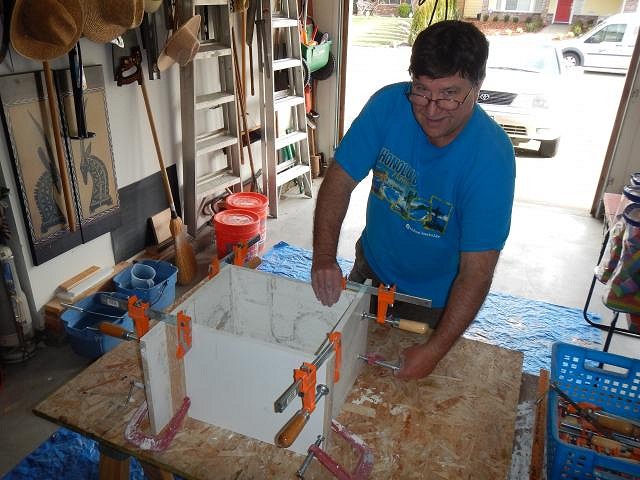
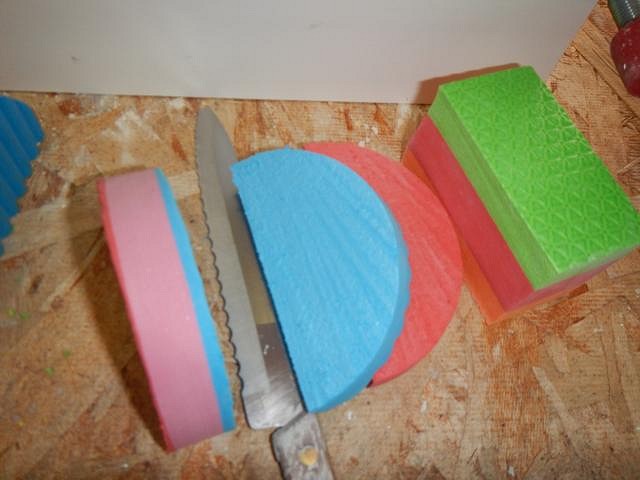
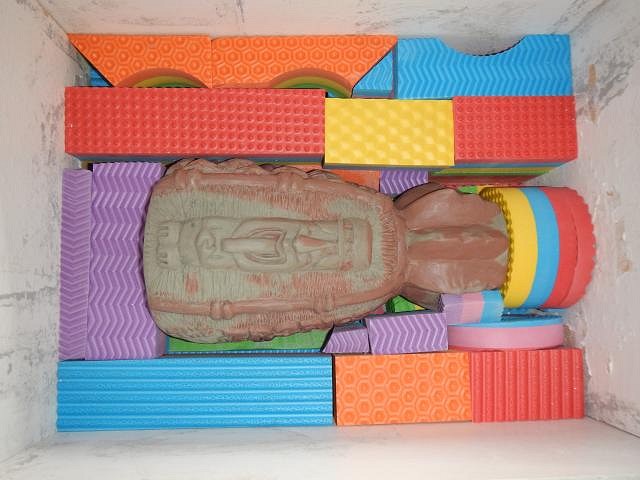
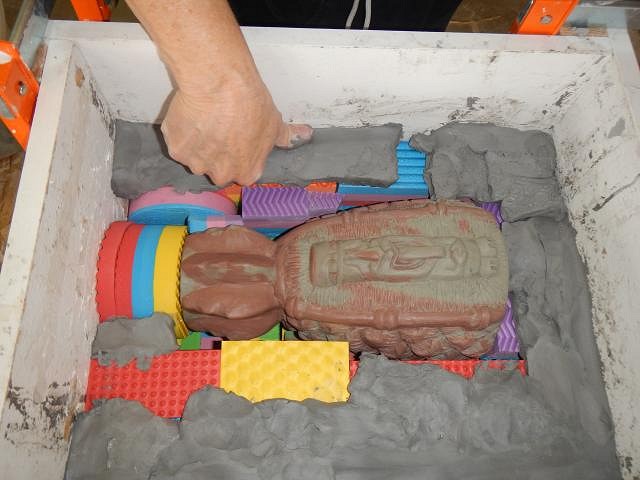
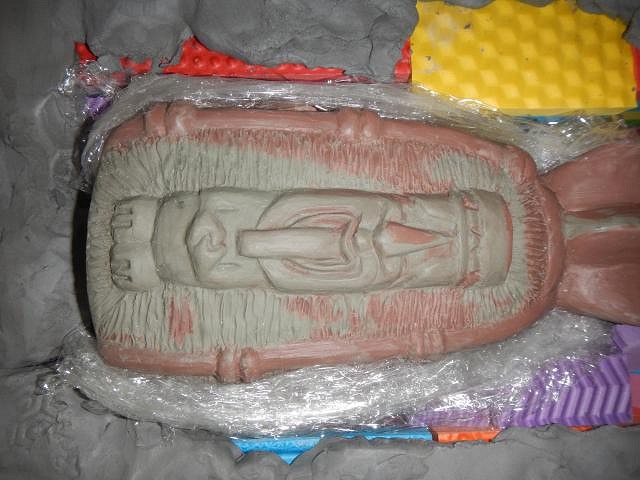
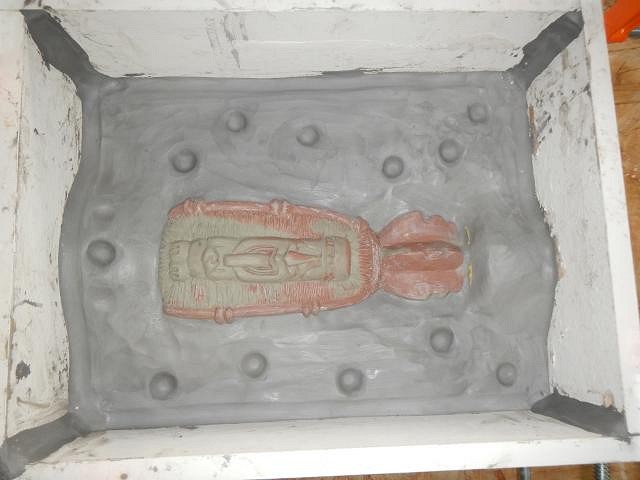
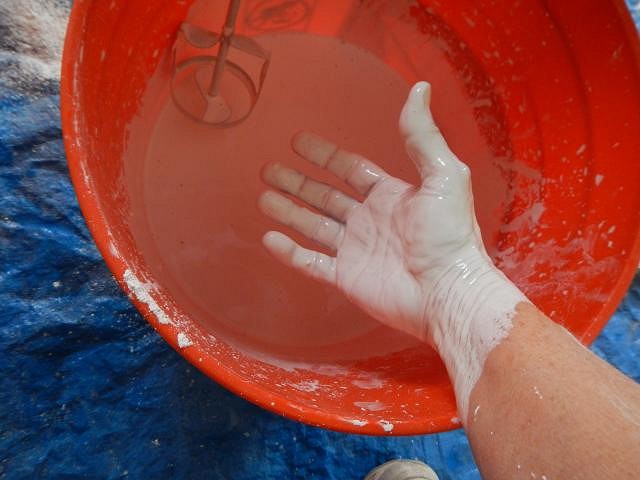
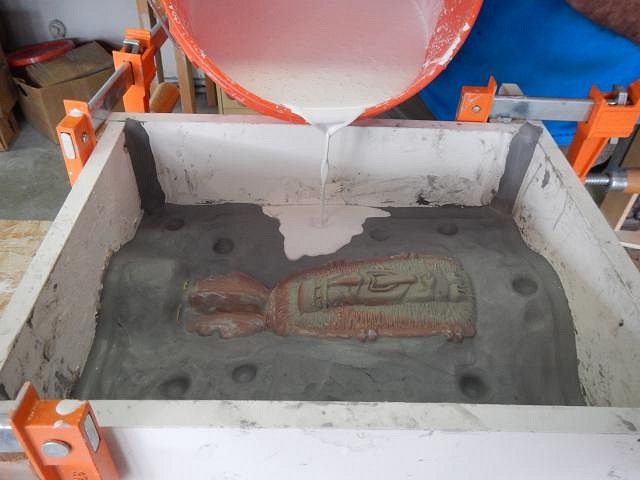
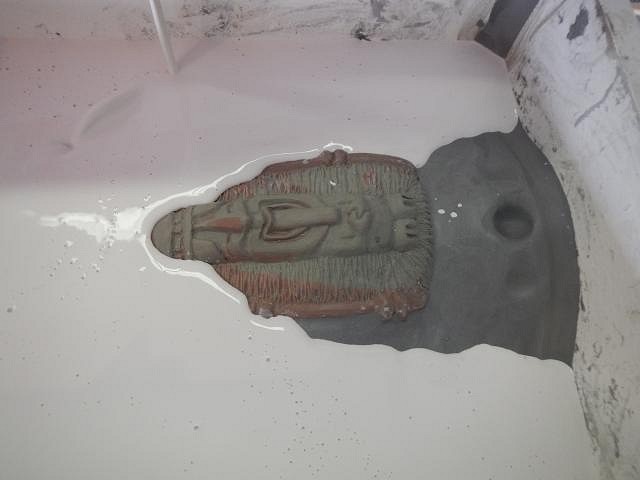
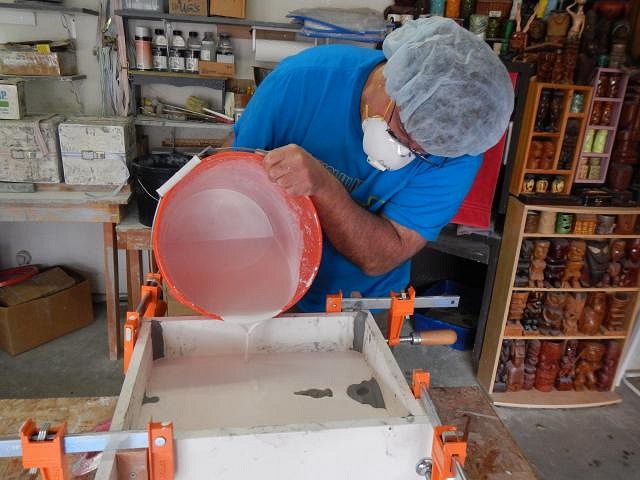
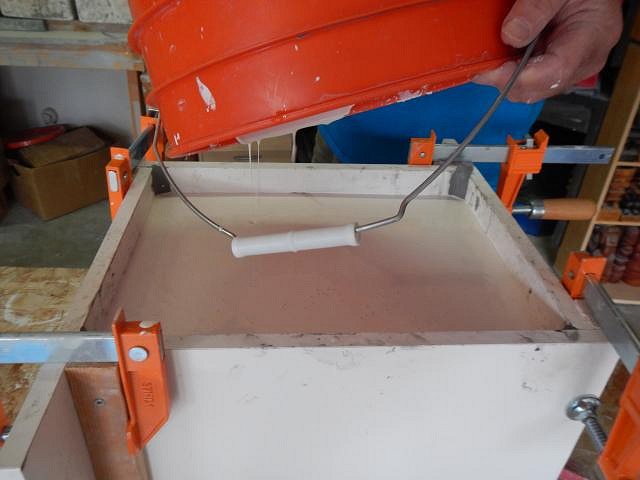
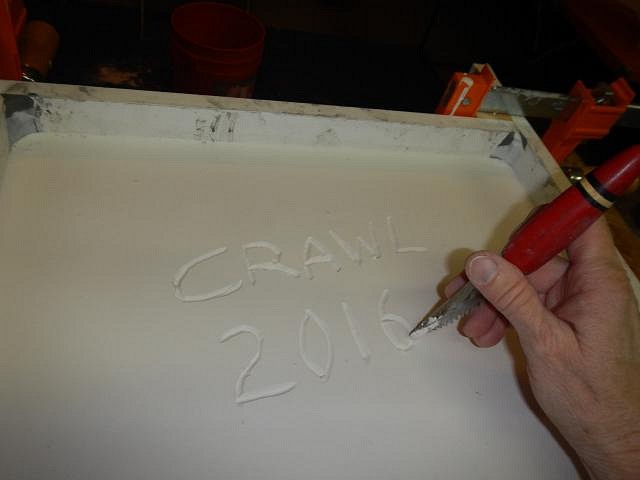
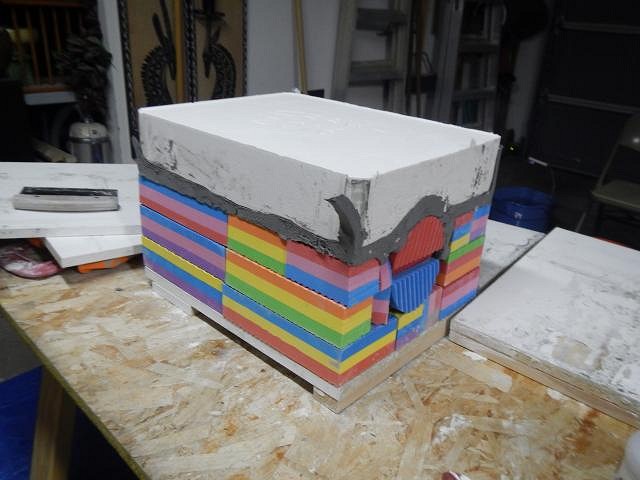
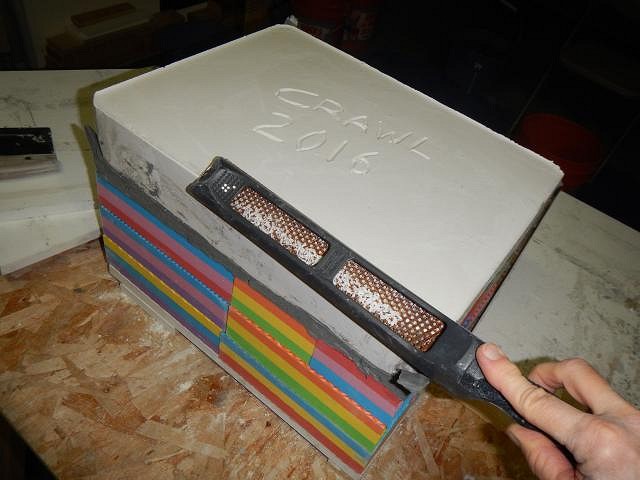
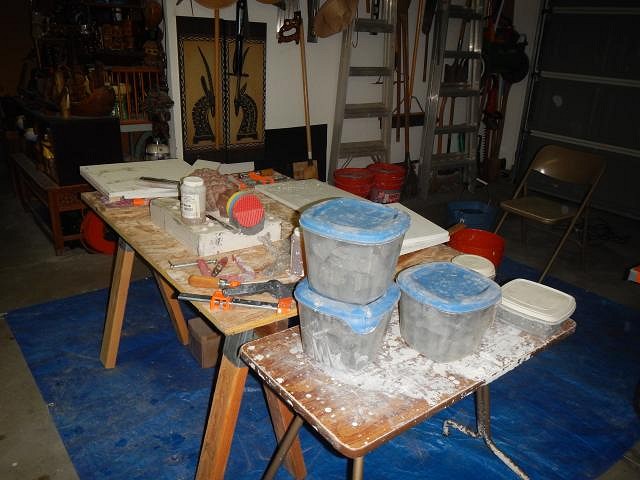
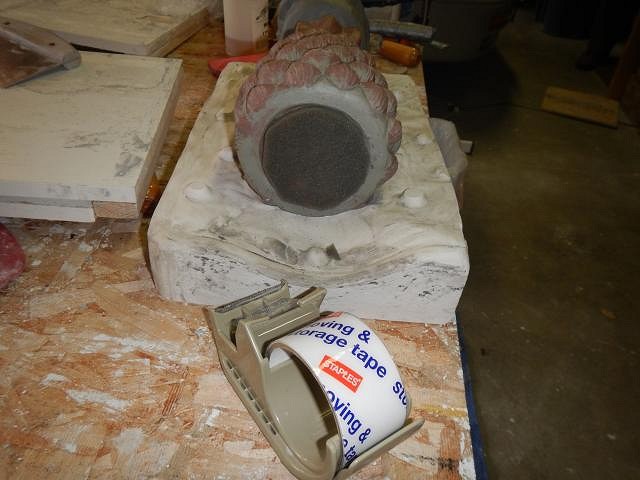
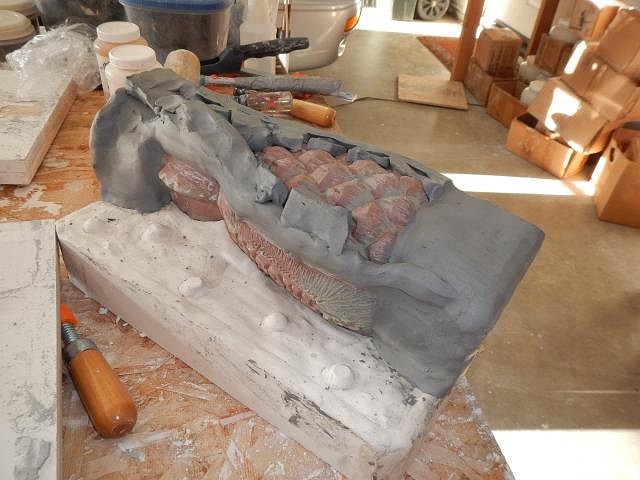
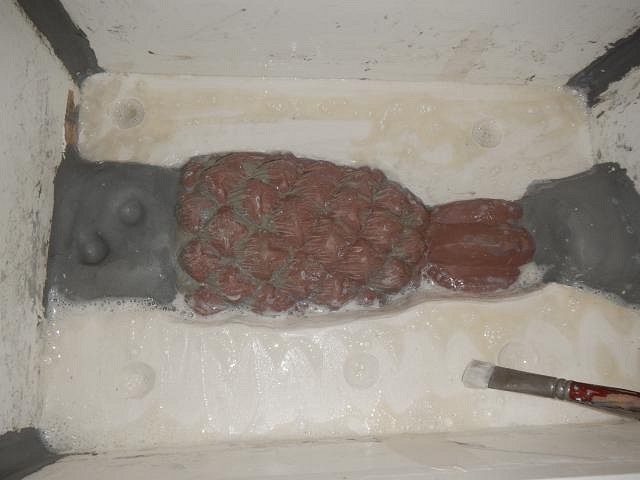
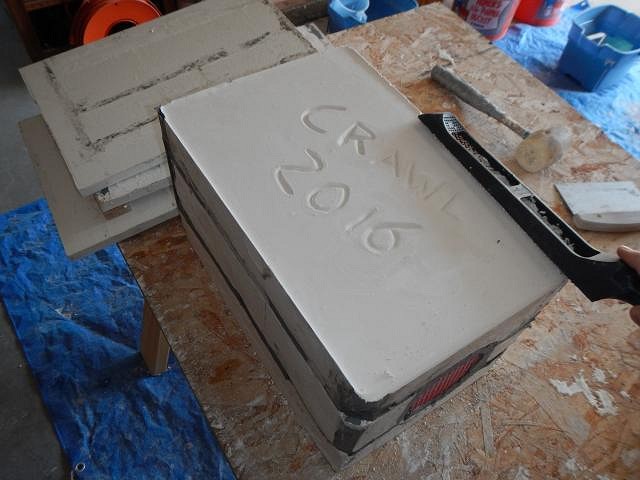
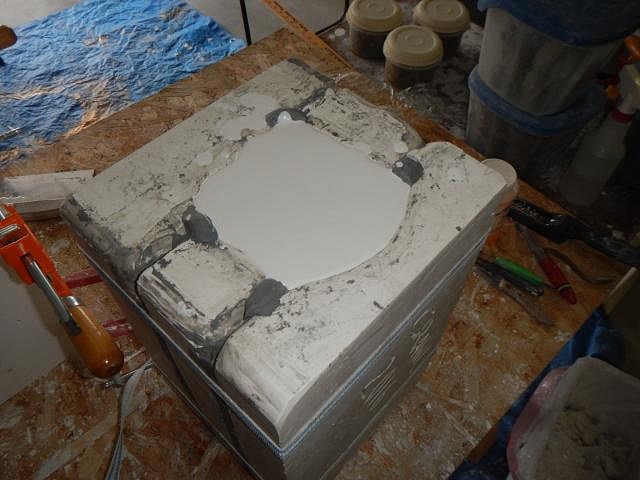
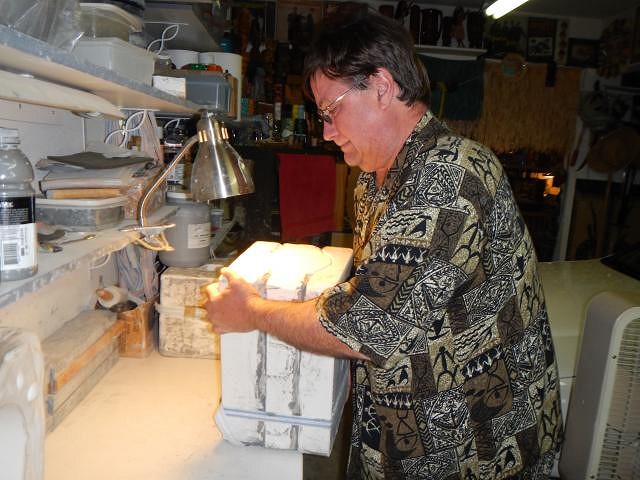
MaukaHale I'm glad to be reminded. I forget to check those home bar threads. I know hang10tiki has one and so does lunavideogames. It's been awhile since I ran about looking at so much fun stuff TC has to offer. =================================== SACRAMENTO CRAWL MUG IS READY TO MOLD. It's a job just to set up the garage with all the supplies it takes to make a mold. I measure the mug so that I can choose the right size pieces of wood for the box. Dan and I assemble the box. First I made a 2 inch thick bottom using soft plastic blocks I bought at ToysRUs. They can even be cut with a serrated bread knife. Then I measure to make sure I can pour 2 inches above the mug using this box. Dan makes snakes for sealing the joints. If I can't find the pieces I need I start cutting some to fit. Next I start putting blocks in place around the tiki and at the top and bottom. These are areas that will not be part of the first mold slab. I cut pieces of clay into slabs that are around 2/3rd's of an inch and start laying them out on top of the blocks and I press them into place. Since I don't want clay to fill in any of the texture on the pineapple side I protect the sculpt with plastic wrap. Then I cover the wrap with clay right up to the mug. Close up. Once this is done and all the snakes are in place to make the box sealed I press in dips/locks. Those will keep the mold pieces from shifting. One last step is to take a wet paper towel and to smooth all the snakes and along the mug. This makes all the seals tight. Now that the prep is done It's time to mix the plaster. PUT ON A FACE MASK AND WEAR IT THE REST OF THE DAY. THE AIR WILL FILL WITH INVISABLE PLATER DUST THAT WILL GO INTO YOUR LUNGS AND TURN HARD. YOU DO NOT WANT EVEN A SPECK INSIDE OF YOU. I figure out how much volume it will need just by looking. I fill a bucket and then place the plaster next to the bucket. I scoop it in and Dan mixes. 2 of plaster to 1 of water. Every so often I have him stop so I can dip in my hand to see it it's right. This is too thin so I add more plaster. I love to watch the mug disappear under the plaster. Last drop. Every time me mix everything has to be cleaned so that there isn't hardened plaster adhering to each tool or bucket. When the piece is hard I carve in the words to identify it. All this for the first slab. Cheers, Wendy [ Edited by: danlovestikis 2016-05-24 21:21 ] |
|
H
hang10tiki
Posted
posted
on
Wed, May 25, 2016 12:01 AM
Love this part |
|
C

cy
Posted
posted
on
Wed, May 25, 2016 2:05 PM
Fantastic sculpt Wendy!! |
|
D
danlovestikis
Posted
posted
on
Wed, May 25, 2016 9:03 PM
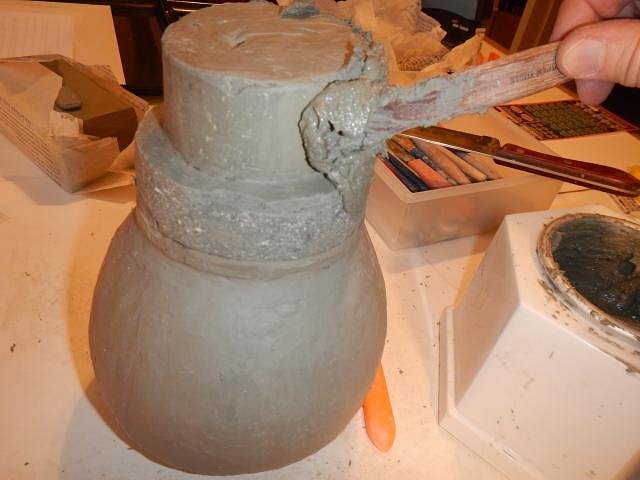
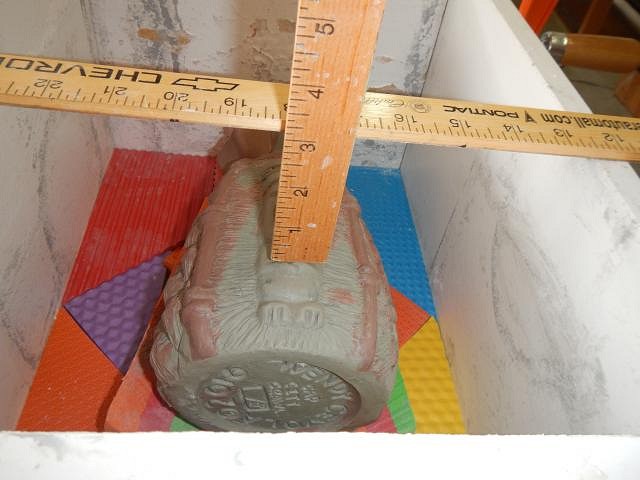
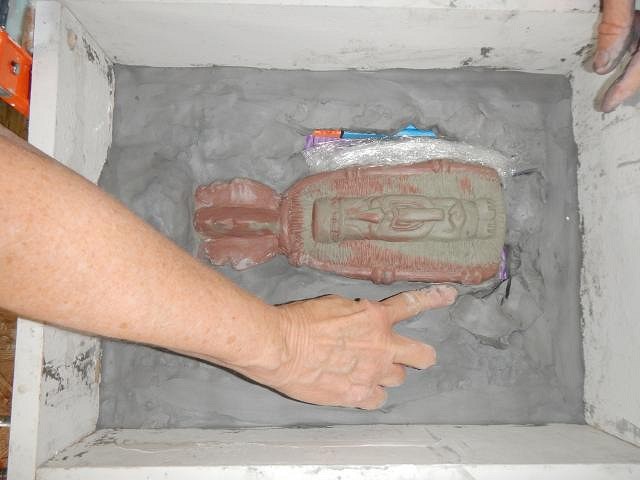
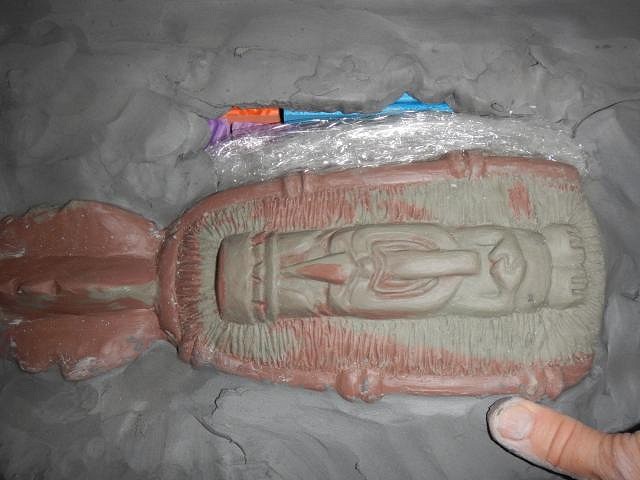
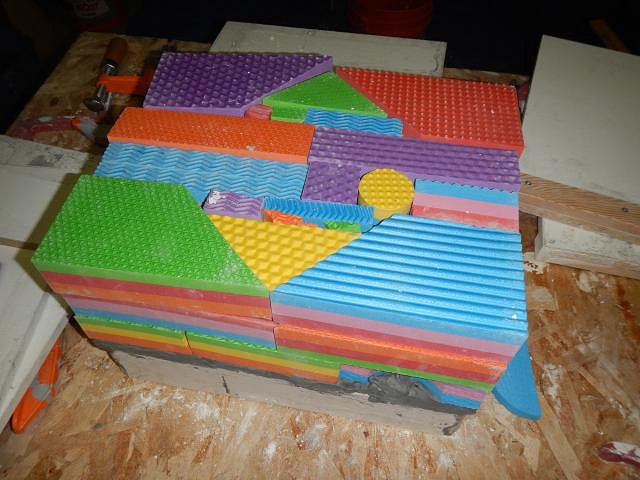
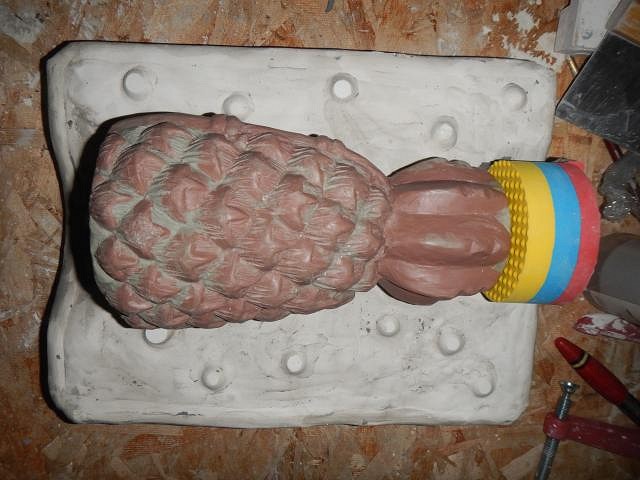
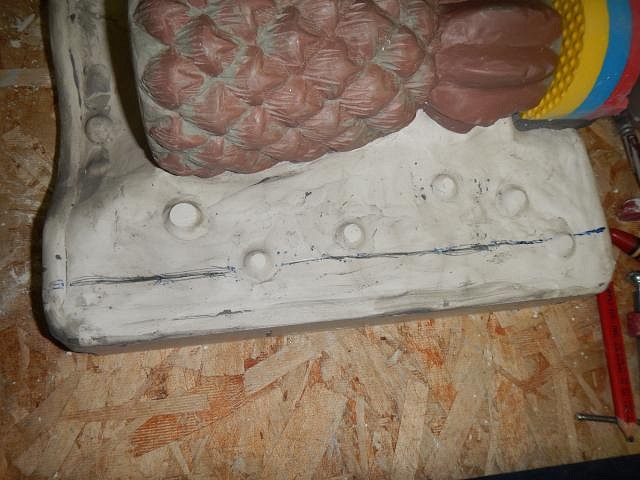
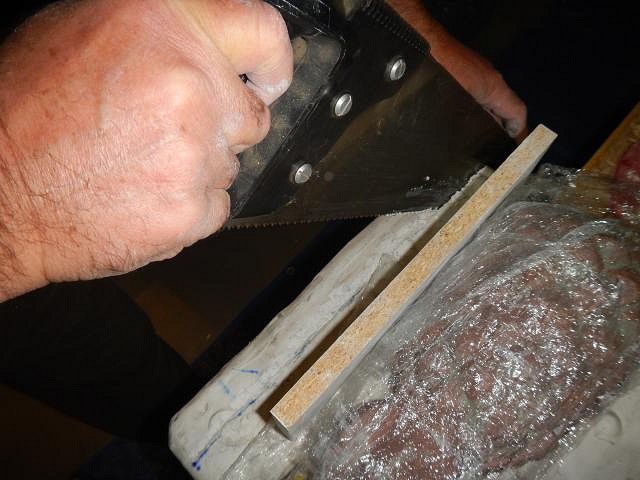
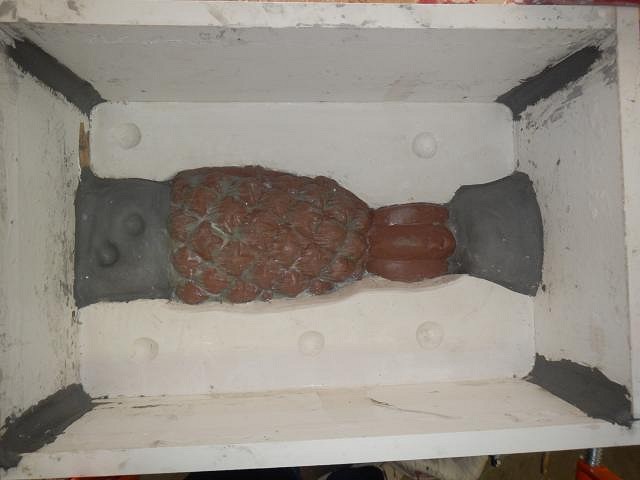
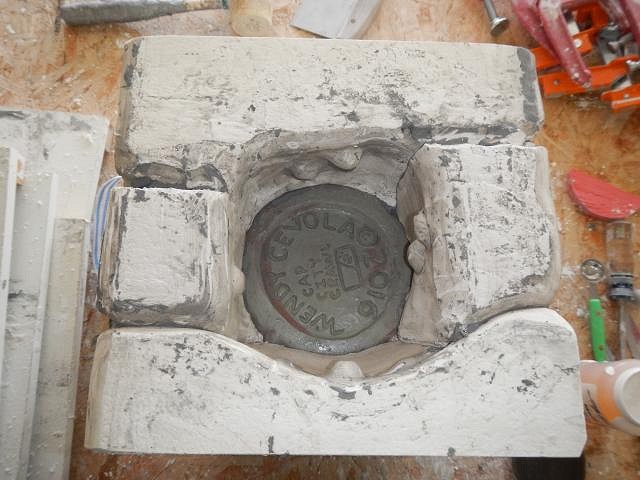
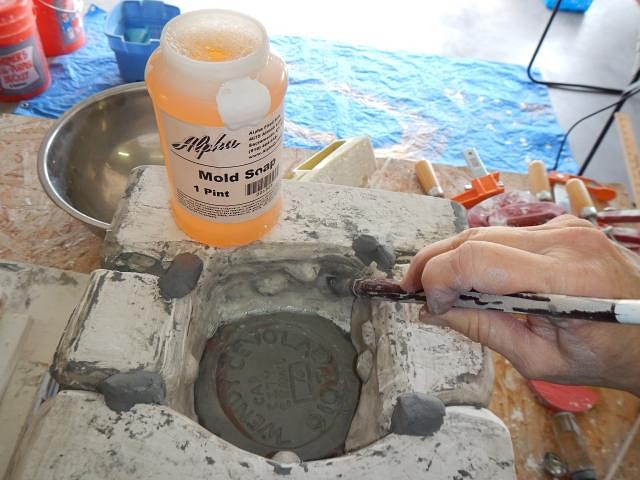
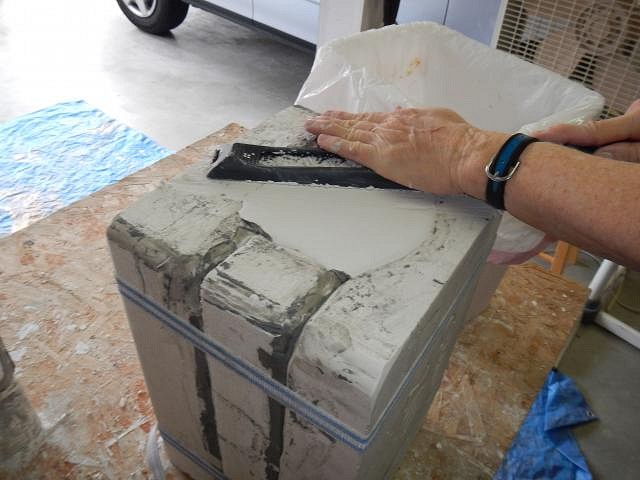
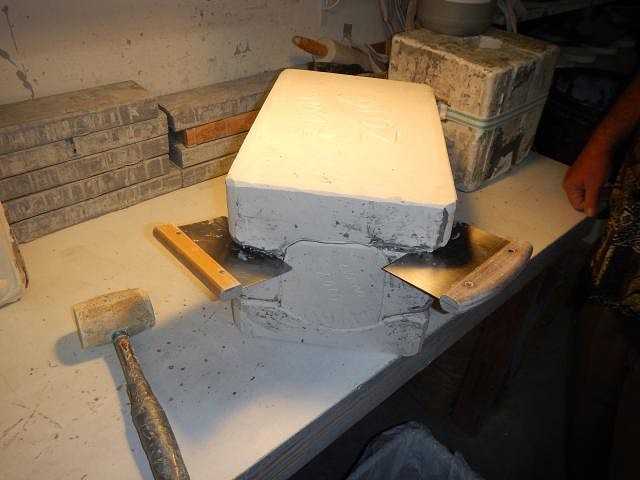
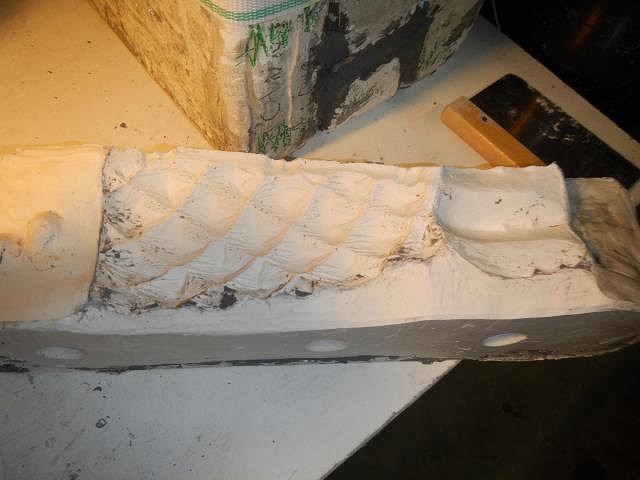
hang10tiki and cy I love reading messages like those. Thank you. ==================================== SACRAMENTO CRAWL MUG 2016 BEING MOLDED. PART TWO: one piece has been made, now I will make two at the same time. I took the box apart. I used a rasp to smooth the edges. You can do this with the backside of a knife and it works just as well. I forgot to take photos. We put straps around the blocks and slab and flipped it over and then removed them. I took the blocks off and put them away. Then I peeled the clay layer off and saved the clay by putting it into Tupperware type containers. I also sprayed it with a bit of water to keep it moist. I noticed that I had not centered the sculpt. I want the sides of the mold to be the same so that the water is pulled from the slip the same amount. So I made sure the sculpt didn't get moved and the debris was kept from it while Dan sawed off the extra along the line I'd drawn. Done without a problem. We are still wearing our masks. This photo shows how the dust stays in the air for hours after we have mixed the first plaster. This is not on my lens it is the flash hitting the floating particles that we do not want in our lungs. Next I cut a piece of foam to cover the writing on the bottom of the mug. I used a roll of tape to hold it in place until I could build up the clay to cover this area. The shape of this mass of clay is important because it will be removed later and the hole will be the last mold piece. Now I covered the blocks with clay. When this is removed this area becomes the open top where the slip is poured into the mold. To make the two side pieces I must build not only the top and bottoms but I must build two dams to stop the plaster and to make the tops of the pieces thick. All done. Next I do 3 or 4 (4 is better) layers of mold soap. MOLD SOAP IS POISON. Wear gloves or be very careful not to touch it to your skin. It requires a face mask but you should still have it on. Between each layer I gently wipe it dry. Now the box is placed around it and the snakes are sealing the pieces. We mix the plaster after I estimate how much we will need. Then it is poured into one side and then the other side. All done and now it sits. As soon as there is standing water on top I know I can scoop out some plaster to make the locks. The locks are done. Plaster is fragile so you don't want any thin edges that can deteriorate or easily break off. So if I see an area that is thin I will trim it off. Then when the next piece is poured it fills in this area and I have a stronger mold. All these little pieces must be removed before the next piece is poured. Phew, that's a lot of posting for an evening. I need to go read a good book. Good night, Wendy |
|
D
danlovestikis
Posted
posted
on
Thu, May 26, 2016 8:15 PM
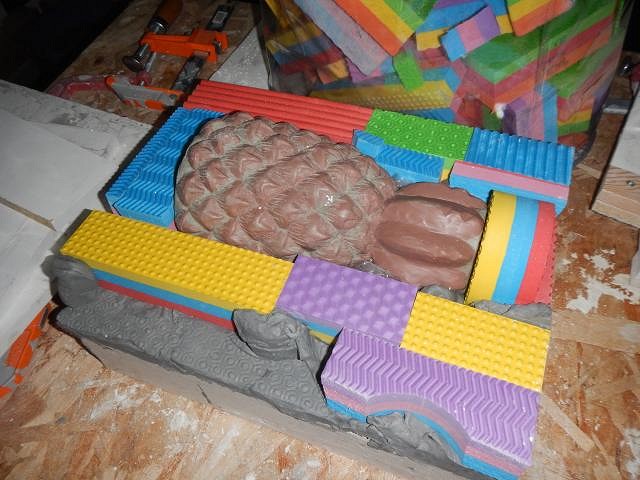
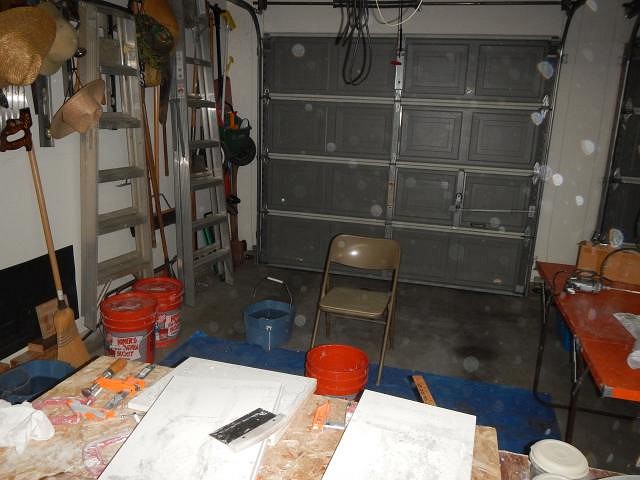
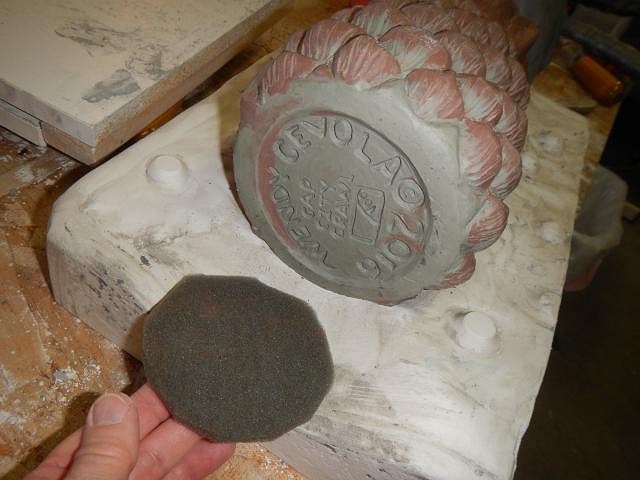
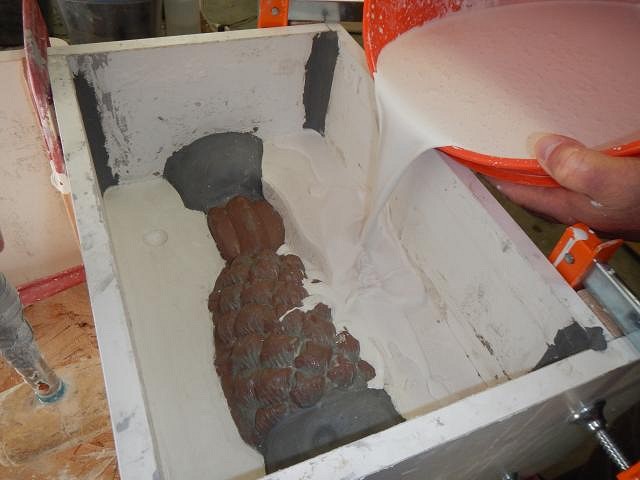
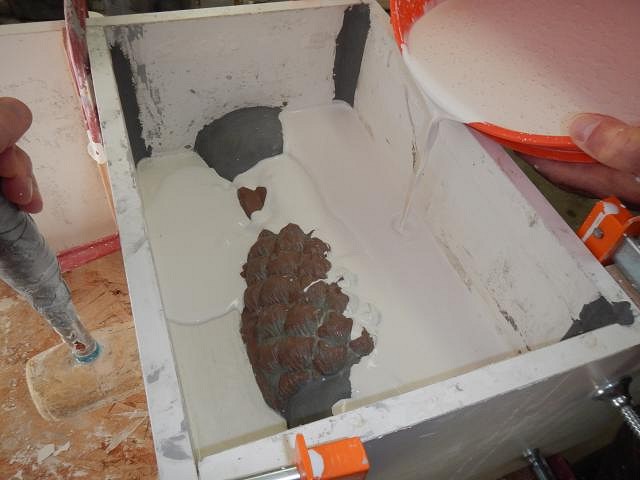
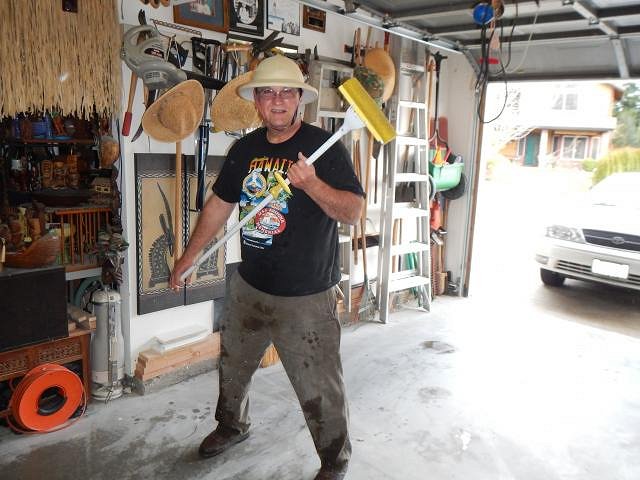
SACRAMENTO CRAWL MUG the last two mold pieces are made. Step by step. To make the next mold piece I again do 4 layers of mold soap keeping it off of my skin and continuing to wear my mask. One thing about masks is that you can wear them a few times before discarding. However you need to take them into a clean environment and let them dry out before putting them in a protective plastic bag. If you don't dry them first they will grow mold. Each layer of mold soap is blotted dry. Now I ready to mix the plaster and then to pour it into the box. I noted were the level of the plaster should rise to in order to give me a 2 inch mold piece. You can make the pieces thinner to save money however if your mold leaks it's more work to deal with and I prefer not to have to worry about that, the slip will dry before it reaches the outside when you have seams that are 2 inches wide. It sits for about 45 minutes before you can take the box off and smooth the edges. Next I put straps around the mold and turn it on end so the bottom is exposed. This is the last piece to complete the mold. 4 layers of mold soap and blotting. I also made little dams to prevent the plaster from running along these crevasses which would make them stick together. Now the plaster is poured in until it almost runs over the dams. Once it is solid I remove the clay dams and rasp the entire bottom so that all pieces will sit on the counter top. This makes putting it together or taking it apart easy. My hero/husband Dan cleans up the mess after we finish making a mold. You should sweep or vacuum because of the dust hazard so while wearing a mask he mops the garage. I had him take off the mask so I could show off his smile. Before I take the mold apart I chisel around the bottom piece. I've found this prevents chunks from breaking off. I make heavy molds. Dan turns it on the side so I can use my vegetable choppers to knock the pieces apart. One by one the pieces are taken apart. I didn't have any problems. No undercuts so I didn't lose any of the plaster.
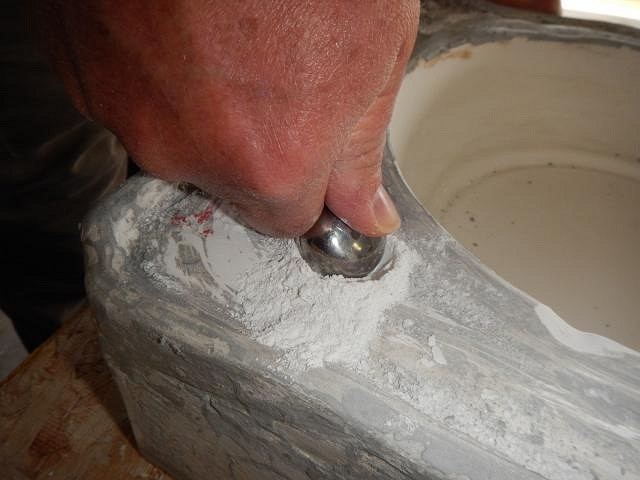
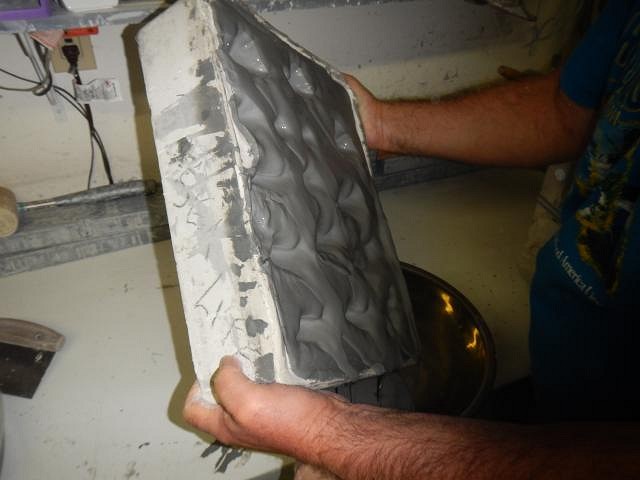
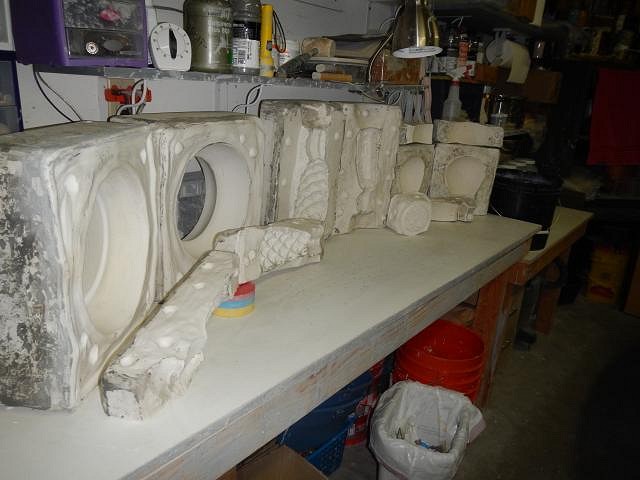
It was during this time that I also dried out the Big Bowl mold.
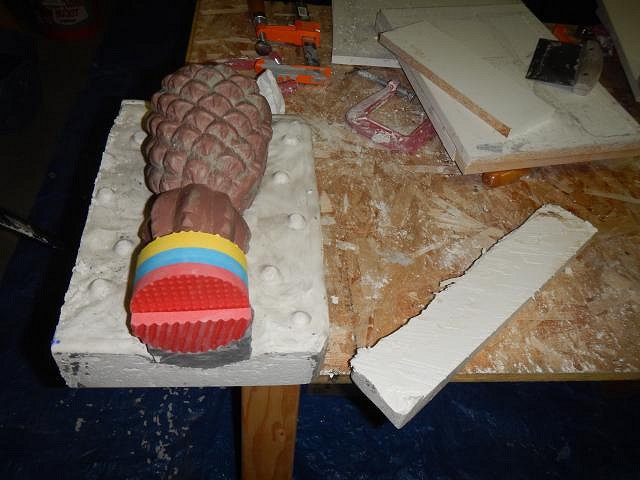
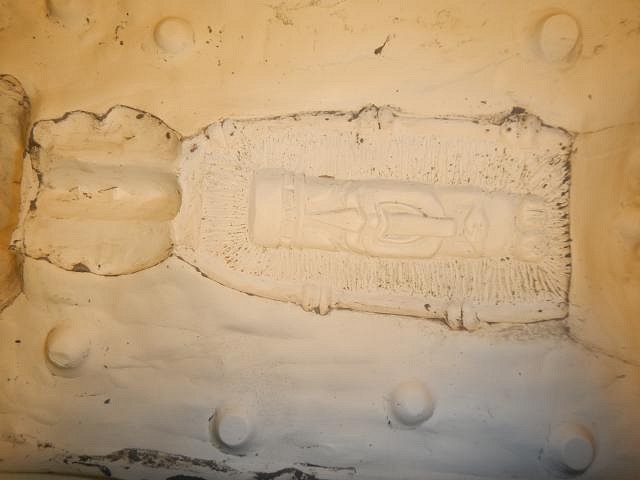
I used a block to lift the pieces off the table to help them dry. All the other pieces are rotated every day. It took 2 fans running 24/7 for two weeks to completely dry out this mold. The plaster must "set" to become a mold that will allow you to cast 100 plus items. To set the plaster you must DRY it Completely. So there you have it from start to finish. If I didn't explain something well enough please just ask me the questions you have and I'll do my best to help you out. Cheers, Wendy |
|
B
bobtiki
Posted
posted
on
Thu, May 26, 2016 8:20 PM
Wendy (and Dan), THANK YOU for the massive new mold-making post. That is just incredibly helpful. I'm still reading the thread from the start, and I'm at page 150 so far. But I think, if I have counted the posts correctly, it's time to congratulate you on 500 pages in this thread. So much sharing and hard work! I'm in awe. |
|
H
hang10tiki
Posted
posted
on
Thu, May 26, 2016 9:23 PM
Wow And congraDs on 500 |
|
D

Danno
Posted
posted
on
Fri, May 27, 2016 9:24 AM
Congratulations on reaching 500! Wow! Still one of my favorites!! |


Pages: 1 2 3 4 5 6 7 8 9 10 11 12 13 14 15 16 17 18 19 20 21 22 23 24 25 26 27 28 29 30 31 32 33 34 35 36 37 38 39 40 41 42 43 44 45 46 47 48 49 50 51 52 53 54 55 56 57 58 59 60 61 62 63 64 65 66 67 68 69 70 71 72 73 74 75 76 77 78 79 80 81 82 83 84 85 86 87 88 89 90 91 92 93 94 95 96 97 98 99 100 101 102 103 104 105 106 107 108 109 110 111 112 113 114 115 116 117 118 119 120 121 122 123 124 125 126 127 128 129 130 131 132 133 134 135 136 137 138 139 140 141 142 143 144 145 146 147 148 149 150 151 152 153 154 155 156 157 158 159 160 161 162 163 164 165 166 167 168 169 170 171 172 173 174 175 176 177 178 179 180 181 182 183 184 185 186 187 188 189 190 191 192 193 194 195 196 197 198 199 200 201 202 203 204 205 206 207 208 209 210 211 212 213 214 215 216 217 218 219 220 221 222 223 224 225 226 10816 replies