Pages: 1 2 3 4 5 6 7 8 9 10 11 12 13 14 15 16 17 18 19 20 21 22 23 24 25 26 27 28 29 30 31 32 33 34 35 36 37 38 39 40 41 42 43 44 45 46 47 48 49 50 51 52 53 54 55 56 57 58 59 60 61 62 63 64 65 66 67 68 69 70 71 72 73 74 75 76 77 78 79 80 81 82 83 84 85 86 87 88 89 90 91 92 93 94 95 96 97 98 99 100 101 102 103 104 105 106 107 108 109 110 111 112 113 114 115 116 117 118 119 120 121 122 123 124 125 126 127 128 129 130 131 132 133 134 135 136 137 138 139 140 141 142 143 144 145 146 147 148 149 150 151 152 153 154 155 156 157 158 159 160 161 162 163 164 165 166 167 168 169 170 171 172 173 174 175 176 177 178 179 180 181 182 183 184 185 186 187 188 189 190 191 192 193 194 195 196 197 198 199 200 201 202 203 204 205 206 207 208 209 210 211 212 213 214 215 216 217 218 219 220 221 222 223 224 225 226 10,816 replies
|
T

TikiAno
Posted
posted
on
Sun, Jun 12, 2016 9:12 AM
Holy pineapples! Great job and congratulations. Such beautiful pieces, and, as always, so impressed by you and Dan's attention to perfecting such a process. I'm tired just looking at all of the photos! :) |
|
D

danlovestikis
Posted
posted
on
Sun, Jun 12, 2016 2:12 PM
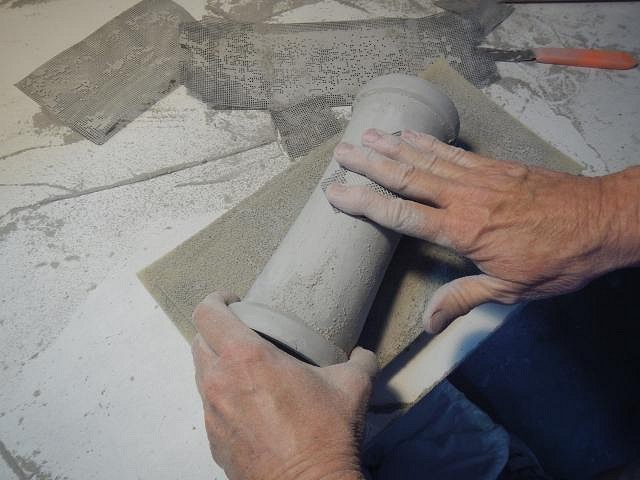
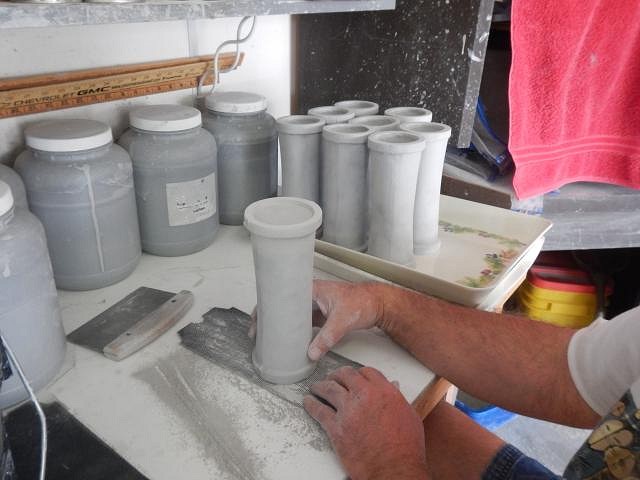
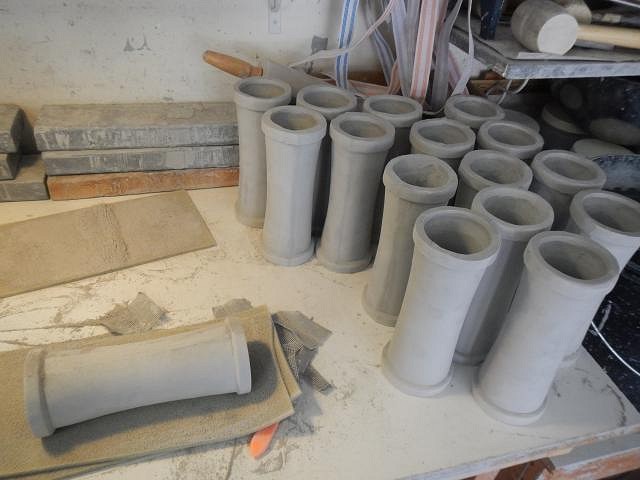
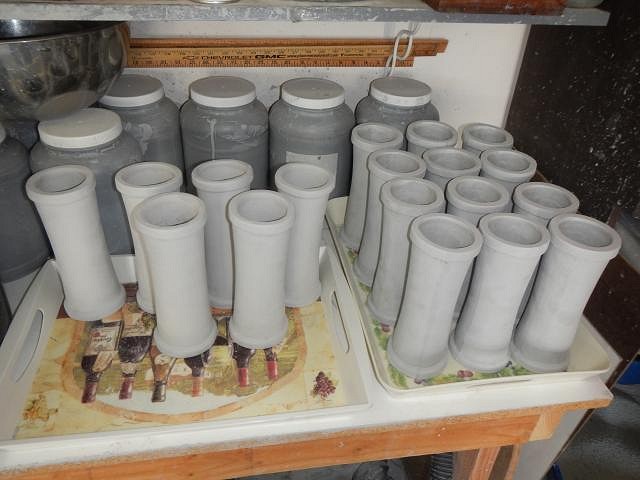
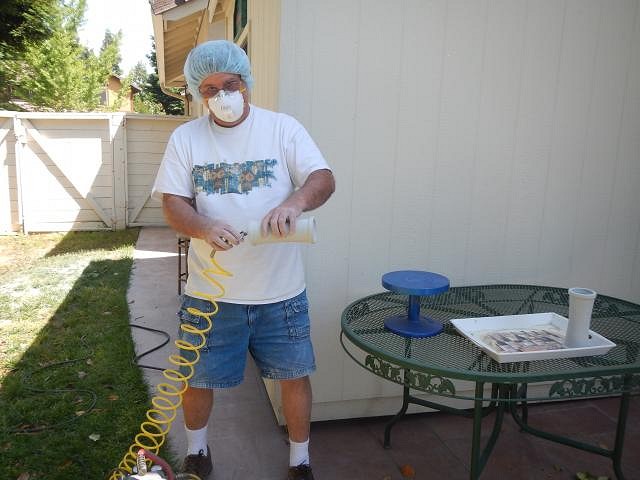
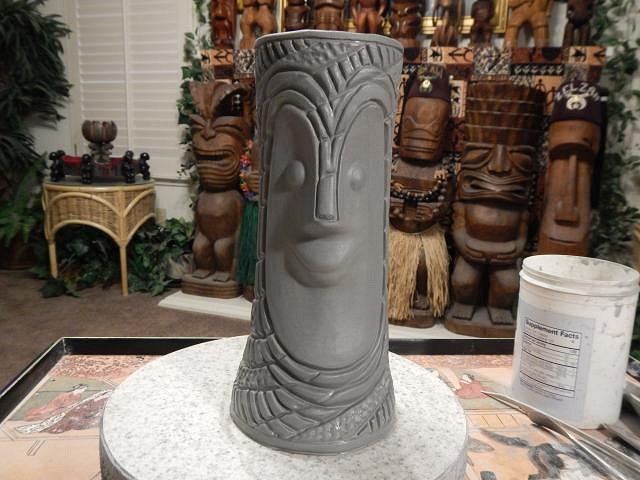
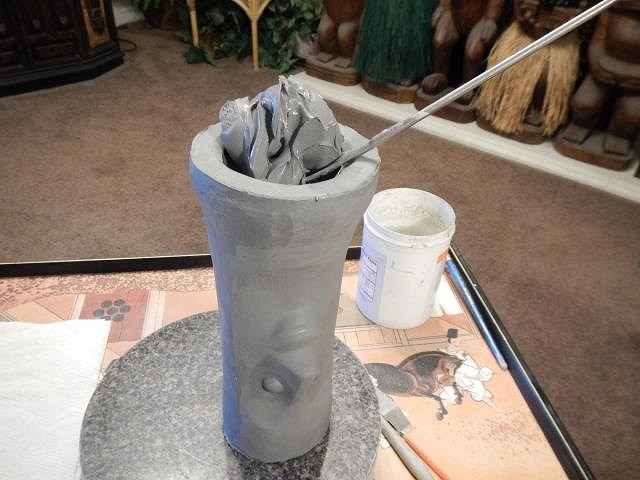
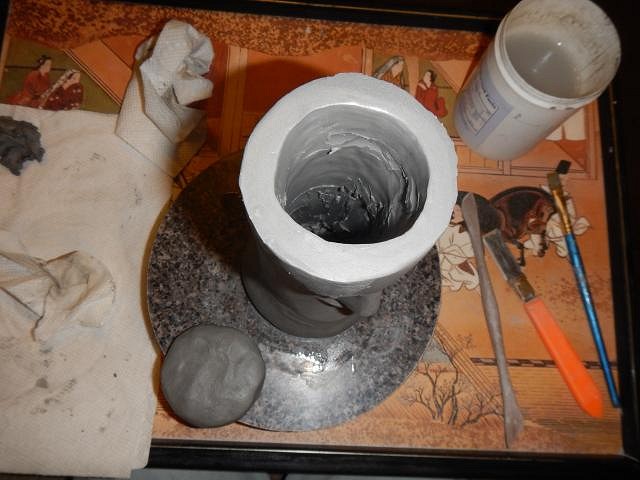
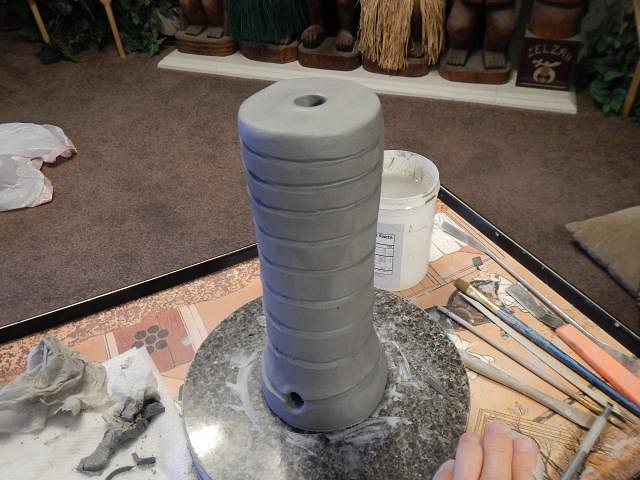
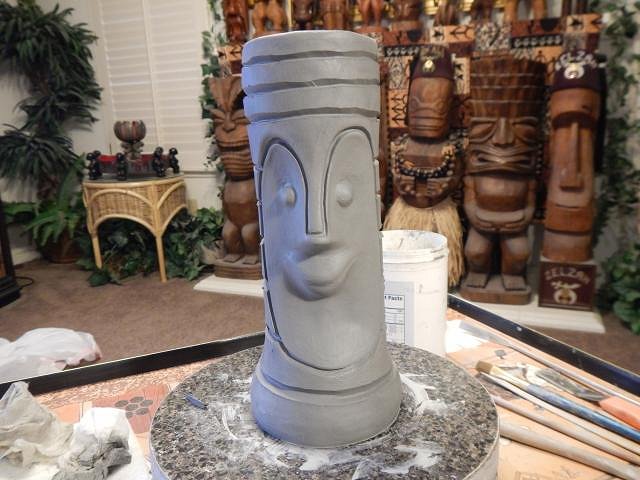
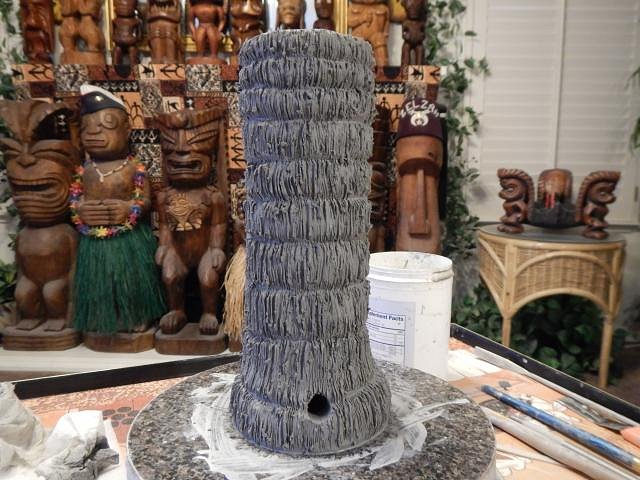
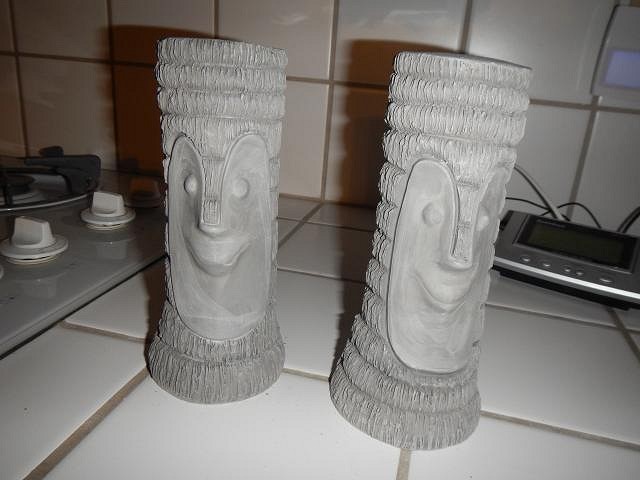
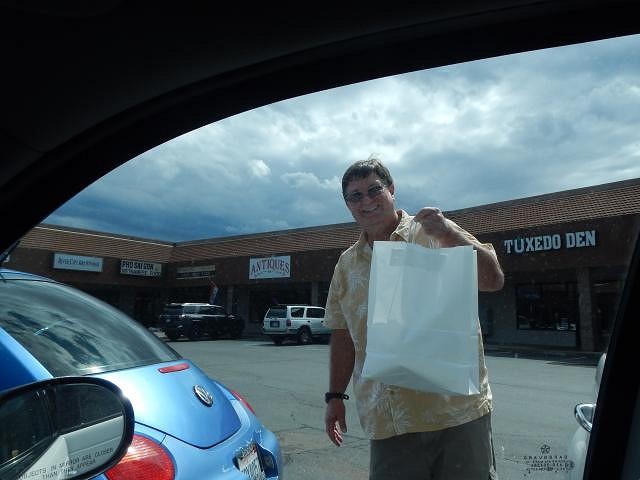
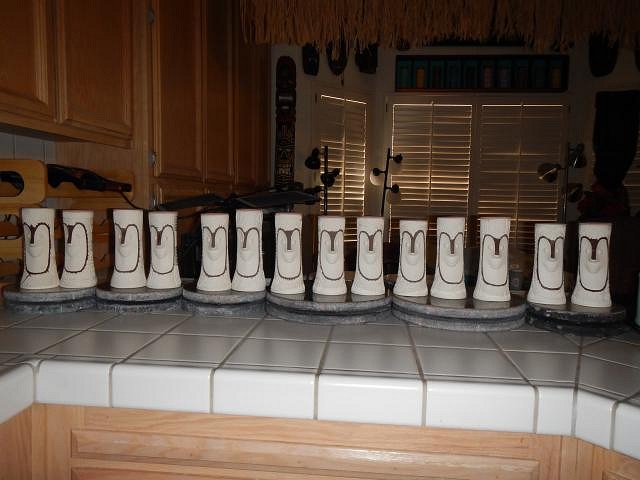
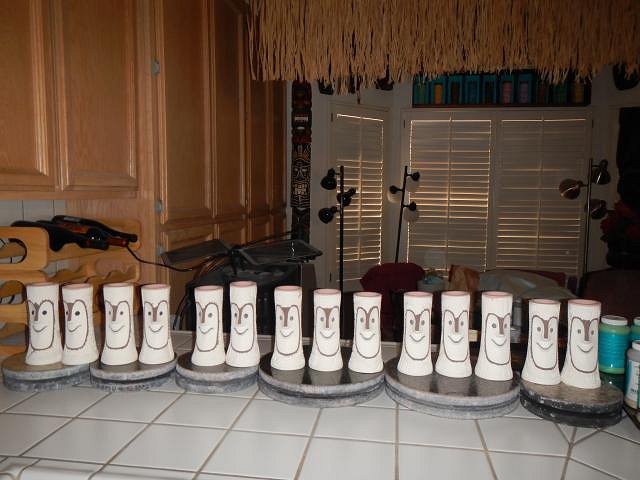
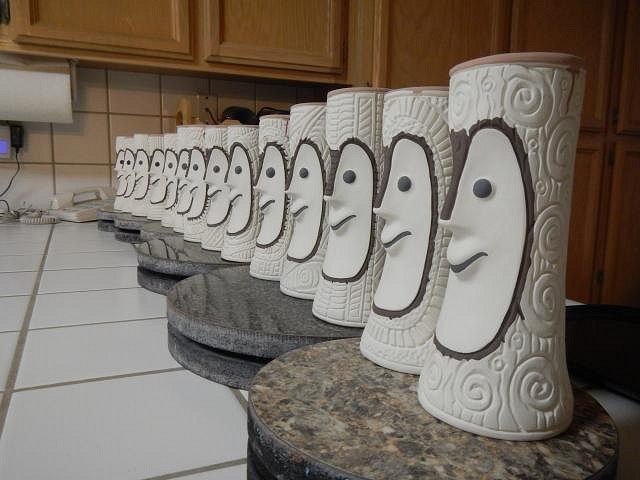
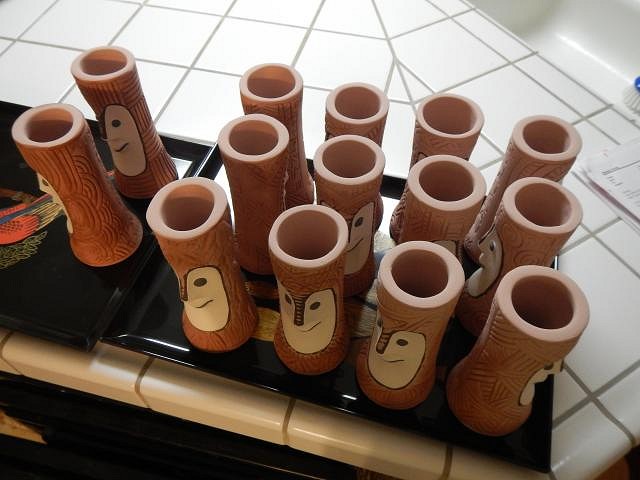
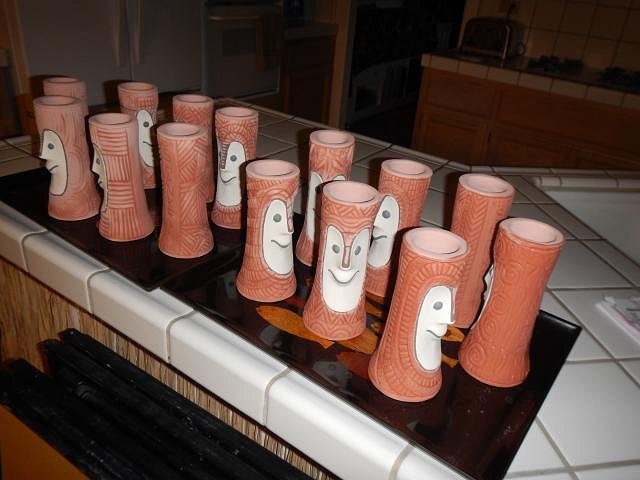
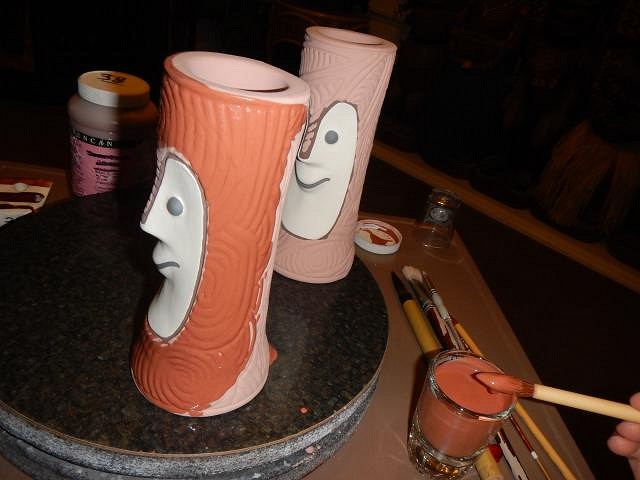
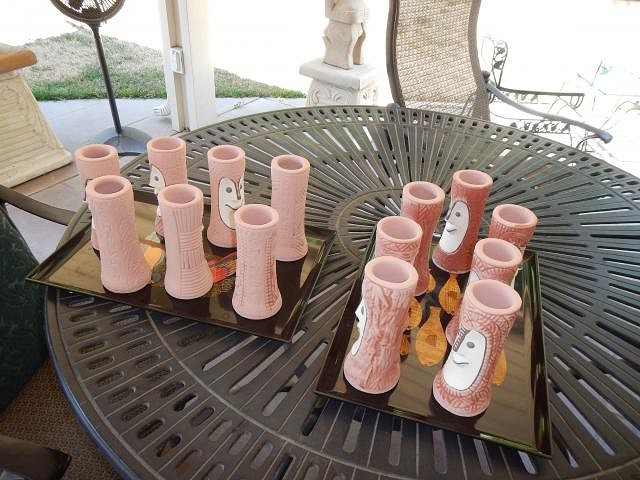
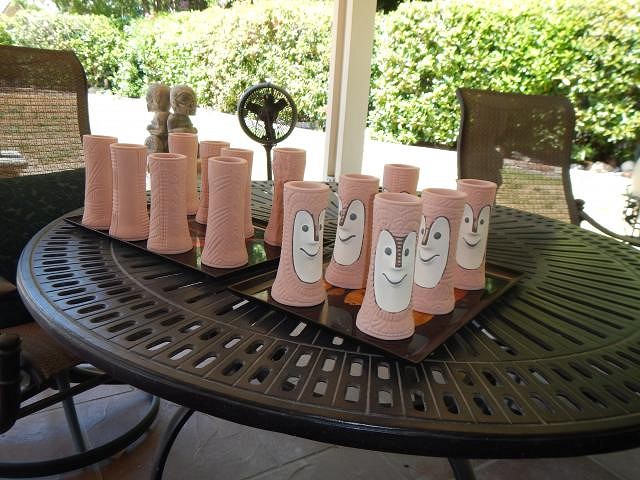
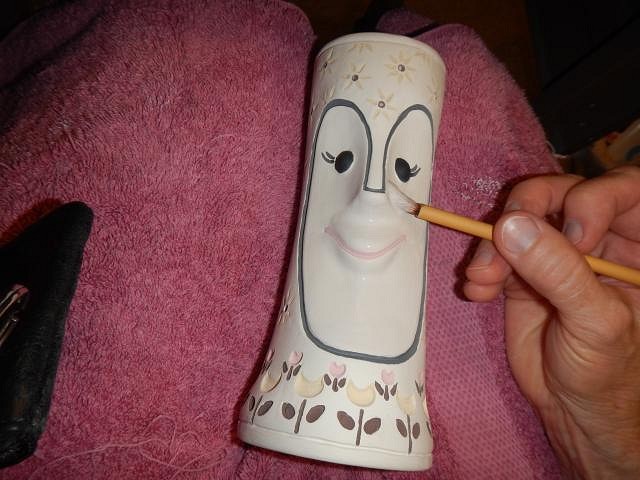
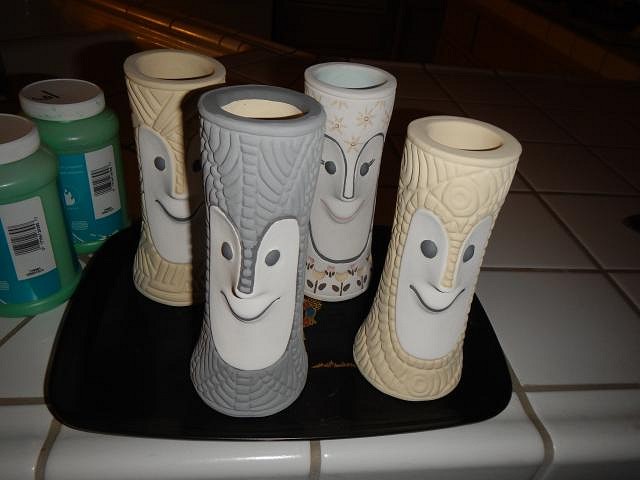
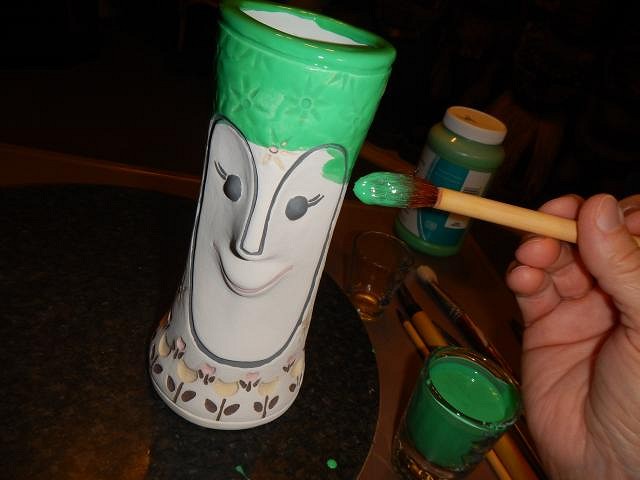
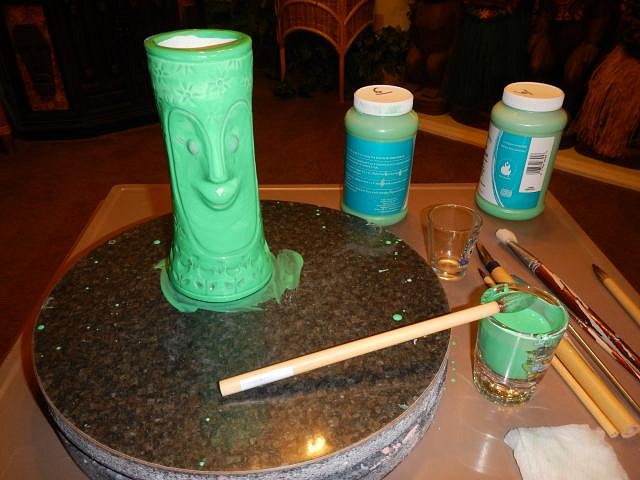
TikiAno it has been a tremendous amount of work however I also did even more. Check below to see what else I did. 14 hour days are not uncommon when it comes to tiki work. ========================= When casting mugs there is always a clean up at the end. If you cast one or more mugs the clean up is the same. However when you open a mold there is the clean up of the mold itself so that part is more work. Even still if I have an empty casting table I know I would be happier if I did a bit more. So 40 times when casting a crawl mug I also cast a fogcutter mug. Remember the Diamond Head Island mug I made? Well I decided that it would speed up the Wish List #7 if I had Foggcutter mugs ready to paint.
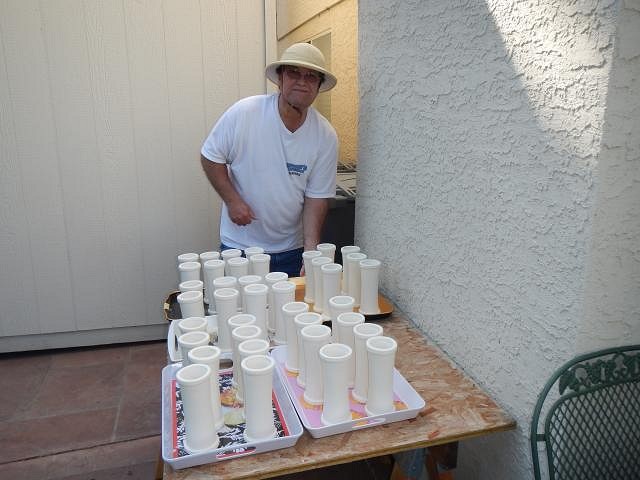
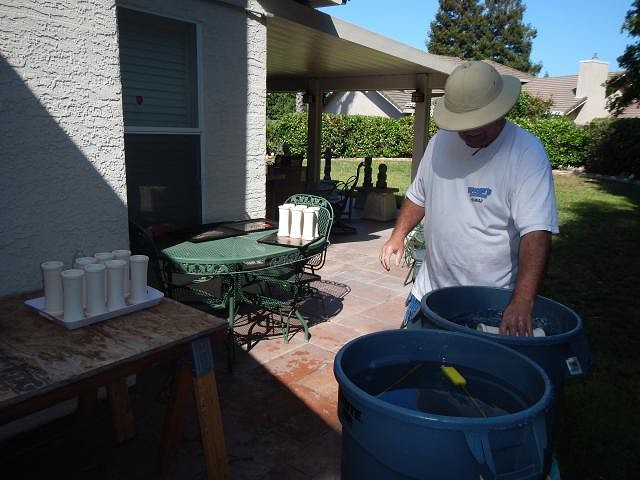
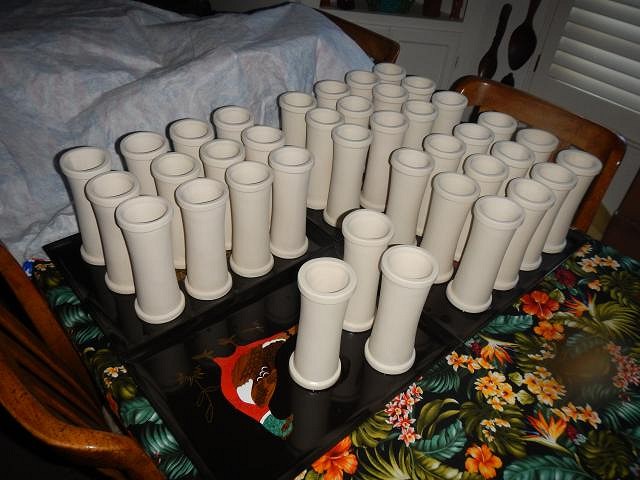
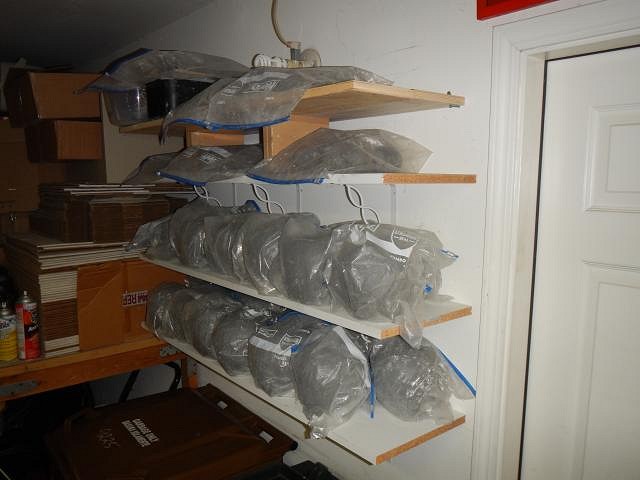
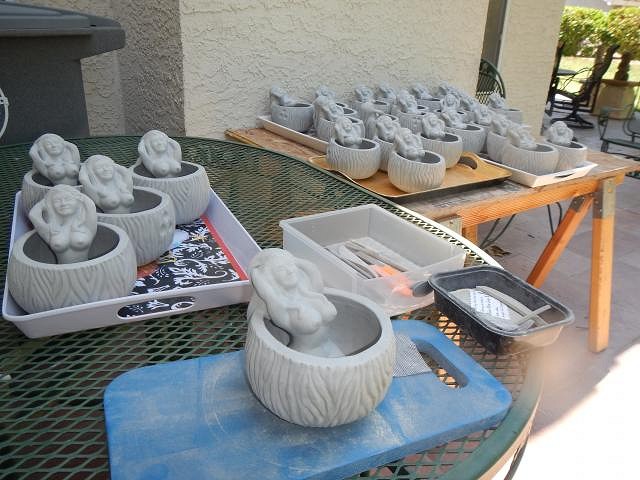
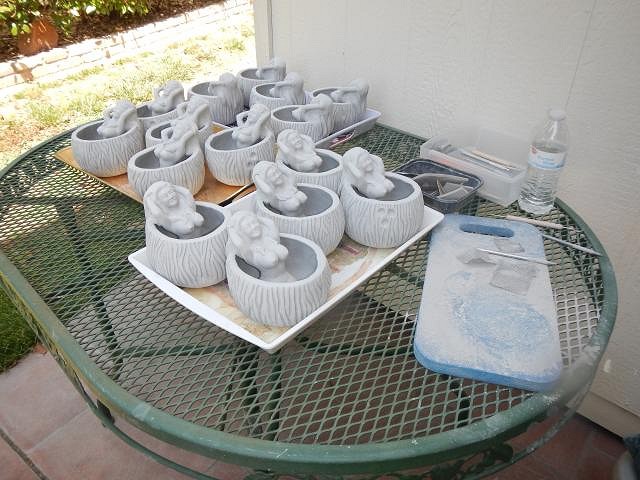
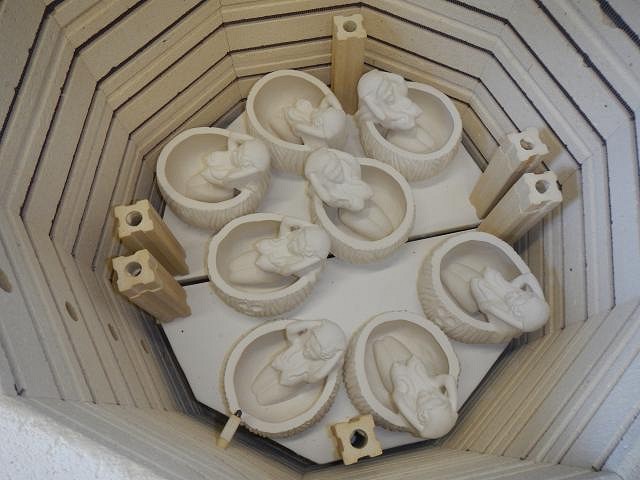
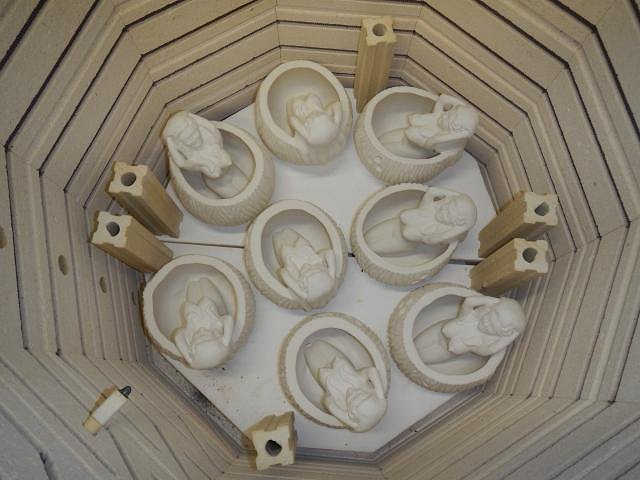
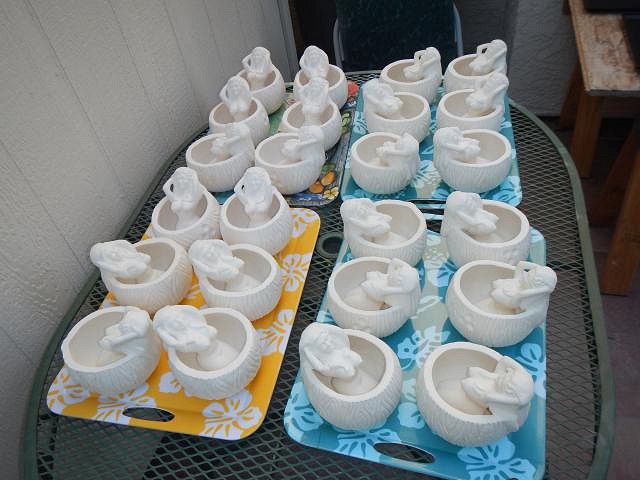
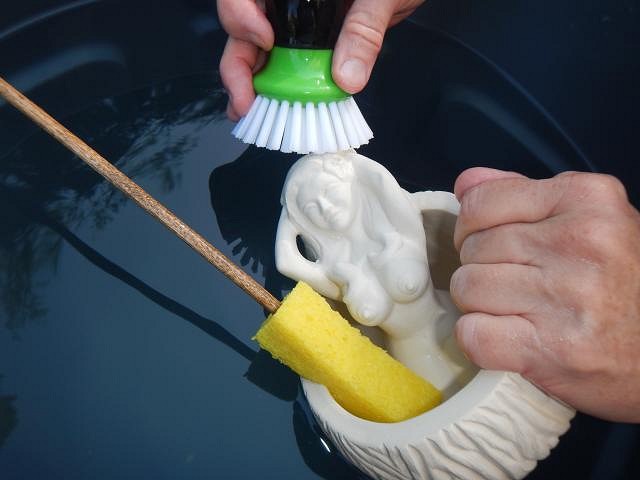
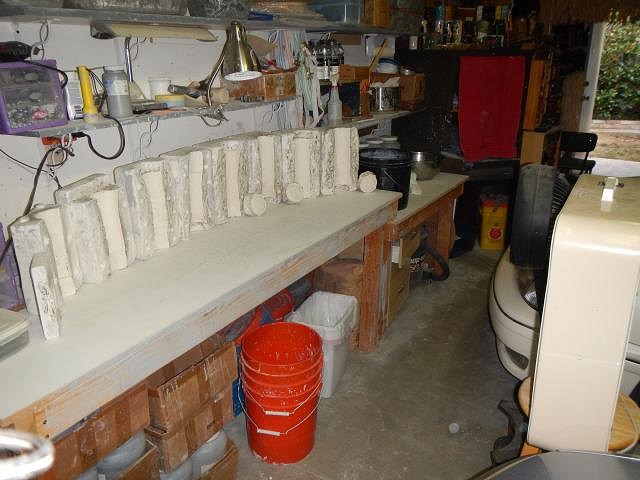
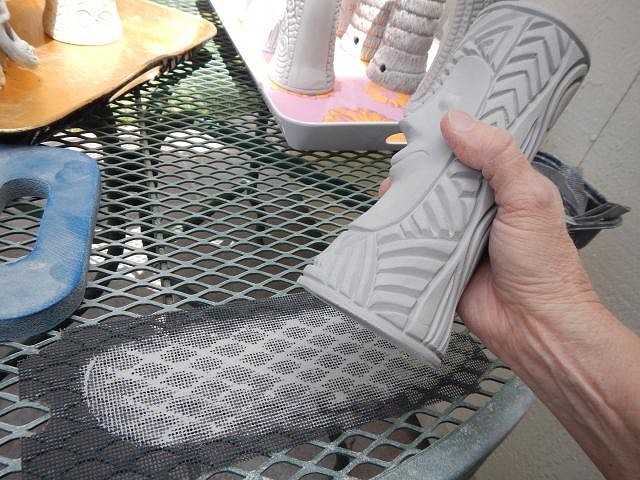
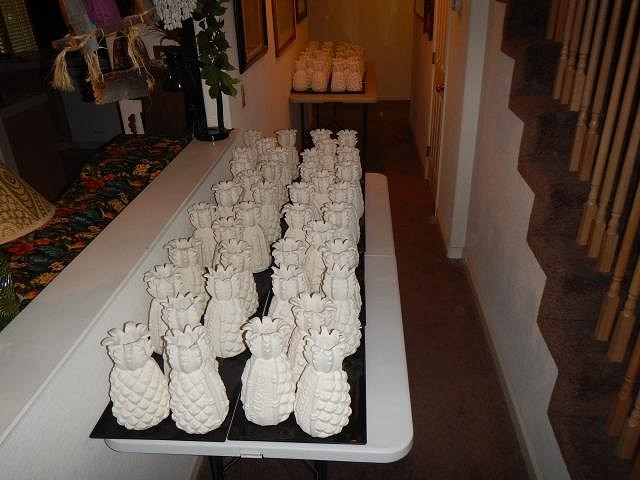
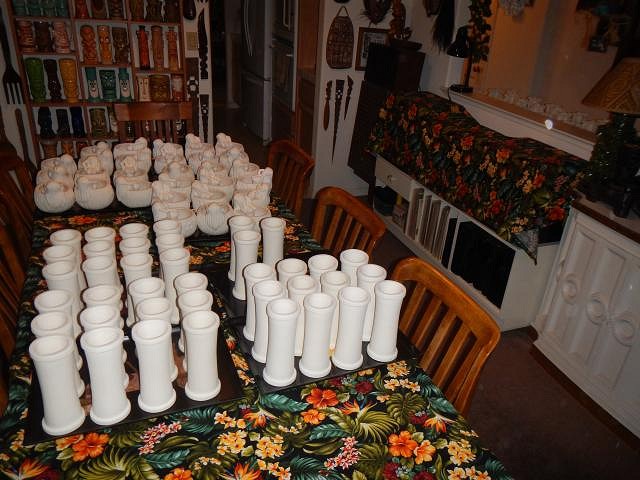
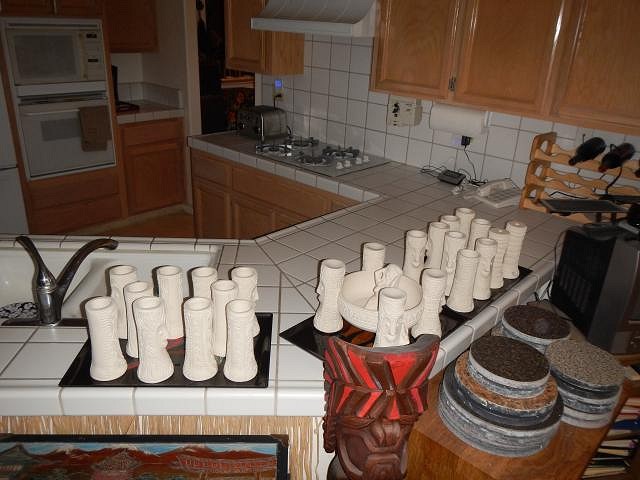
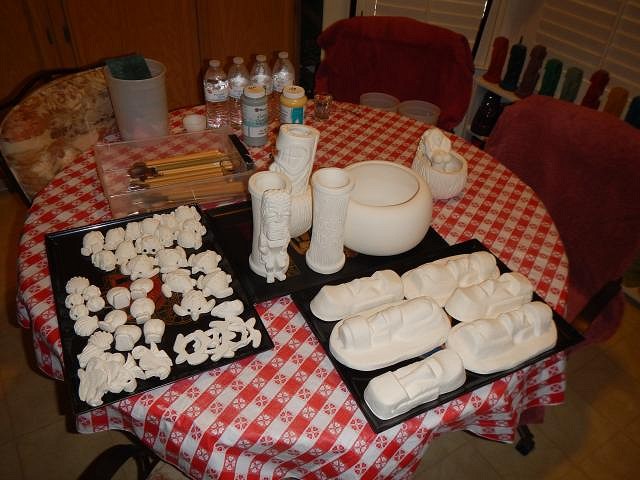
So once all of them had dried I sanded the sides getting rid of mold lines and Dan sanded the tops and bottoms. We sanded all 40 of them in one day and once they were done Dan carried them out and blew off all the dust inside and out. Here's the bottom shelf before firing and after. Here is the top shelf before firing and after. Once out of the kiln and by the side of the house it was time for us to scrub them. Now they are in the house and covered with plastic. They will have to wait now until I open the Wish List #7. Cheers, Wendy |
|
H

hang10tiki
Posted
posted
on
Mon, Jun 13, 2016 10:29 AM
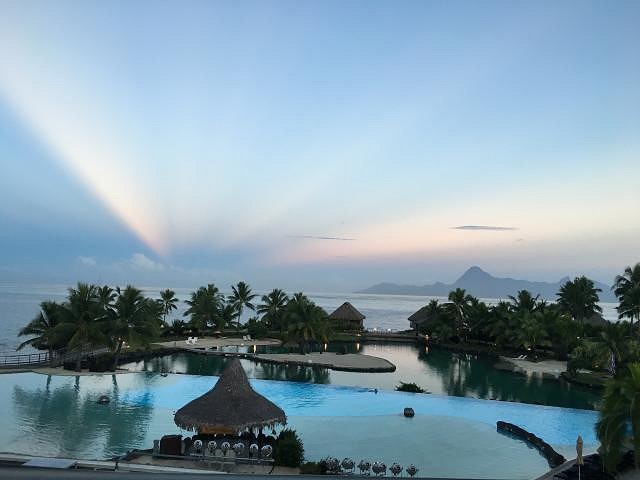
Good job cutting through the fog :) A friend of mine sent this pic today Ahhhh
Worst sound ever, slurp of an empty tiki mug through my straw!!! [ Edited by: hang10tiki 2016-06-13 10:29 ] |
|
D
danlovestikis
Posted
posted
on
Mon, Jun 13, 2016 4:16 PM
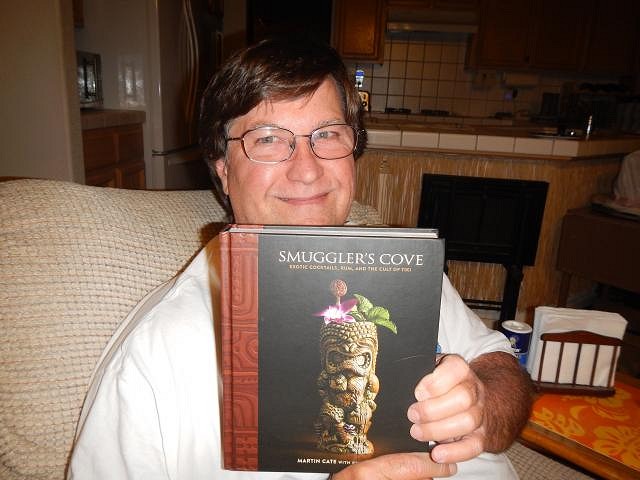
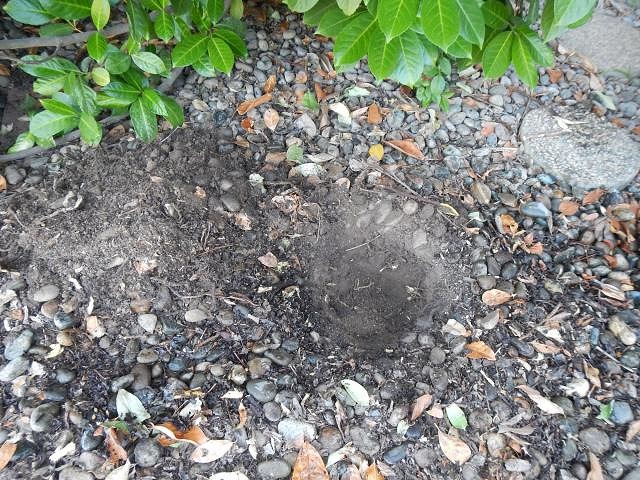
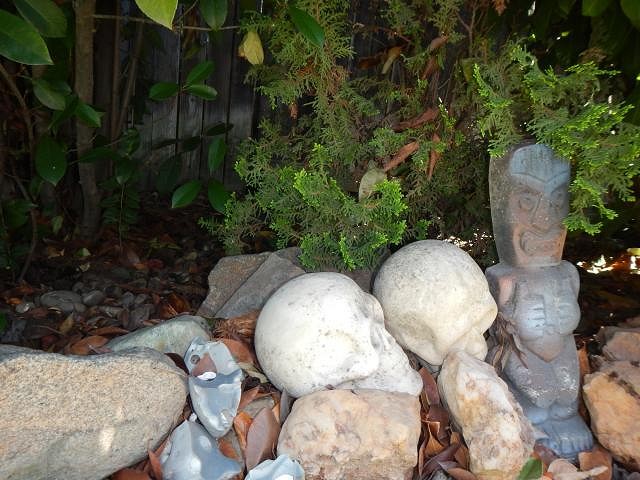
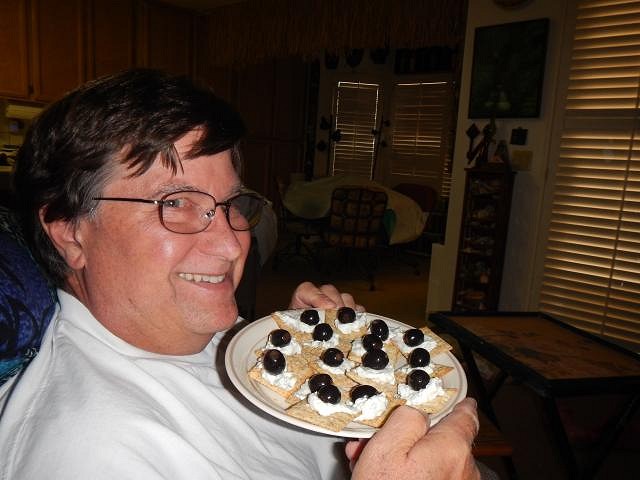
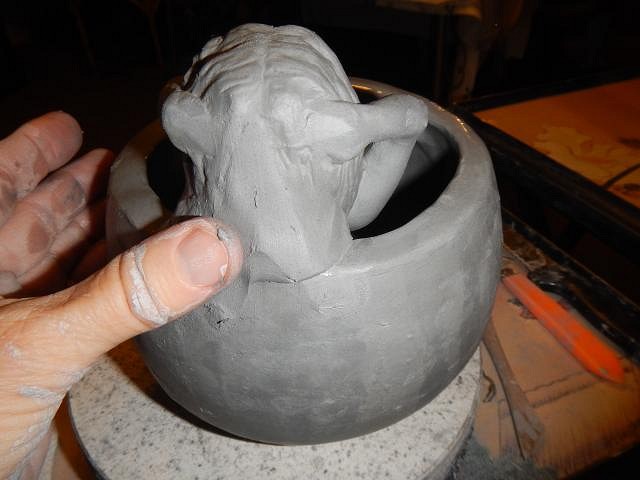
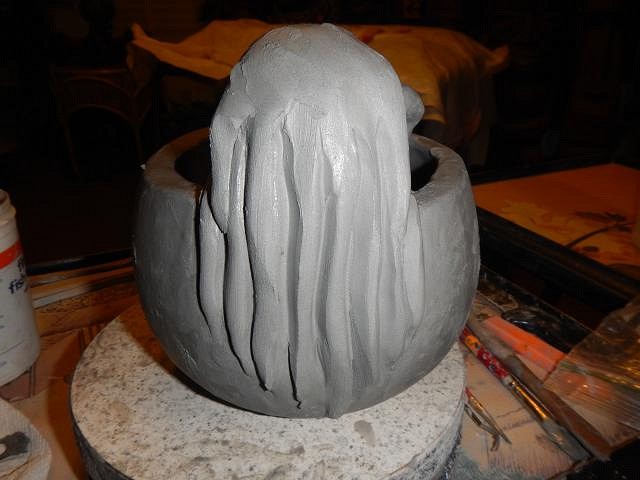
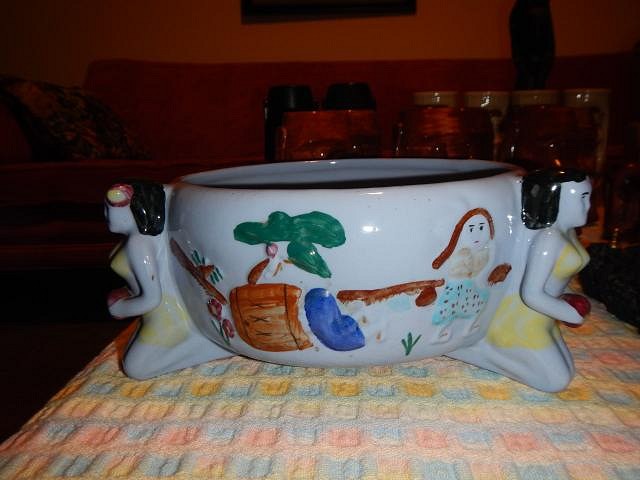
hang0tiki he must be at one of the resorts whose backs we saw. It's great to see some beauty is left on the island. It takes being a guest or working there to see it. From the streets it's not so much fun. ======================= I've been working hard so here's just some catch up photos. Dan's copy of Smuggler's Cove has arrived. It's big and thick and looks like it's going to be fun to read. Dan's been doing a lot of yard work. I told him if he would dig out some roots I'd give him a surprise. Yep, a wonderful Maui Rob mug. I try to have surprises like this hidden away for rewards. Another photo in our backyard. I always wonder what the bug spray guy thinks of us. When Dan makes a treat for himself he likes it to be special. Yes he'll share. We stopped at a garage sale and I got all these frogs for 2 dollars. Dan's going to put them in his jungle room. Here's my hint for the day. The HUGE bowl for Owen is getting close to being dry. You can tell that it is NOT dry if it is cool to the touch. Also the color helps. The Tiki Bob is wet and dark grey while the bowl is lightening up. Now it's time to relax. Cheers, Wendy |
|
H
hang10tiki
Posted
posted
on
Mon, Jun 13, 2016 8:02 PM
That snack looks good Funny, I got my Smugglers Cove book yesterday |
|
T

TikiHula
Posted
posted
on
Wed, Jun 15, 2016 12:43 PM
OH Vegas was so awesome. Thanks for showing me around, Hang10, and for the great photos! I could live at Frankie's, Golden Tiki, and oh my god - Herbs & Rye!! Now back to your regularly scheduled posts from Wendy :D |
|
D
danlovestikis
Posted
posted
on
Wed, Jun 15, 2016 1:47 PM
hang10tiki the book is a close as we have gotten to Smuggler's Cove. One day we will go. TikiHula gosh your ears must have been burning up today. Dan and I were talking about you because today I gave him the mug I got from you. He is so happy to have this mug. He took me on a tour of all the places that bumped mugs until space was made that was just right.
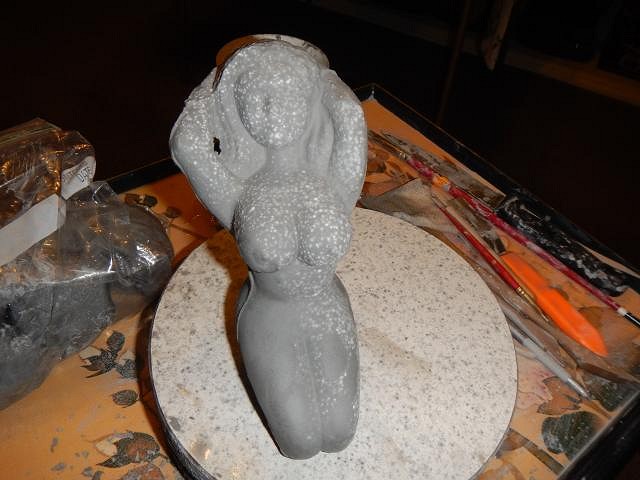
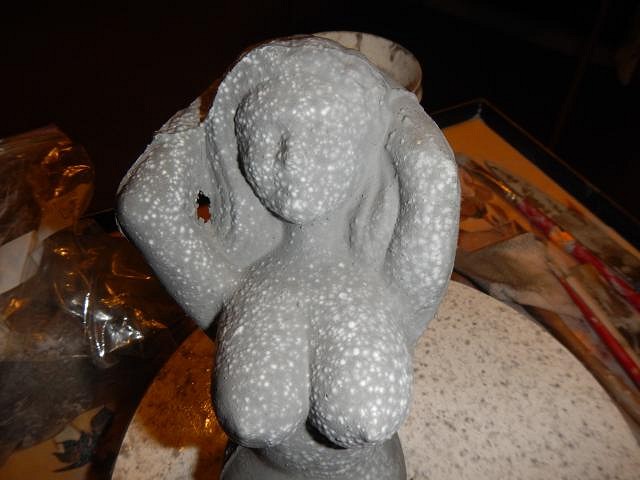
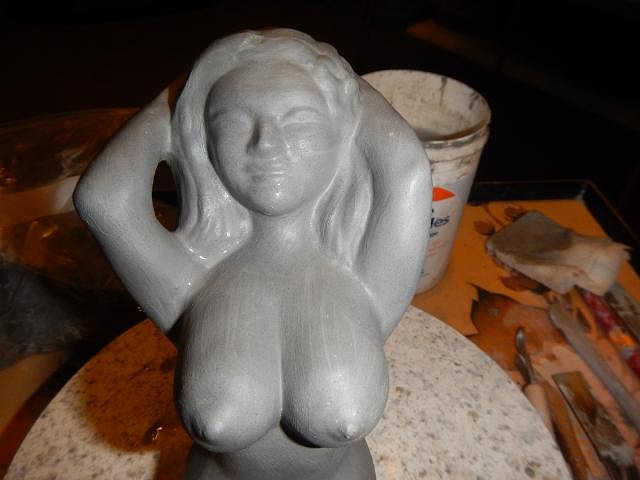
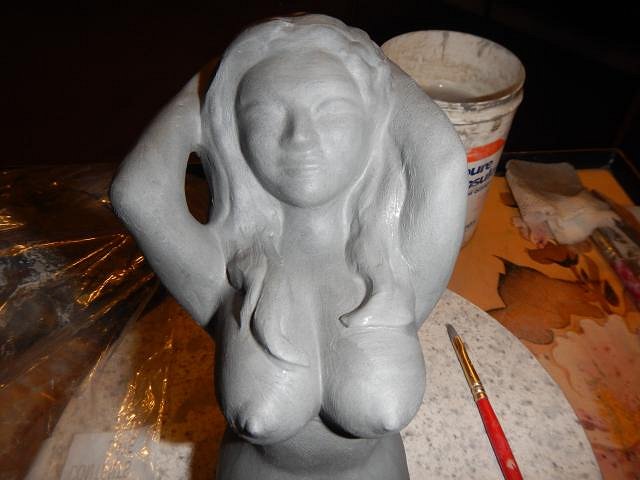
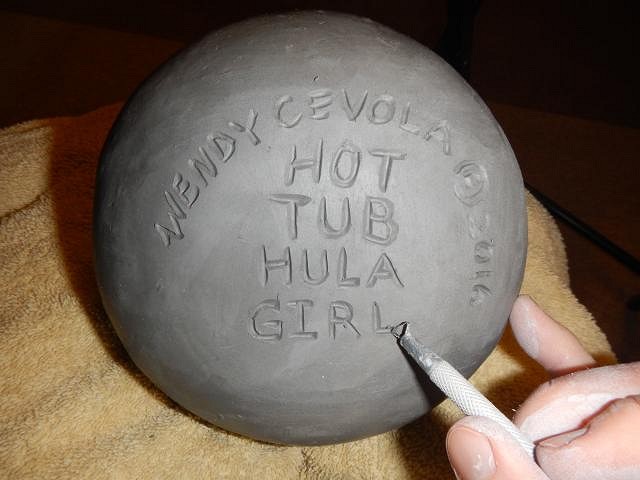
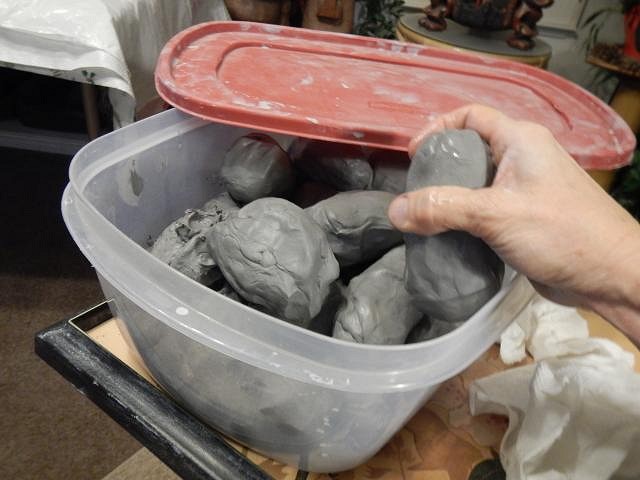
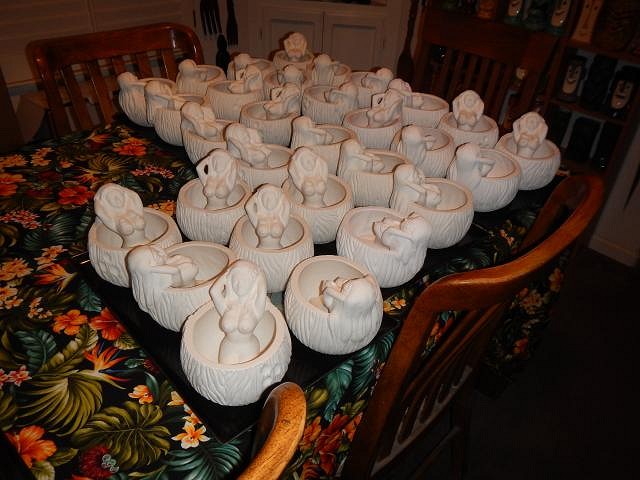
He will treasure it and always think of you when he sees it. ==================================== Last Wish List when I was doing so many custom pieces I also had 30 Hot Tub Hula Girls to make. My work days were far too long. So I decided to make my work days longer during the winter months. While sculpting the Sacramento Crawl mug I spent 10 days casting 30 more of the parts for the Hot Tub Hula Girls. So if you are on the waiting list then these mugs are for you. When I posts months of work it looks so easy but there's so much to do for each step. January 2016 I cast 3 sets a day. All the molds must be cleaned and dried between castings. I put them into plastic bags where they will stay until I have time to work on them. February 2016. I took one out of the bag and found it was covered with mold. So I ignored the mold and cleaned off the mold lines and underneath the mess was a beautiful girl. I added long strands of hair. Once she was finished she went on her side on a table to wait for the next step. March 2016 I finally finished fine tuning all of the girls.
Dan enjoyed watching this part. Cheers, Wendy |
|
T
TikiHula
Posted
posted
on
Thu, Jun 16, 2016 11:42 AM
Glad Dan likes the mug! It's one of my favs and I'll always think of your guys when I see it :) Nice work on all the crawl mugs and hot tub hula girls as usual!! |
|
D
danlovestikis
Posted
posted
on
Thu, Jun 16, 2016 9:41 PM
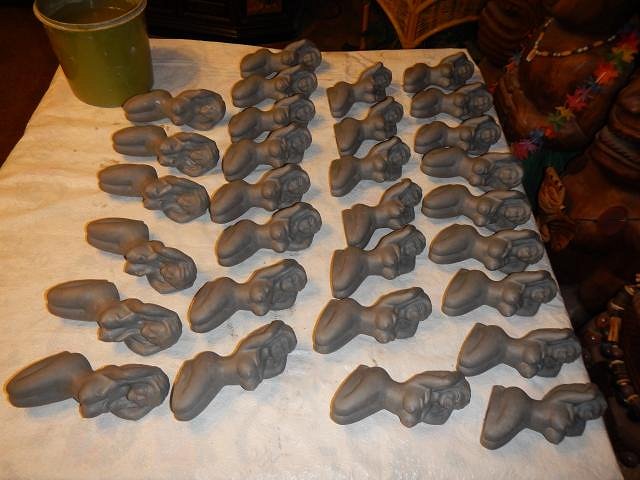
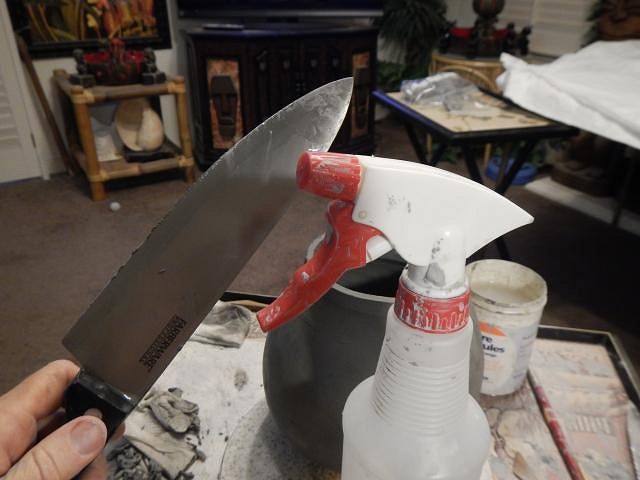
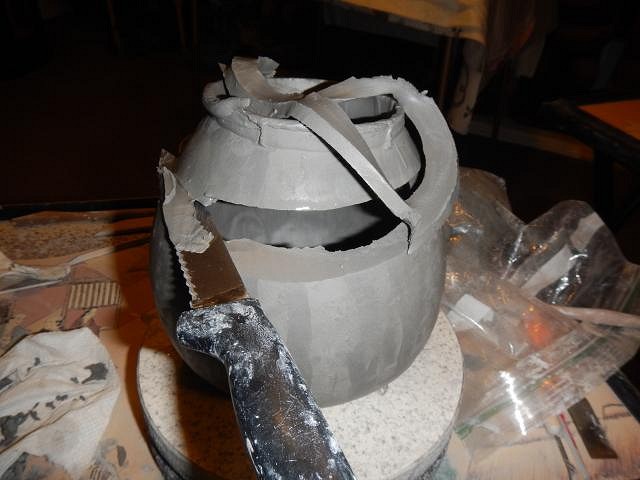
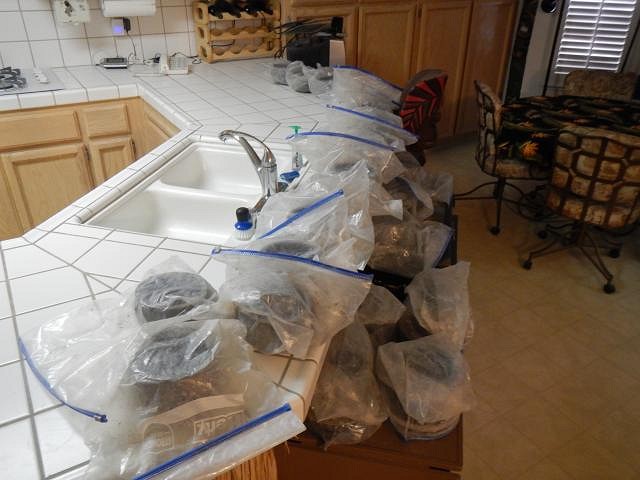
TikiHula it's one of his and mine too. Glad you like the crawl mug and HTHG's in progress. Thank you. ========================== More steps making the Hot Tub Hula Girl mugs #61 - #90. There's a lot of walking to make these mugs. Now I carried all 30 bowls into the kitchen. I keep them upside down in the plastic bags until I'm ready to use them. This keeps the clay from settling leaving the bottom very flat. The air in the bowl keeps it round. Mu bowl mold is blank so I have to carve this into every bottom. That's 30 times. When cutting clay you need a wet tool to make a clean cut. I use a spray bottom full of tap water. I forgot to take a photo but I cut a soda straw to the right height for the hula girl. I used it when I cut the top off each bowl to make the coconut. The clay I cut off was carefully squeezed into balls without air pockets so that I can use it to build other projects. I save it in an airtight container. All 30 have been carved with my words on the bottoms and the tops have been removed. Now they are all back in the plastic bags waiting for the next step. Thank you for the visit, Wendy |
|
T
TikiHula
Posted
posted
on
Thu, Jun 16, 2016 9:51 PM
Justin's photo of your hot tub hula girl is now my computer wallpaper! So awesome :D |
|
D
danlovestikis
Posted
posted
on
Fri, Jun 17, 2016 8:11 PM
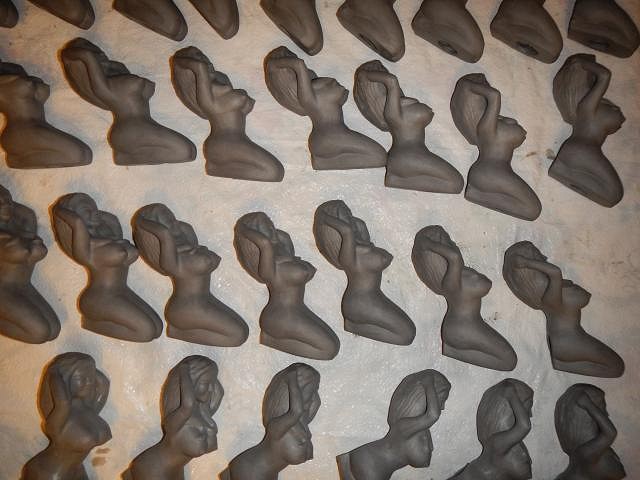
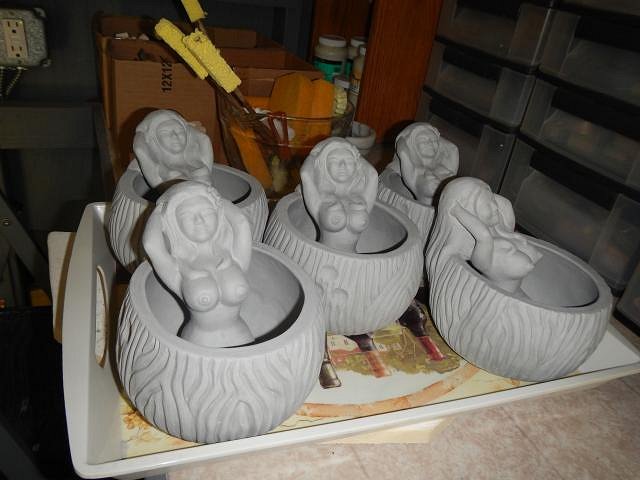
Tiki Hula, that's a first for me. I have my cat as my wallpaper and so does Dan. ============================ More steps for the Hot Tub Hula Girls #61 - #90. Now that the girls and the coconuts were prepped it was time to assemble them together. I added sticky clay to the bottom of the girls legs and also some slip to the bottom of the coconut. Then I pressed her into place. I also carved in the 3 dents into the coconut. For these girls I remove the hands and smooth the area. Next I start to add clay to build hair. It will cover her hand areas and fall down the back of the coconut. Next I carve the detail into the coconut. I did a couple a day and when one was done I put it into an OPEN plastic bag on a shelf in the garage to slowly dry. This will prevent cracking. Eventually all of them made it into the garage. As I've said there is a lot of rotation and walking and carrying each piece of ceramics. Cheers, Wendy |
|
H
hang10tiki
Posted
posted
on
Fri, Jun 17, 2016 10:52 PM
Beautiful |
|
S

swizzle
Posted
posted
on
Fri, Jun 17, 2016 11:58 PM
I made this for myself Wendy when i first started making bowls, maybe Dan can whip one up for you.
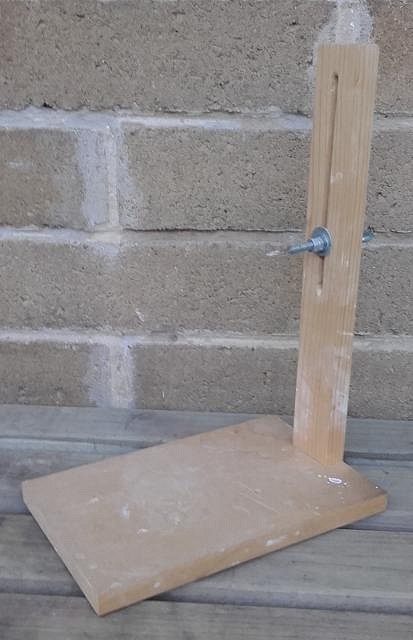
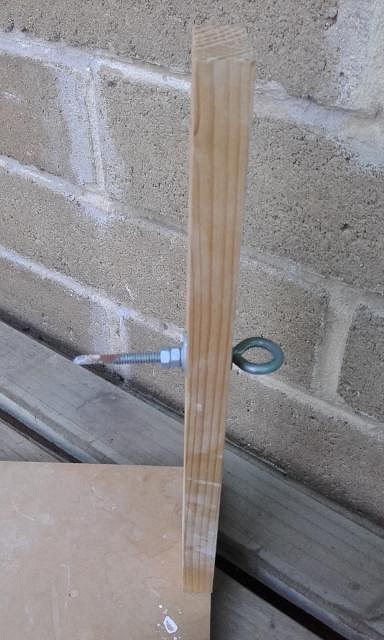
Pretty self explanatory. Filed the end of an eye-hook screw down to give it a sharp edge that can cut into the clay which is then fixed into the groove of a vertical upright screwed/nailed to a flat bottom. Washers on each side of the screw and two nuts to hold it in place. I just put my banding wheel onto the flat base with whatever it is i want to cut down centred on that and then i push it against the sharp edge and slowly turn the wheel to cut a line at my desired height. You can use the screw to cut all the way through the clay but i just use it to make a level mark and then use a sharp knife to cut all the way through. Adjustable for pieces of different heights. All pieces will be level and in your particular case, consistency in the height of all the coconuts. |
|
D
danlovestikis
Posted
posted
on
Sat, Jun 18, 2016 7:54 PM
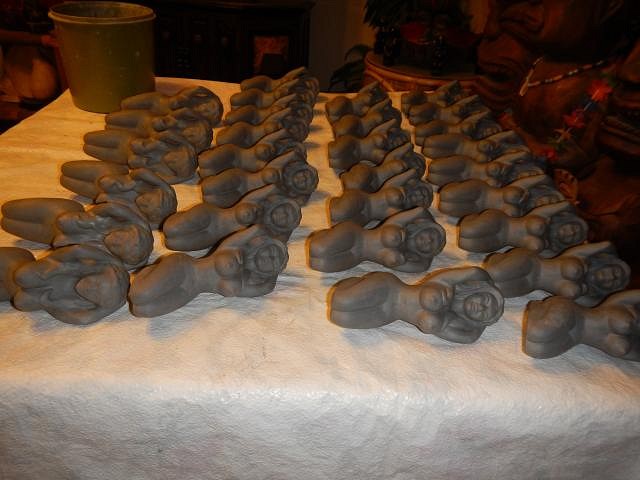
hang10tiki thank you. swizzle that's a really cool devise. I like it. ======================= More steps for the Hot Tub Hula Girls #61 - #90. While they were in the plastic bags I actually rotated them in the bags so that each side was near the opening. After 2 weeks they were dry enough to take out of the bags and to be left to dry the rest of the way on the shelf. Now that they were dry it was time for me to sand each entire mug. So many surfaces. I do each one in the same order so that I don't forget some spot. One by one I got them done.
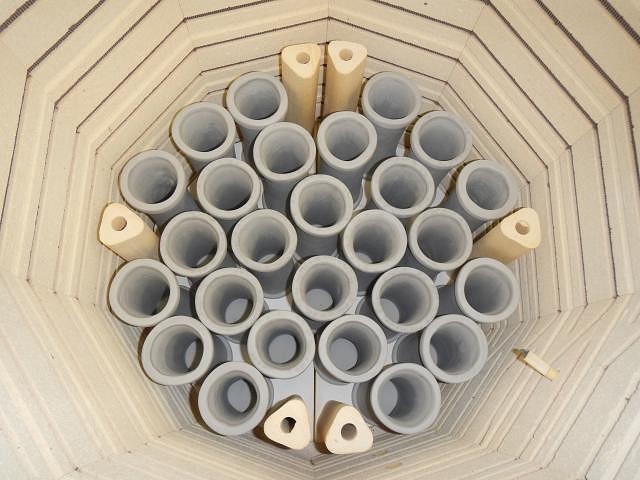
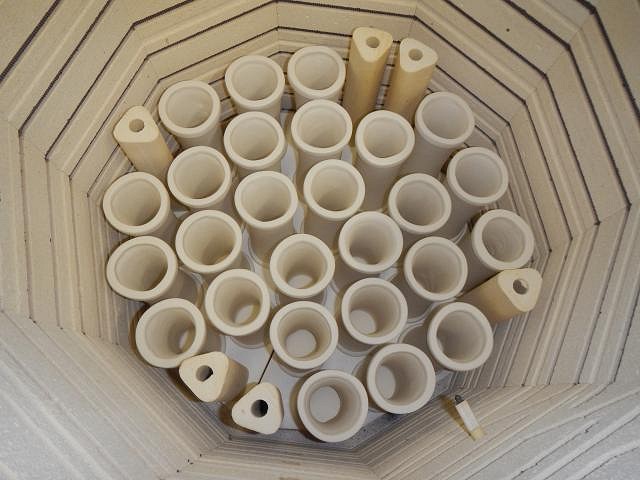
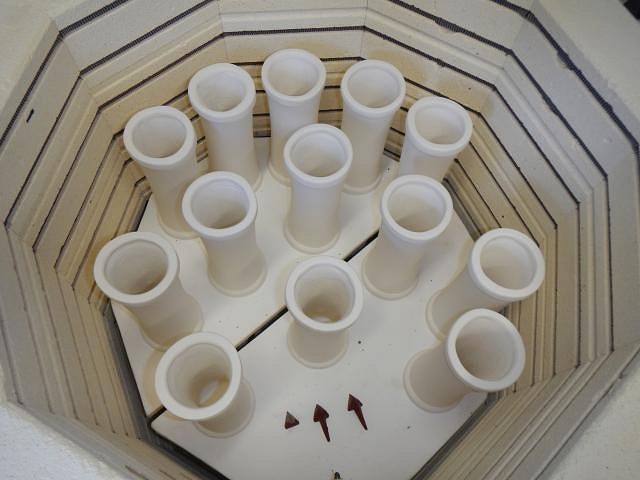
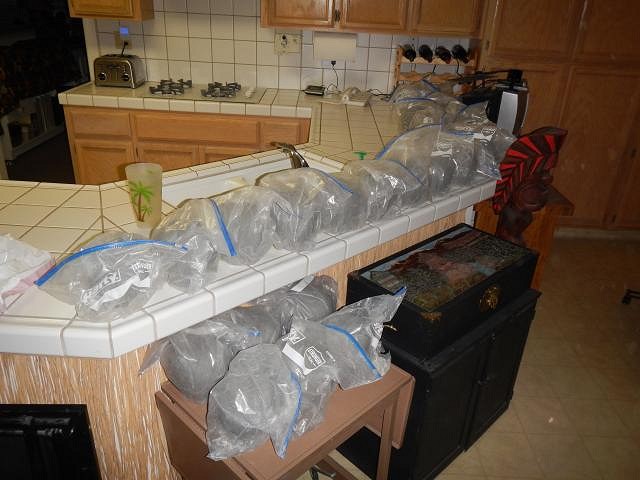
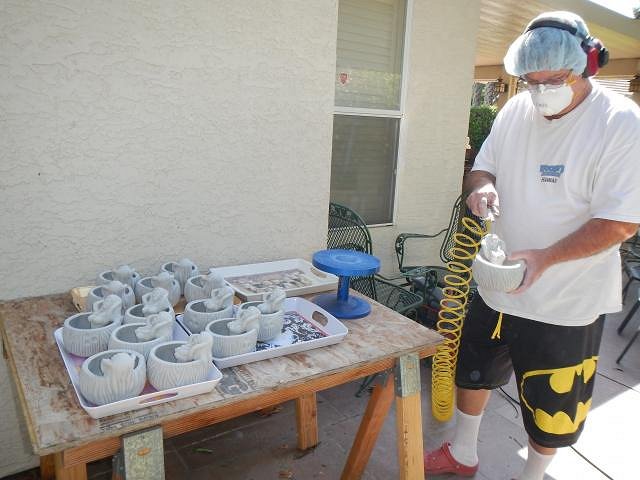
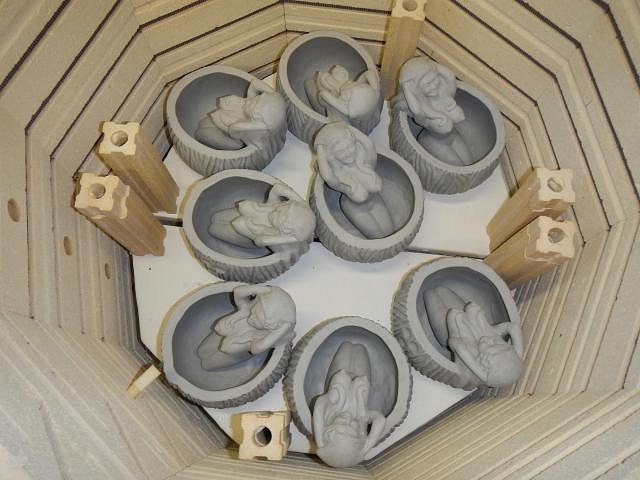
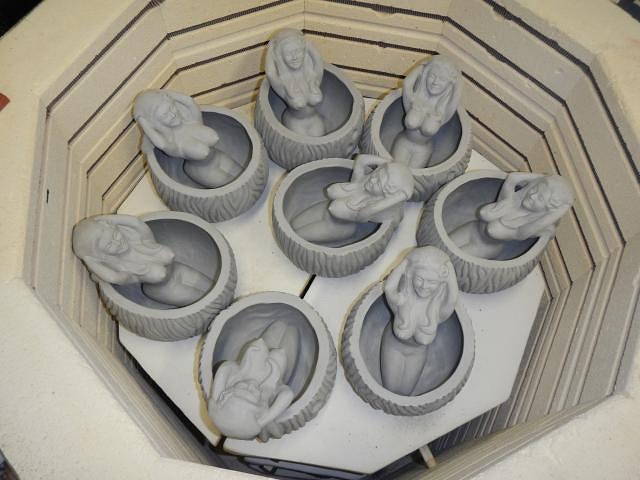
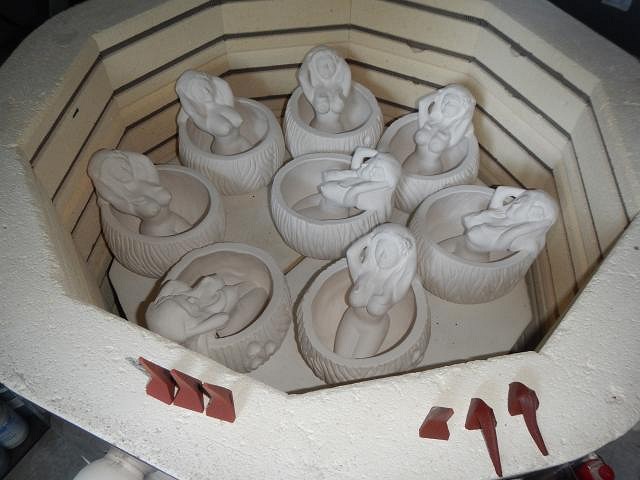
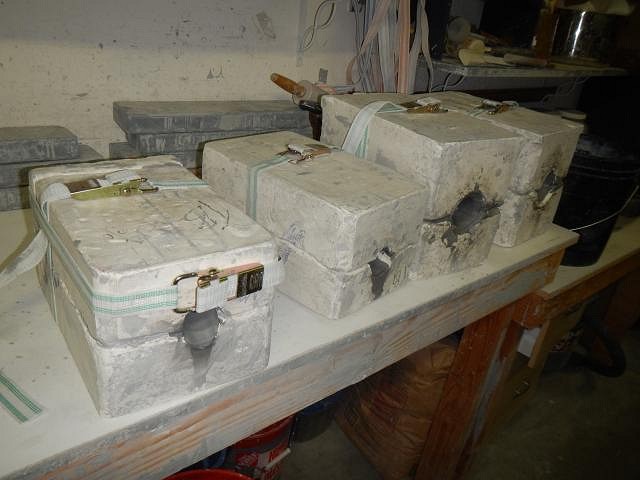
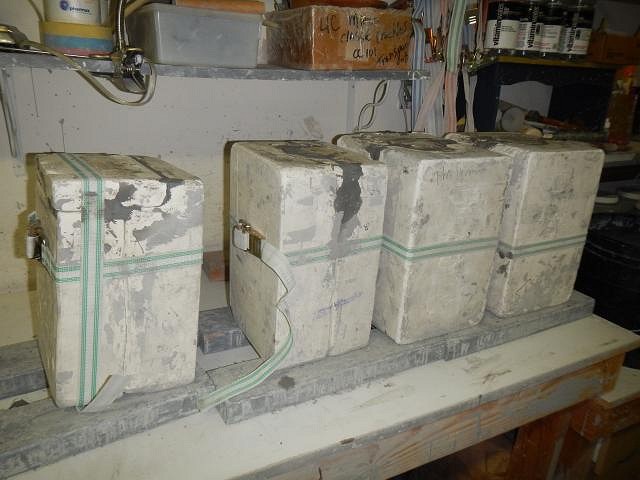
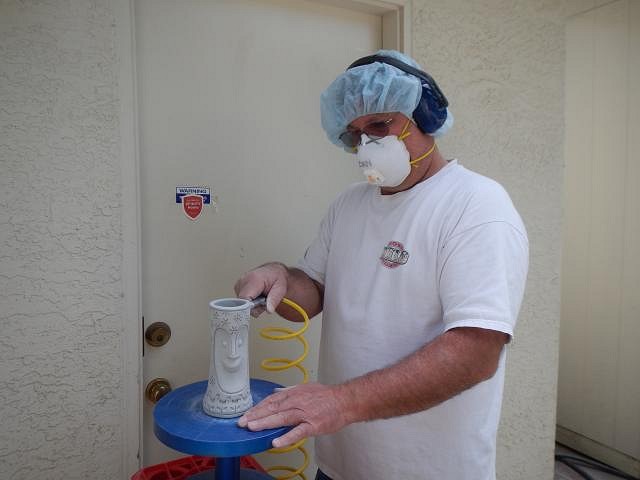
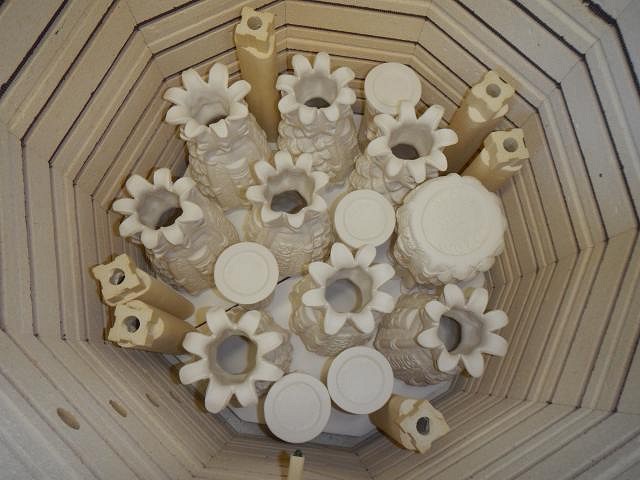
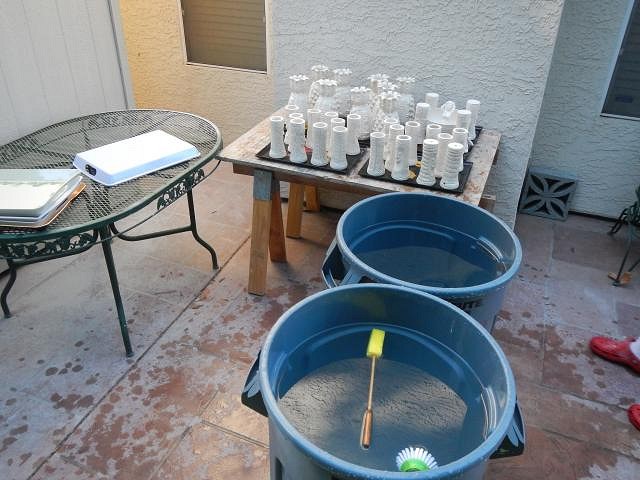
Once I finish the sanding Dan uses the air compressor to blow off the dust. This makes them easier to wash when they come out of the kiln. If any of this dust were to remain on the mug it would cause a glaze skip. I loaded the bottom shelf then a middle shelf and then a top shelf. I didn't have space for these. Bummer. After firing it was time to unload the top shelf the middle shelf and then the bottom shelf. None of them exploded!!! In a sense these are all my dirty dishes waiting to be scrubbed. I do the best job possible to prevent problems later on. I actually fired another load that was the Hot Tub Hula Girls and the crawl mugs. So all 30 are now done. I covered them with plastic. Now they have to wait until I finish the Sacramento Crawl mugs as well as one special project I'll be sharing. Cheers, Wendy |
|
H
hang10tiki
Posted
posted
on
Mon, Jun 20, 2016 4:44 PM
Suddenly craving coconut |
|
D
danlovestikis
Posted
posted
on
Mon, Jun 20, 2016 8:50 PM
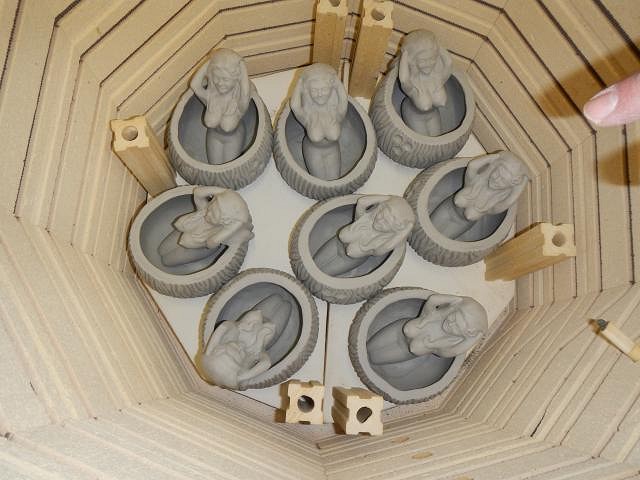
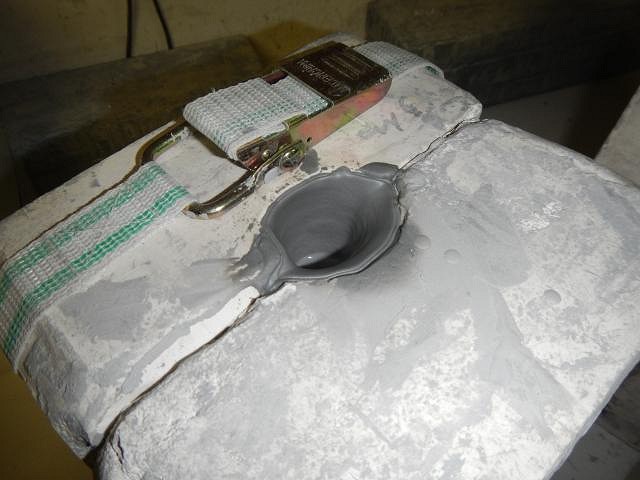
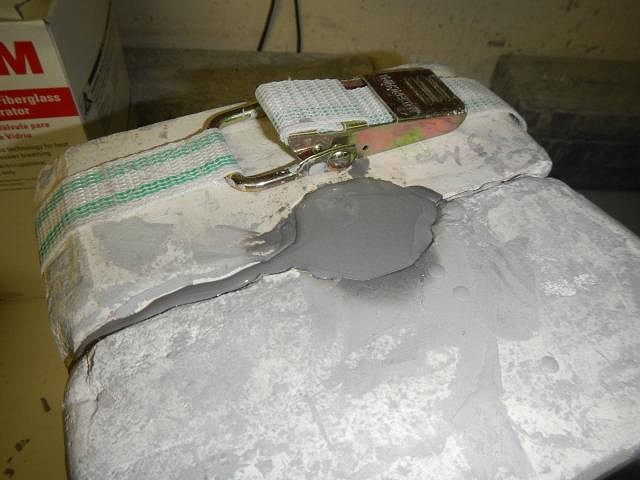
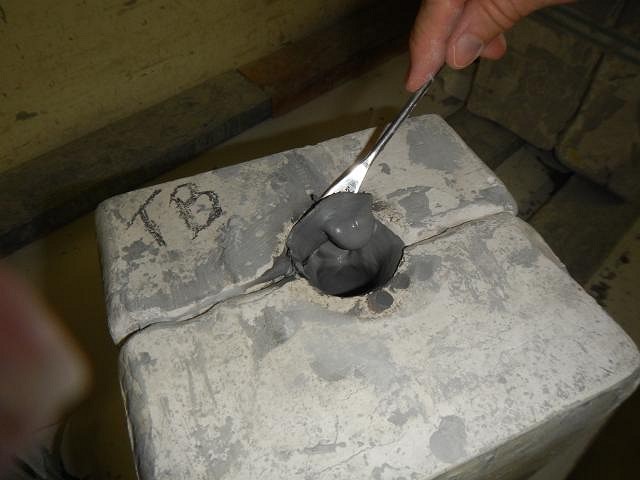
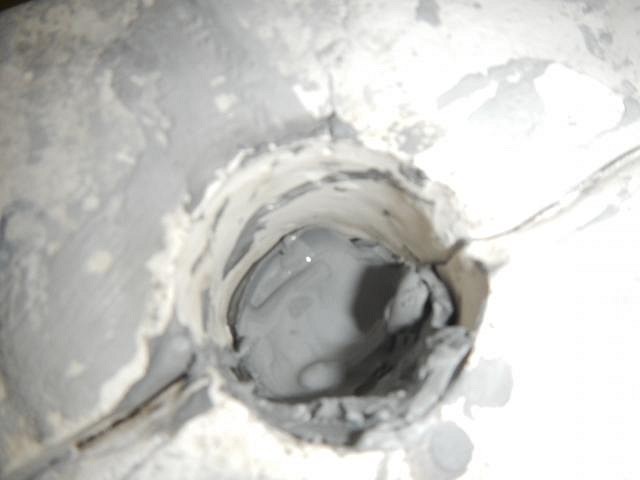
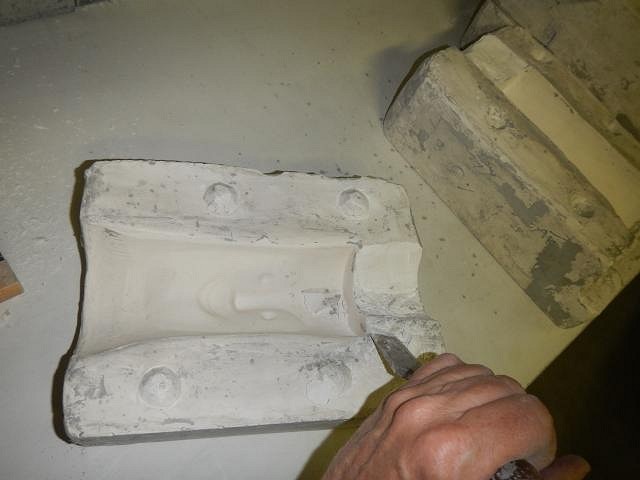
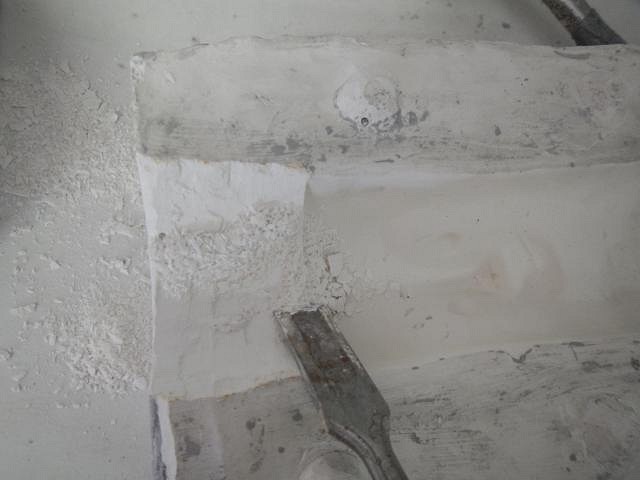
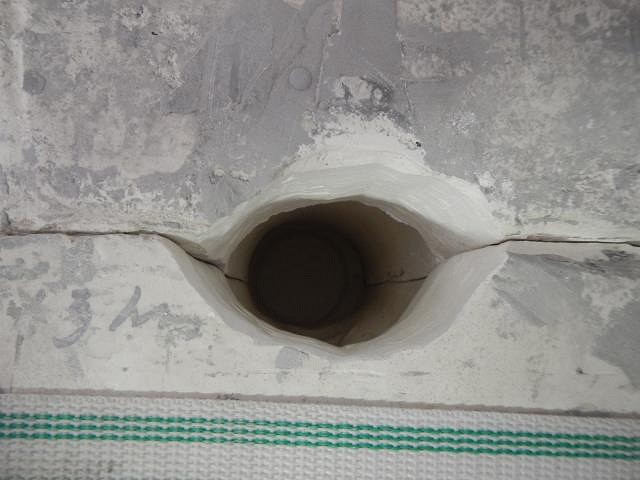
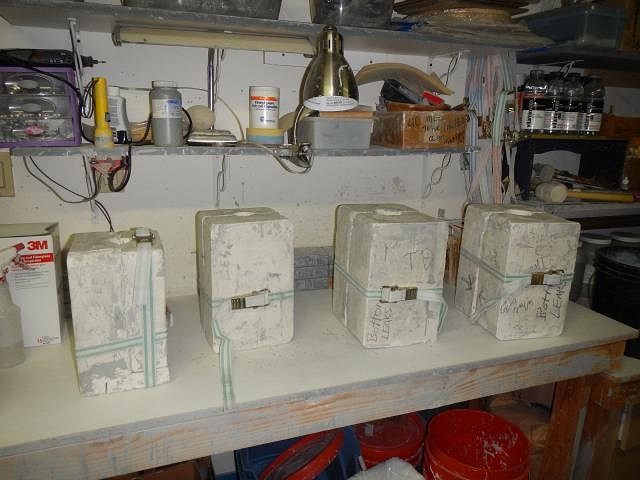
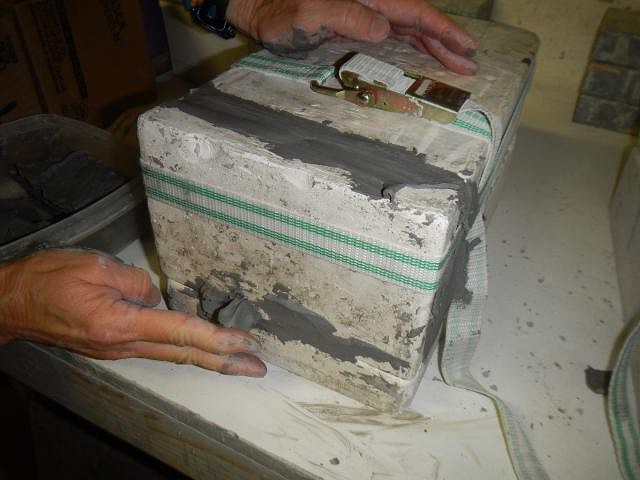
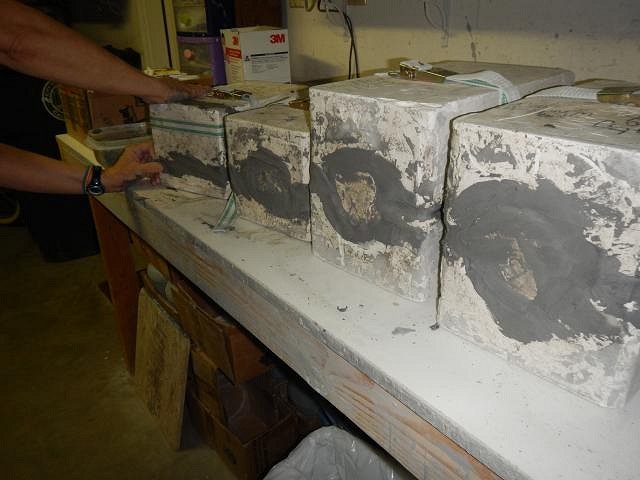
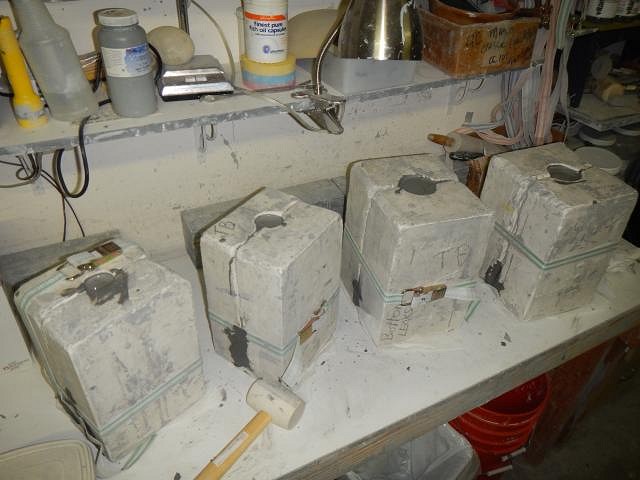
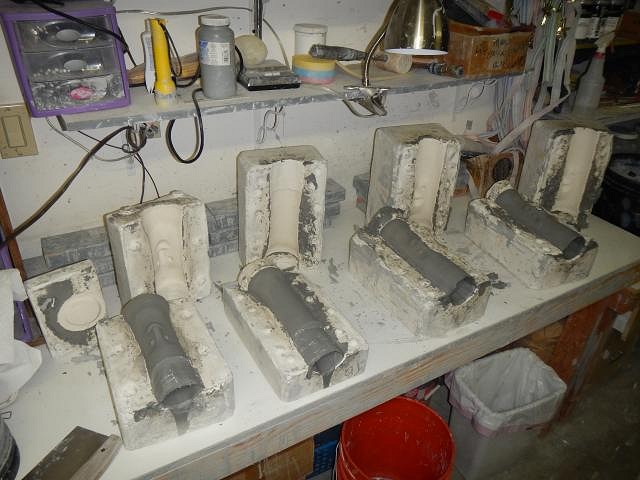
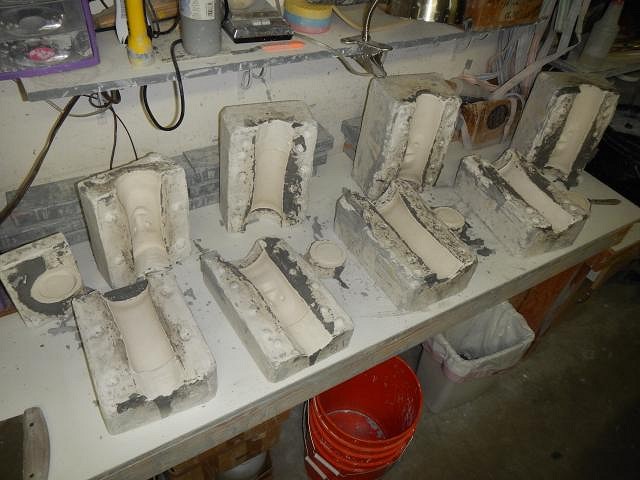
hang10tiki too much saturated fat! =============================== I received a message asking if I could make 150 tiki mugs for a wedding occurring in October. I said if you mean October 2017. NOPE this October. So then I asked what is the least number of mugs you could go with and the answer was a reasonable 15. OK the only way I could do this is if there were supercarved Tiki Bob's because I made four molds of my Tiki Bob sculpt. They agreed and I added this to my work day with Dan helping. First off all molds should be checked every 10 minutes and if the clay level is getting near the top of the mug then you need to top it off. I keep doing this until it is time to pour out the remaining liquid slip. This opening is so small that I have to dig out the firm slip so that I can pour out the slip without it glugging. If it glug glug glugs then the sides will collapse because the slip is pulling on them as it leaves the mold. After years of messing with these I decided to risk a mold to see if I could make the opening larger. I carefully chiseled away some plaster Much better but I will still be topping it off. So I put all four Tiki Bob molds together to get them ready to fill with slip. But first I must fill in all the places between each piece with soft clay to prevent leaks. All four are leaky molds. They are the first I ever made and they also have been used a lot. So that the clay doesn't stick to the table and pull loose I put a dry paper towel under each one. Now they are filled. 2 hours later we poured out the still liquid slip. They are placed upside-down for the night. The next morning I opened the molds and had the first 4 Tiki Bob's. You can see all the slip that moved between the pieces. All of this must be cleaned off before it dries. The little bits that are left are what makes the mold leak by separating the pieces with their presence. Now the molds are clean and must dry over-night with the fans blowing on them. Cheers, Wendy |
|
H
hang10tiki
Posted
posted
on
Mon, Jun 20, 2016 9:17 PM
150 :o Love watching your Bob's come from da mug mold |
|
D
danlovestikis
Posted
posted
on
Tue, Jun 21, 2016 9:37 PM
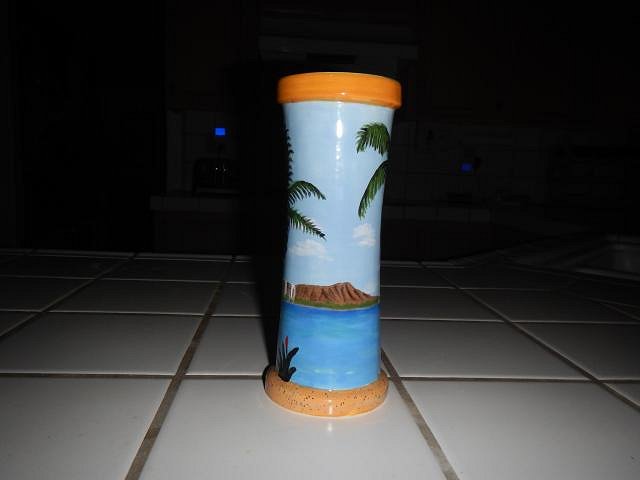
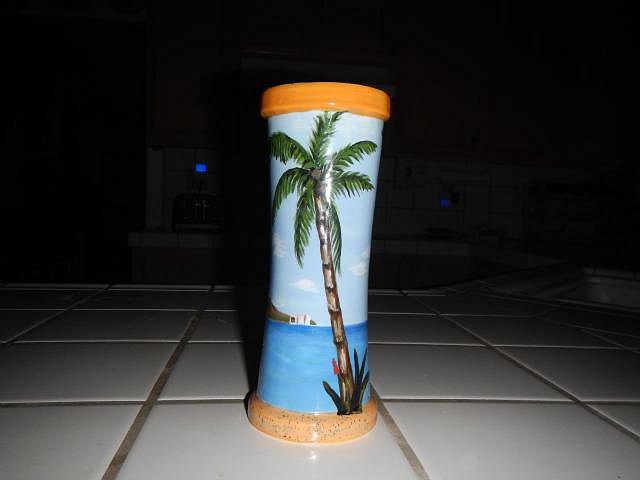
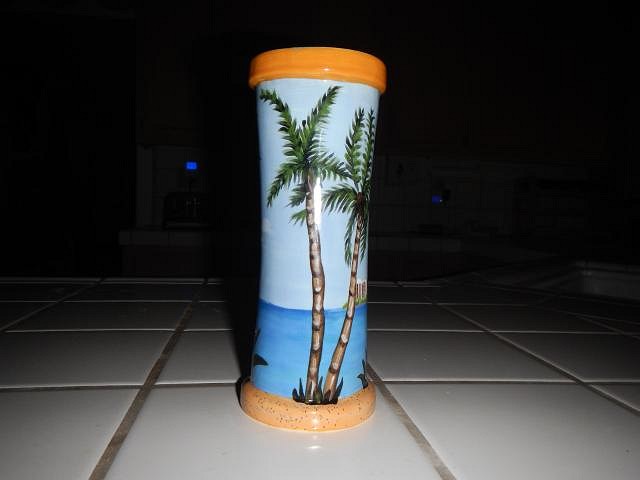
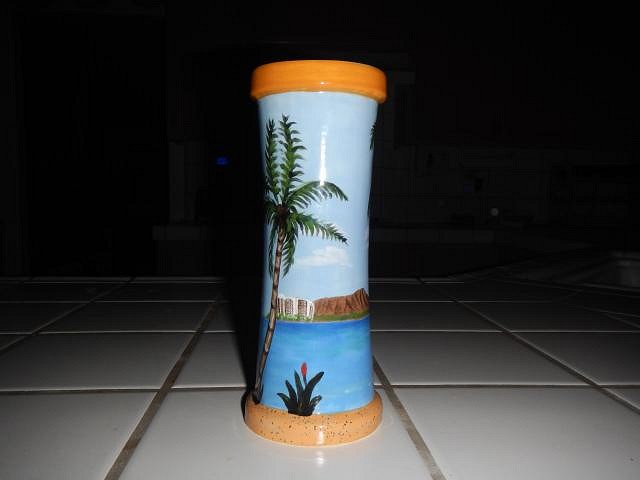
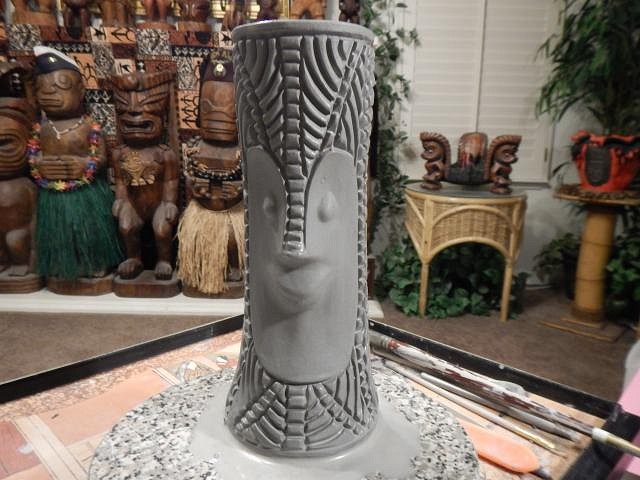
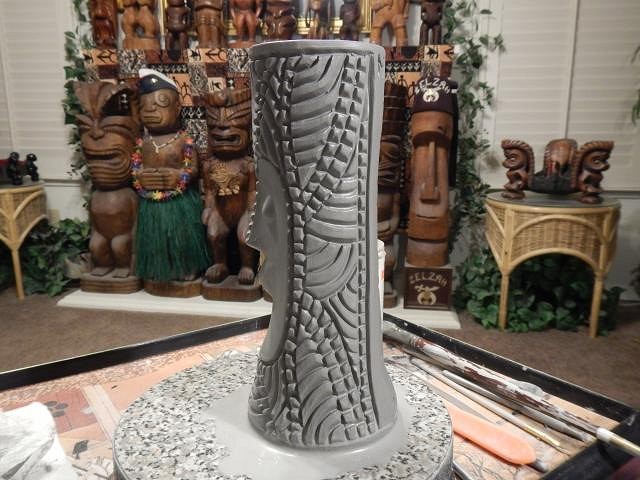
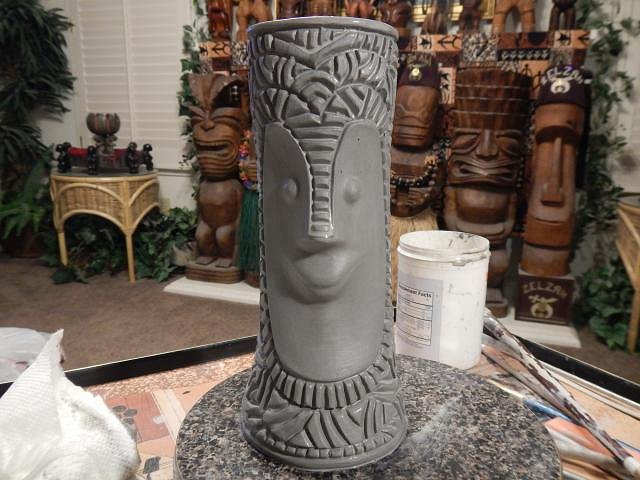
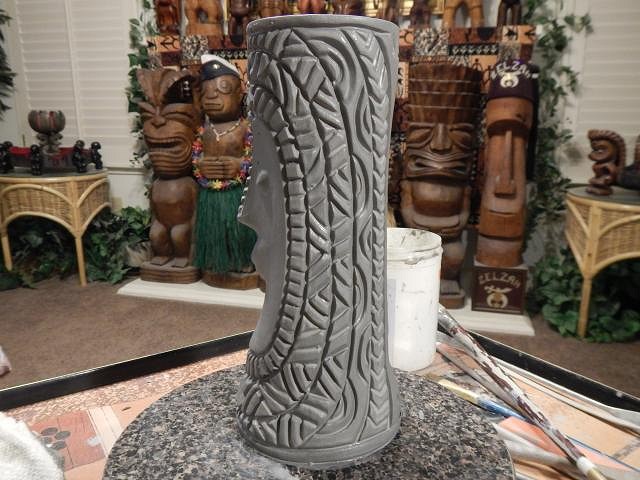
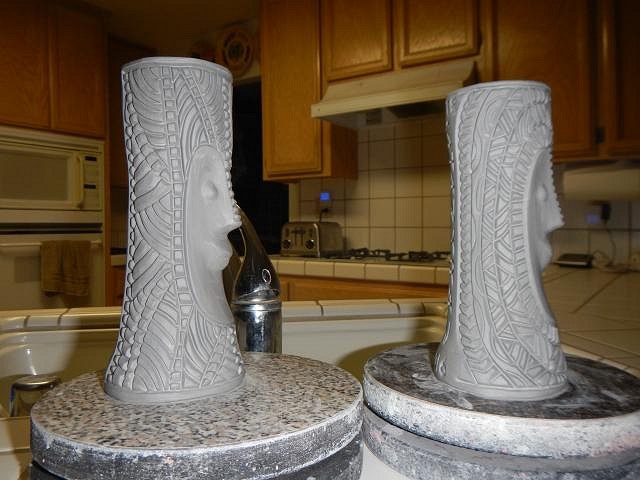
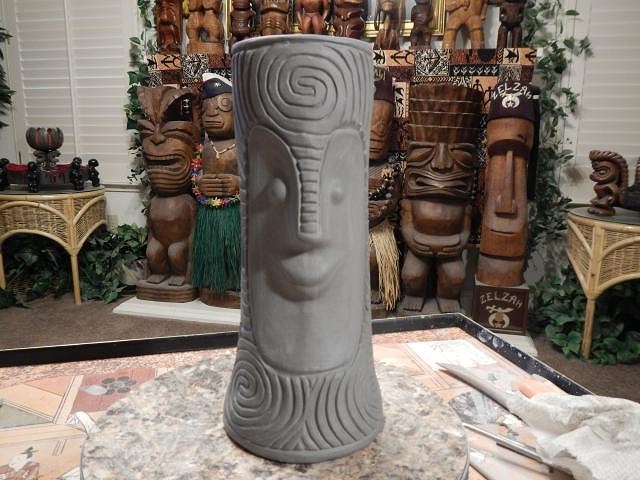
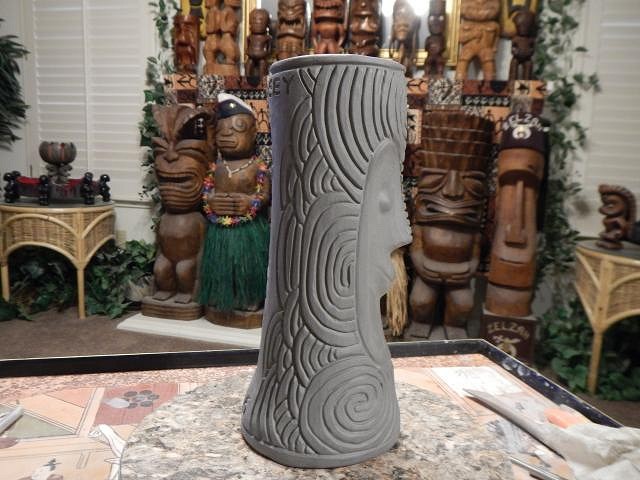
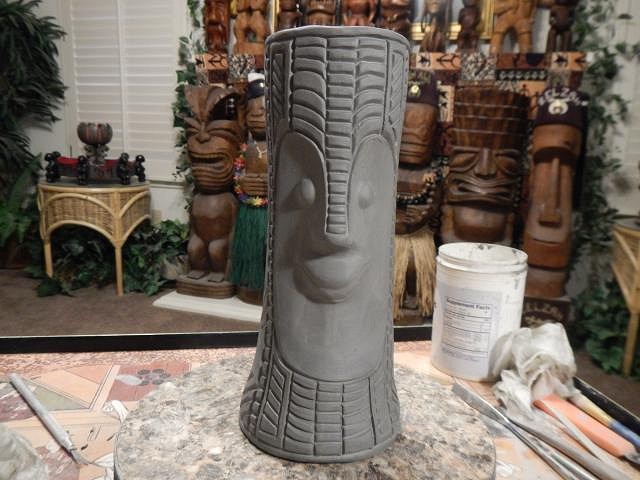
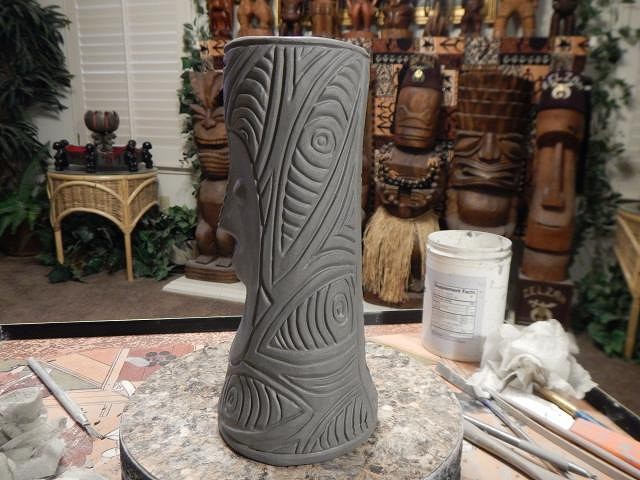
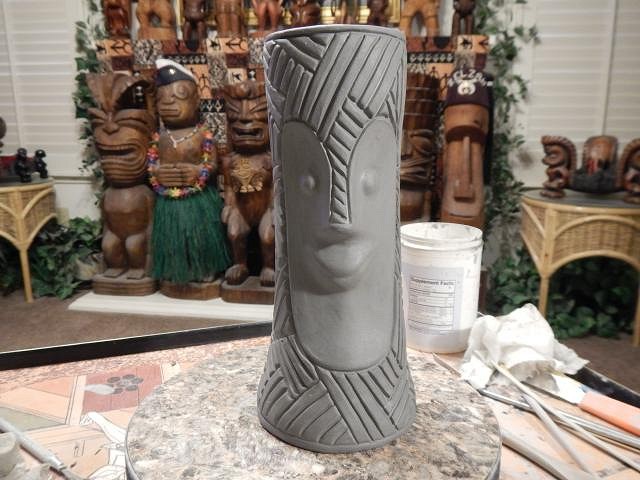
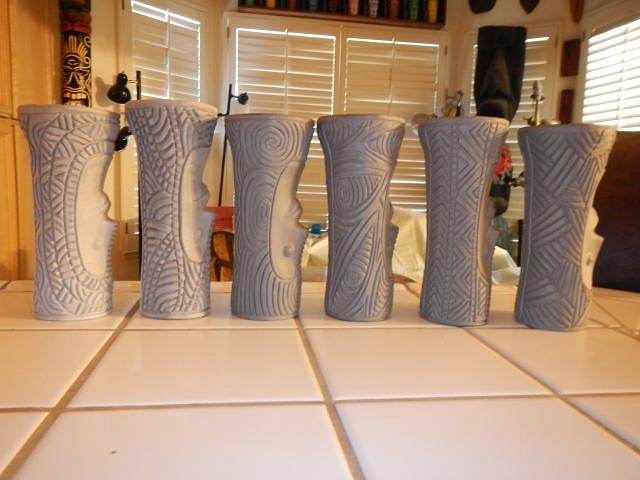
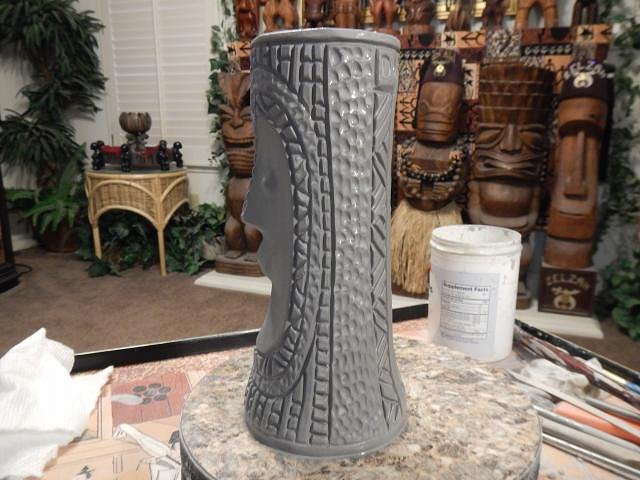
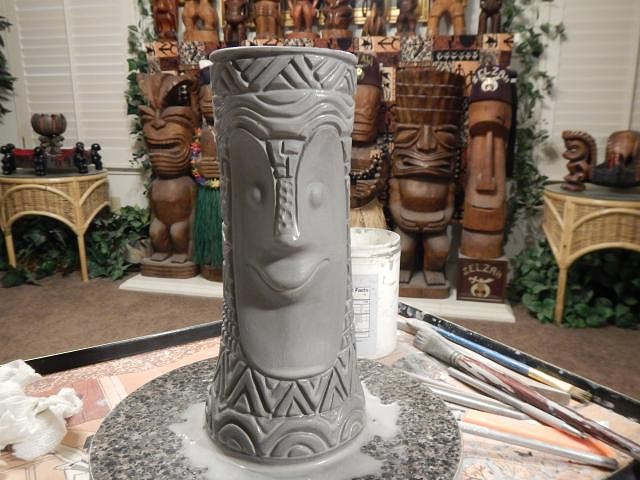
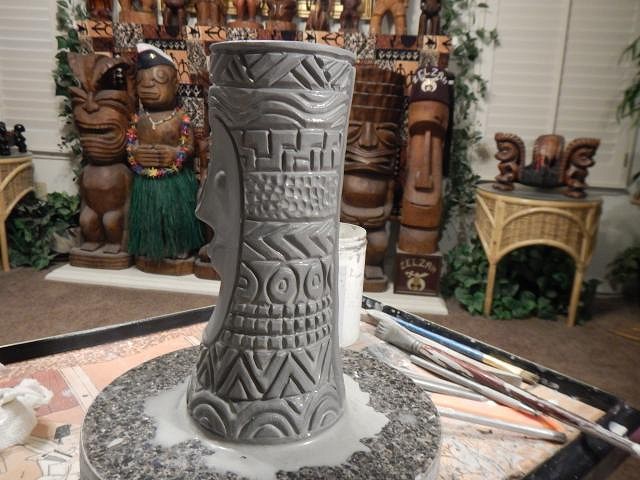
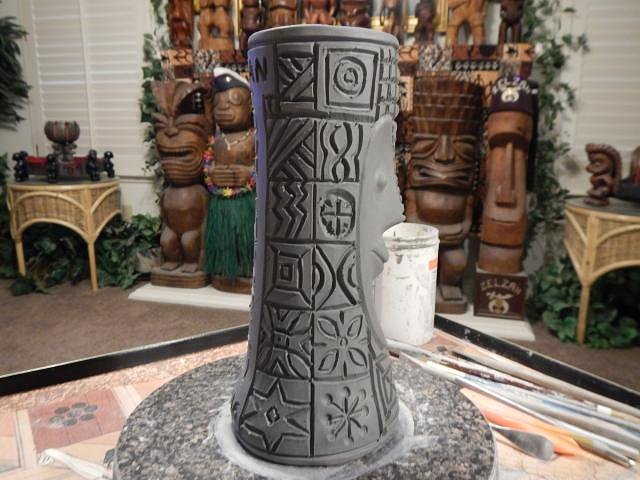
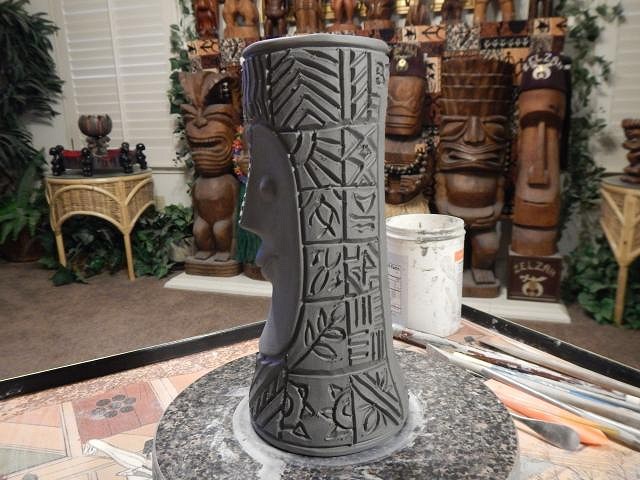
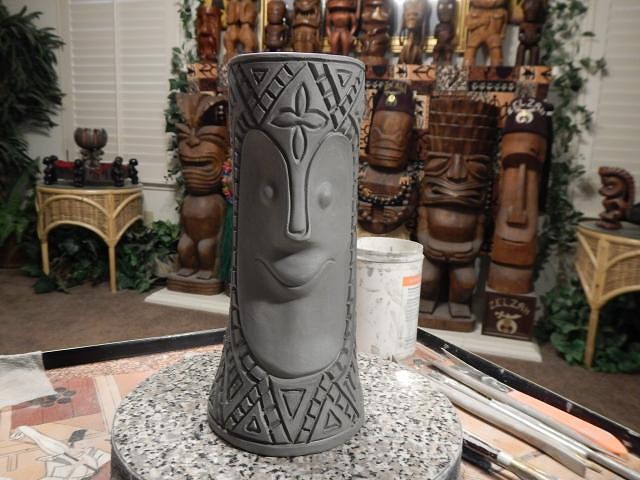
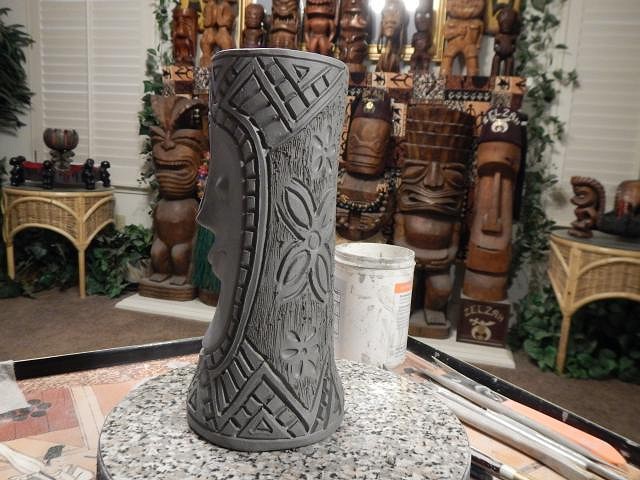
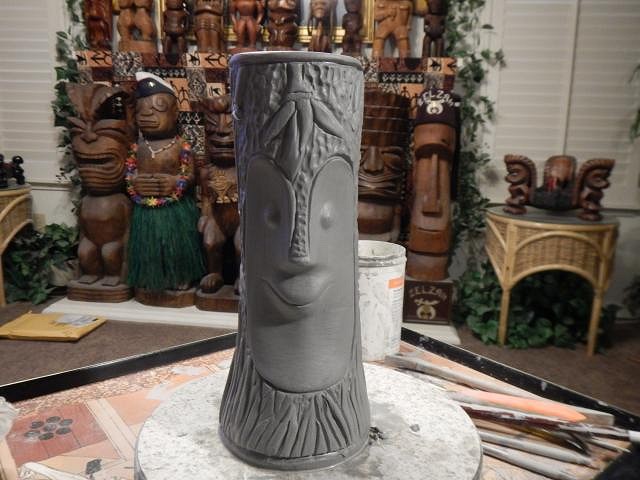
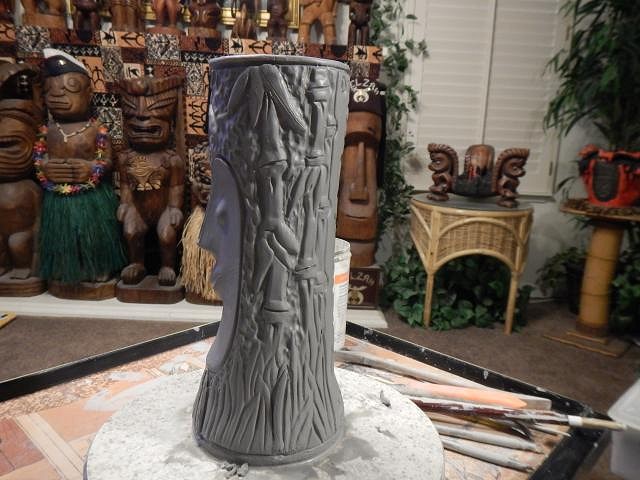
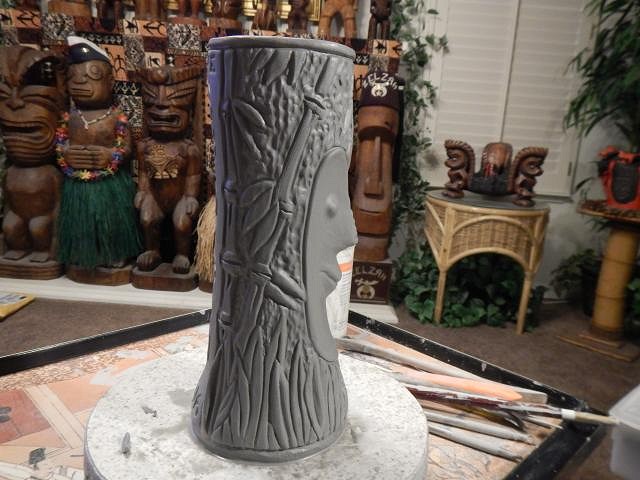
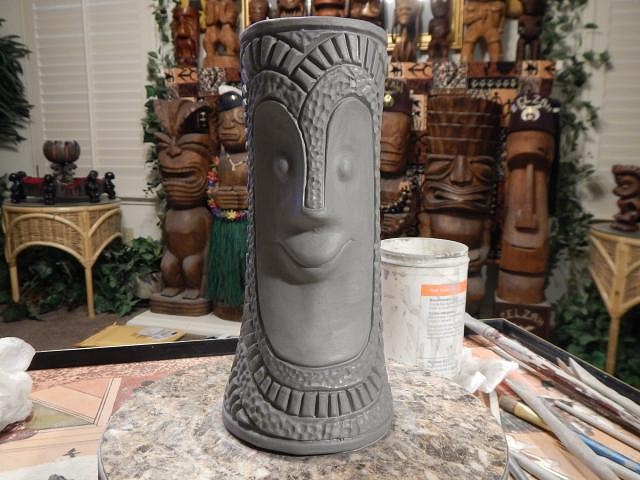
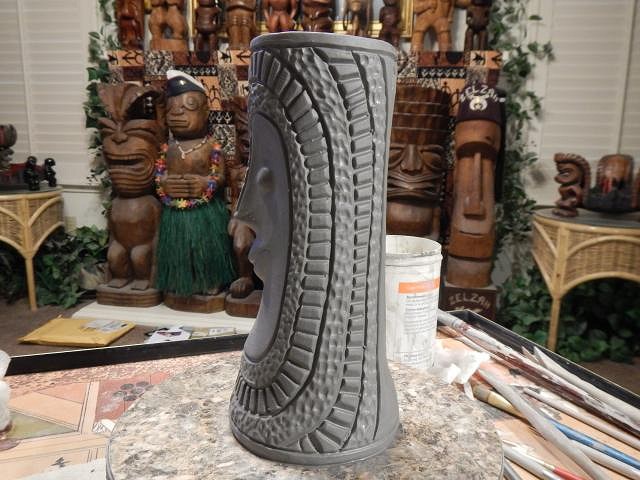
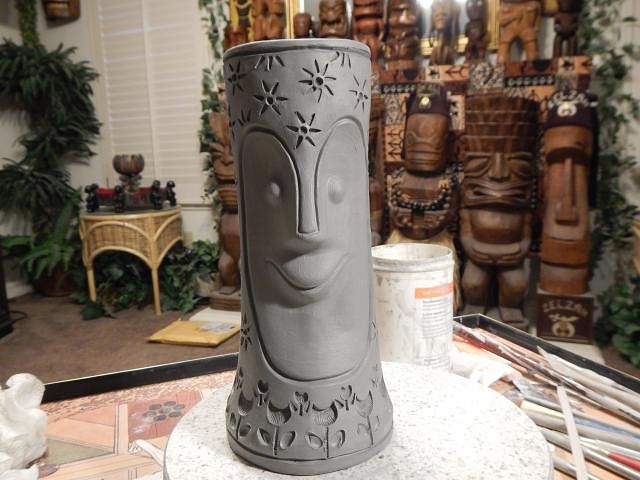
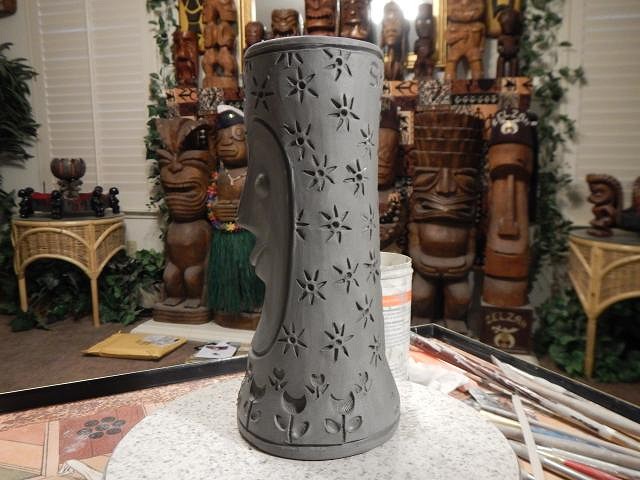
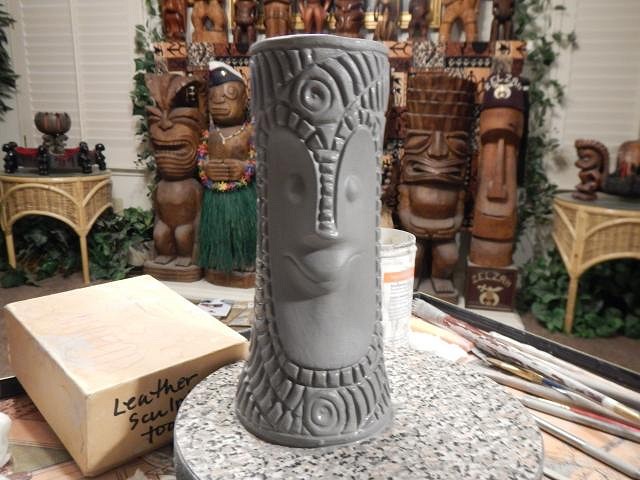
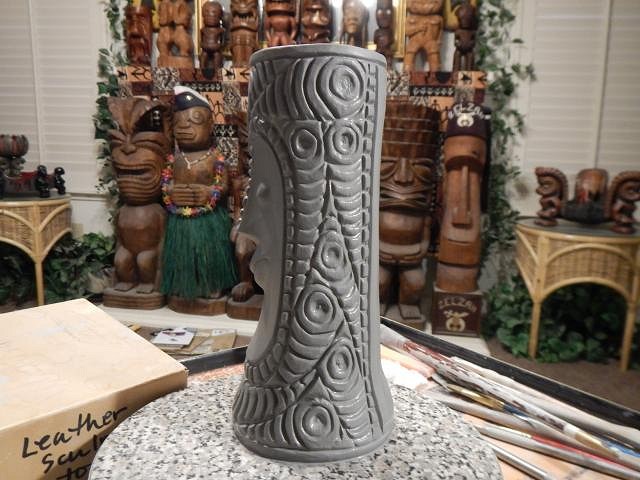
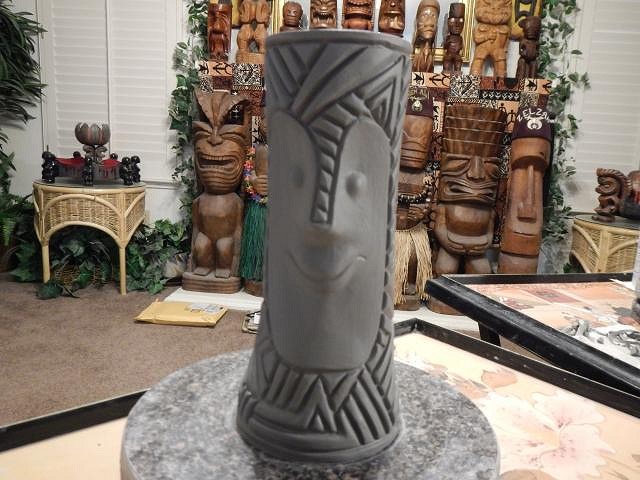
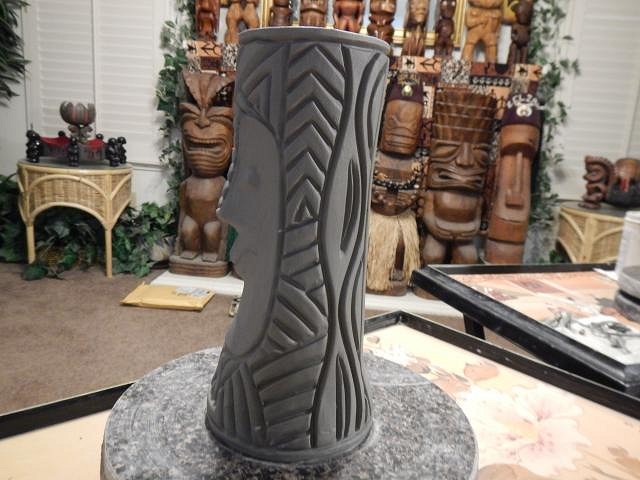
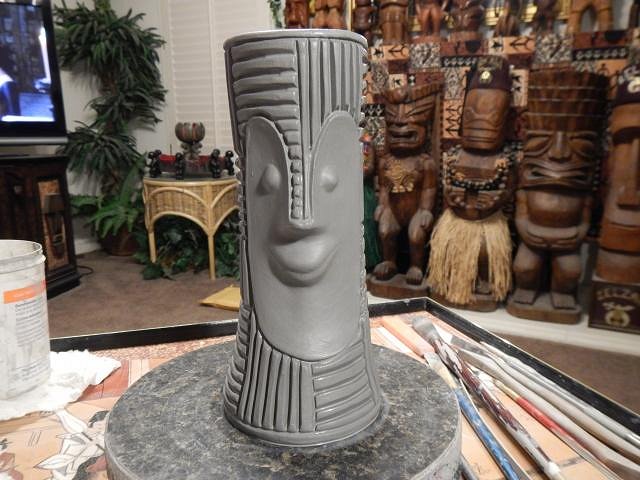
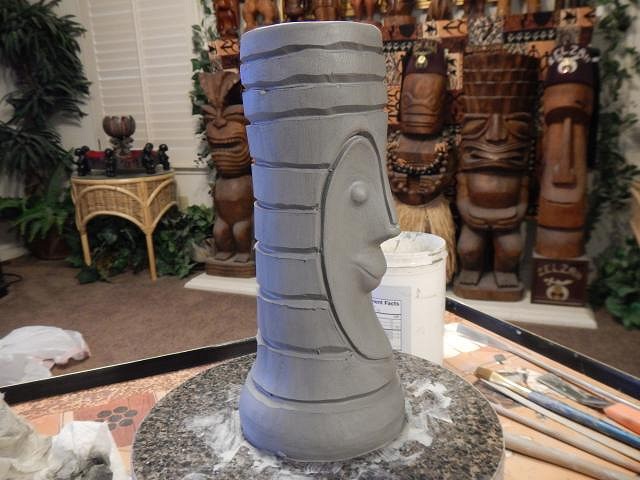
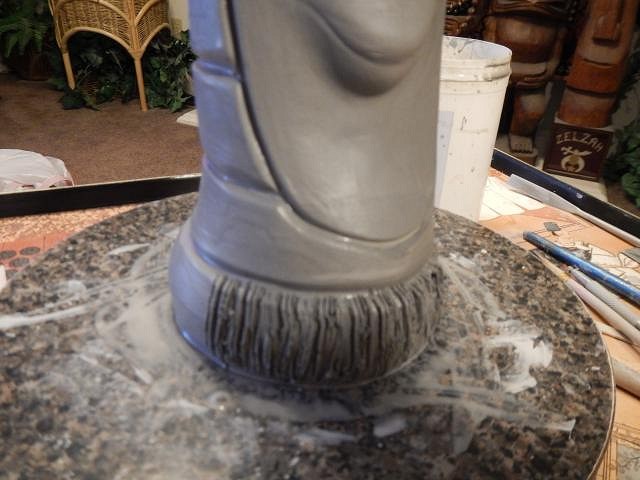
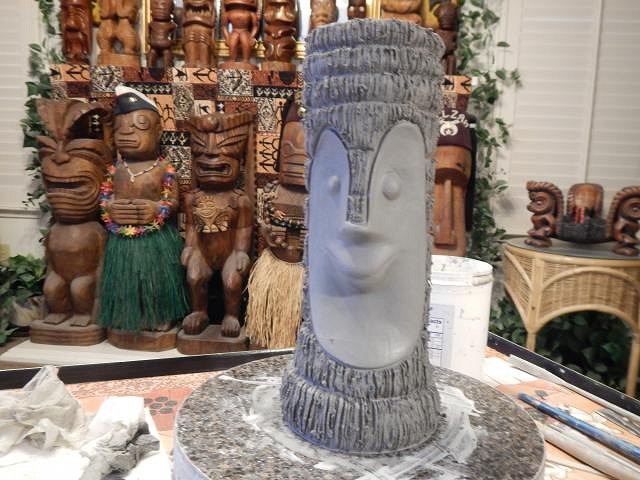
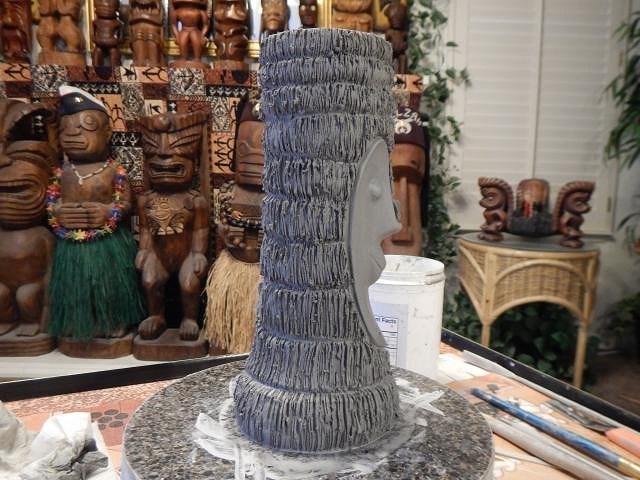
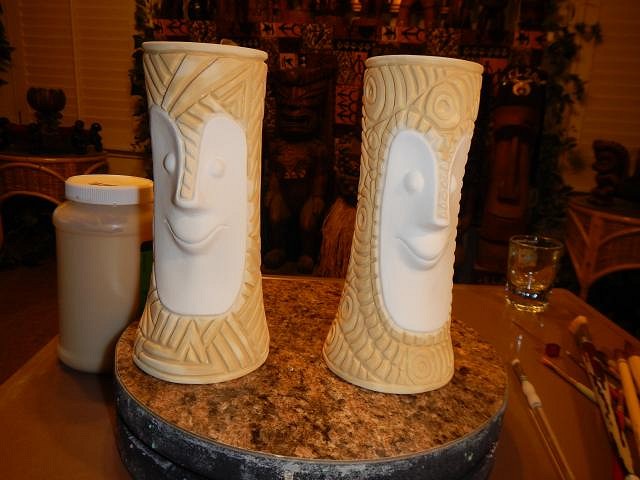
hang10tiki and I love reading your messages! ============================ I am currently working on the Wedding mugs. 15 Supercarved Tiki Bobs. I can't show the backs because they are personalized and the couple want these kept as a secret until the wedding. I have permission to show the fronts and sides. Here are the first four out of the molds and needing to be cleaned up and prepared for doing the carving. I can do two of these mugs in one day. More than that and my hands give out. Numbness takes over. I'm wearing out. Mug #1
Mug #2
The first two mugs together. The next day. Mug #3.
Mug #4
On the third day I did Mug #5
Mug #6
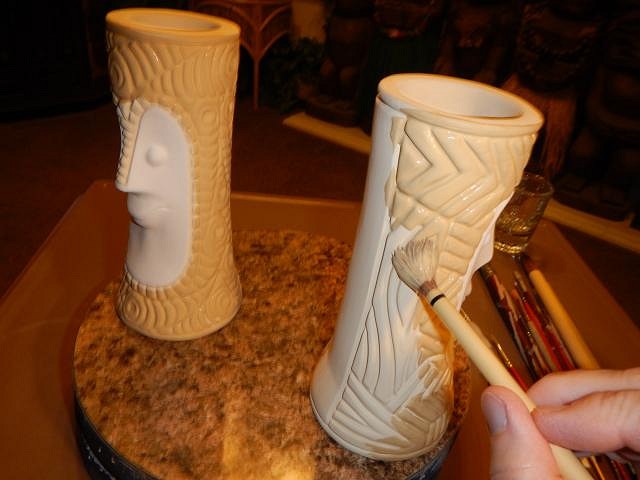
The first 6 mugs are dying. I turn them over so the bottom gets to dry for a couple of hours and them back on their bottoms for awhile. They go back and forth until they are dry enough that lying them on their sides won't dent the carving. Thank you for the visit, Wendy [ Edited by: danlovestikis 2016-06-21 21:40 ] |
|
M

ModernArtifactsNY
Posted
posted
on
Wed, Jun 22, 2016 5:52 AM
Wendy, those Bob's are great. The mugs I love the most are tied to specific events in my life. These Bob's will have strong Mojo for their wedding, I am sure. Love when they are pre-filled with Mana! Thanks as always for sharing! Bill [ Edited by: ModernArtifactsNY 2016-06-22 05:53 ] |
|
H
hang10tiki
Posted
posted
on
Wed, Jun 22, 2016 6:23 AM
Awesome |
|
D
danlovestikis
Posted
posted
on
Wed, Jun 22, 2016 4:41 PM
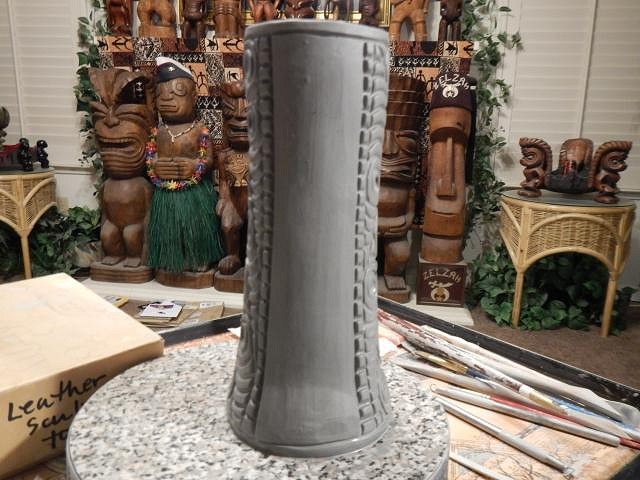
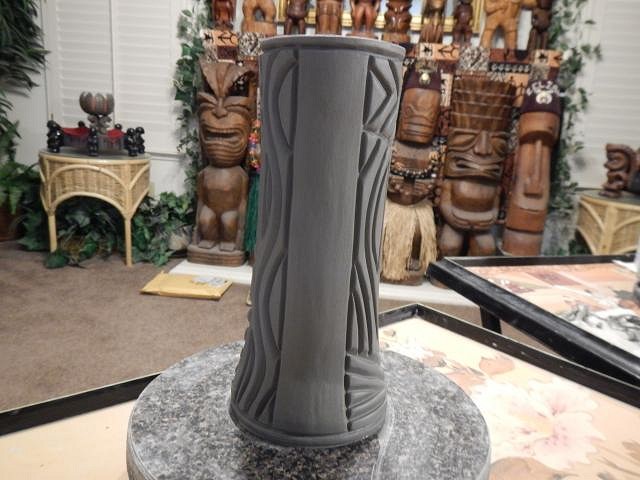
ModernArtifactsNY that's why I just couldn't turn him down. It's fun to be there. I'm waiting for photos from another wedding coming up this summer. hang10tiki I bet it will. ====================================== More of the wedding mugs have been carved. I don' copy past mugs but there will always be similarities. Mug #7
Mug #8
Mug #9
Mug #10
Two a day works out to be just right. Cheers, Wendy |
|
H
hang10tiki
Posted
posted
on
Wed, Jun 22, 2016 7:39 PM
Digin da super carves Ps- I heard TikiHula had some fun yesterday :) [ Edited by: hang10tiki 2016-06-22 19:40 ] |
|
D
danlovestikis
Posted
posted
on
Thu, Jun 23, 2016 8:44 PM
Surprise!!! We are home after a week long trip to a family reunion in Oregon. We found some wonderful tikis while traveling. After I finish posting all the wedding mugs I will post the trip with all the tiki finds. We were on the road for 10 hours today. Eugene, Oregon to home. We took our showers and now it's time to sleep. Cheers, Wendy |
|
H
hang10tiki
Posted
posted
on
Thu, Jun 23, 2016 10:44 PM
Wow |
|
D
danlovestikis
Posted
posted
on
Fri, Jun 24, 2016 1:56 PM
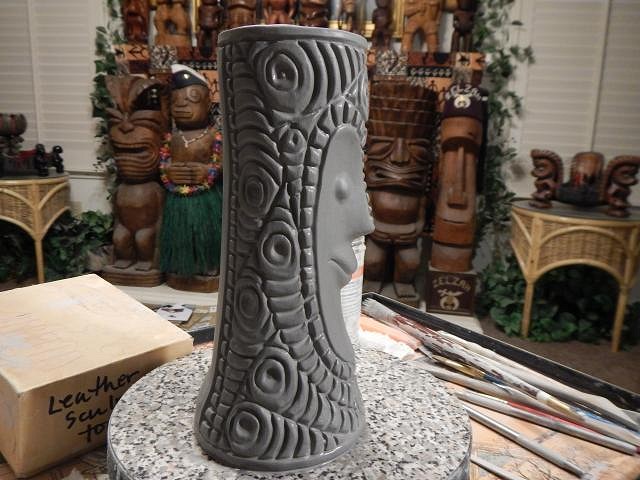
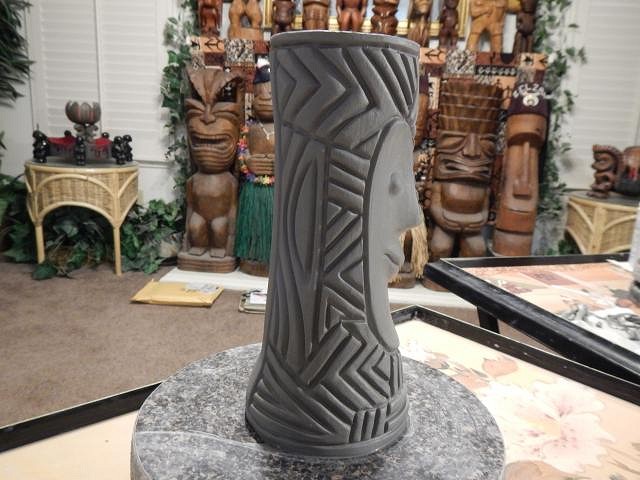
Thank you hang10tiki =========================== Here are the last of the 15 ordered Wedding mugs. #11
#12
#13
#14
#15
That's all that were ordered but in case any crack when fired I have made three mugs that are blank on the back. I could glaze the names there to replace any that don't make it through the kiln. #16 just in case...
#17 just in case
#18 just in case
I am completely done with casting, carving, sanding and bisque firing. I have more catch up photos Cheers, Wendy |
|
Z

zerostreet
Posted
posted
on
Fri, Jun 24, 2016 2:02 PM
Amazing work on that Tiki Bob, Wendy! I still treasure the one-off Bob you made for me a few years ago! |
|
L

lunavideogames
Posted
posted
on
Fri, Jun 24, 2016 7:26 PM
Ooooo... I like Bamboo Bob. Nice of you to do a wedding request. :) |
|
D
danlovestikis
Posted
posted
on
Sat, Jun 25, 2016 9:06 PM
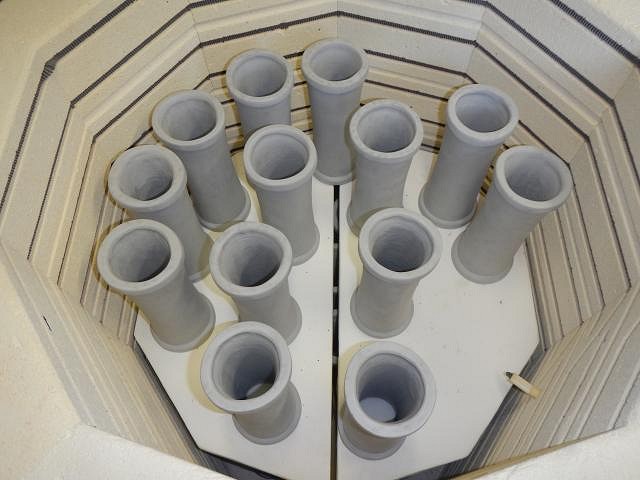
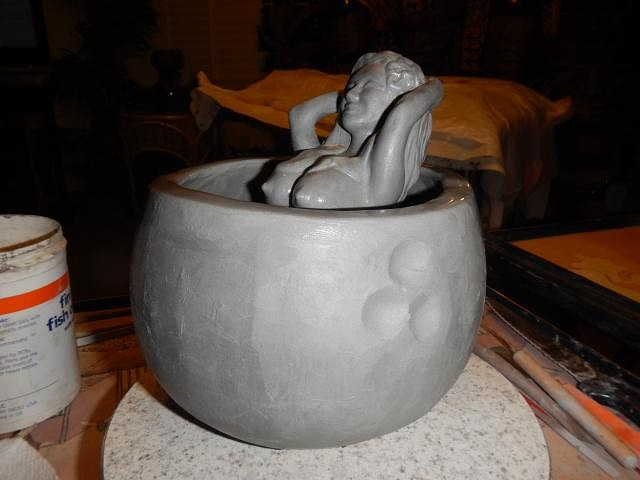
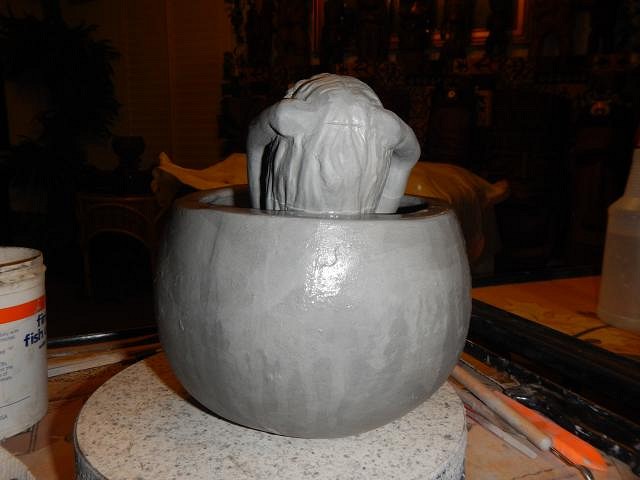
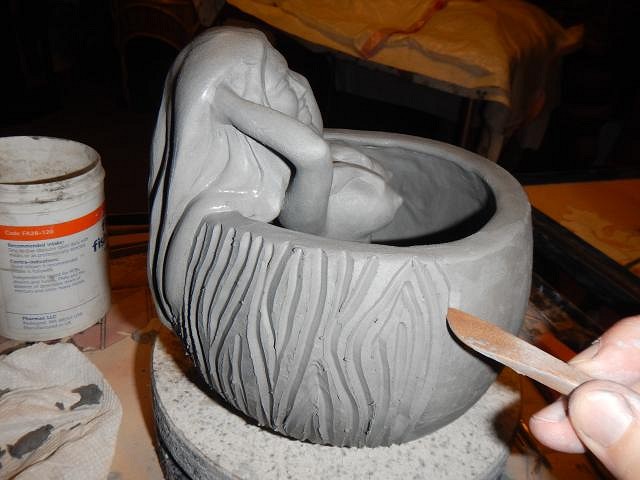
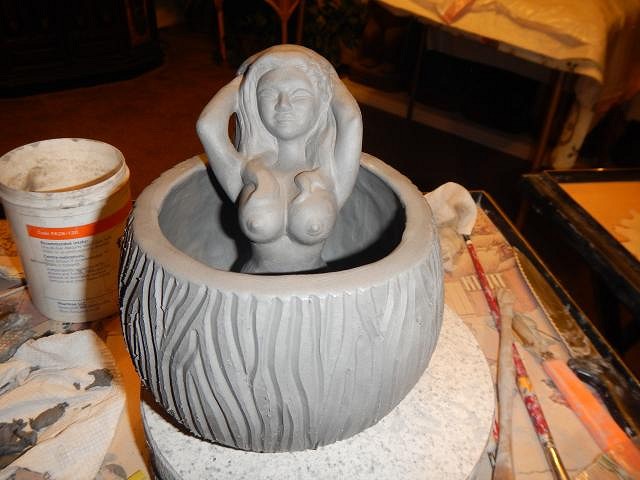
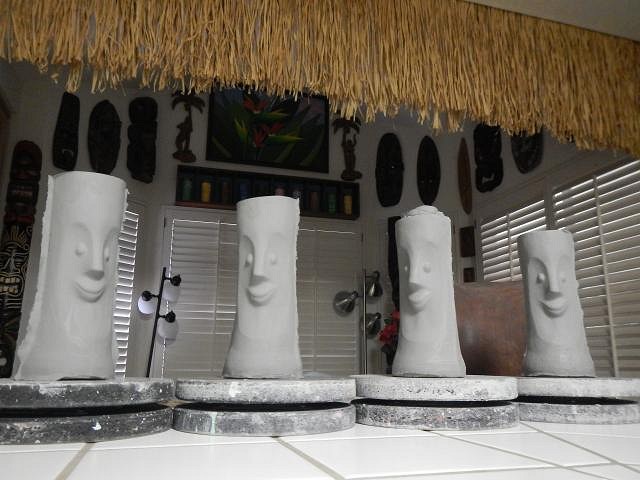
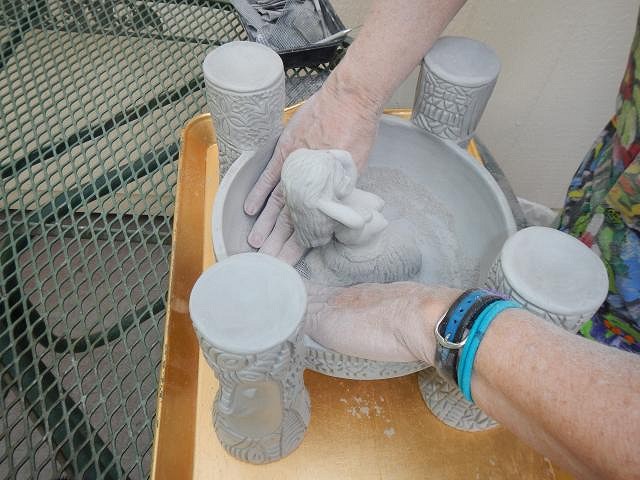
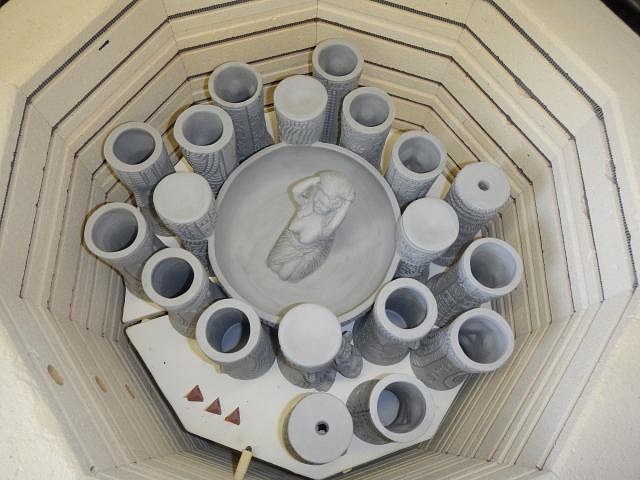
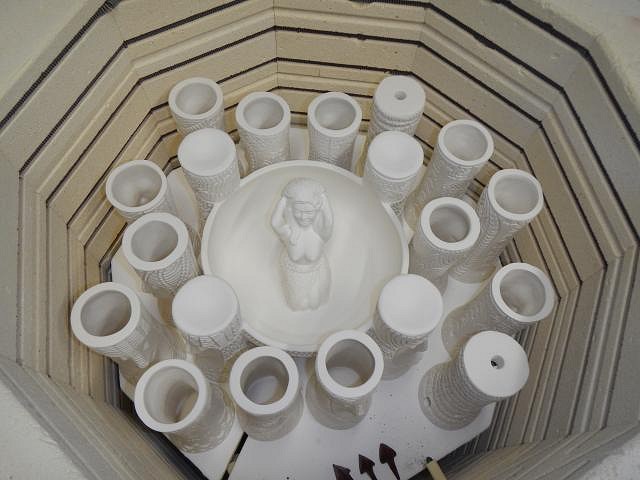
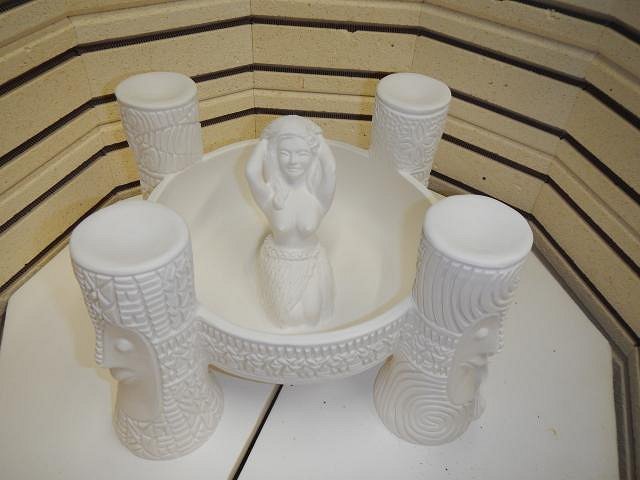
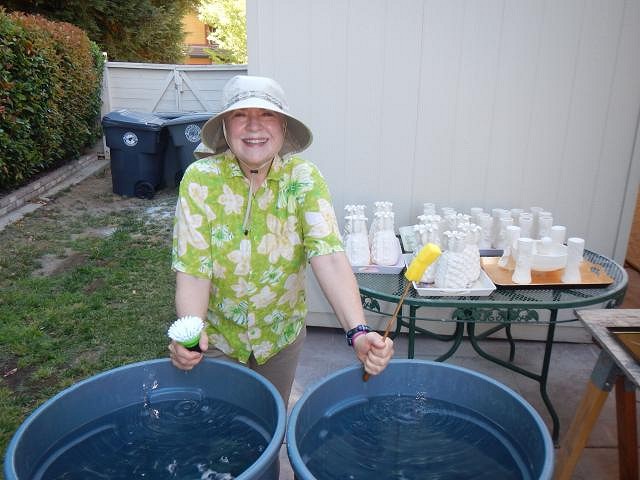
zerostreet that is so sweet. I noticed your logo on the front cover of Strangwise. I'm reading it now and I'm convinced that I had all the back issues hidden in our freezer wrapped in foil but they have since turned into something churning and turning into a rainbow of colors. You may have to come save us if it starts to grow like the Blob. lunavideogames I figured out I had just enough room in the kiln and enough time to carve them at night. It all worked out. See below. ======================= The wedding mugs travel all over the place while being made. They went from the garage where they were cast to the family room where they were carved. Then to the kitchen to dry. However Dan wanted them out of the kitchen so back to the garage. Once they dried they went to the back yard where I did all the sanding. Dan did all the dusting. The HUGE bowl was a challenge to sand. So many places. I fit as much as I could on the bottom level. Some went in upside down. This is the last of the Sacramento Crawl mugs. Then I filled the top level and turned on the kiln. I did a 1 hour preheat, 13.5 hour bisque fire and a 25 minute hold. This should be the last fire until I start glazing everything. I hope you are all having a fun Saturday night. Cheers, Wendy |
|
H
hang10tiki
Posted
posted
on
Sat, Jun 25, 2016 10:01 PM
Now that's a full load |
|
D
danlovestikis
Posted
posted
on
Sun, Jun 26, 2016 8:40 PM
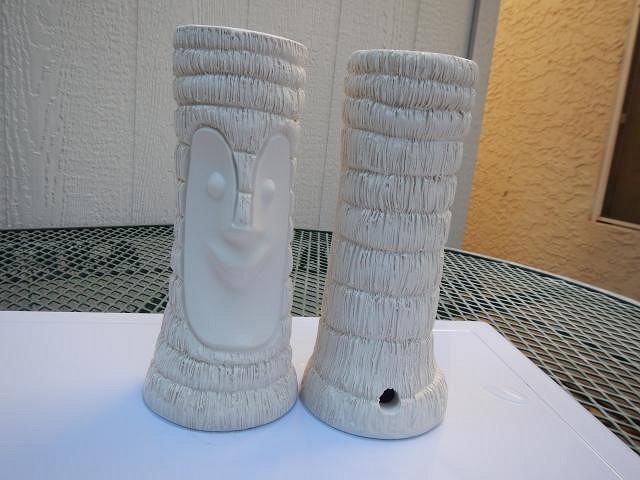
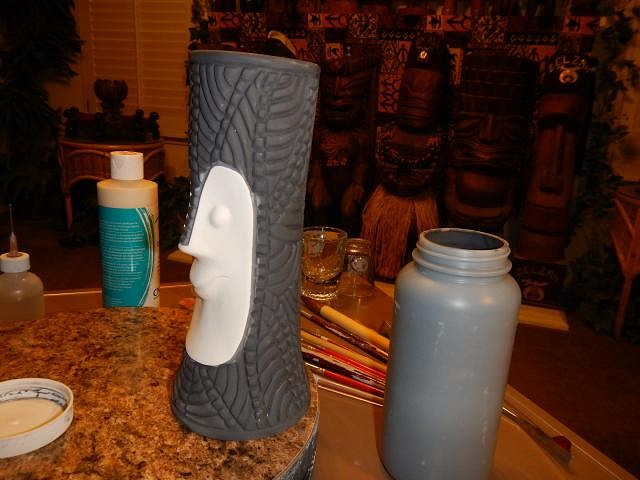
hang10tiki I look at it as a glazing project waiting to be tackled! ============================== The very first day we cast wedding mugs two of them didn't turn out and had to be salvaged. Here's what I do when the slip sticks inside and I forgot to check. When this happens you can put a brush inside or hit the outside of the mold with a rubber mallet. Either way the slip will then pour out. I didn't check so I had two mugs that needed to become something else. Usually when this happens the muck is just at the bottom half. So I turn the mug over and cut out the bottom. Then I scoop out all the mush. Once that is done I smooth the inside of the mug. I always turn these into lamps or torches. Yep I've had this happen in the past. That's why I recently chiseled the molds opening larger. So I add a top and then place a hole at the top and back bottom. For these I like to do a coconut Tiki Bob so I first carve in all the rings. Then I use a wire brush to add the texture. Done.
Now these were set to dry with all the wedding mugs. Cheers, Wendy |
|
H
hang10tiki
Posted
posted
on
Mon, Jun 27, 2016 6:17 AM
Always thinkin That coconut texture looks cool How many coconut lamps does Dan-0 have :) |
|
D
danlovestikis
Posted
posted
on
Mon, Jun 27, 2016 7:28 AM
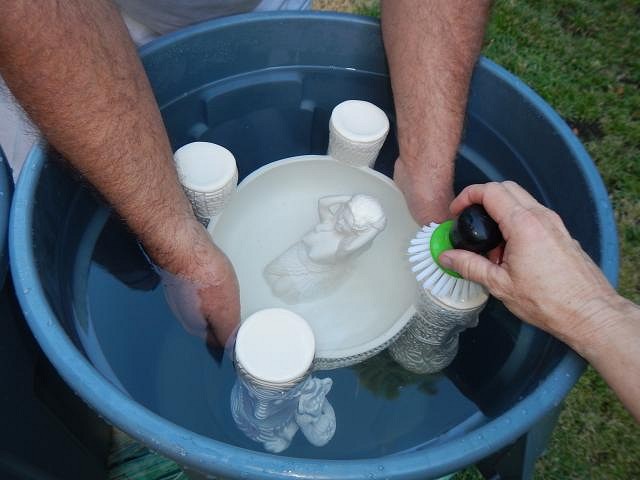
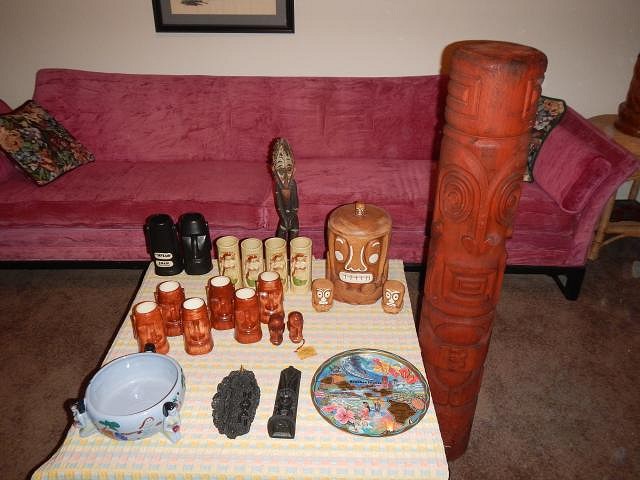
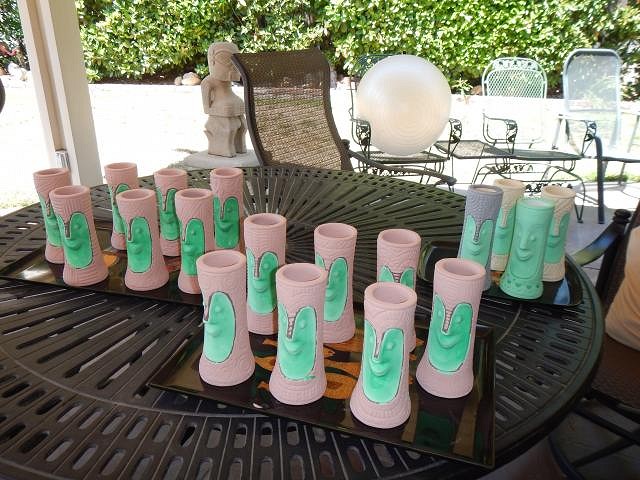
hang10tiki he has 3 of these that just happened. When I finish these they will look for a new home. =================================== It's wonderful to finally get to the point where all I will be doing is glazing. Everything is cast and waiting. Here is the last bisque fired load of the summer. Top shelf. Last item on the top shelf to remove. Bottom shelf. All the art is ready to be washed. I scrub and Dan rinses. This bowl is so HUGE that I had to have him hold it while I scrubbed. The lamp/torch Tiki Bob's. We finished all the washing. Notice the patio floor, we get drenched when washing. I decided that I would take off all the plastic tarps and photograph all the pieces that need to be glazed. The Sacramento Crawl mugs. The Hot Tub Hula Girls in the back. The plain mugs in the front are the fogcutters for the next Wish List #7. The wedding mugs, HUGE Bowl and the Tiki Bob lamps. All the misc. such as The Jungle Bird mug the necklaces, Moai for my wall, the swap mug, the Frankoma coconut head goblet and a bowl that I will paint as an experiment. This will be the summer of glazing! Cheers, Wendy |
|
H
hang10tiki
Posted
posted
on
Mon, Jun 27, 2016 7:33 PM
So much work for you 2 |
|
D
danlovestikis
Posted
posted
on
Wed, Jun 29, 2016 8:47 PM
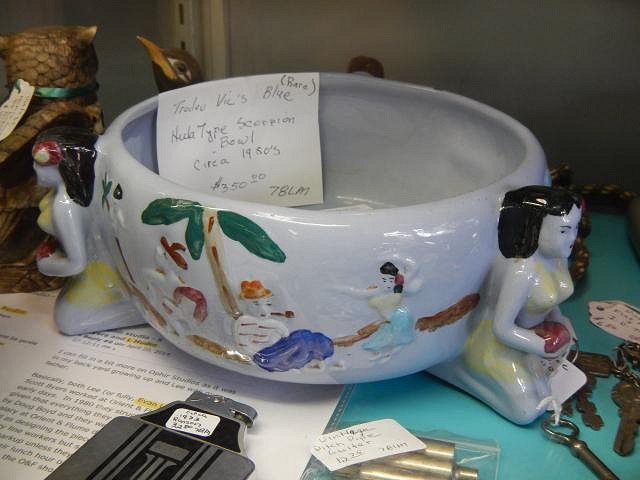
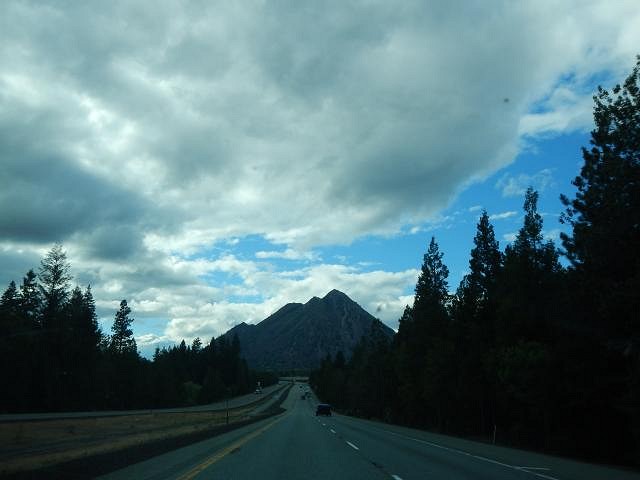
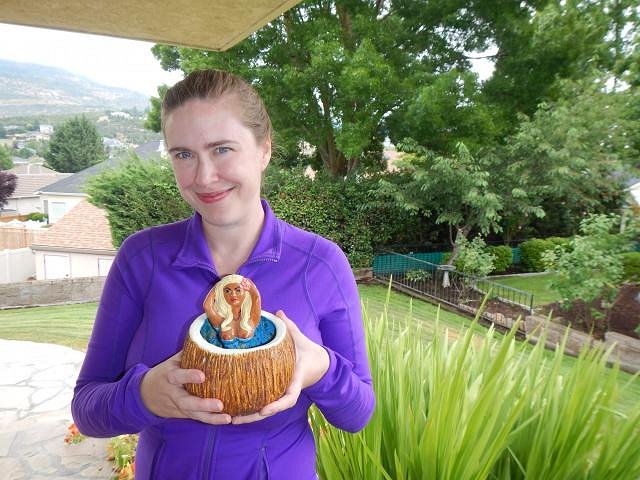
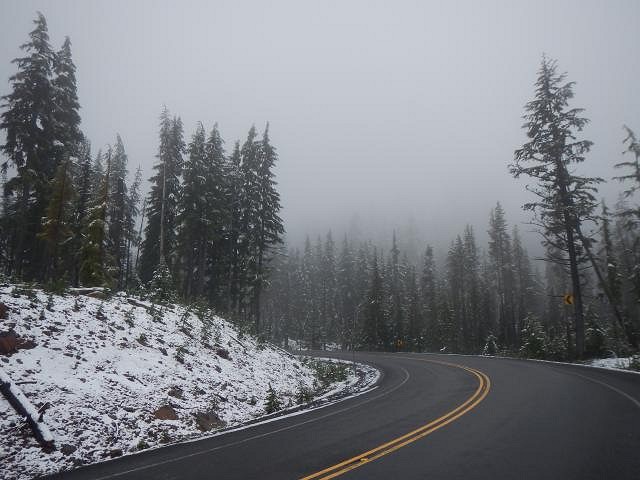
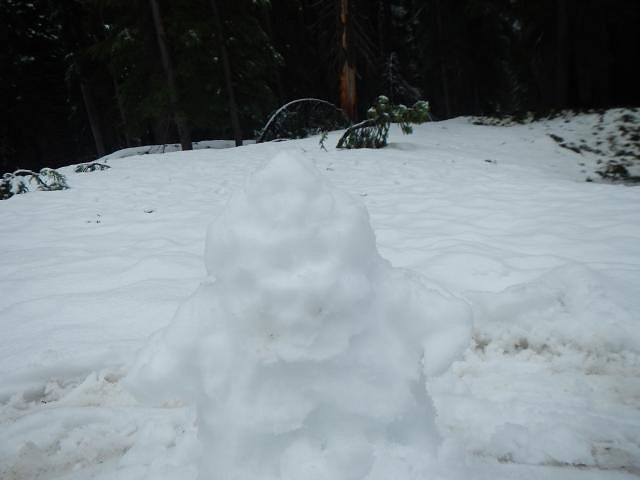
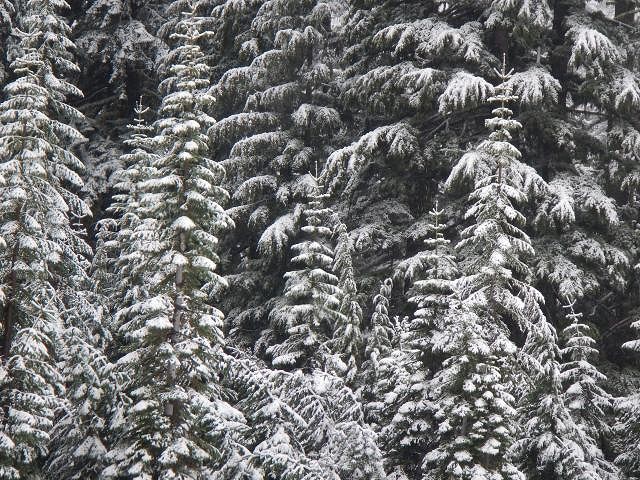
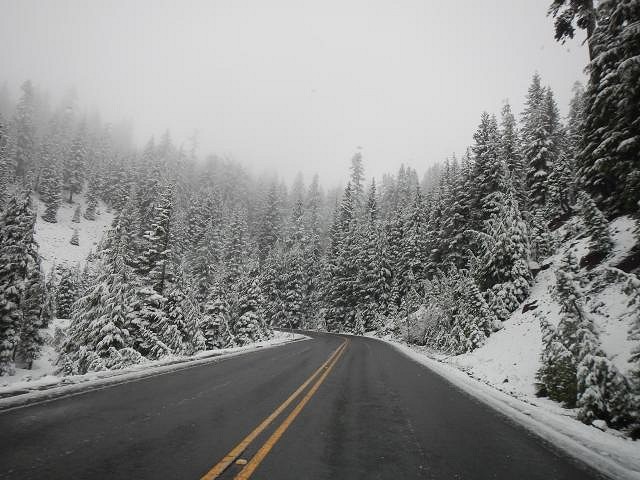
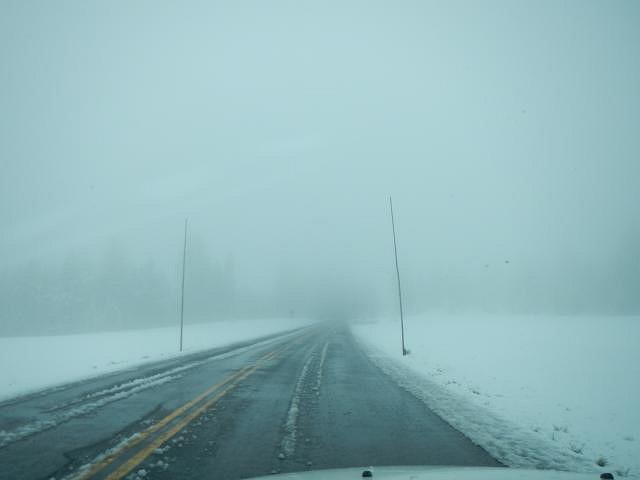
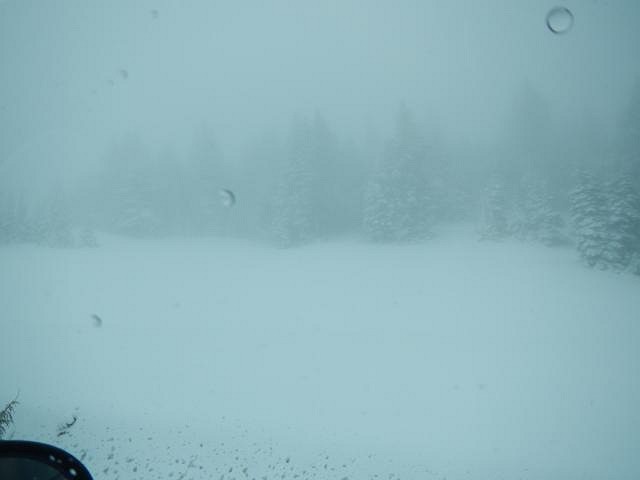
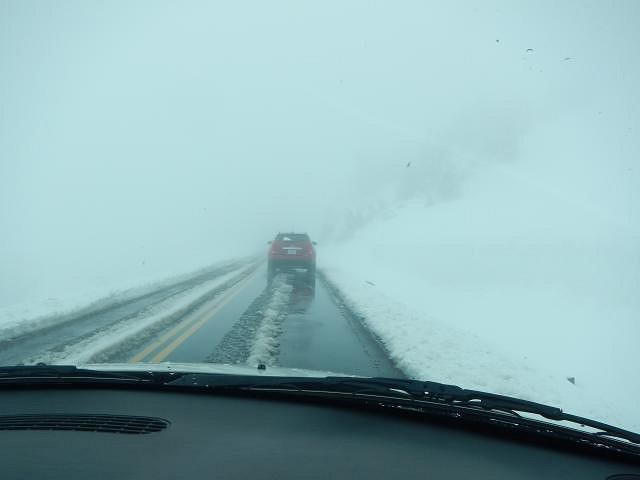
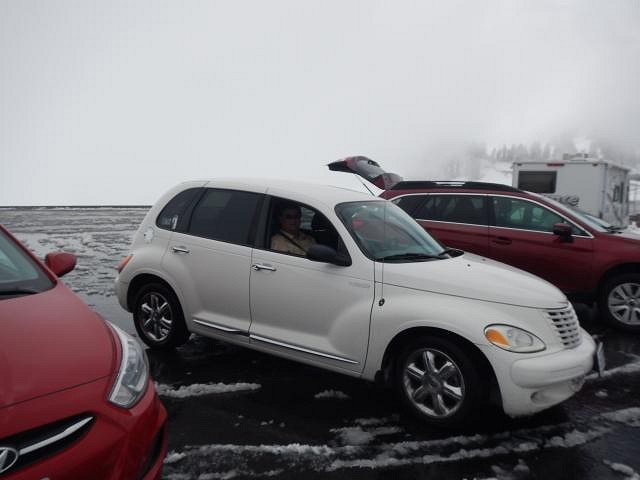
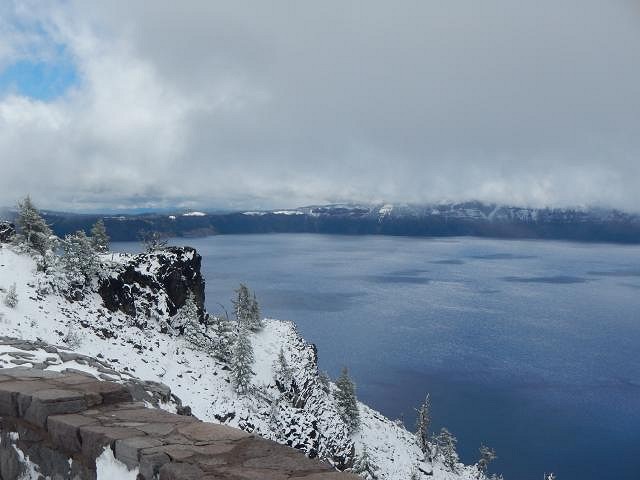
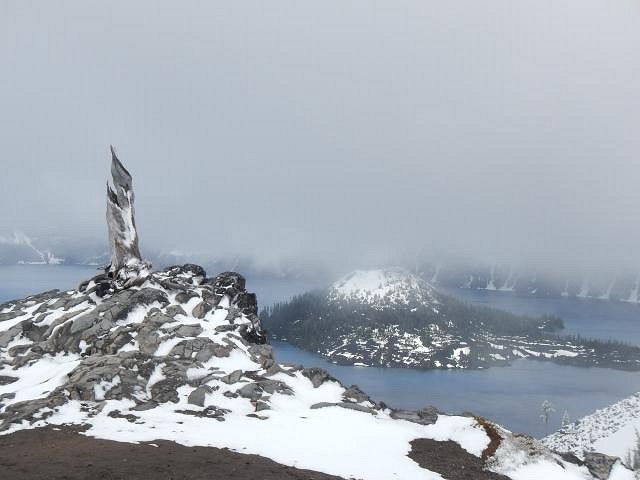
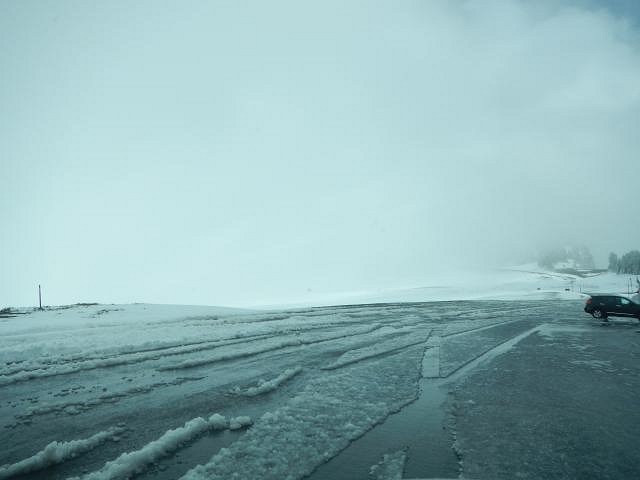
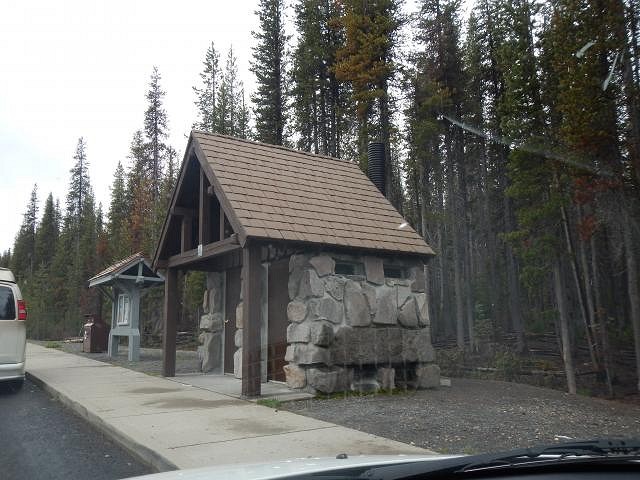
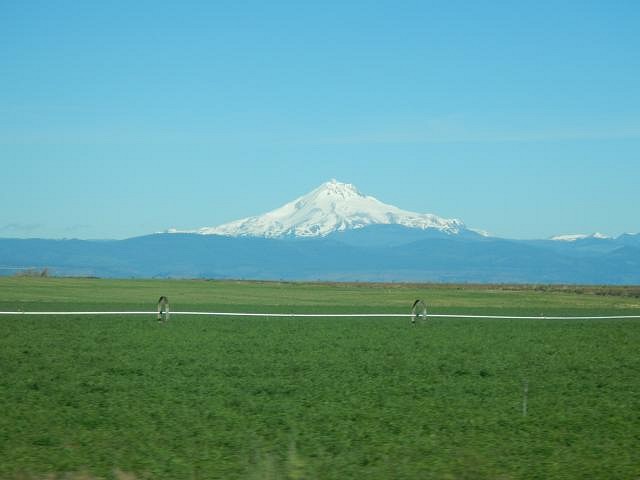
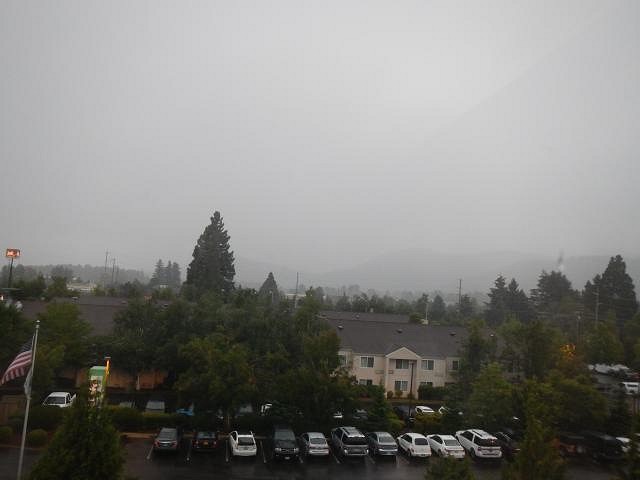
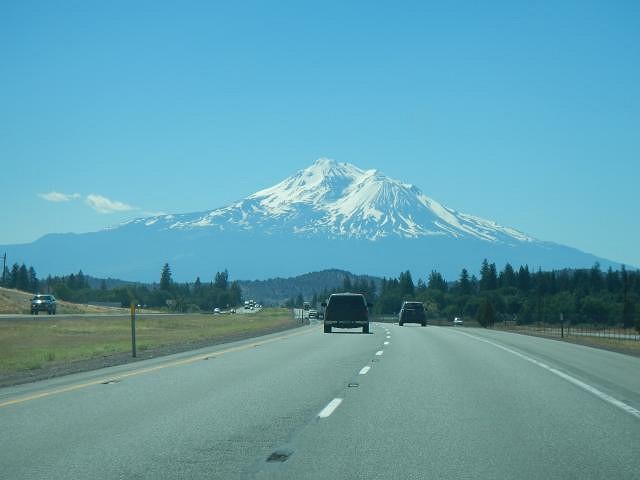
hang10tiki it's fair because I get paid!!! ============================== June 16, 17, 18, 2016 part one of our trip to Oregon. We stopped at antique and thrift stores hunting for tikis the entire way. Dan got such a great deal on the small sized Trader Dick's moai that they were the first tikis to join us on our trip. Here he found a Annette Funacello Hawaiian album. Dan plays records every day. The next time we stopped we saw this blue Tepco bowl with a HUGE price. Dan wanted the bowl but we went back to the car without it. I told him go back it doesn't hurt to make a low offer. I waited in the car. He returned with a huge smile and the bowl. The owner accepted his offer. On Interstate 5 we came upon our favorite grey volcano. Then we got to Mt. Shasta with it's peak in the clouds. We arrived at our family reunion and I presented my great-niece with the blonde Hot Tub Hula Girl she had requested a year ago. After the one day reunion we headed off to Crater Lake. Our first stop was at the Rouge River Gorge. We had been checking the internet for Crater Lake and it was supposed to be sunny. Well it was for about 5 minutes. I've only driven in snow 3 times before and had not touched any in years so I had to stop and build a snow tiki. It was so beautiful. I drove very slowly. There weren't many other visitors. The trees would drop snow every once in a while and once on our windshield. That was fun. As the elevation went up the conditions got worse. "Dan good thing I told you to put the chains in the car." Oh Oh guess who forgot? We began to wonder if we would make it over and out of the park. We also wondered if we would be able to see the lake. The snow/ice in the center of my lane was hitting the underside of the car. We finally saw the turn out for Crater Lake and pulled into the parking lot. We were so happy. We could see the lake. We could also see the island in the lake. It was 30 degrees out so we didn't stay long. We were still concerned as to whether or not we could get out of the park to continue our journey. We got to the North gate without going off the road. It was so worth the drive and much more exciting with the snow. We made our last stop at the doghouse. You know, one side for setters and one side for pointers!!! More tomorrow. Cheers, Wendy [ Edited by: danlovestikis 2016-06-30 09:01 ] |
|
J

JenTiki
Posted
posted
on
Thu, Jun 30, 2016 8:25 AM
Looks like a fun trip! I remember when I was a kid, we were camping at Crater Lake and had to stay an extra day because the snow had caused road closures. IT WAS JULY!! What a crazy planet we live on! |
|
P

Philot
Posted
posted
on
Thu, Jun 30, 2016 8:29 AM
|
|
L

LoriLovesTiki
Posted
posted
on
Thu, Jun 30, 2016 12:21 PM
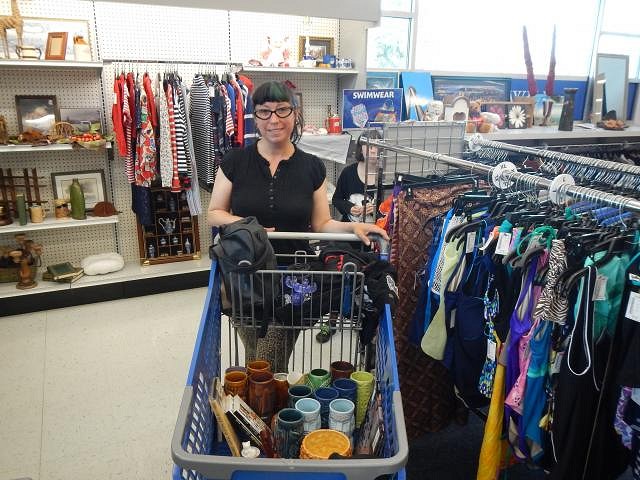
Hi Wendy & Wendy fans! Long time, no see. Facebook is ruining TC for me! I see most of Wendy's stuff and Mike's on FB so I don't remember to check TC as often as I should. Sorry! I saw the crawl mug on your newsfeed Wendy but missed the giant Bob bowl. All I can say is I'm glad I stopped by! That bowl is AMAZING! I might have to have a bowl as my next request. It's summer in NJ and vacation for this teacher but I'm already working at one of my 2 summer camp jobs! I made the most of my 2 days off from working though and bought a beach house, which has been a lifelong dream of mine! It's rented for most of the season but we'll get to enjoy it this holiday weekend and then at the end of the summer into the fall. Just wanted to share. So let's just say I've been a little busy, lol! Nice to "see" you all. |
|
D
danlovestikis
Posted
posted
on
Thu, Jun 30, 2016 4:46 PM
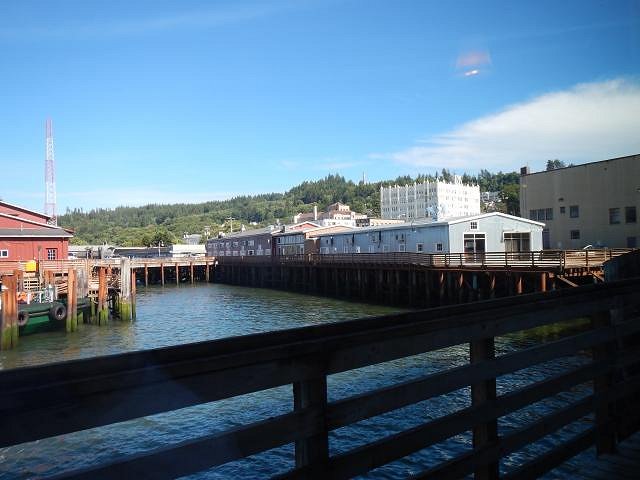
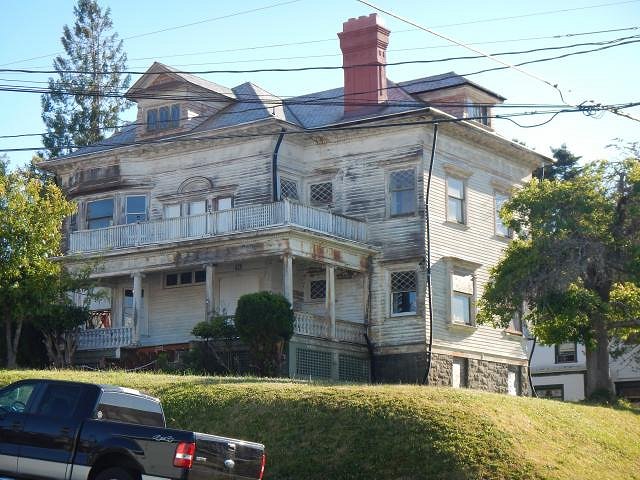
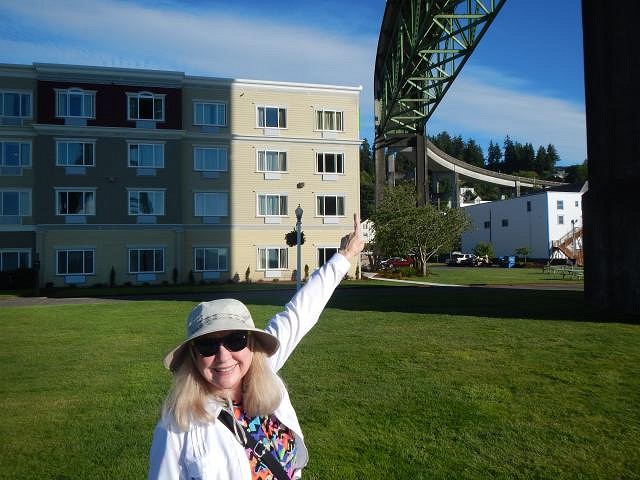
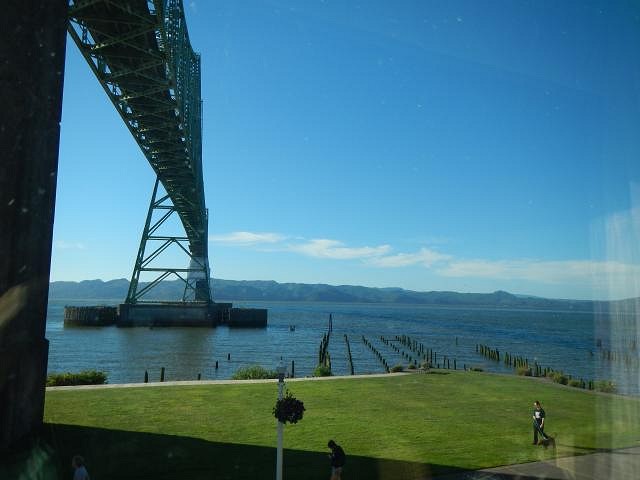
JenTiki camping as kids was such a great time. We always went to Sequoia National Park and Kings Canyon. We never had snow but all the water was icy cold in the summer. It's fun to picture you at Crater Lake with snow. I wish we had stayed to play but it was snowing lightly and we didn't know if it would get worse. Thank you for the story. Philot is it the bust size??? Somehow it all gets done. Maybe it's my 14 hour work days. LoriLovesTiki a beach house sounds like so much fun. We flew over the Jersey shore coming back from a trip. So many homes on the beach. I see you on fb and I was just thinking of you yesterday. I've had so many friends here on Tiki Central that have disappeared. I keep thinking of dartharnie. Hey guy, where are you??? ============================ Here's some more of our trip to Oregon. Part II. From Crater Lake we drove on to Redmond for the night. Along the way there we stopped again to tiki hunt. They wanted $850 for it. It did not come home with us. One antique store had a zillion old boots for sale. We put in for a Holiday Inn and the GPS took us out into the boonies. We were told to turn in to a place called Canyon Escapes and found a Holiday Inn Resort with 3 golf courses. Too bad we don't play. Our room had a view of the course. The next morning we were off again heading to Astoria on the edge of Oregon along the Columbia River. We drove past 3 volcanos with snow. We tried to have breakfast at a fun place but with an hour wait we left and went to Denny's. The Columbia River and a town called The Dalles were pretty but we just kept on driving. We passed the northern edge of Portland after many hours on the road and didn't stop there either. Well traffic stopped us and it was stop and go for an hour and then we were on our way again. We finally arrived in Astoria. We went straight downtown to all the antique stores. We had 2 hours before they would close and we didn't want to shop the next day. Right off we found a tiki bar. We quickly photographed the inside and after the photos it was back to running around to all the stores. We didn't find a single tiki in Astoria. I bought one shot glass with the name on it. We found a restaurant on the ocean and sat down for a nice dinner. We had been to this tower last year so we skipped the drive. Astoria is full of Victorian homes. It was fun to drive a few streets near downtown. We even saw a dear jump a fence and go into a backyard. We found our Holiday Inn hotel and it was right under this bridge. I'm pointing to our room on the second floor. This is the view from our room. We saw so many beautiful landscapes on the drive but it's something I wouldn't do a second time. I'm glad we did it this once. Cheers, Wendy |
|
H
hang10tiki
Posted
posted
on
Fri, Jul 1, 2016 7:32 AM
Great pics |
|
T
TikiHula
Posted
posted
on
Fri, Jul 1, 2016 10:18 AM
Wow, can't believe the snow in June, but it looks like a great trip was had! |
|
D

DixonAlibi
Posted
posted
on
Fri, Jul 1, 2016 11:54 AM
Welcome to Oregon! You are doing all the things I wish I had the time to do!! |
|
D
danlovestikis
Posted
posted
on
Fri, Jul 1, 2016 8:46 PM
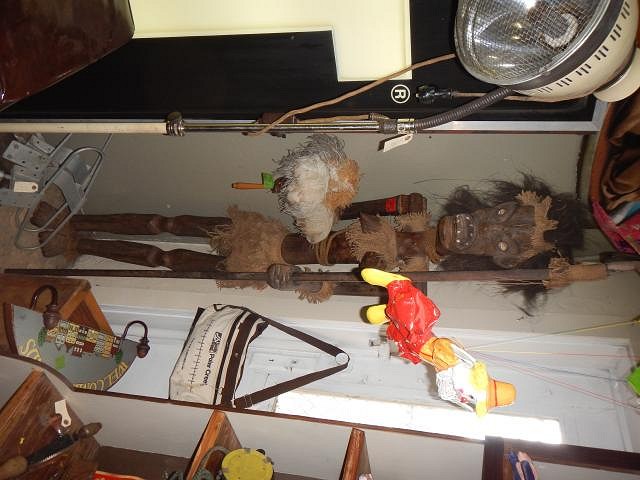
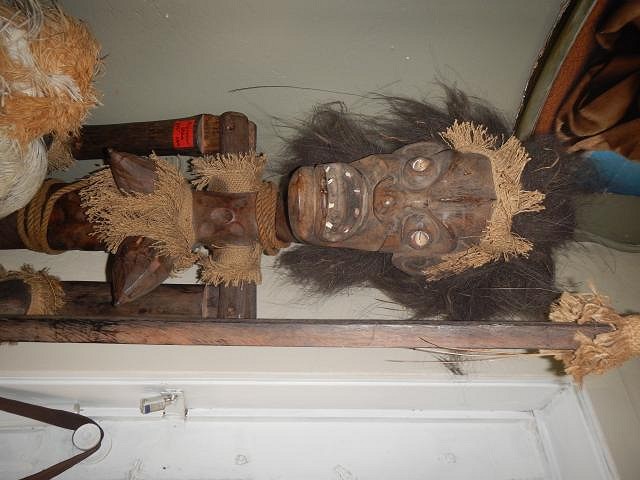
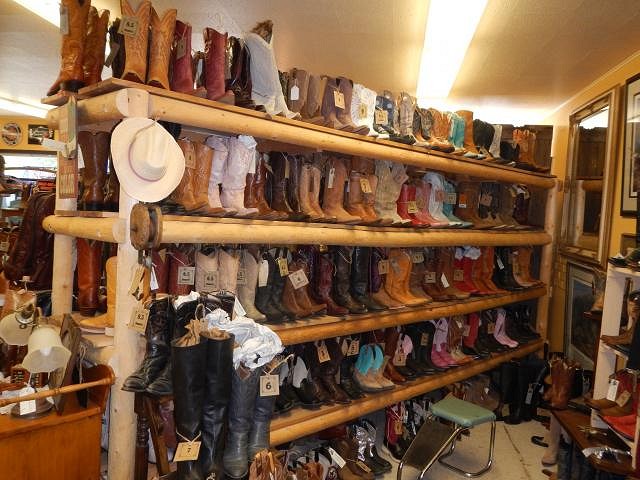
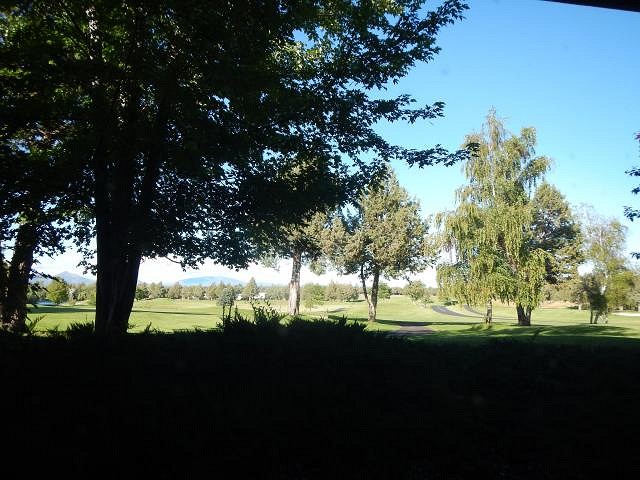
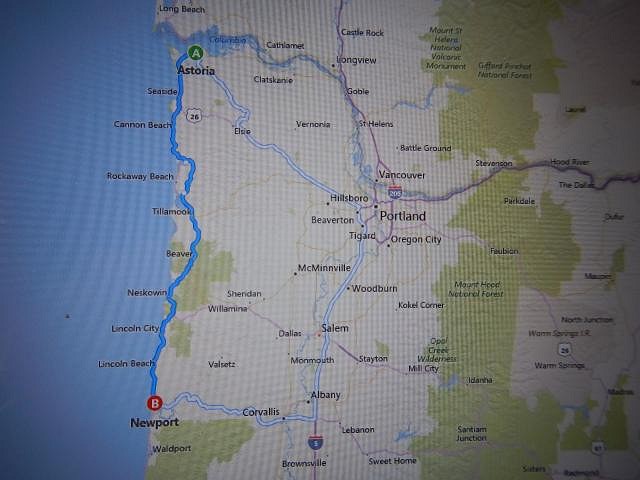
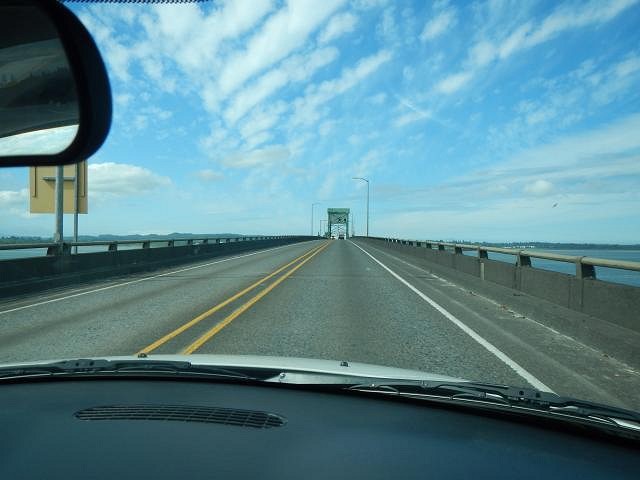
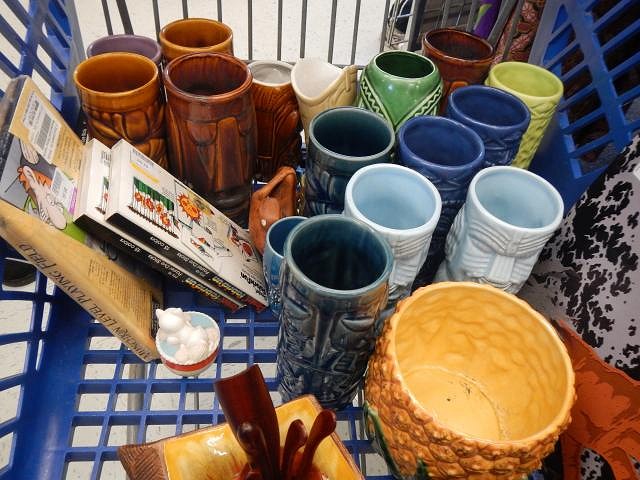
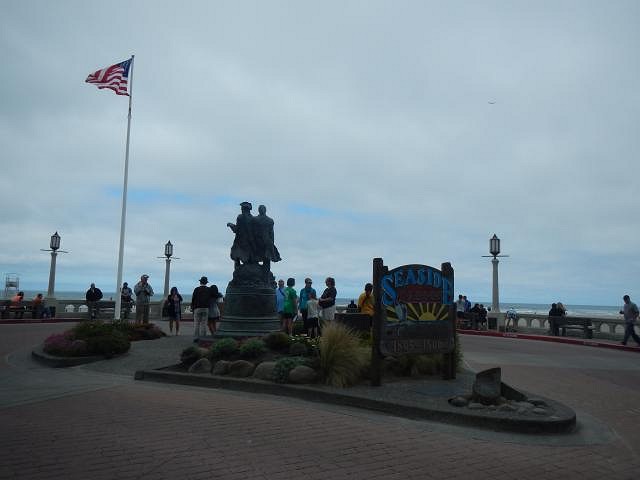
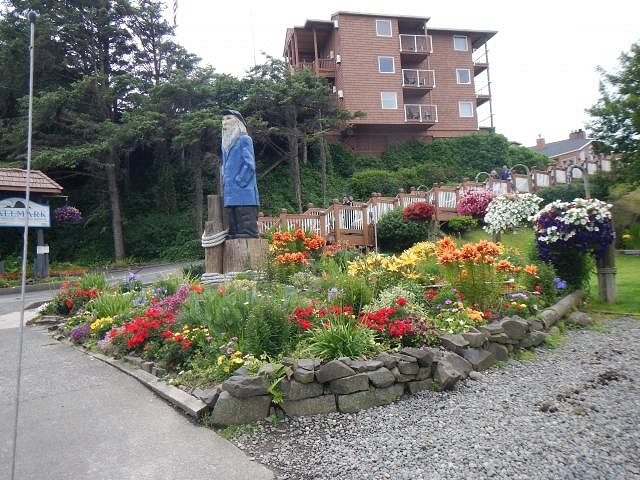
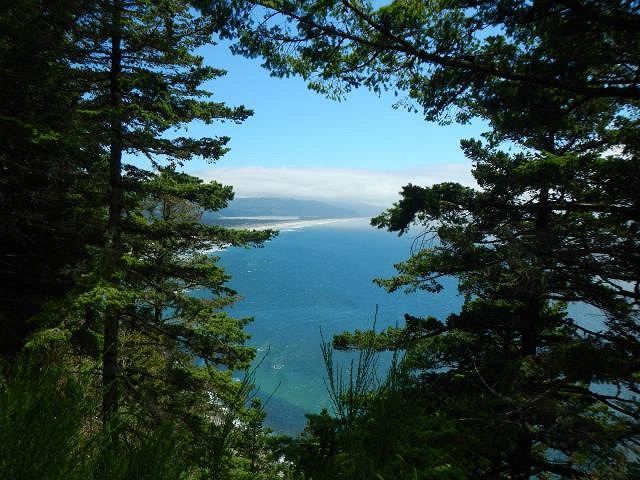
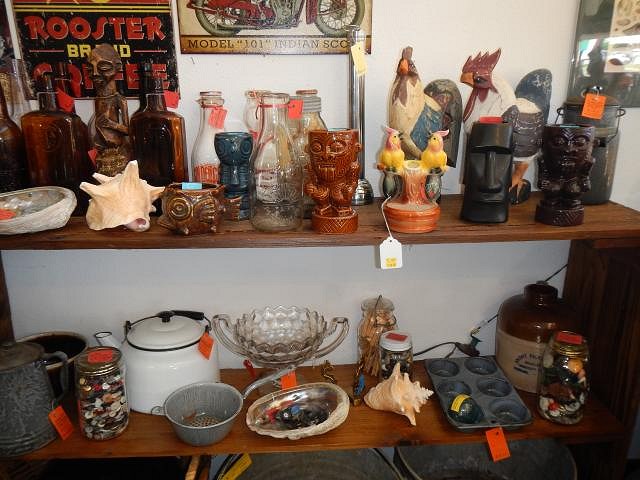
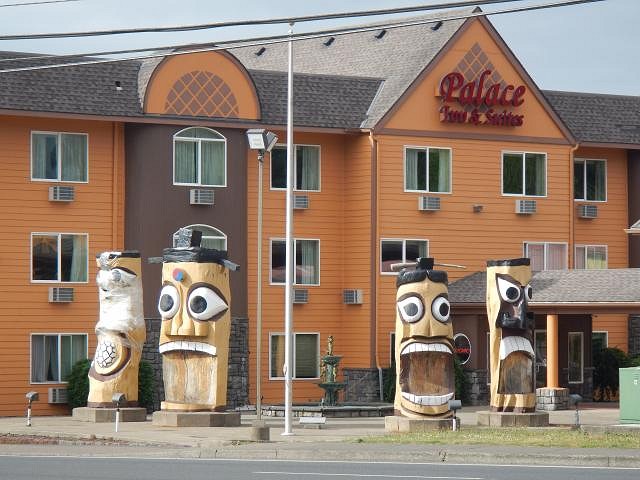
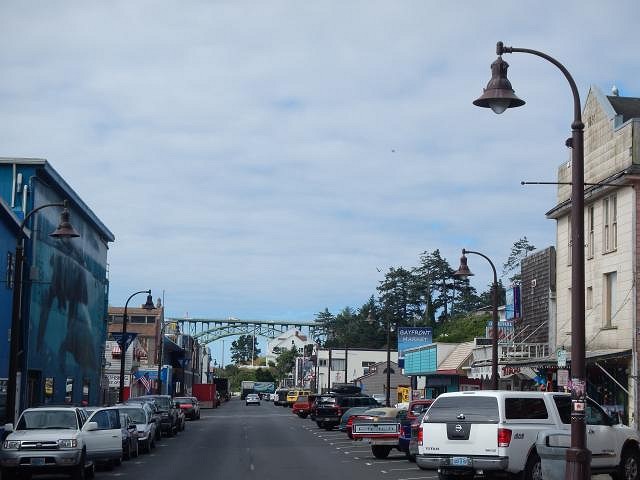
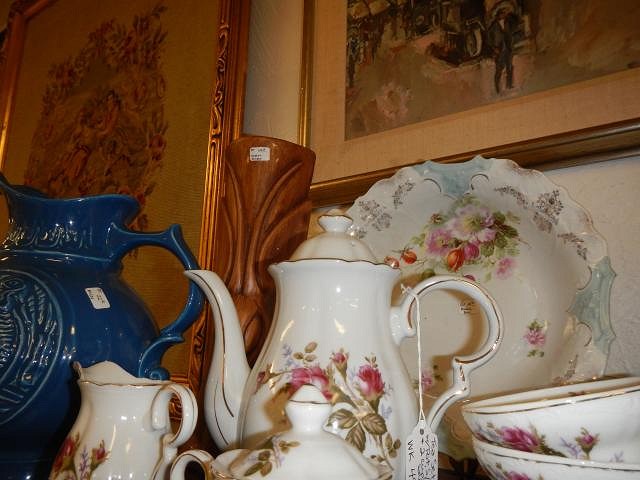
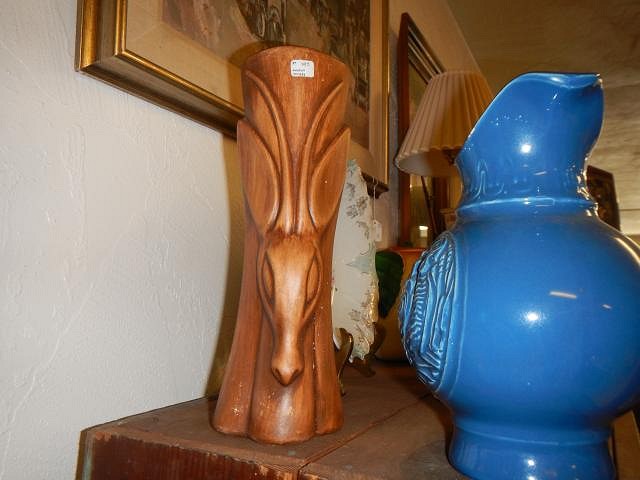
hang10tiki I will have to post some on the "finds" page. We found some great things. TikiHula the snow made it very exciting and dangerous. We will stick to Interstate 5 and the coast from now on. But as a one time trip it was wonderful. DixonAlibi traveling to Oregon has been a yearly trip since the 1960's when my sister's family moved there. They lived in Burp Holler 40 miles above Junction City. I got to watch Eugene build up from a tiny hamlet into what it is today. My family is now spread out from Medford to Portland. As long as we can drive we will continue to enjoy Oregon and family. I hope you'll be able to have fun soon or at least by the time you are our ages. Welcome to my thread. You'll make a lot of friends here. =================================== Part III the rest of our trip to Oregon and the successful Tiki Hunt. Today our goal was to find tikis all the way to Newport. The bridge we slept under goes North to Washington. We took the bridge that took us South. We were commenting on how we didn't find any tikis in Astoria when in a Goodwill store I noticed all the tikis in this ladies cart. She lives in Astoria. Her name is Pooka and she's a tiki collector. She hunts really well so we know not to hunt in her home town. She is my newest fb friend. I hope she joins Tiki Central. We made it to Seaside in time for lunch. All the restaurants on the main drag were super busy. We got to the beach and turned left. We saw a hotel with a sing for a restaurant. After lunch we headed out. Along the way we saw this garden. We drove along the Oregon coast and stopped to admire the view. In several costal towns we saw Munktiki's for sale in the antique shops. That was fun. We got to Lincoln too late to shop. We were sad because our best luck has always been there. Too far to come back and I had a hotel reservation in Newport. At least we got to see some HUGE tikis. We made it to Newport and walked along the pier area. We like to visit these tikis that are in front of Ripley's Believe It Or Not. WOW WOW WOW WOW the next day we found a cookie jar we didn't know existed. We had the shakers (now we have 2 sets) but now we had something wonderful. Here's the bottom of the cookie jar. We were still in ecstasy when in another store we found a wooden tiki pole similar to those at the Tiki Oasis hotel in San Diego. All four sides are tikis. We went to breakfast at Elmer's and had their famous German pancake. It's so good with lemon. At another store I though I'd spotted a tiki mug but I was fooled. I do like the looks enough to try the shape out for a mug in the future. We made a spur of the moment decision to leave the coast and to cut over to Eugene, Oregon so I could visit my nephew and his wife. The next day we took them out to lunch and I gave them a copy of Tiki Magazine and showed them my article. Now it was time to drive home from Eugene. We got to see the top of Mt. Shasta. At home Dan unloaded all of his tiki loot. We are still stunned with this find and this bowl now has been placed with those in the other colors. Oregon is a wonderful state. We always have a great time. Thank you all for sharing this with us. Cheers, Wendy [ Edited by: danlovestikis 2016-07-01 20:48 ] |
|
D
DixonAlibi
Posted
posted
on
Sat, Jul 2, 2016 10:09 AM
That wooden Tiki pole looks like ones that were in the entryway at the Portland Kon-Tiki! |
|
H
hang10tiki
Posted
posted
on
Sat, Jul 2, 2016 11:38 AM
Wow |
|
D
danlovestikis
Posted
posted
on
Sun, Jul 3, 2016 8:22 AM
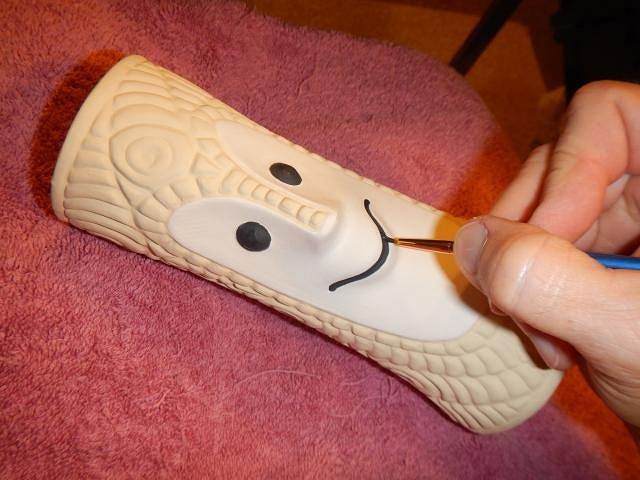
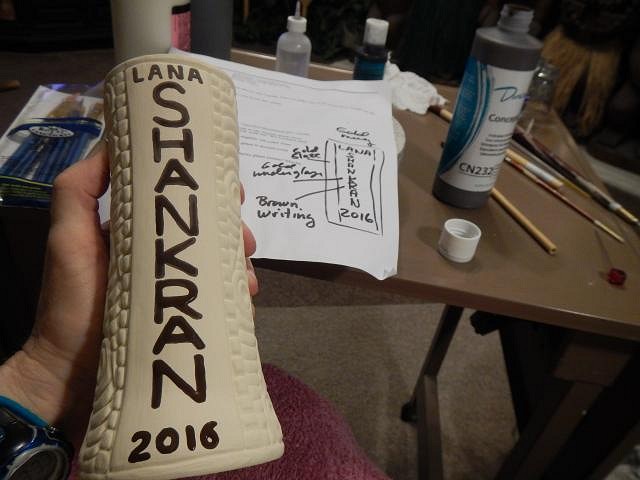
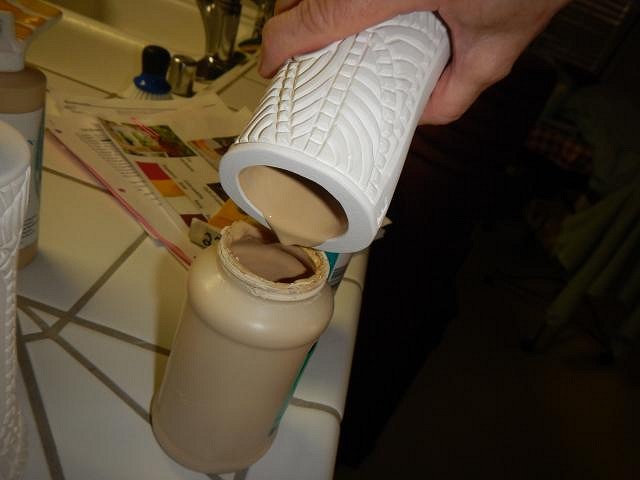
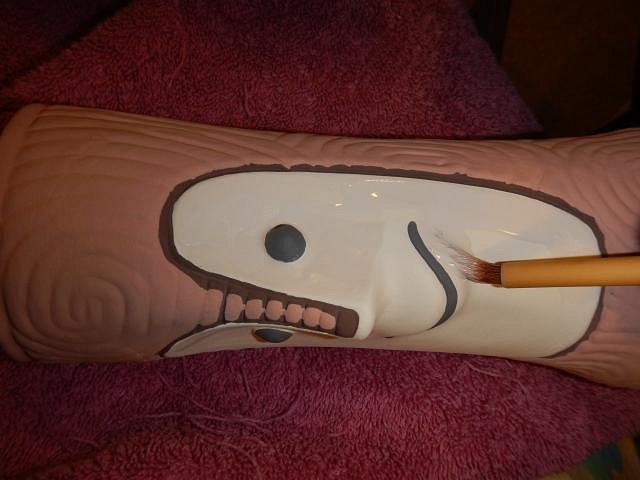
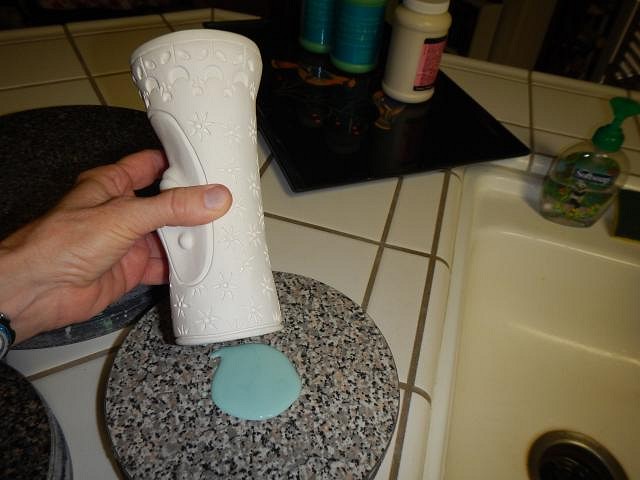
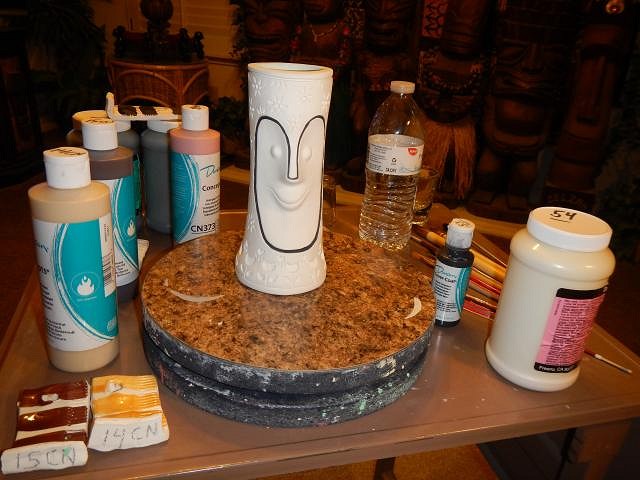
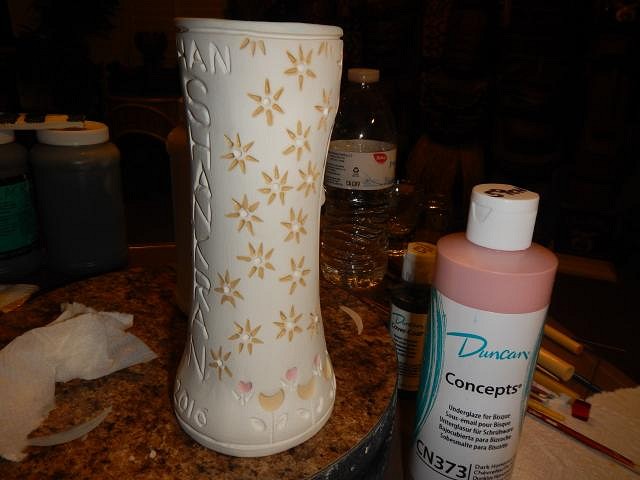
DixonAlibi thank you so much for the photo and information. I wonder if Oceanic Arts made these poles. I printed the photo with your post for Dan's binder. hang10tiki we love Oregon and seeing my family. We just have too many tikis to move there. =========================== I am working on the wedding mugs for Nate and Shannon. Tiki Bob's are a lot of work to glaze. CN glazes are a self glazing underglaze. It doesn't move when fired. IN glazes move into crevasses and enhance the carving. I found CN glaze that matched the IN glaze. So I start by glazing the noses and around the face with the CN glaze. Next I do coat number one all over the rest of the mug. I also used the CN on a back area of one mug where I'll be adding printing. Fronts done and then the sides and backs. Once I had three layers done I did the black part of the face. This blank area is where I also used the CN glaze. That allows me to paint in the lettering to personalize this mug. Even with all of this these mugs are not done. Cheers, Wendy |
|
D
danlovestikis
Posted
posted
on
Mon, Jul 4, 2016 8:36 PM
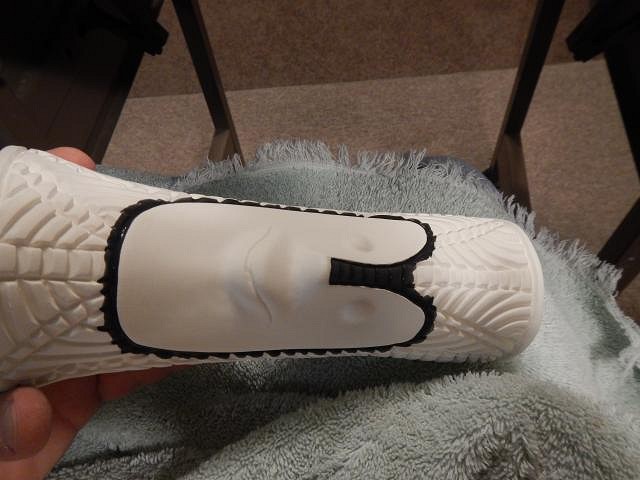
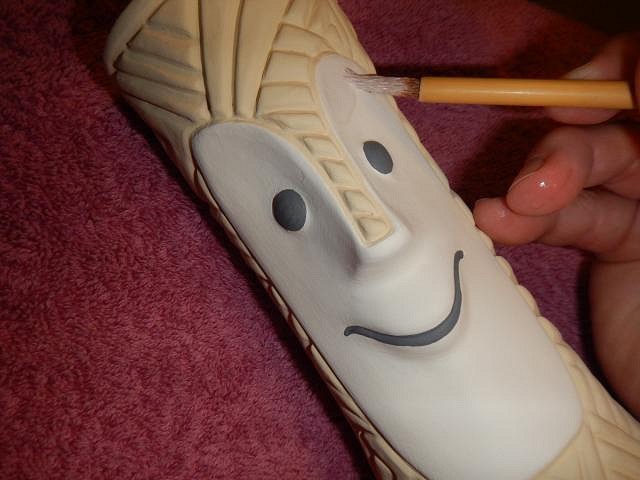
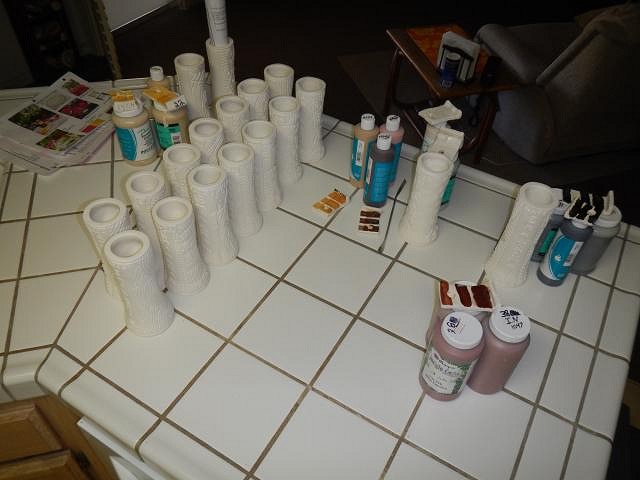
Progress Report on the Wedding mugs for Nate and Shannon. The groom requested a black mug with a gold interior. So I started with the gold. After I did this I let it dry. I used the CN black under-glaze to do the nose and around the face. To do the top lip I just put some glaze on my turn wheel and then Stuck the lip of the mug into the glaze. While it was in position I glazed the bottom. I had never done this glazing technique before and it didn't work. When I pulled the mug loose it sprayed spots of black glaze all over the gold. I was able to scrap it off and to add more gold glaze so that it didn't have these spots. That took more time than carefully painting on the black top. Next I did 3 layers of IN black glaze. Next I did the face and when it was dry I did the 2 layers of white under-glaze. If I just put clear on the white bisque clay it wouldn't look nearly as good. I let the faces dry between each layer of white. This white under-glaze will cover over any imperfections in the clay or from colored glaze that was wiped off but has some remain. That's why I do the glazing steps in this order. It took years to perfect the right way to glaze a Tiki Bob. First layer of Duncan's Clear Brilliance. It's the only clear glaze I've found that doesn't make the black under-glaze run. They dry completely and then I put on another layer. Sometimes the layers are not equal and there can be rough spots after firing. Since I need these mugs to be good with the first firing I did 3 layers of the clear. I hope you are all having a very nice holiday, cheers, Wendy |
|
H
hang10tiki
Posted
posted
on
Tue, Jul 5, 2016 7:42 AM
Bob be lookin good Hope you two had a nice 4th Cheers |
|
D
danlovestikis
Posted
posted
on
Tue, Jul 5, 2016 3:20 PM
hang10tiki we tried to relax last night but the noise and illegal fireworks kept us up until 11 PM. Then I used earplugs and got some sleep. ======================= Here are the best photos of finishing the glazing of the wedding mugs for Nate and Shannon. To do the wedding mugs I put them with their glazes.
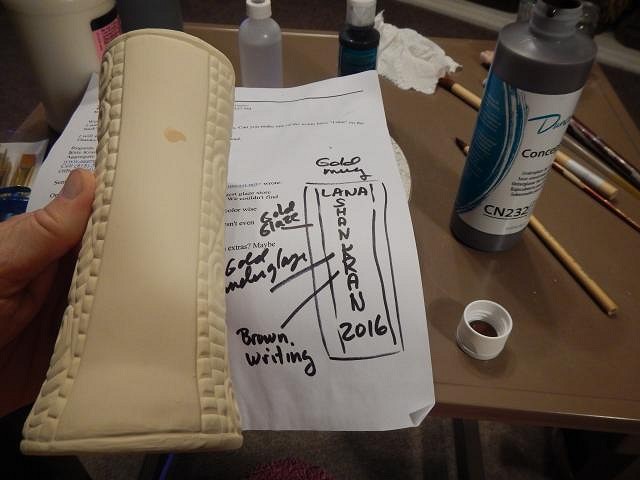
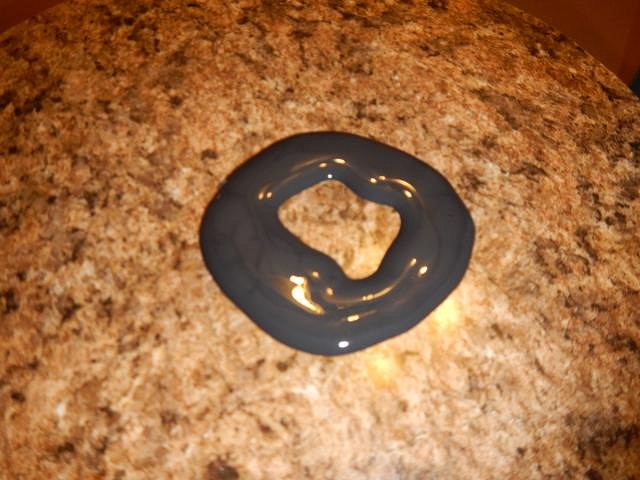
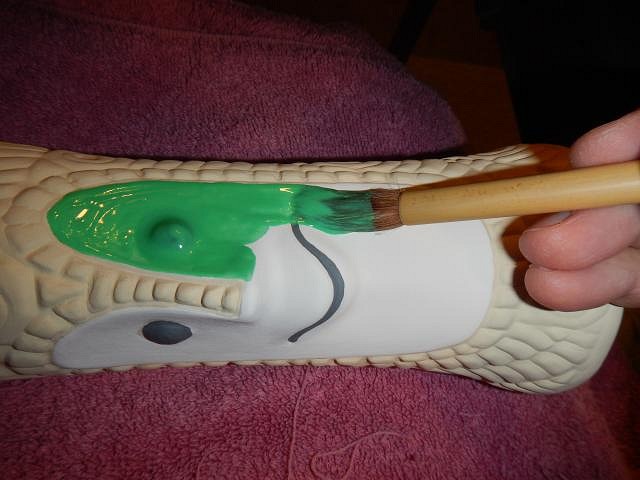
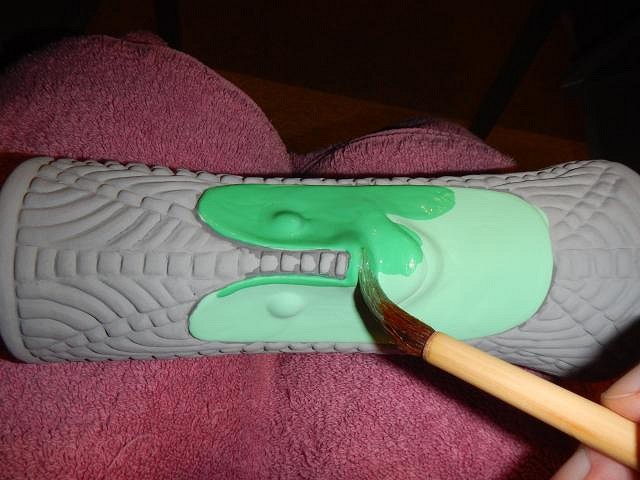
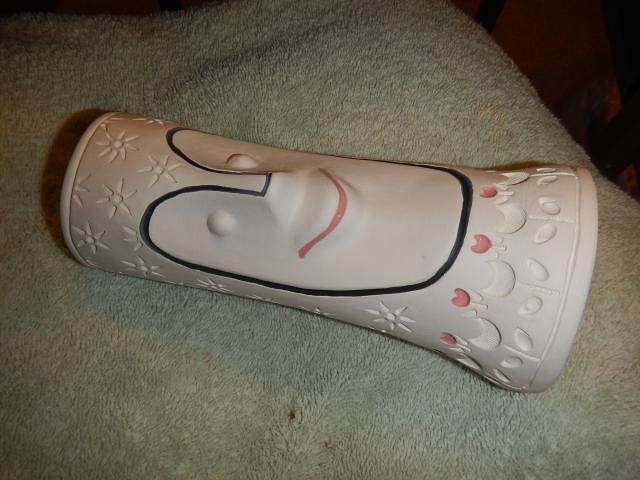
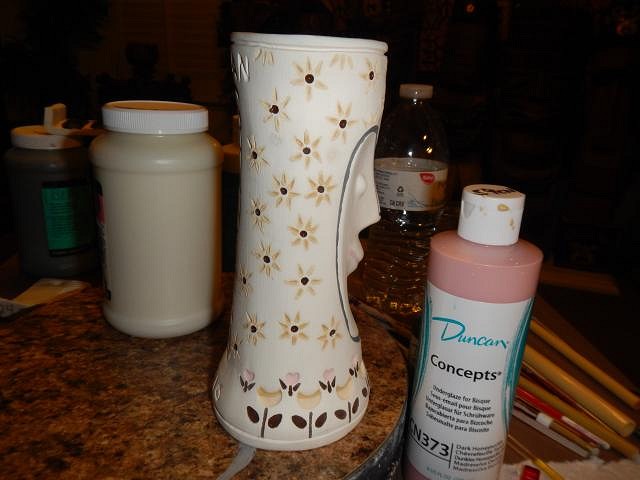
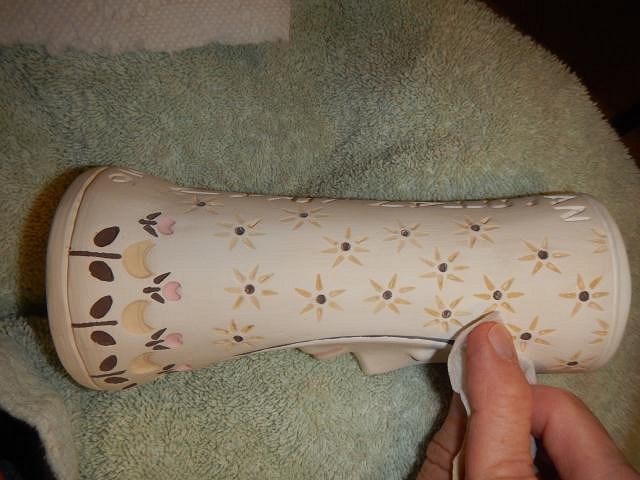
Then I started by doing the insides of the brown mugs. That way they could dry overnight while I worked on the other colors. The inside color is the same as the outside color for these mugs. It sure makes a mess. I got them done. Next was the clean up. I used a CN brown that matched the IN glaze. CN glazes do not move but they do not enhance detail. But I didn't want a runny nose. Next came the Cover Coat black lips and eyes. Just a pretty picture of Tiki Bob. First layer of brown glaze. Drying. Second layer of brown Drying between layers is important. There's a lot of walking from point A to point B to point C when glazing. Point C is the clean up. Third layer of brown. Out to dry. Back in the house for two layers of white cover coat under-glaze and then the 3 layers of clear. Outside to dry. There is no easy way to do a mug like this one. The carving was the easy part the glazing took days. I started by glazing the inside of the mug. Next the black outline of the face. I glazed each flower using a toothpick. A tiny amount of glaze over and over again until one by one the flower indentations were filled up with glaze. I did several colors to match the wedding but the Raspberry color didn't have a glaze to match. I may use enamel after these fire. The next day after the flowers had dried I used a wet paper towel to wipe off any glaze that was out of the indentations. I used the white cover coat to do the face and the black cover coat for the eyes and pink for the lips. The very hardest part was glazing all of the mug with the white under-glaze. I had to be careful not to get any on the flower petals. This took many hours because I had to do it twice. Now it sat overnight to let the white completely dry. Now the four mugs need the clear glaze. I use Duncan's Clear Brilliance because it doesn't make the black under-glaze run. Three coats of clear. I used the outdoor heat to dry them completely before they would go into the kiln for firing. |


Pages: 1 2 3 4 5 6 7 8 9 10 11 12 13 14 15 16 17 18 19 20 21 22 23 24 25 26 27 28 29 30 31 32 33 34 35 36 37 38 39 40 41 42 43 44 45 46 47 48 49 50 51 52 53 54 55 56 57 58 59 60 61 62 63 64 65 66 67 68 69 70 71 72 73 74 75 76 77 78 79 80 81 82 83 84 85 86 87 88 89 90 91 92 93 94 95 96 97 98 99 100 101 102 103 104 105 106 107 108 109 110 111 112 113 114 115 116 117 118 119 120 121 122 123 124 125 126 127 128 129 130 131 132 133 134 135 136 137 138 139 140 141 142 143 144 145 146 147 148 149 150 151 152 153 154 155 156 157 158 159 160 161 162 163 164 165 166 167 168 169 170 171 172 173 174 175 176 177 178 179 180 181 182 183 184 185 186 187 188 189 190 191 192 193 194 195 196 197 198 199 200 201 202 203 204 205 206 207 208 209 210 211 212 213 214 215 216 217 218 219 220 221 222 223 224 225 226 10816 replies