Pages: 1 2 3 4 5 6 7 8 9 10 11 12 13 14 15 16 17 18 19 20 21 22 23 24 25 26 27 28 29 30 31 32 33 34 35 36 37 38 39 40 41 42 43 44 45 46 47 48 49 50 51 52 53 54 55 56 57 58 59 60 61 62 63 64 65 66 67 68 69 70 71 72 73 74 75 76 77 78 79 80 81 82 83 84 85 86 87 88 89 90 91 92 93 94 95 96 97 98 99 100 101 102 103 104 105 106 107 108 109 110 111 112 113 114 115 116 117 118 119 120 121 122 123 124 125 126 127 128 129 130 131 132 133 134 135 136 137 138 139 140 141 142 143 144 145 146 147 148 149 150 151 152 153 154 155 156 157 158 159 160 161 162 163 164 165 166 167 168 169 170 171 172 173 174 175 176 177 178 179 180 181 182 183 184 185 186 187 188 189 190 191 192 193 194 195 196 197 198 199 200 201 202 203 204 205 206 207 208 209 210 211 212 213 214 215 216 217 218 219 220 221 222 223 224 225 226 10,816 replies
|
G

GROG
Posted
posted
on
Sun, Jan 23, 2011 11:37 AM
GROG give it two semi-opposable thumbs up. |
|
T

Tobor64
Posted
posted
on
Sun, Jan 23, 2011 12:35 PM
Very nice, Wendy! I don't know if we can make it up to FI for the party, so can you put me on the list? |
|
L

leleliz
Posted
posted
on
Sun, Jan 23, 2011 12:46 PM
Really love this choice of glazes. Great job! |
|
S

swizzle
Posted
posted
on
Sun, Jan 23, 2011 1:09 PM
Great colour choice Wendy, looks great. |
|
T

TikiKIrby
Posted
posted
on
Sun, Jan 23, 2011 9:06 PM
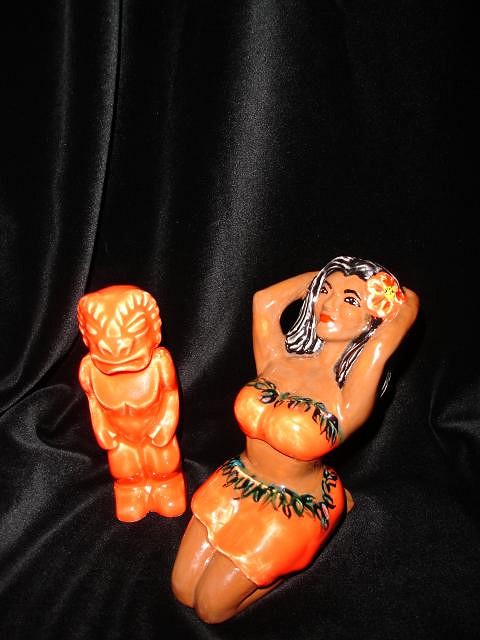
Wow that's crazy sticking to the bottom of the shelf (mental note..), and a glaze explosion.... I think you have to sacrifice a virgin to appease the gods :D I think these turned out awesome, I like the final glaze choice.. (I like the red too).. |
|
B

Beachbumz
Posted
posted
on
Sun, Jan 23, 2011 11:11 PM
Wendy those look great! I really like that bluish color around the tiki and the crate is great. |
|
Z

zerostreet
Posted
posted
on
Mon, Jan 24, 2011 2:58 AM
Beautiful job Wendy! |
|
PTD

Psycho Tiki D
Posted
posted
on
Mon, Jan 24, 2011 4:41 AM
Wonderful glaze and fantastic work...please put me on the list! Thank you, PTD |
|
D

danlovestikis
Posted
posted
on
Mon, Jan 24, 2011 7:18 PM
There is nothing more fun than finding so many comments on your art. It inspires me to work harder. Grog - you have two thumbs? I'm so surprised! Thanks again everyone for the encouragment. |
|
M

MadDogMike
Posted
posted
on
Mon, Jan 24, 2011 7:49 PM
Wendy, that blue is exquisite next to the dark grey - looks like the tiki is packed in a crate of ice :) |
|
V

VampiressRN
Posted
posted
on
Mon, Jan 24, 2011 7:55 PM
Wendy...the colors are awesome. Don't forget...I am #11. GREAT JOB!!!! |
|
D
danlovestikis
Posted
posted
on
Wed, Jan 26, 2011 8:33 AM
MadDogMike, I love what you have said about packed in ice. The statue version is surrounded by fire. You started it - The Tiki Crate Fire and Ice series for Forbidden Island is under production. I've bought the glaze and the first batch are fine tuned and having their bisque fire right now. Vamp, thank you so much. Michael Thanos is doing the sales, shoot him a request. I think he is planning on selling tickets for the event that come with a mug or statue. But I am only guessing since he is still working out his plans. The more I work on these the better I look. Hard work pays off, Wendy [ Edited by: danlovestikis 2011-01-26 08:34 ] |
|
K

ka'lenatiki
Posted
posted
on
Wed, Jan 26, 2011 8:43 AM
Great job on the mugs wendy!! Already planning on taking the thursday off to be at F.I. |
|
M

mp
Posted
posted
on
Wed, Jan 26, 2011 10:01 PM
Amazing Wendy. Beautiful colors and awesome energy. |
|
D
danlovestikis
Posted
posted
on
Sun, Jan 30, 2011 3:26 PM
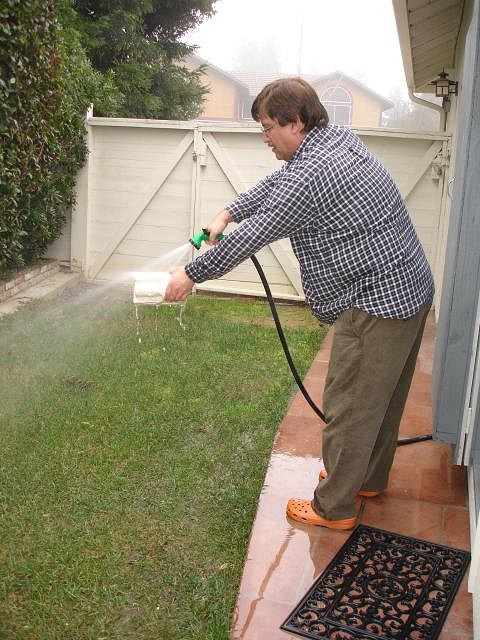
Hi ka'lenatiki, I would be so happy to see you at Forbidden Island. mp you know we love your tiki art so it makes me so happy that you like mine. A helpful hint, after the mugs have been through the bisque firing you can take each mug out of the kiln and hit it with a hard spray from a hose. Not fun when it's in the 40's outside but it works as well as using sponges and is super fast and it's so much easier for the inside of the mug. We do not set the mug down it goes into the house onto a plastic sheet or towel depending on the table surface until I'm ready to glaze. This keeps them as dust free as possible.
Cheers, Wendy |
|
M

McTiki
Posted
posted
on
Sun, Jan 30, 2011 4:09 PM
Slobbers... |
|
B

Babalu
Posted
posted
on
Tue, Feb 1, 2011 8:01 PM
You guys look like your having fun! Dry those out real good before you glaze-um kid. I'll have to read up on that spraying direct water thing....hummm? |
|
D
danlovestikis
Posted
posted
on
Wed, Feb 2, 2011 6:28 PM
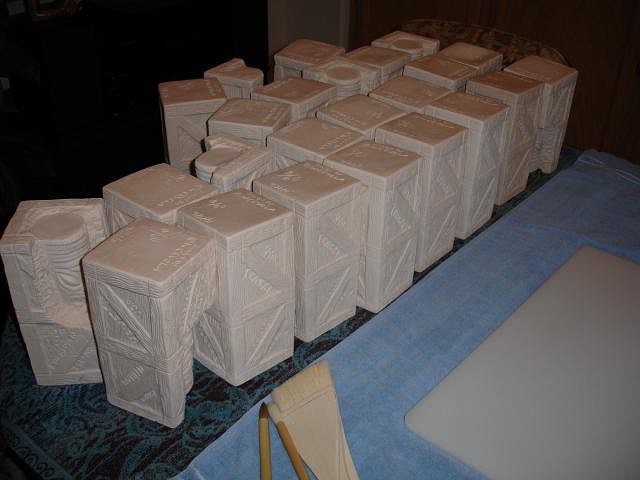
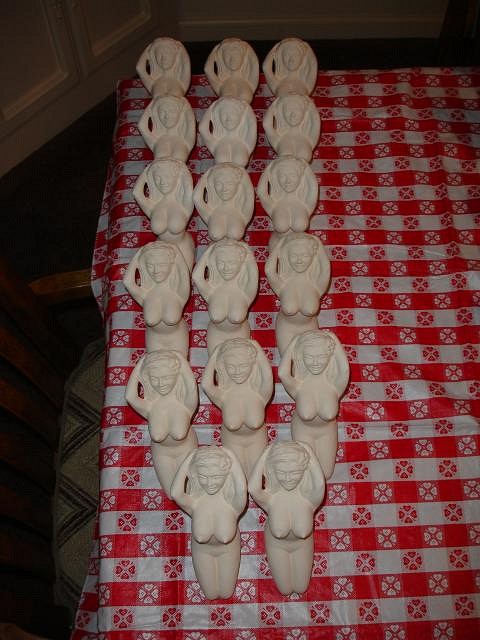
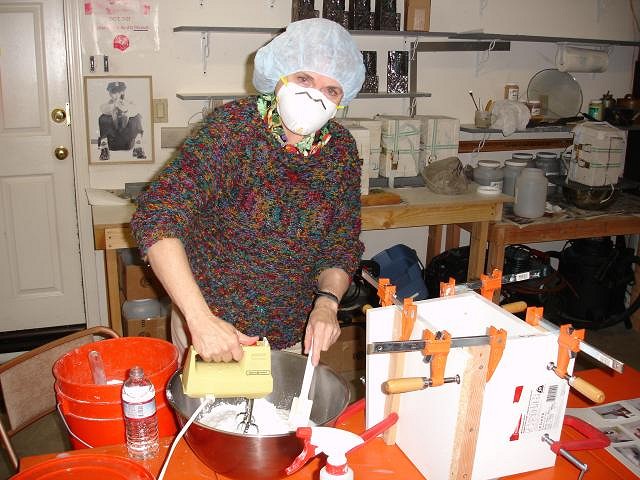
Hi McTiki, isn't that suppose to be drool? Here's my next trick for those who work in cold weather. I have been freezing. Holding a mug for half to a full hour to carve has been like holding a block of ice. I put a heater on the table to warm me up but it didn't help. But then two things occurred to me...heat up the mug before you carve and wear gloves. Yippee it's been wonderful. My hands don't freeze and get stiff and I can work more and not be miserable.
Here are some drying on a plastic table cloth. Also showing is my huge box of boxes that I ordered for the Tiki Crate. They are a perfect fit. Thank you all for checking on my progress. Wendy |
|
M
MadDogMike
Posted
posted
on
Wed, Feb 2, 2011 9:56 PM
Love the way you two have really jumped into this with both feet! Keep on postin' those pics :D |
|
Z

ZeroTiki
Posted
posted
on
Wed, Feb 2, 2011 10:04 PM
Beautiful work! |
|
T
TikiKIrby
Posted
posted
on
Thu, Feb 3, 2011 5:43 PM
Wow, impressive and mahalo for the tips... |
|
D
danlovestikis
Posted
posted
on
Sun, Feb 6, 2011 2:47 PM
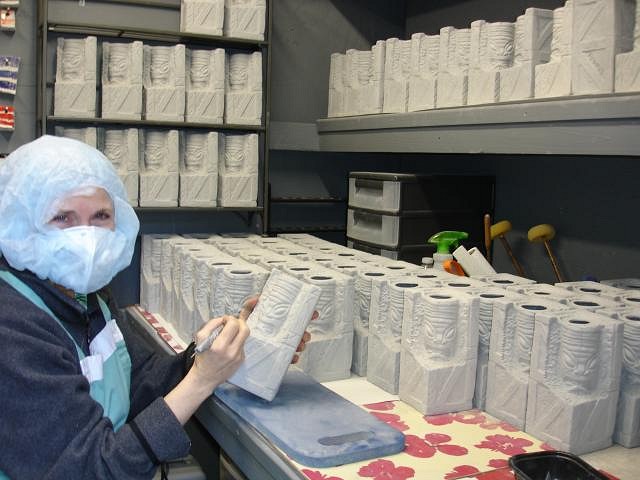
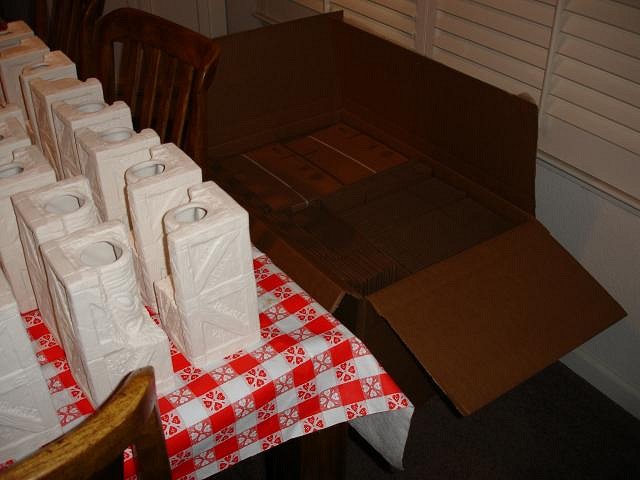
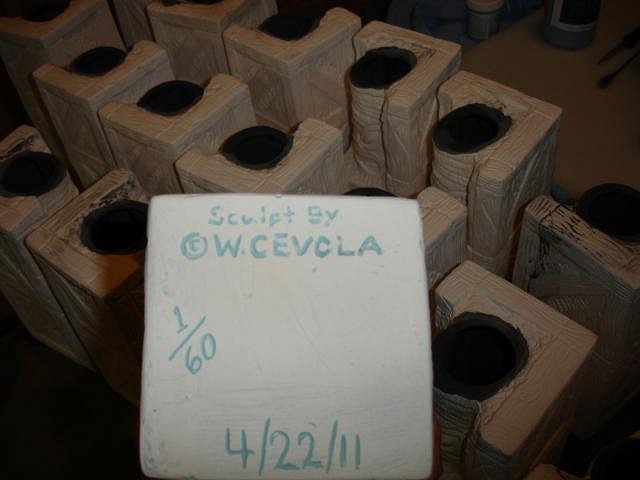
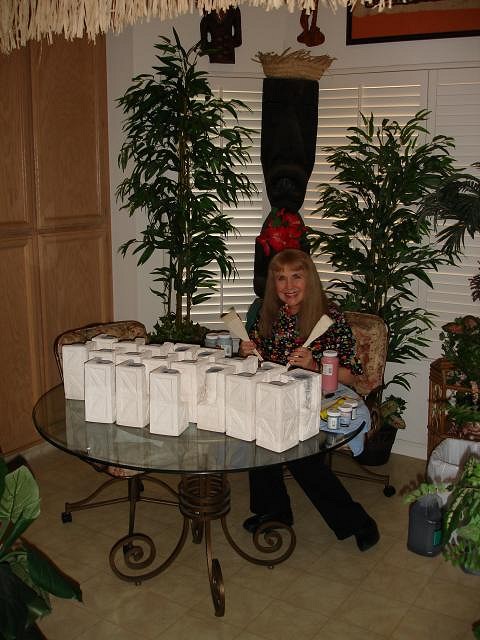
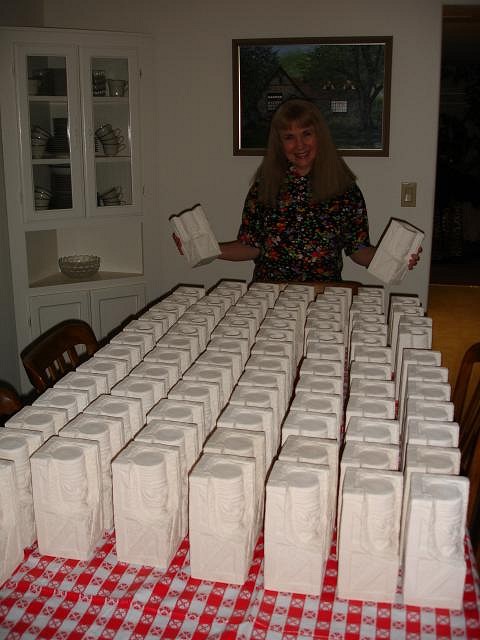
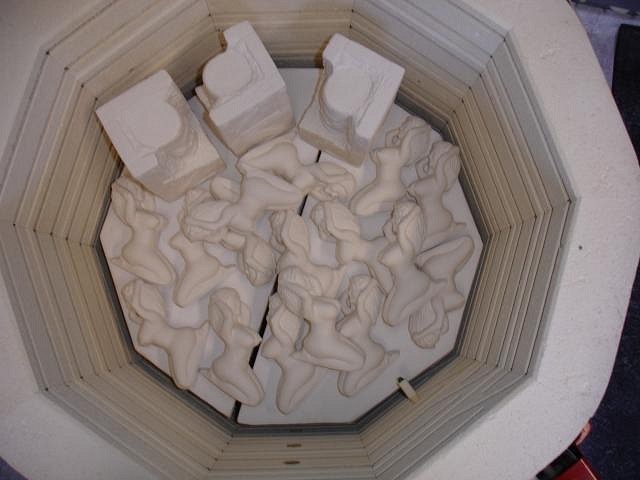
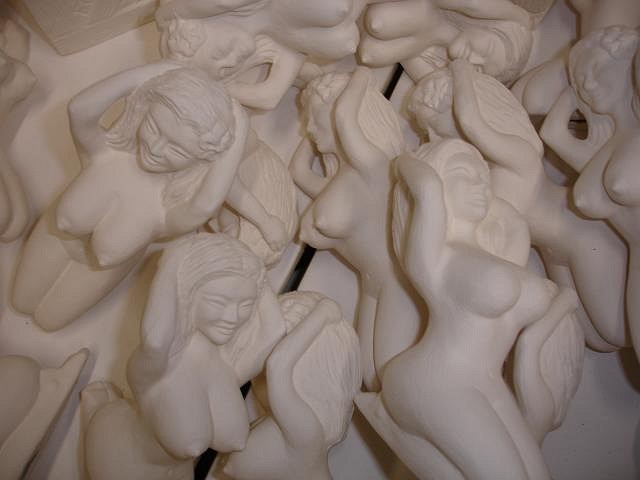
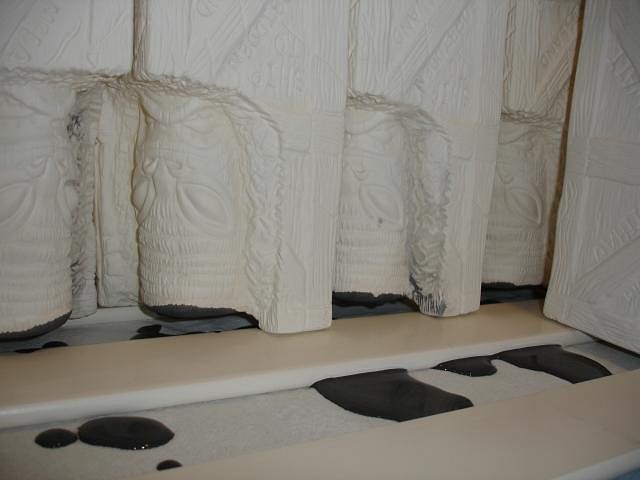
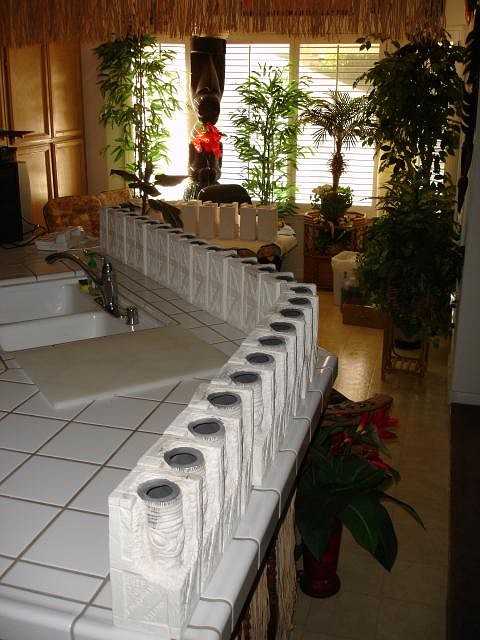
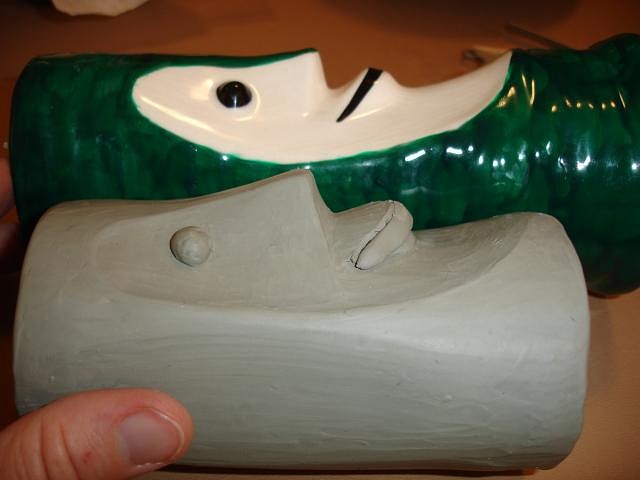
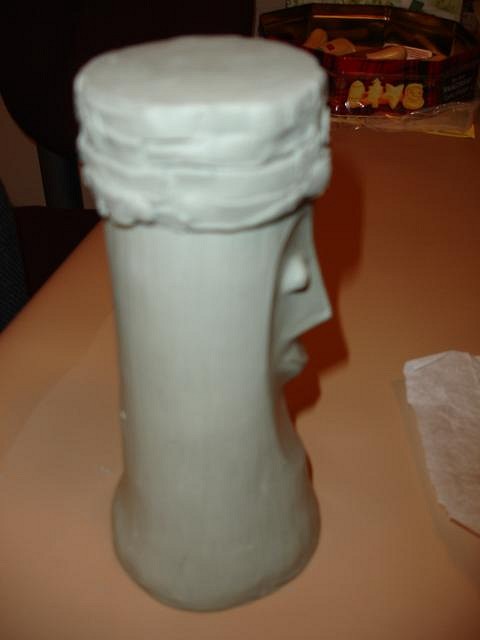
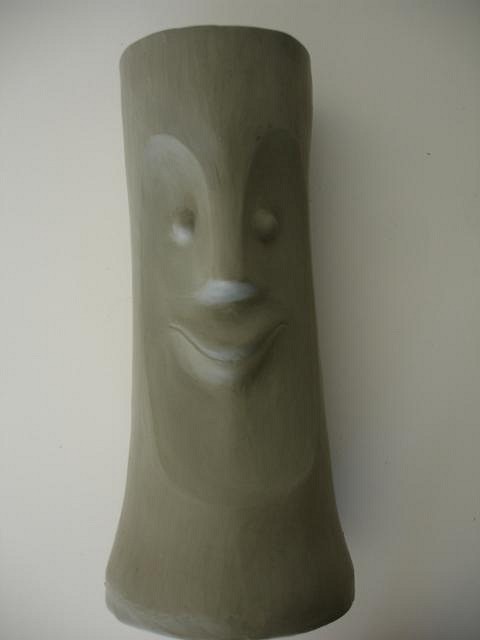
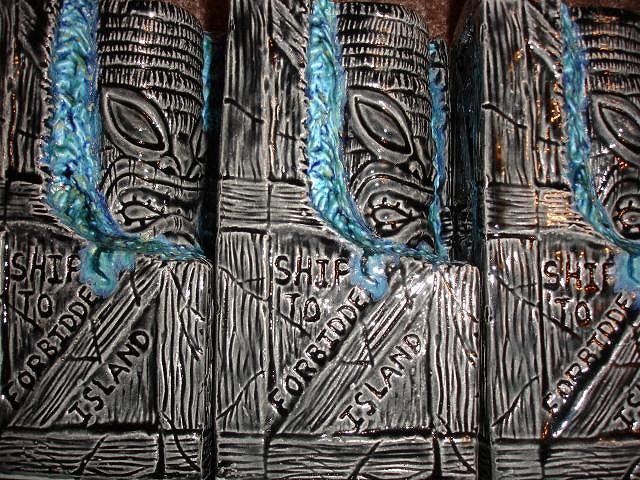
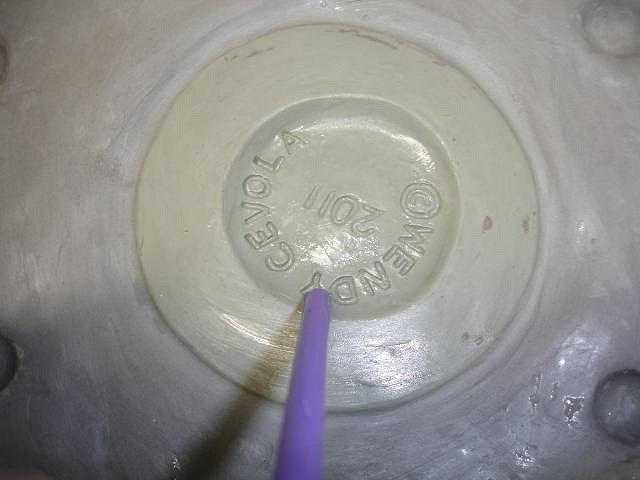
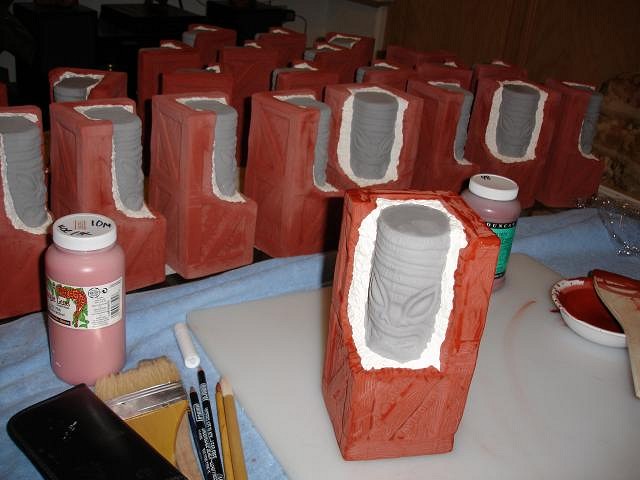
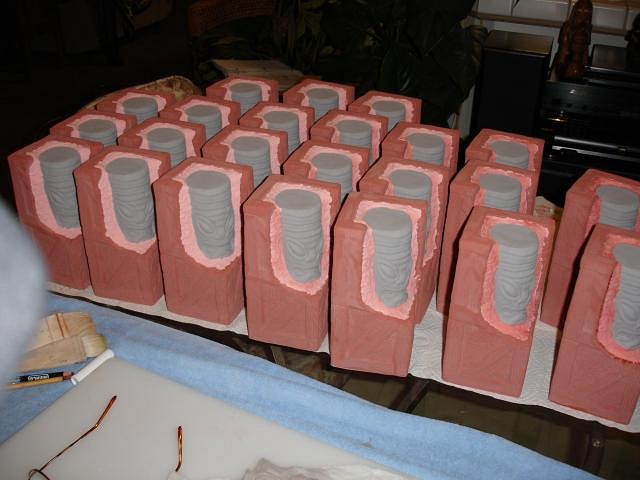
More photos as per your request MadDogMike. Well today I unloaded the kiln and all the Forbidden Island Tiki Crates have been bisque fired. I am now starting the glazing process. I have done two more glaze tests and hopefully when they are fired I will know how I will glaze the statue version. These photos were taken last night at midnight and this morning. Mug makers never sleep, check out Babalu's thread for a photo of Squid who is about to glaze their project at the same time I'm doing mine. The bottom has the real 5th anniversary date, the party at FI is on Thursday the 21st. This shows that I've used underglaze to highlight the numbers and words. and I've poured glaze into the inside of the mugs. What's on the first table plus what's on the second table equals 60 mugs and 50 statues all waiting to be glazed and fired and boxed. These are large! Wendy |
|
M
MadDogMike
Posted
posted
on
Sun, Feb 6, 2011 7:41 PM
Thank you Wendy :D Keep up the great work! Looks like this project is winding down, are ya ready for the next big one? |
|
R

rugbymatt
Posted
posted
on
Sun, Feb 6, 2011 8:10 PM
Looking good Wendy & Dan! Can't wait til April to get one at FI! |
|
D
danlovestikis
Posted
posted
on
Mon, Feb 7, 2011 10:10 AM
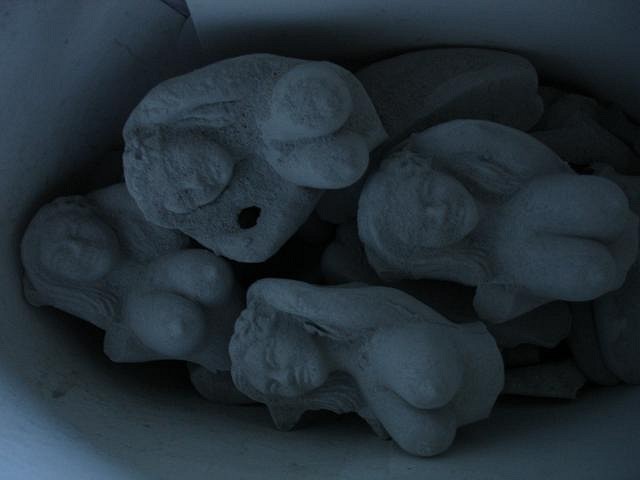
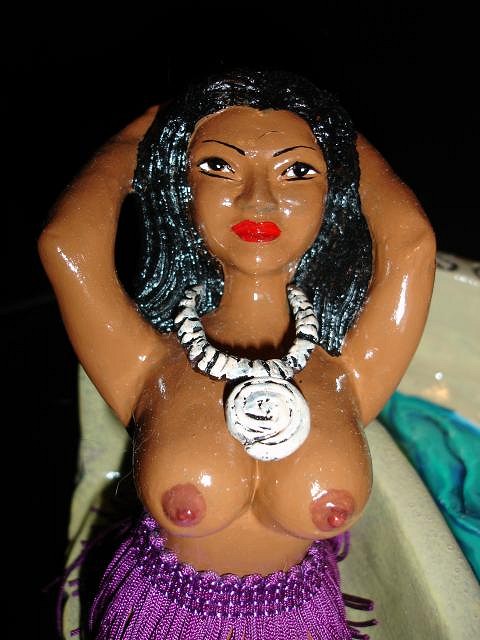
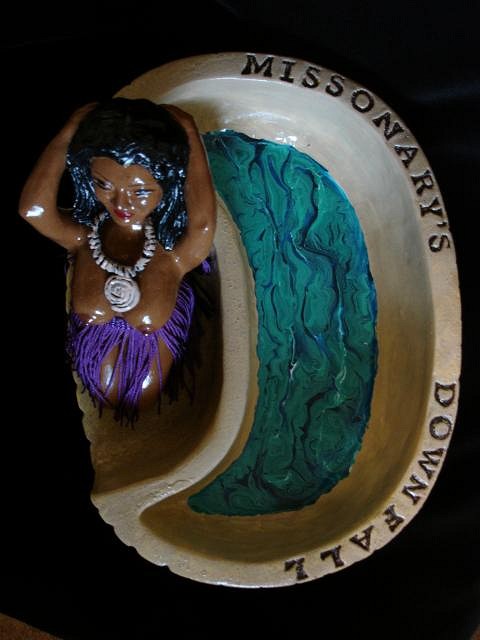
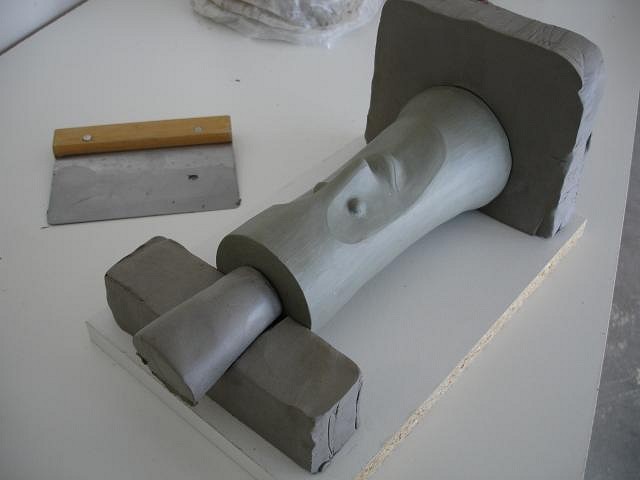
Hi MadDog, winding down? I think I just got to the top of the hill. I started the three layers of glaze on the first 19 yesterday. I'm doing it all by hand no spray gun this time. By tonight I will be able to pre-heat and fire the first load. I'm catching up on all my VHS taped shows. Hey Matt, I hope you can make it to the party at FI, Michael T. says it will be special. While working on the Tiki Crate I have sanded and bisqued my Missionary Downfall hula girl. Gecko is making the version with the bowl I couldn't lift the mold so I sent it back to him. We had a slow down when it was discovered I left out the I in Missionary. I used the I stamp once and set it aside and forgot to use it again. He'll fix it. Wendy I kept forgetting how soft the cast clay is. I kept breaking them, this is my trash can. [ Edited by: danlovestikis 2011-02-07 10:12 ] |
|
G
GROG
Posted
posted
on
Mon, Feb 7, 2011 10:13 AM
Nice boobies. GROG like. |
|
W

WaikikianMoeKele
Posted
posted
on
Mon, Feb 7, 2011 5:03 PM
VERY nice boobies! :wink: |
|
M
MadDogMike
Posted
posted
on
Mon, Feb 7, 2011 5:45 PM
Hubba Hubba! :o :lol: |
|
R
rugbymatt
Posted
posted
on
Mon, Feb 7, 2011 9:46 PM
Wendy how do I get one these? They look awesome! |
|
D
danlovestikis
Posted
posted
on
Fri, Feb 11, 2011 10:08 AM
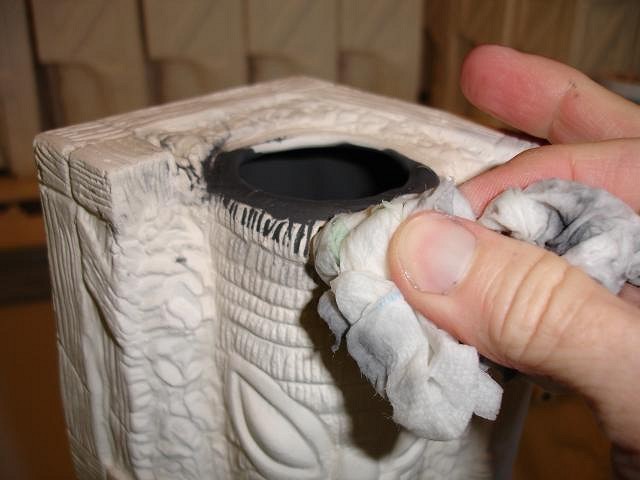
Hi Grog, WaikianMoeKele and MadDogMike, those nice size boobies are only found in California and are very expensive! Rugbymatt, I'll keep updating this thread. Like TikiKirby on his thread I have to figure out how to best glaze and paint her. I'll have an artist proof example soon. The Forbidden Island project is coming along. Yesterday we were back at Alpha picking out more glaze for the statue version. I still have to glaze test that next week. After I pour the glaze into the mug and swirl it around the last is left to drip out with boards keeping the glaze off the rest of the mug. |
|
UT

uncle trav
Posted
posted
on
Fri, Feb 11, 2011 1:03 PM
Wow!! Fantastic work. Love the progress pictures. |
|
LLT

little lost tiki
Posted
posted
on
Fri, Feb 11, 2011 6:04 PM
Wendy! You are my muse! |
|
W
WaikikianMoeKele
Posted
posted
on
Fri, Feb 11, 2011 6:17 PM
I had no idea how much time & work goes into a project like this! I am impressed! |
|
E

ebtiki
Posted
posted
on
Fri, Feb 11, 2011 6:31 PM
I continue to be impressed - nice work! |
|
D
danlovestikis
Posted
posted
on
Tue, Feb 15, 2011 2:49 PM
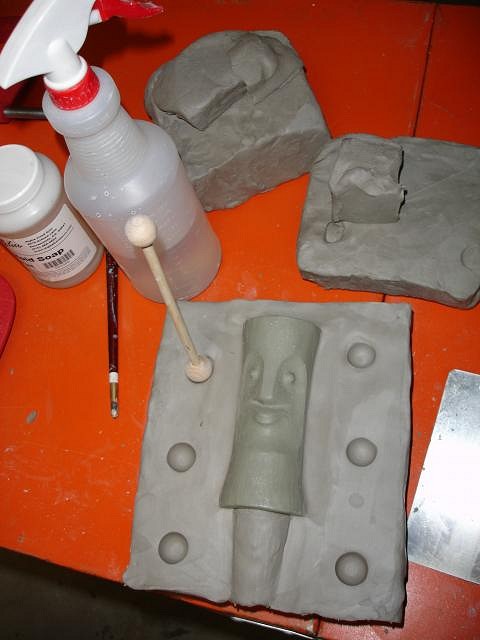
uncle trav and ebtiki, thank you very much. little lost tiki, I posted one of the girls on Gallery - she has a top on and Dan is not happy. Kele, it is like working on a farm up early and go to work with mops and buckets and tools. I want to participate in the Tiki Bob show. I had sculpted a Tiki Bob a few months ago so I just needed to get in there and make a mold. So Dan and I studied the photos from the first page of my thread so we wouldn't forget any steps and here is how it went. Cheers, Wendy NOTE: I NEVER REMEMBERED TO TAKE A PHOTO OF PAINTING MOLD SOAP ON EACH LAYER BEFORE POURING THE PLASTER. SO CHECK OUT PAGE ONE OF THIS THREAD TO SEE HOW THAT WORKS SO THAT THE PLASTER DOES NOT STICK ONE LAYER ON ANOTHER!
|
|
M
MadDogMike
Posted
posted
on
Tue, Feb 15, 2011 8:27 PM
Congrats on your very first solo mold! In just a short time you will be the MOLD MASTER!!! Nice looking Tiki Bob inspiration. I've got a wild Tiki Bob idea, hope I get time to try it out :D |
|
D
danlovestikis
Posted
posted
on
Wed, Feb 16, 2011 2:39 PM
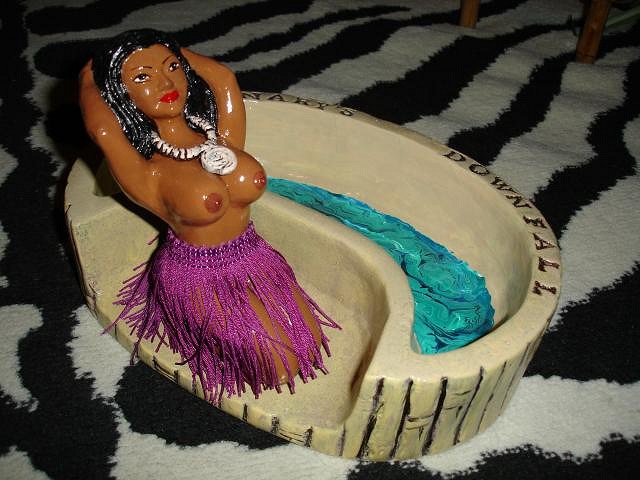
Thanks Mike, it is a lot of work but if it turns out then I'll be screaming with joy. Here is the first Missionary's Downfall hula girls, but I was testing to see what would happen if I added clay by hand. So she has an outfit on. Her hair is all black, funny what a flash will do.
Cheers, Wendy [ Edited by: danlovestikis 2011-02-16 14:39 ] |
|
P

pwest71
Posted
posted
on
Thu, Feb 17, 2011 5:37 AM
Whoa!! Those are awesome...Beautiful work as usual. Please keep the updates flowing... Paul |
|
G
GROG
Posted
posted
on
Thu, Feb 17, 2011 9:40 AM
Good mold. Good sculpt. Good luck. |
|
M

MauiTiki
Posted
posted
on
Thu, Feb 17, 2011 5:29 PM
Thanks for posting the mold making photos. We all do it a little differently. Looks like it came out great. I like your method of the heating pad to warm the clay! I'll have to try that. Keep up the good work. |
|
A

Atomicchick
Posted
posted
on
Sat, Feb 19, 2011 4:22 PM
Nice work Wendy! I'm looking forward to adding some of your work to my collection! |
|
Z
zerostreet
Posted
posted
on
Sat, Feb 19, 2011 5:35 PM
Another great piece! |
|
D
danlovestikis
Posted
posted
on
Mon, Feb 21, 2011 3:51 PM
pwest71 - thank you, I will keep posting because that's what makes it all fun. Grog - not so good a mold see below. MauiTiki - I may need helpful advise in the near future. AtomicChick - I would love to have my work in your beautiful tiki room. zerostreet - Ahhh, thanks a lot. Well we have been working hard. Two steps forward and one step back. Today we poured the very first time into the Tiki Bob mold that we just made. It took the slip in one end and let it out the other. I plugged the leaks with clay so I will get a cast but what a mess. So we started another mold today to see if our technique has improved. We had finished all the Tiki Crate mugs so it was time to get out the flashlight and to study each one for flaws. How did I miss this one? Luckly it only happed to 6 but now I have to pour and sand and carve and bisque and glaze and fire 6 more in addition to the 50 statue versions I have ready to glaze. Never any time to rest. Good thing we love tiki art. |
|
D
danlovestikis
Posted
posted
on
Mon, Feb 21, 2011 4:03 PM
pwest71 - thank you, I will keep posting because that's what makes it all fun. Grog - not so good a mold see below. MauiTiki - I may need helpful advise in the near future. AtomicChick - I would love to have my work in your beautiful tiki room. zerostreet - Ahhh, thanks a lot. Well we have been working hard. Two steps forward and one step back. Today we poured the very first time into the Tiki Bob mold that we just made. It took the slip in one end and let it out the other. I plugged the leaks with clay so I will get a cast but what a mess. So we started another mold today to see if our technique has improved.
Cheers, Wendy |
|
M
MadDogMike
Posted
posted
on
Mon, Feb 21, 2011 7:22 PM
Wendy, my "hand holding the head" mold did that too - made a HUGE mess all over the kitchen counter and floor :lol: As I remember I poured some slip in, sloshed it around a bit and let it dry for an hour - then poured it full and it held. Still not optimal of course, good luck with the new mold :) |
|
RH

Robb Hamel
Posted
posted
on
Fri, Feb 25, 2011 4:52 PM
Your work is SOOOOO slick! I'm jealous of anyone who can make a mold. VEry nice, imaginative work - and TOP NOTCH glazes!! |
|
D
danlovestikis
Posted
posted
on
Fri, Feb 25, 2011 10:58 PM
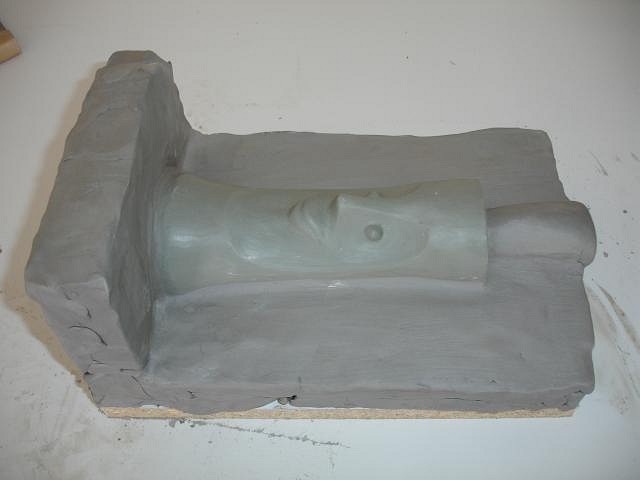
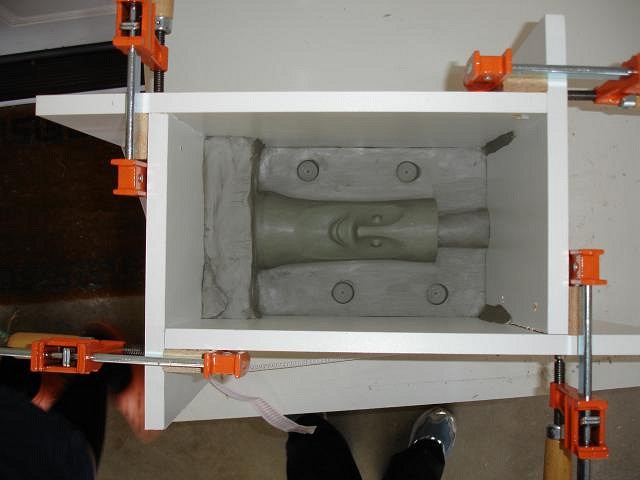
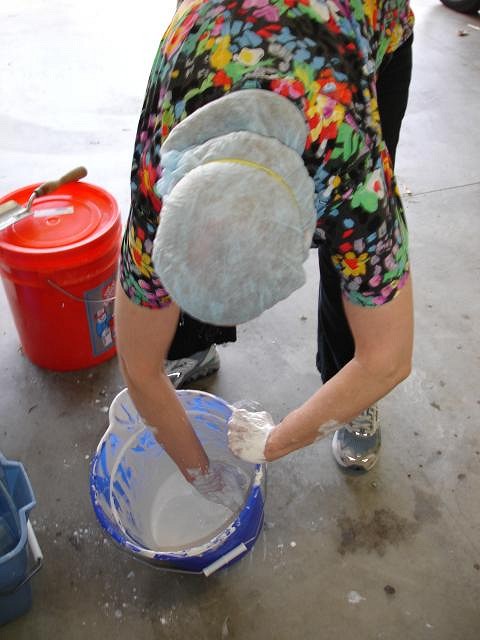
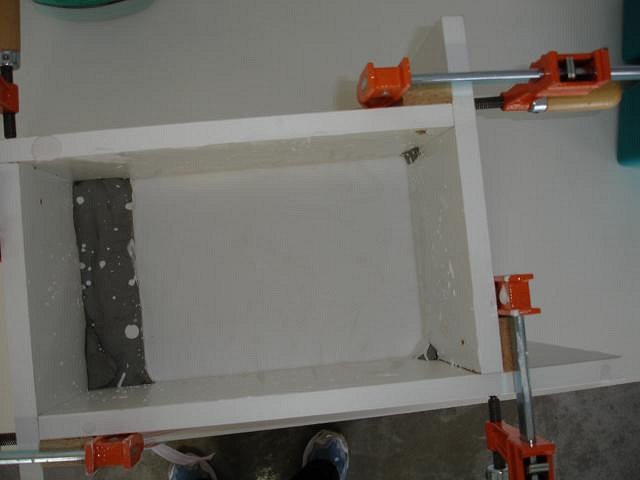
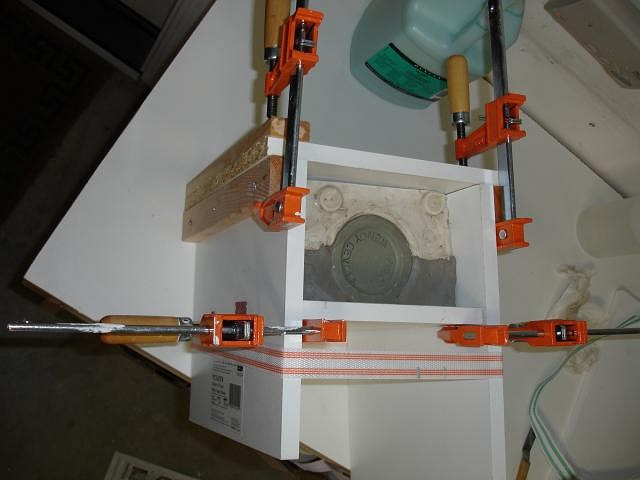
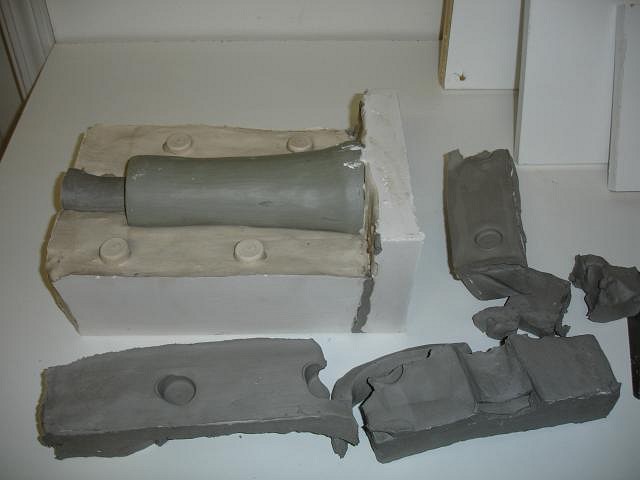
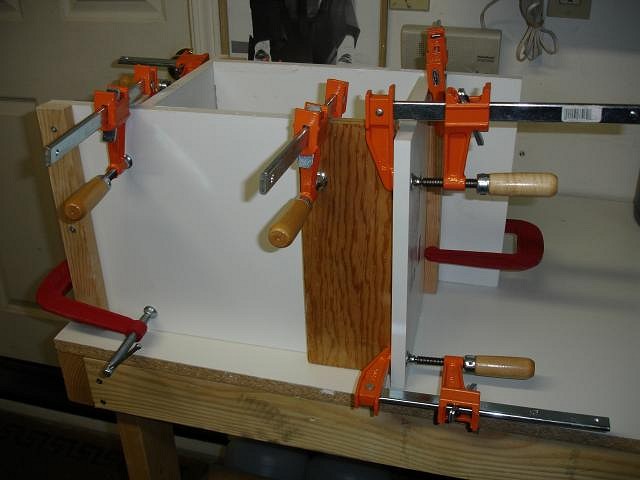
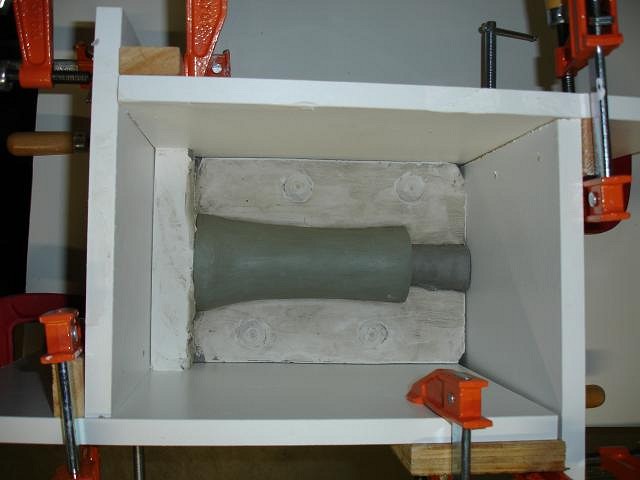
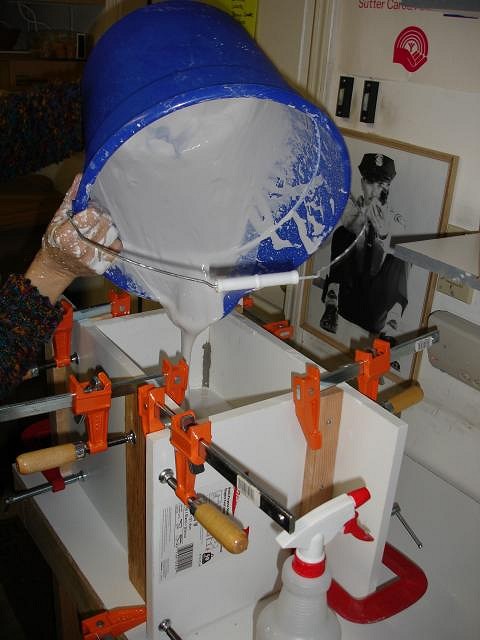
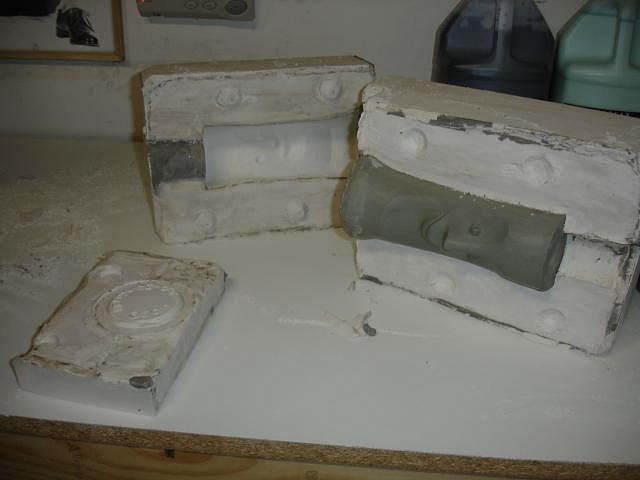
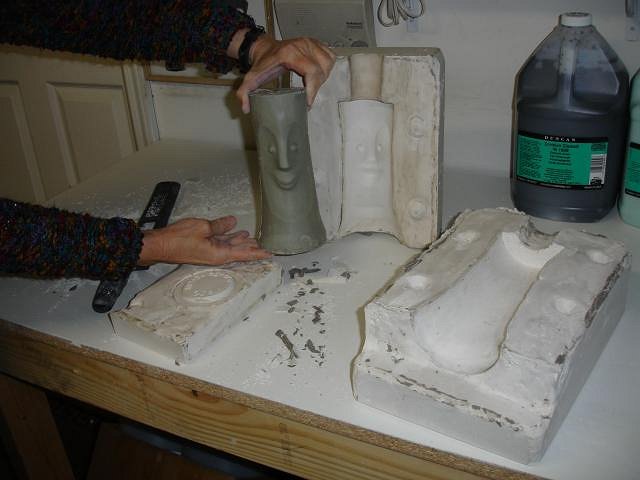
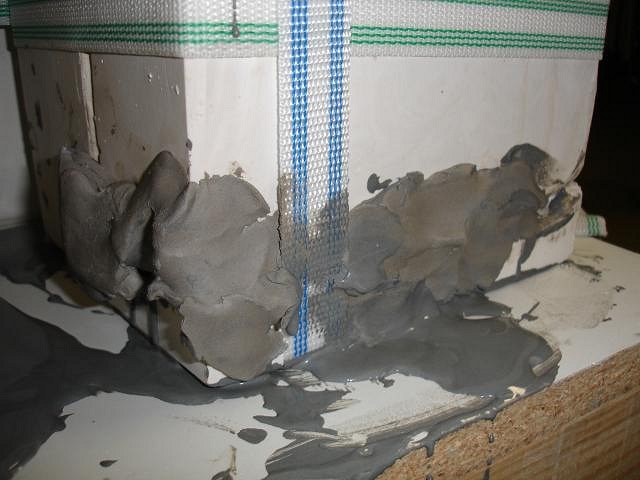
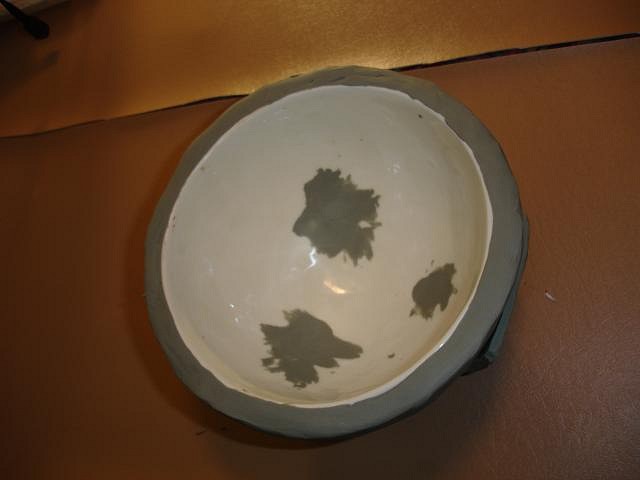
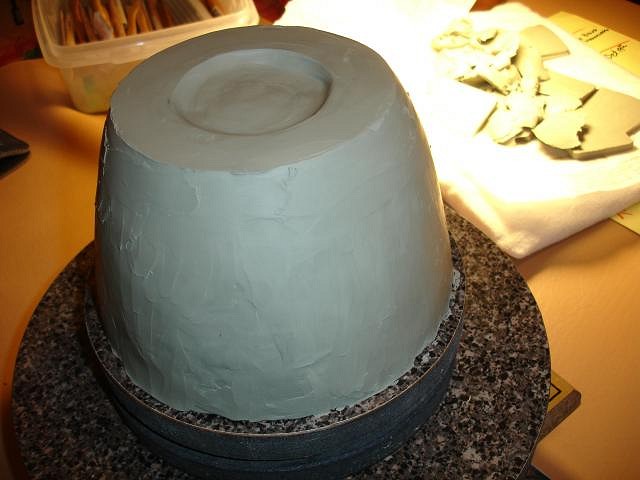
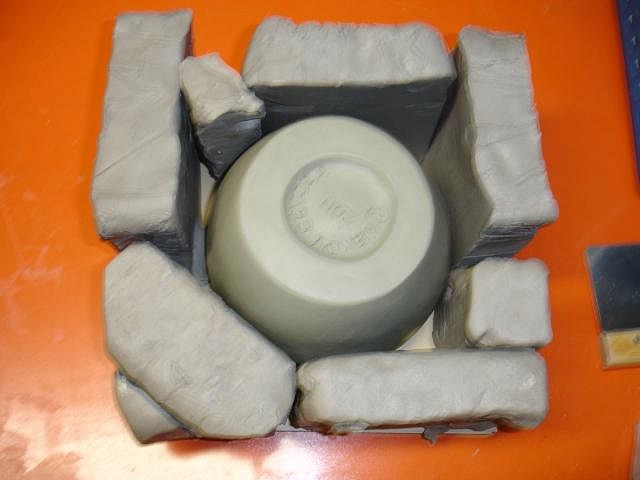
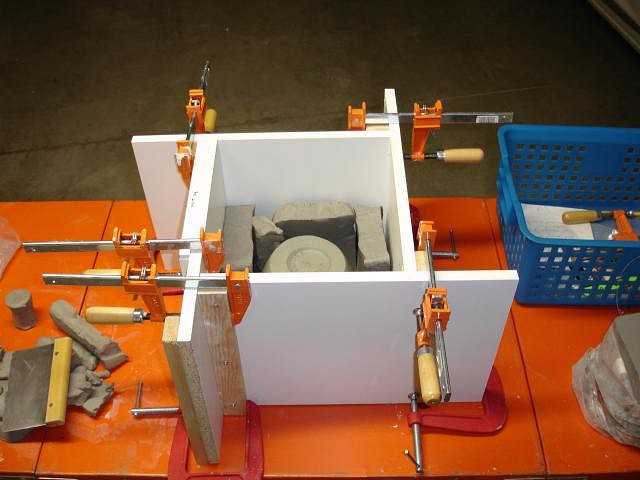
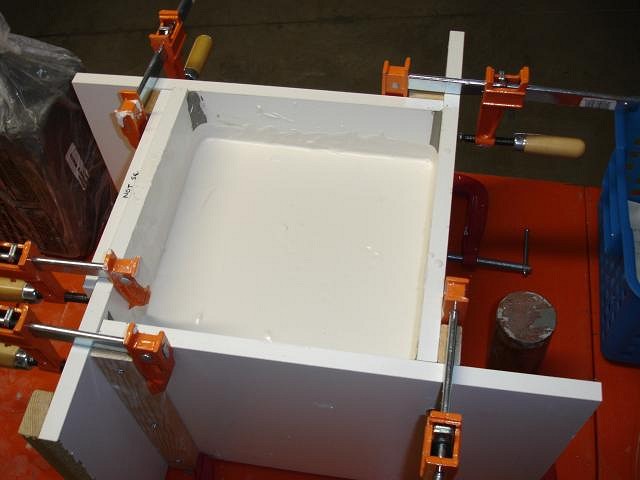
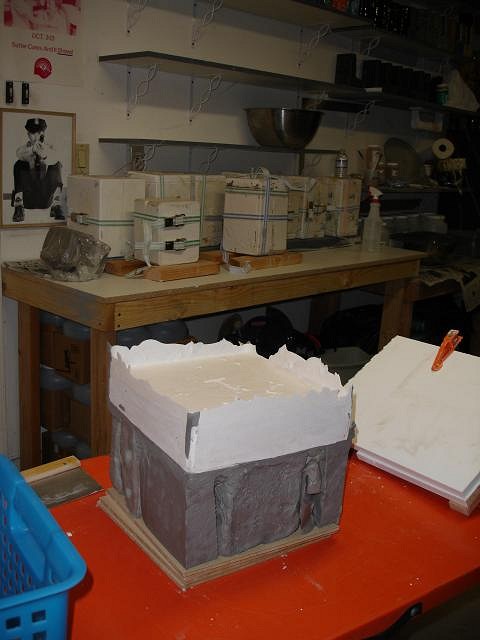
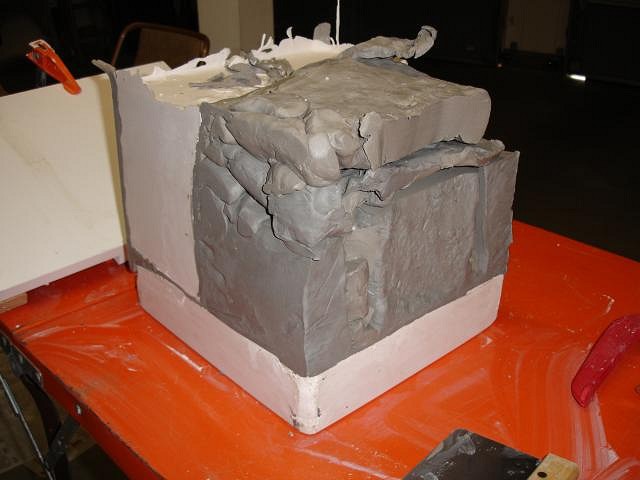
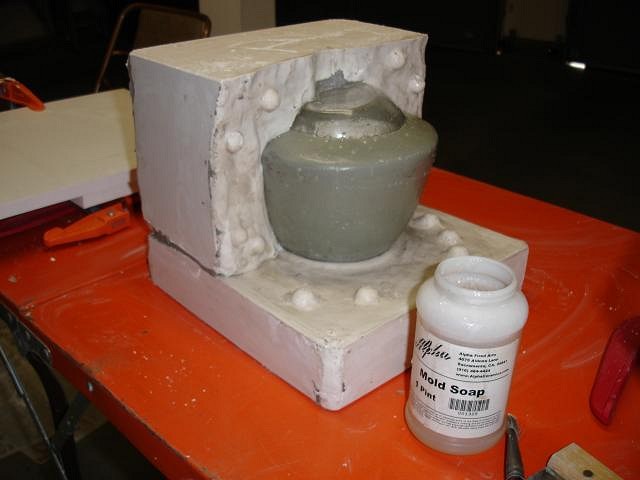
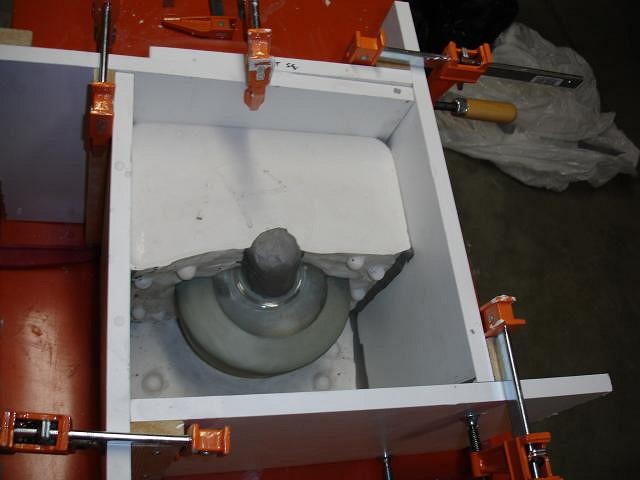
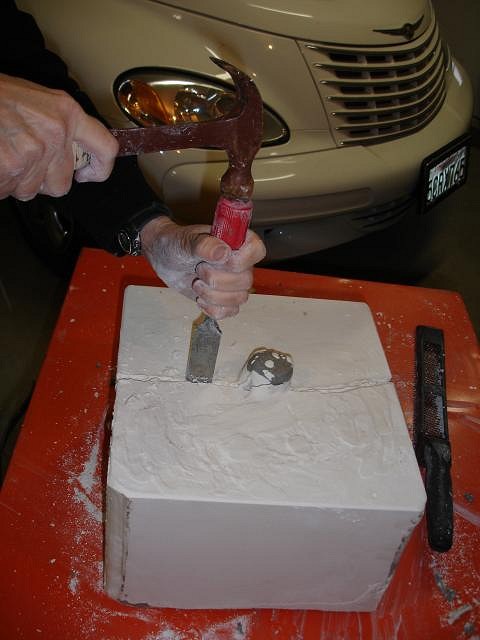
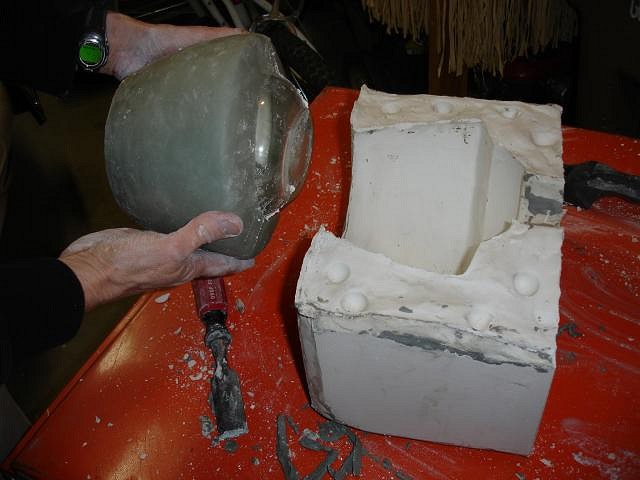
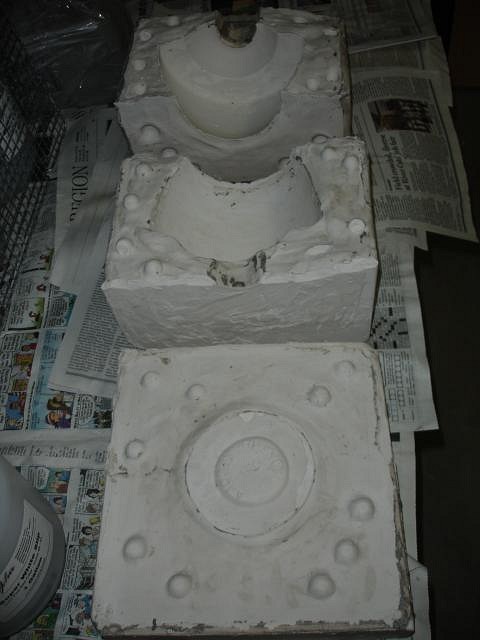
Hi Robb, I'm jealous of someone who can paint on velvet with perfection! Thank you for watching my thread as I watch yours. Here are photos of the mold we made yesterday. It's of a simple bowl I sculpted. The mold weighs so much that it will take both Dan and I to tip it to empty out the extra slip. The way I do one is to picture what I'm going to mold and then practice how I will do it in my mind all night long. Then I wake up sleepy and get it done. We are still in practice mode. I tried to lift the side so I could drop it and get bubbles out. I pulled it loose and had plaster ran all over the table. It ruined my name on the bottom. In a couple of days we will cast a bowl to see if the rest is ok. I can always add my name later. Question, will acrylic paint work on velvet? I've only heard of it being done with oils. I used a bowl as a base for my clay.
I used a second bowl to make a top. I can cut the clay where I want making different types of bowls from one mold.
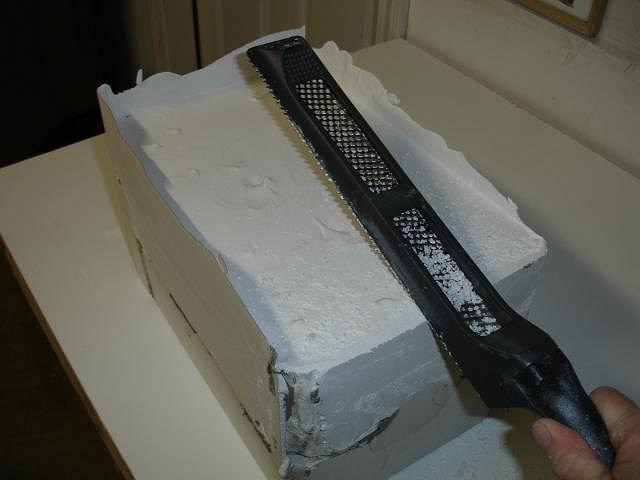
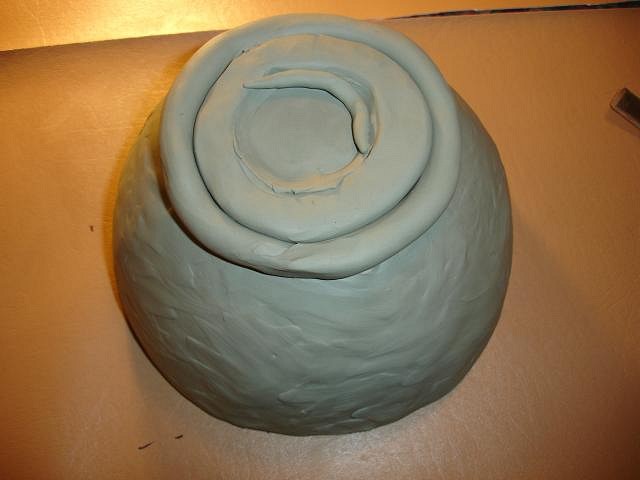
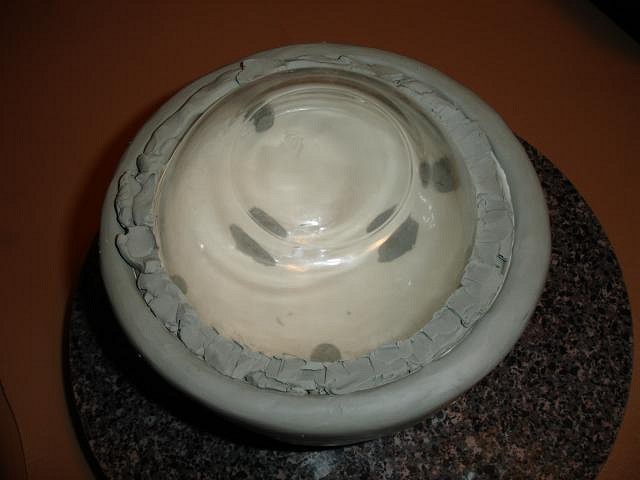
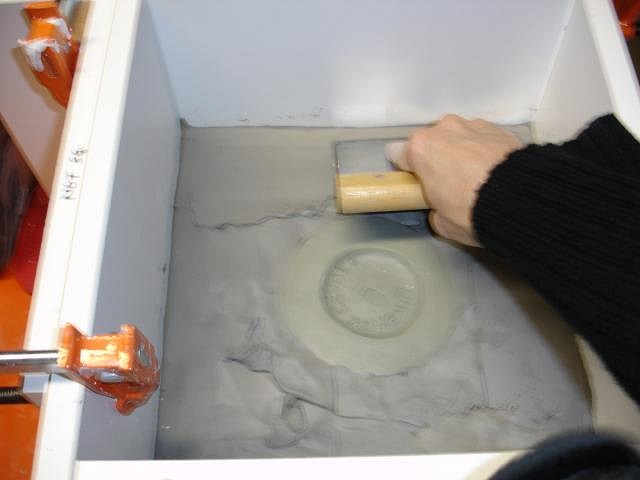
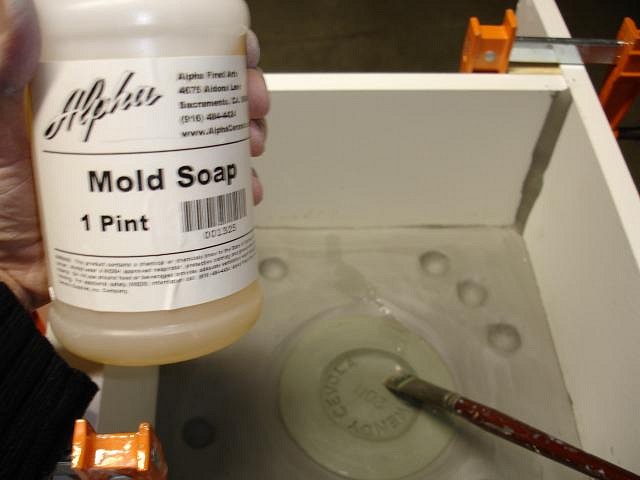
Mold soap must be applied to keep the plaster from sticking to new plaster or to your art. It filled up my name etc. so I used a straw to blow it out.
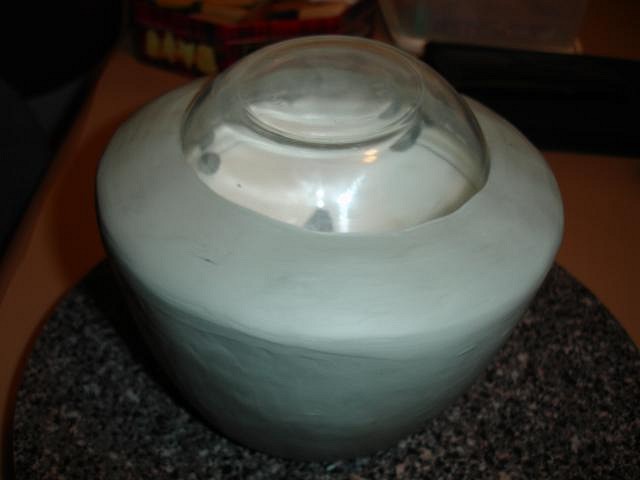
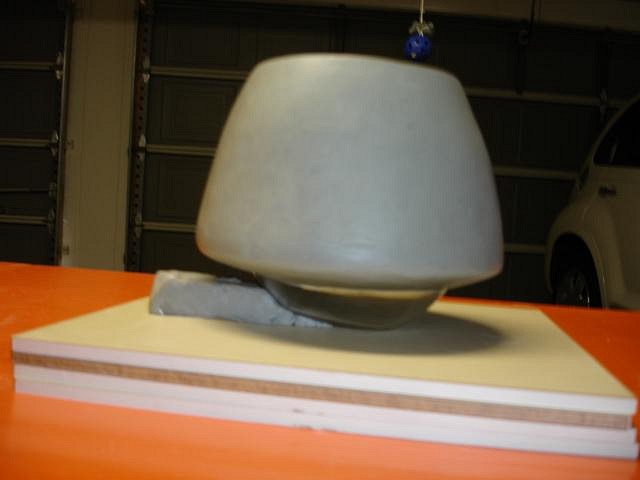
I flipped the mold and used the rasp to smooth the corners. I have begun glazing the Forbidden Island Tiki Crate statue. The first load is in the kiln. I will post photos next week when they come out. Sorry for the blurry photos I had the up close button on of off and sometimes not at the right time. It was hard to take photos without ruining my camera because we were covered in plaster. More soon, cheers, Wendy ps Swizzle I am using three colors on the statue thanks for sharing your thoughts with me |


Pages: 1 2 3 4 5 6 7 8 9 10 11 12 13 14 15 16 17 18 19 20 21 22 23 24 25 26 27 28 29 30 31 32 33 34 35 36 37 38 39 40 41 42 43 44 45 46 47 48 49 50 51 52 53 54 55 56 57 58 59 60 61 62 63 64 65 66 67 68 69 70 71 72 73 74 75 76 77 78 79 80 81 82 83 84 85 86 87 88 89 90 91 92 93 94 95 96 97 98 99 100 101 102 103 104 105 106 107 108 109 110 111 112 113 114 115 116 117 118 119 120 121 122 123 124 125 126 127 128 129 130 131 132 133 134 135 136 137 138 139 140 141 142 143 144 145 146 147 148 149 150 151 152 153 154 155 156 157 158 159 160 161 162 163 164 165 166 167 168 169 170 171 172 173 174 175 176 177 178 179 180 181 182 183 184 185 186 187 188 189 190 191 192 193 194 195 196 197 198 199 200 201 202 203 204 205 206 207 208 209 210 211 212 213 214 215 216 217 218 219 220 221 222 223 224 225 226 10816 replies