Pages: 1 2 3 4 5 6 7 8 9 10 455 replies
|
T

TikiAno
Posted
posted
on
Tue, Feb 25, 2014 7:12 PM
Agree w/ all above- great work! I'm also curious re: application (as Bowana asked earlier)... Look forward to seeing more! |
|
H

hang10tiki
Posted
posted
on
Sat, Mar 22, 2014 10:52 PM
Dig Bob-0 |
|
C

Chippy
Posted
posted
on
Mon, Mar 24, 2014 6:34 AM
All these mugs look great. I am going to have to log onto my home computer and really see what these look like. |
|
M

MauiTiki
Posted
posted
on
Mon, Mar 24, 2014 8:49 PM
Wow Robbie, you are cranking out the mugs, good to see your in progress photos! |
|
S

swizzle
Posted
posted
on
Thu, Apr 10, 2014 1:30 AM
Thanks David. Airbrush, definitely not a deft hand.
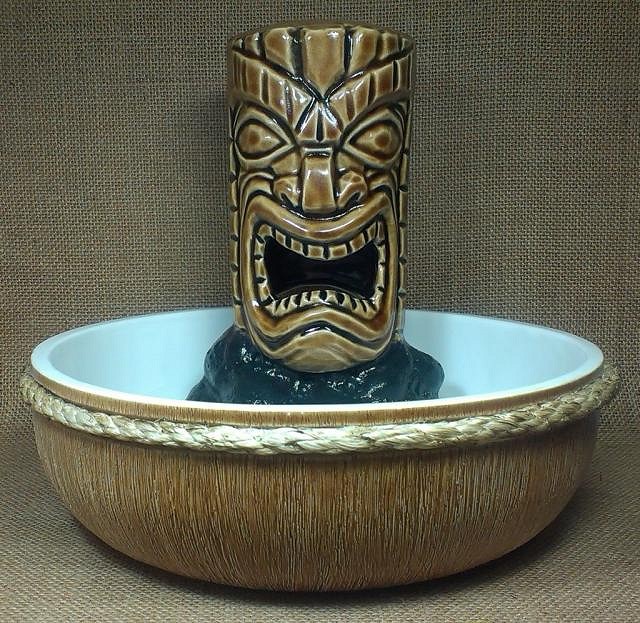
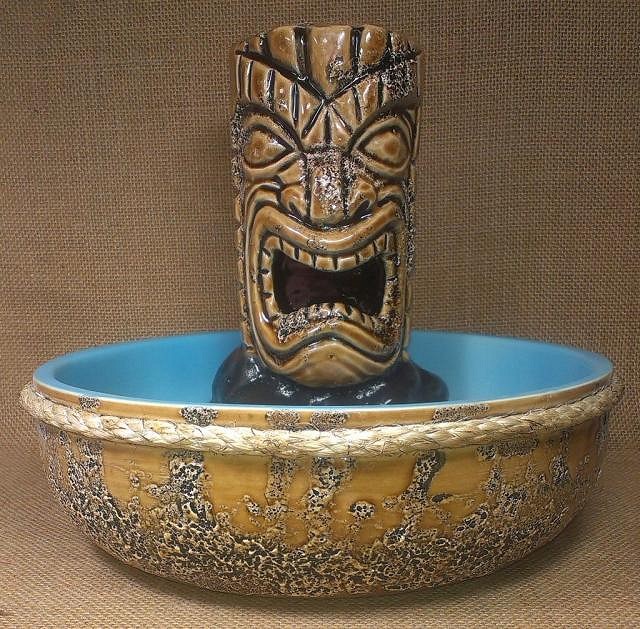
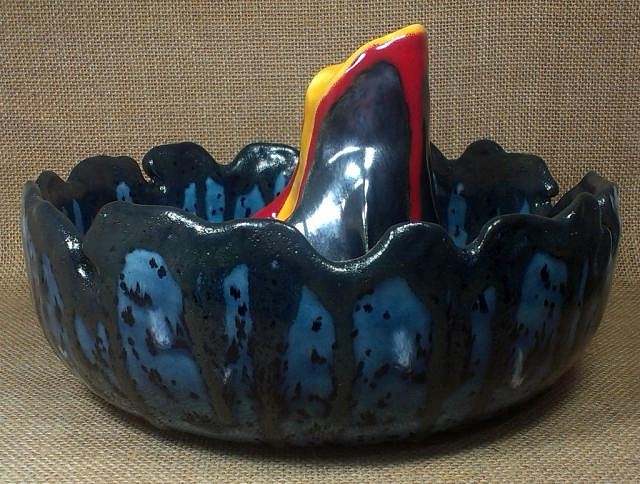
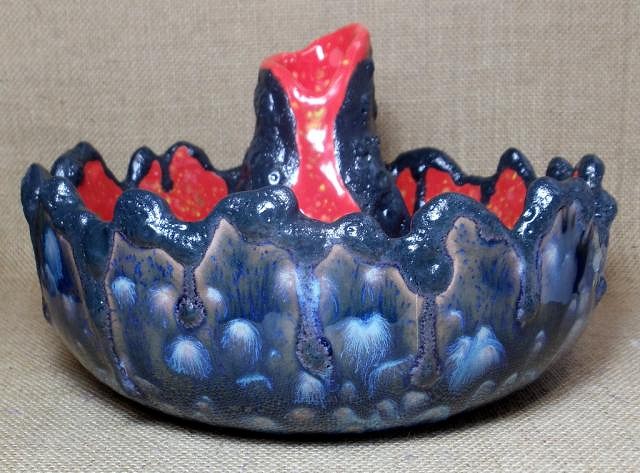
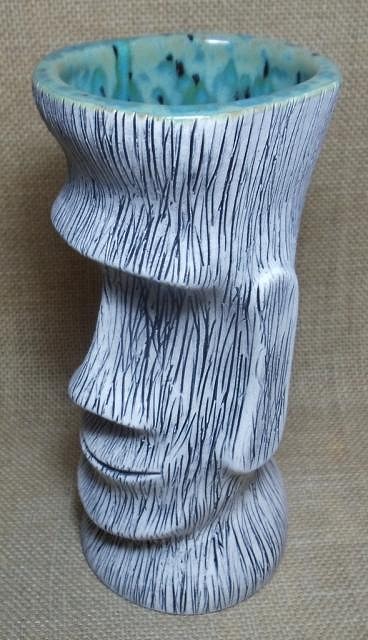
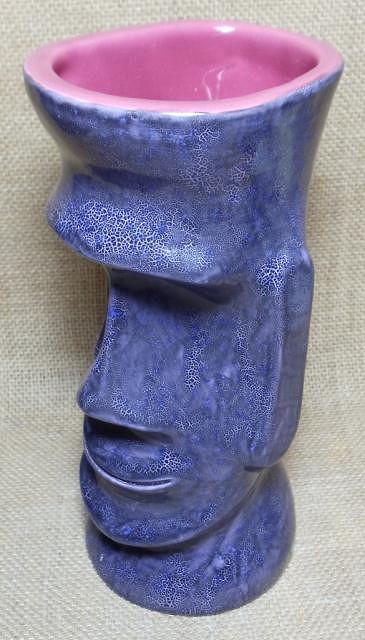
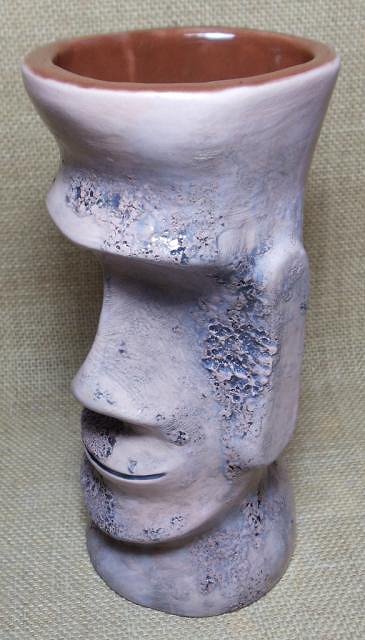
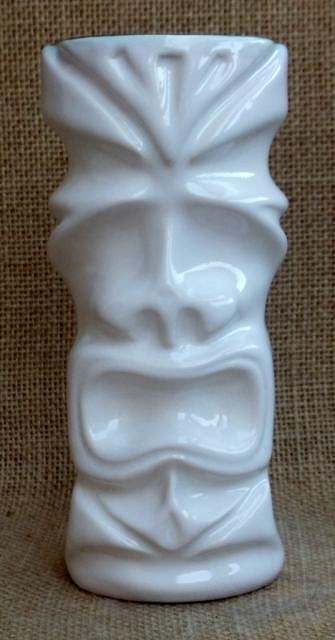
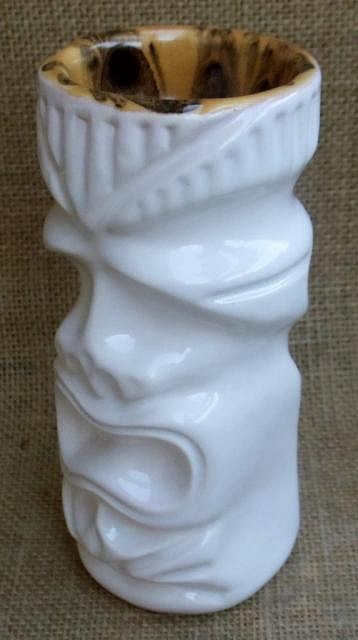
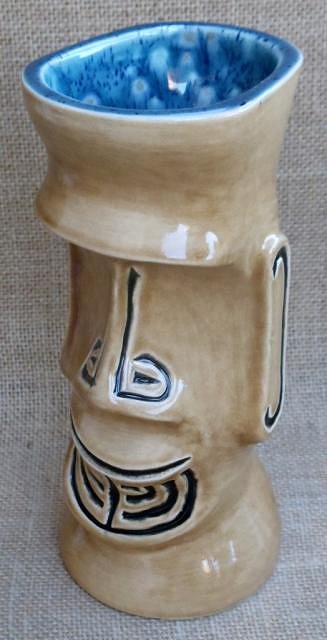
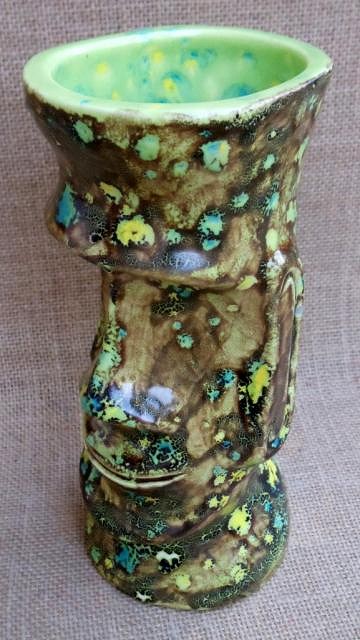
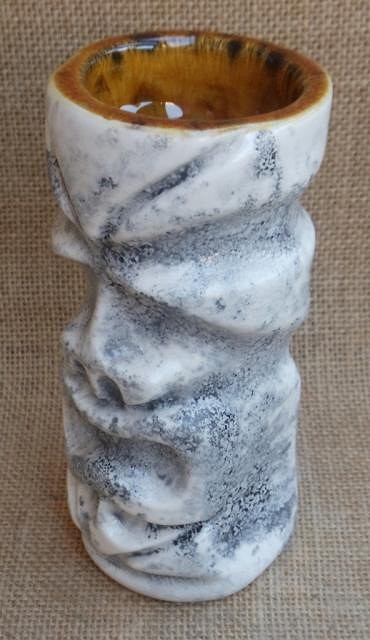
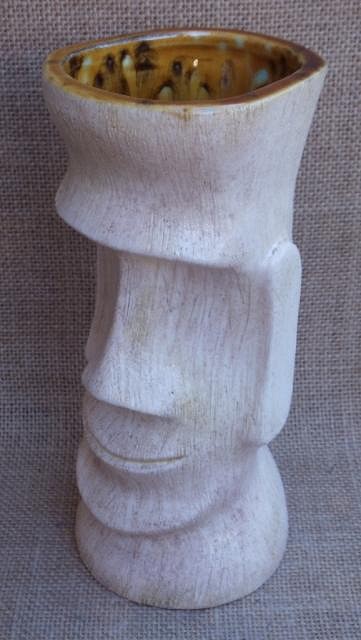
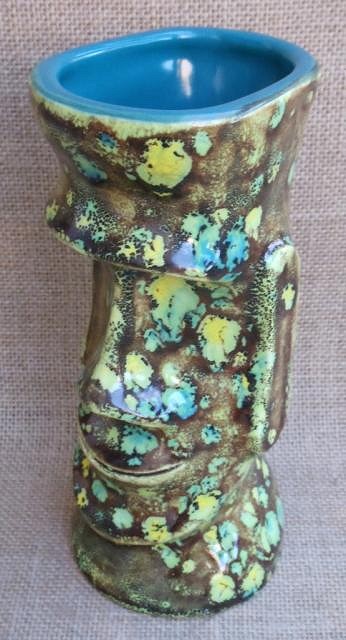
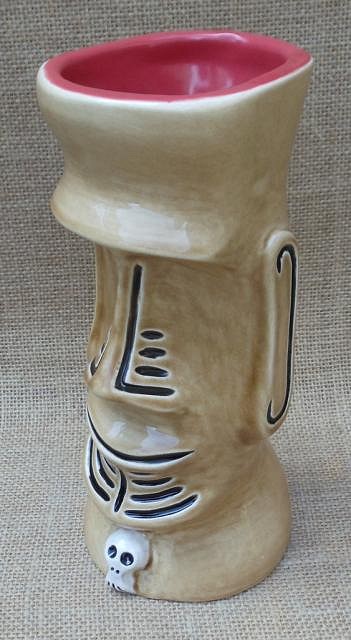
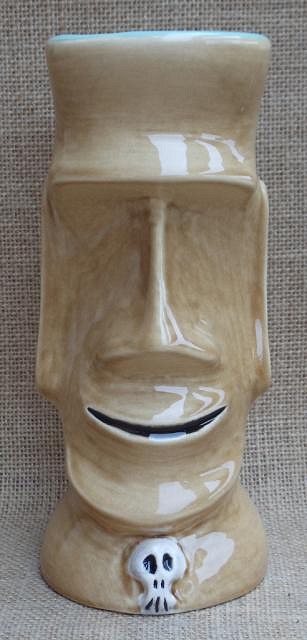
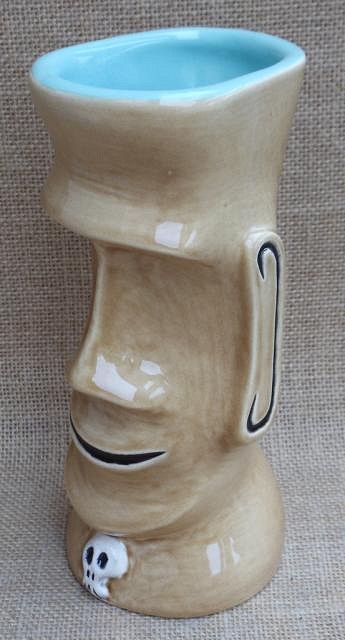
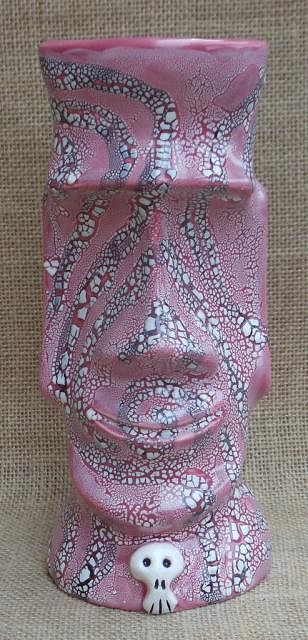
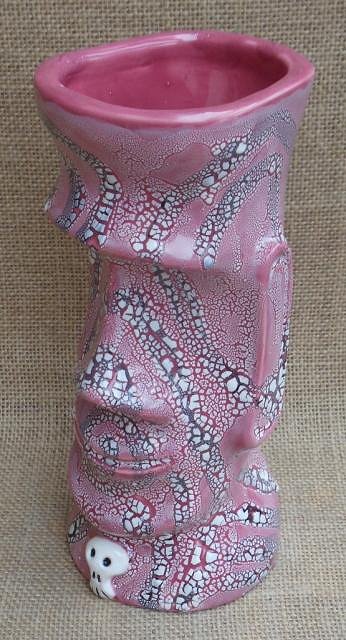
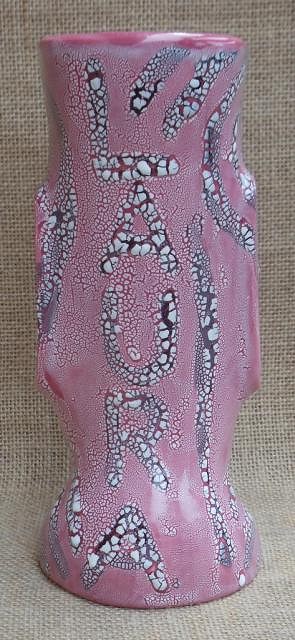
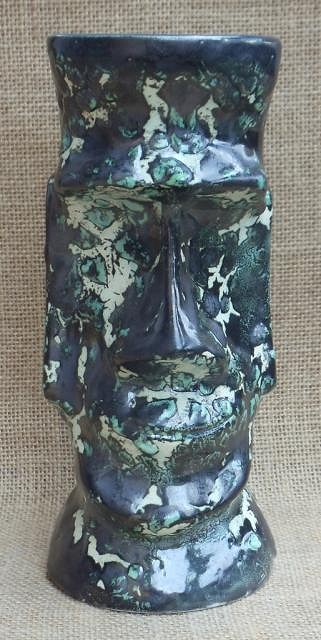
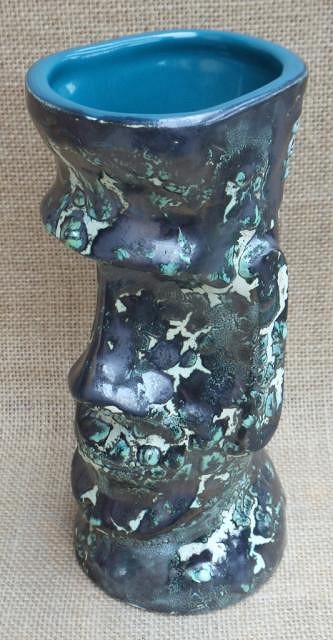
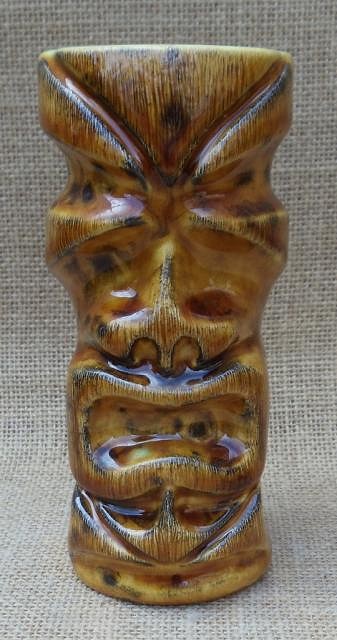
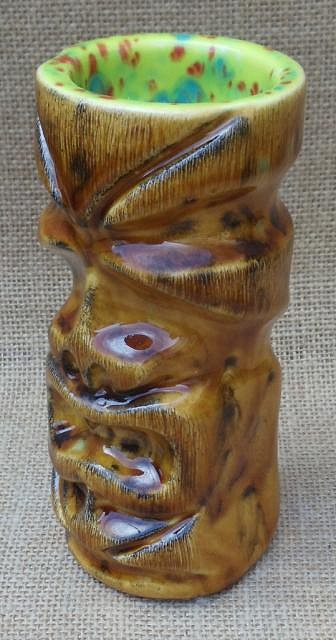
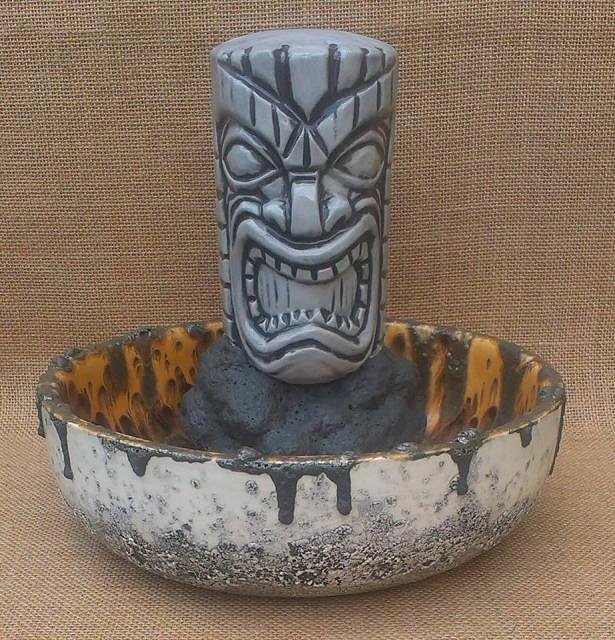
I do show them actually, it's just that you don't see them unless you look close up. And i'm trying to get busy, i'm just a lazy S.O.B. :D And i love that crusty barnacle look too, that's why i use it so much. Thanks hiltiki. Bob'O'nut has been quite a hit. Thanks TikiAno. Yes it's airbrush. I try to avoid using a paint brush if i don't have to, especially covering large areas. Cheers hang10tiki. Thanks Chippy. I'm used to see comments from you on IG so this was a surprise. Not nearly as much as you are Rob. You are a machine compared to me.So Kustom Lane gallery's opening night at their new location was a huge success and i'm proud to say that my fountain bowl (on page 14) was the only piece to sell on the night before i left, besides a black velvet painting that i bought which i'll post pictures of when i collect it, although a few pieces have also sold since then. That fountain bowl was quite popular so i received a couple of orders which is what i'm about to post pictures of. I did a bit of pouring so i have quite a bit of bisqued work ready to go but i've only glazed a few pieces which were fired this week. All of the Lance Corporal Stoney bowls i make i am glazing different or using different textures and/or colour combinations so anyone who buys one is getting a 1/1 piece, although this one pictured is very similar to one i've already made, it is a fountain version with the mouth cut out and has black in the recesses instead of brown so it is still different.
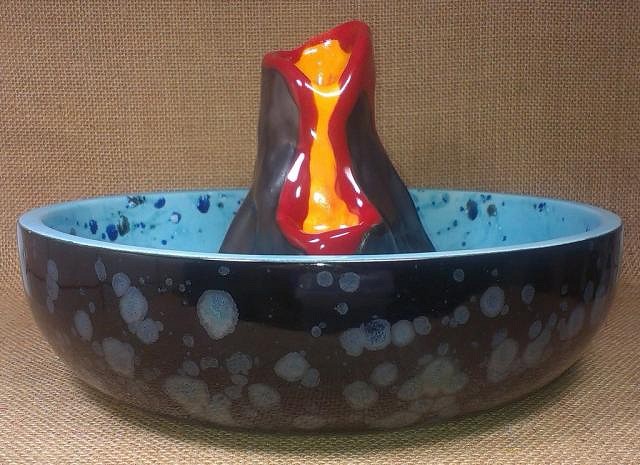
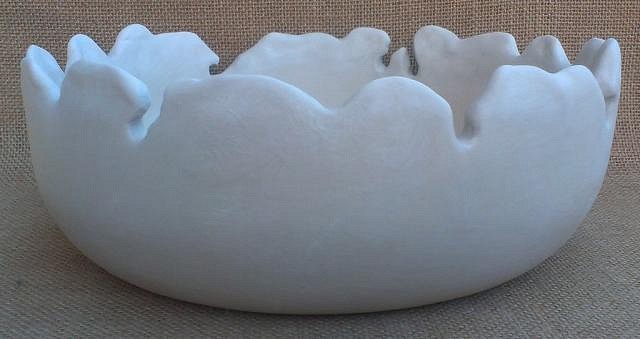
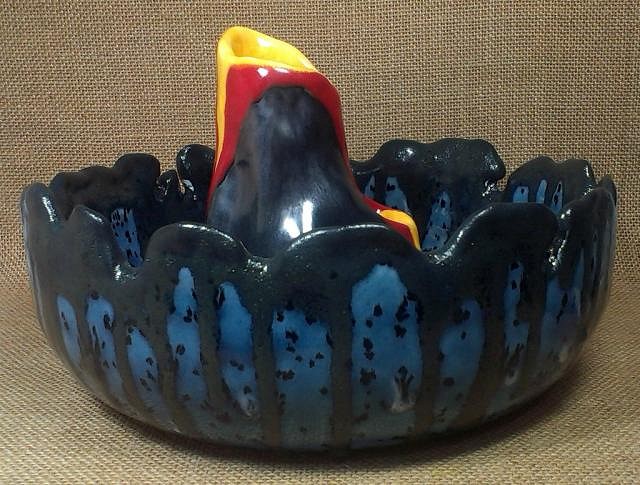
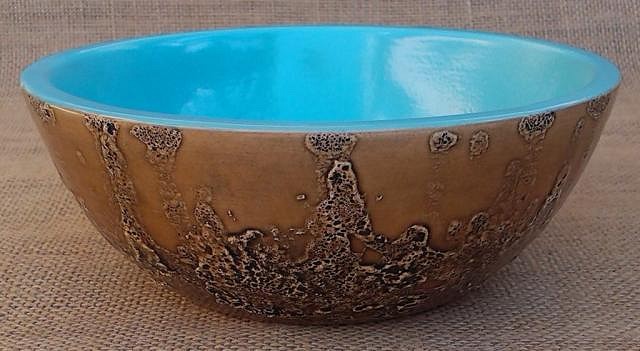
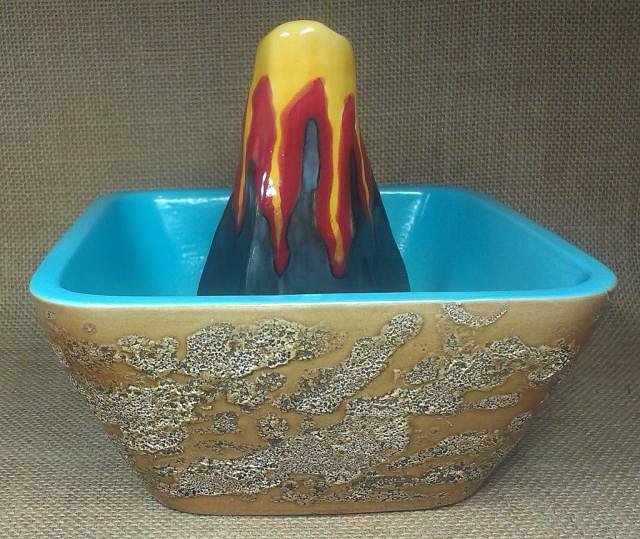
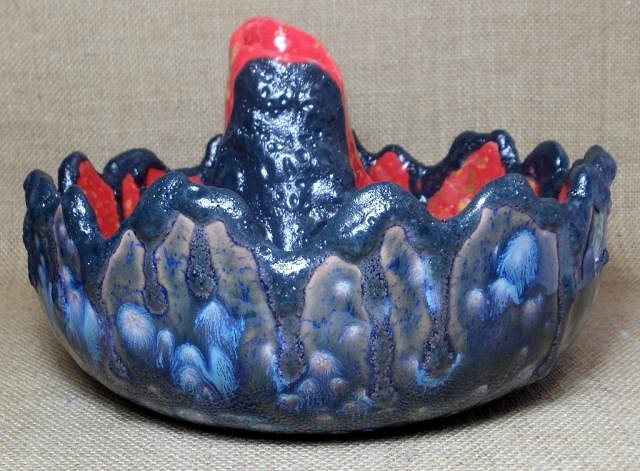
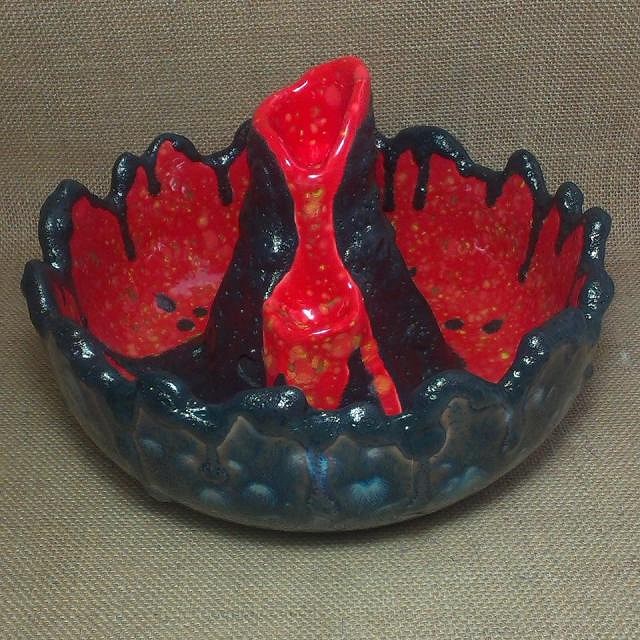
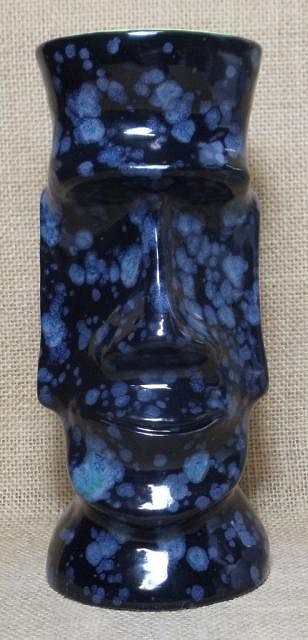
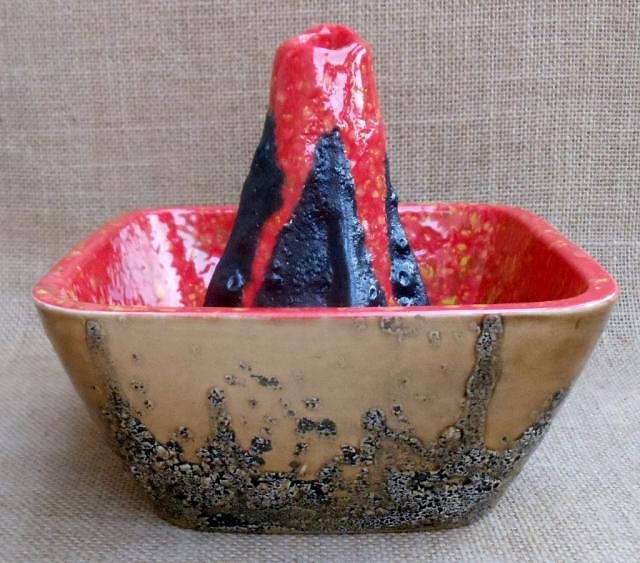
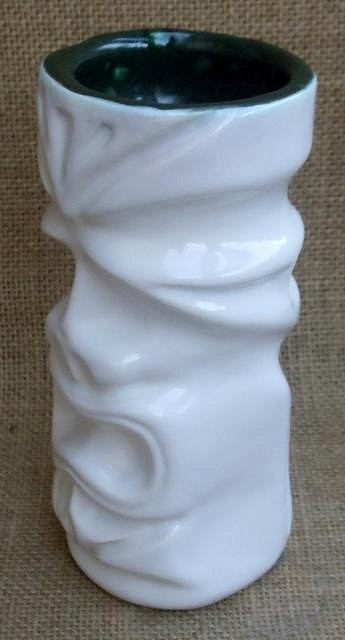
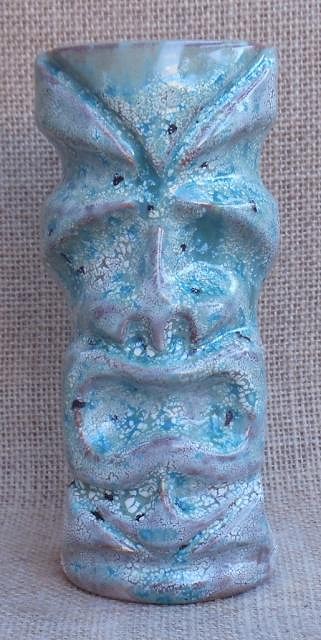
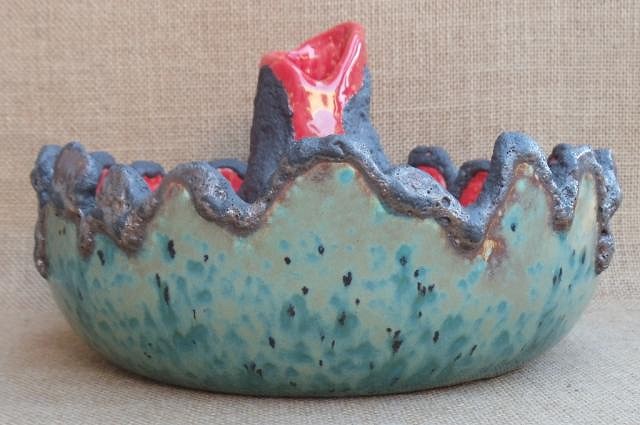
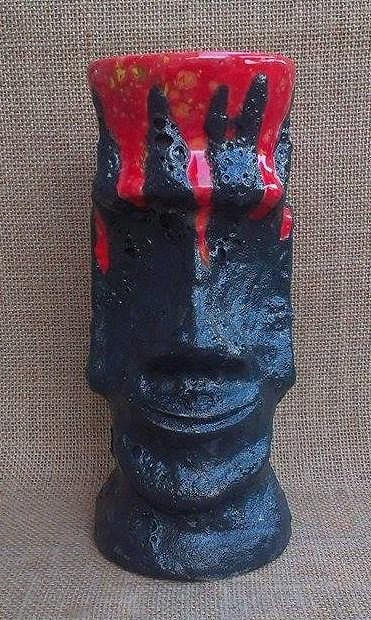
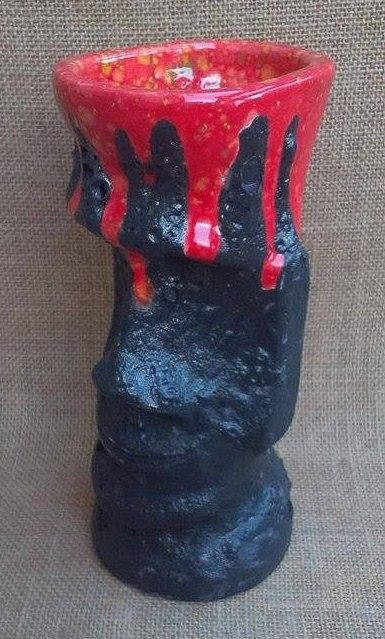
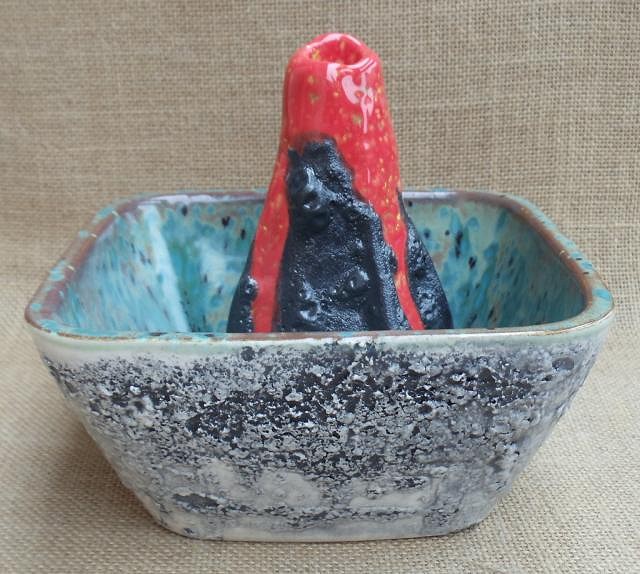
This bowl was one of the very first i poured and i didn't add any texture to the outside of it then so it's been sitting around waiting for me to decide what glaze to use. I went for this black crystal glaze (which i love) and this is the first time i decided to add some orange to the lava in the volcano and i was so happy with the outcome i did it on a couple more pieces.
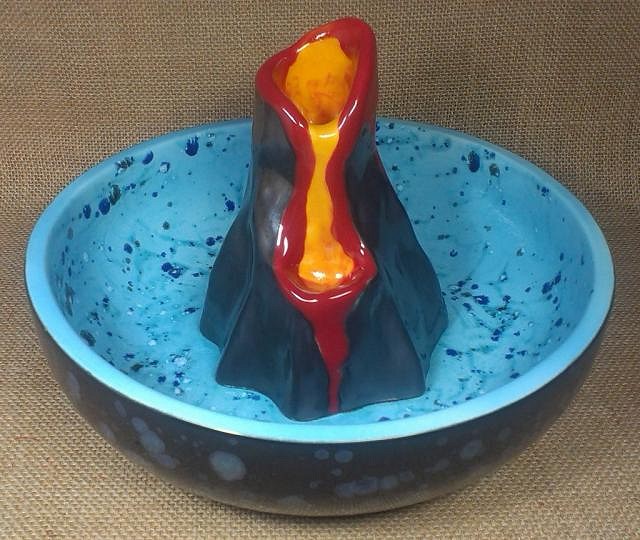
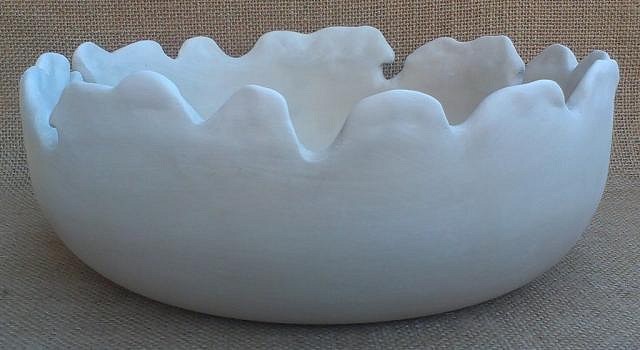
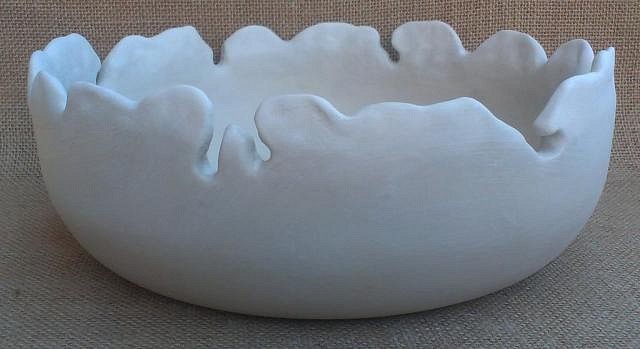
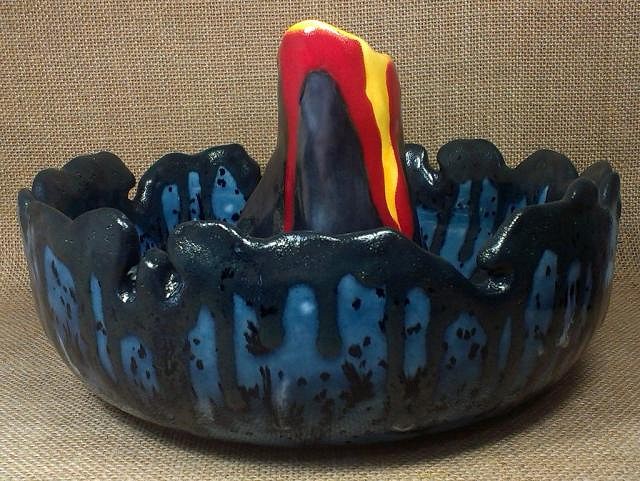
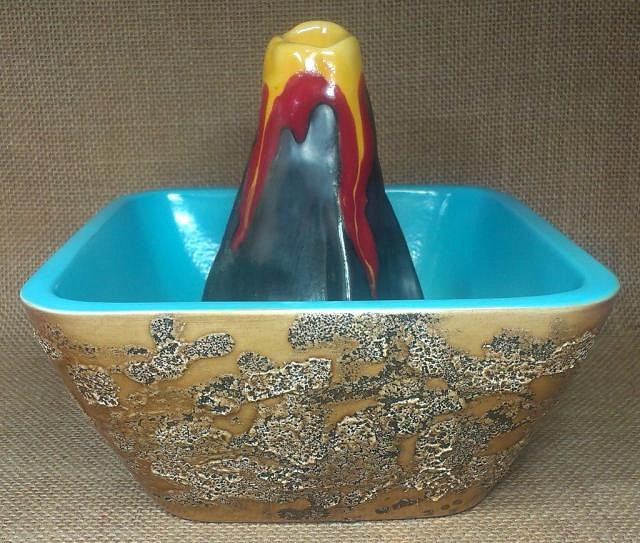
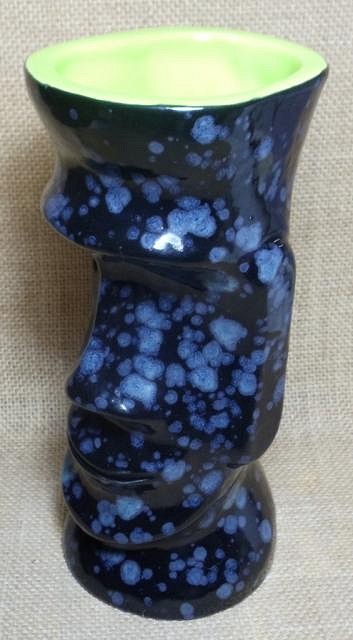
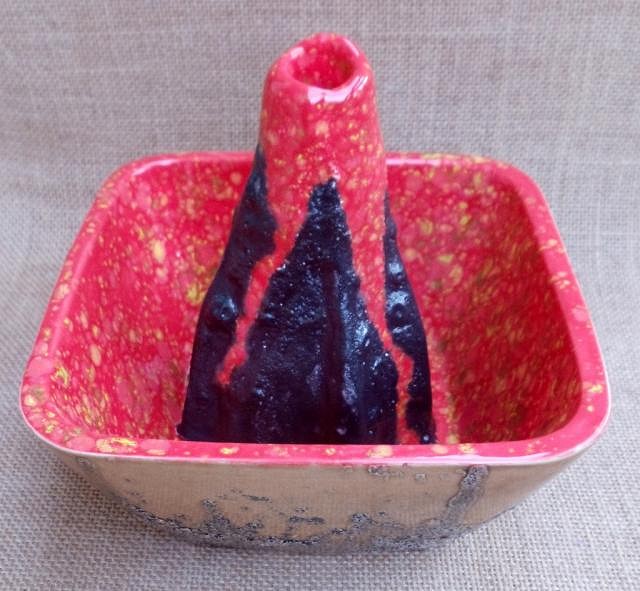
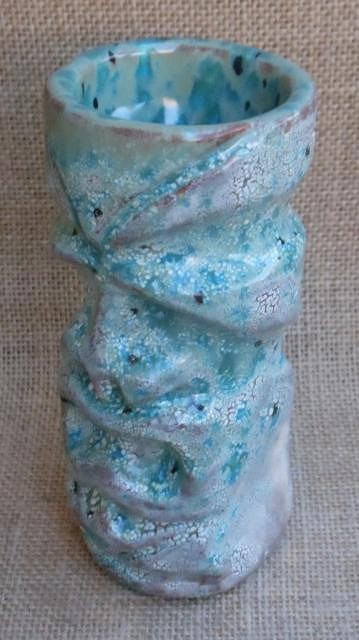
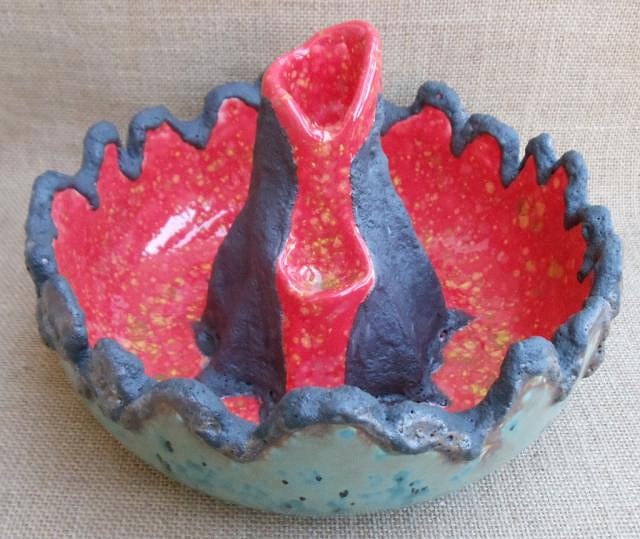
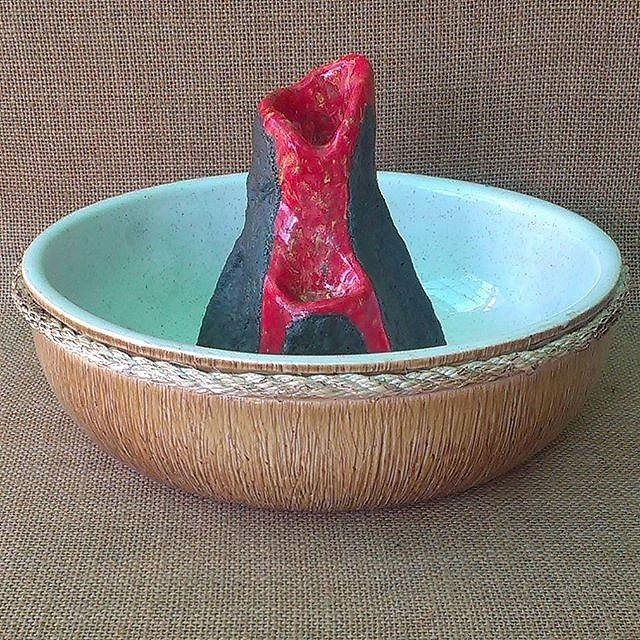
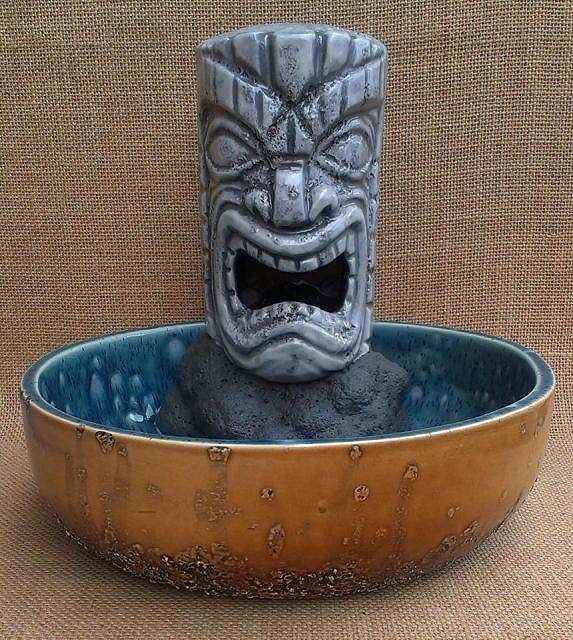
I'm not sure what gave me the inspiration to modify the rim of this bowl like this but i feel it worked out well. Here's what it looked like before it was glazed.
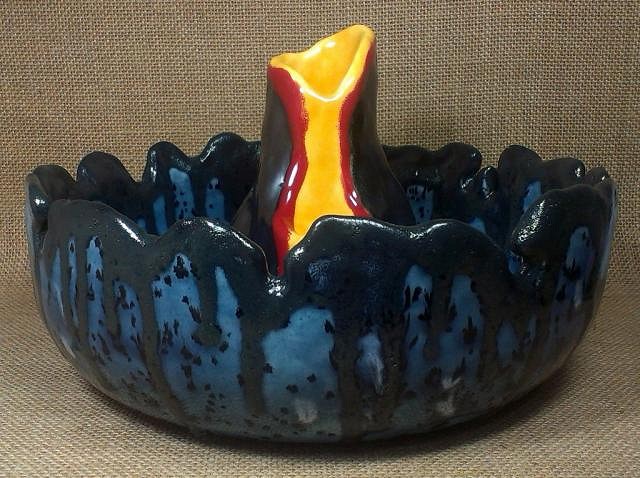
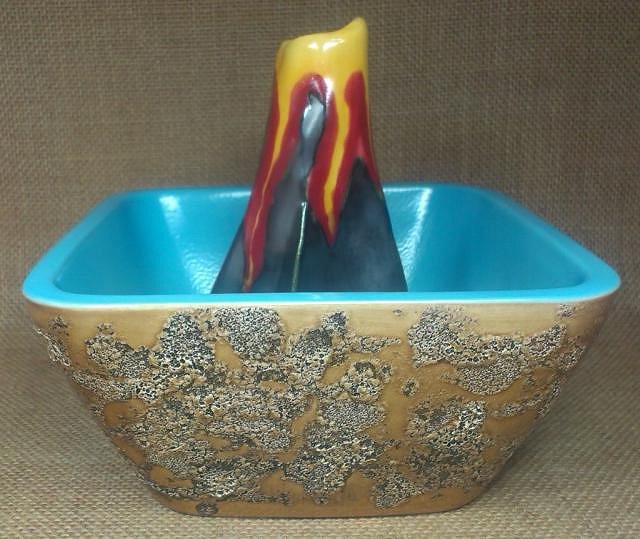
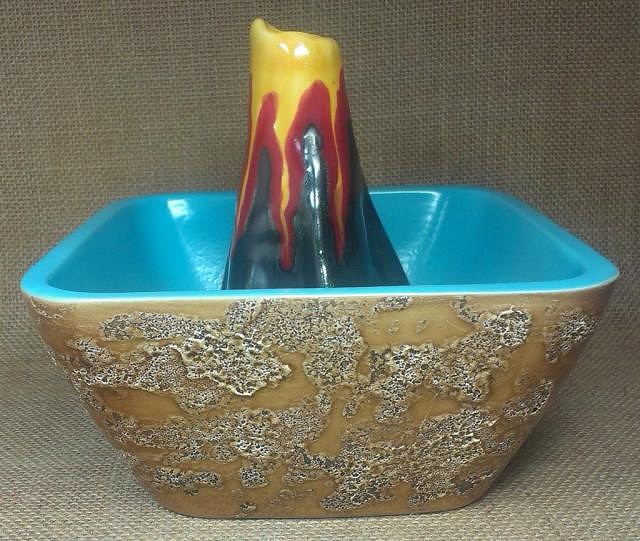
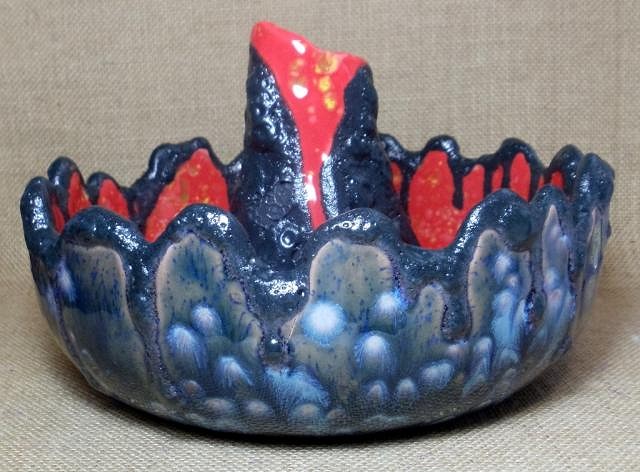
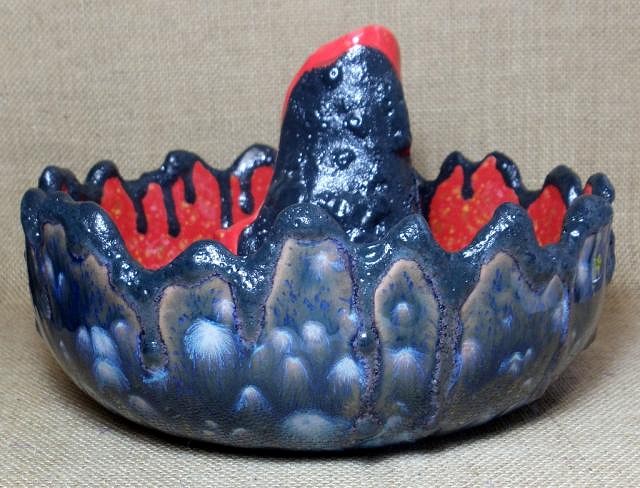
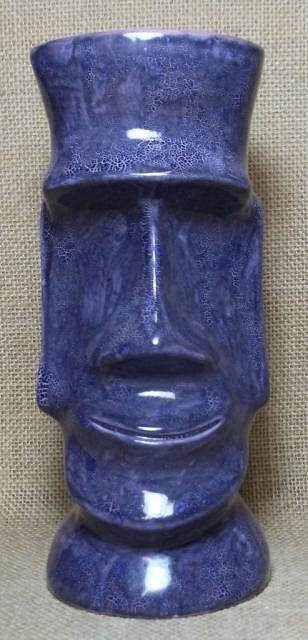
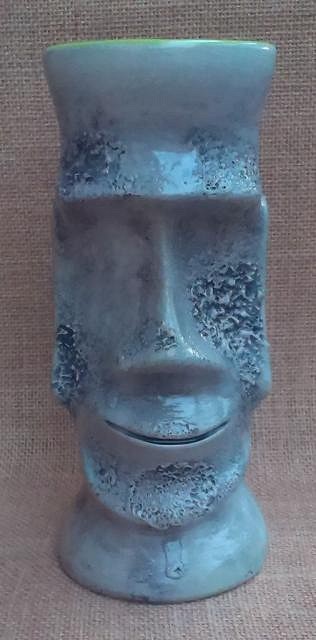
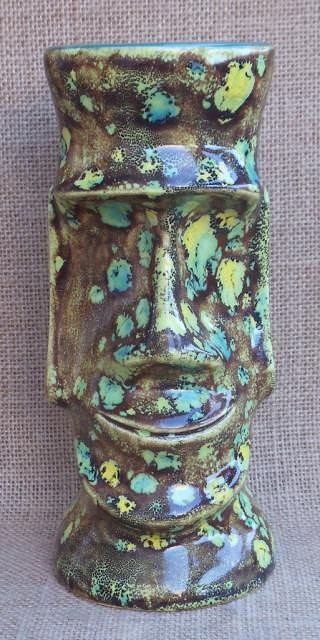
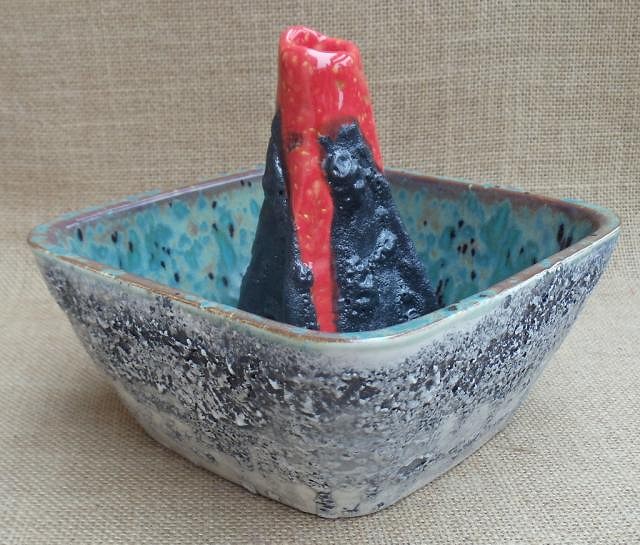
And here it is glazed. I had this idea for the glaze not long after i made it and also added the yellow to the volcano after seeing how good it looked on the previous bowl. The blue glaze is a little darker than i would have liked but i really like this bowl. I'll definitely make some more like it.
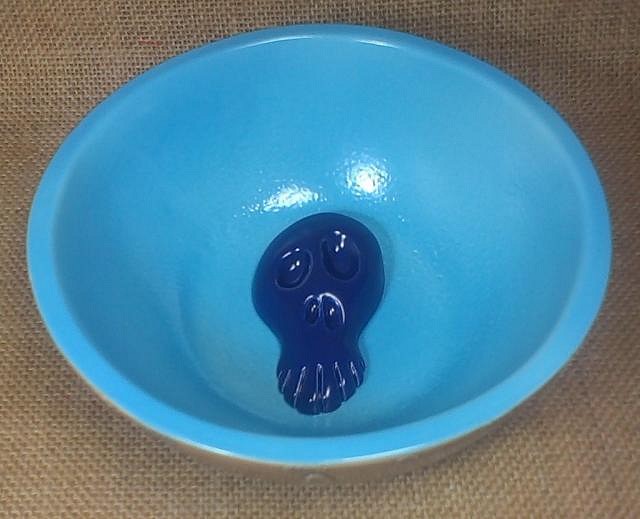
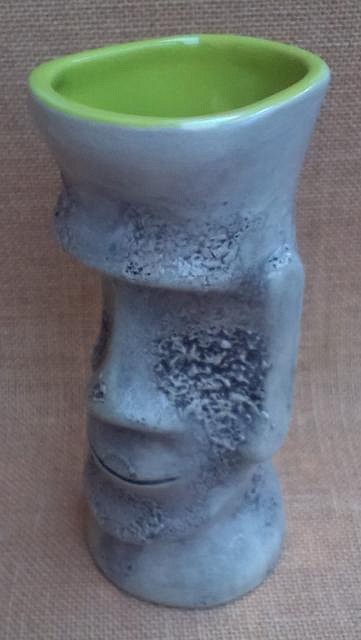
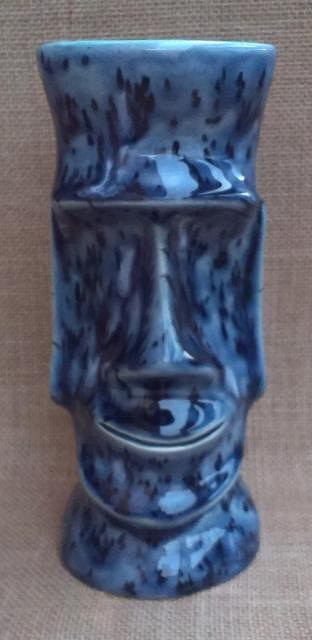
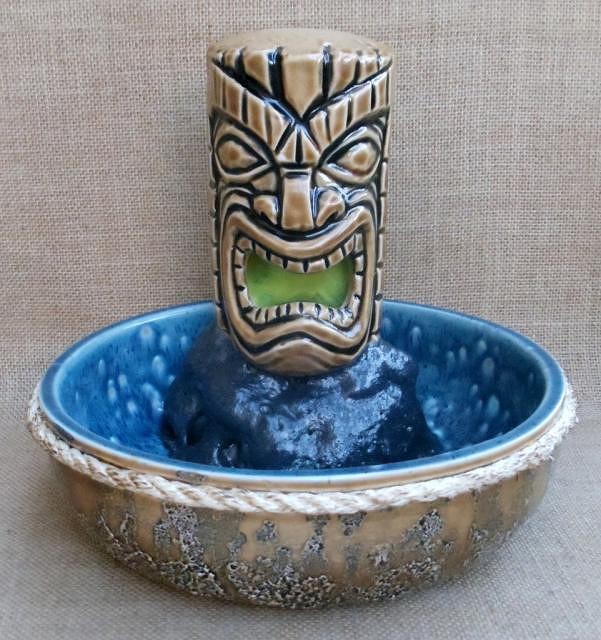
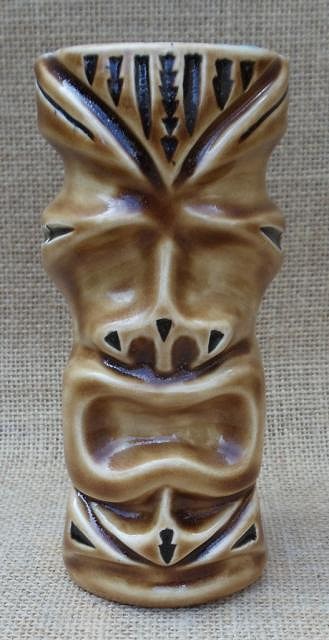
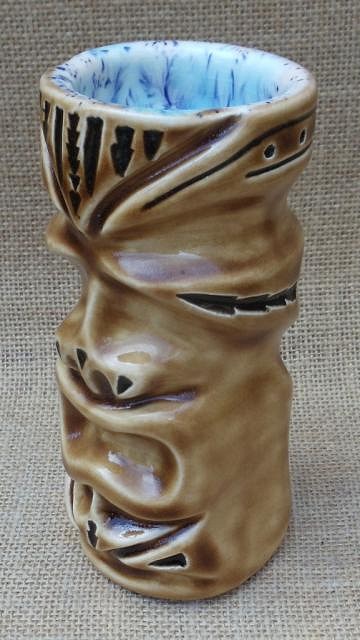
Here's another Colonel Peek-a-boo that i glazed while i had the blue in the airbrush canister glazing the other pieces. I try to glaze as many pieces as i can with the one colour at the same time so that i'm not going back and forth cleaning all the tools/utensils.
A Brigadier VF1 glazed at the same time with yellow glaze in the volcano.
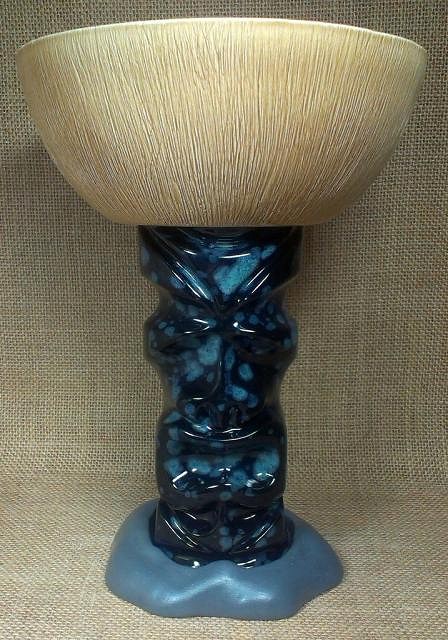
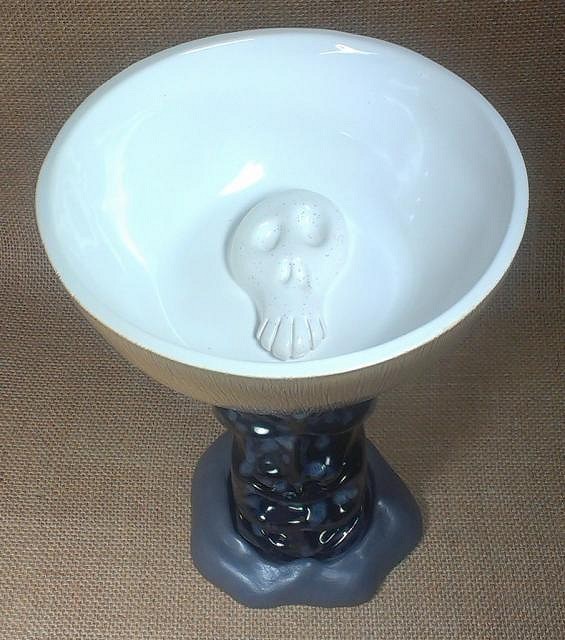
One of the Corporal Punishment/Colonol Peek-a-boo goblets. I had this glaze combination in mind from the start when i made this one. Worked out well.
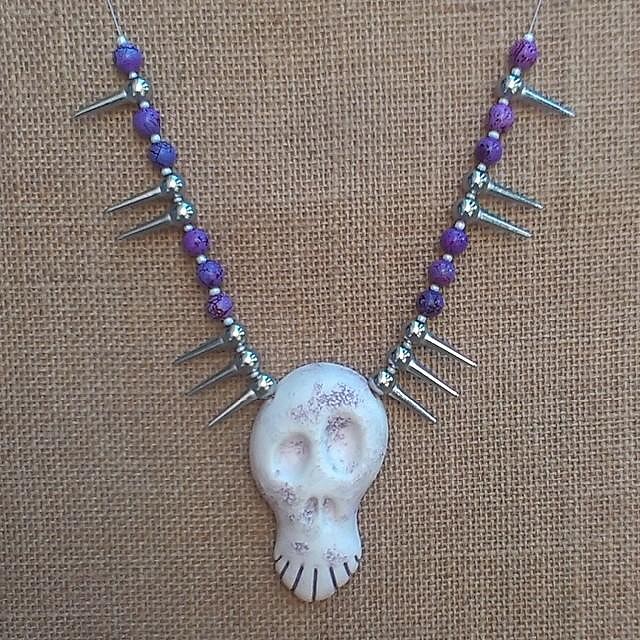
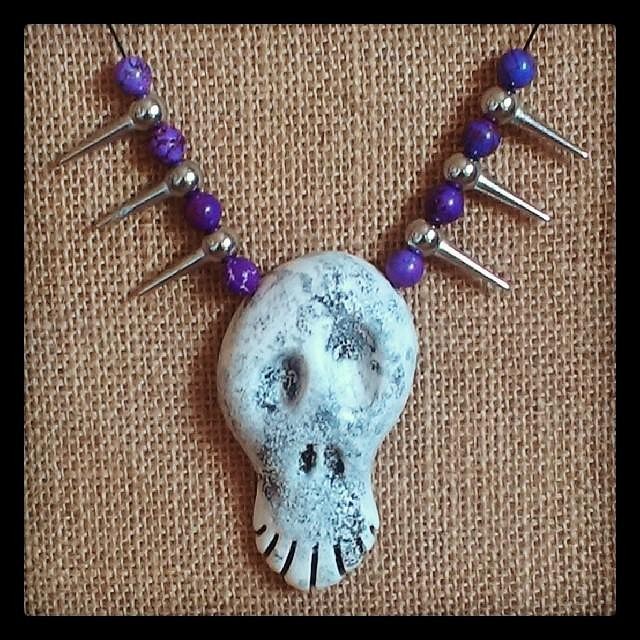
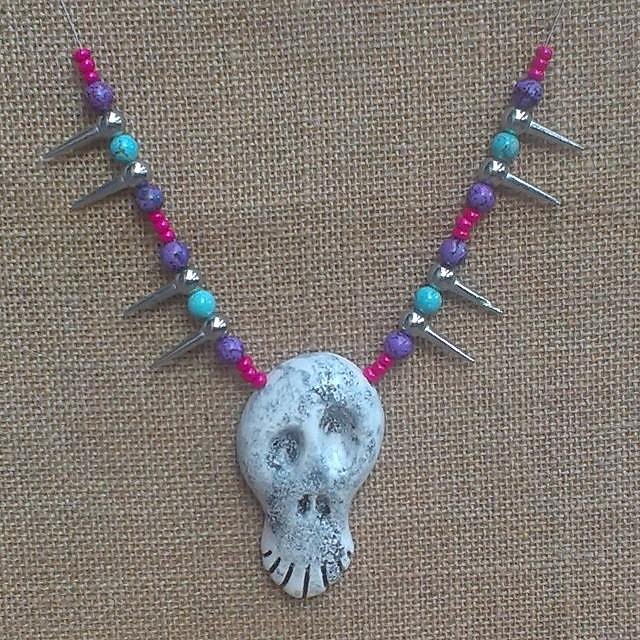
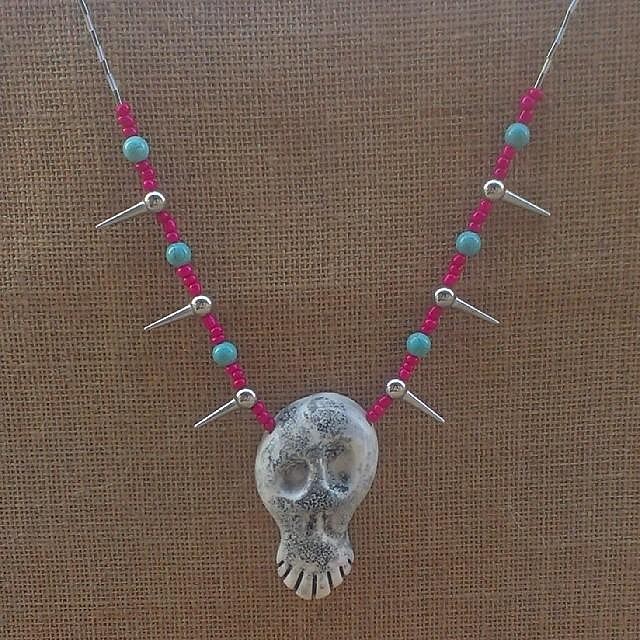
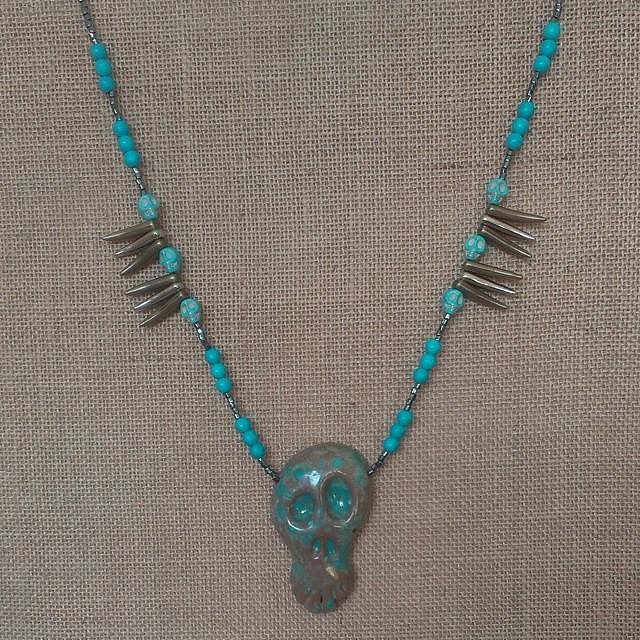
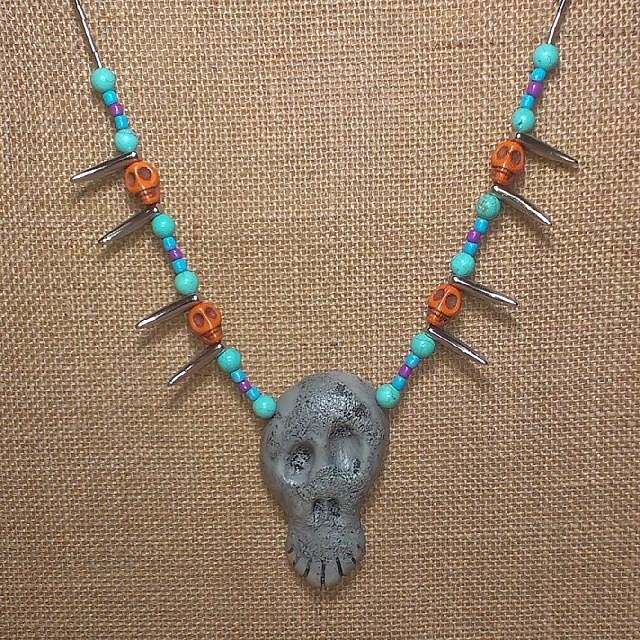
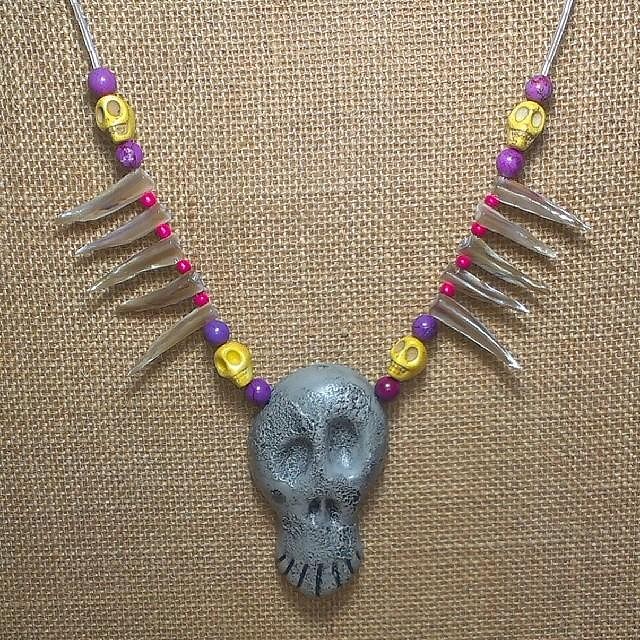
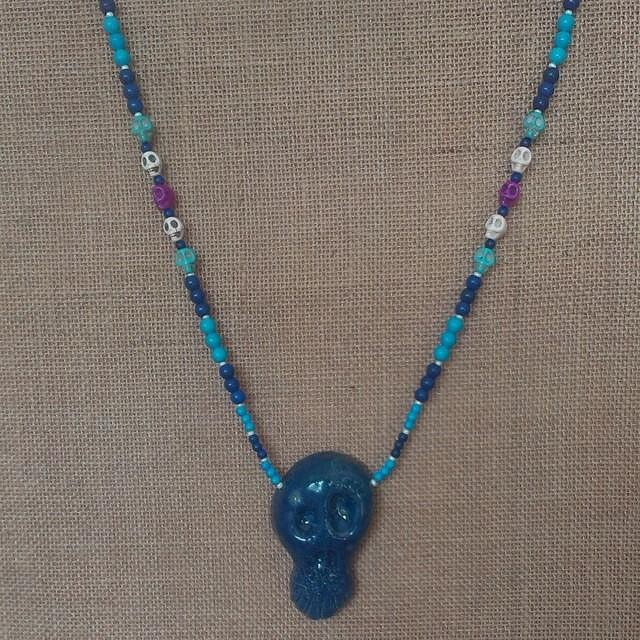
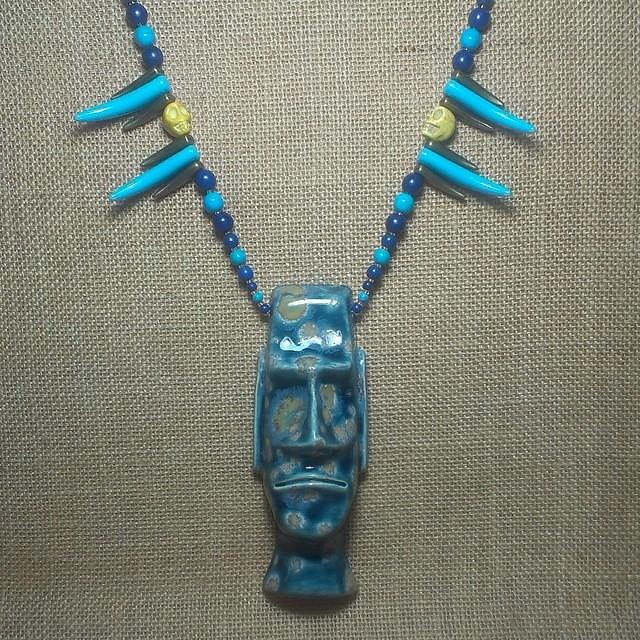
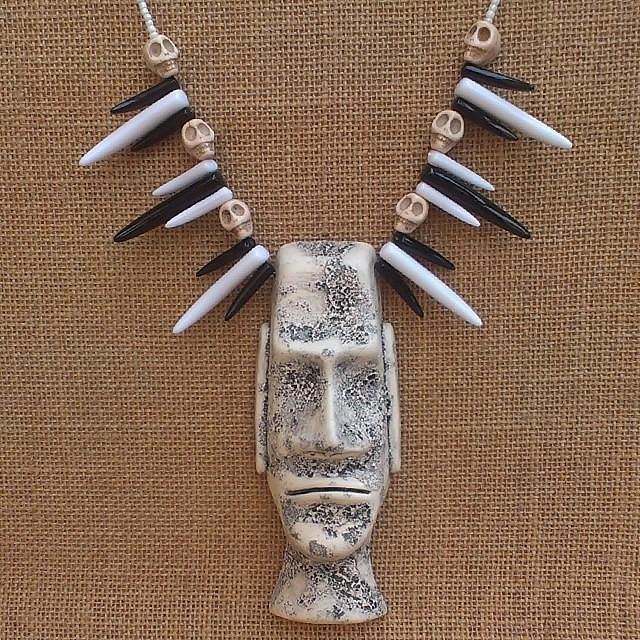
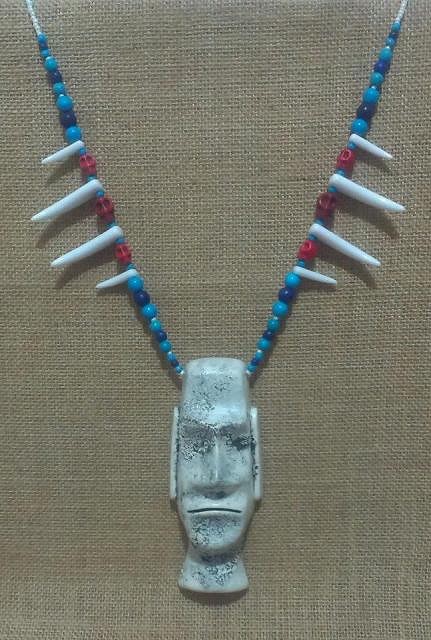
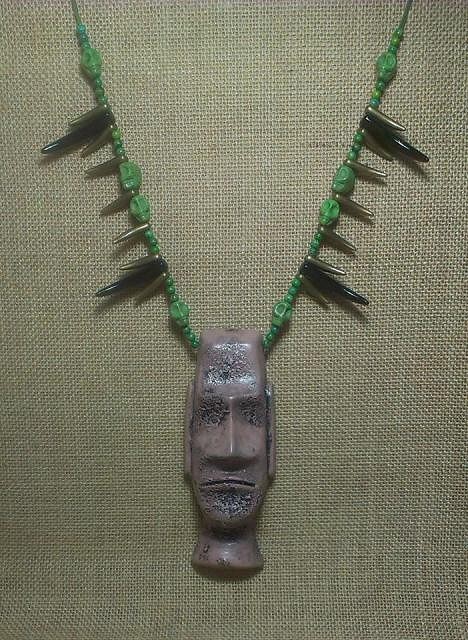
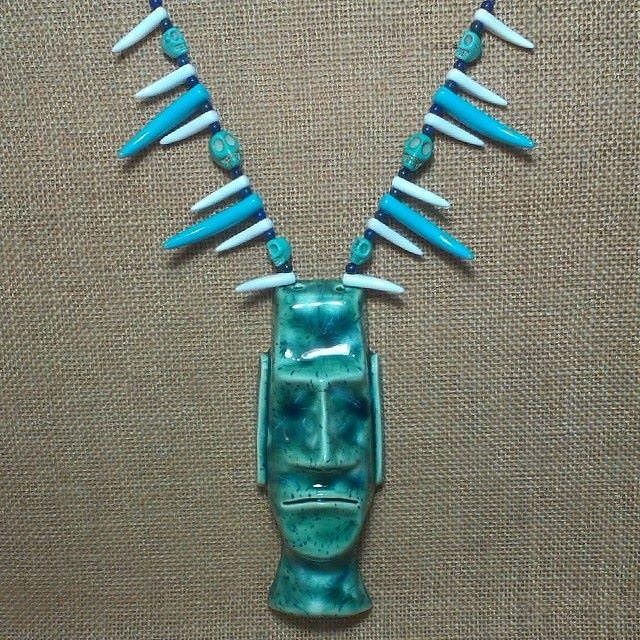
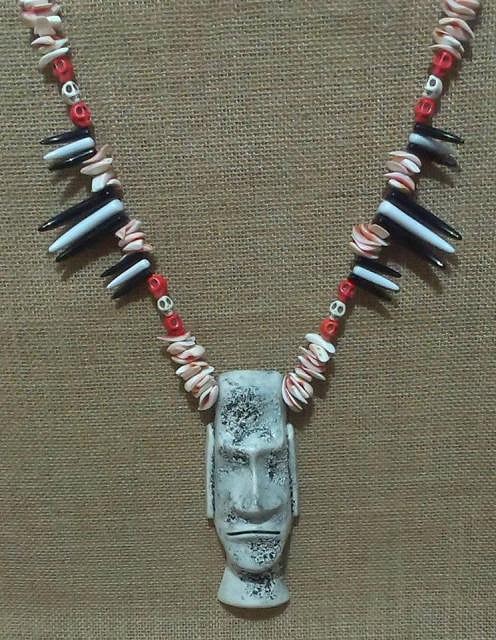
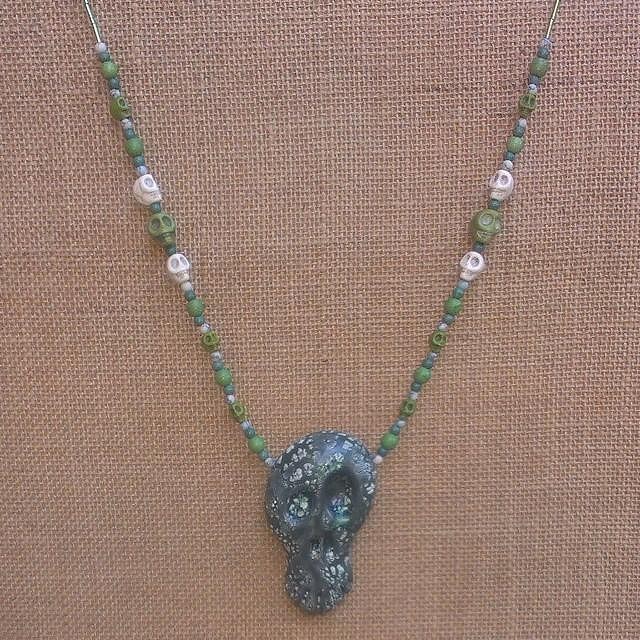
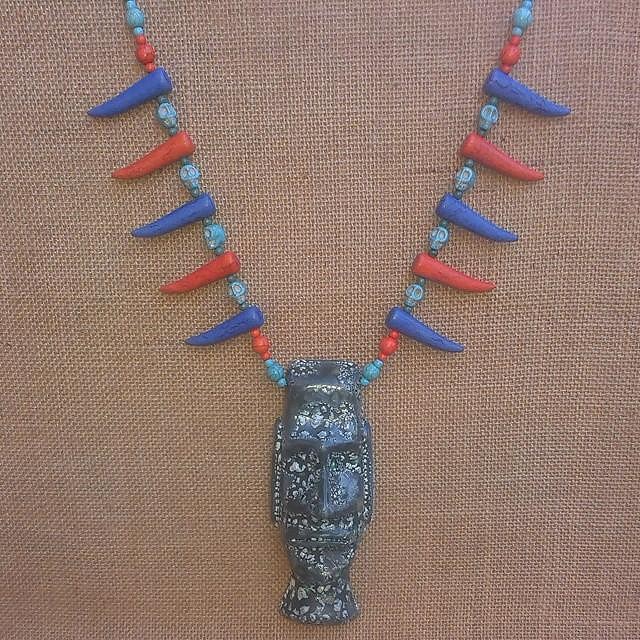
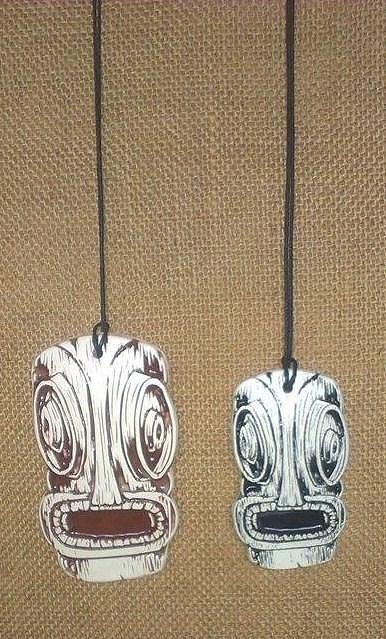
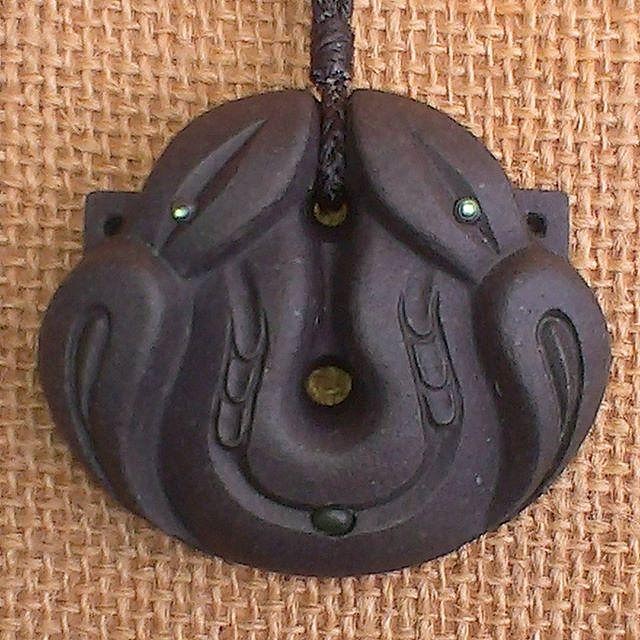
Several more necklaces i beaded up with the skull pendant i make. (Some of the pics are saved from Instagram where i've used filters, that's why the lighting look different).
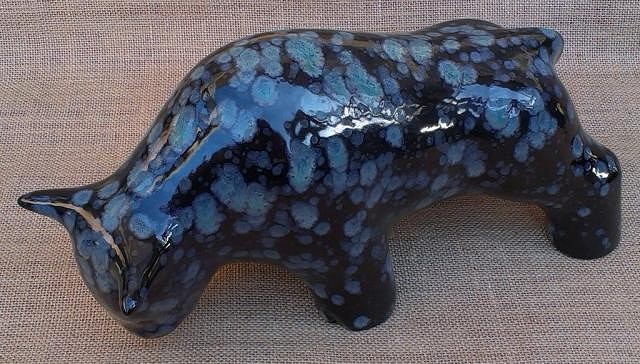
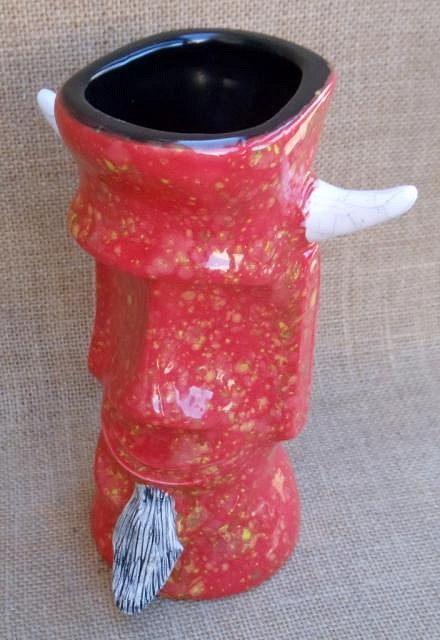
And finally, something that's not tiki but i'm showing it anyway, another bull taken from a mold from the 50's or 60's. My friend gave me a few of these to clean up the greenware and glaze as i pleased and another friend loves them and wanted one. Again these have been sitting around for a while and as i love this glaze so much i knew i'd be happy with it even and would keep it for myself even if my friend didn't like it. But he does.
That's it for now. Cheers
[ Edited by: swizzle 2014-04-10 14:37 ] |
|
L

littlegiles
Posted
posted
on
Thu, Apr 10, 2014 7:17 AM
Loving the new volcano bowls!! The lava flow and that bright blue glaze on the inside is very striking.
|
|
T

tikiskip
Posted
posted
on
Sat, Apr 12, 2014 6:25 PM
Good to see you back at it!!! |
|
M

mp
Posted
posted
on
Sun, Apr 13, 2014 9:34 AM
lookin good Swizzle! Nice'n clean stuff there. MP |
|
C

cy
Posted
posted
on
Mon, Apr 14, 2014 8:56 AM
Always enjoy checking out your work swizzle, love the barnacle-like glazes. |
|
C
Chippy
Posted
posted
on
Mon, Apr 14, 2014 3:34 PM
I am sorry I am not here on TC much, but while the kid is at school I can take a break and hit the computer. It is great to see these mugs on the big screen and not just on IG, on the phone. They look great! Keep up the good work. |
|
S
swizzle
Posted
posted
on
Sat, Aug 23, 2014 4:02 AM
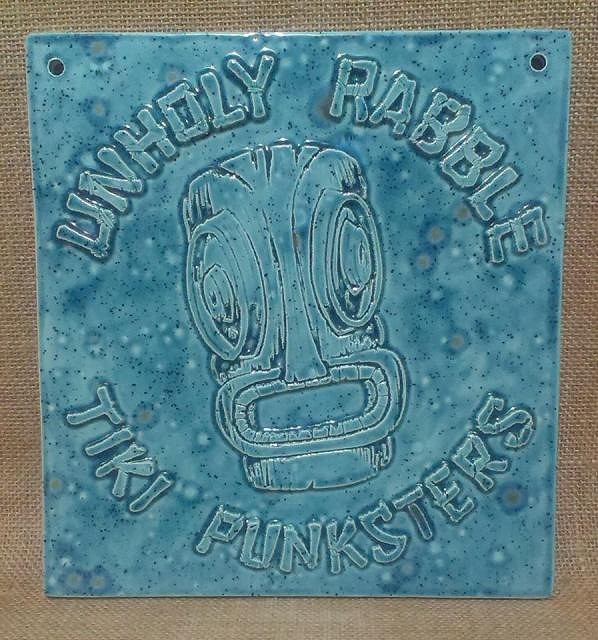
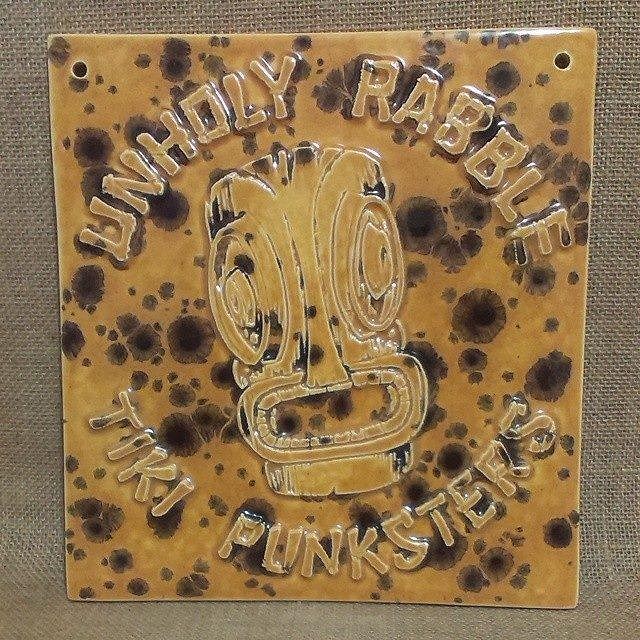
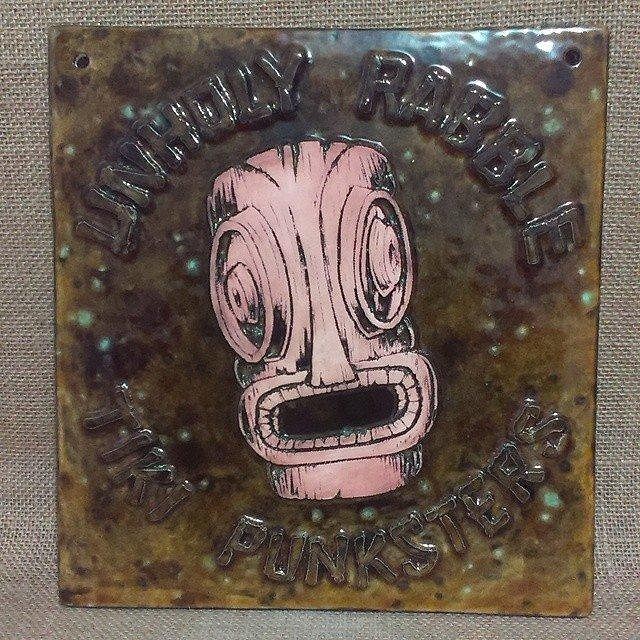
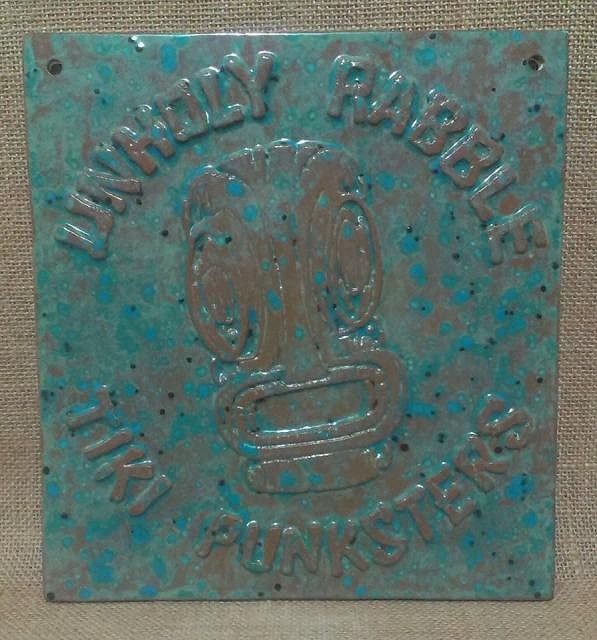
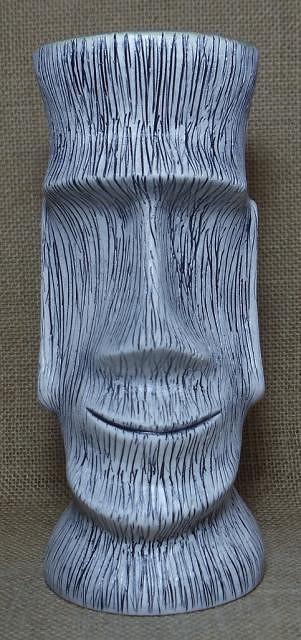
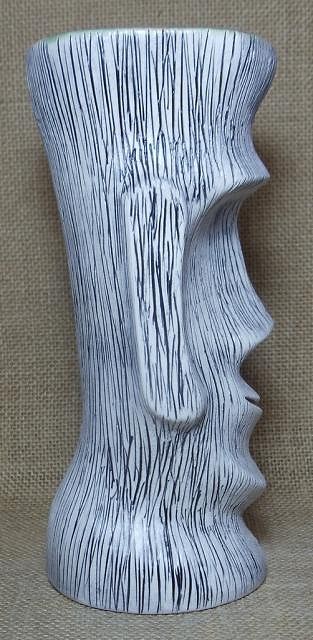
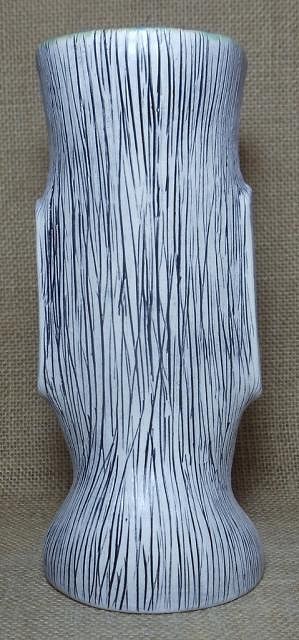
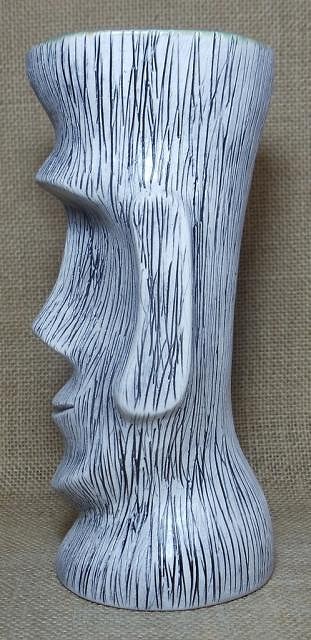
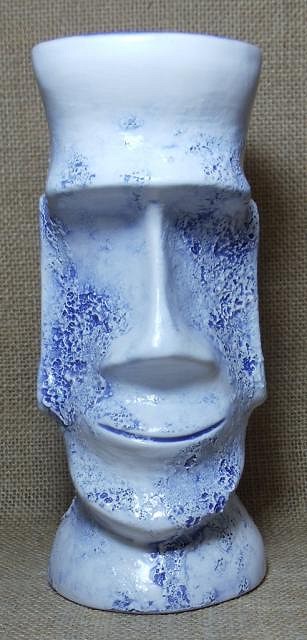
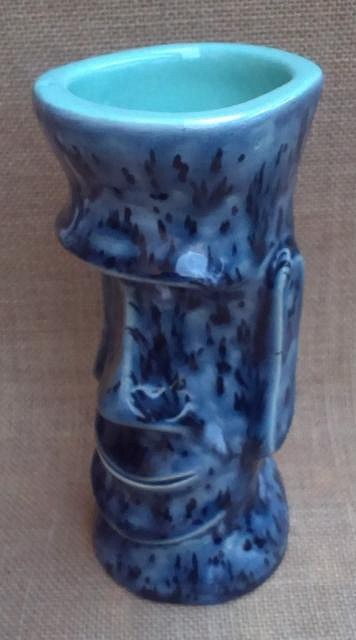
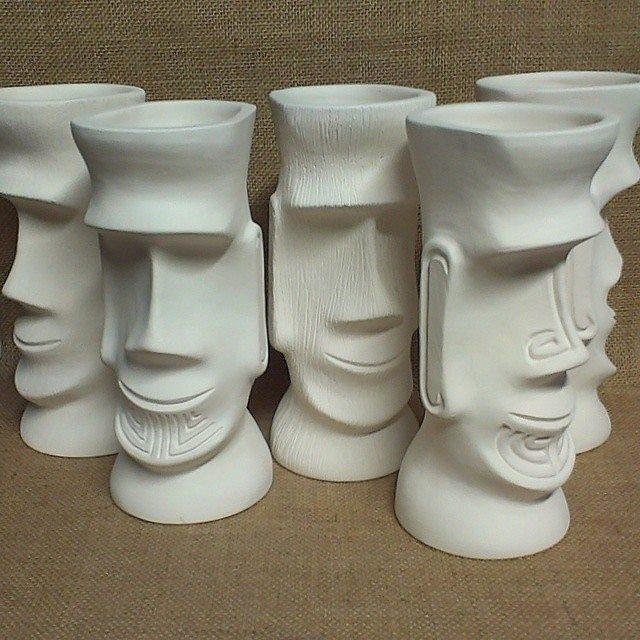
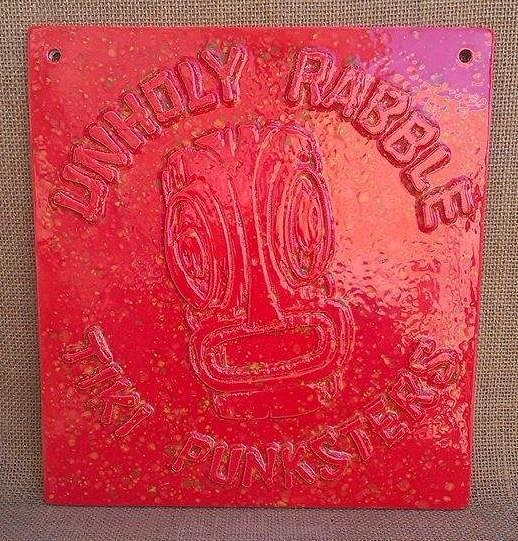
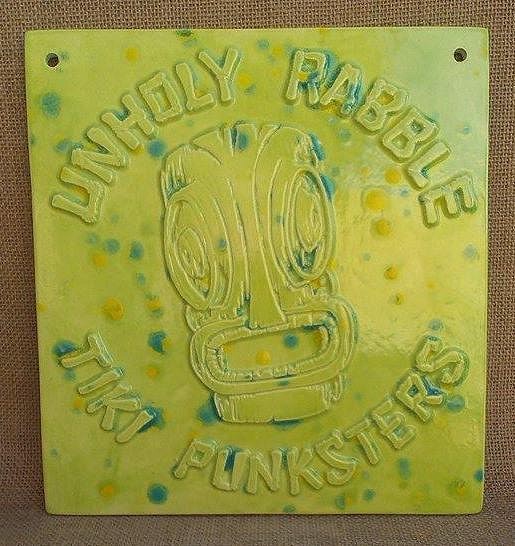
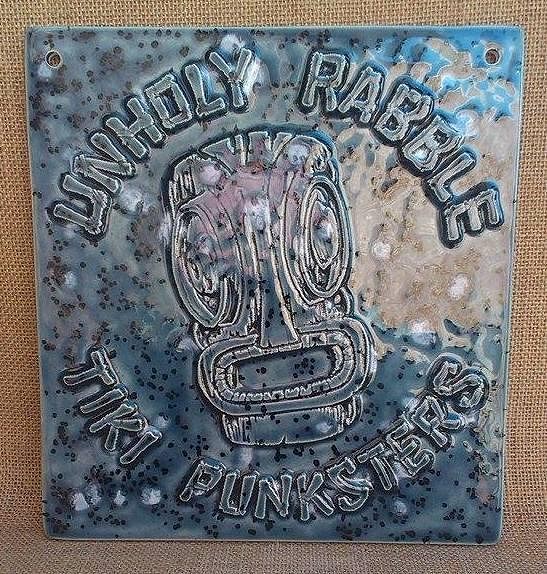
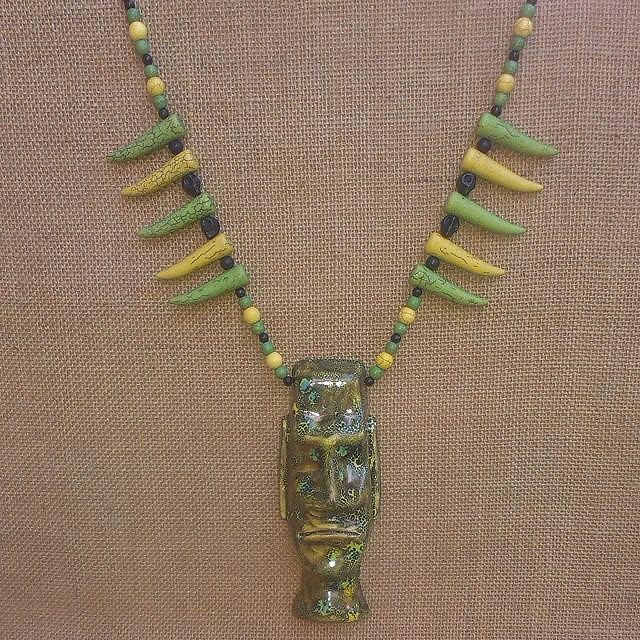
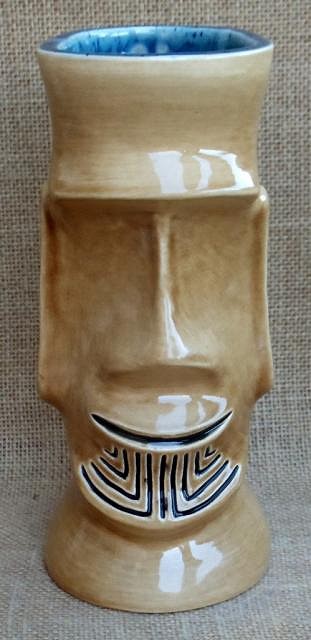
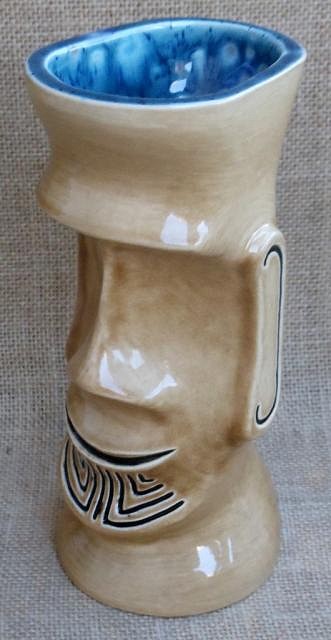
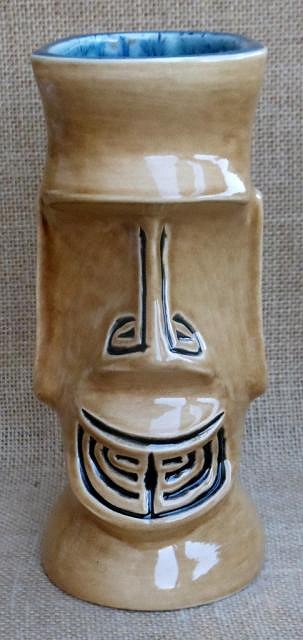
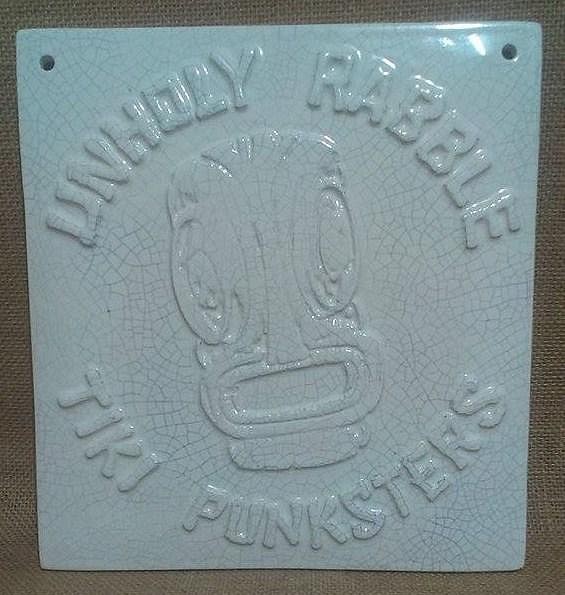
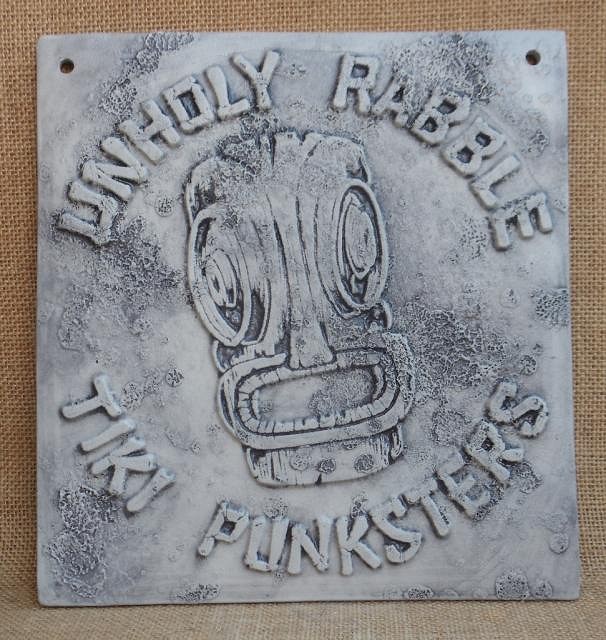
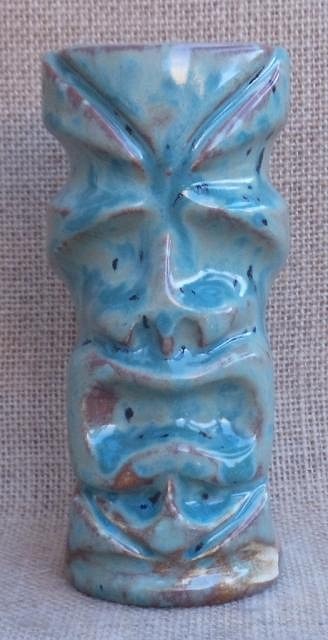
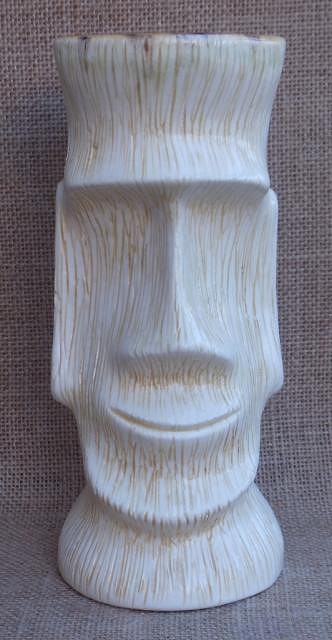
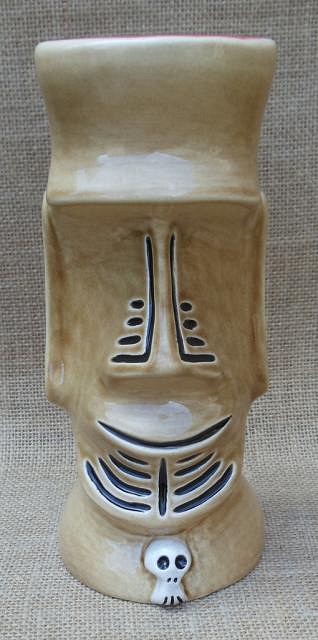
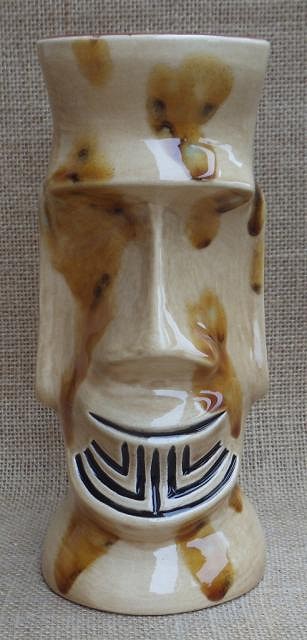
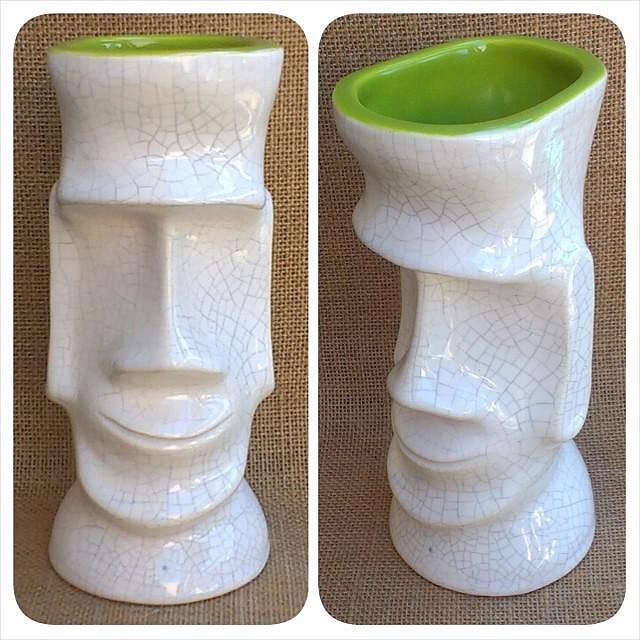
Thanks littlegiles. There's another new one pictured below. Thanks tikiskip, mp, cy (i love that barnacle-like effect myself) and Chippy. So it's been a little while since i've posted and haven't been doing a great deal of work although i do have a new mug design you'll see in a moment. First off here are several more pendants. I've actually made quite a few of the skull ones but i'm only showing a handful here, and there are a few more moais than what is pictured also. This particular one i made for myself. The shells came from a necklace i found at a thrift store. We have the Unholy Rabble Tiki Punksters Suck Em' Up Melbourne Mai Tai Crawl coming up in November so i've made a few more wall hangings. I have more but these are the only ones i've glazed so far with new glazes i picked up while i was in the U.S. in June. Here's another volcano bowl which i am devastated has cracked. When i opened the kiln i was so happy as it turned out even better than i was hoping for and it looked fine. It wasn't until i was taking photos of it that i noticed it had cracked and after having a closer look at it i found another crack on the opposite side. I spoke to my ceramics supplier and he said i could try refiring and the glaze might re-melt to cover the crack or it could also open up further. I don't think i want to take the risk ruining it completely so i'm just going to leave it. As a display piece the cracks are not noticable unless you look up close. Being winter here i think the kiln cooled down too quickly as the ambient temperature outisde the kiln was so cold and also the kiln wasn't completely full to retain the heat, although there is also the possibilty there was an issue with the various glazes i used. I've already started on another one i'll glaze very similar (i'm going to try a different blue on the outside) which i hope stays in one piece. And finally my new mug design. He's new, he's a moai, it's Staff Sergeant Nuoai. And here's a pic of a few more with additional carving on them i still have to glaze. That's it for now. Cheers
[ Edited by: swizzle 2014-08-23 18:57 ] |
|
B

Bowana
Posted
posted
on
Sat, Aug 23, 2014 7:52 AM
Spectacular glazes, Robbie! Esp the unfortunate volcano bowl. Sorry about the crack. I've tried the reglazing trick, and it will work if the crack is small enough. But as you said, you take your chances that it might get bigger. Make another one! Bowie |
|
TT

Tiki Tonie
Posted
posted
on
Sat, Aug 23, 2014 10:32 AM
I just love your work! So clean and beautiful. |
|
S

SandraFremgen
Posted
posted
on
Sat, Aug 23, 2014 11:10 AM
Hi Swizzle, It's smart that you are making tiki mugs through an adult education course. That is an affordable way to access the equipment. I'm more of a painter, so I appreciate seeing pictures of your process. Please keep them coming! :) Your mug has so much character already! I too like the one eye brow raised.. hehe Sandra |
|
EJ

El Jefe
Posted
posted
on
Sat, Aug 23, 2014 9:53 PM
Looking good. Really like the new mug design. Can't wait to see more. |
|
T
TikiAno
Posted
posted
on
Sun, Aug 24, 2014 6:09 AM
Digging all the new stuff, especially Staff Sergeant (and my favorite is the first glaze combo!) |
|
L

LoriLovesTiki
Posted
posted
on
Wed, Aug 27, 2014 6:07 PM
Hey Swiz, Love the new volcano bowl - it's shape, the barnacle glaze on the bowl and the yellow on the volcano. Seriously beautiful! |
|
D

danlovestikis
Posted
posted
on
Thu, Aug 28, 2014 7:46 AM
Swizzle your work is pure tiki and wonderful. I wish we could have met up with you on your last trip. I hope you are well and running around again. Thank you for sharing these wonderful photos. Wendy |
|
B

Beachbumz
Posted
posted
on
Wed, Sep 3, 2014 10:29 AM
Wow Robbie your on fire bra!! :wink: Everything looks great, bummer about the bowl, that glaze though is beautiful!! |
|
S
swizzle
Posted
posted
on
Mon, Sep 22, 2014 3:50 AM
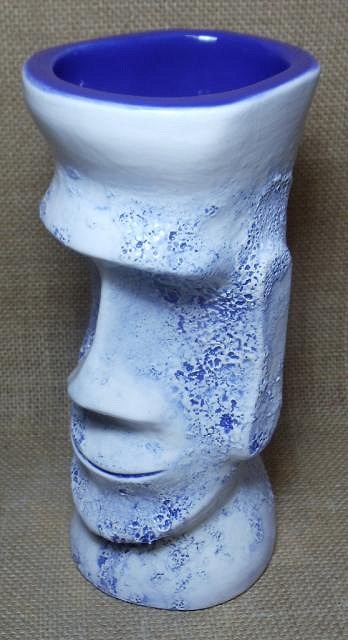
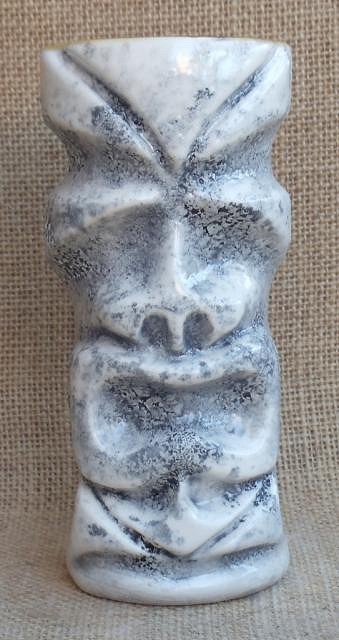
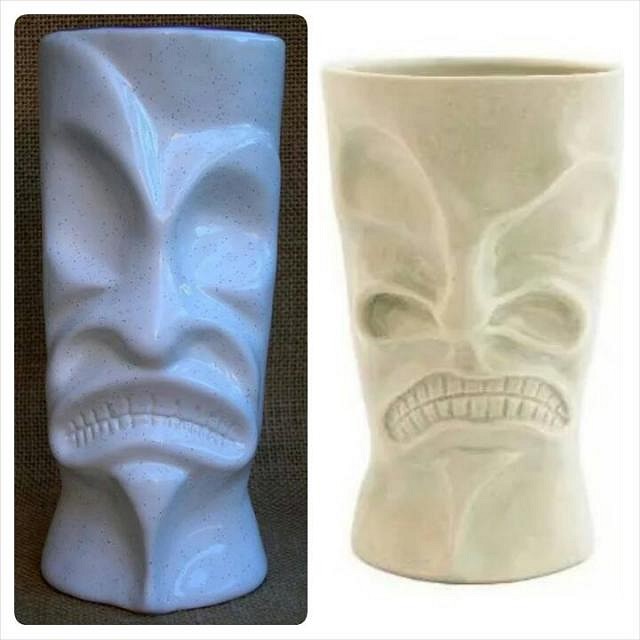
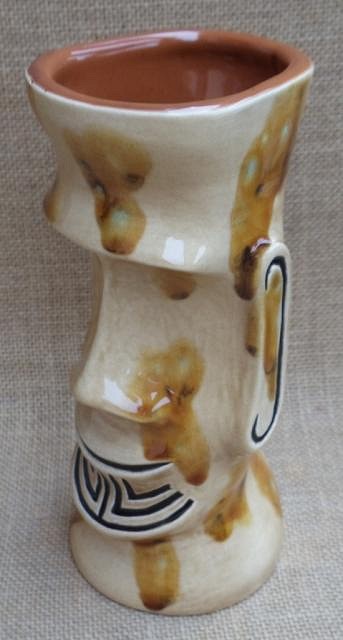
Thanks David (Bowie). It's always very flattering to receive a compliment from such a talented ceramicist as yourself. Thank you Tiki Tonie. I am flattered again by your comment. Thanks SandraFremgan. I have come a long way since then and now own my own kiln and do all my work at home. El Jefe, cheers buddy. I'm pretty happy with the moai myself. Thanks TikiAno. That particular one is probably my most favourite version of this new design. Besides the one coming up. Thank you Lori. I enjoy making the volcano bowls. Especially when they turn out exactly as i would like them to. Thank you very much Wendy. I had a very hectic trip this time so time didn't allow it, although i am looking at coming back for Tiki Oasis in 2015. Beachbumz, thanks my friend. I was shattered when i saw the cracks in that bowl. Personally one of my most favourite pieces i've made so far. And you're welcome for the pendant. ================================================================================================================ Well it's not often i post again so close to the last time that i did, but with the Mai Tai Crawl coming up i've been keeping busy to keep the kiln full to make it worth while firing. First up are a few more Unholy Rabble wall hangings. A few more pendants. Here's another Brigadier VF1 bowl. (Unfortunately i damaged the mold for the volcano and need to make another one). Another Lance Corporal Stoney. This is a fountain version with the mouth cut out and has fortunately sold. I also glazed a few more Corporal Punishment mugs. I actually have several of these already bisque fired but because i've been working on other stuff they have fallen by the wayside. (Both white ones are supposed to be crackle glazes but they have not crackled at all. I need to speak to my supplier and find out why that hasn't happened). And finally a few more of my new design, Staff Sergeant Nuoai. I try to make all my mugs 1/1's now and although the first two have the same glaze colours, the difference in the carving details is enough for me to seperate them. Thankfully i have sold both of these also. This particular one i think i'm keeping for myself. I'm extremely happy with this glaze. That's it for the moment although there's a good chance there will be another update soon as i have a bunch of stuff that is already bisque fired and i need to get a few pieces ready so i have to get motivated to glaze. Cheers |
|
D
danlovestikis
Posted
posted
on
Wed, Sep 24, 2014 8:39 AM
Everything you make always looks perfect. That last glaze is sure a fun one. Sorry your mold got ruined. If it's only chuncks breaking off you can glue them back on with wood glue. That works amazingly well. Wendy |
|
H
hang10tiki
Posted
posted
on
Wed, Sep 24, 2014 9:03 AM
Wow Worst sound ever, slurp of an empty tiki mug through my straw!!! [ Edited by: hang10tiki 2014-09-24 09:04 ] |
|
M

MadDogMike
Posted
posted
on
Wed, Sep 24, 2014 12:31 PM
Swizz, I had tried a crackle glaze that didn't crackle so well. I started pulling them from the kiln when they were still hot (400F?) and allowing them to cool fast. You can try one in the oven and see how that works. When you do get cracks, rub India ink on them and wipe if off to accentuate the crackle effect. |
|
D
danlovestikis
Posted
posted
on
Wed, Sep 24, 2014 12:47 PM
Hey MadDogMike I'll try that too. Thank you, Wendy |
|
M
MadDogMike
Posted
posted
on
Thu, Sep 25, 2014 9:34 AM
Careful, if they are too hot when you pull them out, you stand a chance of cracking the ceramic too |
|
S
swizzle
Posted
posted
on
Sat, Oct 18, 2014 7:15 PM
Thank you Wendy. I'm not sure about perfect but some pieces definitely turn out better than others. As for the mold, i did trying gluing it back together but it just broke again. Thanks hang10tiki. I really like that glaze myself, as did someone else. Another one similar coming up. MDM, the glaze did crackle, it's just that i couldn't see it until i rubbed ink over it. The problem was, being a white glaze over white clay the crackles weren't visible at all. I was expecting them to stand out at least a little bit like other glazes show crazing. But after speaking to my supplier i came home and rubbed ink over them and everything was fine. I don't have pics of those mugs finished but i do have something else to show. ============================================================================================================ So as i mentioned in my previous post we are having a Mai Tai crawl coming up so i've been busy getting pieces done for that and did another firing last weekend.
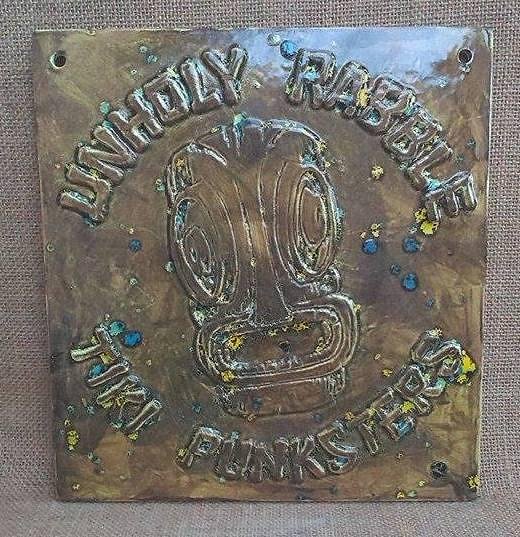
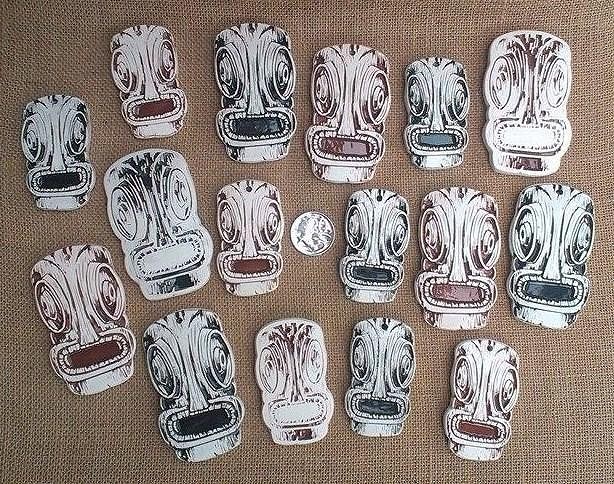
I've also worked on some Unholy Rabble pendants. Two sizes, two colours and two styles. One being a reverse, or negative, of the image.
Here's a few Corporal Punishment mugs. After glazing the inside of one of the blue ones i had left it out on my water heater to dry and when i came back out the wind must have blown it off and it cracked. I threw it in the bin but then decided to see if the glaze would cover the crack and it worked. This is the one that cracked but was saved.
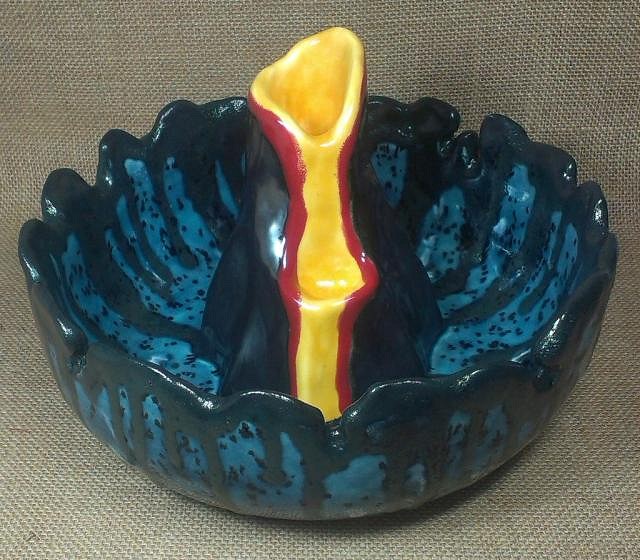
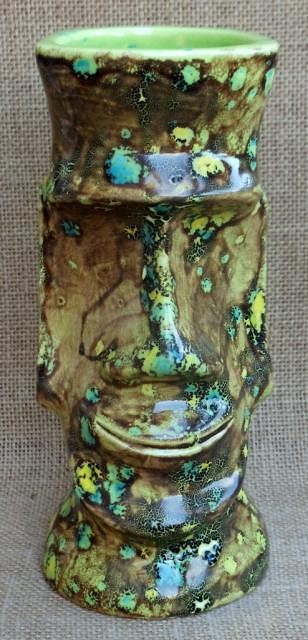
I made another volcano bowl similar to the one from the other week that unfortunately cracked. Although i used the wrong colour on the outside of this one i'm still very happy with how this one came out.
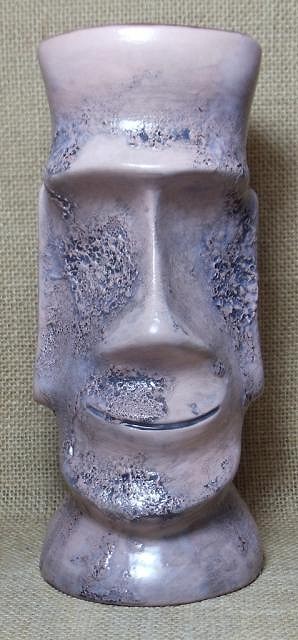
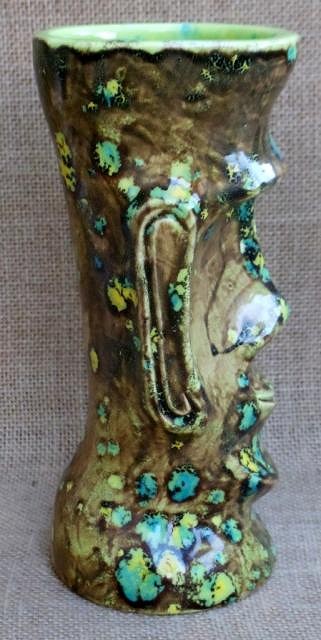
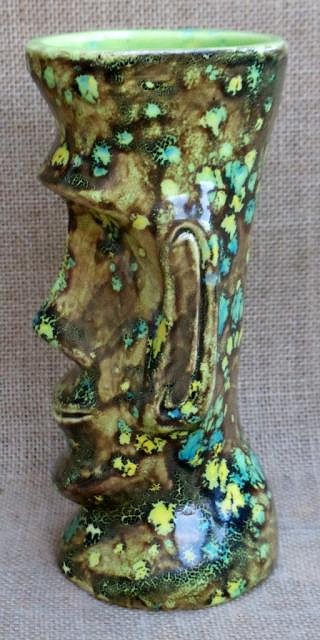
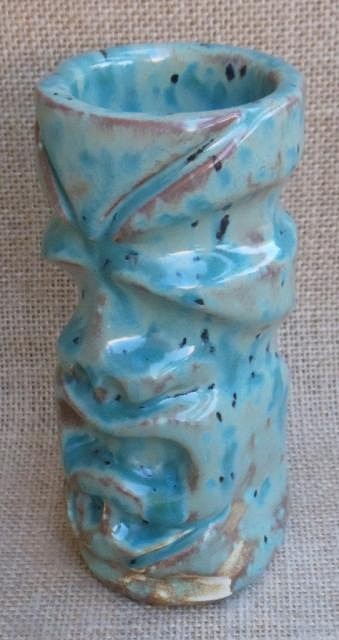
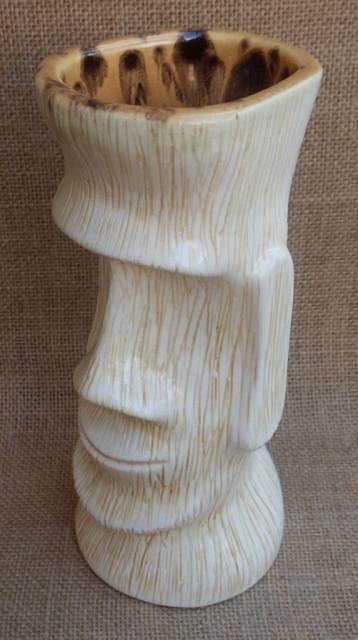
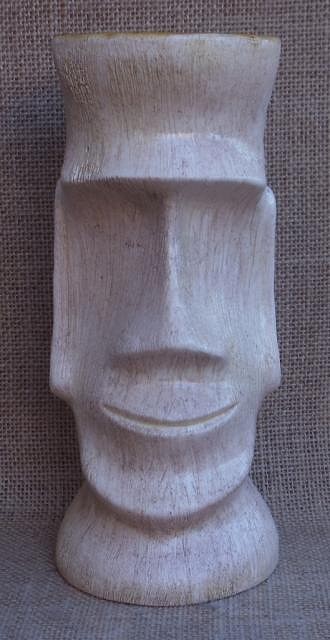
And finally a few more Staff Sergeant Nuoai's. The first two are kind of similar but still both 1/1's. There's a different texture on the outside of each and i used the same colour crystal glaze on the outside as is on the inside, but without any crystals. I just used the base colour to fill in the texture. The fat lava one sold straight away after i posted it to my SWIZ facebook page (https://www.facebook.com/swizmugsnstuff)which i was very happy about. I had a few issues with holes appearing in the greenware which i had to patch up with magic mend. Although it worked a little bit it still wasn't perfect so i used the fat lava glaze to hide the flaws and it turned out even better than i expected. As for the green/yellow one, i have a follower on Instagram who really liked the one from my previous post and i told her i would make her one the same but only if i did a different colour glaze on the inside to keep them both 1/1's. Although having said that, crystal glazes will always turn out looking different due to crystal size and placement on the piece, so no matter what, it was going to look different regardless, but the different colour used on the inside assured that. I have to say i think it looks even better than the first one.
And finally, for those that might not have seen my comment in the Tiki Marketplace thread about Munktiki knock offs, i too have been knocked off. At least i think i have.
That's it for now. I have more pendants to glaze which didn't fit in the kiln so i'll have another firing due to do over the next few weeks before the crawl. Cheers |
|
WC

Will carve
Posted
posted
on
Sun, Oct 19, 2014 5:47 AM
You sure got a lot going on there. |
|
H
hang10tiki
Posted
posted
on
Sun, Oct 19, 2014 7:45 AM
Super swiz on fire |
|
H

hiltiki
Posted
posted
on
Sun, Oct 19, 2014 8:15 AM
Your mugs are very nicely done. Your glazing techniques are amazing. I love the black and red volcano looking mug. |
|
TBBMT

tiki beat by marcus thorn
Posted
posted
on
Fri, Nov 28, 2014 3:23 PM
keep up the good work mate |
|
L
LoriLovesTiki
Posted
posted
on
Sun, Nov 30, 2014 5:14 AM
Hey Swizz, Check your PM's. I need something of yours! Mahalo! |
|
S
swizzle
Posted
posted
on
Sun, Oct 11, 2015 6:09 AM
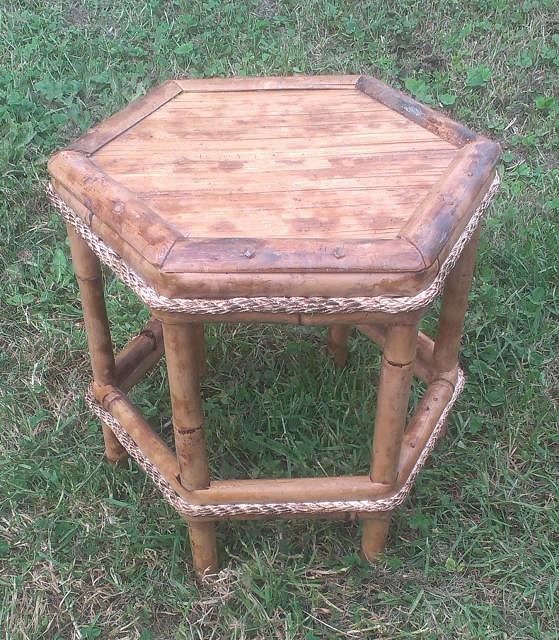
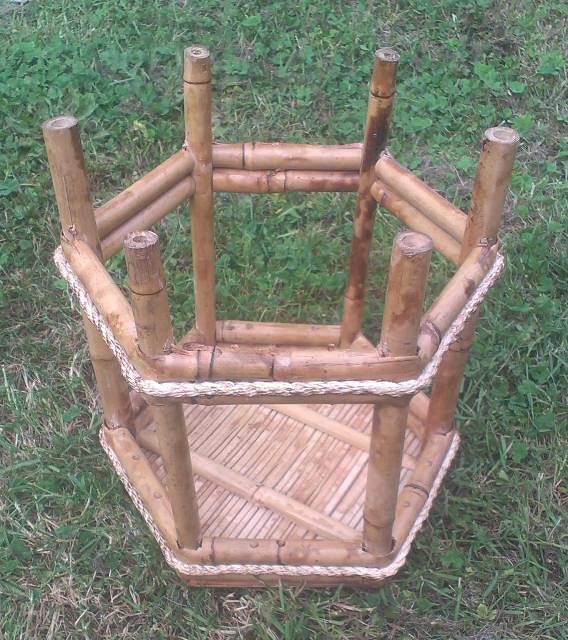
WOW! It's been nearly a year since i've posted here in my thread. A lot has happened since then so let's get started. First things first, thank you Will carve, hang10tiki, hiltiki and Marcus for your compliments. LoriLovesTiki, you now have something of mine. So, back in March i had to move out of the place i was living in and unfortunately i am not set up to do any ceramics at the moment. I'm hoping i'll be able to change that soon but at the moment all i'm able to do art wise is some woodworking which you'll see in a moment. All of these ceramics pictured are pieces i had finished just before i moved house but for whatever reason i just never posted them. There's a good chance there might be some missing but i think this is all of them. I'll give a brief comment on any that i think you might find of interest. So without further ado, here we go. Staff Sergeant Nuoai's. Self-portrait. (Personal collection). I made three mugs with these skulls. A good friend requested one with a moko.
A gift for a friend.
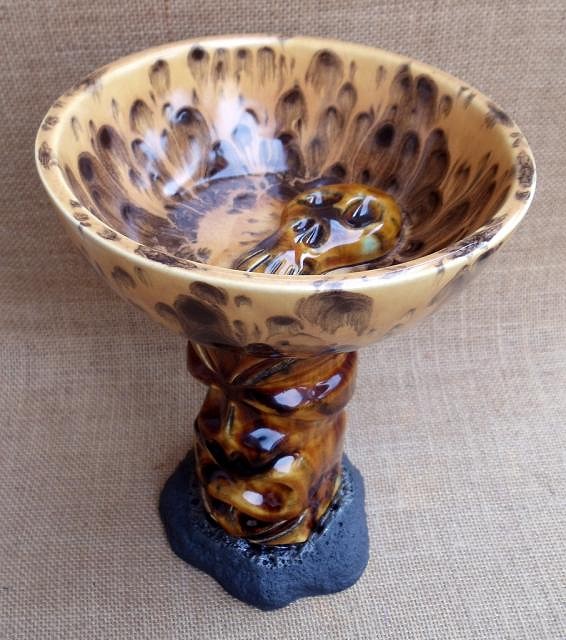
This was supposed to be for a trade but the glaze just wouldn't work as my trade partner wanted it (although i liked it like this) so i ended up doing something completely different which he was really happy with. I tried another different glaze over the top of this mug and it came out great but unfortunately cracked. I don't have any pictures of it at the moment though. This is (one of) the mugs i ended up trading for and the piece i received in return. An amazing stone pendant carving by the extremely talented Paipo. Although its been a while since he posted here, if you search for his name you'll find his thread. Here's a Brigadier VF1. A few Corporal Punishment's.
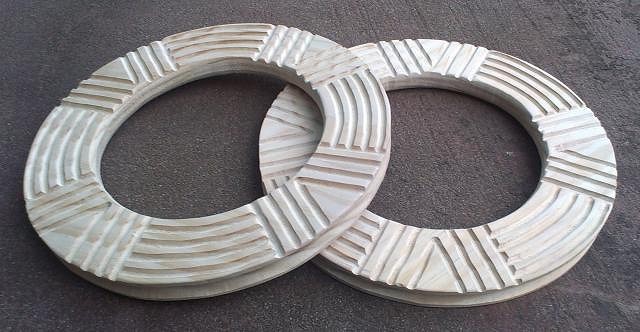
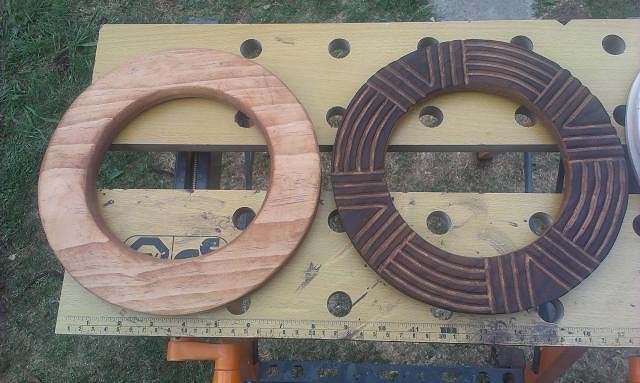
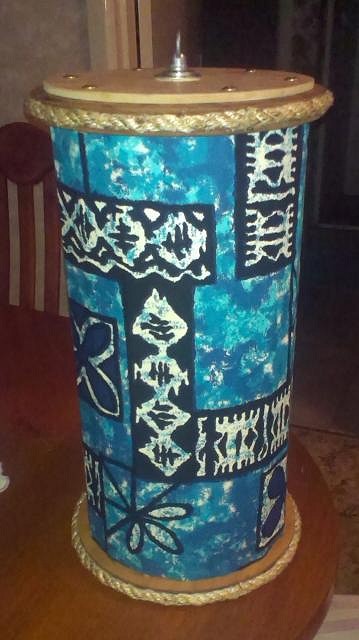
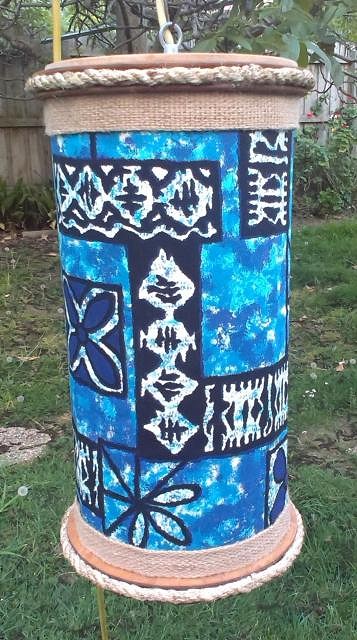
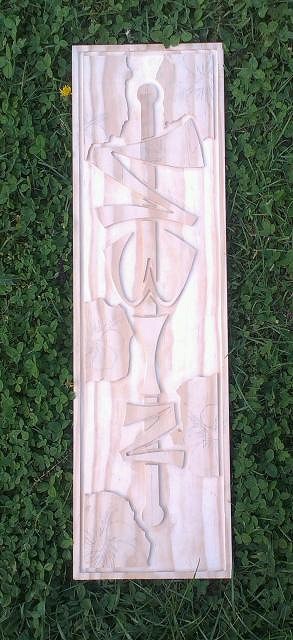
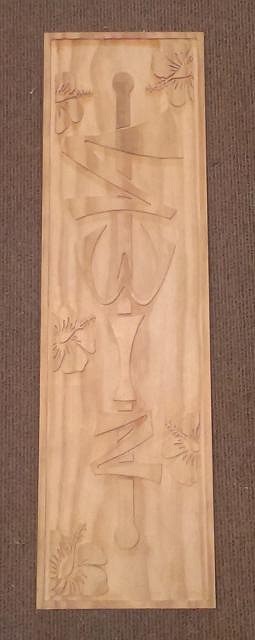
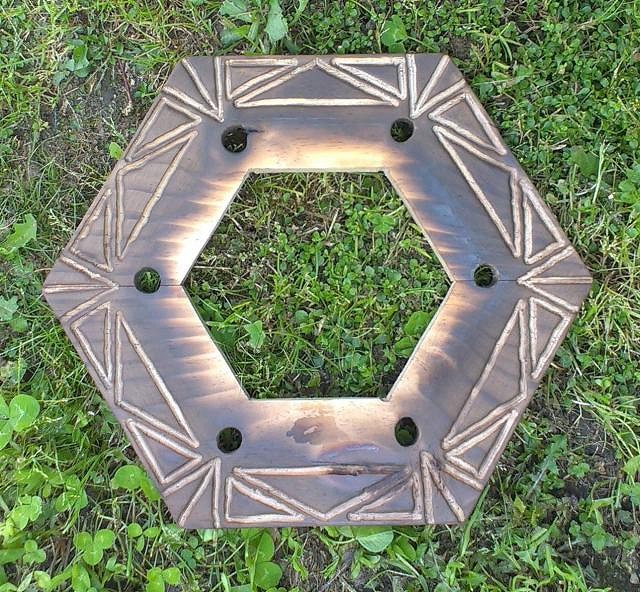
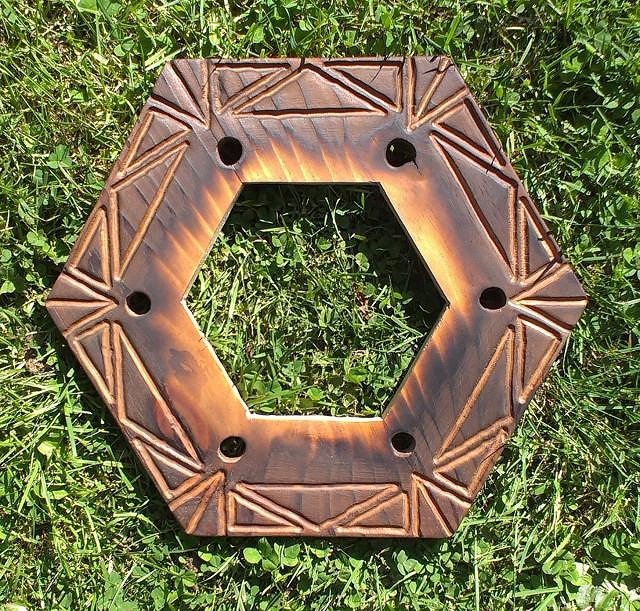
Here's a goblet version. Because i used a fat lava glaze on the base i put it on some stilts and as i wasn't aware that it wasn't level, when it came out of the kiln the skull inside the bowl didn't fuse centered. Instead of re-firing it a friend was happy to take it for a discount. Here's a few Lance Corporal Stoney bowls. This one belongs to VampiressRN (I think). LoriLovesTiki's bowl. So that's it for ceramics at the moment. Like i mentioned earlier, there might be a few pieces i've missed, including some pendants, but now to my current projects. I've always enjoyed working with wood and have wanted to make some lamps/lights for a while and as i have no room to do ceramics it's given me the perfect opportunity to get started on some as i can easily set up a workhorse in the back yard and only need a few power tools at hand. I've completed two so far, which are quite basic, but i'm very happy with the results. I've been working on several at the same time and the next few, once completed, will be quite different. I bought a router (which i love using) and here's one of the pieces from the first light i finished. As i just said, i've been working on several pieces at once so you'll see more router work on the lights still to come. Burnt and stained. The piece on the left is for the top. The other one in the photo above will be used in another light. This is actually a pic of the second light i finished. I didn't take a pic of the first one but it is assembled in the same way as this. Wrapped in fabric. With trim added and then wired up and finished. Lit up. And here is the second light. It's not quite as tall as the first and has some cowrie shells added to it. Lit up. And finally, something else i've started. As i said, i'm really enjoying using a router so i thought i'd use it to make a carving of my logo. The pic on the left is before i bought a small router bit so i could finish the hibiscus flowers which i did today (the pic on the right). Now it needs to be sanded and stained. So that's it for the moment. Hopefully it won't take a year until my next update. :lol: Cheers [ Edited by: swizzle 2015-10-11 18:16 ] |
|
D
danlovestikis
Posted
posted
on
Sun, Oct 11, 2015 8:24 AM
Every project that you do is so creative and professional. The lamps are just perfect. Love the step by steps. |
|
M
MadDogMike
Posted
posted
on
Sun, Oct 11, 2015 11:21 AM
All of it is cool but this glaze ROCKS! |
|
K

kingstiedye
Posted
posted
on
Sun, Oct 11, 2015 12:15 PM
great stuff, robbie! the sergeant moko & skull is my favorite. |
|
S
swizzle
Posted
posted
on
Thu, Oct 15, 2015 4:32 AM
Thank you Wendy. Creative i'll accept but professional, i'm not so sure about. I'm very clumsy and impatient and always make errors that i need to correct. Thanks MDM. That was an experiment that worked out quite well and now i know that i can replicate that effect and 'hopefully' get what i want. Cheers Bullet. It's interesting to hear that you like, what I think is, one of my most basic mugs the best. P.S. I have had over 600 views of my most current update to my thread and only three comments (plus a PM) in 4 days. And all of those people are people that i personally know and have met. There are a couple of members who only update their threads and rarely, IF EVER, comment on others, and people wonder why this forum is dead. 600 views in 4 days says it's not dead at all, BUT, to receive such little response is really discouraging. See you on Facebook. [ Edited by: swizzle 2015-10-15 04:33 ] |
|
T
tikiskip
Posted
posted
on
Thu, Oct 15, 2015 4:59 AM
"P.S. I have had over 600 views of my most current update to my thread and only three comments (plus a PM) in 4 days." That's three more comments than I get. Did not see this update myself, but then I too have stopped commenting as TC is one The light is cool, as are the mugs. On the light you can get away with way smaller dowels and even the wood struts on the The Asians build huge tall scaffolding with small bamboo, it is the combined structure and Heck I use all thread for struts this way there is no blocking of the light on the Your router work is very good! Keep on posting. |
|
C
cy
Posted
posted
on
Thu, Oct 15, 2015 8:37 AM
I feel your frustration Swiz, but I figure if people would rather view and not participate in the comments that is OK. I always enjoy seeing your top notch work, keep posting! [ Edited by: cy 2015-10-15 08:38 ] |
|
L
LoriLovesTiki
Posted
posted
on
Thu, Oct 15, 2015 8:27 PM
Cool lamp Swizz! I still love my bowl and it's in my kitchen where I look at it every day and SMILE! I still want a personalized Bob-o-nut though.....:) |
|
S
swizzle
Posted
posted
on
Wed, Oct 21, 2015 6:32 PM
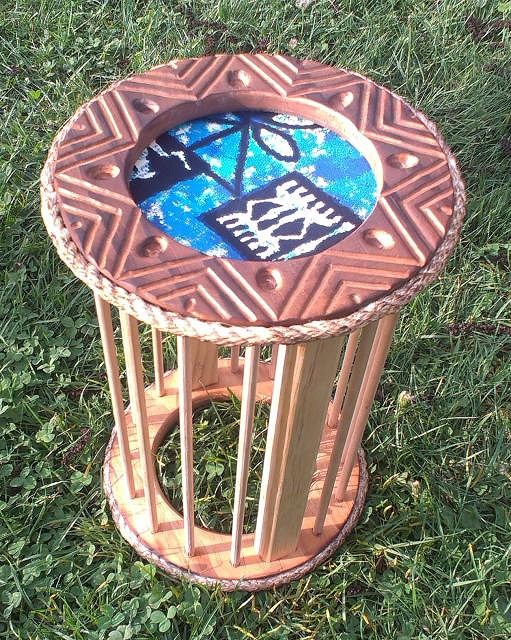
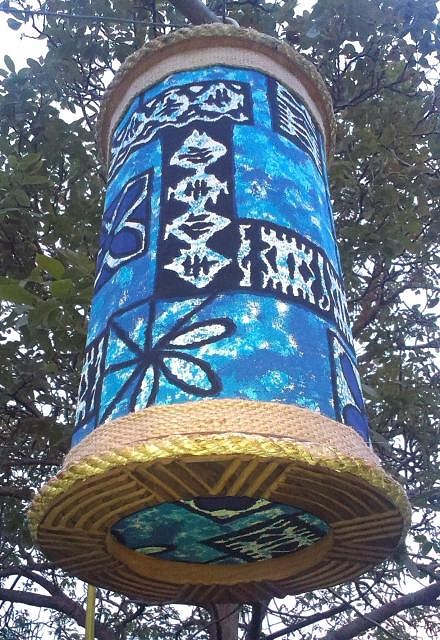
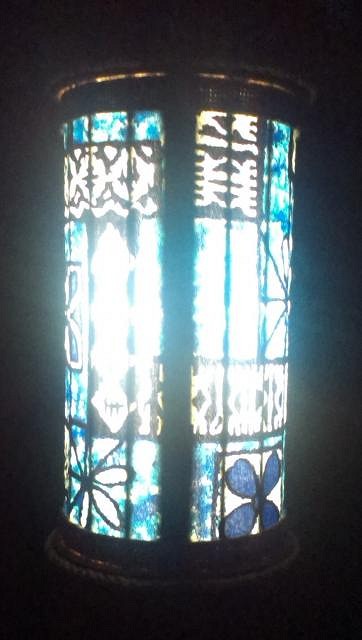
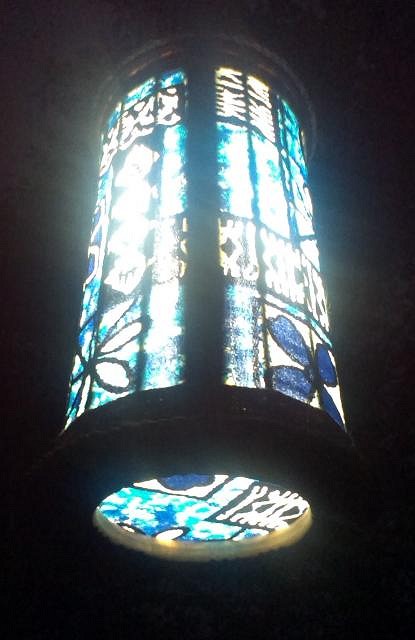
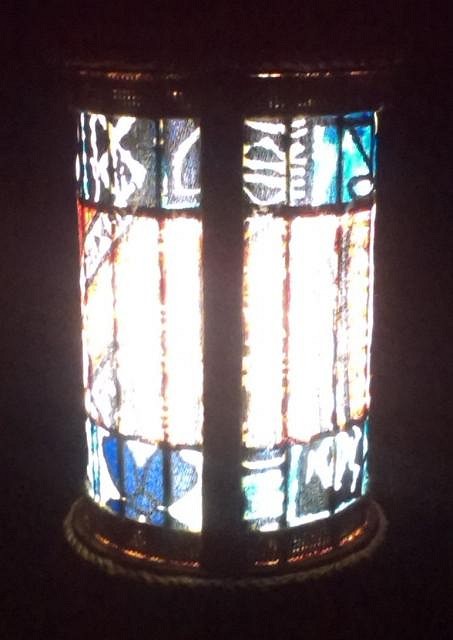
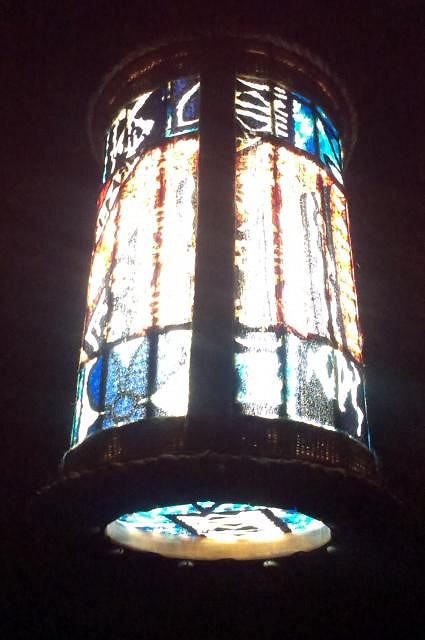
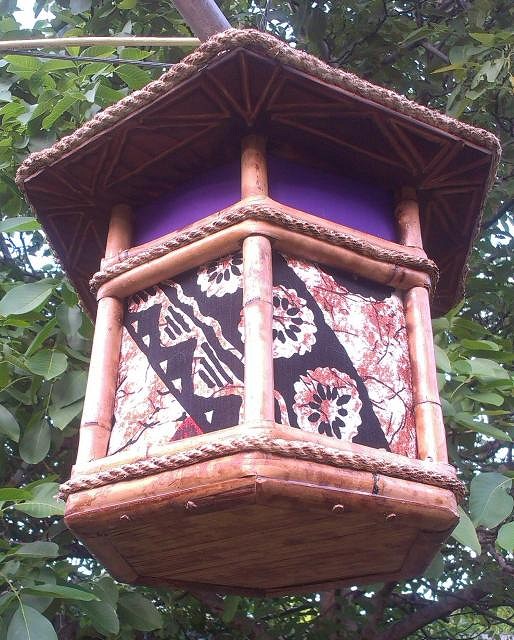
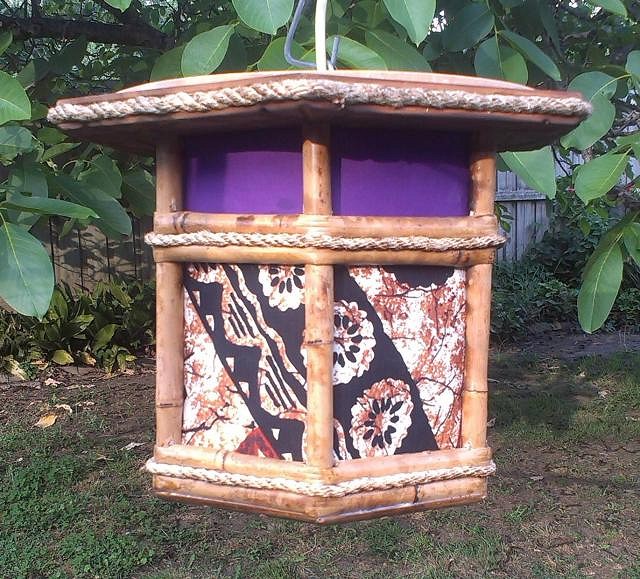
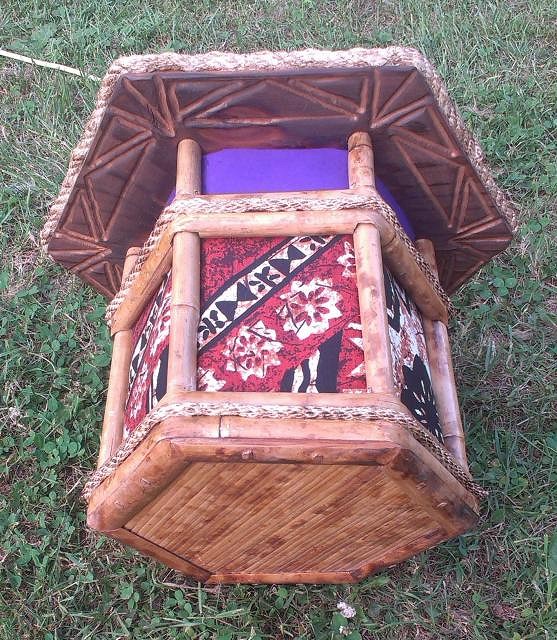
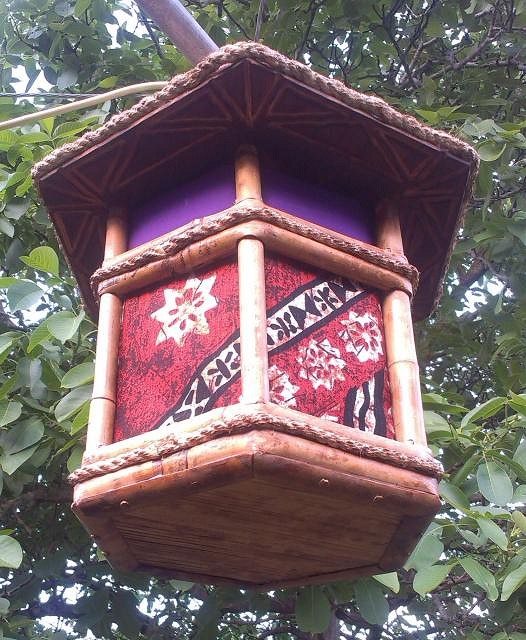
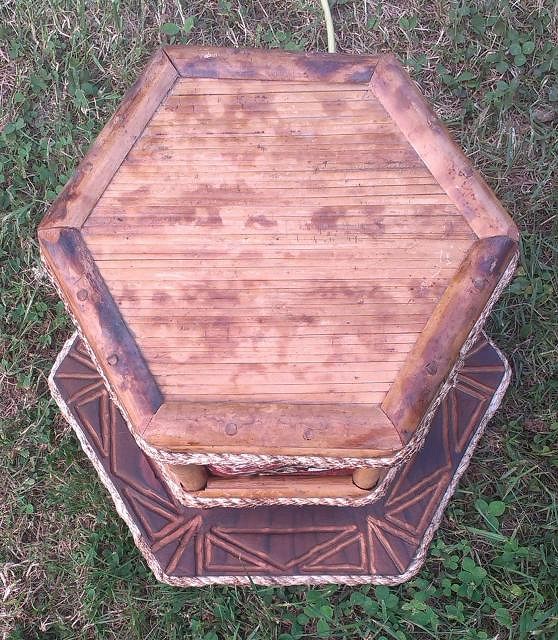
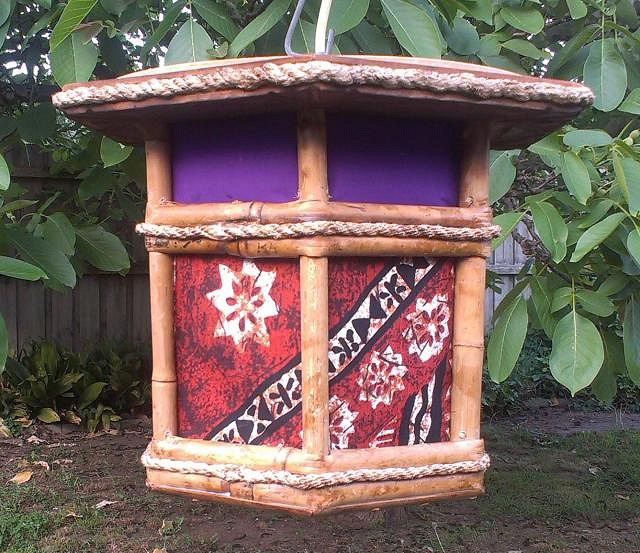
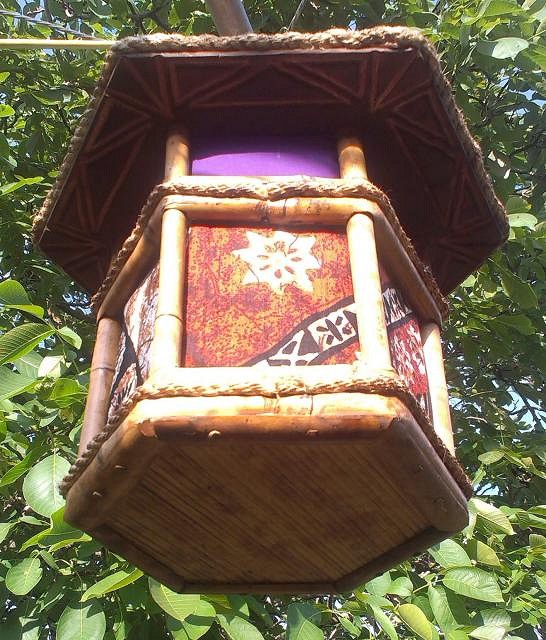
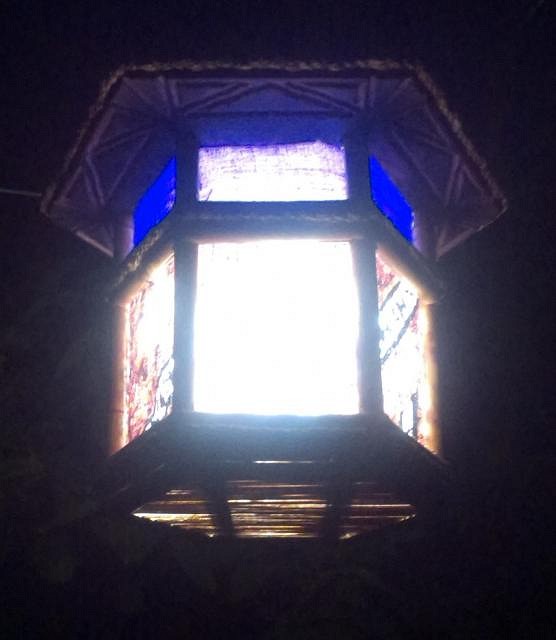
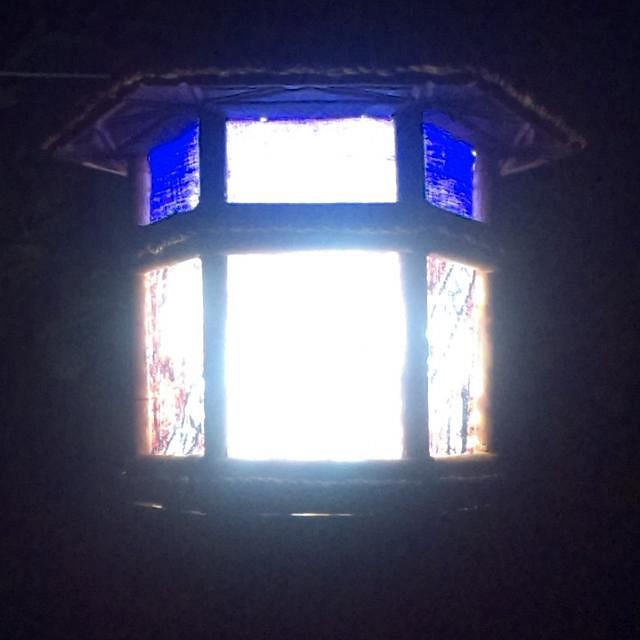
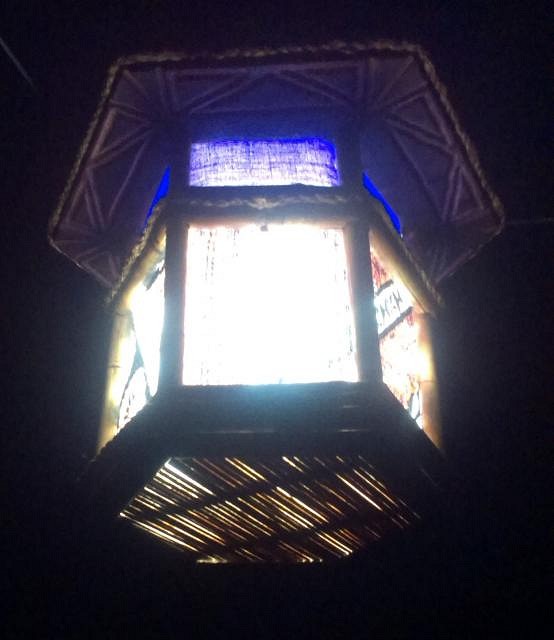
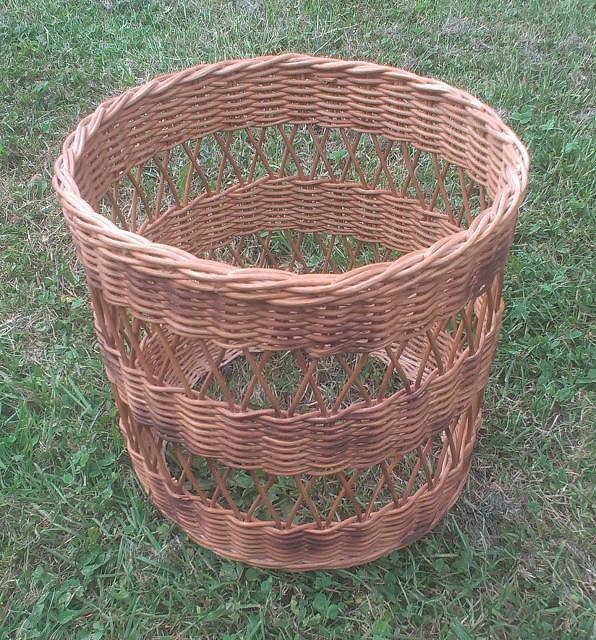
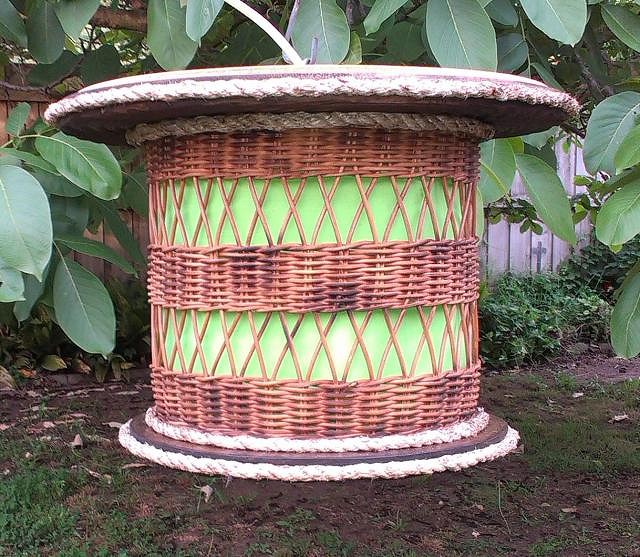
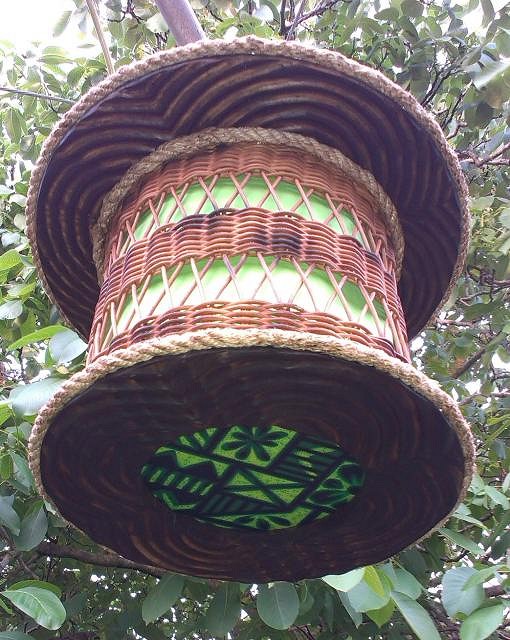
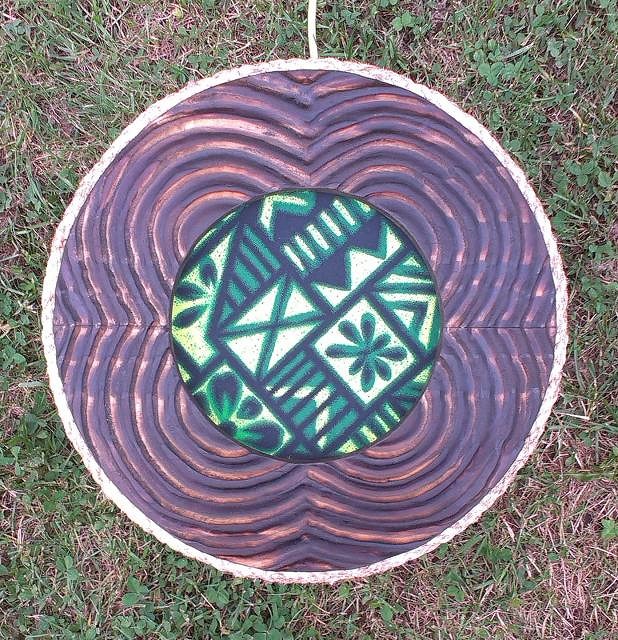
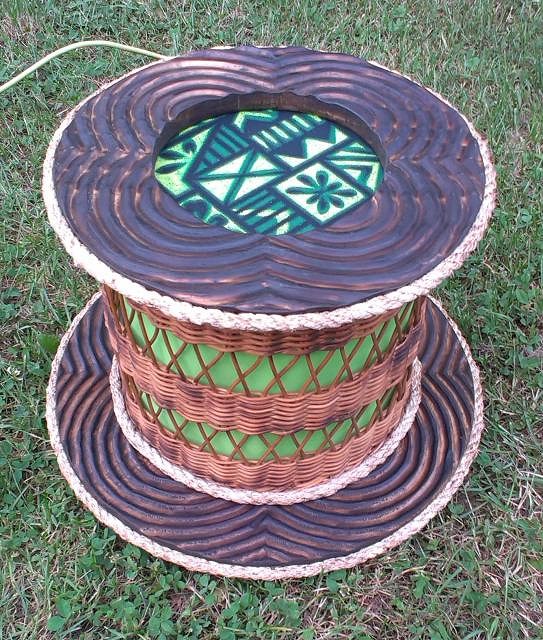
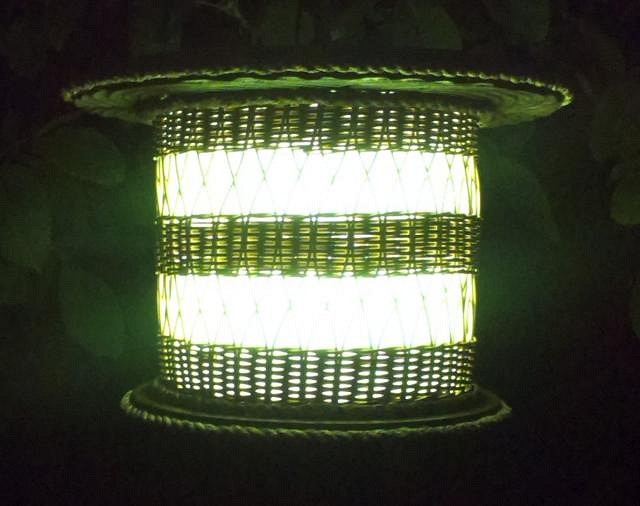
Thanks for the compliments tikiskip. You're right, i could have used smaller dowels but i just made those lights up as i went along with no real planning. The thick struts are off-cuts i had so that's why i used them and the reason for all the dowel was to create a circular shape that i could wrap the fabric around. I would have prefered for them to not show when the light is on but it doesn't bother me. Also, the second light is smaller because i worked out it was cheaper to cut the lengths of dowel (available to me) in to equal sized pieces and then just cut the strut down a little bit to match. Thanks to you too cy. Seeing all those views is great but a little feedback would be nice. The number of views doesn't really let you know how much, if at all, your work is appreciated. I will keep posting regardless though. Thank you Lorilovestiki. If i get back into ceramics we'll talk about a Bob'O'Nut. ============================================================================================================ I've finished my third and fourth lights. They are both quite different to the first two although they do have the routed pine features which is something i think all my lights will have, as i enjoy doing it and it's a base that i can build from/onto. This first one i'll be keeping for myself. Here's what i started with. I found this 'thing' (i'm thinking it is probably a stand for pot plants) at a thriftsore and though that i would be able to utilise it somehow and make a light out of it. (I didn't take any pics before i added the rope to it). The routed base/top, burnt on the left and then with stain on the right. And here it is from various angles completed. There are one or two little holes where light is escaping that i need to patch up, but otherwise it's finished. And here it is lit up. It's hard to get a good photo of it like this. The camera makes it look white in the photo but you can actually see the tapa pattern looking at it with the naked eye. And this is the fourth light i've completed. When i decided to start making some lights i bought a bunch of cane/wicker baskets from thrifstores which i knew i could modify. Here is the first of those. The base has been cut out and i also forgot to take pics of the routed discs before i assembled it. Assembled. And lit up. I have another one with a basket half done but i came up with something different so that's been put on hold whilst i work on this new one. Should hopefully be ready in about a week. Cheers |
|
B

bamalamalu
Posted
posted
on
Wed, Oct 21, 2015 7:12 PM
Great idea reusing found parts! I really like the one made from the stand / little table. |
|
H
hang10tiki
Posted
posted
on
Wed, Oct 21, 2015 7:12 PM
Dang Swiz |
|
T
tikiskip
Posted
posted
on
Thu, Oct 22, 2015 5:30 AM
Lights look great! Man I never find baskets that will work for lights anymore. Good job. |
|
H
hiltiki
Posted
posted
on
Thu, Oct 22, 2015 9:30 AM
Swizzle, your lamps are made so precise and they are well executed, I also like your design, great job. And I do appreciate all your beautiful artwork. :) |
|
EJ
El Jefe
Posted
posted
on
Fri, Oct 23, 2015 4:33 PM
Nice work my man! |
|
S
swizzle
Posted
posted
on
Mon, Oct 26, 2015 6:13 PM
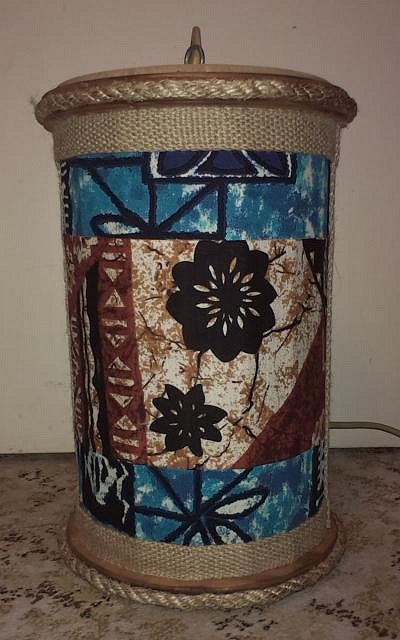
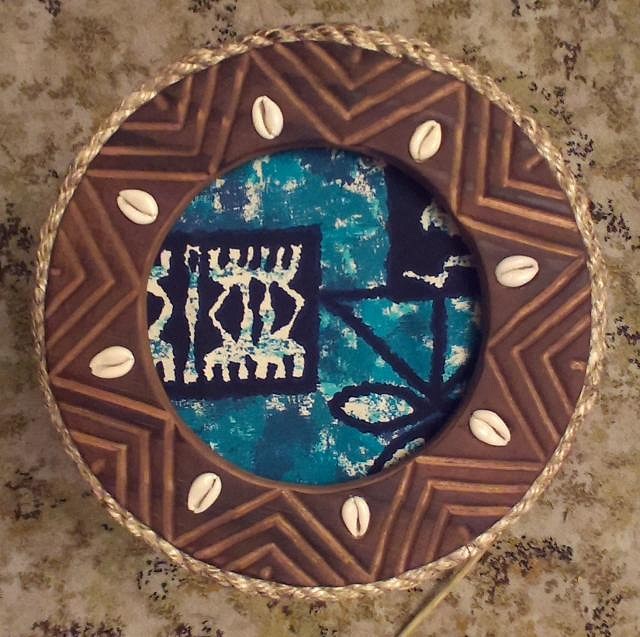
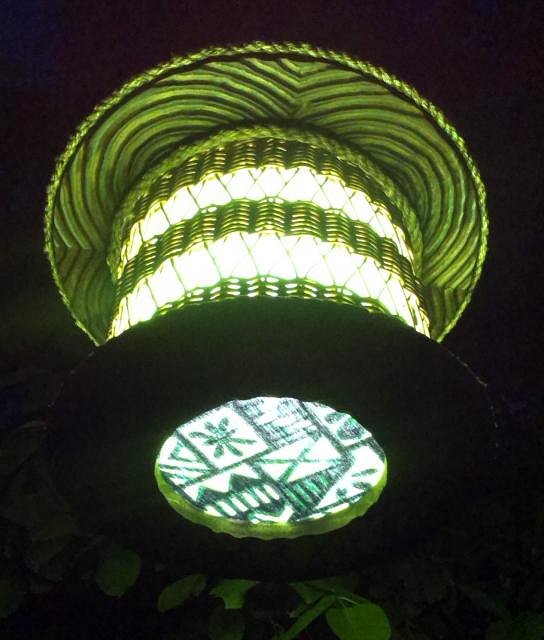
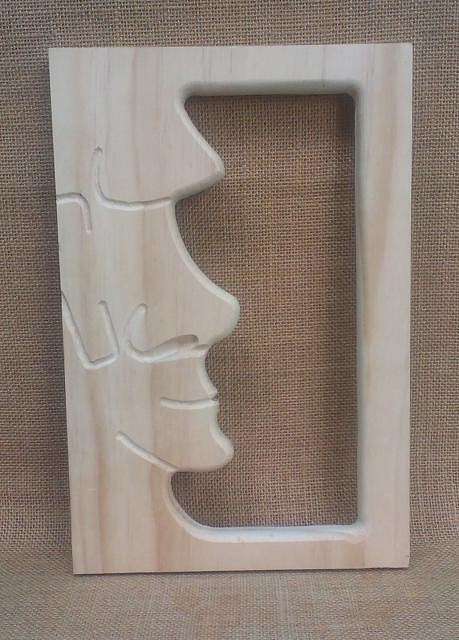
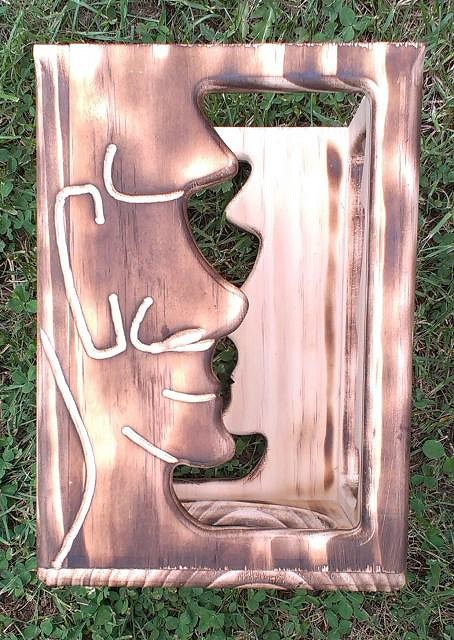
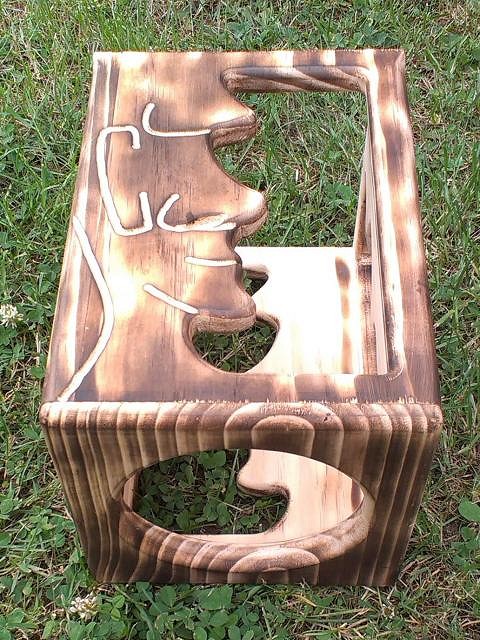
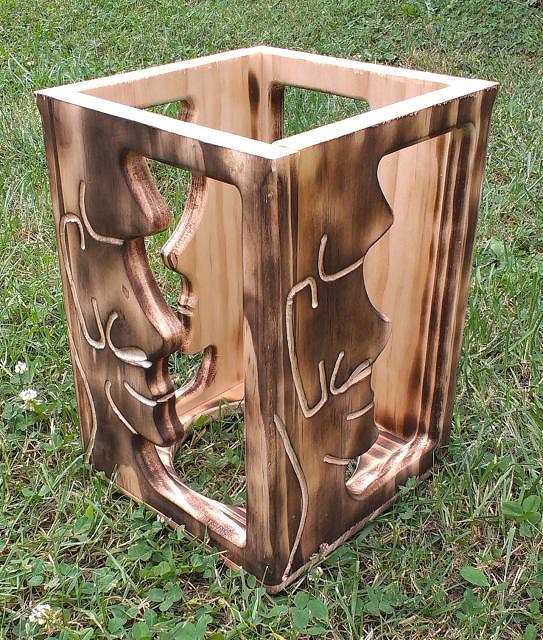
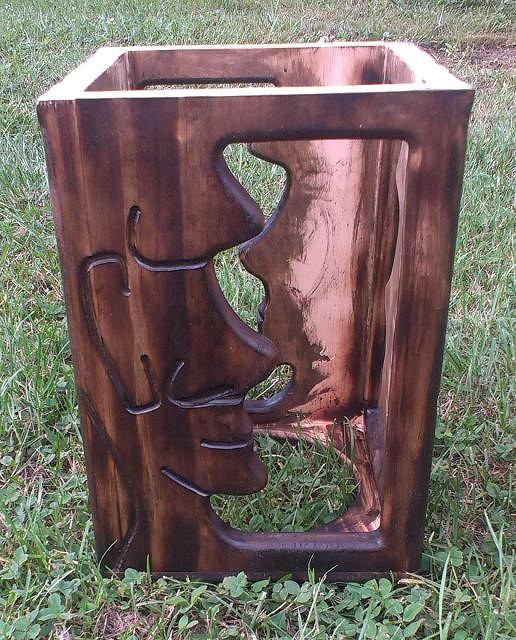
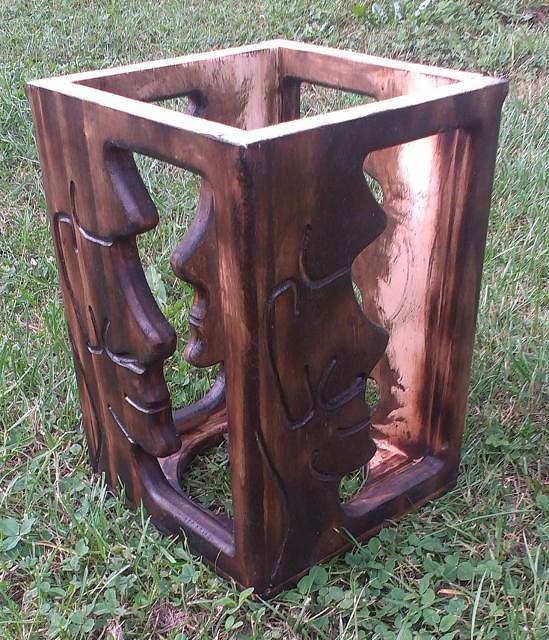
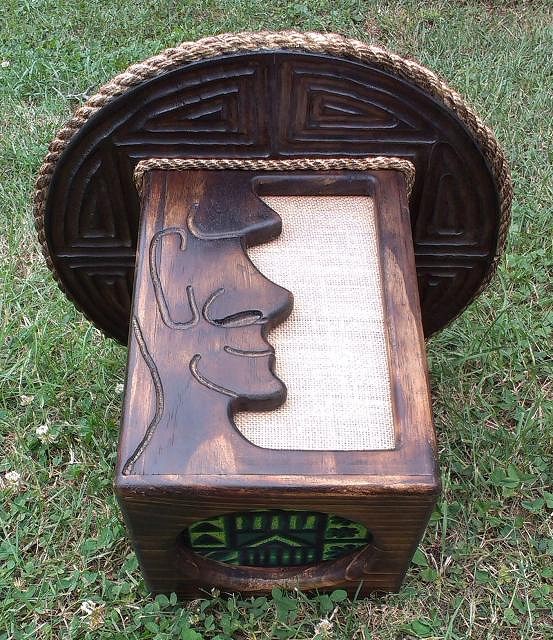
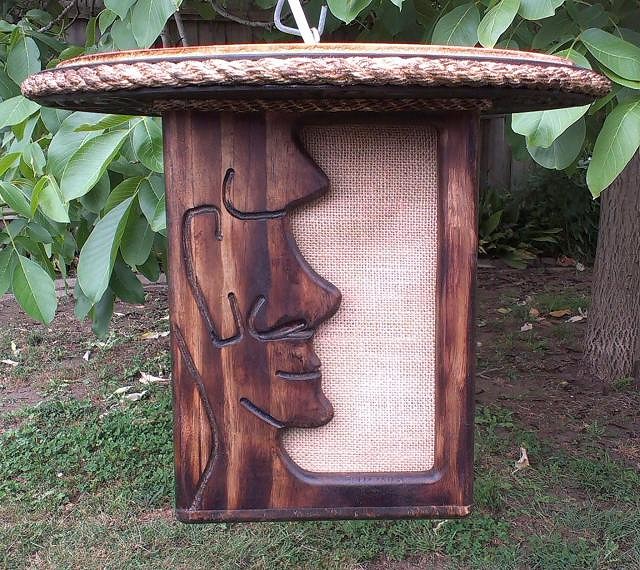
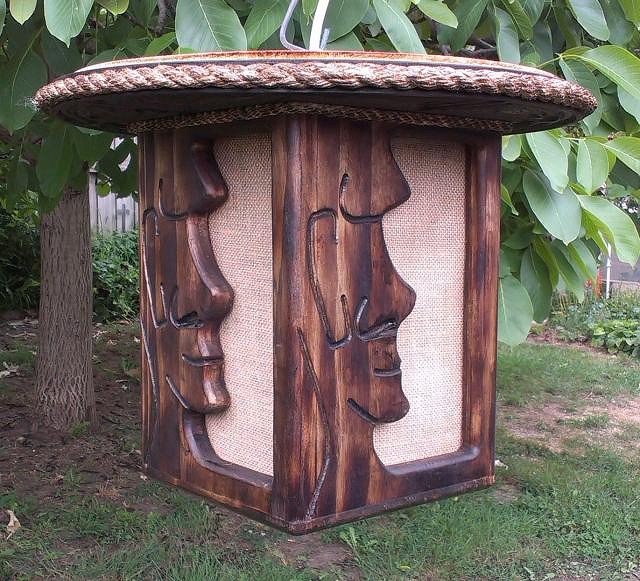
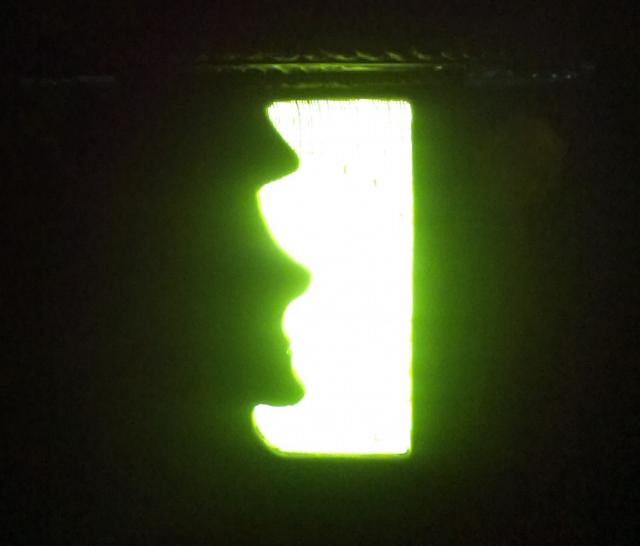
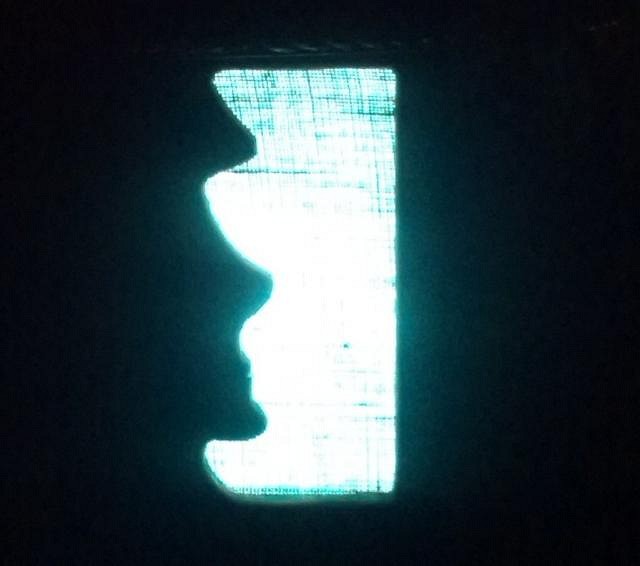
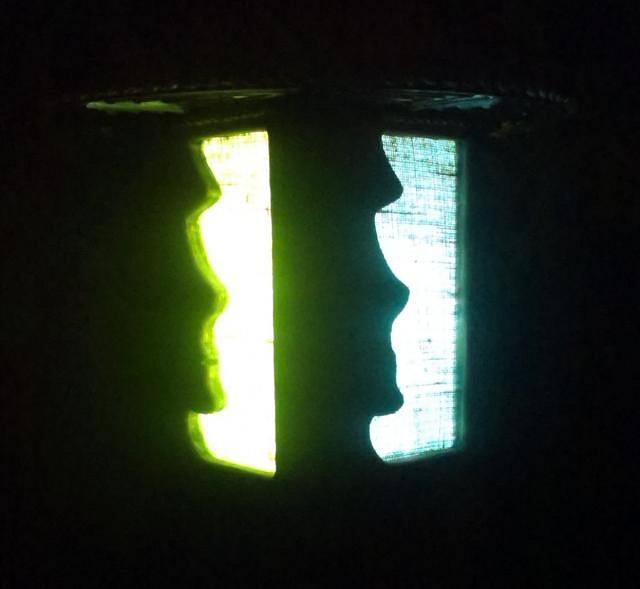
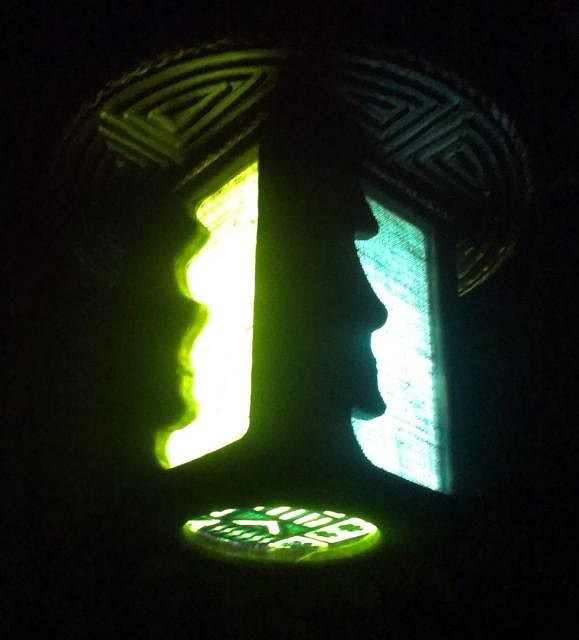
Thanks bamalamalu. Not every one i make will have reused parts but i like the idea of finding something that gives me a base to start with. Cheers hang10tiki. Thanks tikiskip. I'm always looking for baskets i can use when i'm in thrifstores but it's not that often i'll find anything good. Although, having said that, i do have a bunch of bits and pieces which i've collected over the last year or so when i decided i wanted to start making lights. hiltiki, thank you for your compliments. I try to be as precise as i can but if you saw my work up close you'd see that that is not always the case. El Jefe, cheers buddy. ================================================================================================================= So i mentioned in my previous post that i had put one of my other lights on hold while i worked on a new idea i had and here it is. I'm pretty happy with how this turned out and plan on making more like it but also using different images and some table top versions. After making this one i remade the template and changed the chin shape and nose a little bit as i wasn't 100% with it. First a few progress shots. Here's the first panel cut out. Assembled and burnt. Stained. And finished. When the light is not on you can only see the hessian in the panels and then when it is the coloured fabric i put behind it shows. There's a light green and dark green on opposite sides to one another which you can see in the pics but unfortunately they look a lot whiter than it really is because of the photo. I've started work on a table top version which i'm going out to continue working on now. Still deciding on what fabric i'll be using for it though. I'll post pics when it's done. Cheers |
|
D
danlovestikis
Posted
posted
on
Mon, Oct 26, 2015 8:11 PM
You are good at whatever you choose to do. Fast learner. The tapa light is really great. Wendy |
|
T
tikiskip
Posted
posted
on
Tue, Oct 27, 2015 4:16 AM
"Thanks bamalamalu. Not every one i make will have reused parts but i like the idea of finding something that gives me a base to start with." Man found objects is what it's all about! Even the fish float was not made to be a light, It was for fishing. If you can find something old is best as it's aged, also you get a three to four hour jump Cheaper, faster, aged = Win, Win, Win. Good one Swizz man! |