Tiki Central / Home Tiki Bars
Aloha Theater and Tiki Bar!
|
PP

Pele Paul
Posted
posted
on
Wed, Jun 5, 2013 9:47 AM
the next lamp day, how bout teaching the next "How to do molding"day?? wow awesome job!! |
|
L

Longboard
Posted
posted
on
Wed, Jun 5, 2013 11:31 AM
How did you hang the Tapa? Glue, staples? -Longboard |
|
M

MaukaHale
Posted
posted
on
Wed, Jun 5, 2013 5:52 PM
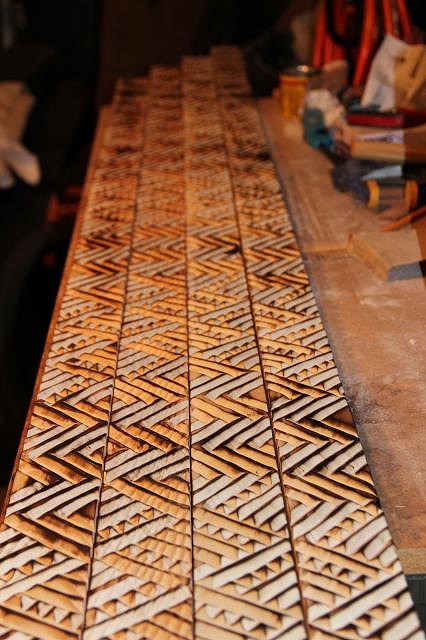
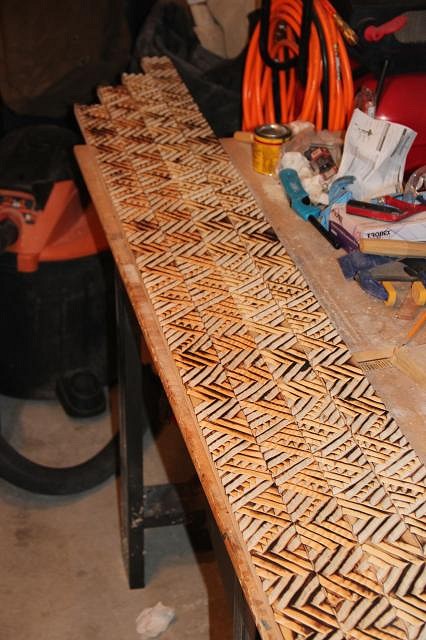
Hi Pele Paul, Thank you for the complement but it was Monkeyman that got me started. It was through his instruction, using his tools and seeing what the others were doing that day that gave me the confidence to do it. Also, I own some carving done by Leroy Schmaltz that has helped as well. If you haven't seen Monkeyman's "South Pacific Room" you should check it out: http://www.tikicentral.com/viewtopic.php?mode=viewtopic&topic=35684&forum=20&start=90 Here are some more progress pictures.
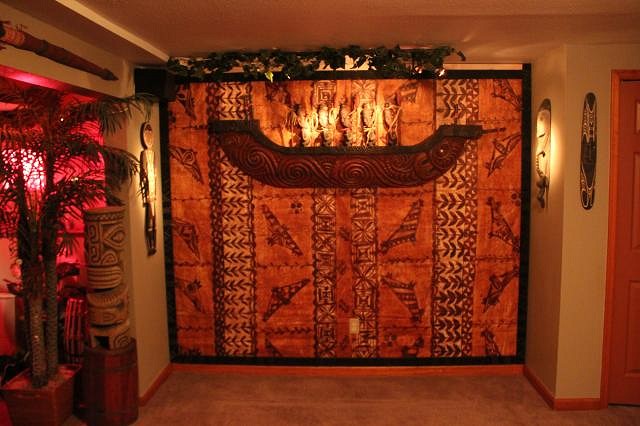
Here is a picture of the wall almost completed. I decided to not have the trim carving go to the ceiling. Some day I'm going to do some type of treatment to the ceiling and I don't want to hide it.
The unstained wood is going to have a different pattern carved into it. I like your quote - "You cant contain Tiki to one room! Once the Jeanie is out of the bottle, there's no putting it back !! slowly my tiki stuff has taken over the whole house, backyard and front yard, like a fine fungus!! Tomorrow I'll post a story about how tiki has moved to another part of my house.
[ Edited by: MaukaHale 2013-06-07 10:01 ] |
|
M
MaukaHale
Posted
posted
on
Wed, Jun 5, 2013 5:55 PM
Longboard, I did a lot of research on how I should hang tapa and after I rejected most I just nailed it to the wall with the carved trim. I also have it attached with the metal plate that holds the canoe as well. I found this to be the best way for me. If I ever move I can take it with me. |
|
ATP

Atomic Tiki Punk
Posted
posted
on
Wed, Jun 5, 2013 6:33 PM
Very nice work! looking good, But you need to loose that couch..... |
|
M
MaukaHale
Posted
posted
on
Thu, Jun 6, 2013 9:11 AM
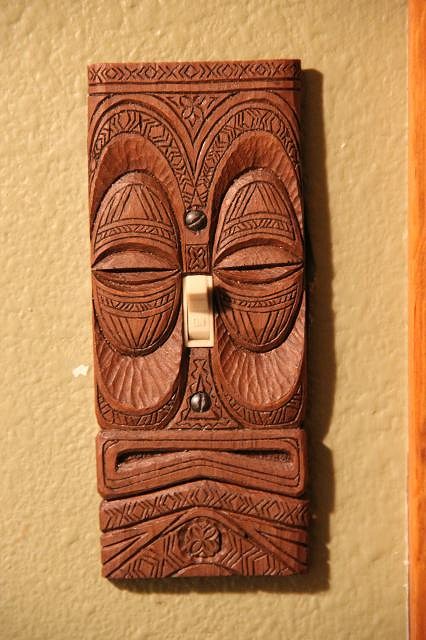
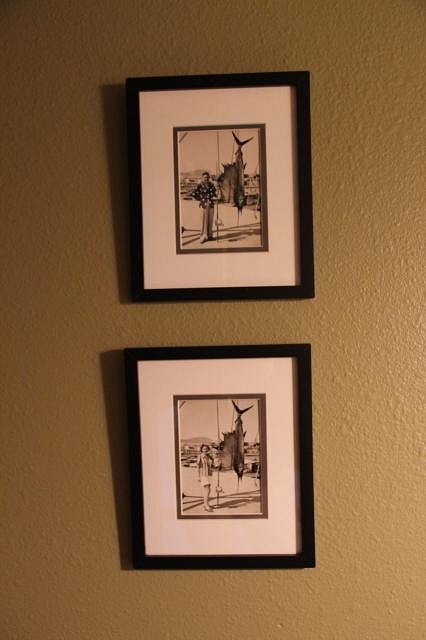
Pele Paul, Here is why your quote makes sense: - You can't contain Tiki to one room! Once the Gene is out of the bottle, there's no putting it back !! Slowly my tiki stuff has taken over the whole house, backyard and front yard, like a fine fungus!! Not to long ago I added a few tiki items to the restroom, around the corner from the Aloha Theater and Tiki Bar. A light switch, Longboard beer sign and some vintage pictures of my parents fishing in Mexico.
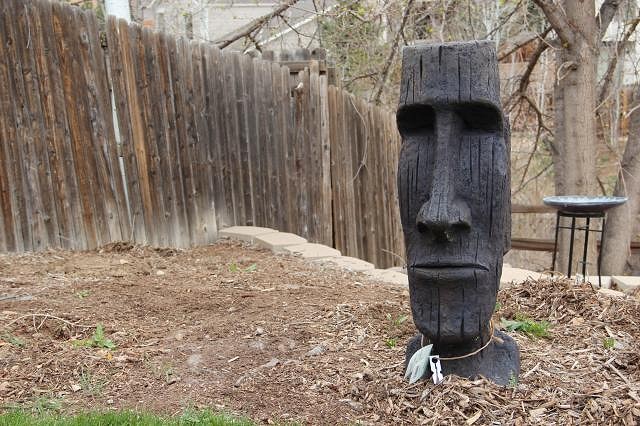
The hall takes you to the back yard. After the restroom decor, it wasn't much longer that I was in the back yard and this appeared.
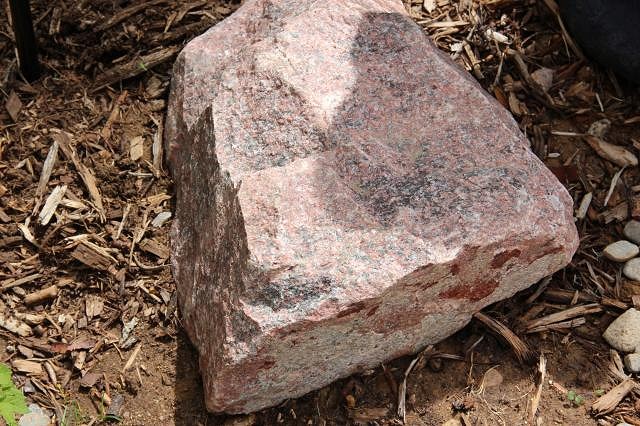
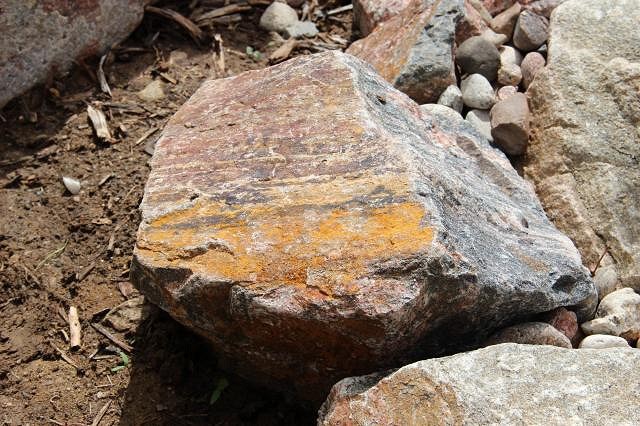
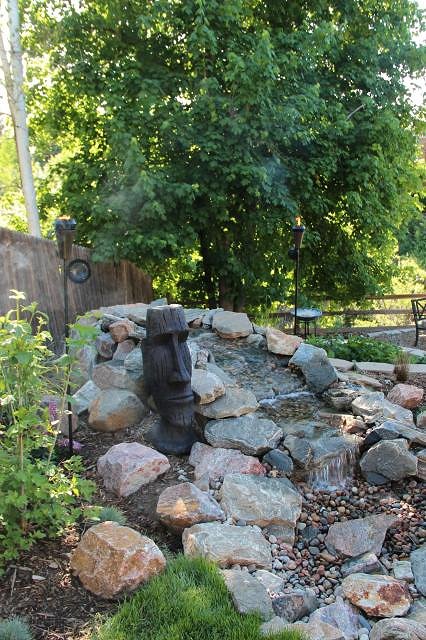
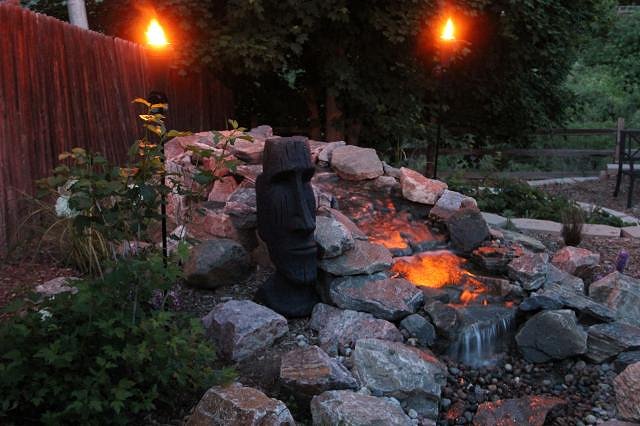
A 36" concrete Moai that weighs about 200 lbs. Before I knew what was happening a rock appeared.
... and then another!
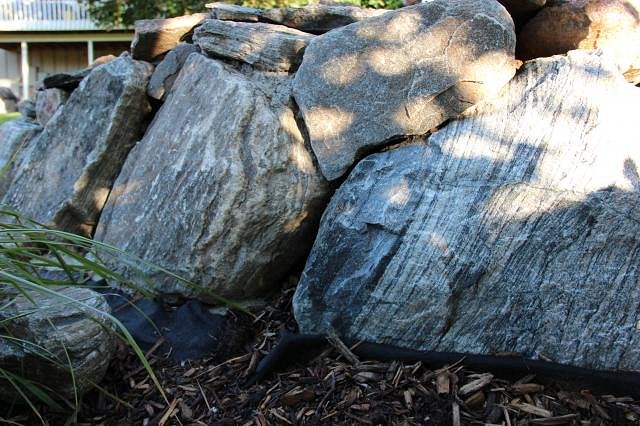
Soon the rocks were stacked creating a structure.
Then like a bog, water started to bubble up from out of the ground.
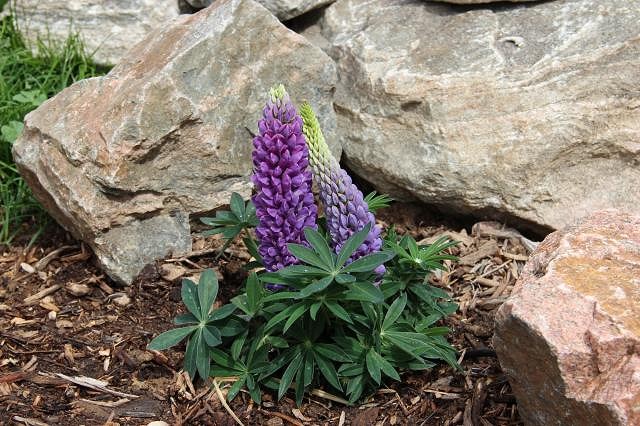
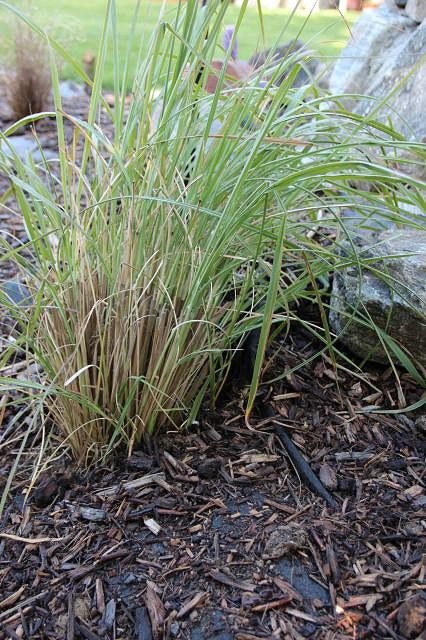
Flowers and grasses started to appear.
Tomorrow, the rest of the story.
[ Edited by: MaukaHale 2013-06-07 21:10 ] |
|
ATP
Atomic Tiki Punk
Posted
posted
on
Thu, Jun 6, 2013 12:03 PM
Spontaneous landscaping, nice & you can never have to many Moai.... |
|
THI

Thurston Howell IV
Posted
posted
on
Thu, Jun 6, 2013 3:46 PM
Wow! That tiki and rocks and flora just appearing in your backyard! Just I suspected, the tiki exerts a powerful and mysterious force over the natural world. Maybe Tiki Central should be registered as a new religion. Do you think we could claim tax exemption? If so I'm in. I'll be the Arch Bishop of Australia. |
|
L

littlegiles
Posted
posted
on
Thu, Jun 6, 2013 7:11 PM
Tease! Can't wait to see what you did outside. Like what I see so far.
|
|
M
MaukaHale
Posted
posted
on
Fri, Jun 7, 2013 8:57 PM
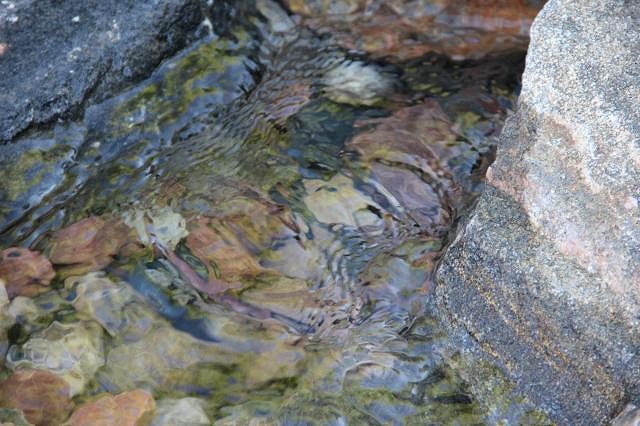
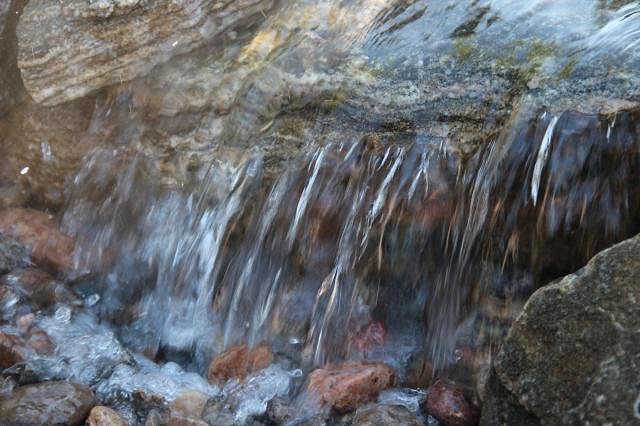
Dale, I wasn't trying to tease you. I had to stop because I had to go to work. To continue the story: As the water began to flow over the rocks, water falls were created.
A stream was created emptying into a small pool of river rocks at the bottom.
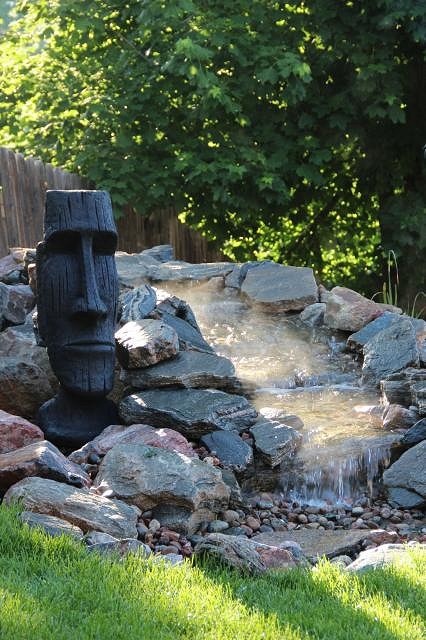
What is most interesting about this tiki landscape is that it is extremely alive at sunrise and sundown. In the morning steam comes off the surface as if it were lava, cooling as it flows into the sea.
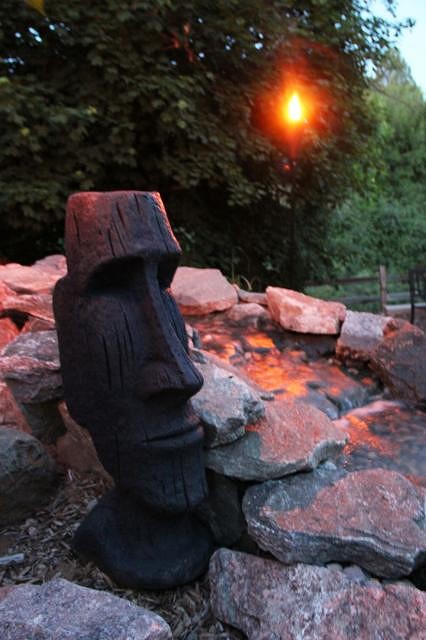
In the evening the water turns bright red as if Pele herself, is spewing hot lava from the volcano.
Sometimes I wonder what this Moai is thinking.
Maybe Robb Hamel could make a black velvet painting of him. What tiki experience will appear next? I don't know but I do know its time to head for the deck to have a Mai Tai with my friends!
[ Edited by: MaukaHale 2013-06-07 21:13 ] |
|
J

jimsflies
Posted
posted
on
Sat, Jun 8, 2013 5:42 PM
Awesome tikiscape! |
|
M
MaukaHale
Posted
posted
on
Sat, Jun 8, 2013 9:20 PM
jimsflies, thanks! |
|
L
littlegiles
Posted
posted
on
Sun, Jun 9, 2013 6:12 AM
Great job with the waterfall and landscaping. Feels very calming just looking at the pics and I'm sure the sound must be wonderful. Thanks for the pics.
|
|
V

VampiressRN
Posted
posted
on
Sun, Jun 9, 2013 9:25 AM
Wow...you are doing an awesome job...your place is really looking classy!!! |
|
M
MaukaHale
Posted
posted
on
Mon, Dec 23, 2013 11:45 PM
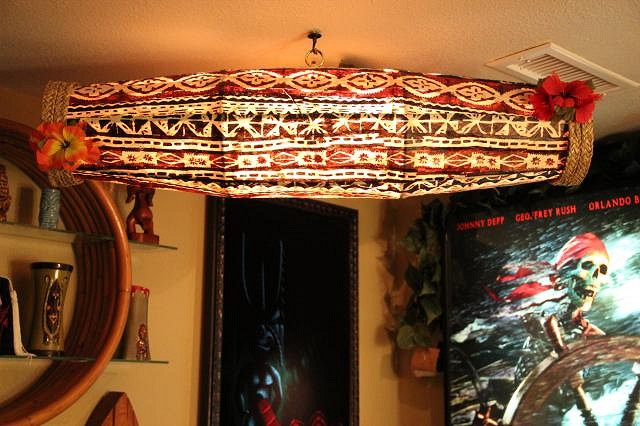
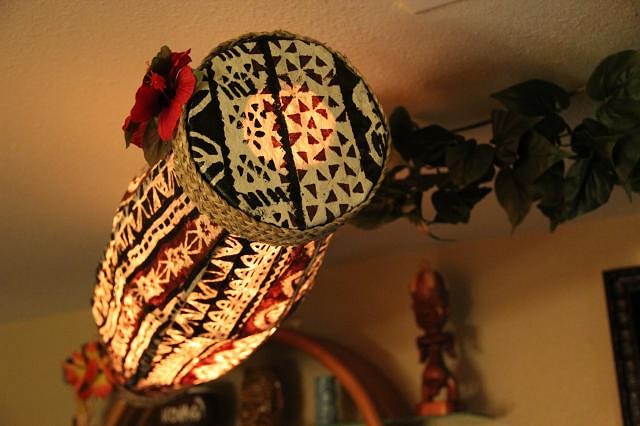
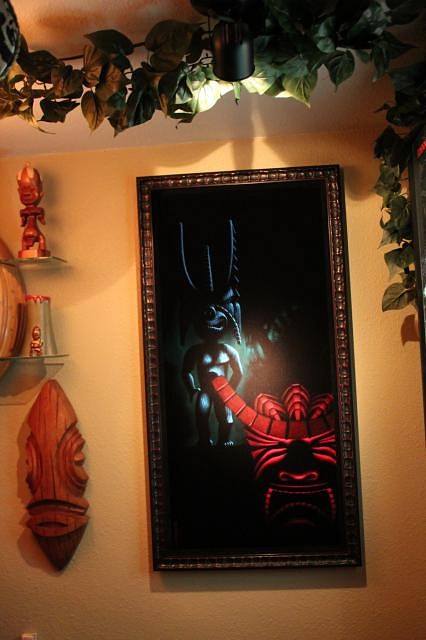
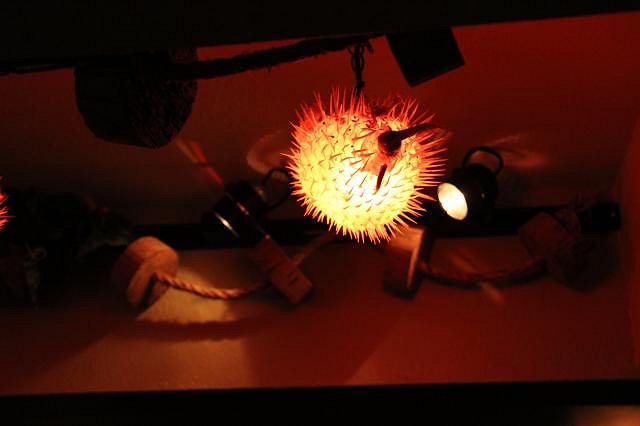
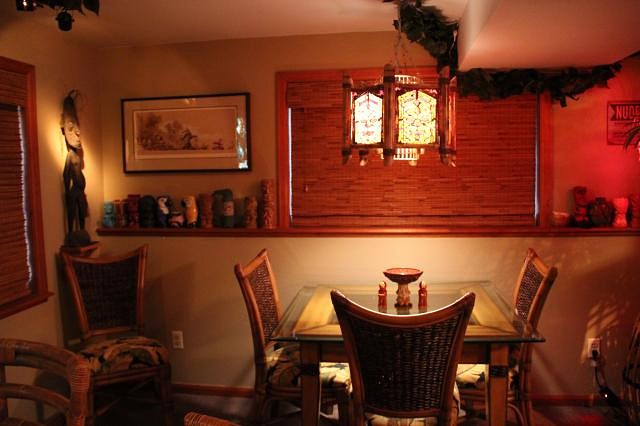
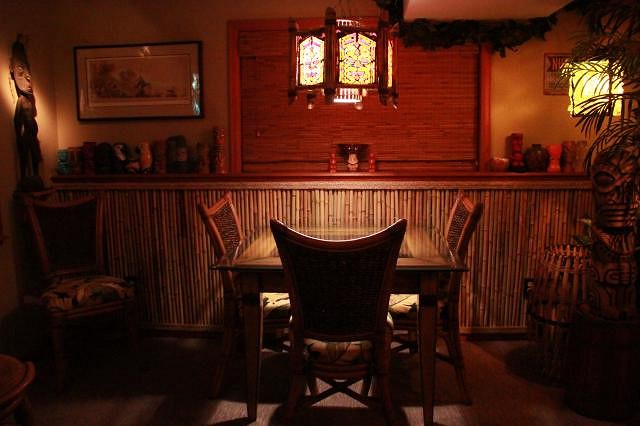
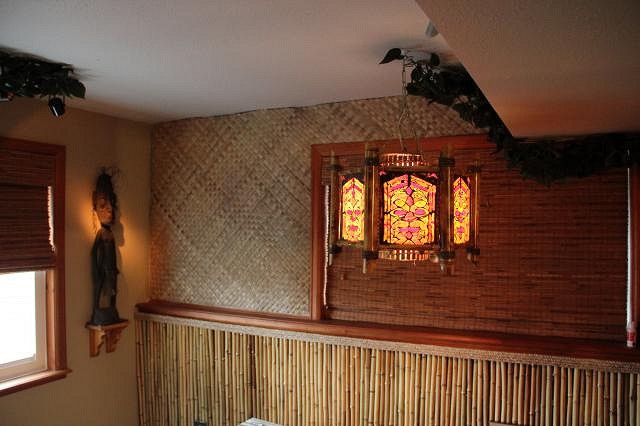
Marlene, This is a little late but thank you for the classy comment. I am trying to create an oceanic art look. This post also gives me a chance to thank you again for the work you did on the Sacramento Cap City Tiki Crawl. I met some wonderful people and gained some new experiences. Dale, thank you for your landscaping comments. I also realized that I never posted a picture of the finished tapa light. I would have never built this if I hadn't visited Monkeyman's South Pacific Room.
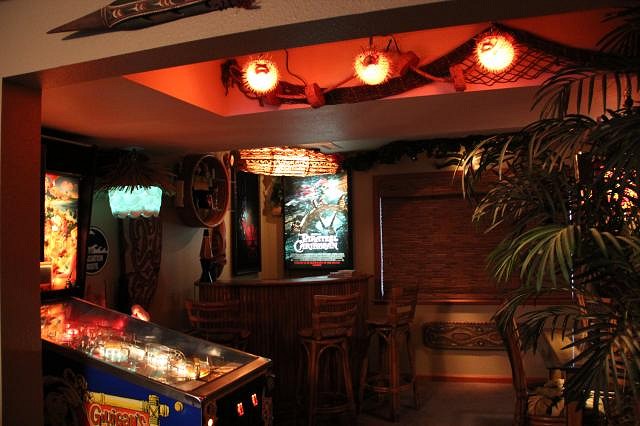
When I started building these two rooms I never realized how important the lighting would be. I discovered the use of low voltage spotlights and how they can accent the art.
|
|
M
MaukaHale
Posted
posted
on
Tue, Dec 31, 2013 12:07 AM
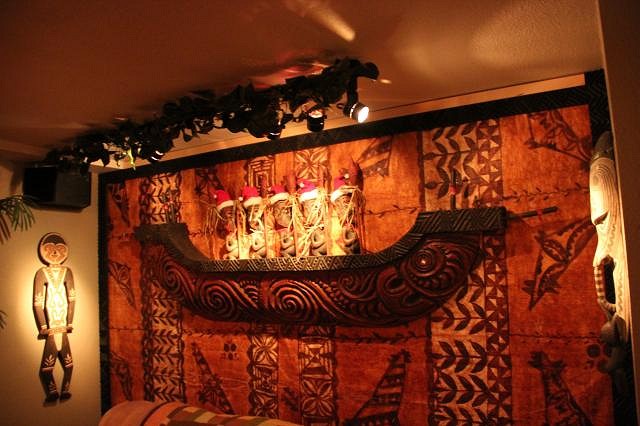
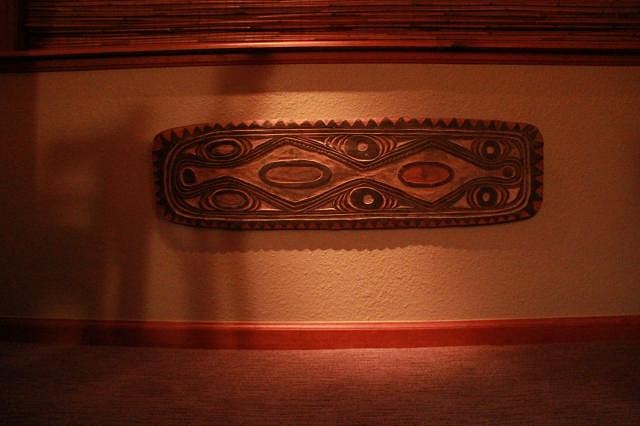
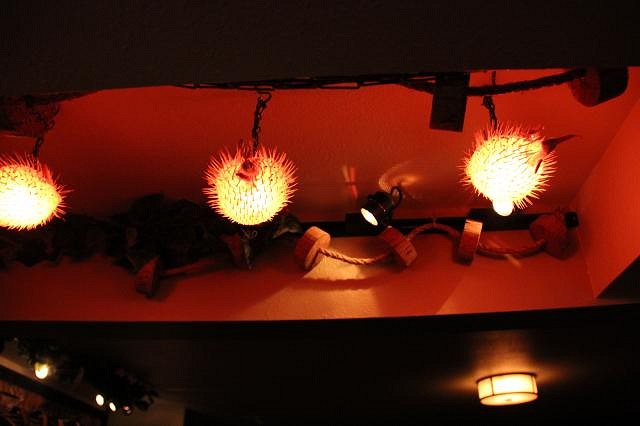
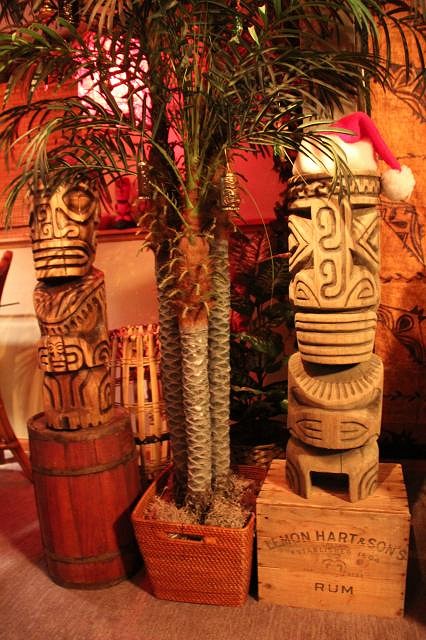
Here are a few more spotlights:
I added these for the two smaller tikis:
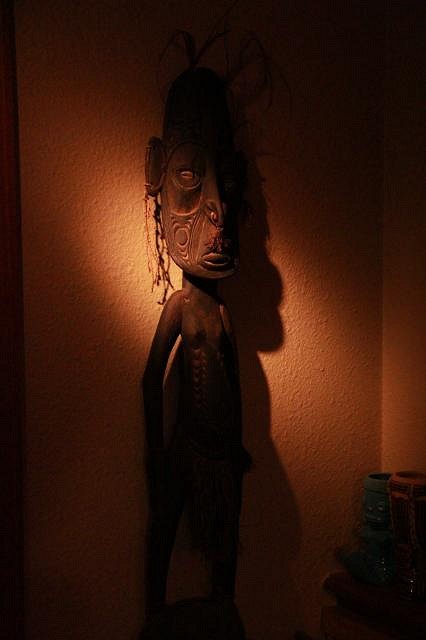
I found a wooden keg on Ebay for the Koa Marquesian Tiki.
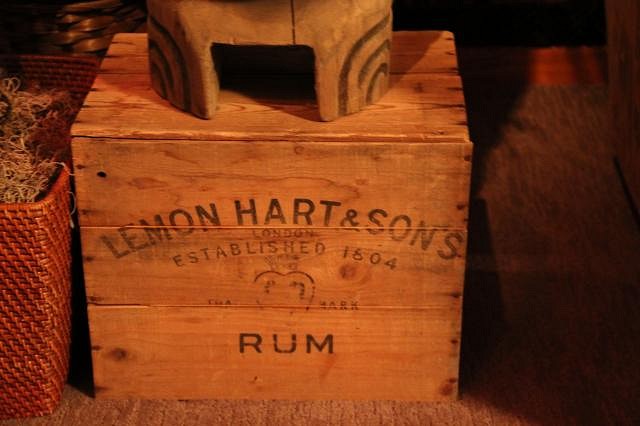
and for the Wailua King Tiki I found a wooden crate on Etsy. It had stamped on it Lemon Hart & Sons Rum.
The stamp was on the inside so I took the side off and turned it around. Here is a picture of the Wailua King when he first arrived. I took him skiing with me.
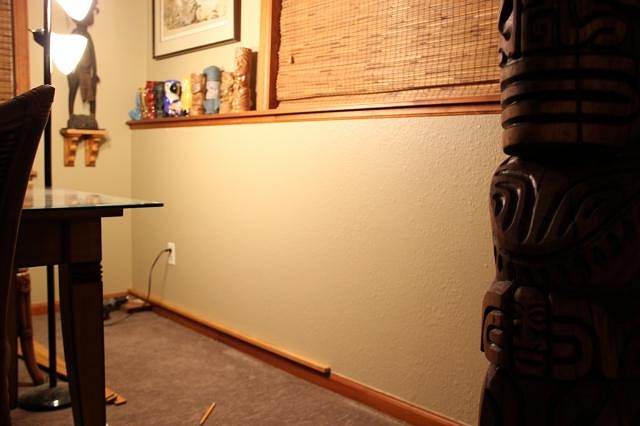
This is my next project putting bamboo on the lower wall.
|
|
V
VampiressRN
Posted
posted
on
Wed, Jan 1, 2014 11:48 AM
You are doing a fabulous job!!! |
|
M
MaukaHale
Posted
posted
on
Wed, Jan 1, 2014 8:23 PM
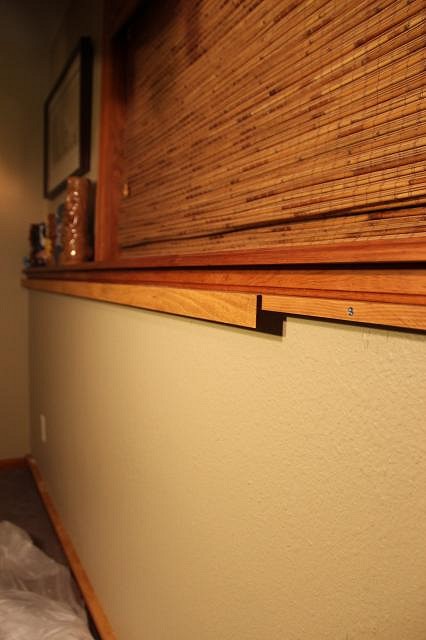
VampiressRN, thank you. It was at the home tiki bar "Walls of Voodoo," during the Sacramento CAP CITY TIKI CRAWL, that I was inspired to use bamboo fence on the wall. Here's a picture of the wall, from the crawl, with my new friend!
I had no idea how to do this. It seems like you would just staple it to the wall but the weight would make it tough to hang even. Since the room is already finished with a baseboard and wood trim running under the window, I couldn't rest the bamboo on the floor. Also, I didn't want to take out the baseboard. I came up with this idea of hanging a sleeve for the bamboo.
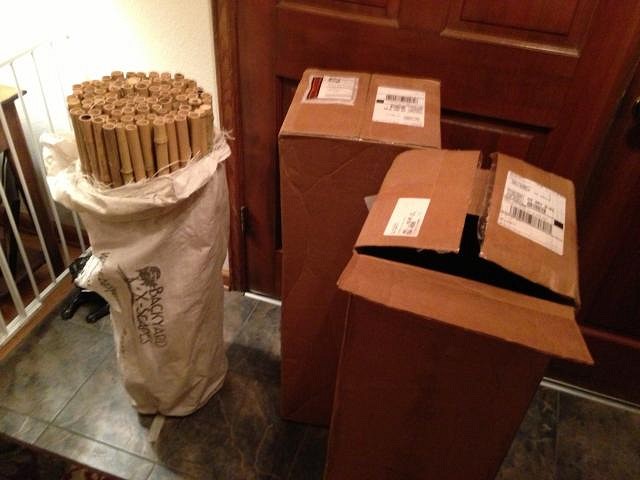
When the bamboo fence arrived I was disappointed at first.
I ordered it from Home Depot. The price seemed right and the shipping was free. I thought all the poles would be somewhat uniform in color but they weren't.
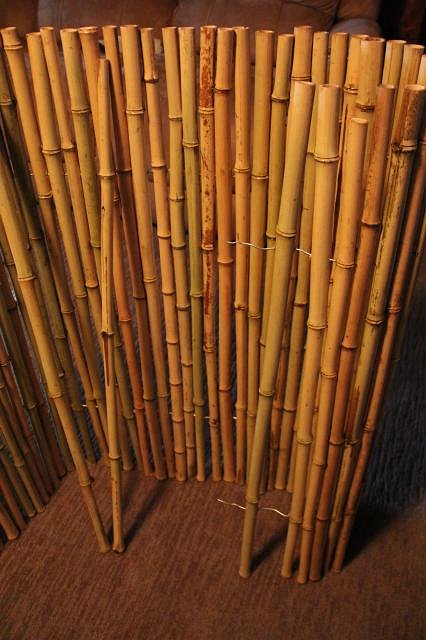
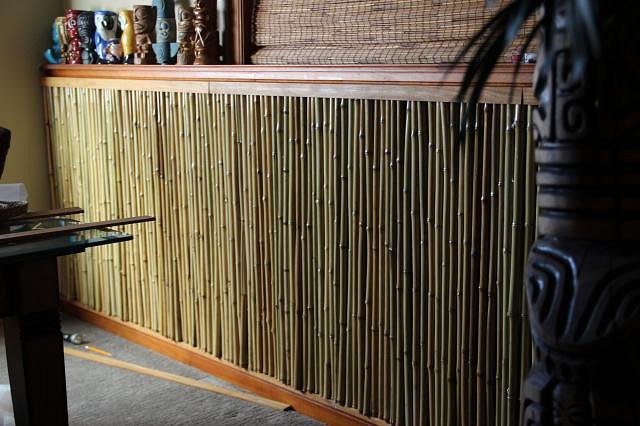
Since I had a few extra feet I found that it wasn't to difficult to switch out the undesirable poles.
As it turns out I actually like having some poles green, yellow and brown. It makes it look more primitive. It even goes better with the color of the carpet and adds a different texture to the room. |
|
M

Monkeyman
Posted
posted
on
Fri, Jan 3, 2014 9:08 AM
Looks really nice. Keep up the good work :) |
|
M
MaukaHale
Posted
posted
on
Mon, Jan 6, 2014 8:20 PM
Thank's Monkeyman. Here's the top sleeve nailed.
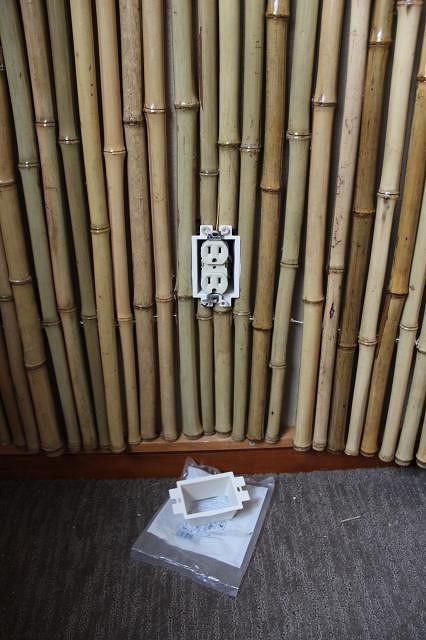
For the outlets I cut out sections and then inserted remodel outlet box extensions.
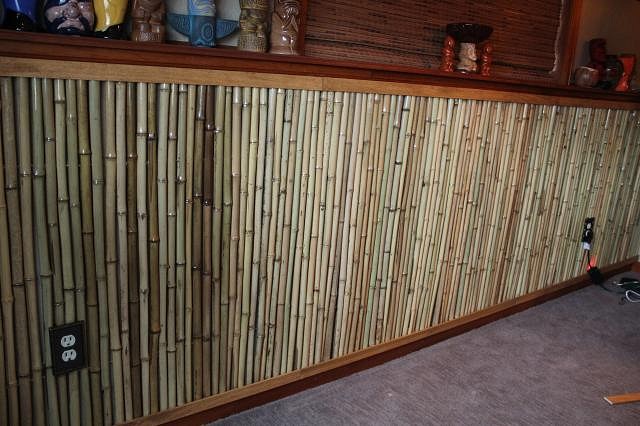
Here's the bottom sleeve nailed with the outlet covers.
Next a sea grass braid is added.
Here is the before picture:
and the after.
|
|
K

kkocka
Posted
posted
on
Tue, Jan 7, 2014 10:33 AM
Night and day difference! Looking great. |
|
M
MaukaHale
Posted
posted
on
Tue, Jan 7, 2014 7:30 PM
Thanks kkocka, it makes me realize that I need to keep going and do some kind of treatment for the rest of the walls and ceiling. Its funny how the more you put into your tiki bar the more you realize that the project is never really done. |
|
H

hiltiki
Posted
posted
on
Tue, Jan 7, 2014 8:21 PM
Your place looks very nice. Love how you have decorated it. Great job. |
|
B

bamalamalu
Posted
posted
on
Thu, Jan 9, 2014 8:37 PM
Alright, this forum is giving my house an inferiority complex. |
|
T

TikiAno
Posted
posted
on
Fri, Jan 10, 2014 8:38 AM
Awesome work! Wall treatments look fantastic and the spotlights are a great touch (I need to find some for my own bar). Tapa light is a great touch, and huge score on the Lemon Hart crate! Forgot to mention, the waterfall and landscaping is epic as well. Inspired stuff. [ Edited by: TikiAno 2014-01-10 08:54 ] |
|
M
MaukaHale
Posted
posted
on
Sun, Jan 12, 2014 10:02 PM
hiltiki and bamalamalu thank you for your comments. Tikiano - I really like my Lemon Hart and Son's crate. My favorite Mai Tai is the one in Frankie's Liquid Vacation. I use Lemon Hart 151. I'm working on another wall in the room and I'll have more pictures when I'm done. |
|
M
MaukaHale
Posted
posted
on
Sat, Mar 29, 2014 7:58 PM
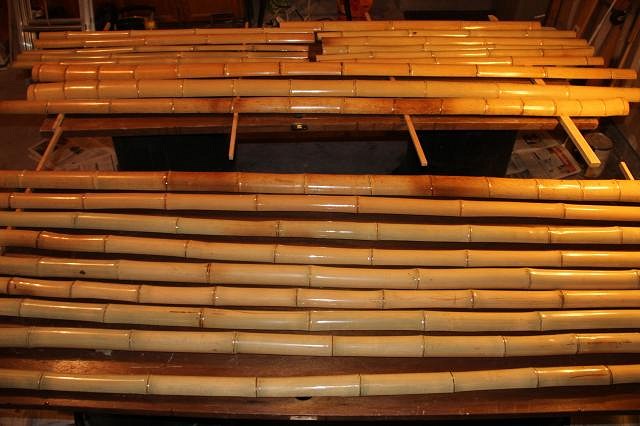
Time for wall no. 2.
Add some black bamboo, Lauhala matting and tapa.
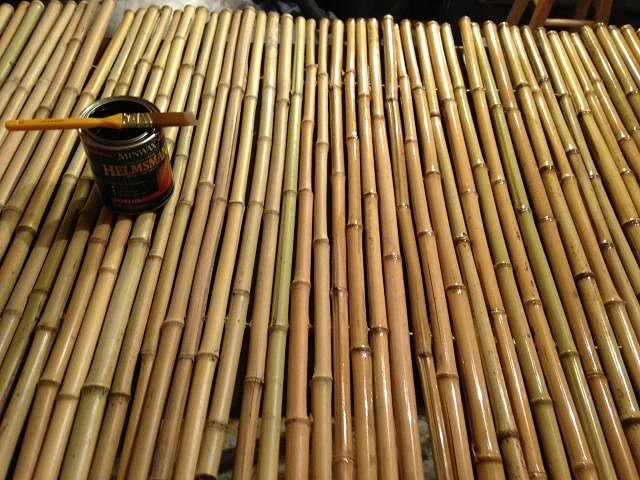
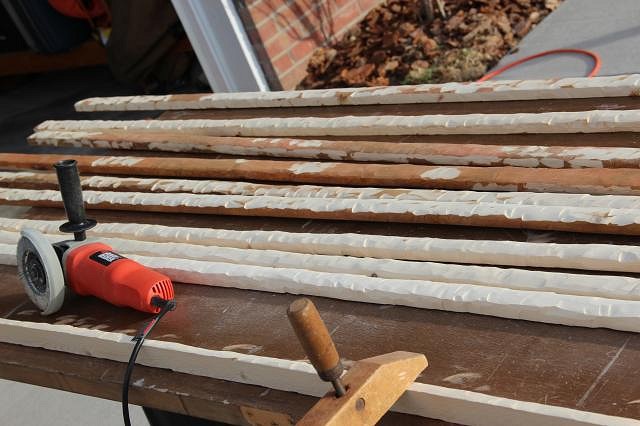
Some bamboo prep.
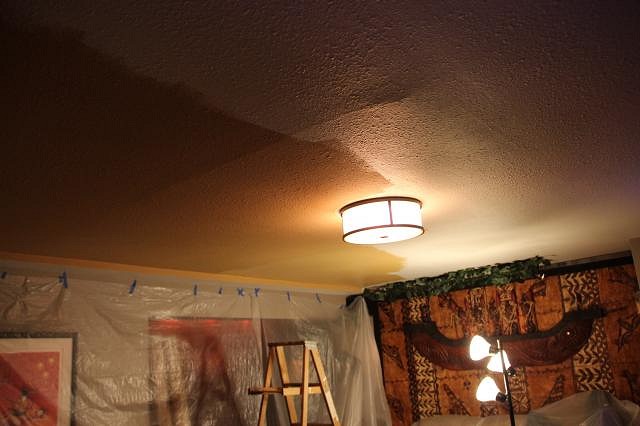
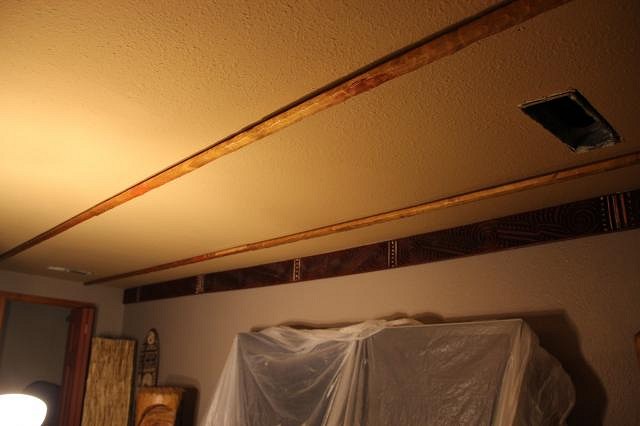
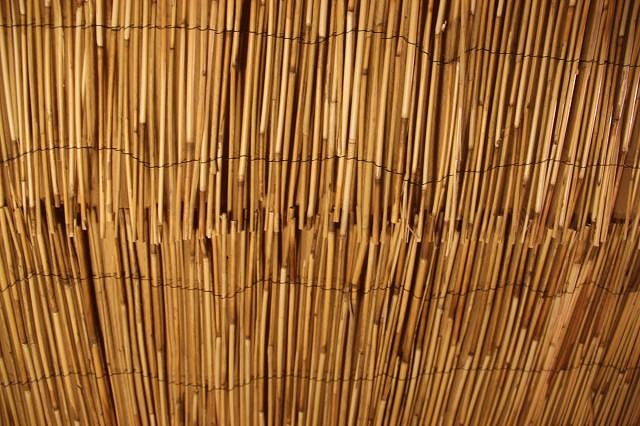
Before I can put up the bamboo I need to do the ceiling first. Putting on a new color to go behind the bamboo reed.
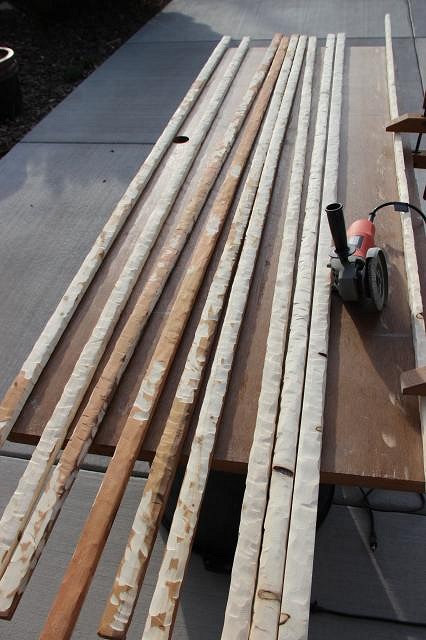
Next distressing the supports for the ceiling.
|
|
L
littlegiles
Posted
posted
on
Sun, Mar 30, 2014 6:44 PM
Love the latest changes! The black bamboo looks great up there.
|
|
M
Monkeyman
Posted
posted
on
Sun, Mar 30, 2014 8:09 PM
Glad the South Pacific Room Thread has come in handy for you. Things are looking great. |
|
H

hang10tiki
Posted
posted
on
Sun, Mar 30, 2014 9:38 PM
Outstanding........... Jon |
|
S

SandraDee
Posted
posted
on
Mon, Mar 31, 2014 9:26 AM
Your build is really beautiful. I love that water feature also. |
|
L
Longboard
Posted
posted
on
Mon, Mar 31, 2014 1:06 PM
MaukaHale, When you going to post the rest of the ceiling project. I really appreciate your showing us the step by steps. Also, I'm stealing your outlet box extensions idea as well. Keep up the good work! -Longboard |
|
M
MaukaHale
Posted
posted
on
Tue, Apr 1, 2014 3:52 PM
Thanks everyone for the comments! I still have a ways to go. Longboard, I'm still finishing the supports but there is a chance I may hang the ceiling tomorrow (Wednesday). I need two other guys to help me since the width of the reed I'm using is 6 feet wide. It will be two sections. The room is 12 feet by 17 feet. I will use two strips running down each section and one strip covering the seem between the two. If I don't hang it Wednesday it will be next week.
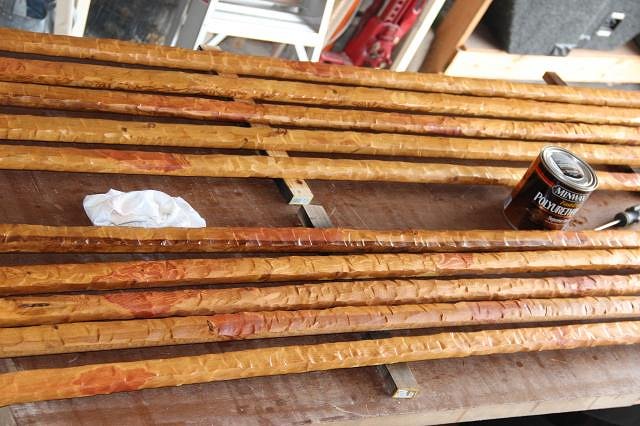
The concept I'm using is from Monkeyman's "South Pacific Room." Here is the page that shows how he did it. http://www.tikicentral.com/viewtopic.php?mode=viewtopic&topic=35684&forum=20&start=15 One of the things I did was mix some Cherry Wood stain with Golden Oak stain. I did red spots to make the wood look a little more exotic than just a plain piece of Golden Oak. If you look at Monkeyman's ceiling he overlapped the reed and used either 3 or 4 ft width sections. Monkeyman has been extremely helpful in sharing his expertise. This forum has been fantastic for gaining tips and ideas for tiki bar build outs. I have to thank Bamboo Ben for a post he did explain that scissors work best for cutting Lauhala matting. I saw where some people tried to use a razor blade with a straight edge, The scissors worked great.
[ Edited by: MaukaHale 2014-04-01 16:00 ] |
|
L
Longboard
Posted
posted
on
Tue, Apr 1, 2014 4:46 PM
Thanks, for the update, photo's and the link. Looking forward to seeing yours done. -Longboard |
|
M
MaukaHale
Posted
posted
on
Mon, Apr 21, 2014 9:05 PM
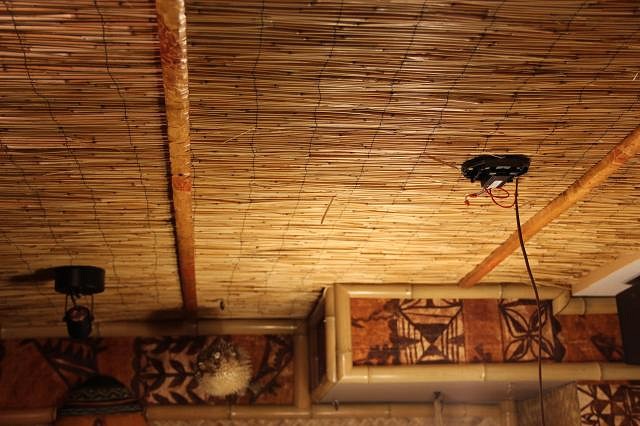
I found the easiest way to get the reed fence to the ceiling was to first find the joist with a stud finder. I then predrilled the holes and attached the beams to the ceiling.
I then laid the beams on the floor with the screws attached and sticking up. I then laid the reed fence on top of the beams. With two people lifting the beams, with the fence on top, a third person screwed the beams to the ceiling.
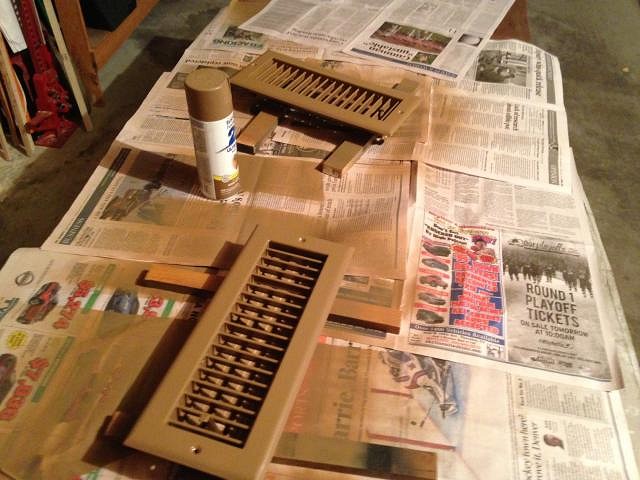
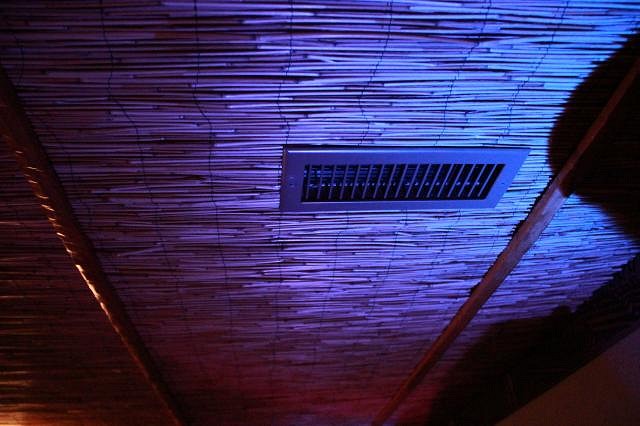
Next a little paint on the old vents.
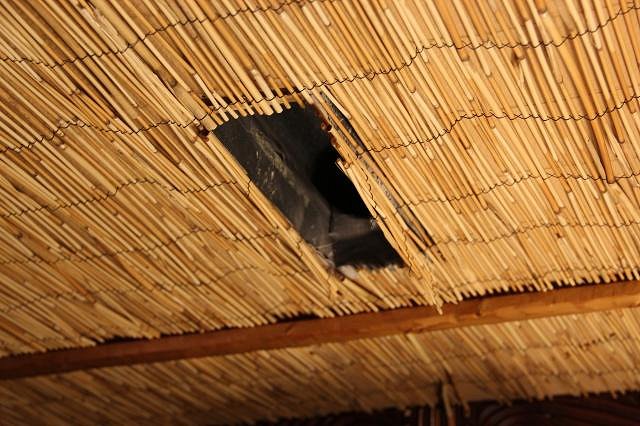
The holes cut,
Where the two fences came together I had to do some trimming before I could put up the center beam.
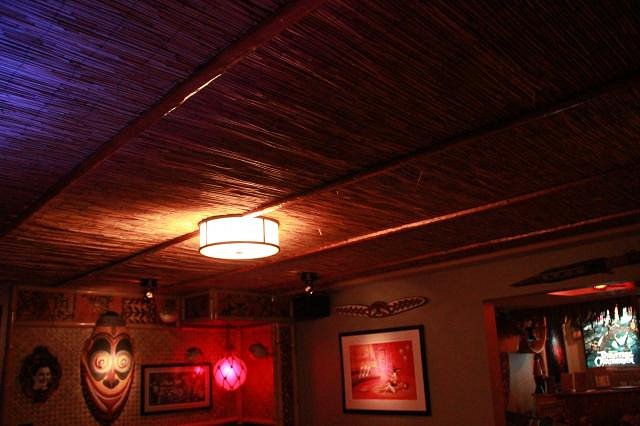
Next I added a new spot and reinstalled the existing one.
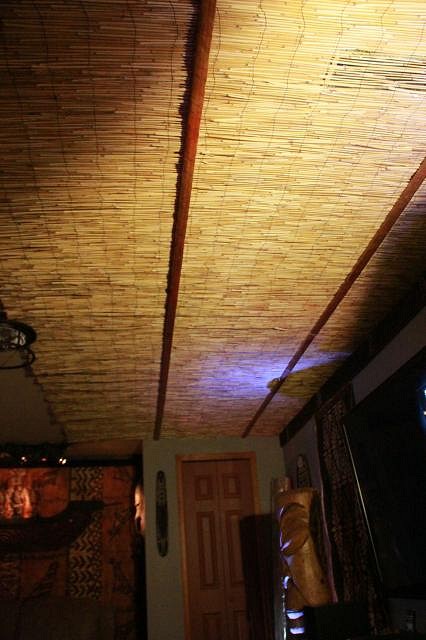
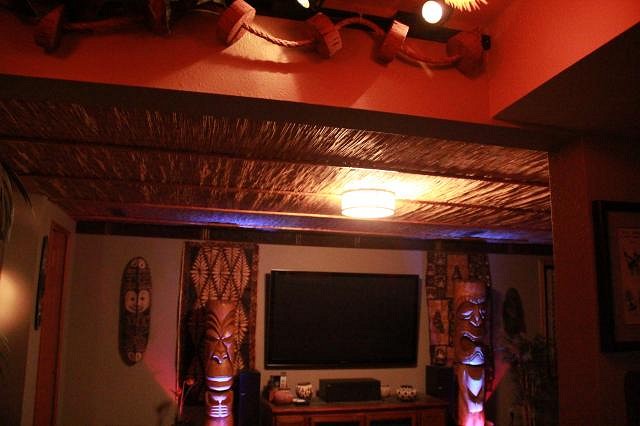
Here is the new ceiling:
|
|
H
hiltiki
Posted
posted
on
Mon, Apr 21, 2014 10:39 PM
Your place looks great and the new ceiling makes your place look just perfect. |
|
L
littlegiles
Posted
posted
on
Tue, Apr 22, 2014 6:15 AM
Beautiful job on that ceiling! Love the finished look it gave the whole room.
|
|
L
Longboard
Posted
posted
on
Tue, Apr 22, 2014 10:28 AM
Oh Yeah, Ceiling came out great. Thanks for posting your step by step process. -Longboard |
|
S
SandraDee
Posted
posted
on
Wed, Apr 23, 2014 11:12 AM
The lighting really is fantastic! You have done such great work so far--I am loving the progress photos. Can't wait to see what else you do! |
|
BK

Big Kahuna
Posted
posted
on
Thu, Apr 24, 2014 8:30 AM
Very innovative. The ceiling looks great. |
|
L

LoriLovesTiki
Posted
posted
on
Fri, Apr 25, 2014 7:13 PM
I agree with everyone else - the ceiling came out great! |
|
M

MissClaireTiki
Posted
posted
on
Sat, Apr 26, 2014 7:39 PM
Your place has fantastic detail, really like the bamboo on the lower wall. Please keep posting new pictures |
|
M
MaukaHale
Posted
posted
on
Tue, Apr 29, 2014 9:27 PM
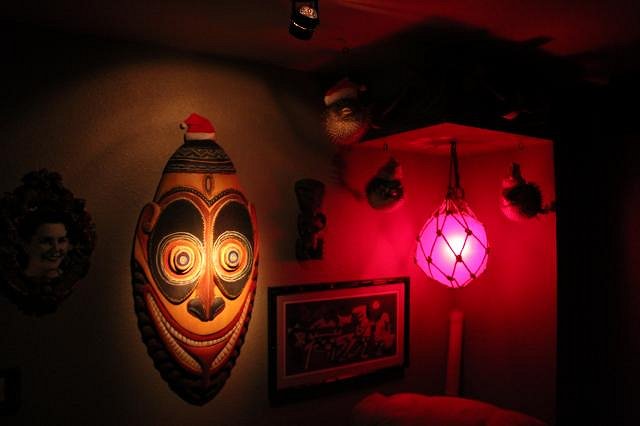
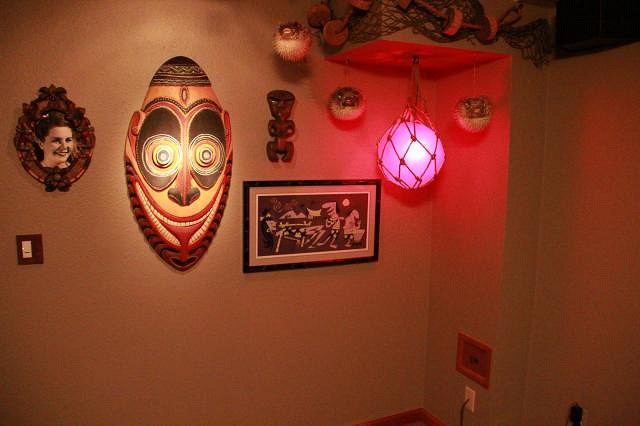
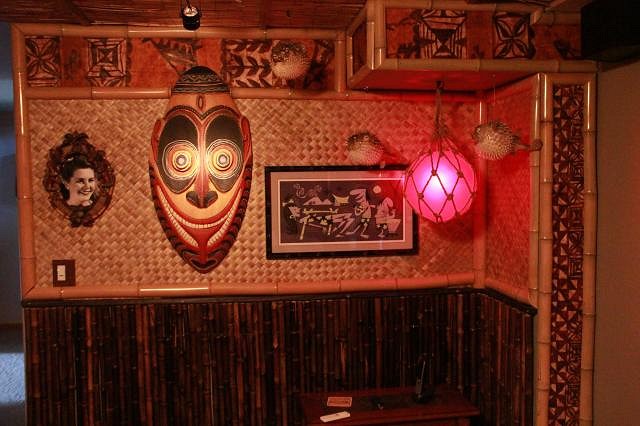
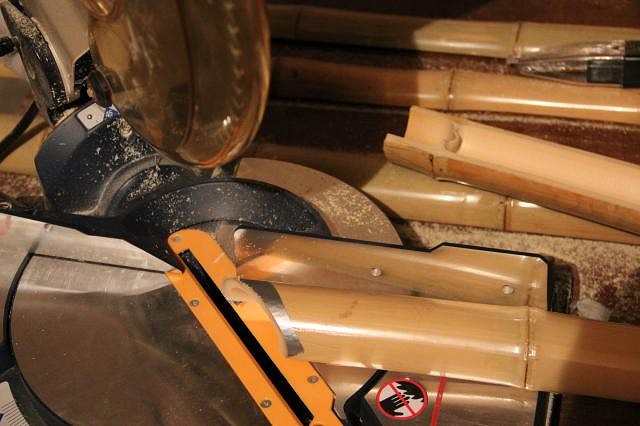
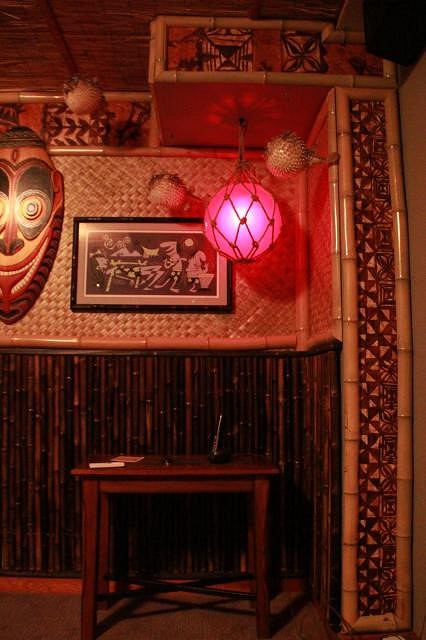
Thank you everyone for your comments. I am just about done with wall no. 2.
Its the first time I have cut bamboo for trim work. I read on another thread that putting tape over the cut area, before cutting, helps keep the skin of the bamboo from shredding. Since I had a lot of Duct Tape I gave it a try.
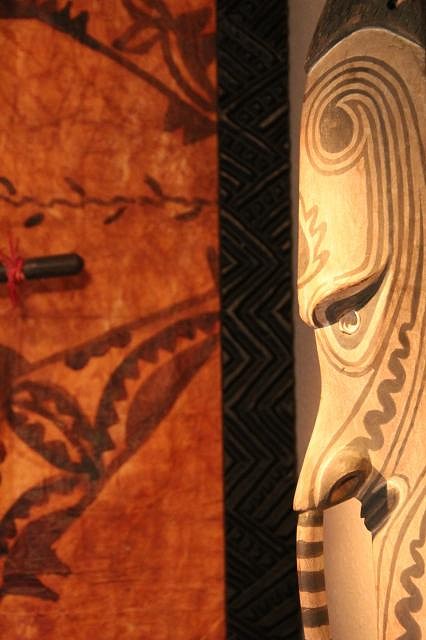
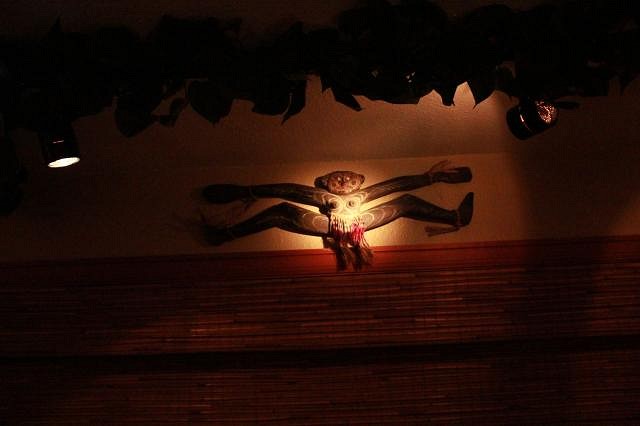
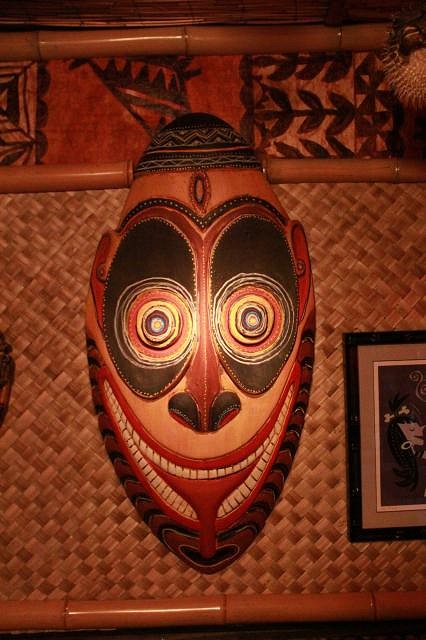
It worked really well and I left it on after the first cut in case I needed to take a little more off. I knew the PNG mask was going to be too big to fit into the space. I thought I would run the trim around the mask but it looked just as good running the trim through the mask.
The only thing I have left to do is some router carving on wood strips to cover the gap at the top and bottom of the black bamboo.
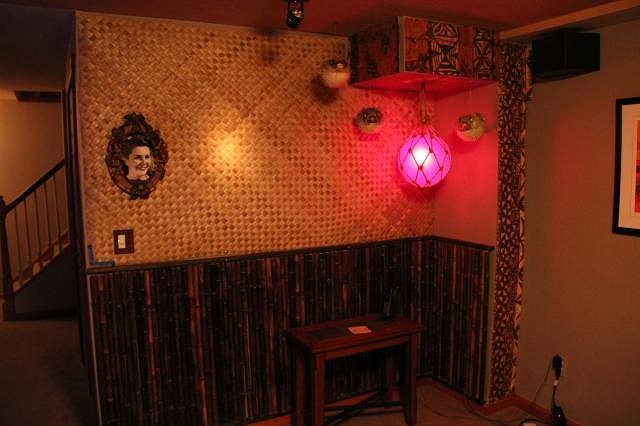
In the meantime I am adding Lauhala matting to the wall with the natural bamboo.
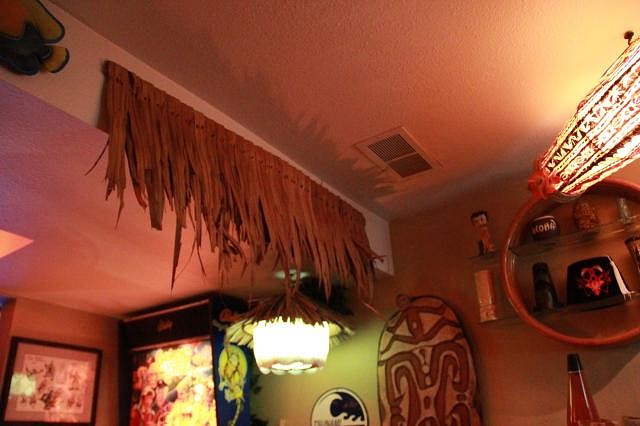
Next I need to put reed on this ceiling and Nipa Thatch is going over the drywall that covers the air ducts.
|
|
M
Monkeyman
Posted
posted
on
Tue, Apr 29, 2014 10:07 PM
very clean installation... |
|
ATP
Atomic Tiki Punk
Posted
posted
on
Tue, Apr 29, 2014 10:55 PM
Looking Good! |
|
L
littlegiles
Posted
posted
on
Wed, Apr 30, 2014 5:30 AM
Looks amazing! That light on the PNG mask is...very...mesmerizing. Must...make...mai-tai...now.
|
|
M
MaukaHale
Posted
posted
on
Sun, May 11, 2014 11:18 AM
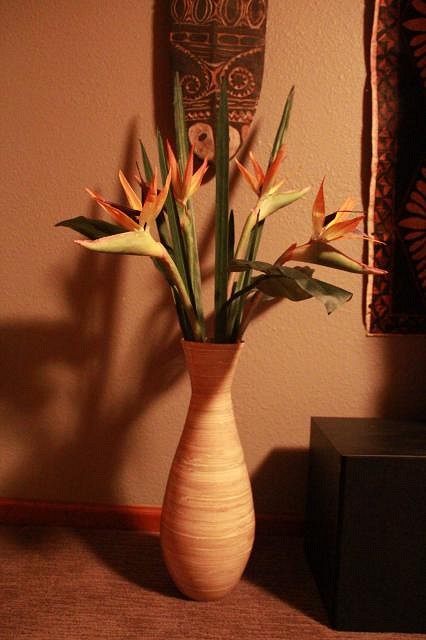
A new flower arrangement in memory of Mom on Mother's Day.
|
|
PP
Pele Paul
Posted
posted
on
Mon, May 12, 2014 8:17 AM
LOL I agree!!!! must make Mai-Tai's too!!!! |