Tiki Central / Home Tiki Bars
Ki'o wai Lounge (bar construction page 3)
Pages: 1 2 3 4 5 6 7 8 338 replies
|
T

tikiskip
Posted
posted
on
Fri, Aug 23, 2013 11:04 AM
|
|
J

jimsflies
Posted
posted
on
Fri, Aug 23, 2013 11:30 AM
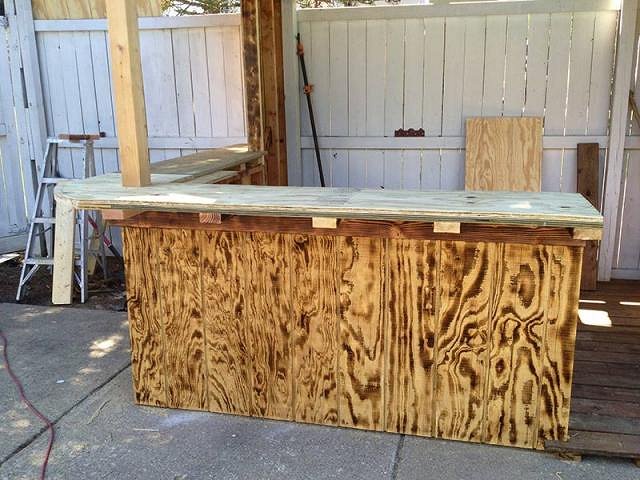
Yeah I thought about that type of thing. I planned to make a piece of trim to cover the edges on the tile. But you have me thinking of going with wood instead again. I have the bar built up with plywood so I don't need the thickness for strength. Maybe some cedar planks and trim the edge like I was going to do with the tiles? |
|
J
jimsflies
Posted
posted
on
Fri, Aug 23, 2013 11:47 AM
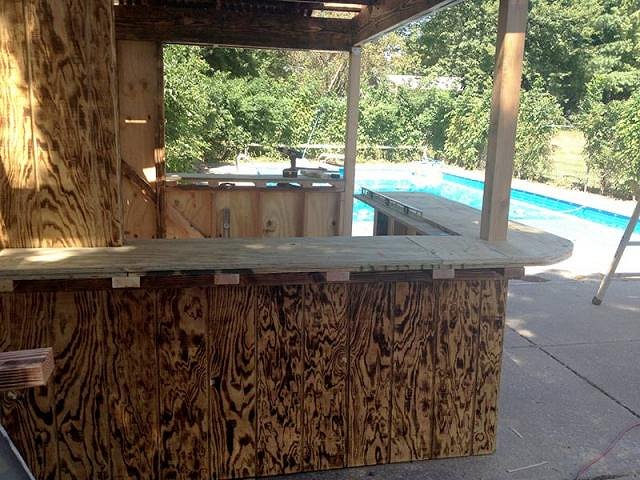
Here is where I am right now. I'm about at a height of about 41-inches with the bar.
|
|
E

ErichTroudt
Posted
posted
on
Fri, Aug 23, 2013 12:29 PM
You might consider the bar top to look like something reclaimed or re-used..... Sides of a crate with stamp stencils still on it, wood off a ship, deck hatch, life boat... |
|
T
tikiskip
Posted
posted
on
Fri, Aug 23, 2013 3:13 PM
yes that would be cool, and this is what Kronkie means. "I have the bar built up with plywood so I don't need the thickness for strength" Good luck. |
|
J
jimsflies
Posted
posted
on
Fri, Aug 23, 2013 4:33 PM
Well before you posted to "take my time", I had left for the big box store and picked up some cedar boards. I tried to find ones that had some pattern to them...not easy when you are also looking for a board that isn't too beat up.
I also know what you mean by the feel that comes with a big block of wood. I guess the plan for now is to put this on and see how it goes. If I come across a better top down the road, It won't be as hard to redo it as the tiles would have been. With that said, I think it would look good to nail these down with some wrought iron rose head nails to help with the rustic look...somehow regular screws don't seem like they will fit in very well. The problem is where to get some quickly? Another question this brings up is how to finish the wood? [ Edited by: jimsflies 2013-08-23 16:34 ] |
|
T
tikiskip
Posted
posted
on
Fri, Aug 23, 2013 7:56 PM
You need to put a thick piece of trim for the front of your bar top first. |
|
T
tikiskip
Posted
posted
on
Fri, Aug 23, 2013 8:10 PM
This is how you can mount the top to your wood frame. I like this look a lot myself. [ Edited by: tikiskip 2013-08-23 20:21 ] |
|
J
jimsflies
Posted
posted
on
Fri, Aug 23, 2013 8:33 PM
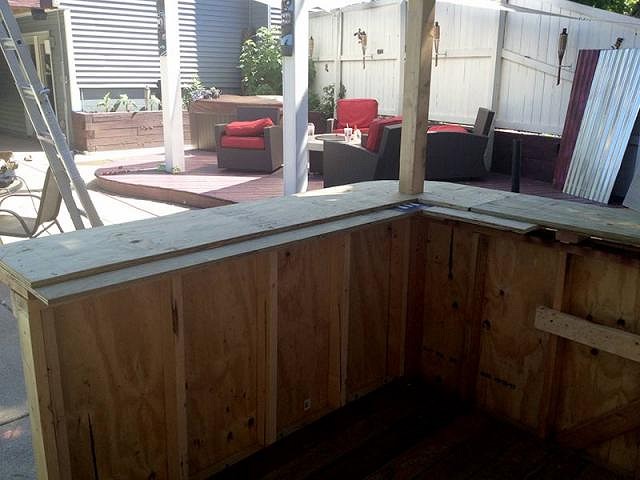
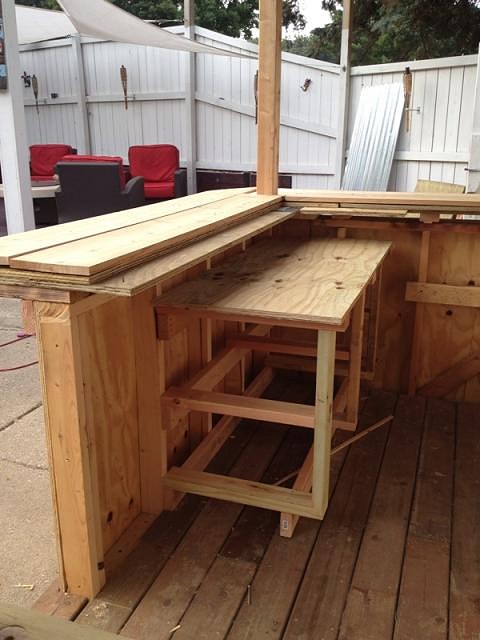
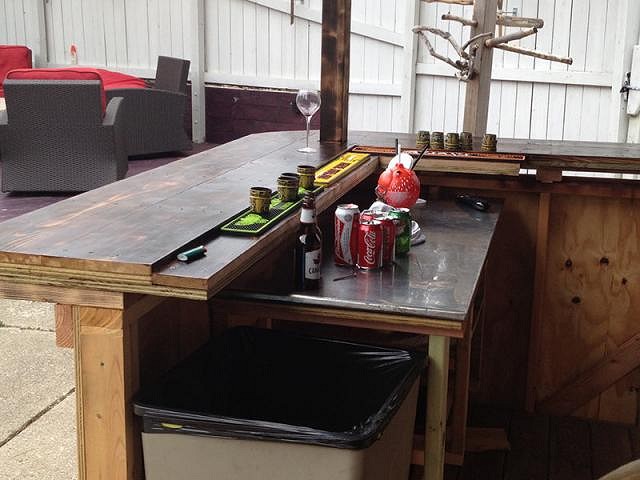
Thanks for the links. I think I will try some of that on the top when I get it on and trimmed out. For trim I was going to route some pattern. But after seeing the edge on that video in your second post. I'm thinking that would look pretty cool to wrap the edge in trim and then give it the grinding wheel treatment. Here's a pic that shows the drip guard (bar rail or whatever its called). I made it 3/4-inch lower than the bar top, does that sound about right?
[ Edited by: jimsflies 2013-08-23 20:34 ] |
|
J
jimsflies
Posted
posted
on
Fri, Aug 23, 2013 8:50 PM
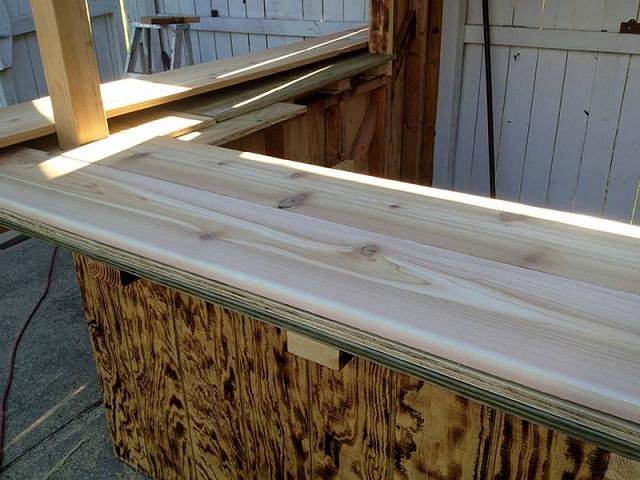
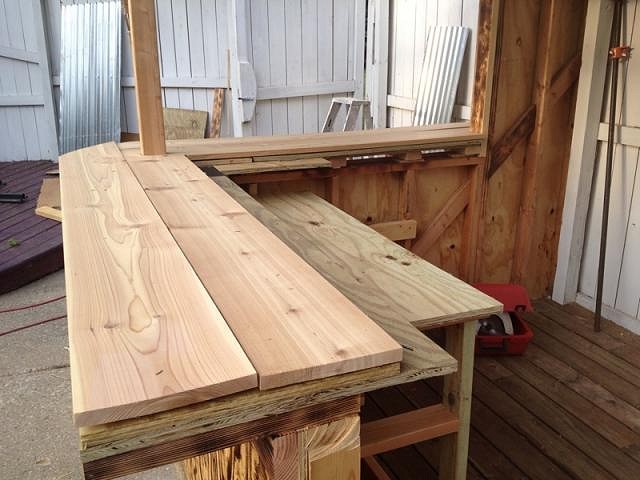
I'm already glad I went with the wood planks rather than the tiles. The planks not not only look better it has saved me a lot of (precious) time. I got the wood almost cut and fit to the bar in about an hour tonight. I just ordered these nails and should have them midweek. So I will have wait to nail the boards down. These nails combined with the distressed look give it that old look.
|
|
E
ErichTroudt
Posted
posted
on
Fri, Aug 23, 2013 10:13 PM
You might use a smooth head hammer so you don't "rosebud" the wood when you beat in the nails... |
|
J
jimsflies
Posted
posted
on
Fri, Aug 23, 2013 10:16 PM
The key is to control the distressing (hammer marks around nails = bad workmanship, hammer marks on other areas = cool). |
|
T
tikiskip
Posted
posted
on
Sat, Aug 24, 2013 7:28 AM
Those look great! |
|
T
tikiskip
Posted
posted
on
Sat, Aug 24, 2013 7:55 AM
Just got an idea for yer top. |
|
J
jimsflies
Posted
posted
on
Sat, Aug 24, 2013 2:15 PM
I was going to go back and watch/listen to the details about that grinder blade. I was awe struck when they showed it and forgot to listen to what all he was saying. That was a mean looking grinder blade! |
|
J
jimsflies
Posted
posted
on
Sat, Aug 24, 2013 2:19 PM
Good idea on the trash can. Its funny that after spending an hour picking out the best boards with no splits and good edges that I'm going to put gouges and cracks in them. :) |
|
T
tikiskip
Posted
posted
on
Sat, Aug 24, 2013 8:05 PM
"That was a mean looking grinder blade!" It is, take care if you do use it as it will take off a finger or more. |
|
J
jimsflies
Posted
posted
on
Mon, Aug 26, 2013 7:41 AM
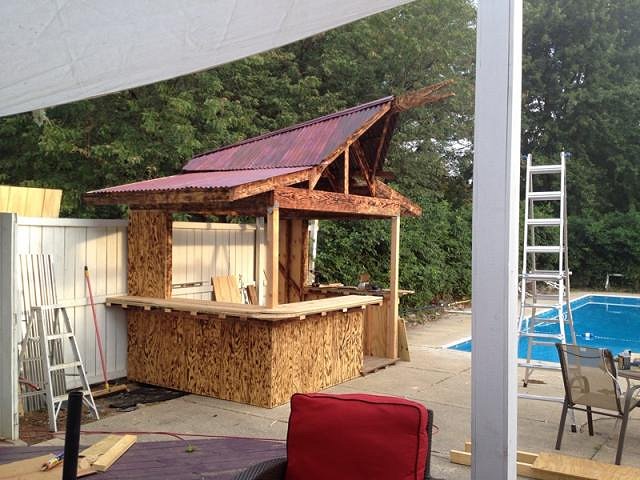
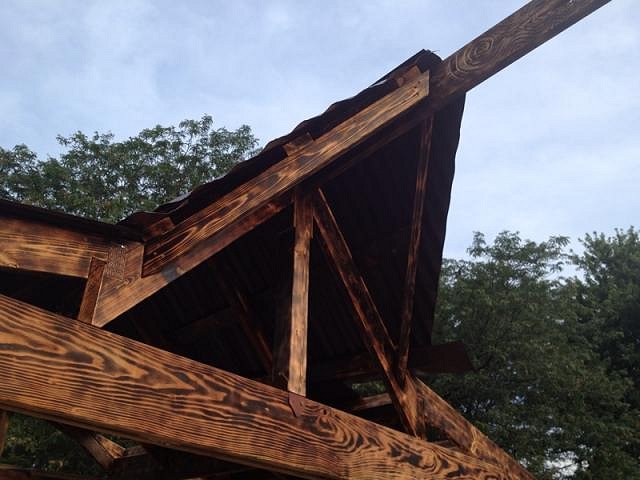
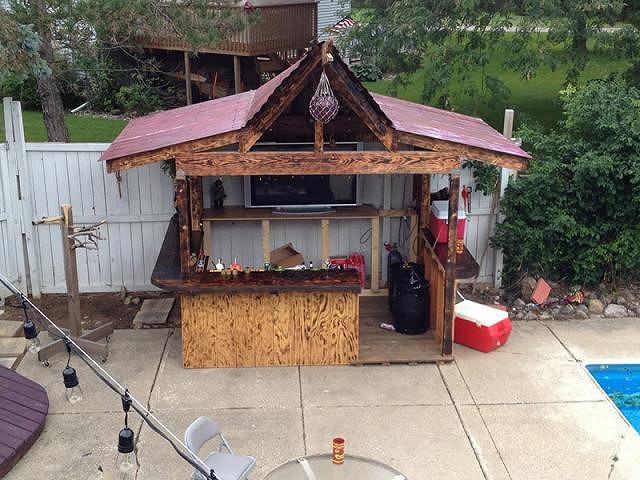
This project ceases to amaze me at how long everything seems to take. While I made some good headway over the weekend, it still fell short of expectations. Anyways, here is where I am now...the top section of the roof is on. I need to put all the ends back on the lower roof section (removed to accommodate the scaffolding). The bar is coming along but not done yet. Hopefully by the weekend, I will be in a position to finish the bar top. I don't think I am going to get the siding up on the gables before the party but it looks okay without it. Hoping to get some power run out there as well. But might end up with an extension cord if I run out of time.
|
|
Q

Q-tiki
Posted
posted
on
Mon, Aug 26, 2013 8:12 AM
It is really looking good JF! I like the roofing a lot. Well done. Keep up the good work. I think you will be very proud of this bar for years to come. |
|
J
jimsflies
Posted
posted
on
Mon, Aug 26, 2013 11:10 AM
Thanks. I'm pretty happy with how its turning out. However, my wife hasn't been very please with me building it. She told me last night when we decide to sell the house I should take it down because most people wouldn't want a tiki bar. Maybe she's right...but I don't plan to tear it down any time soon. [ Edited by: jimsflies 2013-08-26 11:11 ] |
|
V

VampiressRN
Posted
posted
on
Mon, Aug 26, 2013 5:39 PM
Your doing a great job...keep those pictures coming!!! |
|
S

stormrider
Posted
posted
on
Tue, Aug 27, 2013 9:14 AM
Just read the complete build. It looks great. Can't wait to see it completed. Storm |
|
T
tikiskip
Posted
posted
on
Sat, Aug 31, 2013 8:11 AM
"However, my wife hasn't been very please with me building it. She told me last night when we decide to sell the house" Wish my wife did that a little bit more really, she is the reason we have this in our back yard. I think you may find that the new owners will want some of your tiki stuff to stay with the house. Keep posting photos of your build.
|
|
P

pjc5150
Posted
posted
on
Sat, Aug 31, 2013 1:07 PM
you could router-out some pretty fun stuff with those beams...
|
|
K

kala60
Posted
posted
on
Sat, Aug 31, 2013 4:03 PM
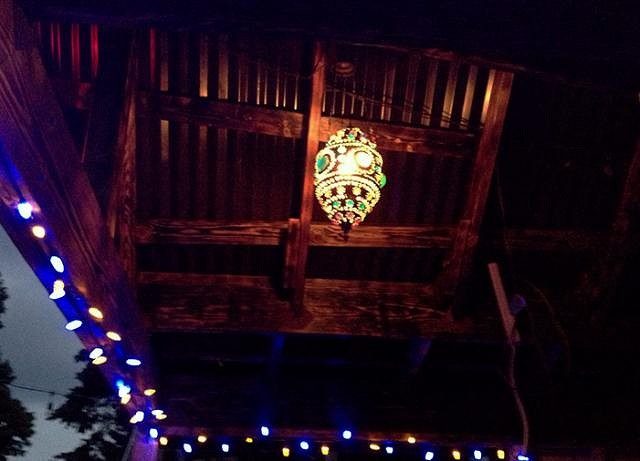
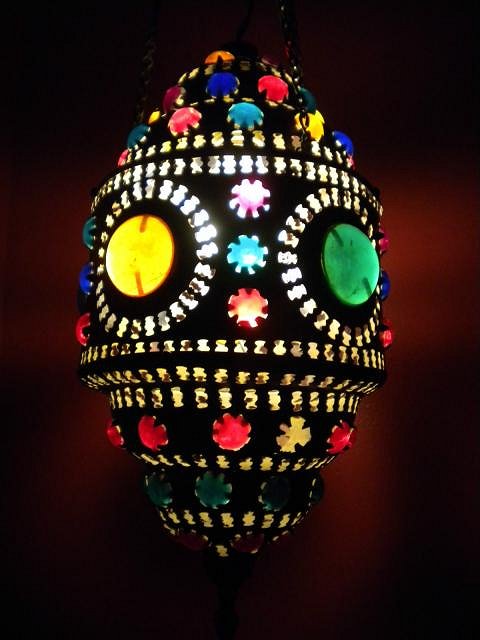
Any inof on the Brass swag lamp? One of a kind or more available? thanks carl |
|
J
jimsflies
Posted
posted
on
Sun, Sep 1, 2013 7:31 PM
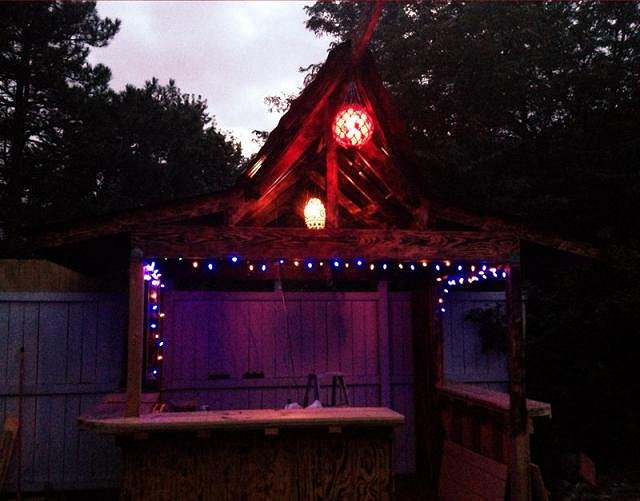
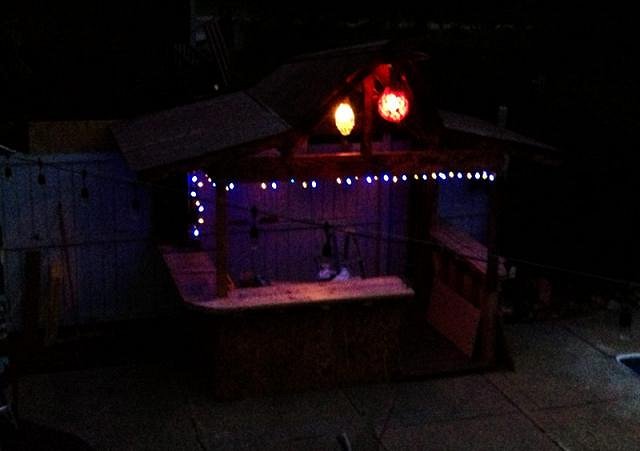
It was the only one I have seen. There must be more of them. Looks pretty cool I think. I just got it hung up tonight. Here are a few updated photos taken at dusk...photo quality isn't very good unfortunately.
|
|
BB

Bruddah Bear
Posted
posted
on
Mon, Sep 2, 2013 3:14 PM
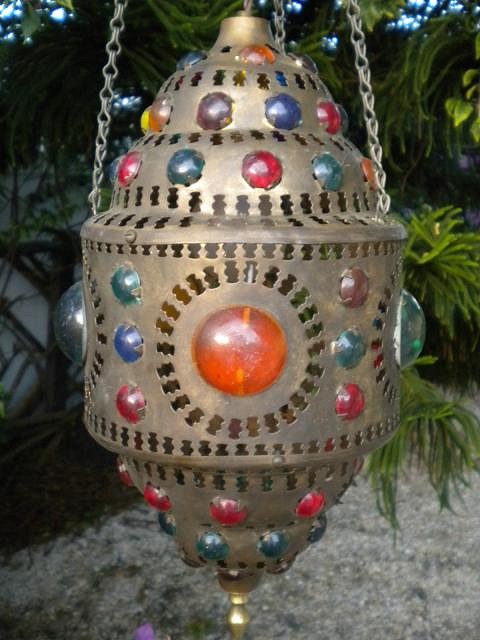
Carl, My guess is that the lamp is of Mexican manufacture based on designs brought over during the Spanish Colonial period that were in turn based on Moorish designs. Many Moorish influences in Spain, you know, architecture, art, metal working, etc.
This one is of a bit better quality in manufacture and more polished in design, but I think you'll see the similarity. If you search for "Lantern" images online with keywords like Moorish, Middle Eastern, Moroccan, Turkish, or even Persian (ie: Moorish lantern), you'll see numerous examples of similar types of lanterns. Some just intricately pierced metal that cast beautiful lacy patterns of light, others with colored glass inserts that bathe the area with tinted light, and a combination of the two. I'm sure you can find such lamps for sale online *like the above example. Hope that helps. *edit: added pic and link. [ Edited by: Bruddah Bear 2013-09-02 15:53 ] |
|
J
jimsflies
Posted
posted
on
Sun, Sep 8, 2013 7:53 AM
I've been working my tail off the past week to get ready for last nights party. Everyone seemed to enjoy the bar! Here are a updated photos of the build the morning after the party:
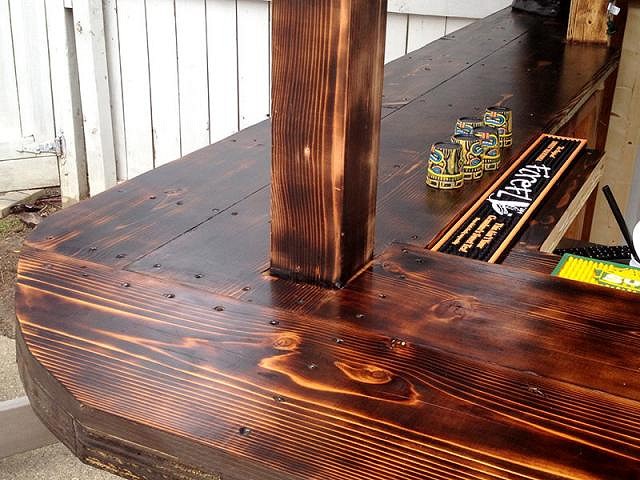
Although not yet distressed, the bar top I think turned out looking very nice. It is made of cedar planks that haven been finished by burning with a spar varnish top coat.I notice quite a few splits have formed over the past week, but I think they look fine and add to the character. I may still add some manual distressing to give it more character.
Here is the back counter. I repurposed an old stainless steel counter top for the work surface. While not very "tiki", it is easy to sanitize and will weather the elements:
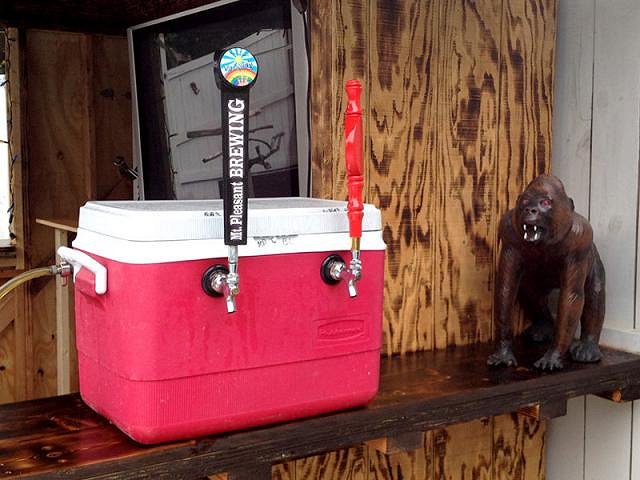
The party was self serve bar-tending. A double jockey box was used to dispense a wheat beer and an specialty beer (Black Pepper Honey Hibiscus Ale):
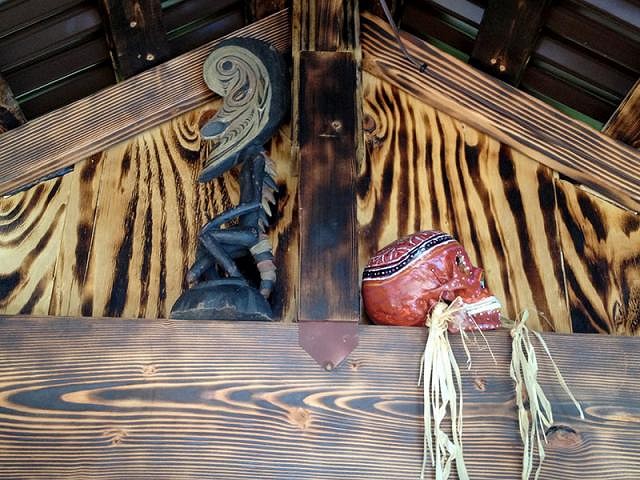
After enclosing the back gable, I found I had a nice bonus shelf to put some of my tiki objects. Here is a PNG spirit figure and one of Pele Paul's painted skulls on the shelf:
[ Edited by: jimsflies 2013-09-09 07:17 ] |
|
J
jimsflies
Posted
posted
on
Sun, Sep 8, 2013 1:34 PM
[ Edited by: jimsflies 2013-09-09 07:13 ] |
|
PP

Pele Paul
Posted
posted
on
Mon, Sep 9, 2013 8:02 AM
Hey Jim, paul |
|
J
jimsflies
Posted
posted
on
Tue, Sep 10, 2013 12:31 PM
Thanks Paul. Now I just need to have your eye for collecting and putting it altogether to make it look more tiki. |
|
J
jimsflies
Posted
posted
on
Fri, Sep 13, 2013 4:06 PM
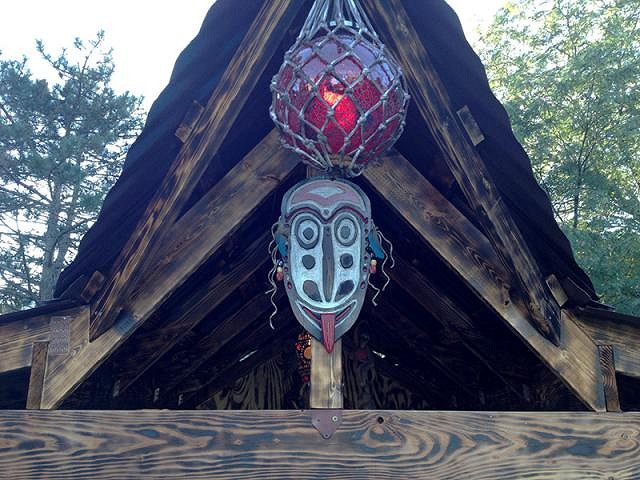
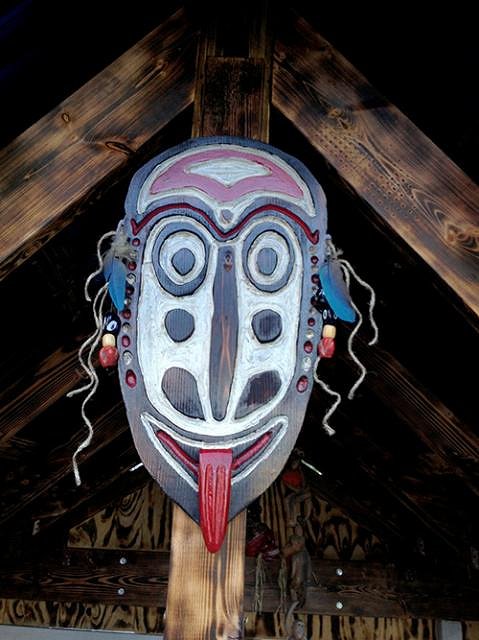
I took one of the scraps from the bar top and made a mask for the gable. Its about 12" wide by 20" tall. I dressed it up with some beads and feathers from the resident Barker bird. My first attempt at anything like this...guess it turned out okay?
|
|
ATP

Atomic Tiki Punk
Posted
posted
on
Fri, Sep 13, 2013 5:20 PM
I thought these are from India, Pier One imports carries these. |
|
J
jimsflies
Posted
posted
on
Fri, Sep 13, 2013 5:27 PM
Even the Pier Ones are cooler in Southern California! Who would have thought? I just looked at Bruddah Bear's link...I guess I did okay price wise for $10. I think it looks okay in the bar for now. By no means do I think it is the coolest tiki lamp. I'd much prefer some of tiki skip's lamps. [ Edited by: jimsflies 2013-09-13 17:34 ] |
|
BB
Bruddah Bear
Posted
posted
on
Fri, Sep 13, 2013 7:03 PM
Lance, It could be from India. I just made a best guess based upon other items I've seen in the past of similar quality construction and materials, but India is certainly a candidate as well. That Eastern Mediterranean/Asia Minor design pool has quite a reach, the lineage of artistic influences can get murky (thank you Alexander the Great, the Moors and the Ottoman Empire), couple that with the whole India/Pakistan current practice of "if you want us to make cheap copies of something old/antique/historical, we'll do it for a good price," and well, you know...
Yeah, I only posted the other lamp as an example of a similar lamp made in Mexico. Price wise, you can find more pricey ones as well as less expensive ones, I'm sure. You didn't do bad at all for $10. Mainly I was just trying to give Carl an idea of what it is and how he might locate something similar. The space is coming along nicely, Jim. |
|
L

Longboard
Posted
posted
on
Mon, Sep 16, 2013 7:54 AM
Great job on the mask, looks almost like the real deal. Like to see the Barker bird, on the rotisserie. Those birds always creeped me out. Keep up the good work! -Longboard |
|
J
jimsflies
Posted
posted
on
Wed, Oct 23, 2013 3:59 PM
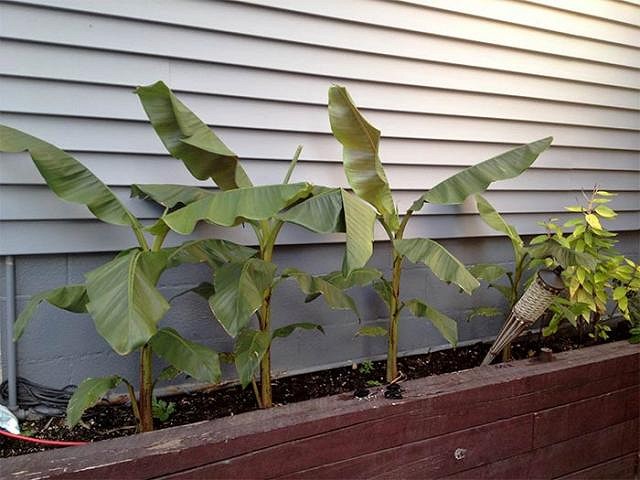
Been awhile since I posted an update. I haven't done much in the way of bar construction since my party...taking a rest after the big push. Anyways, I doubt there is much time left for the bananas to grow since the nights are getting colder here so I thought I would show a photo of my bananas at the end of the season. Here is a photo when I got them on July 14:
The week I got them, I nearly killed them due to it being too hot and shocking them. So I transplanted them next to the house were they got shade for part of the day and they recovered...I'm sure it stunted their growth by a couple weeks. Here they are today:
I was contemplating digging them up and keeping them inside for the winter, but now I'm leaning toward building a cage around them and filling it with leaves to protect them from the cold. While I've done some research, if anyone in colder climates has some suggestions I'm open to hear your experience. [ Edited by: jimsflies 2013-10-23 16:21 ] |
|
J
jimsflies
Posted
posted
on
Thu, Apr 24, 2014 7:36 AM
Now that its finally warming up, time to turn my attention back to the KioWai Lounge to continue with the build I started last summer. The good news is, I don't see any ill effects from winter's weather on the bar. Although I am sure the bananas are goners. Being new plants and given that are temps were below zero a couple weeks this winter, I don't expect to see any life coming from the little nubs left in the ground from last year's plants. One of the things I definitely need to address is seating... if anyone has some ideas for inexpensive/durable bar stools that fit the part, I would like to hear from you. I'm up for building them as well ...provided I don't have to be a finished carpenter to pull it off. Other goals are to redo/finish the backbar area, add a refrigerator, and run permanent electricity. I'm also on the look out for some inexpensive tikis in the 2 to 6-foot range to fill in around the lounge and pool. Its unfortunate that tiki is non-existent in Michigan. Most I find are unwilling to ship or it is cost prohibitive to ship. [ Edited by: jimsflies 2014-04-24 07:38 ] |
|
J
jimsflies
Posted
posted
on
Sun, Jun 8, 2014 4:54 PM
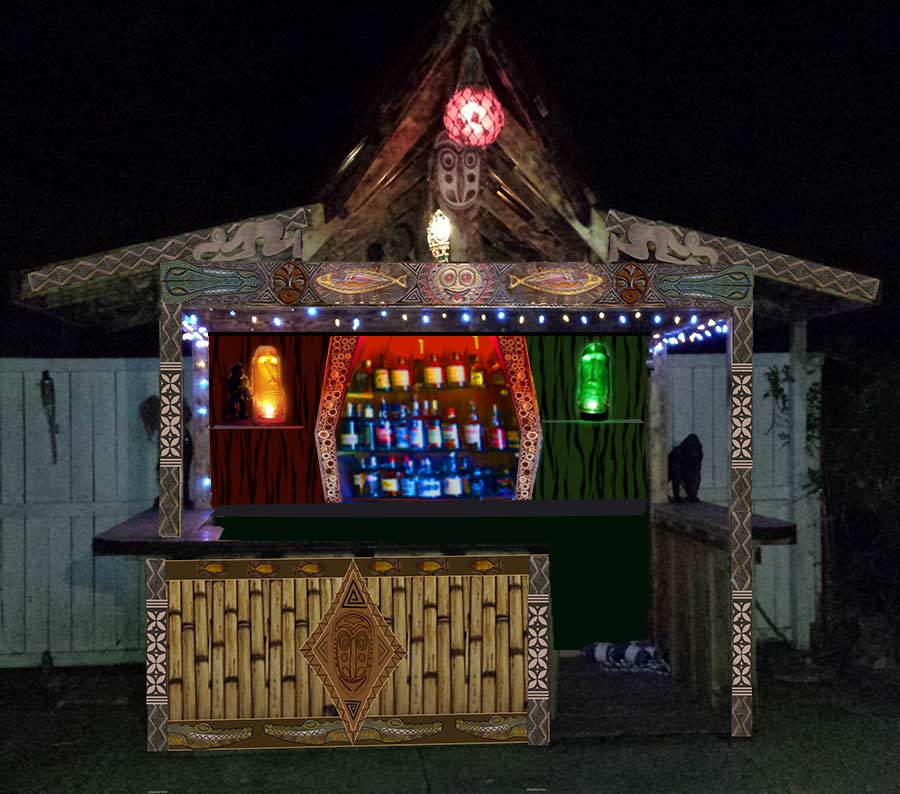
Getting back into the bar build! I decided to work on the exterior trim. Here is a mockup showing the general direction I'm headed for the exterior...lots of routing in my future: (ignore the white fence for now)
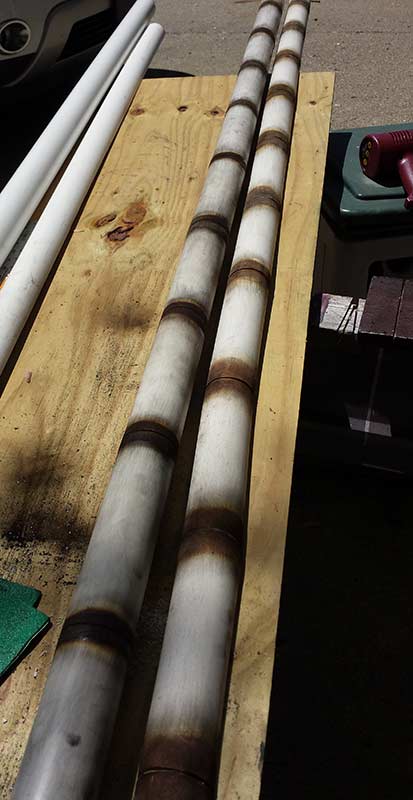
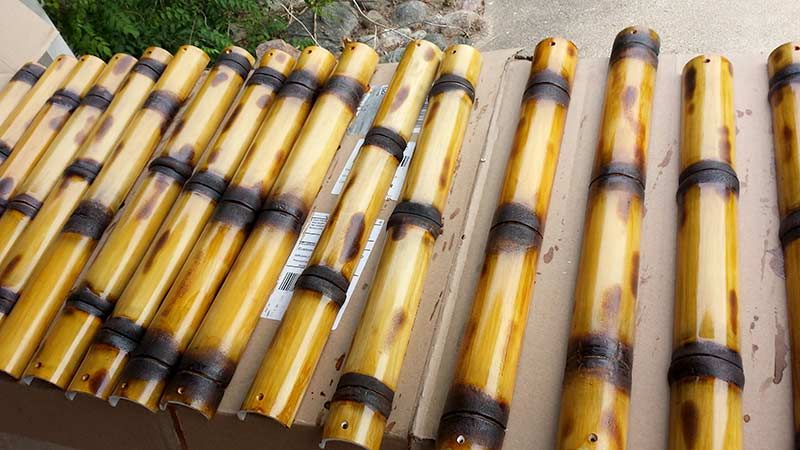
For the past couple weeks, I've been making PVC bamboo for the area under the bar. While this isn't difficult...its a project that seems to drag on. I have about 2/3 of it ready for shellac. I think I will go ahead and get that bunch done and hung so I can break up the job and feel like I've accomplished something. Plus, I'm running out of room with all the pieces.
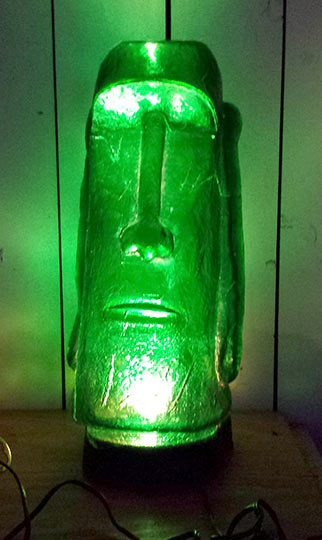
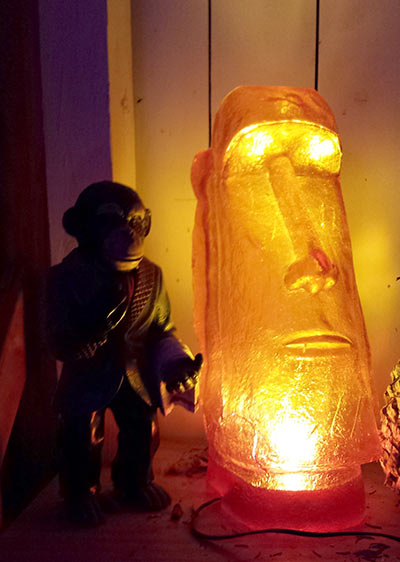
I also picked up a couple vintage(?) Spencer's moai lamps...these will go on some shelves in the back bar. Once again had issues with shipping, the green moai was smashed when it arrived. I seem to have the worst luck with getting tiki stuff shipped to me. :( After several hours of careful super gluing, I think it will still be okay for my purposes.
|
|
H

hiltiki
Posted
posted
on
Sun, Jun 8, 2014 5:34 PM
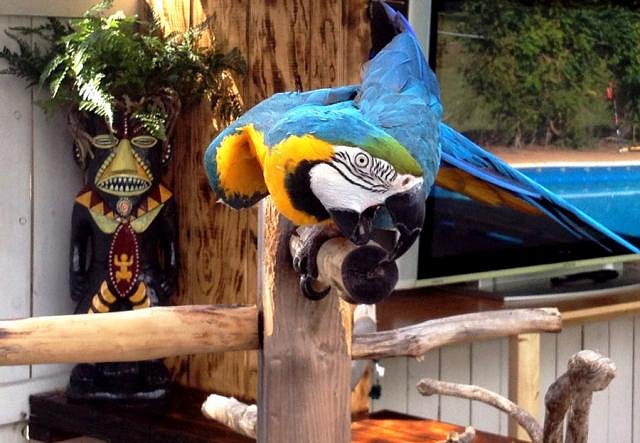
Your place looks awesome, love the monkey. |
|
FT

forgotten tikiman
Posted
posted
on
Sun, Jun 8, 2014 9:22 PM
Nice!!! Looks like your getting some inspiration from Derek's South Pacific Room and Scott's Ventiki Tiki bar. :D |
|
ATP
Atomic Tiki Punk
Posted
posted
on
Sun, Jun 8, 2014 10:36 PM
The Outside bar is looking sharp! |
|
J
jimsflies
Posted
posted
on
Mon, Jun 9, 2014 6:30 AM
Thanks guys!
I've been studying tiki bars for several years now and have picked up so many cool ideas especially from this forum. The tough part is assembling the ideas into an original cohesive design. I borrowed a couple of monkeyman's glyphs for the mockup...his carved trim is out of this world. The crocodiles go well with front facing gable which has a crocodile carved in it as well. However, I want to change up the graphics a bit though to maintain originality. I'm also weighing whether to keep the large carved beam concept, or install a thatched awning across the front of the bar. If I go this route, the front beam would be obscured from view unless you are sitting right under the awning. The bamboo structure for the back bar was an idea I got from photos of Honi Honi in Honk Kong (http://honihonibar.com/) and then saw again with Ventiki. I think it looks "exotic" and certainly something you don't see around these parts. I would like to put acrylic panel across the back of the bamboo section and side light it with color changeable LEDs (to makes the acrylic panel glow)....I think the effect of the indirect light behind the bamboo tubes would look cool. [ Edited by: jimsflies 2014-06-09 06:50 ] |
|
L

littlegiles
Posted
posted
on
Mon, Jun 9, 2014 7:24 AM
You chose some great inspiration and I can't wait to see how you take that and turn it into your own carvings. The bar is really looking fantastic.
|
|
J
jimsflies
Posted
posted
on
Tue, Jun 10, 2014 8:11 AM
Well...here's the pvc bamboo with 2 coats of shellac. I'm planning to coat it with Varathane so that it will have some UV protection to keep it from fading. I guess the nodes are darker than real bamboo even after burning...hopefully it will look okay under the front of the bar once its in place.
|
|
L
littlegiles
Posted
posted
on
Tue, Jun 10, 2014 8:20 AM
I really like the dark nodes on the "bamboo". It gives it a slightly different look and I think it will be really striking to look at. Great job!
|
|
J
jimsflies
Posted
posted
on
Wed, Jun 11, 2014 8:03 AM
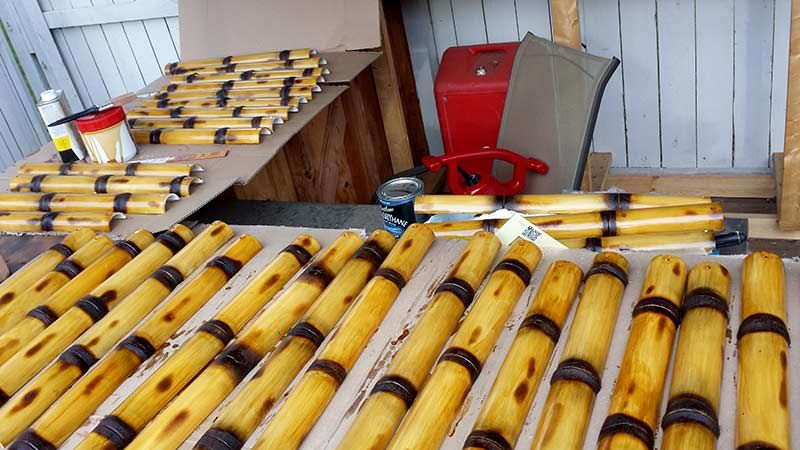
Thanks Dale! I appreciate your feedback/input...encouragement. :) I started coating with Varathane last night. But after a few pieces, I decided I didn't like the results and got to thinking if the shellac finish fades with UV, it may not be too big of a deal to brush more shellac on to freshen it up if I don't put the Varathane on them. The faux bamboo is fairly protected under the bar and only receives direct morning sun on the front (short side) of the bar. I hung a few pieces last night to start seeing how its going to look. I'm happy with how it looks a few of them in place...tonight I will hopefully get more hung. It also appears it will be easy to trim around the corners of the bar so I may end up doing that instead of adding trim around each corner at least for now. I should have a photo to share tonight or tomorrow. |
|
J
jimsflies
Posted
posted
on
Thu, Jun 12, 2014 6:55 AM
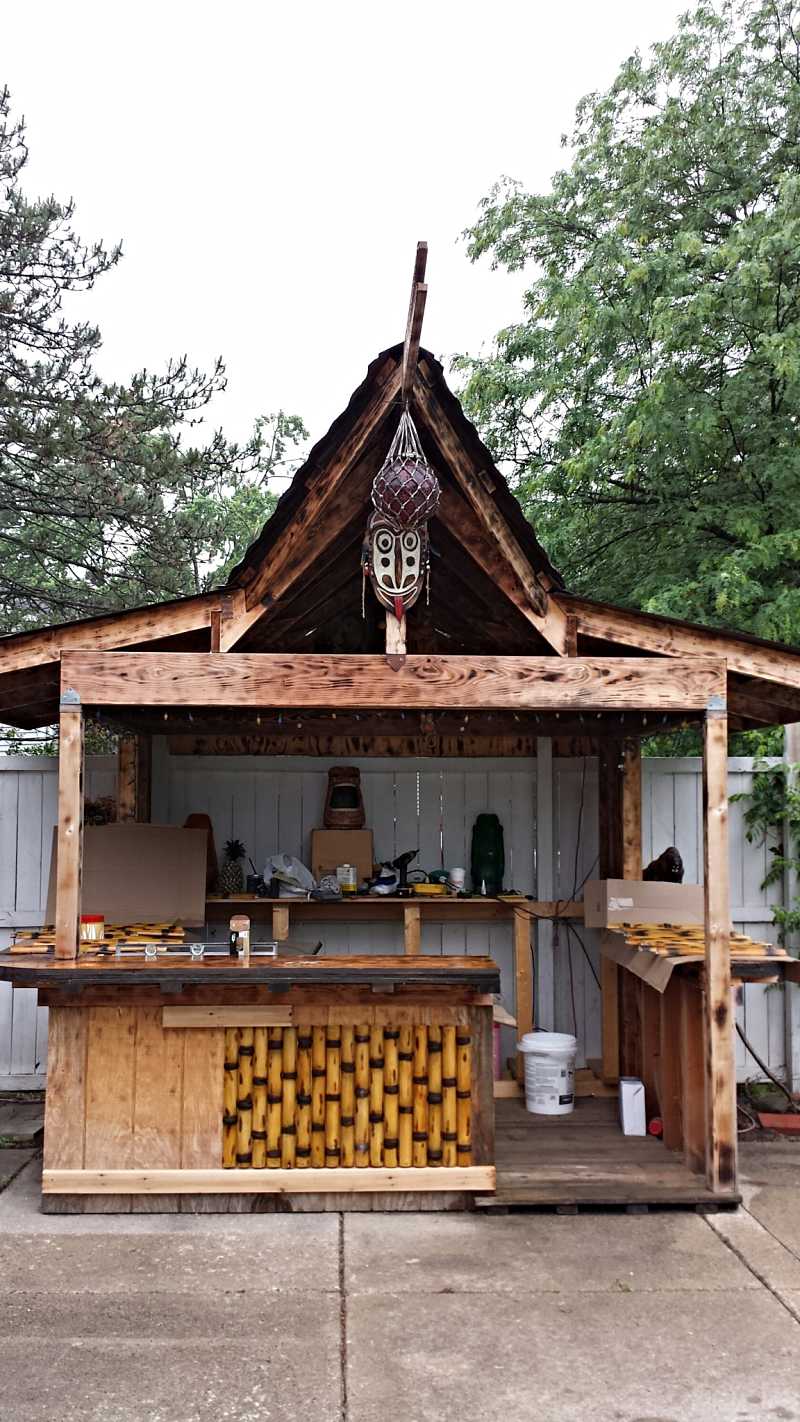
I managed to attach a few pieces of "bamboo" last night between rain storms...
|


