Tiki Central / Home Tiki Bars
Leroys Lū‘au Lounge
|
L

leevigraham
Posted
posted
on
Tue, Aug 27, 2019 2:48 AM
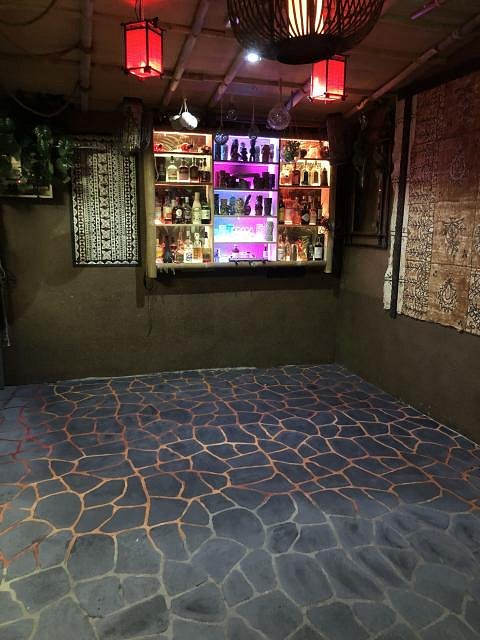
A friend just sent me this photo from the weekend :)
|
|
W

W8N2Surf
Posted
posted
on
Wed, Aug 28, 2019 10:07 AM
I wonder if those chairs would like some cushions in the right fabric? |
|
L
leevigraham
Posted
posted
on
Wed, Aug 28, 2019 4:08 PM
I bet they would! In the last pic I put the original cushions back on after a good bleaching and 2x wash. Creating new cushion covers is on the list. |
|
BS

bamboo stu
Posted
posted
on
Thu, Aug 29, 2019 6:18 PM
Nicely stocked bar! I struggle to keep one or two bottles on the shelf if ya know what I mean... |
|
L
leevigraham
Posted
posted
on
Thu, Aug 29, 2019 6:44 PM
The struggle is real… I tried to cut back on the occasional mid-week mai tai which made a difference. Buying an extra bottle here and there also helps. |
|
R

rumackay
Posted
posted
on
Fri, Aug 30, 2019 4:47 PM
Great job on the bar and it's great to see some Aussie rums get a pic. The Select Vat is what normal Bundy used to taste like for mine and is my "workhorse" rum. Still, some of their Small Batch choices are very nice as sipping rums and I enjoy one or two most weekends |
|
L
leevigraham
Posted
posted
on
Fri, Aug 30, 2019 10:44 PM
The two Bundy (UP and select) were gifted by a friend. I'm originally said I would never have Bundy UP in the bar but I wouldn't knock back a free bottle! The Ord River was worth the purchase and will be rotated through a few cocktails over the next few weekends. |
|
L
leevigraham
Posted
posted
on
Mon, Dec 16, 2019 2:44 AM
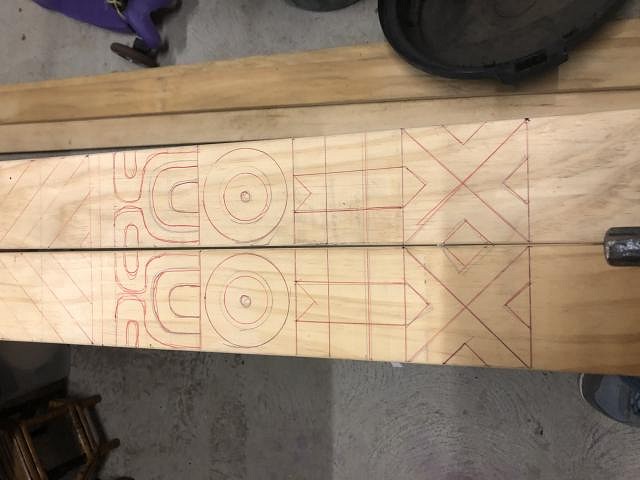
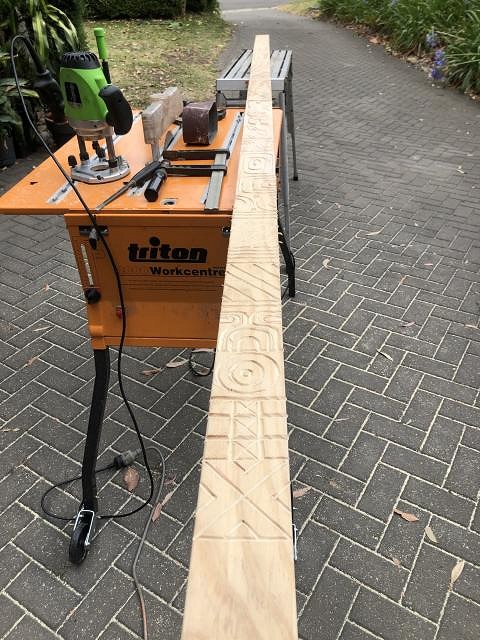
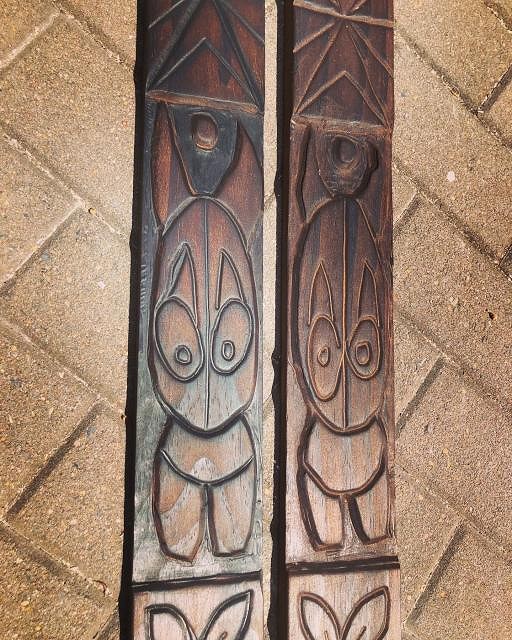
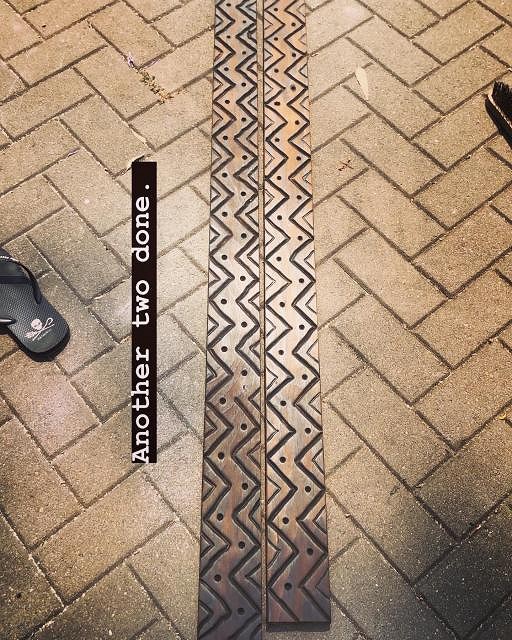
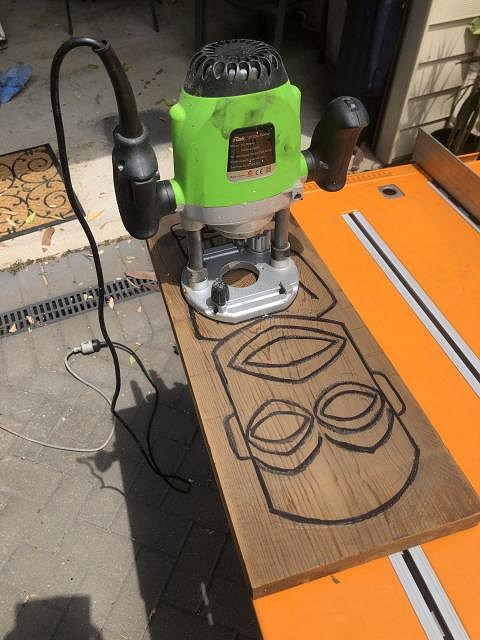
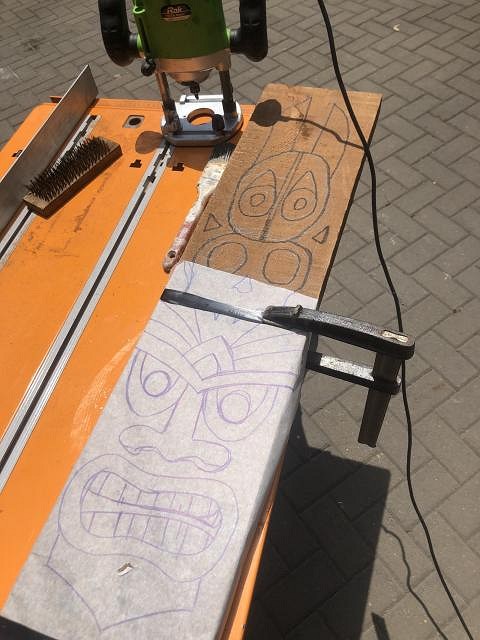
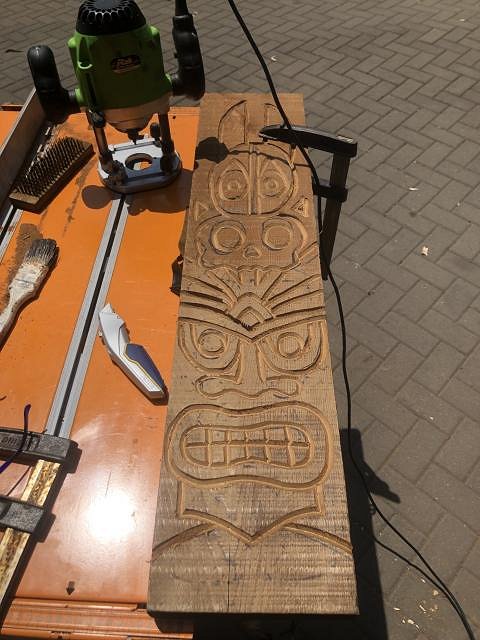
A quick pre-christmas update! I've spent some more time practicing carving patterns and panels with the router. First pair are for the garage door trim. I wanted to experiment with as many different patterns as possible to see what I could do with the router and what I liked visually.
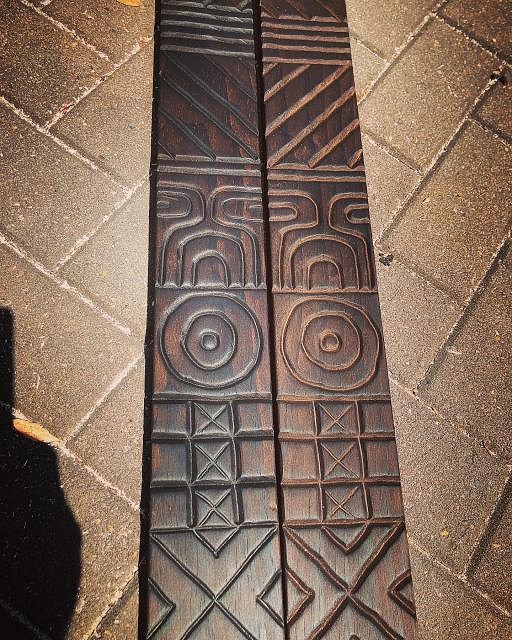
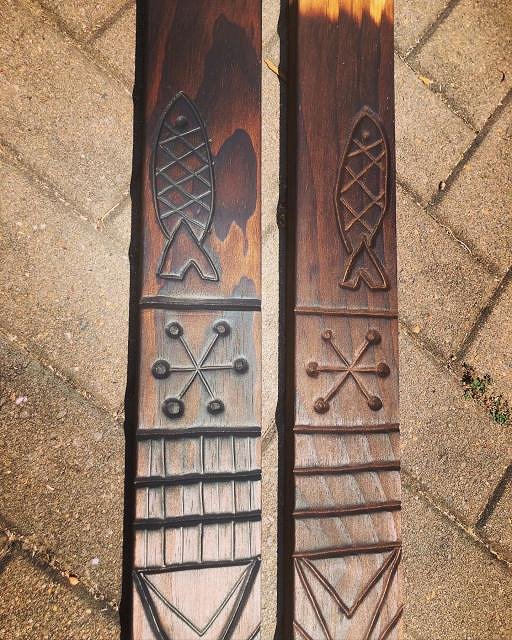
The second pair are screwed to the top of the door trim so I kept the same pattern. It still wasn't straight forward as you can see by the geometry. I tried a couple of different cutting depths as well.
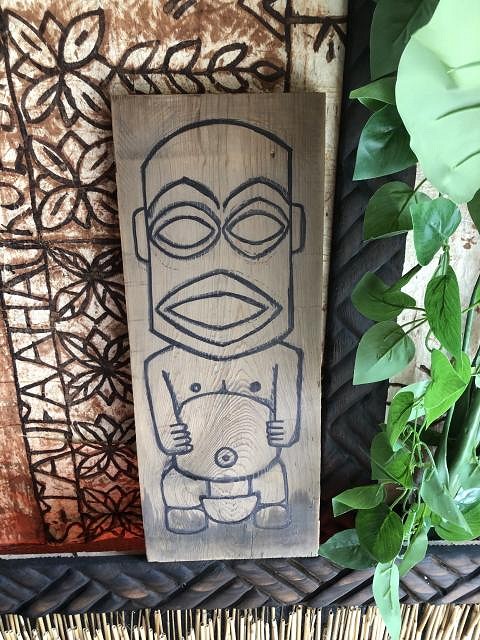
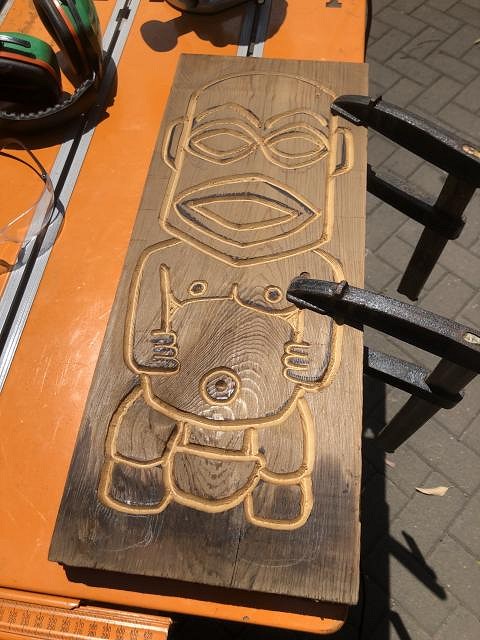
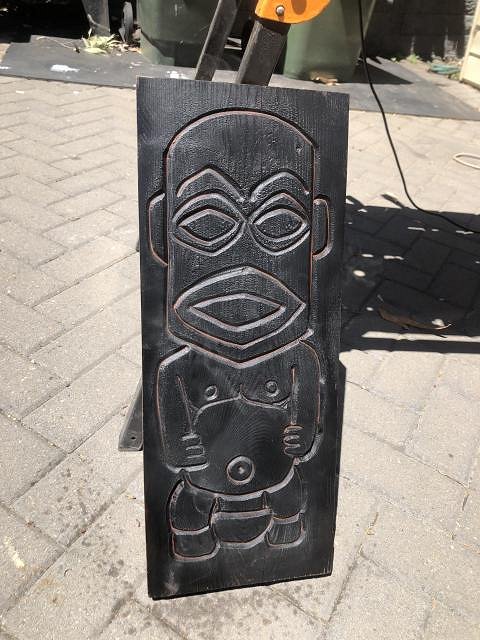
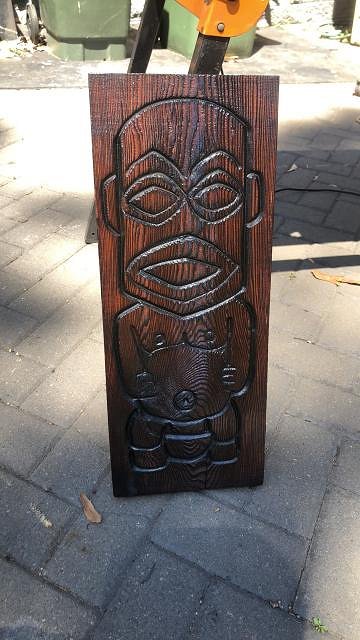
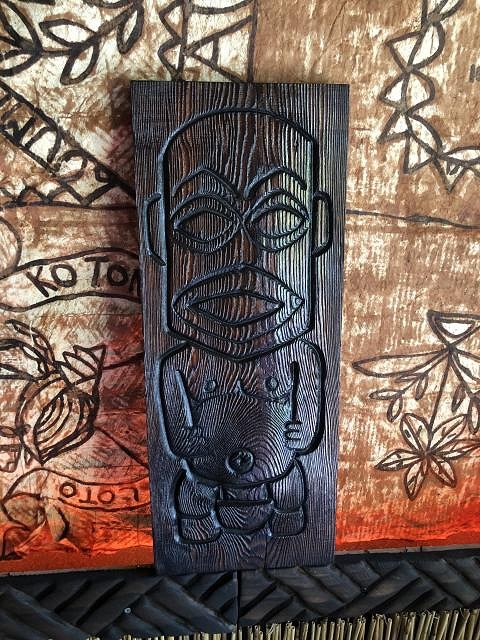
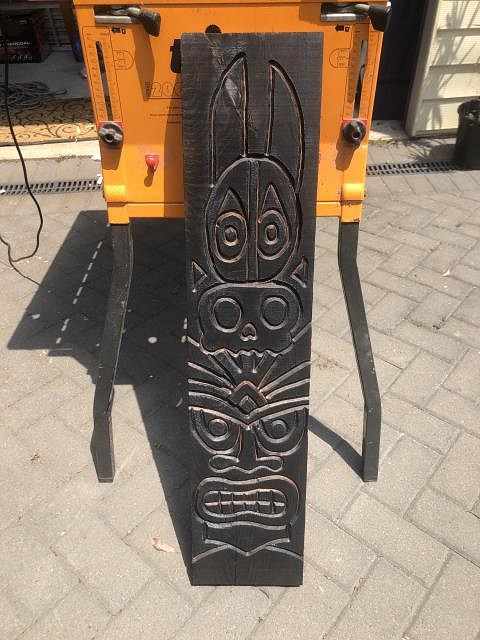
The one thing that really made them pop was adding Japanese black to the grooves after the first burn and stain. There's a few videos of the process on my instagram account: I actually did some panel carving as well but I think I might thickness them back and go again. Panel 1
Panel 2
|
|
W
W8N2Surf
Posted
posted
on
Tue, Dec 17, 2019 10:01 AM
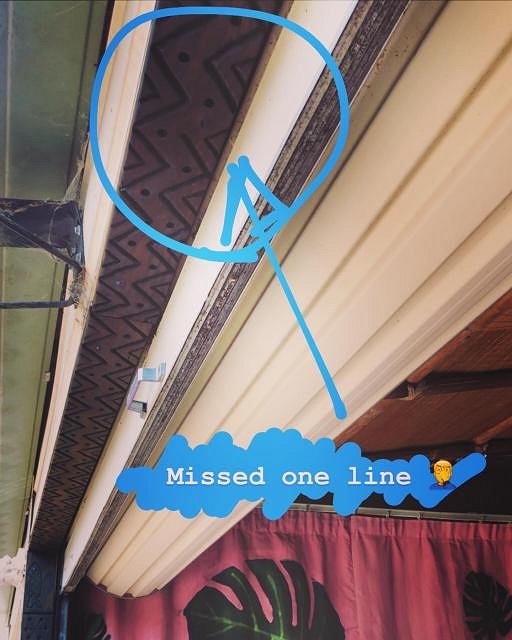
Just paint that one missing trim line in black, no one will know. I'm sure no one but you notices anyhow. :) |
|
J

jimsflies
Posted
posted
on
Fri, Dec 20, 2019 2:25 PM
Looks great! You're a pro with the router. I didn't see the missing line. If tiki trim is perfect, it doesn't look right anyways. That's one of the things I love best about this style. |
|
L
leevigraham
Posted
posted
on
Wed, Jan 15, 2020 5:45 AM
Another weekend of carving… finally finished the panels to hide the curtain rail.
Here's a short video of the whole piece
Hopefully these images stay visible as they're hosted on Google due to issues with Tiki Central file uploads. Here's a link to the full album: https://photos.app.goo.gl/v1PFUBVrcsjZxucWA |
|
C

Commodore
Posted
posted
on
Wed, Jan 15, 2020 6:38 AM
Looks awesome Leevi, I know how much carving that is, well done! The black stain is very subtle and I think it really looks fantastic - nice touch. Hope all is as well as can be with you with all of the fires down there. Keep the updates coming & cheers! -Commodore |
|
PP

Prikli Pear
Posted
posted
on
Thu, Jan 16, 2020 5:24 PM
I already told you this on IG, but that's some mighty fine looking work you're doing. Keep it up! |
|
L
leevigraham
Posted
posted
on
Thu, Mar 19, 2020 3:43 AM
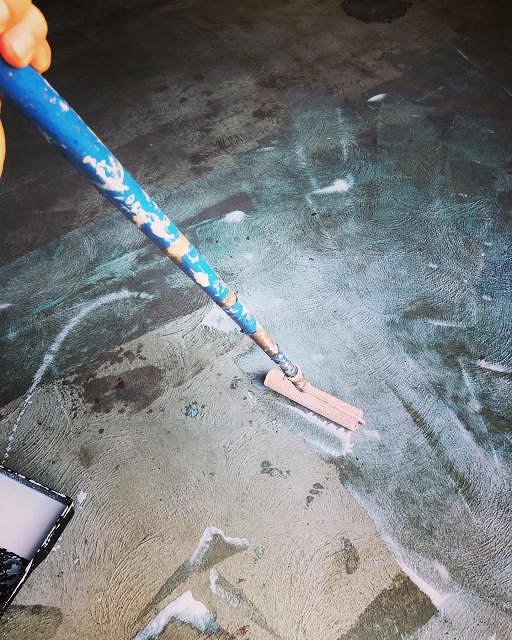
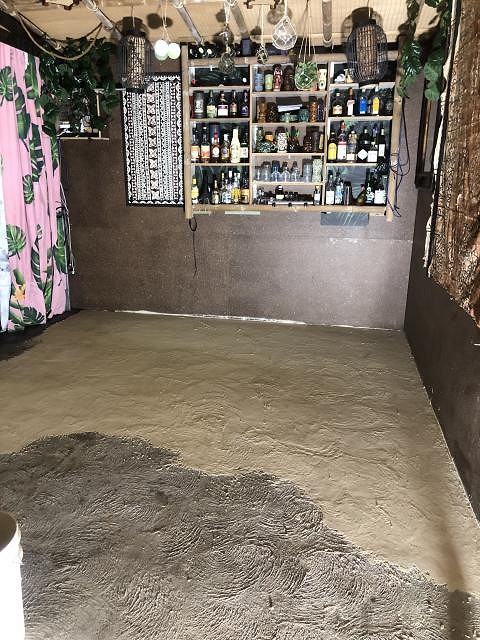
Hi everyone, I've been hard at work on / in Leroys Luau Lounge since the start of the year. My goal was to finish the last large chunk of work before posting any teasers so here it is. If you've seen my previous posts you'll know Leroys Luau Lounge takes up half of my double garage. Given it's a garage the floor was covered in paint, oil and other stains. When the lights are off this is ok but during the day it just didn't feel right. My plan was to simply resurface the concrete with a flat grey colour… and as you all know it's rarely that straight forward in tikibar land. Warning… lot's of pics ahead. More than happy to answer questions about the process :) First step was to clean the shed so everything can be moved around. This alone took a week. I threw out a bunch of stuff and put everything else in tubs. This allowed me to pack everything into half the shed so I had a clean slate to work with. After a pressure wash the floor was ready for priming which I applied with a roller.
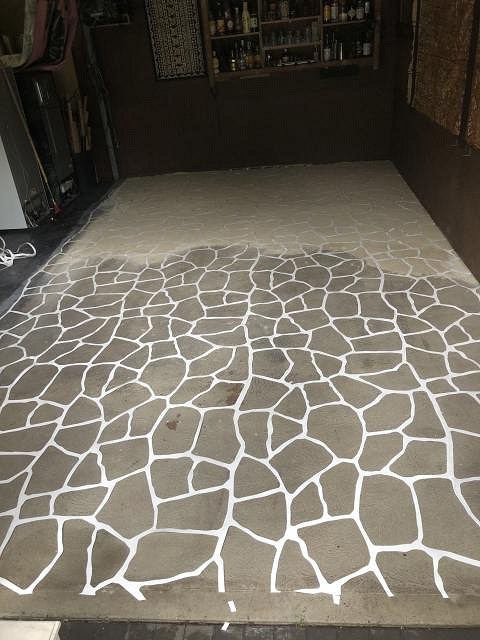
When I was at the concrete supply store I thought it would be a good idea to add a pattern so I bought a roll of "bush rock" pattern. Basically it's a coated light cardboard you put down before you spray.
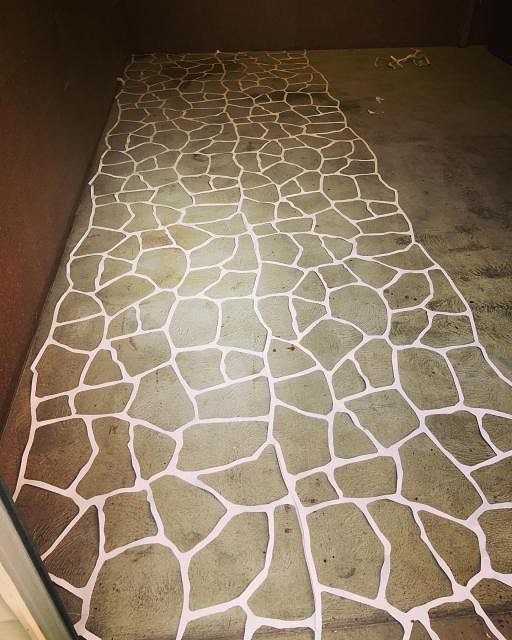
The roll has a repeating pattern which means you need to line it up side by side:
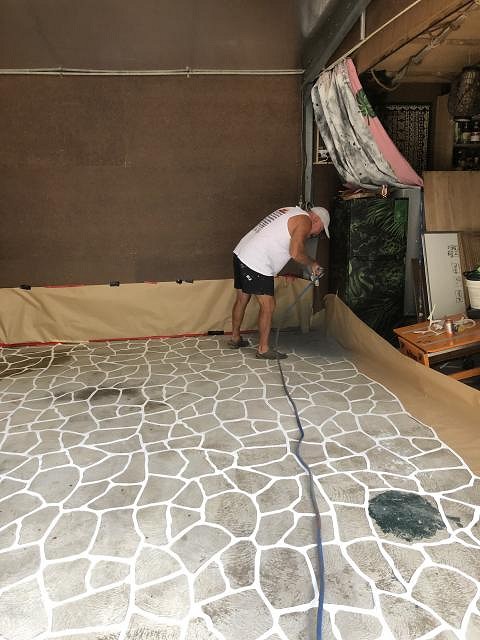
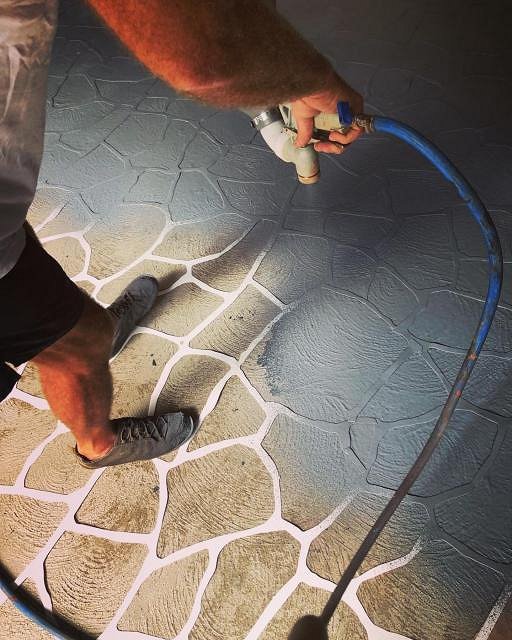
I wanted to make sure everything was perfect so I used extra amounts of blutac to hold down the pattern. Under every junction there's a small piece of blutac. I then added more blutac to hold down the other grout lines. Setting the pattern took about 3 nights to complete. On the weekend we then masked off the walls with some brown paper and started spraying the concrete mix onto the floor:
In some places I trimmed the pattern to hide larger stains and paint marks:
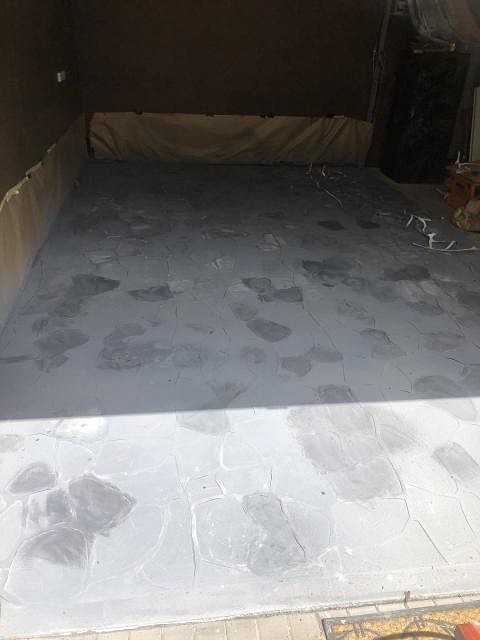
Once the concrete was pretty close to being dry I sponged some darker stain on some of the stones. If I had to do this again I would have waited just a bit longer. In some places the extra water made the top coat a bit flaky.
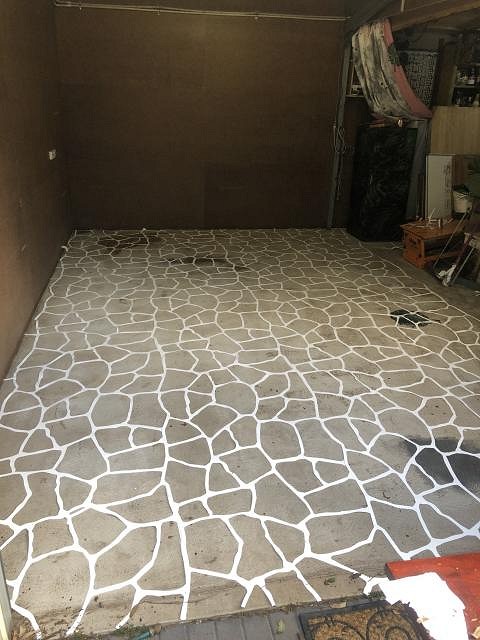
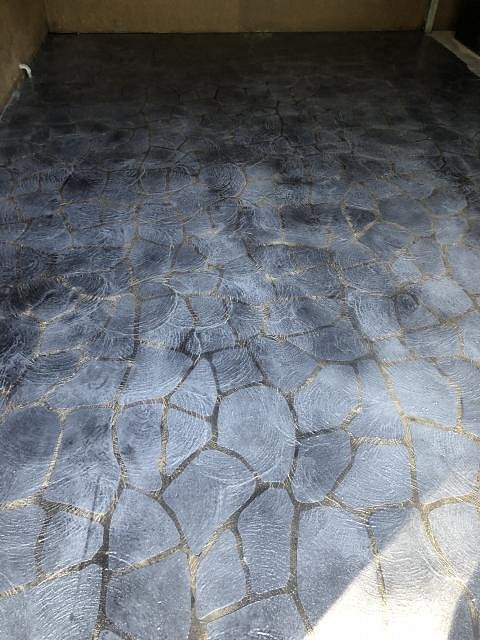
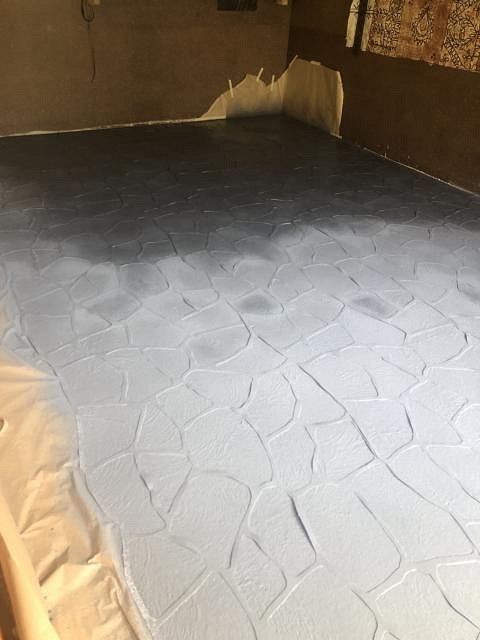
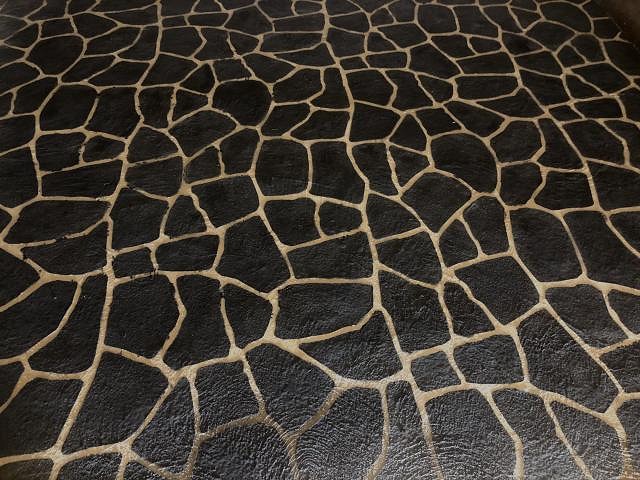
In the pic above you can see where we started to pull up the stencil but the concrete wasn't quite dry enough to walk on. Once the concrete was dry we pulled up the pattern revealing the grout lines below. I was pretty happy with how things turned out but the grout was a bit bright compared to the stones which only had a little bit of texture. The colour was much lighter than in this pic:
I saw another post in this forum where the author mentioned that he put a wash over the whole floor to bring it all together. So I thought I would try that Basically the wash is water with a very small amount of colouring agent. Again I should have probably let everything dry a bit more before applying.
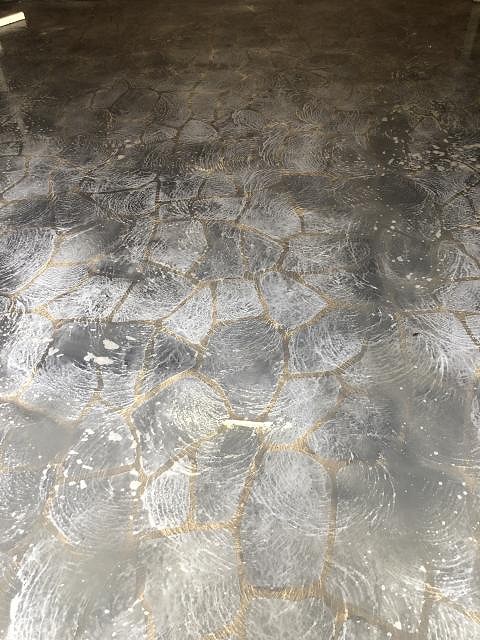
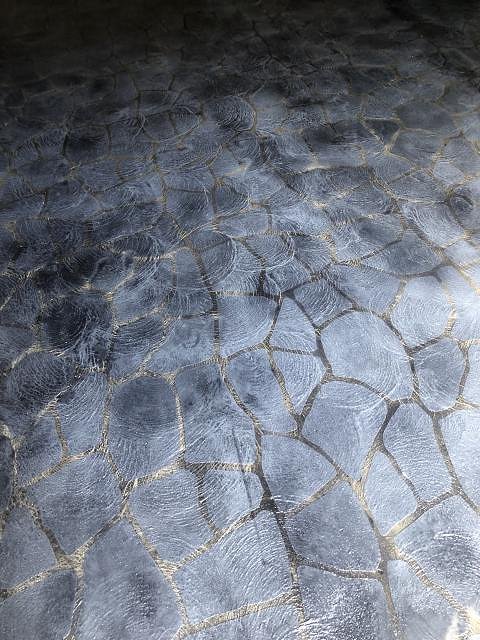
The result blended everything together nicely.
Finally a coat of sealer and let dry. The sealer also darkened everything a bit more. It was pretty bright when I took this photo of one side complete. In the top corner you can see the difference between the two sides.
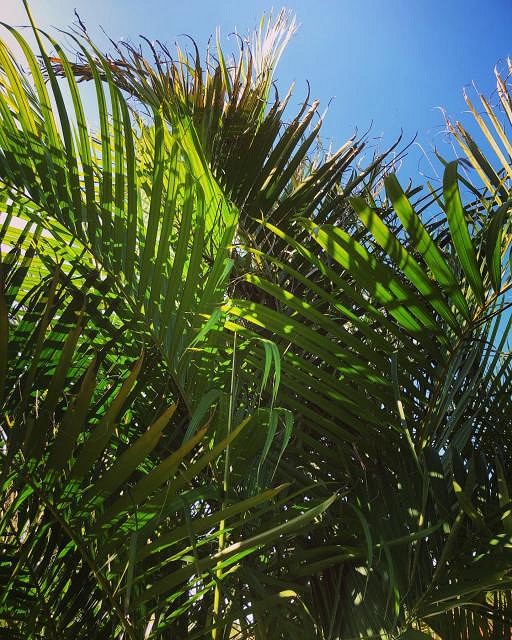
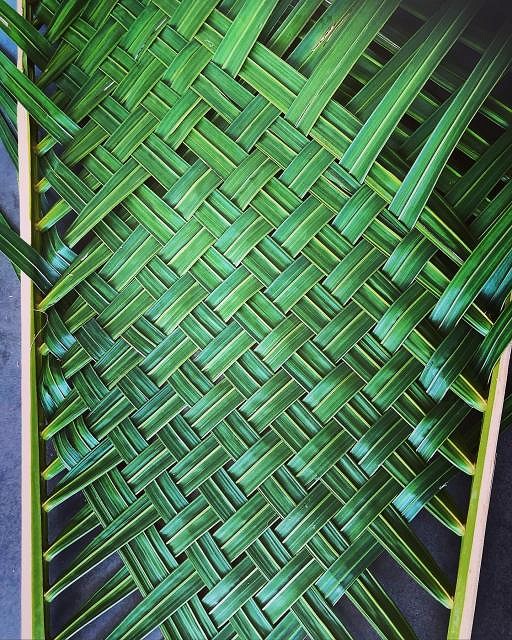
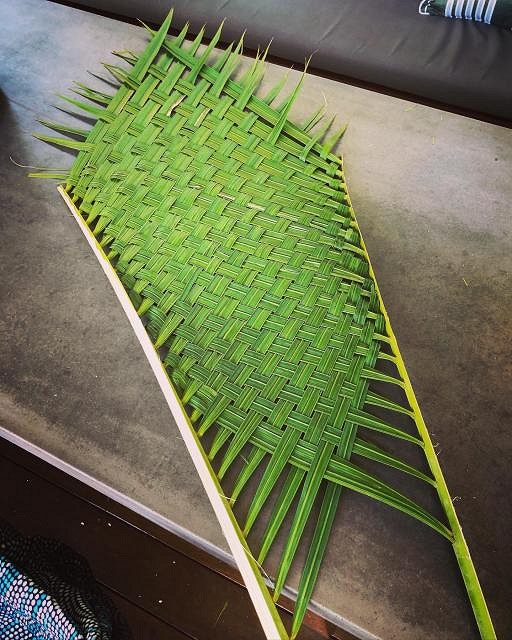
With all the hard work done I visited my mum's house for a swim in her pool. While I was still feeling creative I thought I would give weaving a go. I cut off a fond from one of her golden palms, split it in half and weaved the two together.
Not bad for a first crack at weaving and concrete resurfacing. |
|
L
leevigraham
Posted
posted
on
Thu, Mar 19, 2020 4:17 AM
Part 2 - The tiki bar side. I should have said at the start of the previous post the left side of the shed I started on was not the tikibar side of the shed. I used it as a bit of a practice. Once the left side was completely dry and the sealer was set I moved everything back across to the left side to start the whole process again… but this time with a twist! Feeling confident I decided to darken the area under the bar to give the area a bit more interest. To make sure I had a cleaner area to work with I hand troweled a light sand colour as a base coat.
I actually wish I put a layer down over the whole floor first to provide a better base. I then remembered it's just a shed :)
Here's the two colours faded together
Again I hit a few random stones with the sponge
Finally I pulled up pattern and everything looked pretty good.
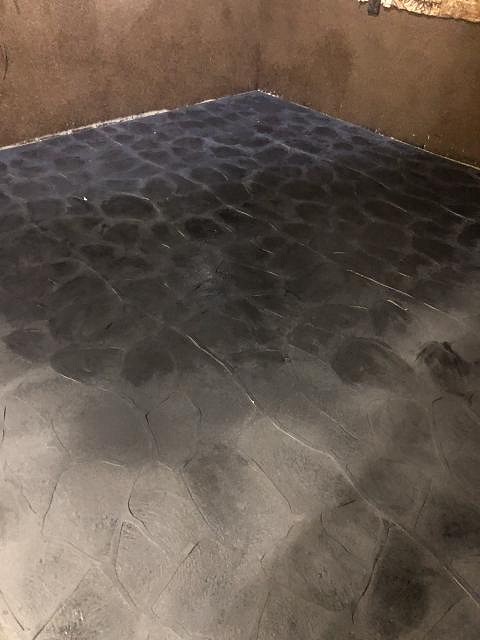
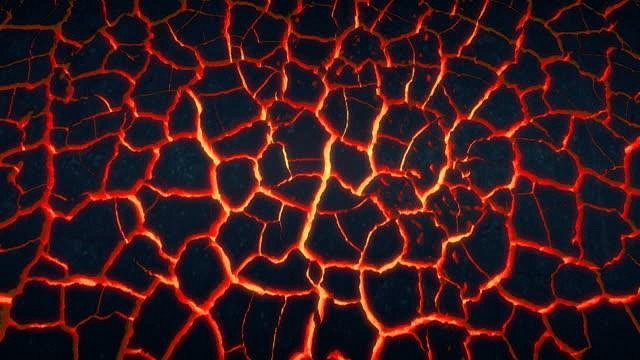
I had previously shared the pics with a few friends and one of them commented "You could make this a pretty cool lava effect". Of course that sent my mind racing and in a few minutes I found this pic on google.
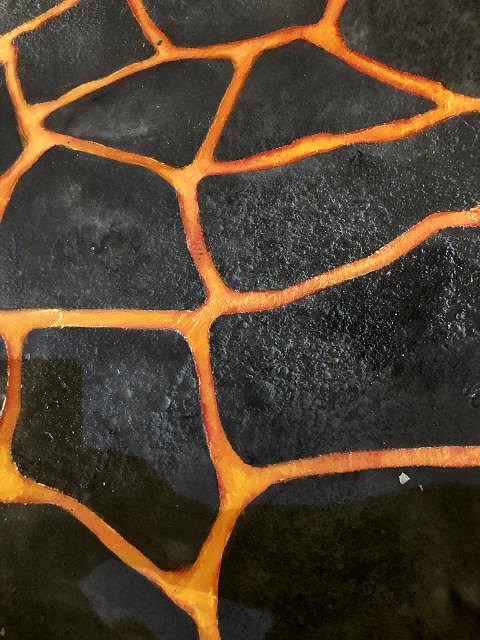
This was the actual reason for the base coat and dark bar area. I went back to the concrete supplier and purchased some orange colouring. My plan was to put a base down and highlight from there. Here's my first test area.
This area is about 2ft by 3ft. It took me nearly an hour. This was looking like it was going to be a long long task. Regardless I was really happy with the result so I was encouraged to keep going. For a week, every evening I would spend a few hours painting away
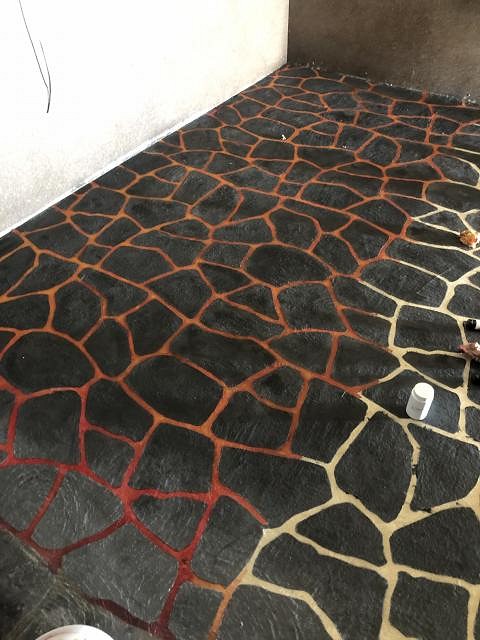
… covering a few feet each night
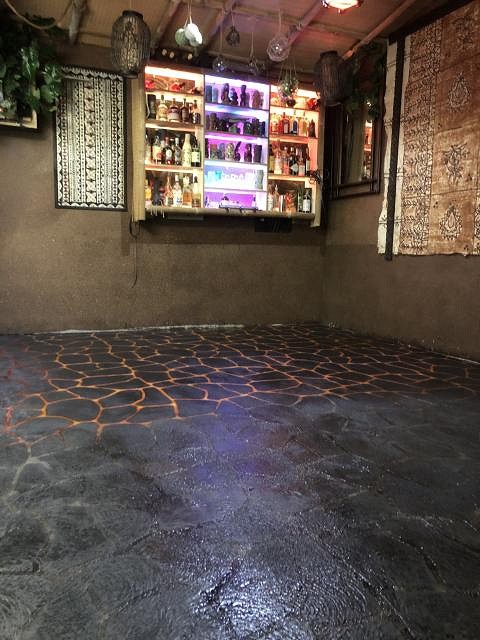
… until finally the bar area was done
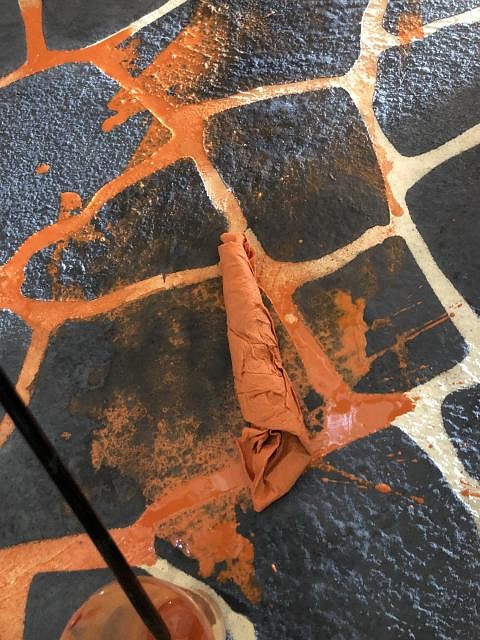
Of course there had to be one spill when I wasn't paying attention.
Again I gave everything a wash but this time I was careful not to was the volcano section.
When the wash was dry there was some nice texture. It was a little darker than the left side but not noticeably.
I squeegeed the sealer on… forgetting I used a roller on the right side which gave a thicker coat but a slightly uneven finish.
I was super happy with the finish but a second coat with the roller smoothed everything out. The sealer did make some of the paint bleed over the stones but it's not super noticeable. Of course I'll be super critical and always see it but I doubt others will. |
|
L
leevigraham
Posted
posted
on
Thu, Mar 19, 2020 4:25 AM
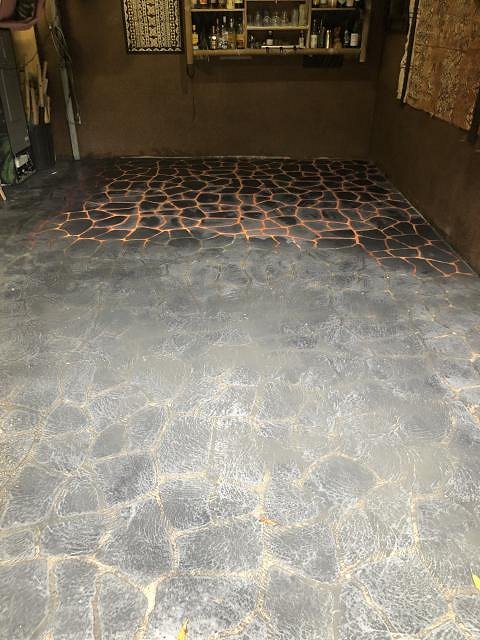
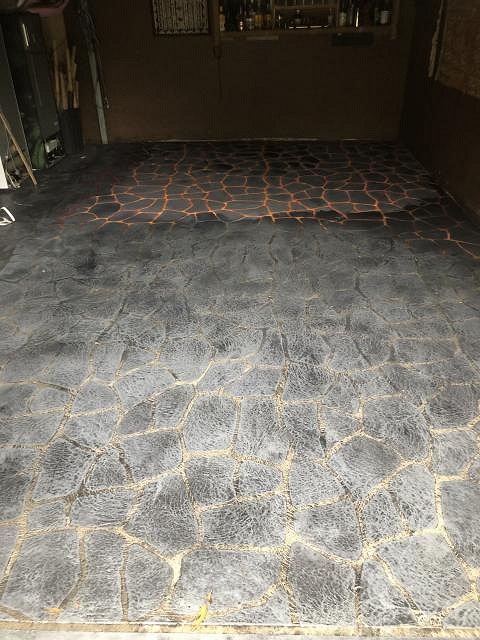
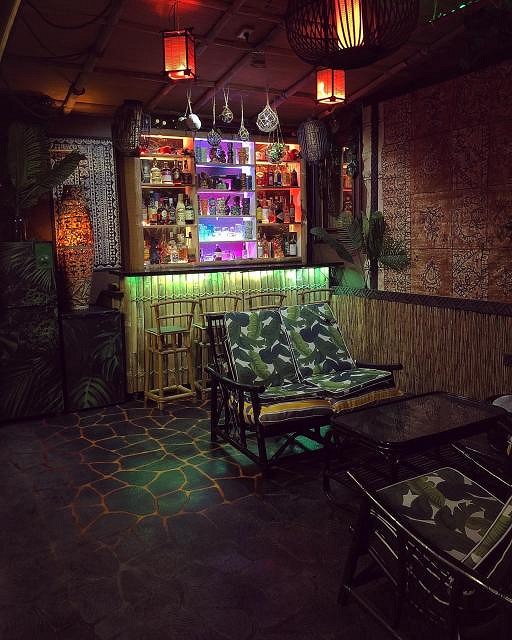
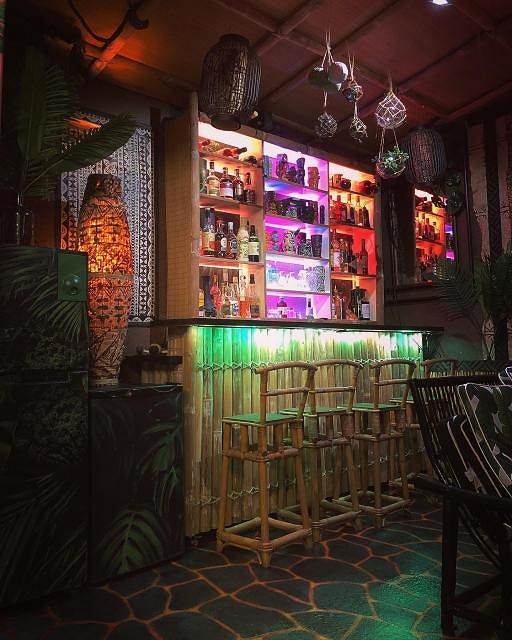
Part 3 - The big reveal. Once everything was dry I re-assembled the tikibar side. Here's the result!
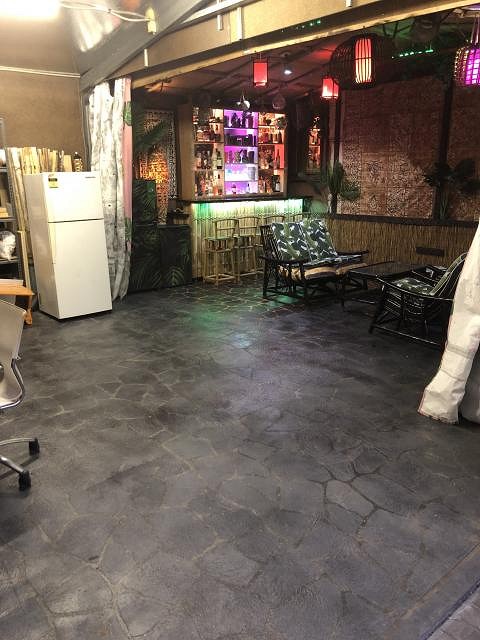
And a few less sexy ones with the lights on so you can see the whole space. Usually the curtain in the middle is drawn so guests don't see the workshop side.
|
|
L
leevigraham
Posted
posted
on
Thu, Mar 19, 2020 4:27 AM
I'm also cross posting on Instagram if you want to see the progress in real time including videos and stories: https://instagram.com/leevigraham |
|
B

Benbow
Posted
posted
on
Thu, Mar 19, 2020 3:22 PM
Your space looks awesome! Great progress pics! |
|
E

eroc
Posted
posted
on
Fri, Mar 20, 2020 11:11 AM
Brilliant idea on the lava flow in the floor. Looks awesome! If you ever wanted to redo/extend, you can also trowel on the concrete instead of spray. I've used a pool trowel (long, rounded ends) to make very realistic chiseled rock texture. The trick is to 'pull up' to allow a vacuum-like pressure to move the concrete at multiple tiny elevations. Then just knock it down with a sturdy scraper once dry. |
|
C
Commodore
Posted
posted
on
Fri, Mar 20, 2020 8:28 PM
I love it! the floor looks great... and overall can tell the place has a great vibe. Dig it! Lastly - liking the palm frond weaving... giving something to do this weekend while quarantined.... cheers all! |
|
M

MauiRose
Posted
posted
on
Fri, Mar 20, 2020 11:53 PM
I absolutely love that lava rock. Genius! Thanks for posting all the progress pics. |