Tiki Central / Other Crafts
Volcano fountain
Pages: 1 16 replies
|
B

BlackWater
Posted
posted
on
Sat, May 13, 2023 8:06 PM
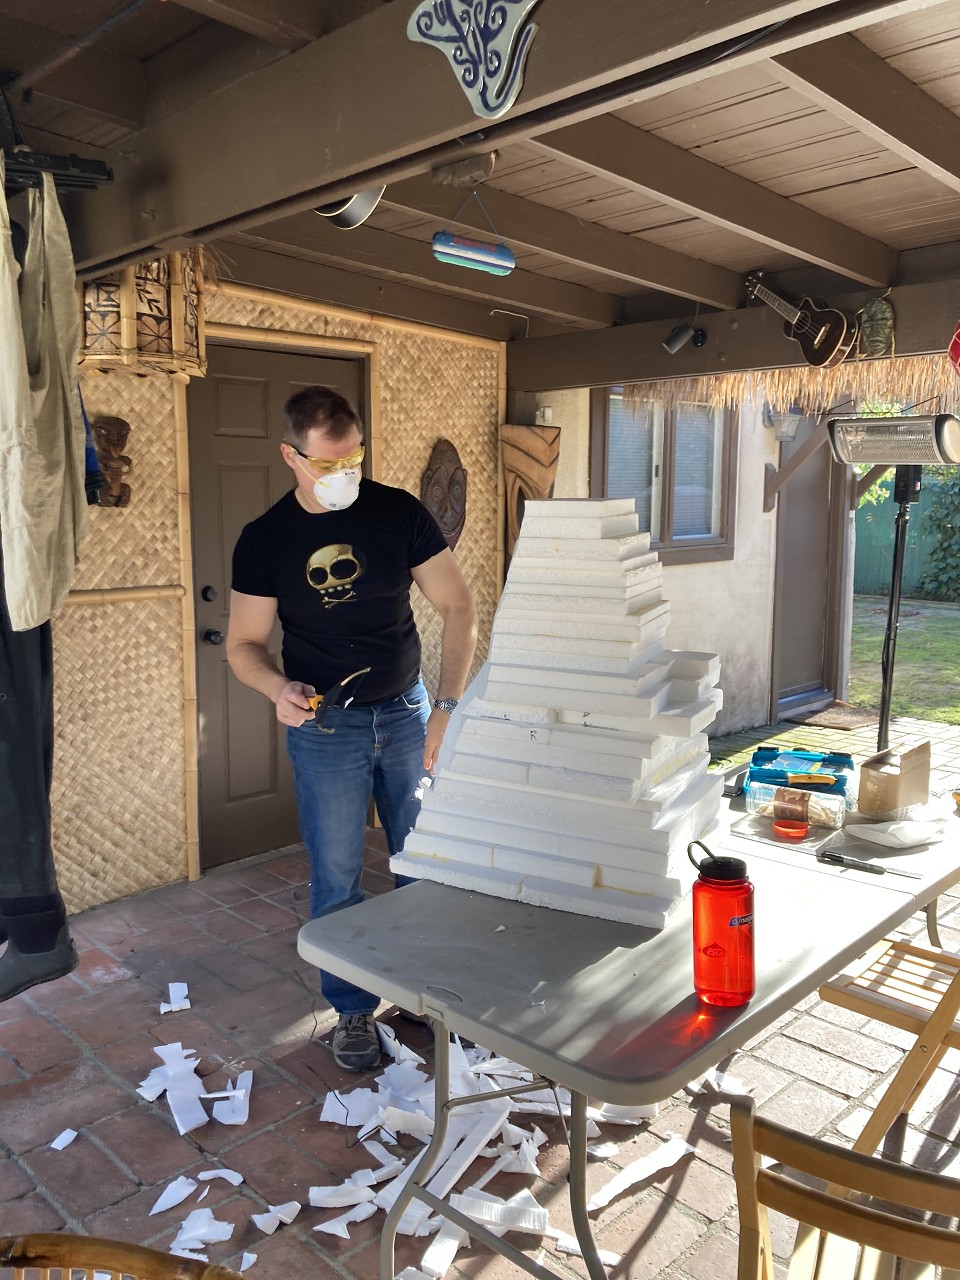
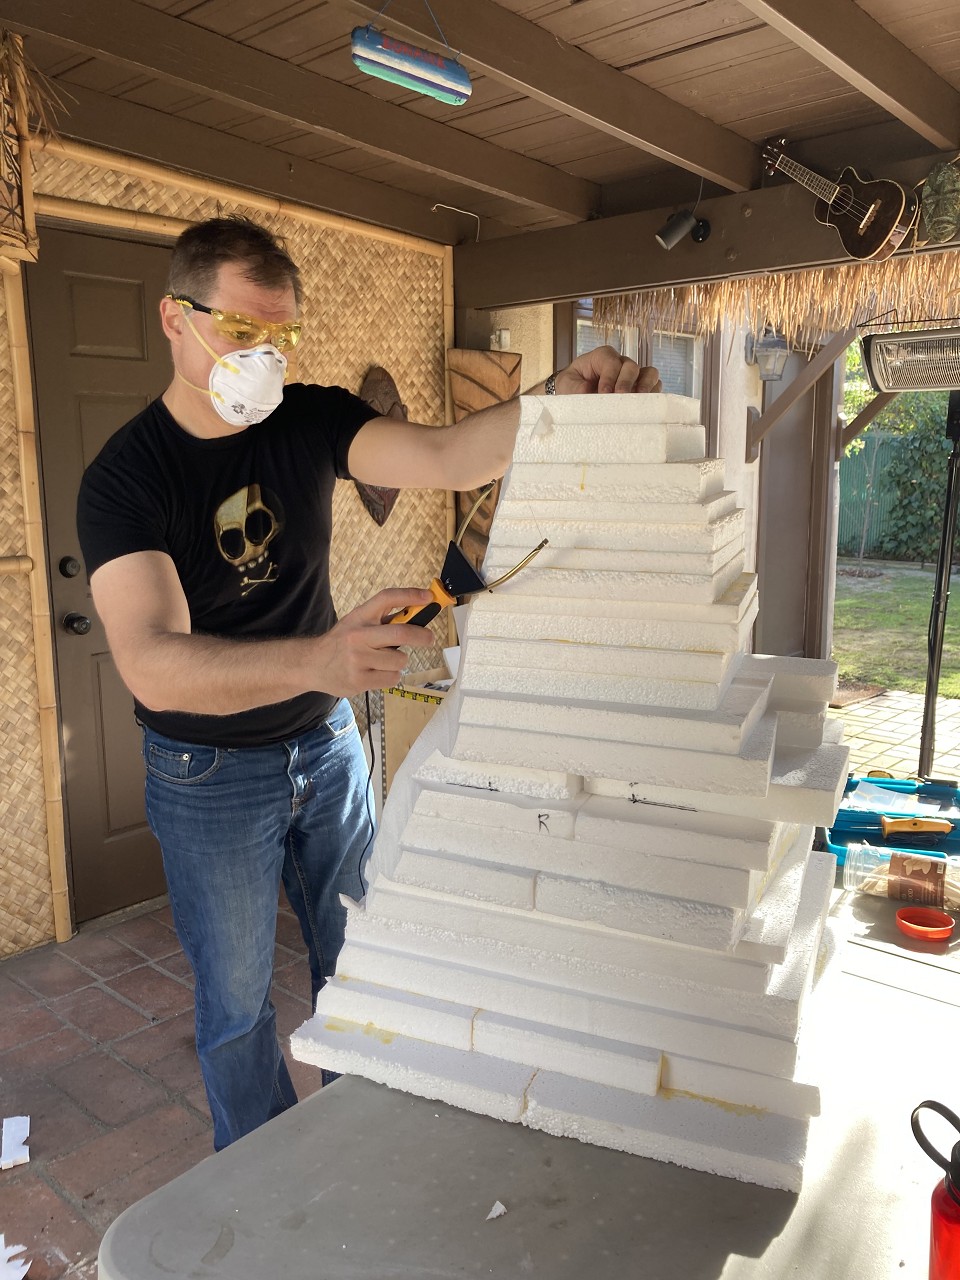
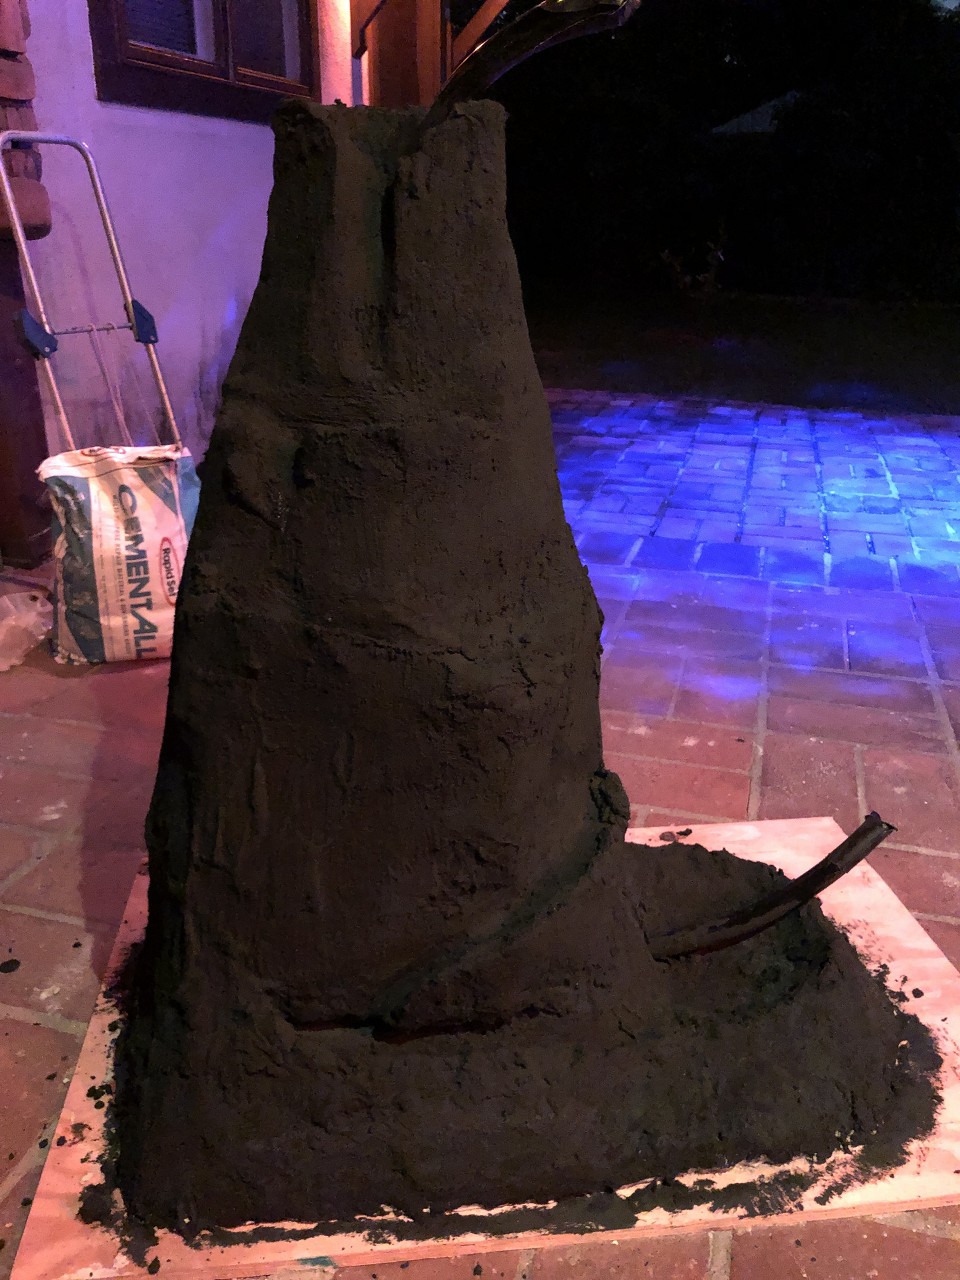
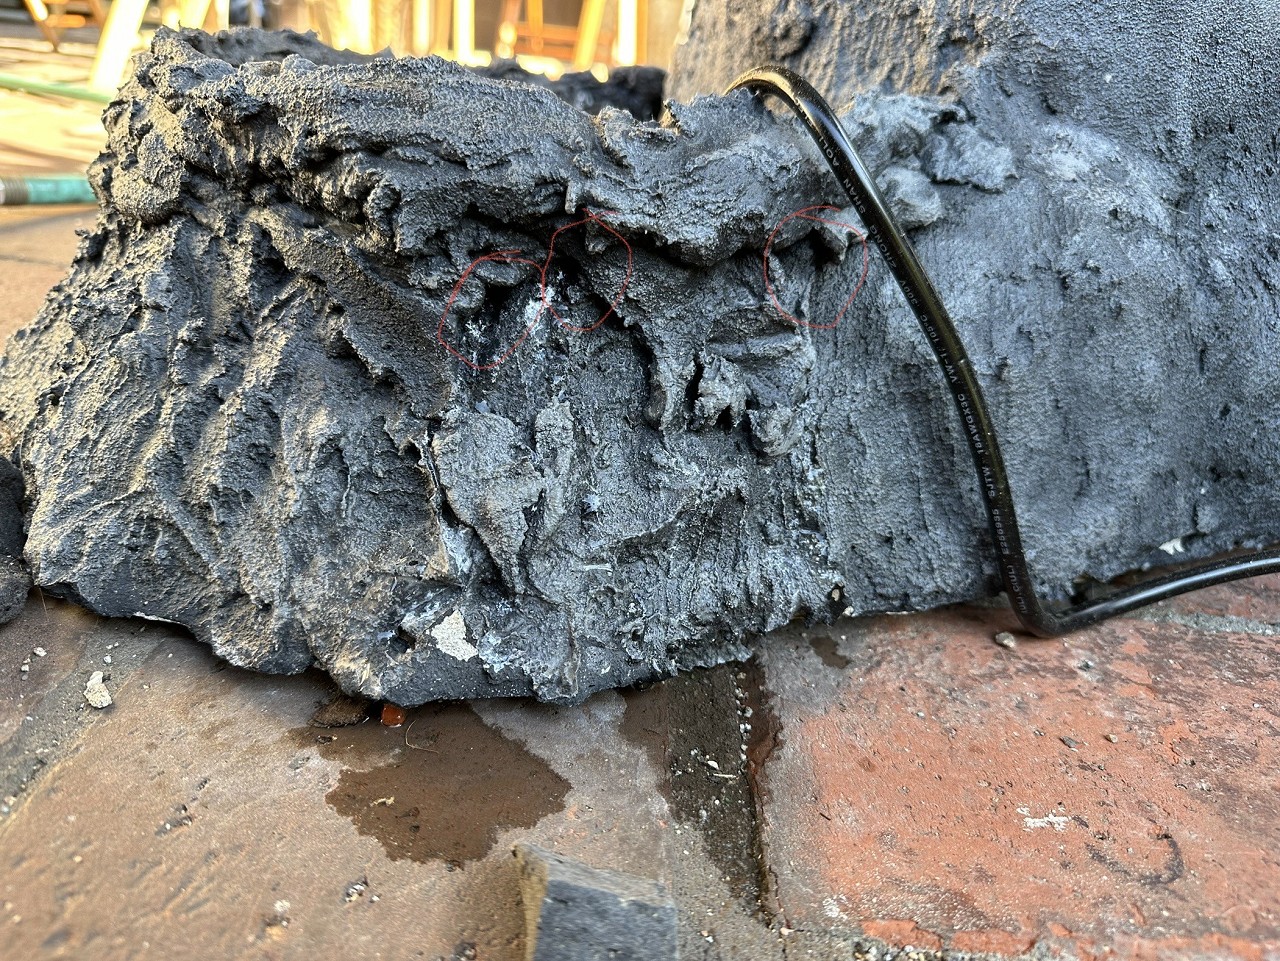
I’ll post some pics of my volcano fountain for the tiki bar, with lessons learned along the way. I started by saving styrofoam from work for months, prototypes always came packed in this foam so I upcycled it for the fountain. They were stuck together with wood glue and/or 3M spray glue. I carved the foam with a wire foam cutter kit from Amazon. I knew I wanted some mini-waterfalls, because the water turbulence sound is what is nice about fountains. In retrospect I should have made the channels a bit deeper, these are too short so water spills over the side. Especially once I filled them in with cement and epoxy.
|
|
B
BlackWater
Posted
posted
on
Sat, May 13, 2023 8:11 PM
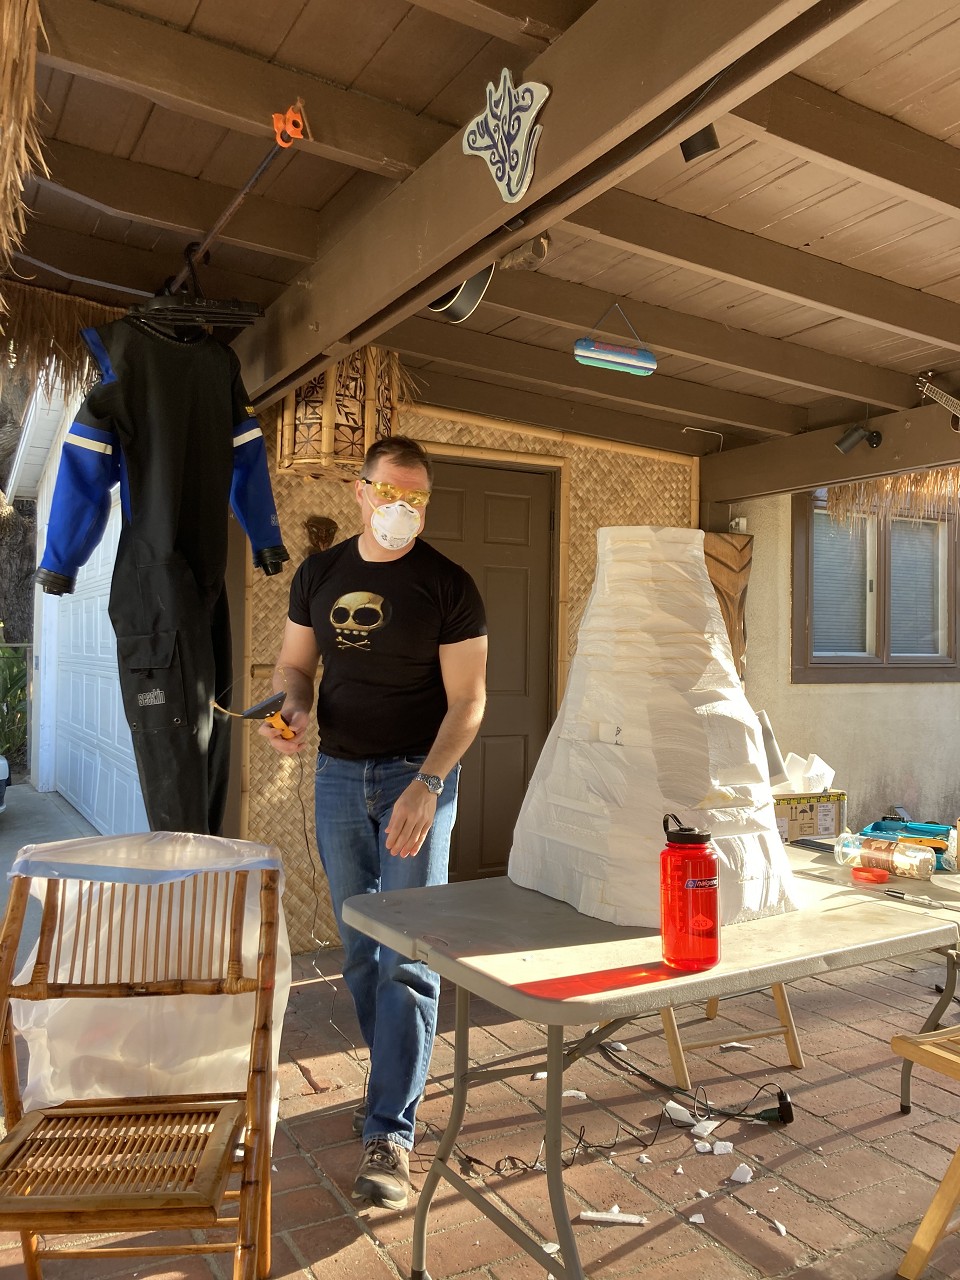
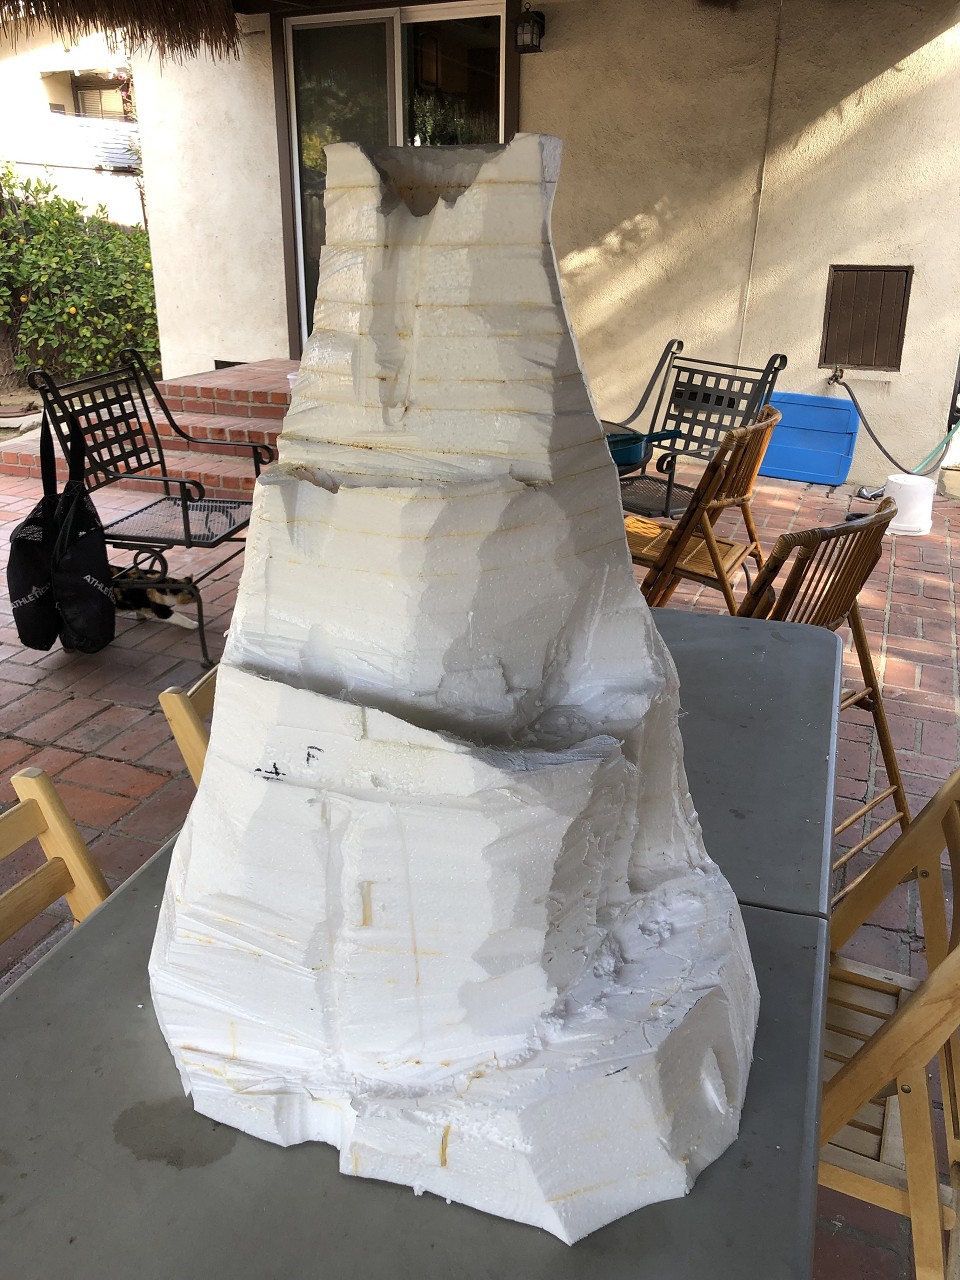
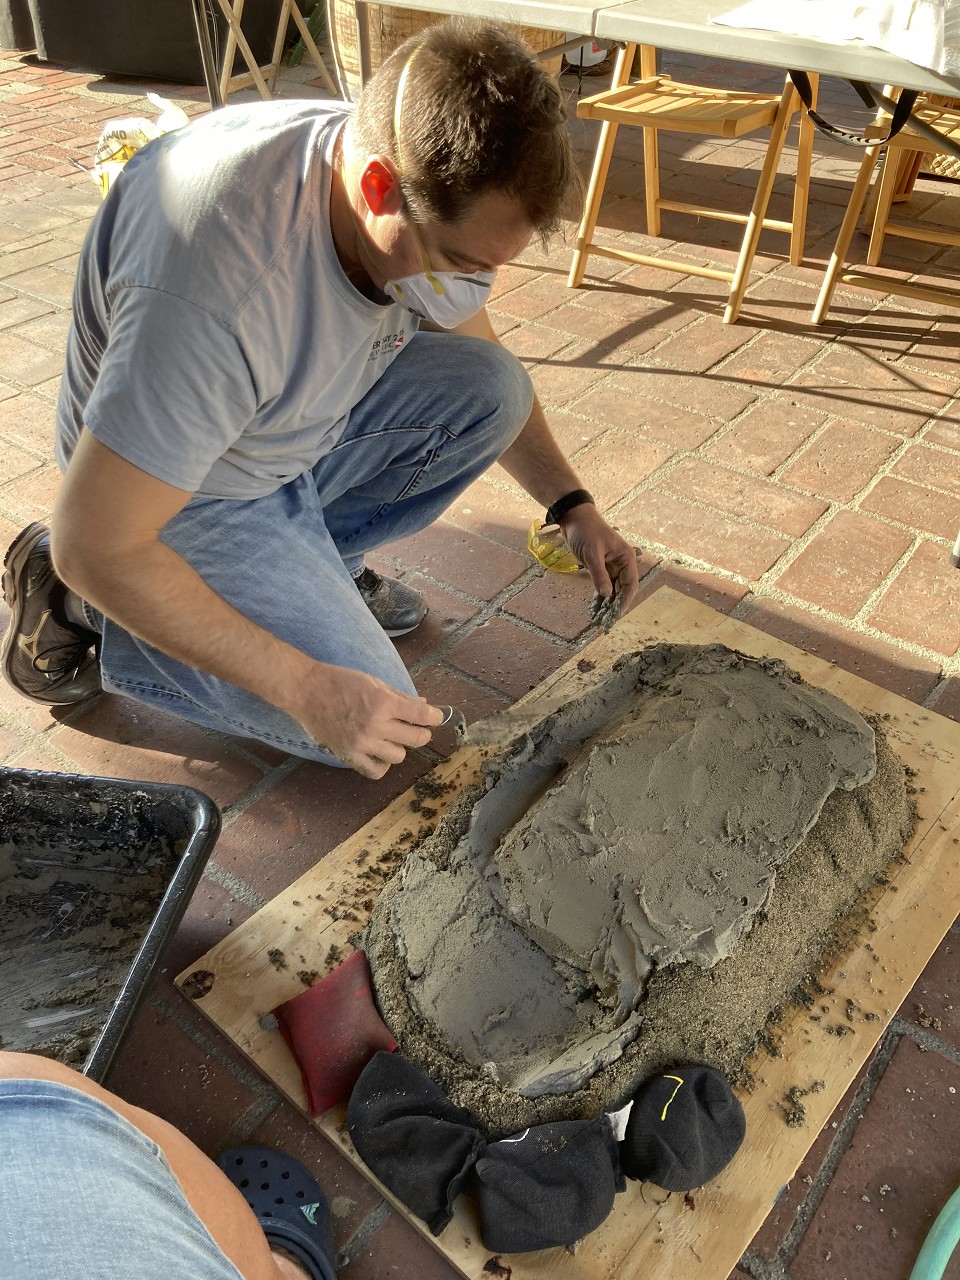
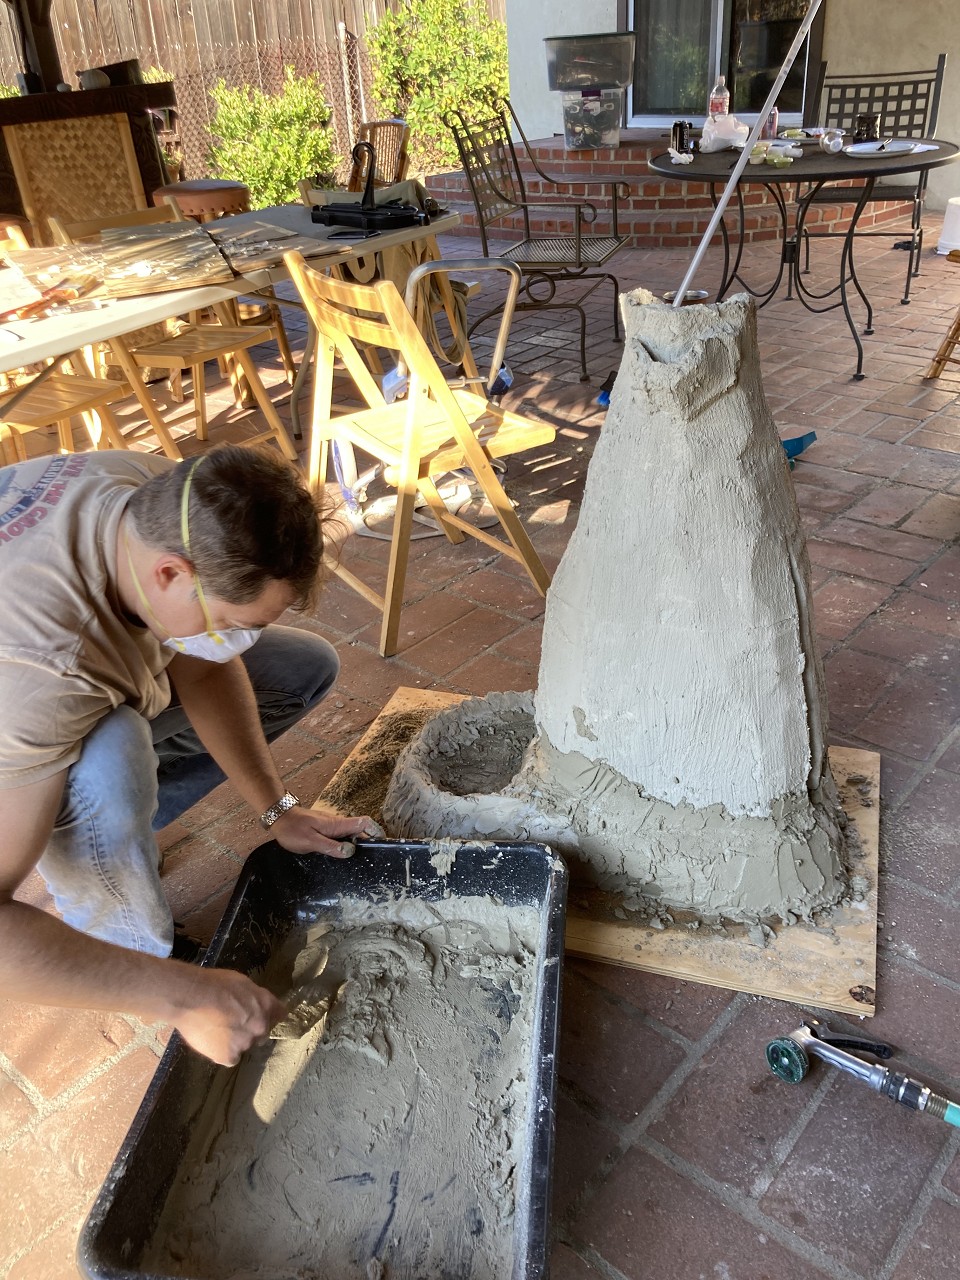
I wasn’t able to find enough styrofoam for the whole project, so the bottom third was formed over sand. Once again I wish I had more depth here, I’ll add it later which will cause more problems. I made the shape with wet sand, smoothed concrete over it, then dug the sand out from the bottom. I left a hold for the water tubing, which was drilled through the foam. The styrofoam was fitted on top, a few last carving adjustments, then it was ready for a first cement coat using a brush.
|
|
B
BlackWater
Posted
posted
on
Sat, May 13, 2023 8:17 PM
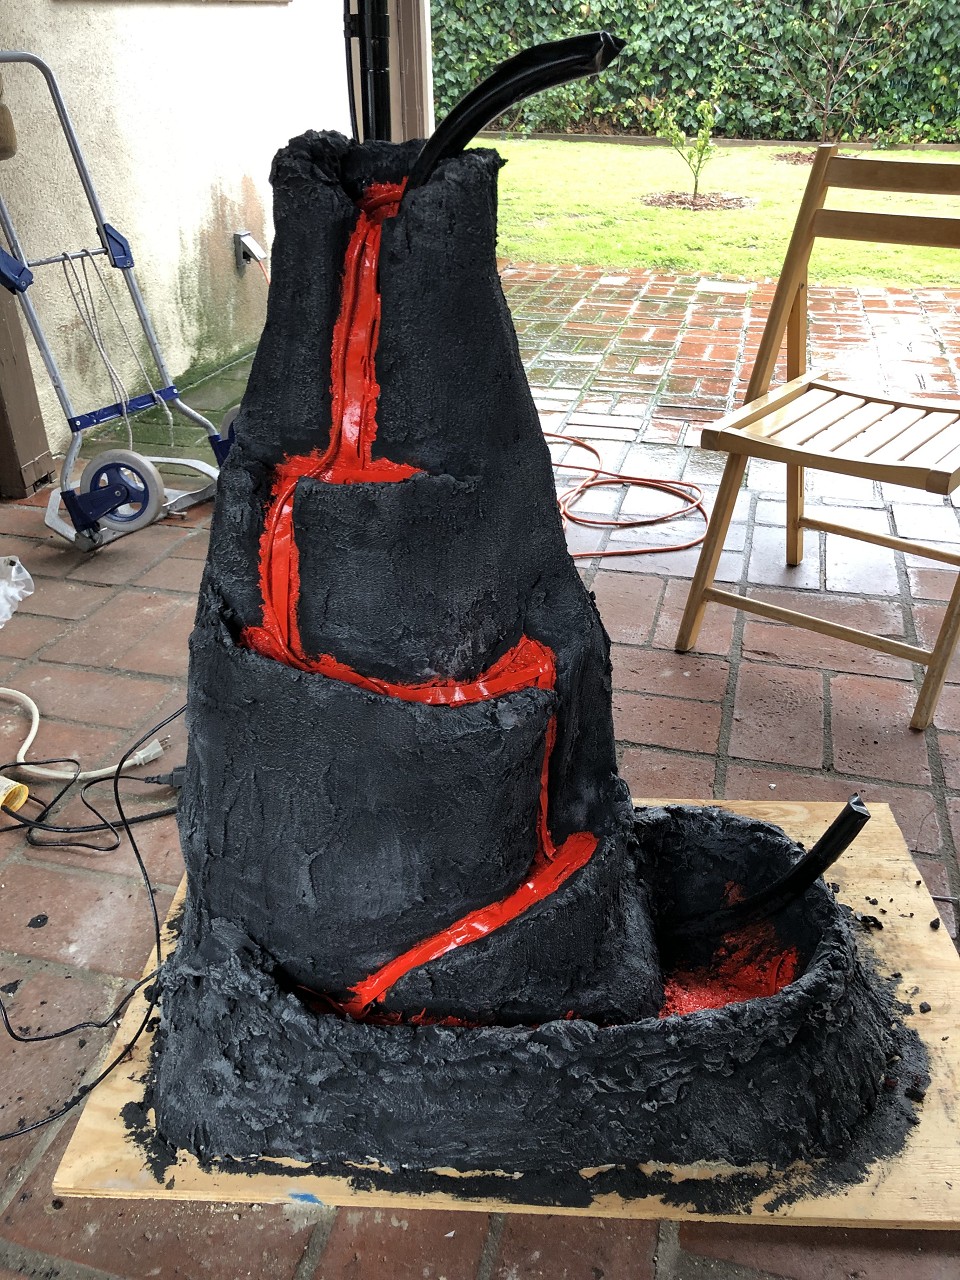
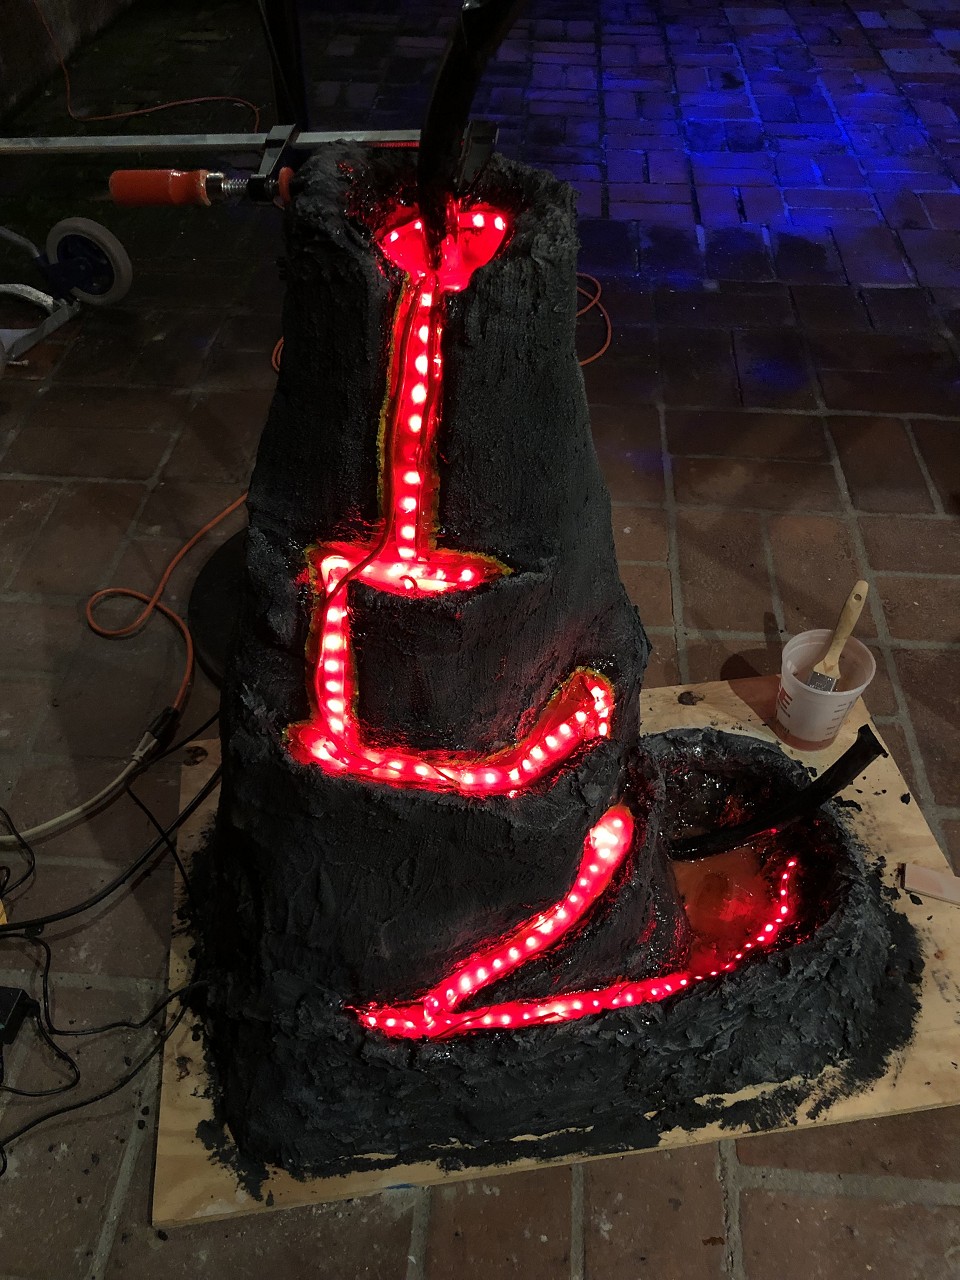
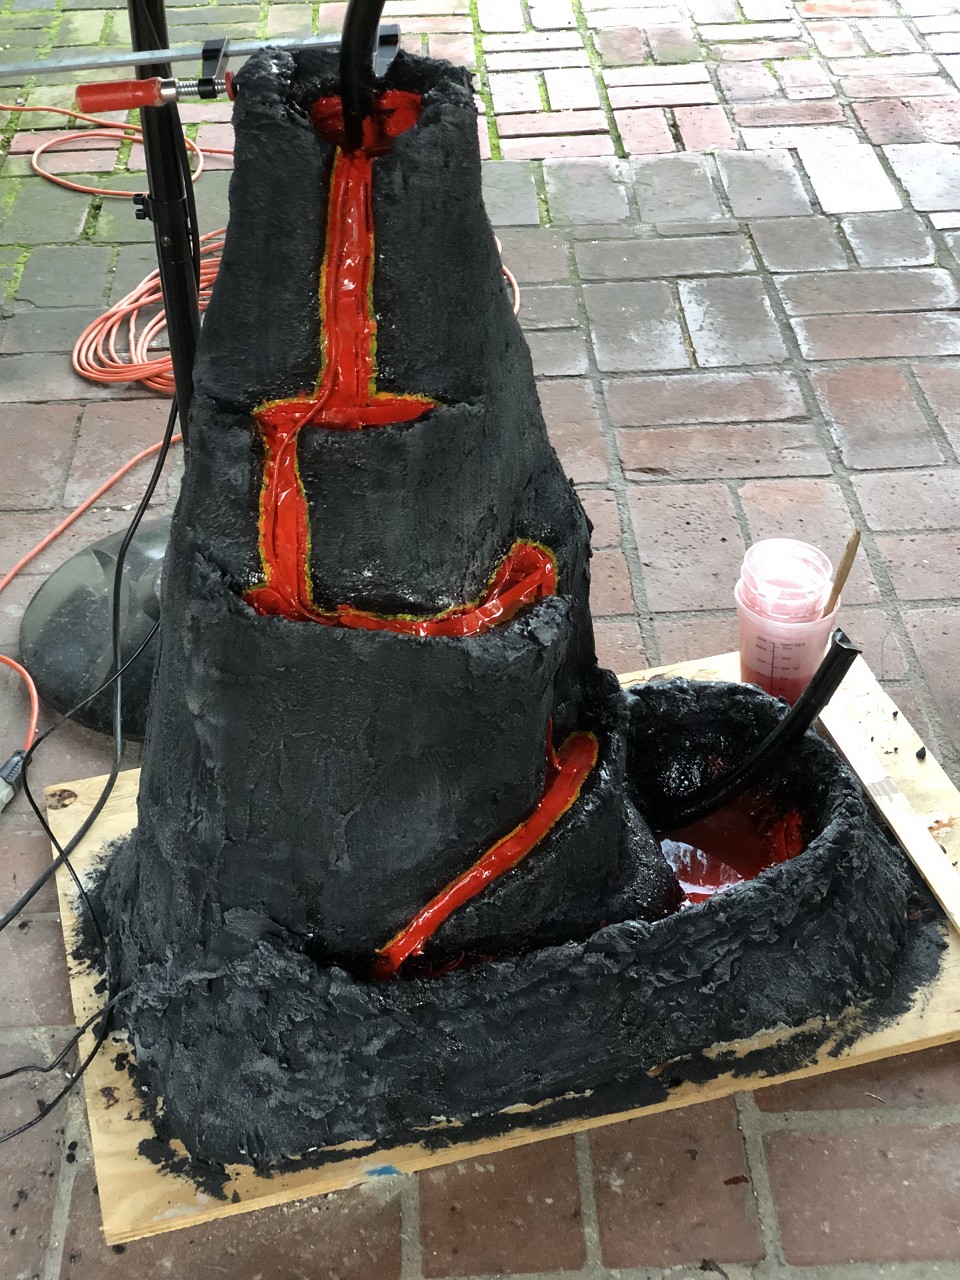
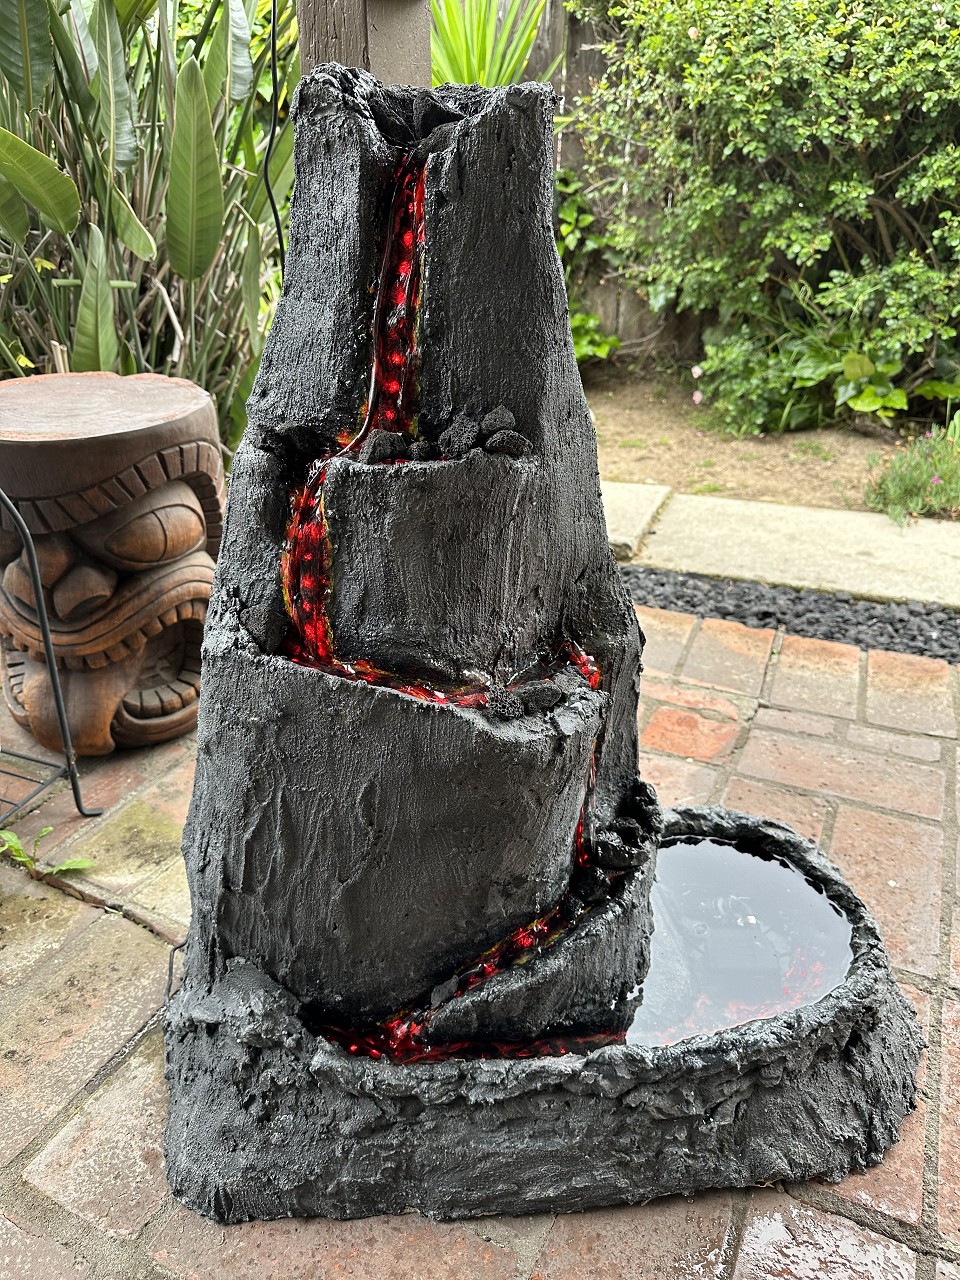
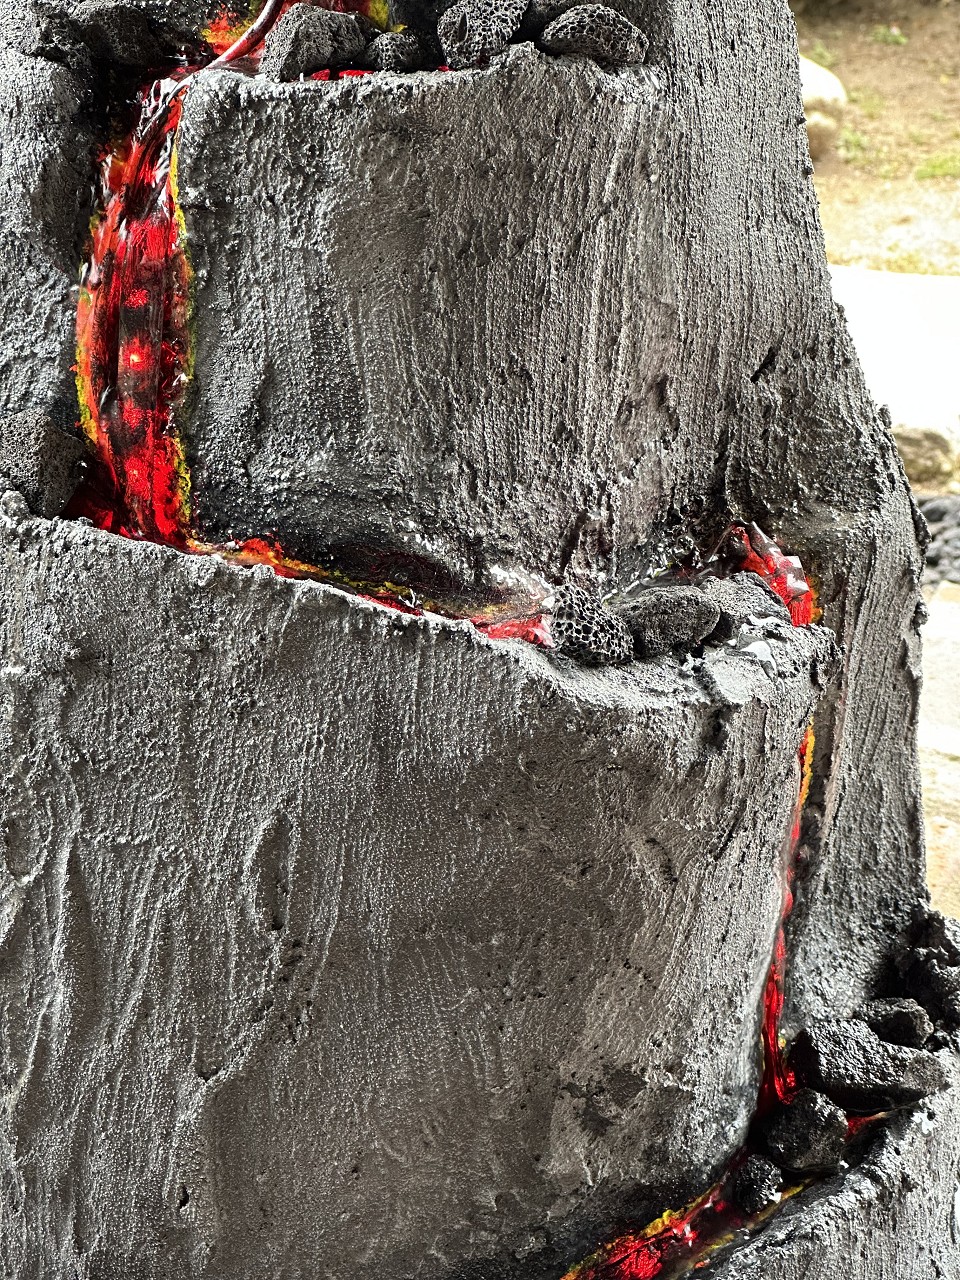
Next up, I used some black cement tinting for a second coat lava look and it looked great. I dry brushed some grey on top of that and I think that part looks good. I got some red LED strip lights to cover the lava path and wired those up in series. To cover the LEDs, it was red-tinted epoxy, red paint with some yellow on the edges, black paint over that, then clear epoxy as a final coat. Miraculously it turned out to be waterproof — I was nervous the first time I poured water over it but it worked.
[ Edited by BlackWater on 2023-05-14 14:38:41 ] |
|
H

Hamo
Posted
posted
on
Sat, May 13, 2023 9:44 PM
Welcome to TC. This is a marvelous project. I'm not sure that anything similar has been documented. |
|
T

TikiRobD
Posted
posted
on
Sun, May 14, 2023 6:34 AM
Wow...that's amazing! Can't wait to see the rest, and thanks for sharing your process. :) Rob |
|
B
BlackWater
Posted
posted
on
Sun, May 14, 2023 9:42 AM
So far everything had been going to plan. But if I had to summarize the challenges with this project, it would be “It’s all fun and games until you add water.” First, choosing a pump. How many gallons/liters per hour do I need? I didn’t know. Fortunately they’re all pretty cheap on Amazon for trial and error, unfortunately I glued each one in place and had to rip it out. This caused stress around the water pipe, breaking the seal of epoxy at the bottom of the basin. I finally figured out to clamp the pipes in place instead of gluing them, and found a pump that doesn’t spray water out of the top. Besides trial and error, a rough estimate would be if a pump says it can do 3 feet of vertical, you’ll get a trickle at the top of those three feet (mine is almost exactly 36”). If it can do more than that, you’ll get a gushing spraying artery up there and all your fountain water will be on the ground. Second, the pumps that say “adjustable” just mean that there’s a plastic thing in front of the inlet that closes, it doesn’t really change the flow very much. Next issue with water was leaking. I mentioned before that my sand-formed basin wasn’t very deep. You want that to be deep, that’s the reservoir of water that recirculates and you need room for error. I made a second coat of cement and formed that on the sides to increase the basin depth, but this left cracks that epoxy didn’t fill. Regular Epoxy wants to flow down, so it’s not good at filling holes on the sides. I found some “pond seal” epoxy, which is rubberized. This filled some leaks, especially at the tube that got cracked when I was switching pumps. I got some disposable syringes to squirt into where I thought the leaks were, and I think I’ve fixed them all. I haven’t had the confidence yet to leave it running 24/7 but I think I’m almost there. If I did this again, I would make a plastic basin that wouldn’t leak and design around that. The only remaining issue is that some water flows over the sides instead of the neat path I made. I sealed the whole thing with stuff you put on a garage floor to make it waterproof, but we’ll see what it looks like in a year.
|
|
B
BlackWater
Posted
posted
on
Sun, May 14, 2023 9:55 AM
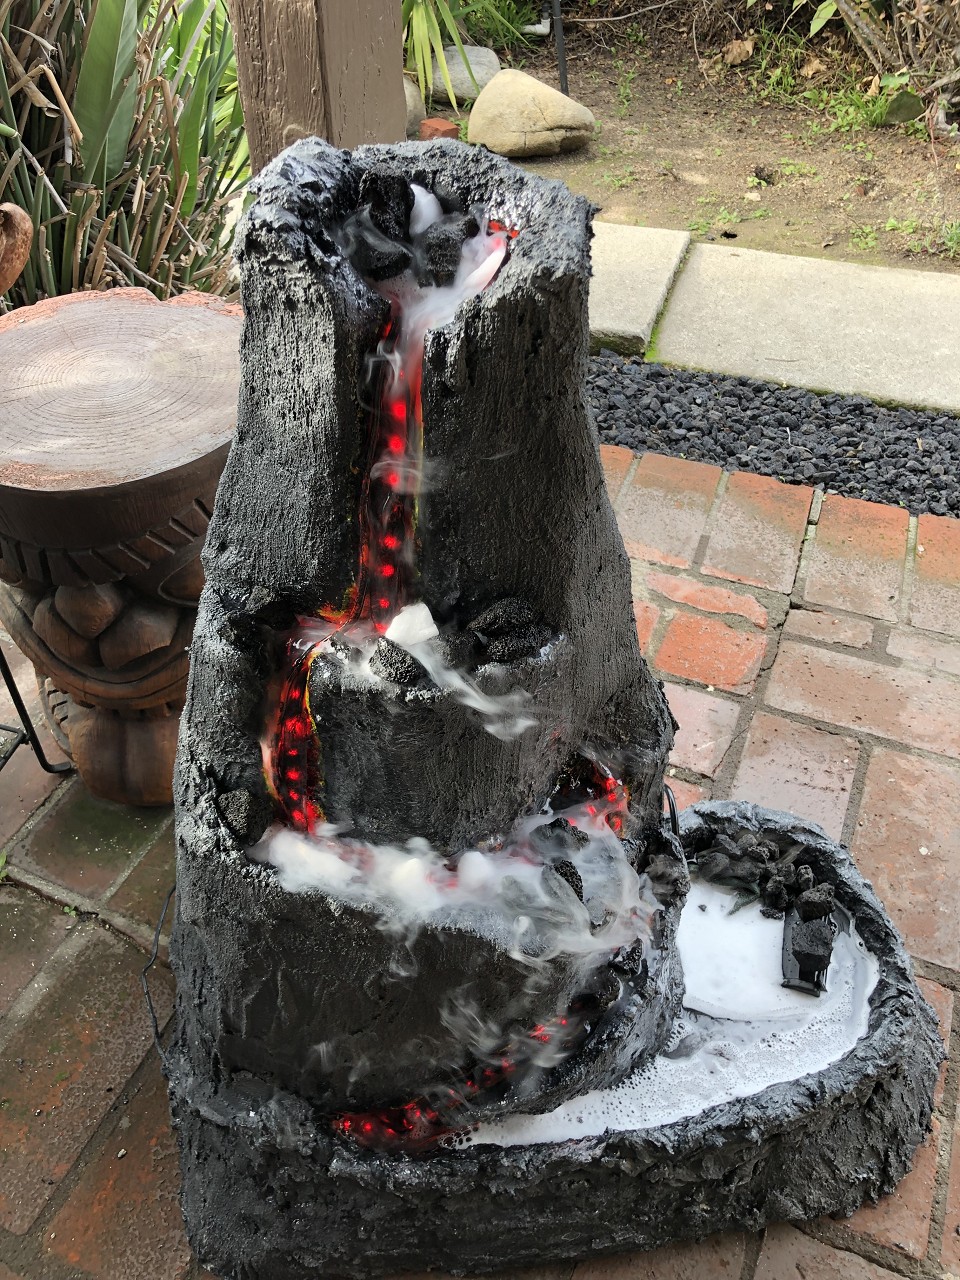
One last protip, get a block of dry ice for parties. (My bar is outdoors, this might not be a good idea indoors.) I originally designed a little pocket on the back for dry ice, but we ended up dropping pieces in the water and it looked great. I guess I could rig up one of those misters for a similar effect with some lighting, but I’m ready to call this project finished and move on to the next one. Bob and Leroy said the two essential sounds in a tiki bar are a fountain and tropical music. I finally have those covered. :)
https://www.instagram.com/reel/CsOyB1EA_X4/?igshid=MzRlODBiNWFlZA== |
|
B

bamalamalu
Posted
posted
on
Sun, May 14, 2023 2:42 PM
Wow, that came out great! Thanks for sharing the steps and lessons learned. I'd love to have something like that - looks especially good with the dry ice! |
|
B
BlackWater
Posted
posted
on
Mon, May 15, 2023 1:09 PM
Still leaking. Fountains suck. ;) |
|
WC

Will carve
Posted
posted
on
Tue, May 16, 2023 9:17 AM
They spew. |
|
D

danlovestikis
Posted
posted
on
Tue, May 16, 2023 6:32 PM
I love step by steps for projects. This is a really fun one to view and read. Very cool. |
|
B
BlackWater
Posted
posted
on
Wed, May 17, 2023 9:27 PM
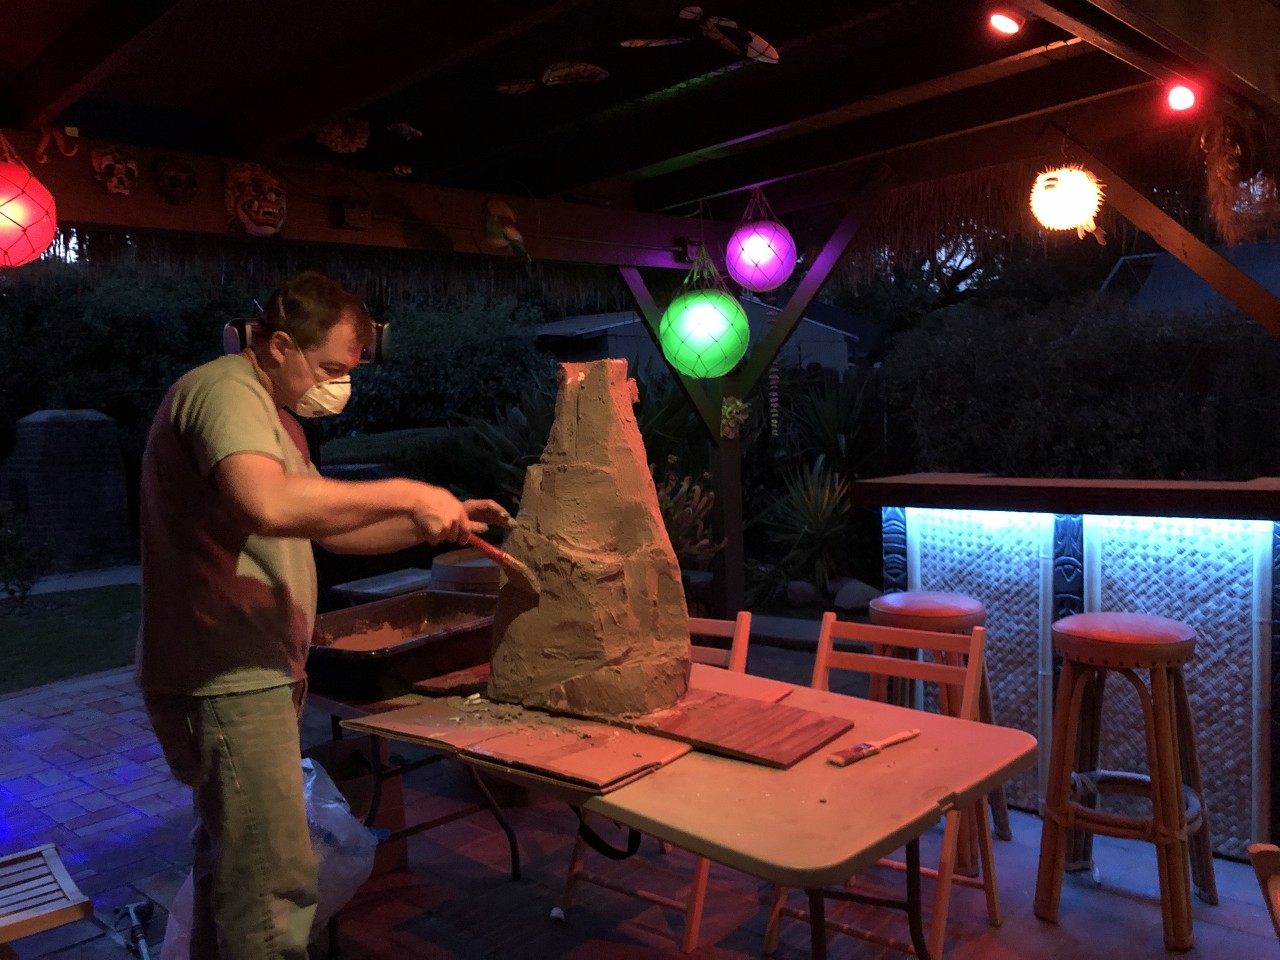
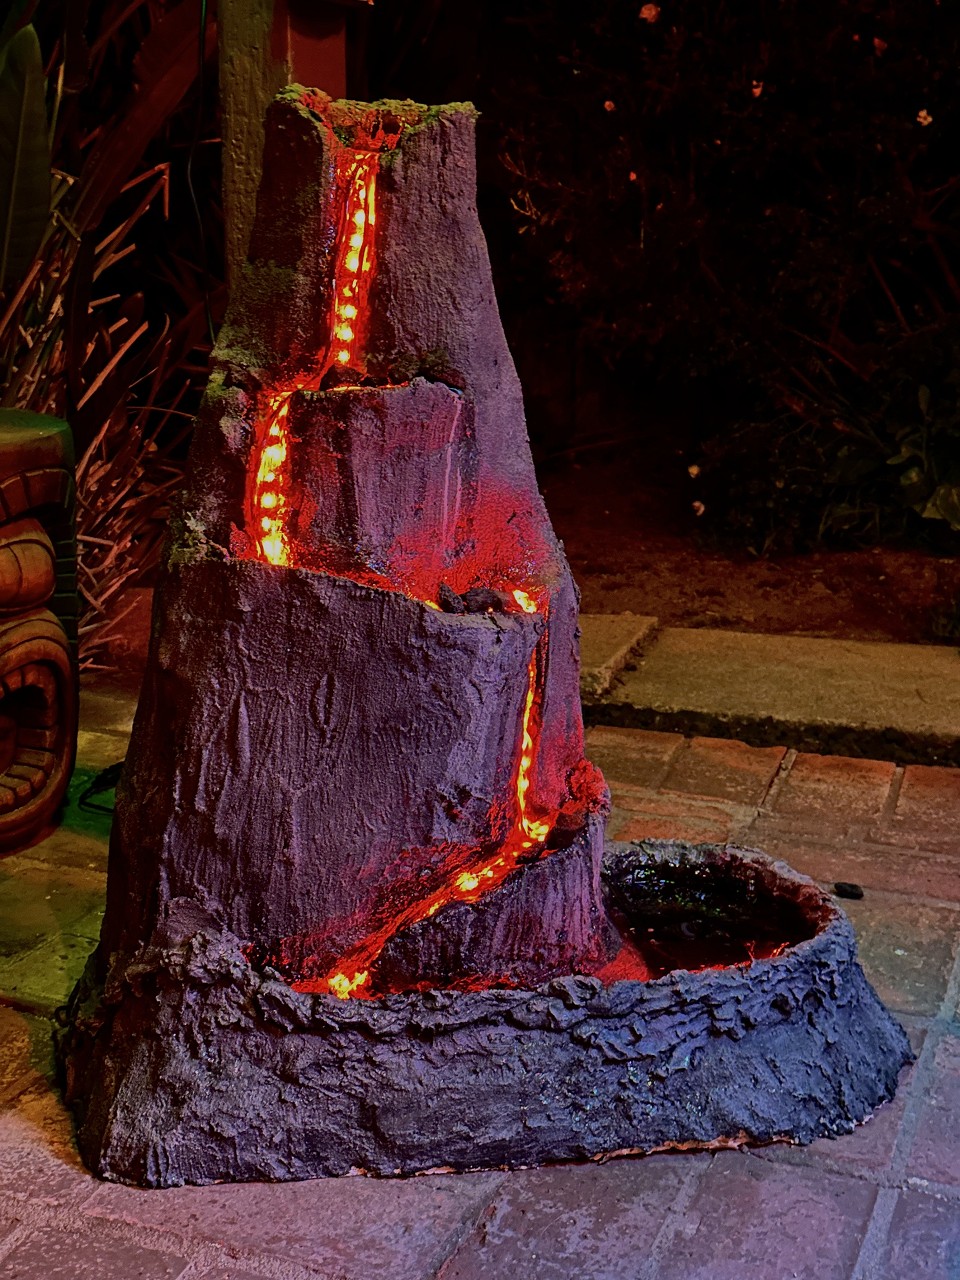
Night shot
|
|
M

MadDogMike
Posted
posted
on
Thu, May 18, 2023 10:12 AM
Turned out great! Love the step by step along with the challenges and solutions, that's pretty much how I work too. |
|
OGR

Or Got Rum?
Posted
posted
on
Thu, May 25, 2023 10:11 AM
Mike you truly are a madman...the variety of your projects is fantastic...and ambitious. You remind me of myself in where I do and explore all genres of "paper art"...or something like that. 🤔 |
|
B
BlackWater
Posted
posted
on
Fri, Jul 14, 2023 9:55 AM
The volcano fountain isn't leaking! Took at least 15 rounds of filling cracks to find them all but it's been a week and no new leaks yet. LESSONS LEARNED:
Looks and sounds great though. |
|
D
danlovestikis
Posted
posted
on
Fri, Jul 14, 2023 8:08 PM
Learning and sharing is key to having fun on Tiki Central. You've got that down pat. Love the volcano fountain, it turned out really well. Keep on sharing. Wendy |
|
C

coldwarspacemonkey
Posted
posted
on
Sat, Jul 15, 2023 2:28 AM
in reply to BlackWater
Looking great! Thanks for taking the time to share your lessons learned. |

Pages: 1 16 replies