Tiki Central / Tiki Carving / Paipo's Stone Tikis - 1st Thread - Jun 06 - May 08
Post #370280 by Paipo on Sun, Mar 30, 2008 4:19 PM
|
P
Paipo
Posted
posted
on
Sun, Mar 30, 2008 4:19 PM
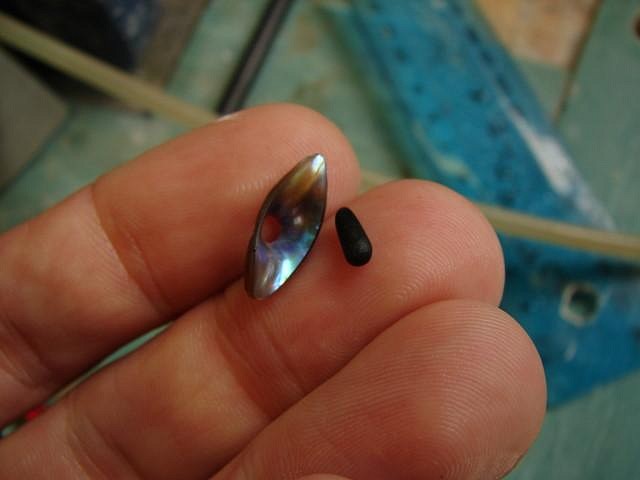
Cheers G, Will, Tom, Ben, Henrik, Jim, Clarita, Ben (again!), hewey, Everlie and Robin! G & Ben, yep, the feathers are a concern with these float stones, but I have enough experience with them now to know how to minimise the risk. Not to say that that will get me through all problems - turns out the biggest chip I had to worry about this week was on the other piece! (see below) VanT, those stones look like they're from a little further south of here - Hokitika or even down the Glacier way? There are so many different stones here (and beaches to find them on) and I am always getting turned on to new discoveries by the locals. I think that symposium was probably 48 hours looking at the size of the raw blocks and having had some experience of the Oamaru limestone. I can't imagine the bidding was very hot on the giant Sony camera!?! WTF? Clarita, unfortunately Hoku Ili was getting too much sun in his new location, and was turning a disturbing shade of yellow! so I have relocated him back to the dank, tiki-infested interior of the workshop :) Robin, the piece is just a greywacke pebble (you can see where I've nipped out the "shoulders" to allow for the tapered rod), and the components are all MOP, some of which I brought back from Rarotonga. The main crescent/breastplate piece is carefully fitted into a groove in the stone, then pinned with silver, which is then concealed under the little inlay. Earlier versions just had the silver pin polished down flush to the stone surface, but I like this way better. So, on to some new pics! These whole-stone pieces are a lot of fun but occasionally dicey - sometimes you have to make the choice between leaving a problem area you know might come adrift, or biting the bullet and working out how to remove it without compromising the design. I also made another decision that cost me a lot of extra time - choosing to do my paua inlay from the piece of shell that had a natural hole in it. This shape was incredibly awkward to fit, but was worth the effort in the end. Held in place by a tiny little black jade pin! So, many hours later, with the addition of a shell tooth, and overnight wait for the epoxy to dry, and a coating of beeswax...done! [ Edited by: Paipo 2008-03-31 02:18 ] |


