Tiki Central / Other Crafts / SWIZ - Mugs 'n' Stuff....just like it says, mugs 'n' stuff.
Post #578422 by swizzle on Wed, Mar 2, 2011 5:15 AM
|
S

swizzle
Posted
posted
on
Wed, Mar 2, 2011 5:15 AM
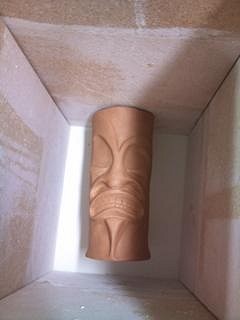
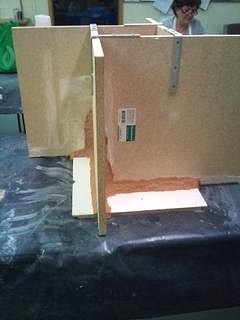
Started on my mold this week. I was hoping to do it last week but after looking at the master I ended up modifying it a bit as i'm only doing a three piece mold (with the spare) and it looked liked I might have some problems with it separating around the mouth so he's ended up more round than when I started. My teachers method of doing the first pour of plaster is different to the posts i've seen by Wendy Cevola and other mug makers on this forum. Being shown this way does actually seem a little easier to me than what i've seen on this site. I'll be interested to see what others think of the method i'm/we are doing. I also like the way she has made the box. Each piece of wood has an L shaped bracket screwed to it which allows the other pieces to slot up nicely next to the other (you can just see it in the third photo). I plan on making one of my own this way which will be closer in size to a standard mug. The one we are using is quite large. She also recommended I get some bicycle tubes to hold the mold together when it comes to pouring. Here he is inside the box. Instead of packing the base with clay and around the master it is just propped up on two blocks of clay and the plaster is poured in around him up to the separation line. The idea is to remove those clay blocks after all the pieces have been poured and then do another pour to fill the holes. (I took a photo but my camera was going flat so it didn't work, i'll try to remember to take one again next week).
Now as mentioned above instead of packing the base with clay to stop the plaster leaking out, we filled up the cracks on the outside of the box with clay to stop it from doing that. You can see how in these two photos. She also didn't measure the plaster as we were mixing, but instead went by feel (although she did say it's about 2/1 plaster/water). It was actually very thick when we poured it so that therefore made it more difficult for it to leak out of any gaps and also, as she said, makes the mold more dense and stronger.
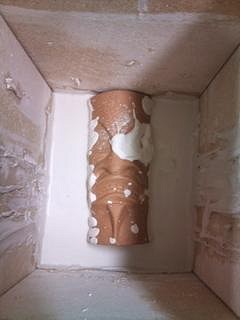
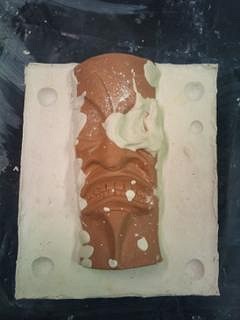
Here it is after pouring the plaster in and then with the box removed and the guide markers added. The excess plaster on the master will be removed before the second half of the mold is poured, I didnt have time to do that tonight as the class was finishing up.
More pics next week.
[ Edited by: swizzle 2011-03-02 05:20 ] |