Tiki Central / Other Crafts / Wendy Cevola - Doing a major repair of a Tiki Diablo bowl.
Post #764209 by danlovestikis on Tue, May 24, 2016 8:59 PM
|
D

danlovestikis
Posted
posted
on
Tue, May 24, 2016 8:59 PM
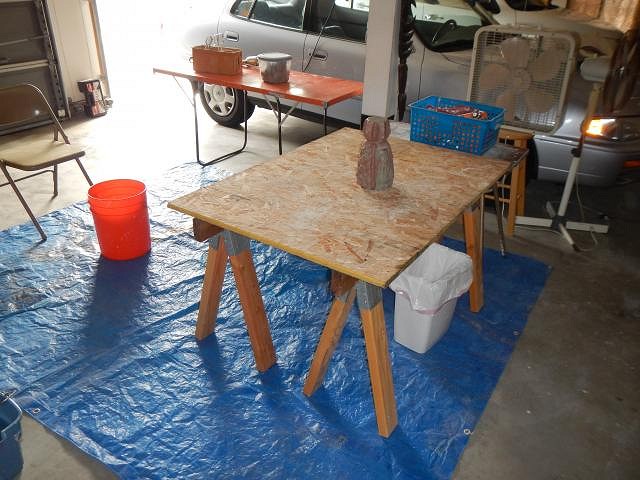
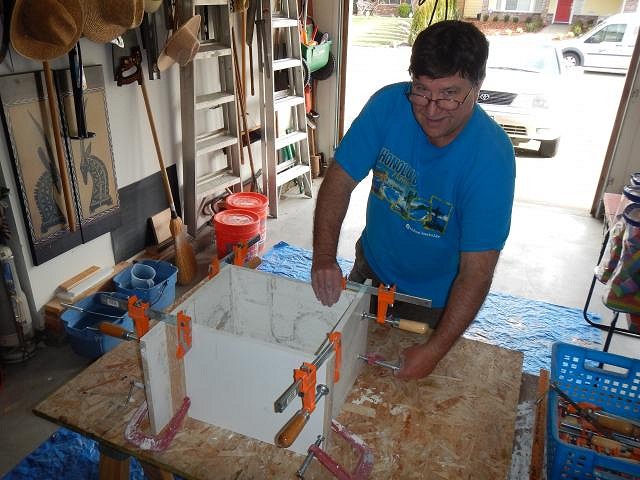
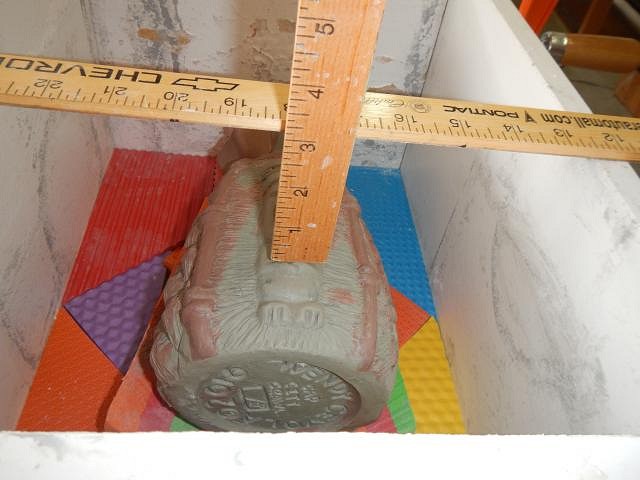
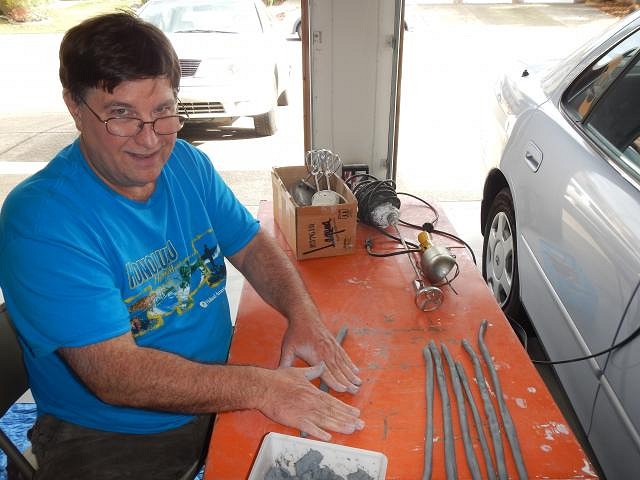
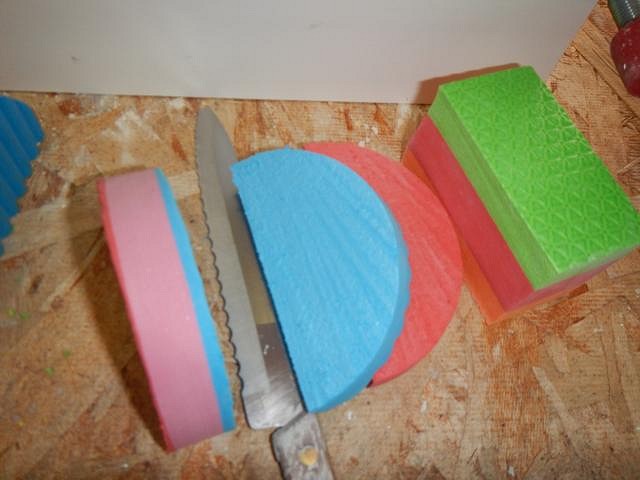
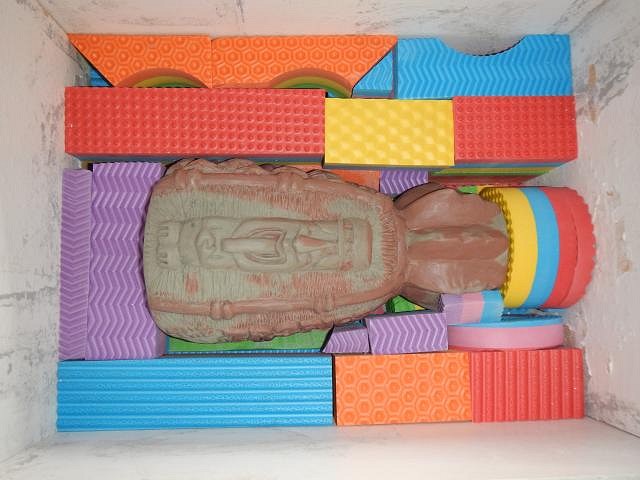
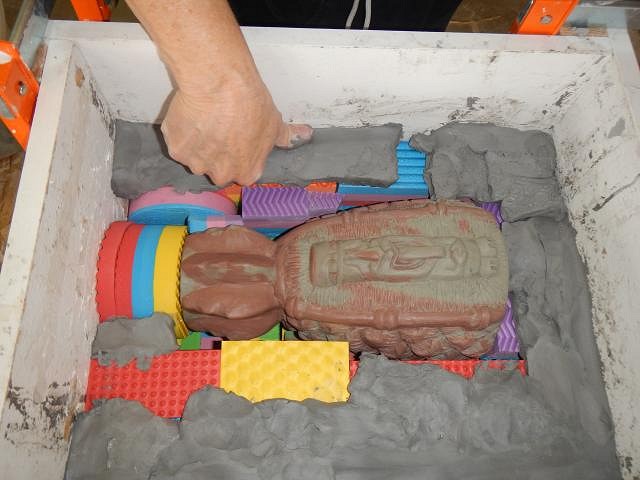
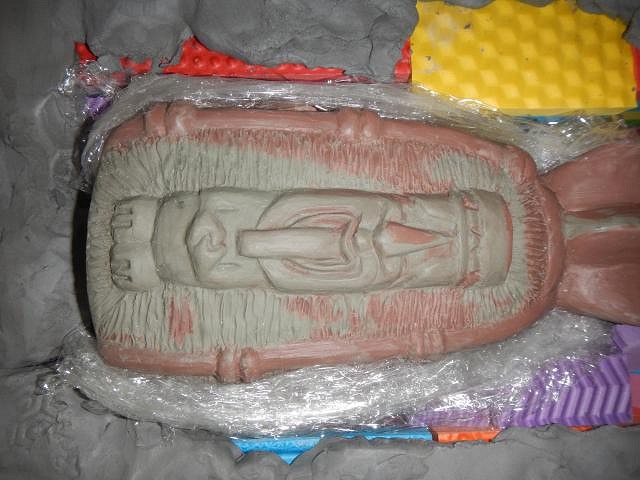
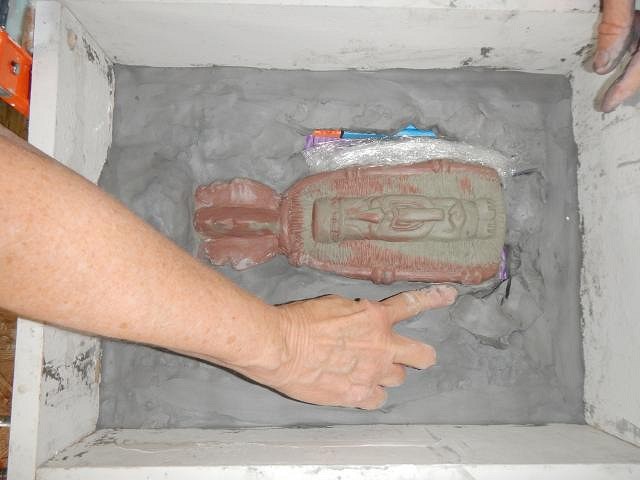
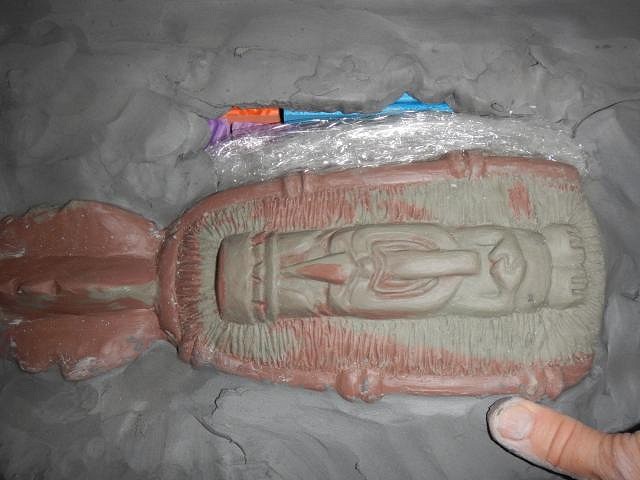
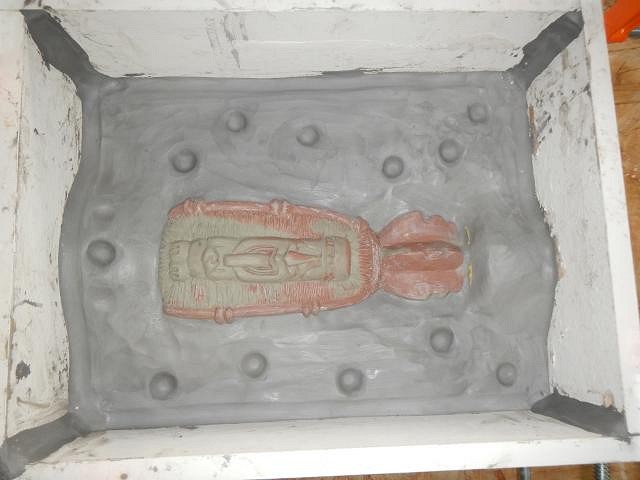
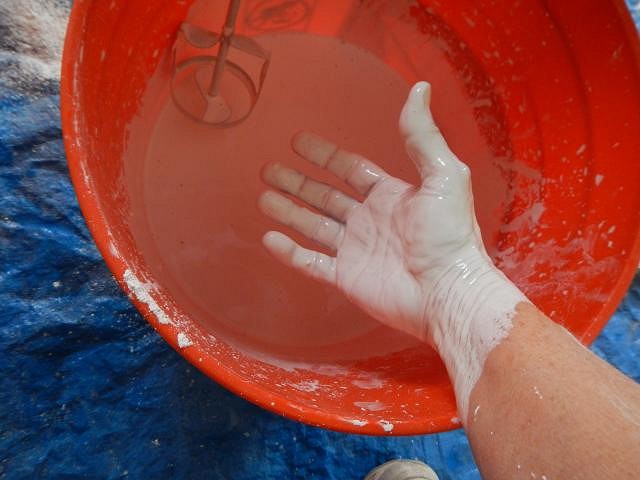
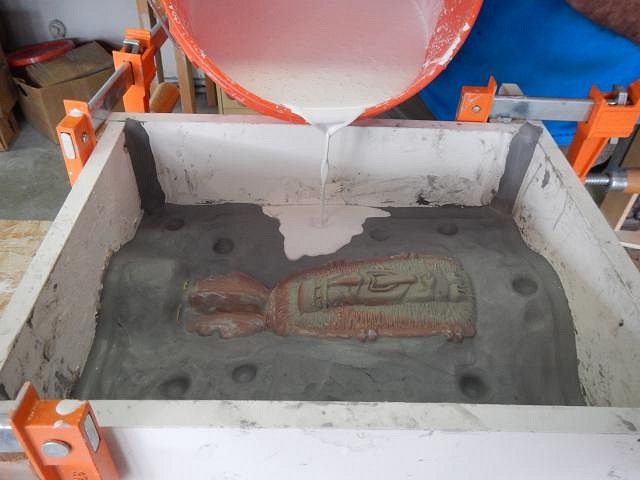
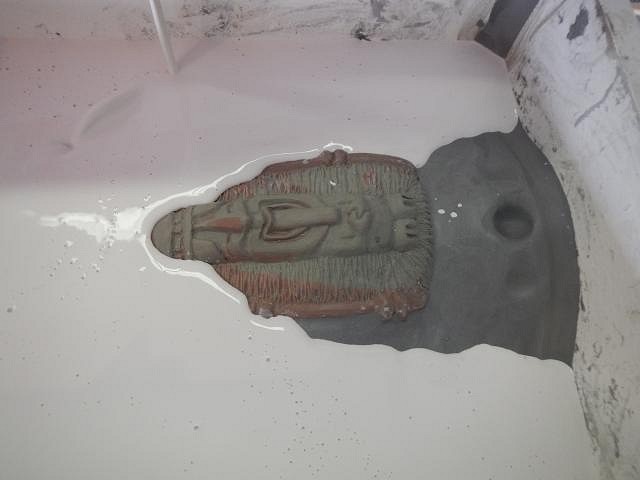
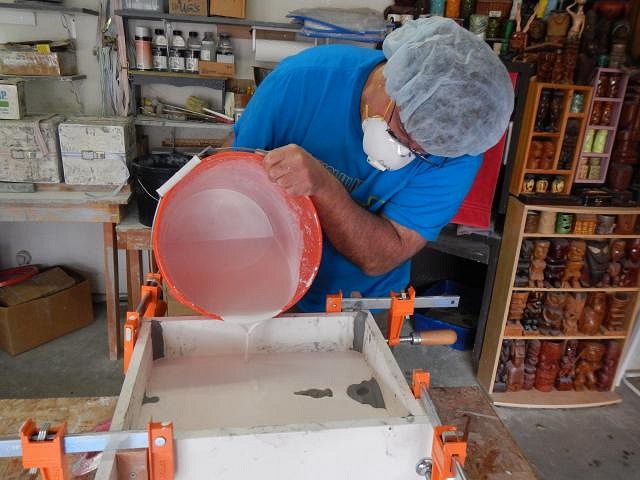
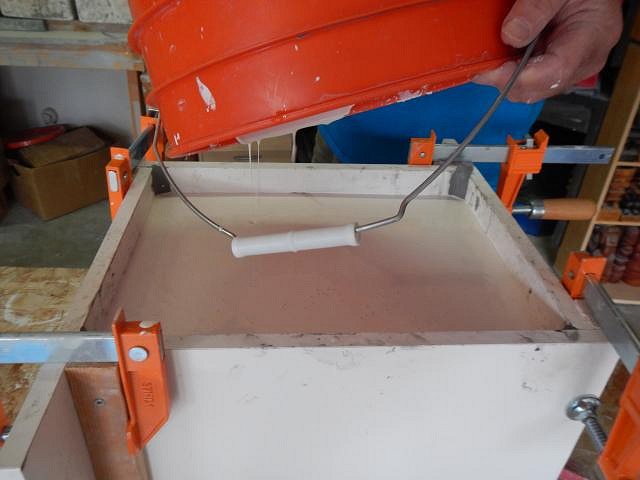
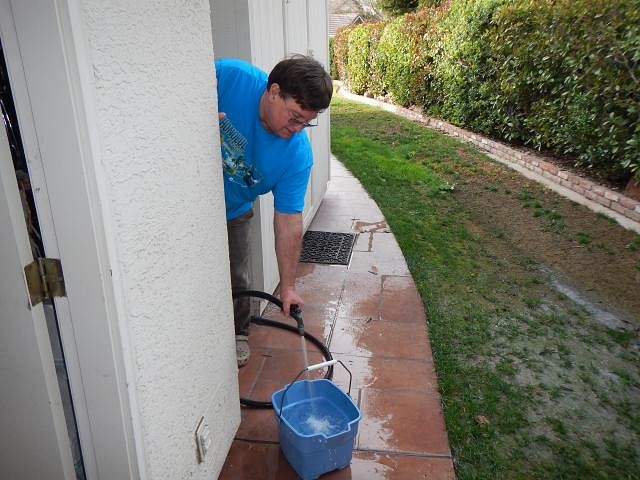
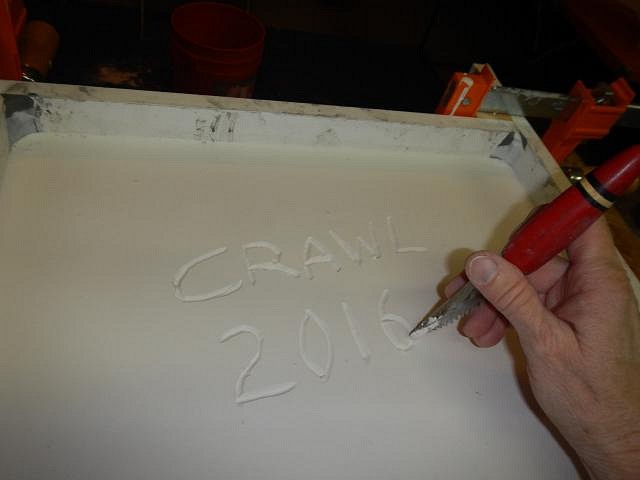
MaukaHale I'm glad to be reminded. I forget to check those home bar threads. I know hang10tiki has one and so does lunavideogames. It's been awhile since I ran about looking at so much fun stuff TC has to offer. =================================== SACRAMENTO CRAWL MUG IS READY TO MOLD. It's a job just to set up the garage with all the supplies it takes to make a mold. I measure the mug so that I can choose the right size pieces of wood for the box. Dan and I assemble the box. First I made a 2 inch thick bottom using soft plastic blocks I bought at ToysRUs. They can even be cut with a serrated bread knife. Then I measure to make sure I can pour 2 inches above the mug using this box. Dan makes snakes for sealing the joints. If I can't find the pieces I need I start cutting some to fit. Next I start putting blocks in place around the tiki and at the top and bottom. These are areas that will not be part of the first mold slab. I cut pieces of clay into slabs that are around 2/3rd's of an inch and start laying them out on top of the blocks and I press them into place. Since I don't want clay to fill in any of the texture on the pineapple side I protect the sculpt with plastic wrap. Then I cover the wrap with clay right up to the mug. Close up. Once this is done and all the snakes are in place to make the box sealed I press in dips/locks. Those will keep the mold pieces from shifting. One last step is to take a wet paper towel and to smooth all the snakes and along the mug. This makes all the seals tight. Now that the prep is done It's time to mix the plaster. PUT ON A FACE MASK AND WEAR IT THE REST OF THE DAY. THE AIR WILL FILL WITH INVISABLE PLATER DUST THAT WILL GO INTO YOUR LUNGS AND TURN HARD. YOU DO NOT WANT EVEN A SPECK INSIDE OF YOU. I figure out how much volume it will need just by looking. I fill a bucket and then place the plaster next to the bucket. I scoop it in and Dan mixes. 2 of plaster to 1 of water. Every so often I have him stop so I can dip in my hand to see it it's right. This is too thin so I add more plaster. I love to watch the mug disappear under the plaster. Last drop. Every time me mix everything has to be cleaned so that there isn't hardened plaster adhering to each tool or bucket. When the piece is hard I carve in the words to identify it. All this for the first slab. Cheers, Wendy [ Edited by: danlovestikis 2016-05-24 21:21 ] |