Tiki Central / Other Crafts / Wendy Cevola - Doing a major repair of a Tiki Diablo bowl.
Post #765819 by danlovestikis on Mon, Jul 4, 2016 8:36 PM
|
D

danlovestikis
Posted
posted
on
Mon, Jul 4, 2016 8:36 PM
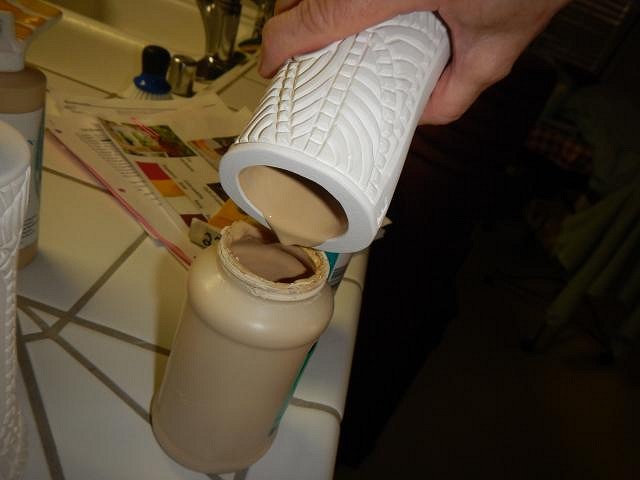
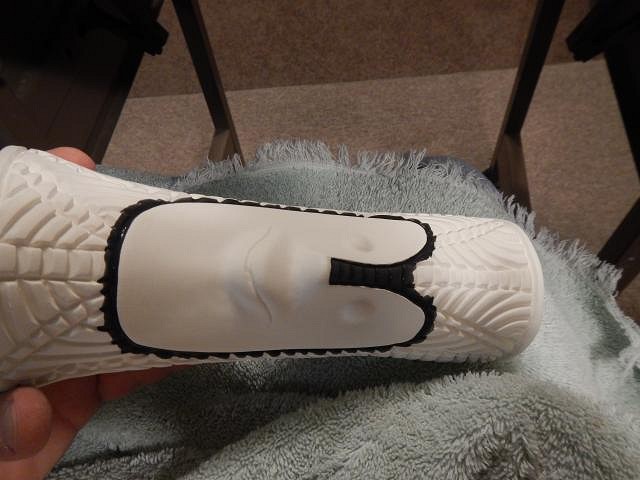
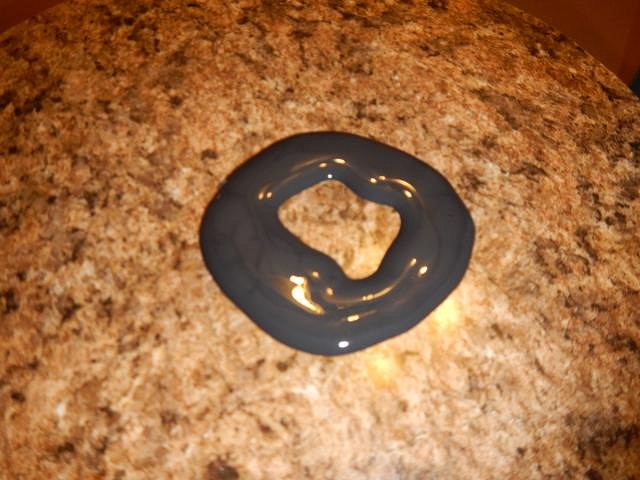
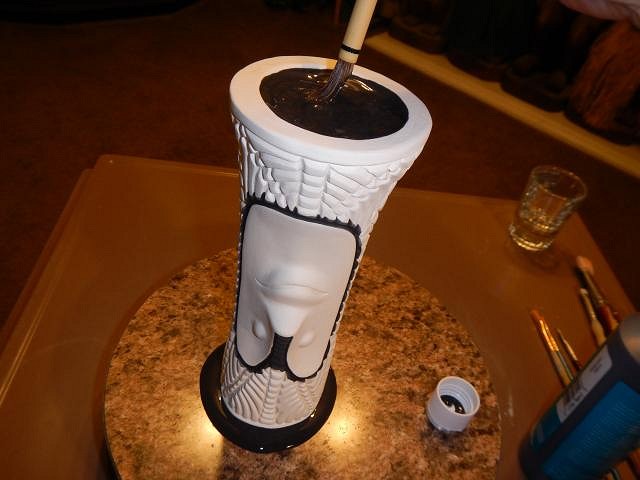
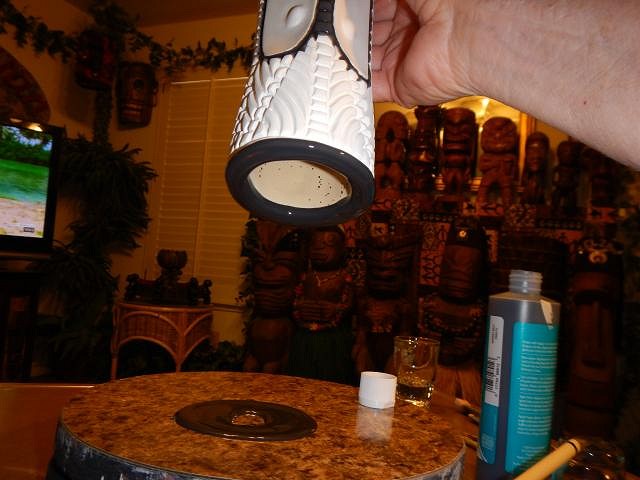
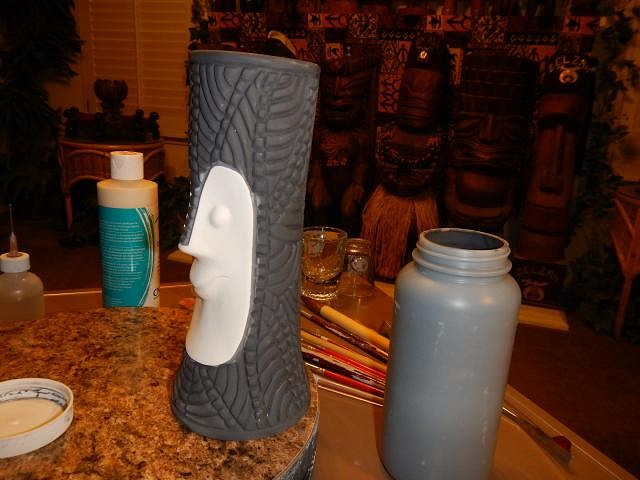
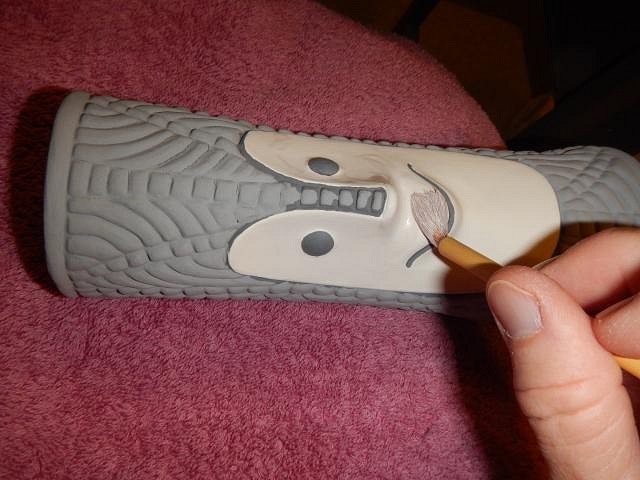
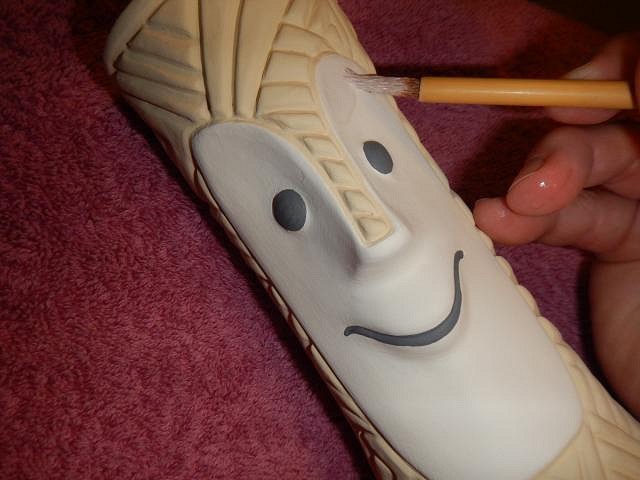
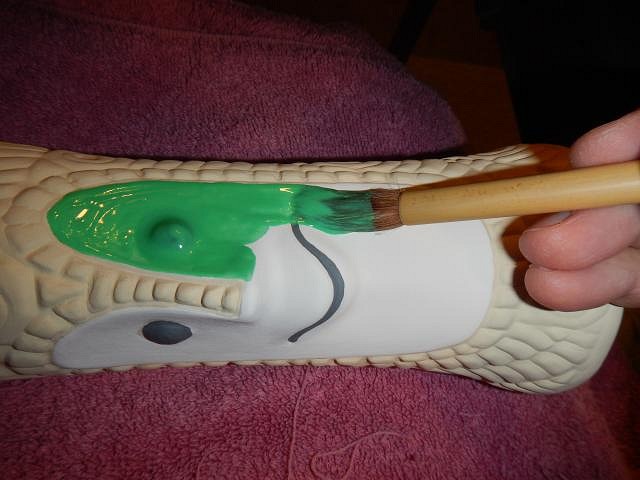
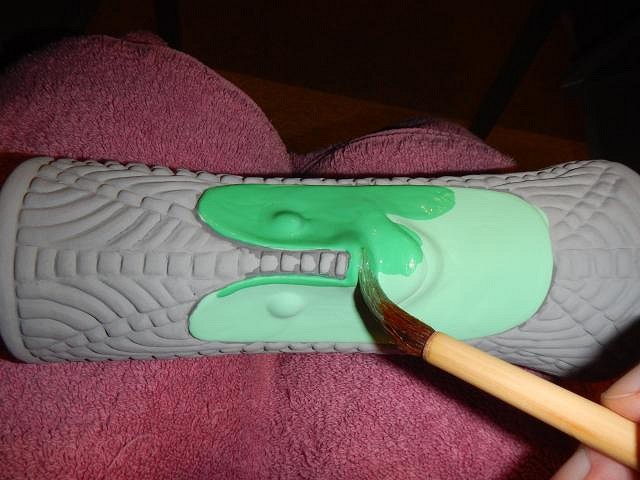
Progress Report on the Wedding mugs for Nate and Shannon. The groom requested a black mug with a gold interior. So I started with the gold. After I did this I let it dry. I used the CN black under-glaze to do the nose and around the face. To do the top lip I just put some glaze on my turn wheel and then Stuck the lip of the mug into the glaze. While it was in position I glazed the bottom. I had never done this glazing technique before and it didn't work. When I pulled the mug loose it sprayed spots of black glaze all over the gold. I was able to scrap it off and to add more gold glaze so that it didn't have these spots. That took more time than carefully painting on the black top. Next I did 3 layers of IN black glaze. Next I did the face and when it was dry I did the 2 layers of white under-glaze. If I just put clear on the white bisque clay it wouldn't look nearly as good. I let the faces dry between each layer of white. This white under-glaze will cover over any imperfections in the clay or from colored glaze that was wiped off but has some remain. That's why I do the glazing steps in this order. It took years to perfect the right way to glaze a Tiki Bob. First layer of Duncan's Clear Brilliance. It's the only clear glaze I've found that doesn't make the black under-glaze run. They dry completely and then I put on another layer. Sometimes the layers are not equal and there can be rough spots after firing. Since I need these mugs to be good with the first firing I did 3 layers of the clear. I hope you are all having a very nice holiday, cheers, Wendy |