Tiki Central / Tiki Carving
Foam Tiki Totem Pole
Pages: 1 13 replies
|
R

reinkense
Posted
posted
on
Wed, May 11, 2011 11:45 AM
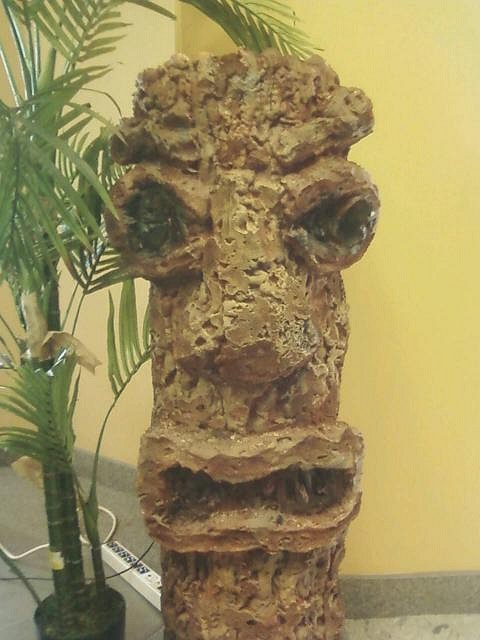
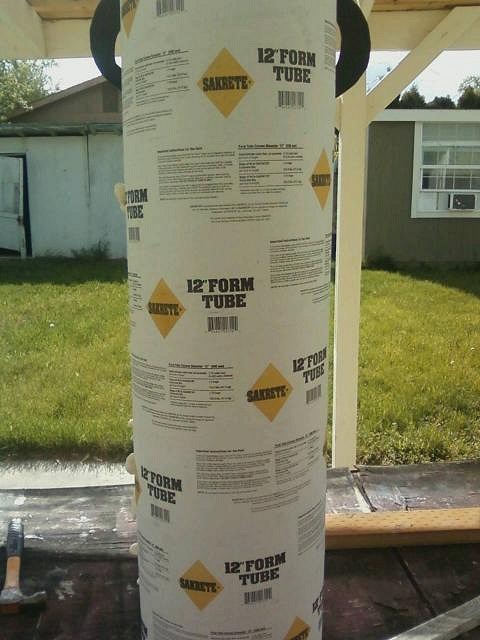
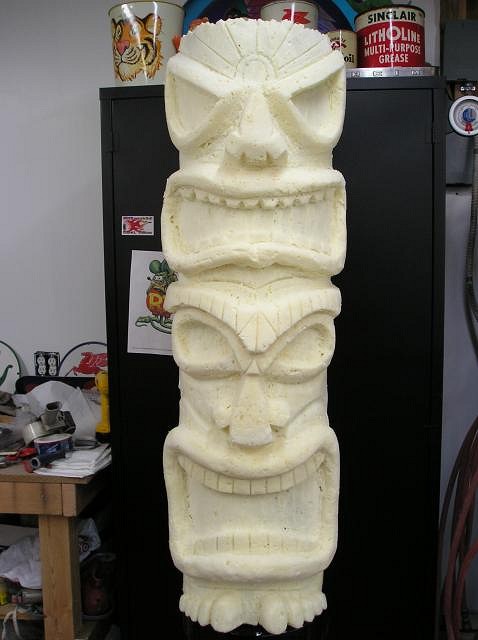
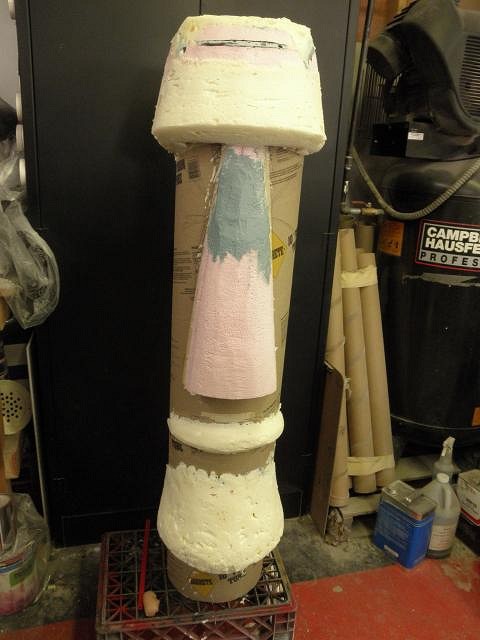
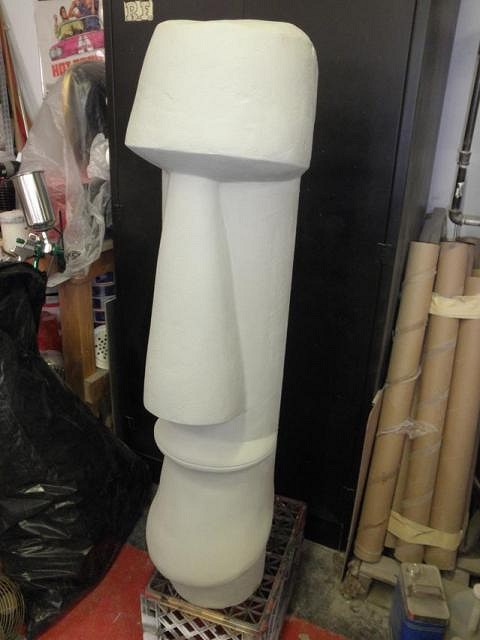
Last night I finished making my first Tiki Totem Pole out of spray foam. I thought that I would share it with people who like all things Tiki. If you want to make you own Tiki Totem Pole here are the directions:
Step 1 Step 2 Step 3 Step 4 Step 5 Step 6
[ Edited by: reinkense 2011-05-12 09:22 ] [ Edited by: reinkense 2011-05-12 11:33 ] |
|
M

MadDogMike
Posted
posted
on
Wed, May 11, 2011 12:50 PM
Welcome to TC Reinkense. Your tiki reminds me of a Fern Wood Tiki. You could also paint it with a dark color and rub it off to accentuate the texture. |
|
P

peacefrogman
Posted
posted
on
Wed, May 11, 2011 8:01 PM
That's a great idea, I can't wait to try it. I also want to drill some holes partially through the foam and insert some LED's in the eyes and mouth. |
|
M

mieko
Posted
posted
on
Fri, May 13, 2011 6:58 AM
That's great! Thanks for the details and the photos. That's a great way to make a lightweight tiki that would be good for stage decorations. |
|
M

metikigal
Posted
posted
on
Fri, May 13, 2011 8:43 AM
That looks great. I might give this a try, you make it look easy. I'm very DIY challenged - what would you say if the difficulty rating on a scale of 1-10? |
|
E

EyeballJohn
Posted
posted
on
Sat, May 14, 2011 6:11 AM
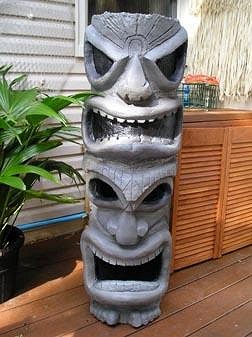
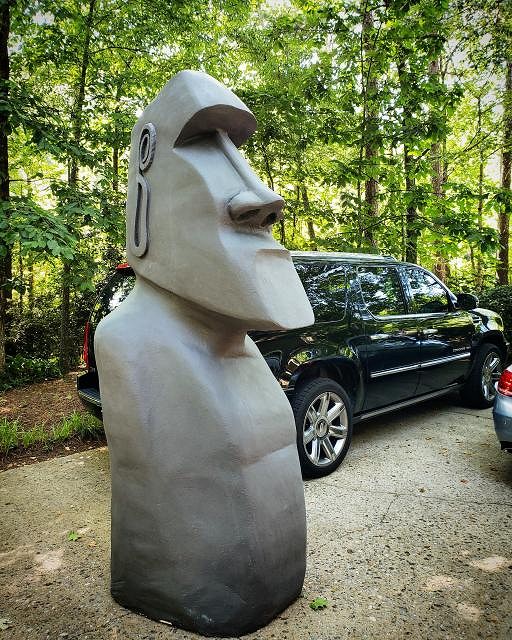
Here are a few pics of the foam Tikis I made using the spray foam and carving out the shapes along with a lot of sanding, you can coat the foam with a house exterior paint to seal the foam and then spray or brush on other paints that would normally melt the foam, I covered mine with fiberglass I do a lot of carving using differnt foams take a look.
|
|
N

NIxxon
Posted
posted
on
Sun, May 15, 2011 3:45 PM
those look really cool! Nice job! Seems as if the foam is pretty user friendly |
|
N
NIxxon
Posted
posted
on
Sun, May 15, 2011 3:47 PM
WoRD [ Edited by: NIxxon 2011-05-15 15:50 ] |
|
R
reinkense
Posted
posted
on
Mon, May 16, 2011 10:23 AM
I would say it is a 4 on the difficulty scale. Because you cut out the expression before applying the spray foam it is easy to carve the face. The most difficult thing is to wait for the foam to dry between layers. |
|
T

Tiki-Atari
Posted
posted
on
Mon, May 16, 2011 12:10 PM
Here are a few pics of the foam Tikis I made using the spray foam and carving out the shapes along with a lot of sanding, you can coat the foam with a house exterior paint to seal the foam and then spray or brush on other paints that would normally melt the foam, I covered mine with fiberglass I do a lot of carving using differnt foams take a look. Those look great! Thanks! Jonathan |
|
E
EyeballJohn
Posted
posted
on
Mon, May 16, 2011 3:28 PM
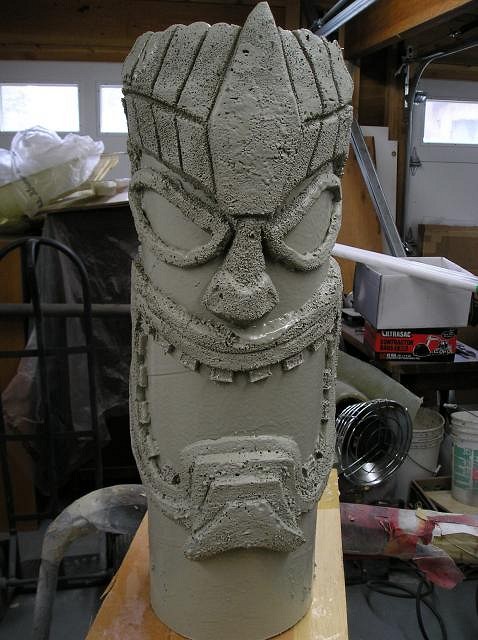
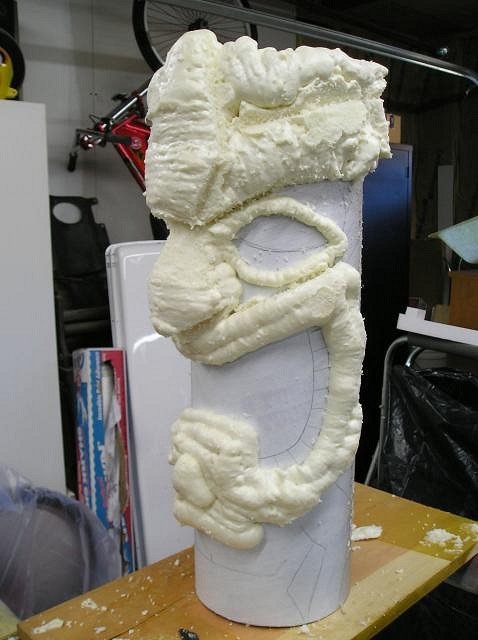
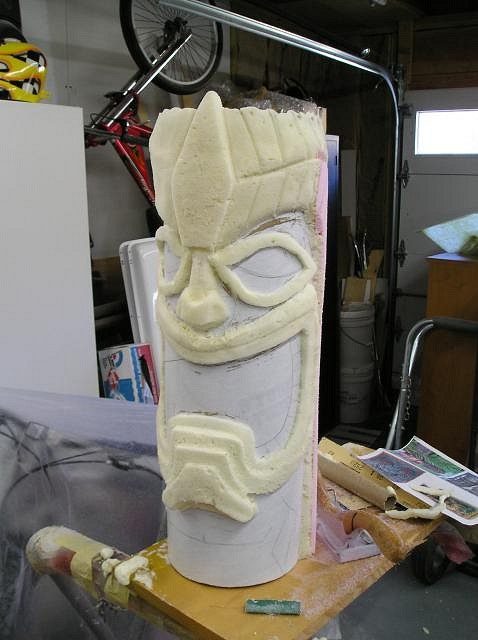
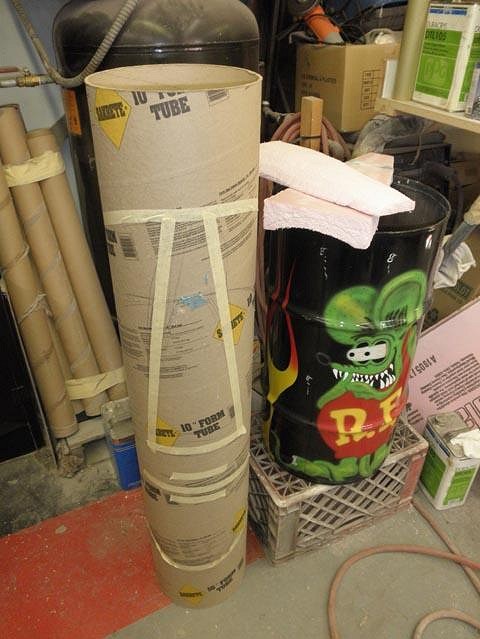
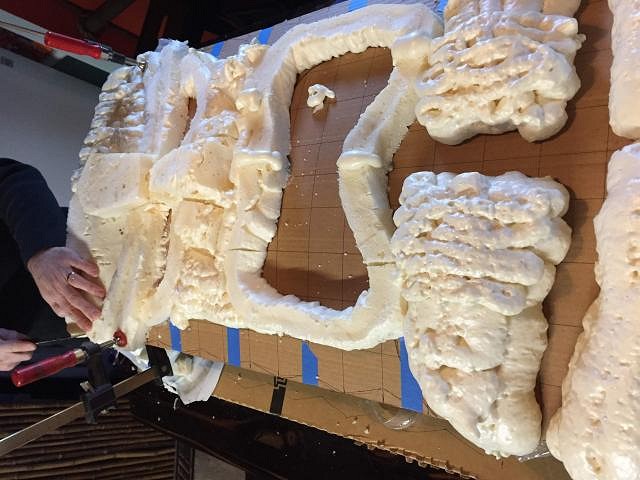
The Tikis don't start out looking like much of anything but foam, I spray the foam in tight lines to start then I will add highlites with more foam and then start cutting and sanding my shapes, sometimes I will draw out on the tubes the shape and folow along with the foam, I couldn't find any start pics of the 4 foot Tiki totem but here are some in progress shots along with a starting shot of the 2 foot Tiki, I never carved wood but have done a lot of foam carving, in New York its easier to find spray foam then it is to find a palm tree :)
|
|
E
EyeballJohn
Posted
posted
on
Sun, May 29, 2011 10:39 AM
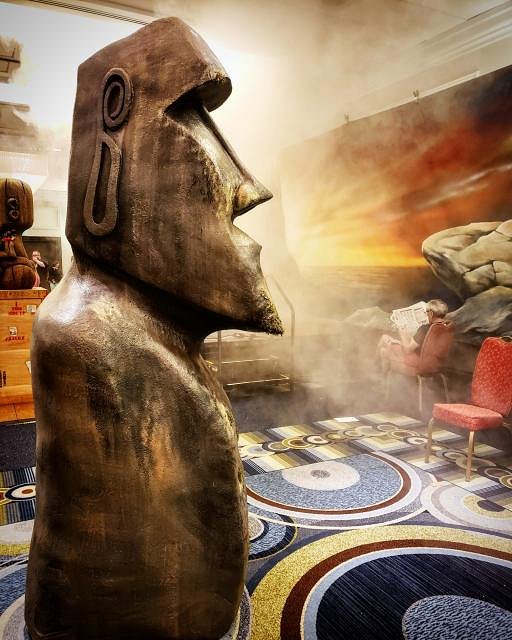
Just finished another foam Tiki, this time I made a Moai head using a cardboard tube, pink insulation foam, spray foam, bondo and polyester primer as a top coat, take a look, Later Eyeball
|
|
B

bobotron
Posted
posted
on
Mon, May 20, 2019 8:29 AM
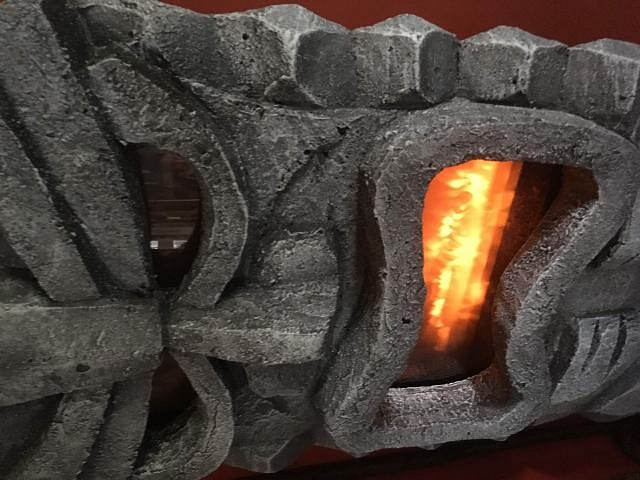
You guys were my inspiration to create this spray foam fireplace cover! Thanks for the tips!
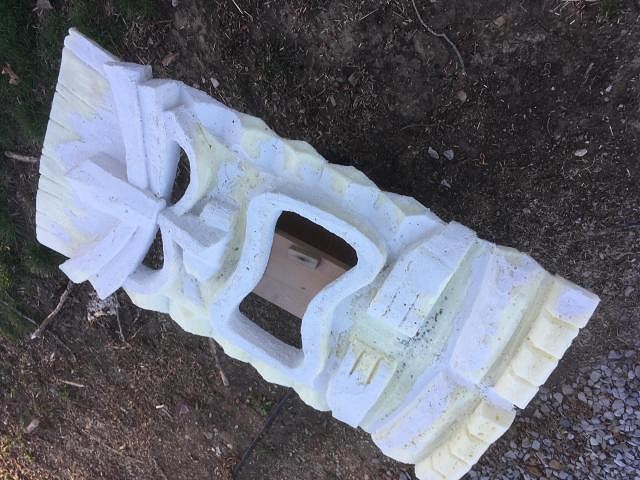
Carved and ready to paint. I ended up spackling the whole thing because I spackled a few spots I wantd to fix, but the texture was different after spray painting and even brush painting with latex. So I spackled the whole thing for texture consistency. I wish I never spackled any of it and left the imperfections because the cut foam had a more "sponge" like appearance. Would have looked more like lava stone IMO if I left it alone. I just used a big serrated bread knife for all the carving. Definitely needs to be serrated as a plain knife just wants to push the foam and tear it.
Spraying and carving. I did parts of it so I could follow my pattern on the cardboard. Doing it again, I think I would try just spray foaming the whole board, draw the design on the foam, and carve all at once.
My template. A piece of cardboard taped to the fireplace glass. If it wasn't for the curve of the glass, I may have just bought a piece of the thick pink foam and carved that instead. (Don't worry. The only place that even gets warm on this is coming out the top. So nothing on this addition will be in the heat).
Note I had some extra foam left in the can, so I sprayed a bunch on a piece of cardboard to make a smaller face, instead of throwing it away. But, I came out the next day and the cardboard was all curled from the drying process. SO, if you opt for some sort of backing, make sure its firm enough that it doesn't bend easily while curing. |
|
T

tikirancher
Posted
posted
on
Tue, Jul 2, 2019 6:53 AM
I make foam tikis for those that can't or don't have the time. Check out http://www.tikirancher.com for more details
|


Pages: 1 13 replies