Tiki Central / Tiki Carving
For the Love of Tiki
|
FTLOT

For the Love of Tiki
Posted
posted
on
Wed, Feb 20, 2013 12:14 PM
Hello everyone,
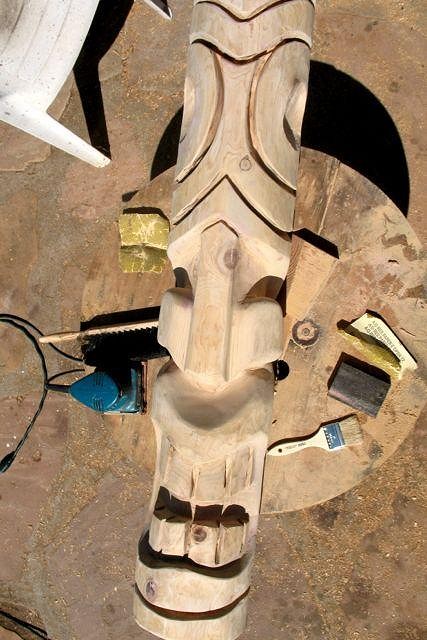
This was my first go at tiki carving. The wood is cedar - a soft wood.
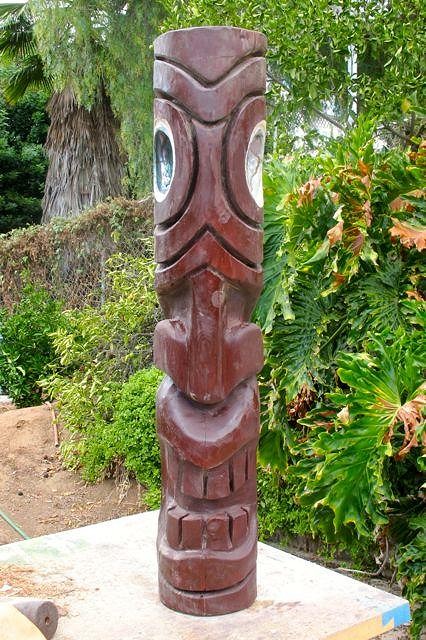
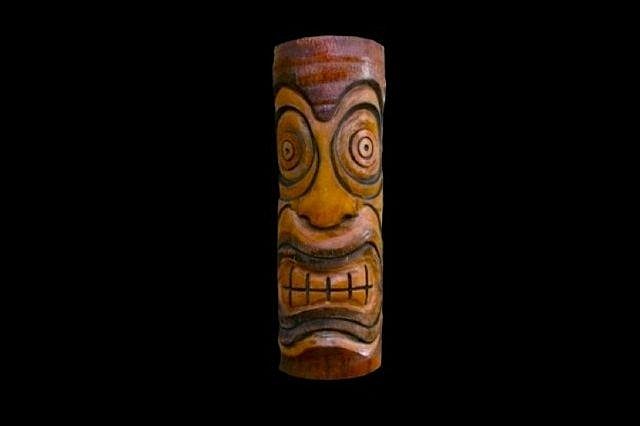
Here's Tiki #2
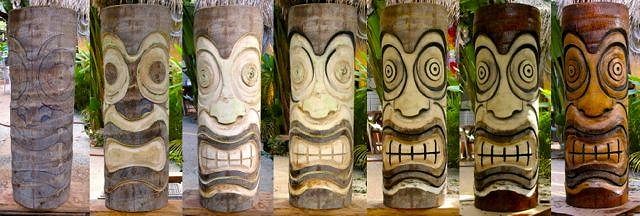
A little stain and they really come alive.
Inlaid abalone for the eyes.
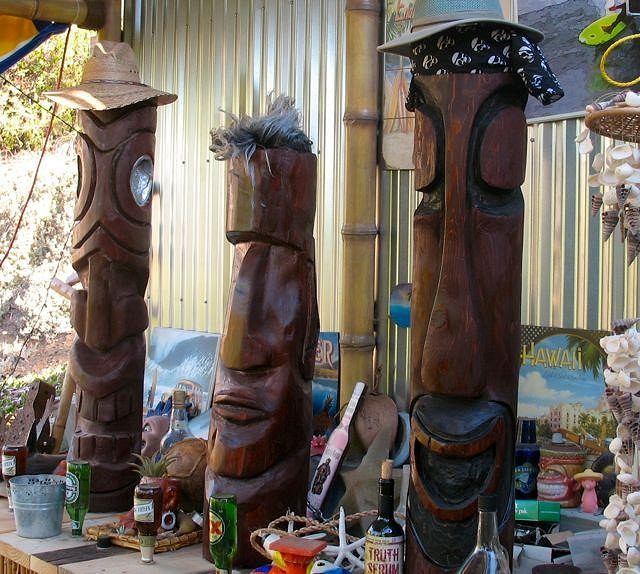
And here's a group shot of my first three tikis. #3 is on the far right. They're all from cedar, about 4' tall and 10" in width. #2 was real challenging - but all were fun to do. |
|
P

pjc5150
Posted
posted
on
Wed, Feb 20, 2013 12:40 PM
very cool bro. nice firsties... welcome to the party... |
|
R

RIOTURBAN
Posted
posted
on
Wed, Feb 20, 2013 1:29 PM
Welcome aboard!the family is getting bigger!!! |
|
FTLOT
For the Love of Tiki
Posted
posted
on
Wed, Feb 20, 2013 1:51 PM
Thanks :) |
|
FTLOT
For the Love of Tiki
Posted
posted
on
Wed, Feb 20, 2013 1:53 PM
Thanks, Rioturban. It has taken me a while to get signed up - but glad to finally be here. |
|
H

hang10tiki
Posted
posted
on
Wed, Feb 20, 2013 4:07 PM
Great stuff Jon |
|
C

cy
Posted
posted
on
Wed, Feb 20, 2013 4:32 PM
Nice to see some new blood for the love of tiki, an impressive first 3. |
|
M

McTiki
Posted
posted
on
Wed, Feb 20, 2013 6:03 PM
Very nice work! Thanks for jumping in. Well done Mahalo and welcome McTiki |
|
A

amate
Posted
posted
on
Thu, Feb 21, 2013 5:42 AM
Off to a great start. Keep it rollin' |
|
FTLOT
For the Love of Tiki
Posted
posted
on
Thu, Feb 21, 2013 8:29 AM
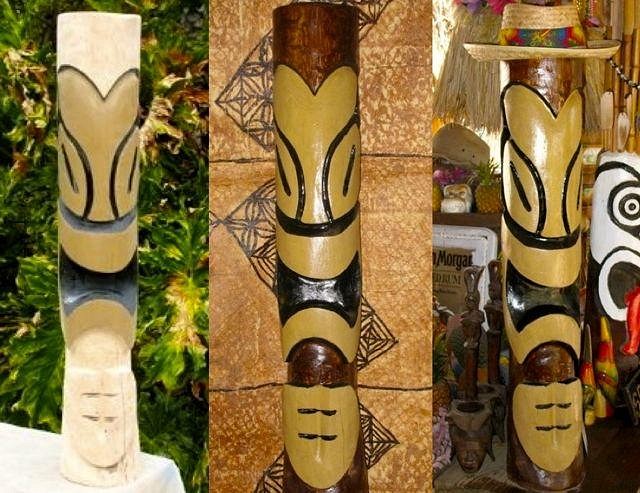
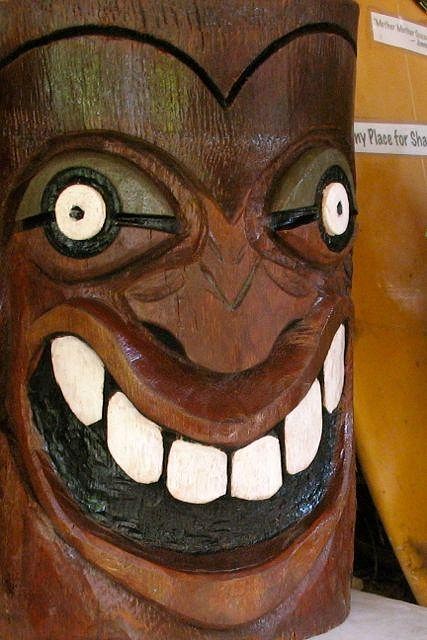
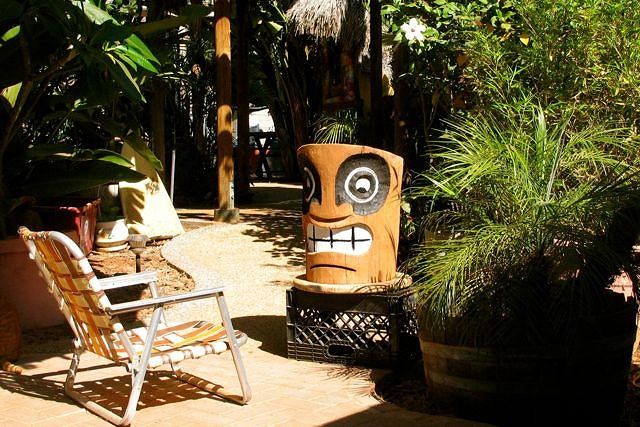
Hey hang10tiki, cy, McTiki & amate…. Glad to meet everyone and thanks for the warm welcome. I call this tiki - Mort Jagger. Inspiration comes from the famous Trader Mort's Tiki but I wanted to give him a Mick Jagger tongue - although survey sez it turned out more like Gene Simmons of KISS. I had these short leftover bamboo pieces from another project and added a King Kukulele style crown. BTW, the "SD" Native sign is for San Diego - and not- South Dakota. :wink:
[ Edited by: For the Love of Tiki 2013-02-21 08:51 ] |
|
FTLOT
For the Love of Tiki
Posted
posted
on
Thu, Feb 21, 2013 5:09 PM
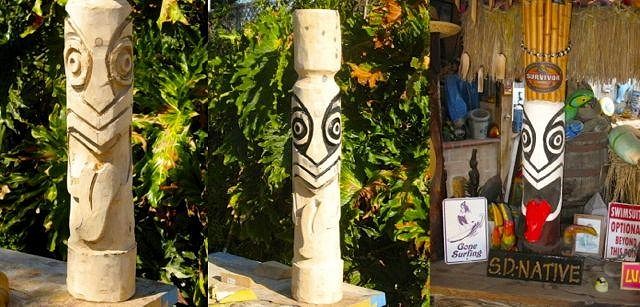
I've always liked this tiki style - so thought, I'd give it a try.
|
|
TT

Trailerpark Tiki
Posted
posted
on
Thu, Feb 21, 2013 7:14 PM
Welcome, great tikis. My first tiki sure didn't look that cool. But I guess I'm a little artistically challenged... |
|
FTLOT
For the Love of Tiki
Posted
posted
on
Sun, Feb 24, 2013 5:23 PM
I ran through all of the cedar wood that I had and then got a hold of some palm wood. This was my first palm wood tiki. It was a quickie. I really just wanted to cut into it and get a feeling as to what to expect from palm wood as compared to the cedar.
Here are Tikis #11 & 12.
|
|
FTLOT
For the Love of Tiki
Posted
posted
on
Sun, Feb 24, 2013 5:58 PM
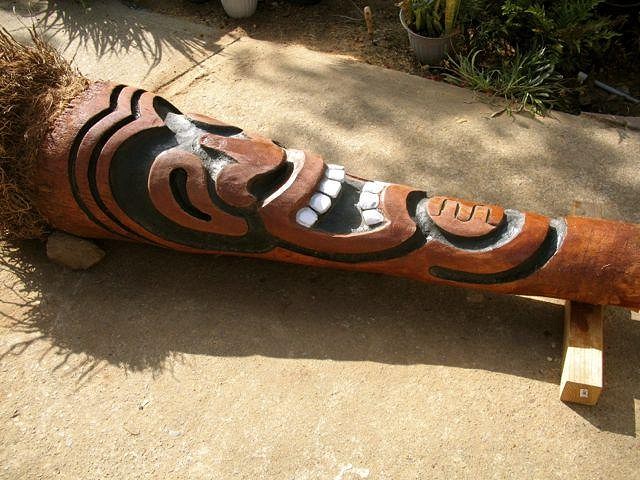
Here's Tiki #13 - from a Queen Palm. Check out the video for start to finish process. I have a feeling you guys might really like the song "Church of the Tiki God.'
|
|
FTLOT
For the Love of Tiki
Posted
posted
on
Sun, Feb 24, 2013 6:11 PM
|
|
FTLOT
For the Love of Tiki
Posted
posted
on
Tue, Feb 26, 2013 6:39 AM
Here's my first go at a Marq Tiki.
|
|
WP

Watango productions
Posted
posted
on
Tue, Feb 26, 2013 6:11 PM
Kool stuff! keep em com'n. |
|
FTLOT
For the Love of Tiki
Posted
posted
on
Sat, Mar 2, 2013 1:48 PM
Thanks, Watango! [ Edited by: For the Love of Tiki 2013-03-02 13:52 ] |
|
FTLOT
For the Love of Tiki
Posted
posted
on
Sat, Mar 2, 2013 1:50 PM
For the Love of Tiki #17
|
|
FTLOT
For the Love of Tiki
Posted
posted
on
Sun, Mar 3, 2013 5:20 PM
For the Love of Tiki #19 |
|
FTLOT
For the Love of Tiki
Posted
posted
on
Thu, Mar 7, 2013 12:20 PM
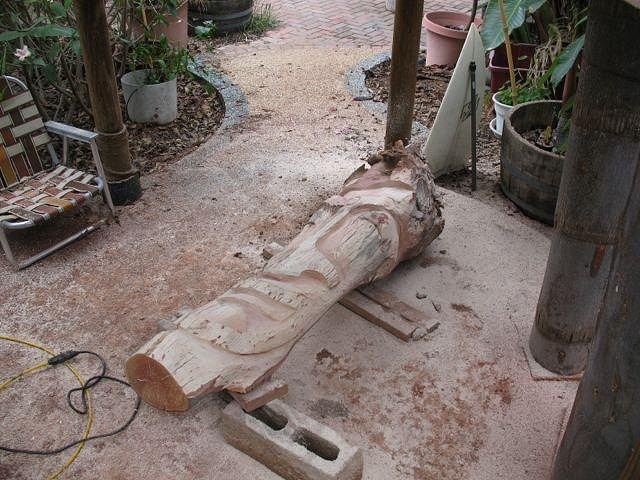
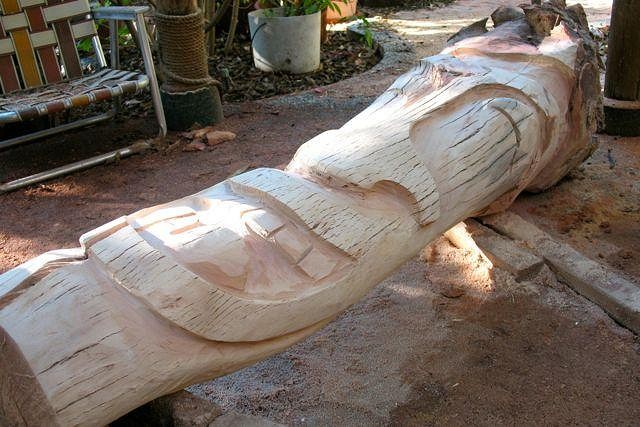
Here is the current work in progress. Its a queen palm, 4' tall and 11" diameter. Its still a bit green. I'll make some cuts, then give it a couple of days in which to dry out a bit - then hopefully, be able to get back at it.
|
|
CP

Coffee Pirate
Posted
posted
on
Thu, Mar 7, 2013 12:36 PM
Wow! Lovely stuff! My Uncle Barry is thinking about trying his hand at carving Tikis. I suggested he start with cedar, but I suspect he will pick up a driftwood log from the beach since it will be free. I hope I can help him carve it. This thread is so inspiring! |
|
L

lunavideogames
Posted
posted
on
Thu, Mar 7, 2013 12:47 PM
I really like your Mort Jagger! I live right by Trader Morts, and I really like that tiki! You really made a good likeness to the original. Good job! |
|
L
lunavideogames
Posted
posted
on
Thu, Mar 7, 2013 12:49 PM
I see you are also in SD. Are any for sale? |
|
FTLOT
For the Love of Tiki
Posted
posted
on
Thu, Mar 7, 2013 2:05 PM
Thanks for the kind words. I liked starting out with cedar. Its more like real wood - certainly as compared to palm. .. but if driftwood was readily available in my local, without a doubt, I'd be carving it too. Be sure to check out the recent post by 4WDTiki - he's been using driftwood for his latest tikis. I feel that searching on the beach for a good piece of driftwood to carve would be fun in itself. Ya know, finding a piece of wood that already sort of looks like something. It is a great hobby & am sure, you and Uncle Barry will have a good time at it. My recommendation: if you want to do it, is don't give it too much thought, just set some time aside for it & then start to let the wood chips fly. :wink: Of course, be sure to observe all safety precautions - but the main thing is to make it hands on. Anyways, thats what works for me - although, I read about how everyone else approached it on Tiki Central as well. |
|
FTLOT
For the Love of Tiki
Posted
posted
on
Thu, Mar 7, 2013 2:39 PM
Hiya Lunavideogames, Thanks for the compliment. Mort Jagger gives a wink :wink: So far, my tikis have ended up as gifts for close friends & family - but believe I might be approaching that day in the near future when I'll be in a selling mode. Thanks for asking (you've just made my day) & I'll let ya know. |
|
FTLOT
For the Love of Tiki
Posted
posted
on
Sun, Mar 10, 2013 7:43 PM
For the Love of Tiki #16
[ Edited by: For the Love of Tiki 2013-03-10 19:44 ] |
|
C
cy
Posted
posted
on
Mon, Mar 11, 2013 9:09 AM
Some good work goin' on there FTLOT, really like the time lapse photos. |
|
A
amate
Posted
posted
on
Mon, Mar 11, 2013 7:03 PM
Sweet 16 rocks! |
|
BPB

Bay Park Buzzy
Posted
posted
on
Tue, Mar 12, 2013 3:57 PM
Thanks for the tour last weekend! You have a lot of ultra cool DIY things going on over there. (Just don't tell anyone around here its real name. :wink: ) Buzzy Out! |
|
P
pjc5150
Posted
posted
on
Tue, Mar 12, 2013 5:46 PM
cool stuff man.... I tend to avoid queen palms because they're so stringy....but looks like that one came out fine! |
|
FTLOT
For the Love of Tiki
Posted
posted
on
Sun, Mar 17, 2013 2:54 PM
Thanks Cy, Amate, BuzzyHere & pjc5150 for the encouraging posts. Here it is - from start to finnish.
|
|
R
RIOTURBAN
Posted
posted
on
Wed, Mar 20, 2013 3:46 PM
nice! looks a bit like KAA from "The Jungle Book",hehe. |
|
FTLOT
For the Love of Tiki
Posted
posted
on
Wed, Mar 20, 2013 6:49 PM
[Haha... Good one, RIOTURBAN. Don't stare into those eyes for very long - who knows what you might end up doing? [ Edited by: For the Love of Tiki 2013-03-20 18:50 ] |
|
FTLOT
For the Love of Tiki
Posted
posted
on
Tue, Mar 26, 2013 8:14 AM
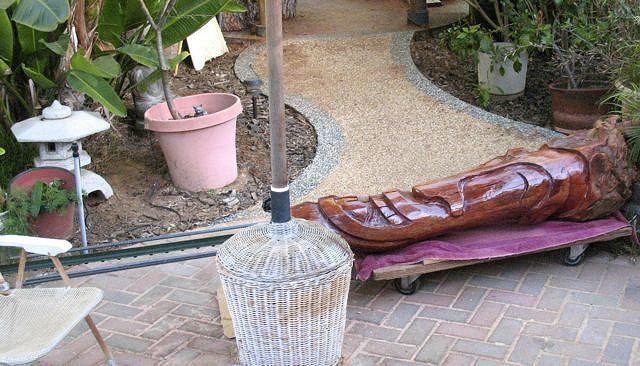
Here's an update for the current work in progress - Tiki #20. Now, ready for some stain.
|
|
FTLOT
For the Love of Tiki
Posted
posted
on
Thu, Mar 28, 2013 7:03 AM
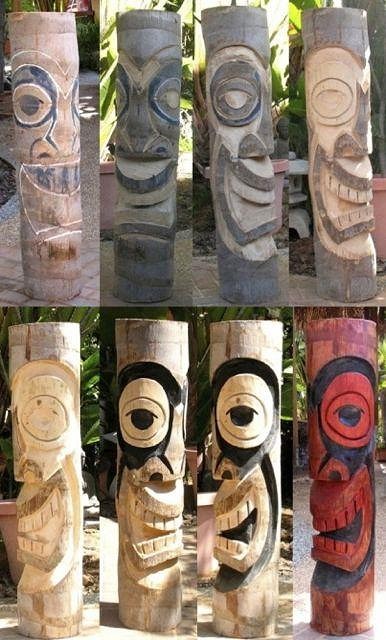
Tiki #20 is done! Here are the time lapse photos... |
|
FTLOT
For the Love of Tiki
Posted
posted
on
Mon, Apr 29, 2013 7:54 PM
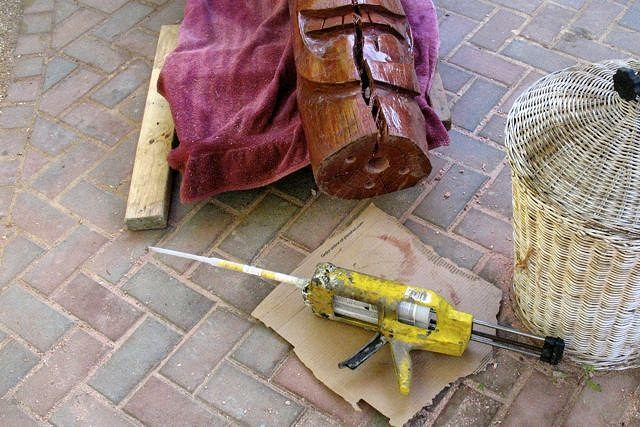
The bark had a real nice red color to it. I was hoping that the color would carry through into the wood - but that wasn't the case.
This tiki is very top heavy and I finally decided to pour him in concrete to keep him from toppling over. |
|
FTLOT
For the Love of Tiki
Posted
posted
on
Mon, Apr 29, 2013 8:28 PM
First drill out your somewhat oversized holes - about 3/16 larger than the rebar you intend on using. I used 1/2" rebar so, I drilled the holes at 5/8" and then reamed them out a bit more. I went extra deep (a strong 9") because the tiki is so top heavy. Usually, 4" or so would be plenty deep. Be sure to clean out the holes so that you will get good adhesion. Safety Precaution: Be sure to wear eye protection and gloves when working with epoxy. Apply the epoxy into the hole and then insert the re-bar - making sure that you don't have any air pockets. The epoxy gun with the nozzle makes this a lot easier - but if you don't have a gun - you can also do it by mixing the epoxy (2 parts) then applying it directly onto the rebar as you slowly "screw" or "turn" it into place. If you hear an air pocket "pop" inside the hole, then slowly reverse the rebar and pull it out some - add some more epoxy onto the rebar, then re-insert it into the hole - using the same turning technique. When it goes in all the way, some of the excess epoxy will kind of bulge out - this is the desired result. Take what epoxy is left over and spread it with a putty knife to seal the wood where it will make contact with any concrete.
I like to give it until the next day for the epoxy to come up to full strength.
|
|
FTLOT
For the Love of Tiki
Posted
posted
on
Mon, Apr 29, 2013 8:35 PM
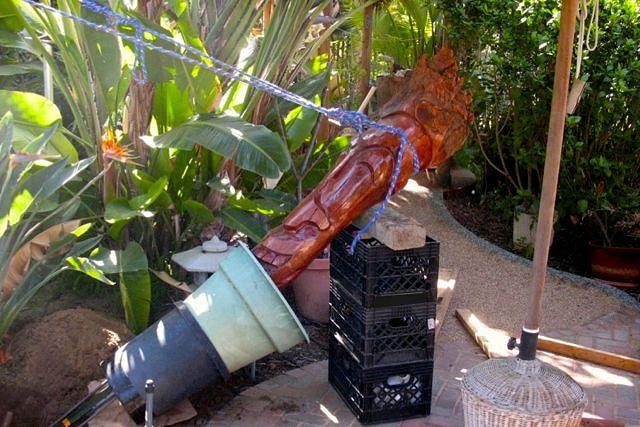
Then, its up, up and away...
Some improvised concrete formwork along with a footing... and there ya have it!
|
|
FTLOT
For the Love of Tiki
Posted
posted
on
Thu, May 2, 2013 5:16 AM
Just posted a video, showing the process from start to finish.
|
|
FTLOT
For the Love of Tiki
Posted
posted
on
Tue, May 28, 2013 6:30 PM
Another root ball tiki. This one is a Mexican Fan Palm - and was way easier to carve than the last one I did, made from macadamia nut!
|
|
FTLOT
For the Love of Tiki
Posted
posted
on
Tue, Jun 11, 2013 5:35 PM
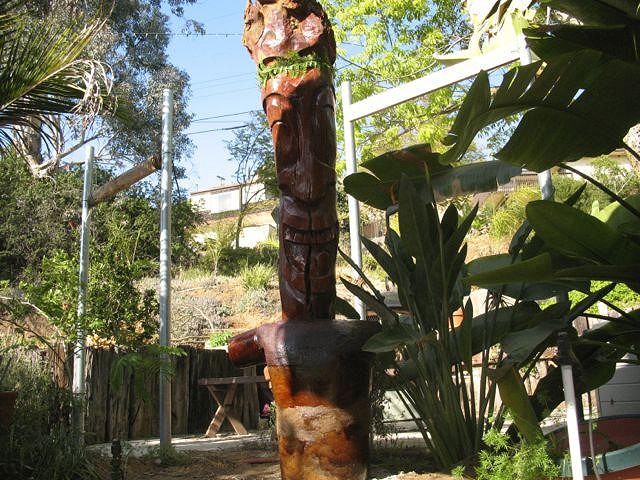
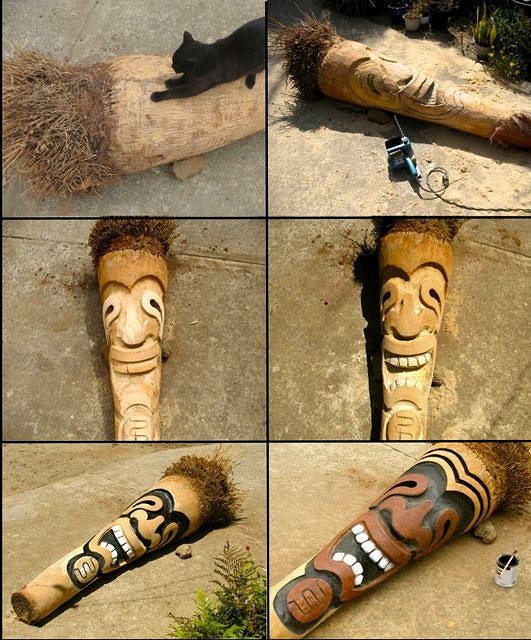
Here's the latest work in progress-- a queen palm 4'-6" height x 1'-2" width.
|
|
R
RIOTURBAN
Posted
posted
on
Thu, Jun 13, 2013 2:47 PM
nice stuff again!i like the carving progress pics.and the cat seems to like your tikis too! [ Edited by: RIOTURBAN 2013-06-13 14:48 ] |
|
HT

Hale Tiki
Posted
posted
on
Fri, Jun 14, 2013 8:52 AM
I really like the KAA tiki. It made me laugh, and I dig the style. |
|
FTLOT
For the Love of Tiki
Posted
posted
on
Mon, Jun 17, 2013 8:46 PM
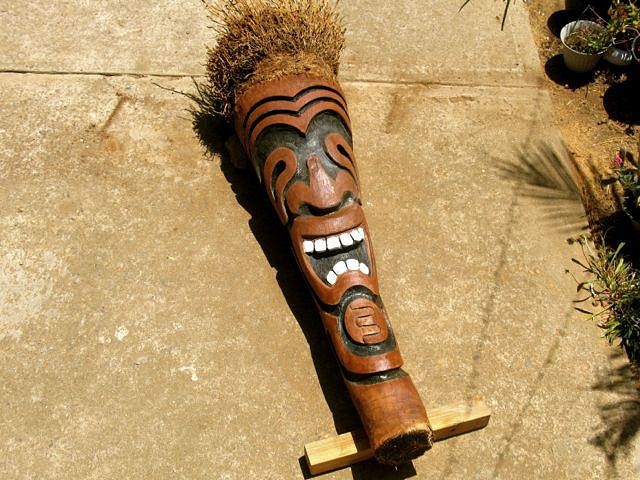
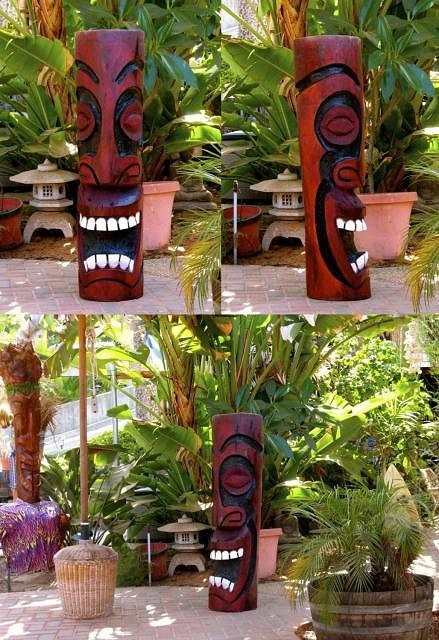
Thanks Rioturban & Hale Tiki for the kind words & encouragement. Here's the latest all stained up.
|
|
FTLOT
For the Love of Tiki
Posted
posted
on
Fri, Jun 21, 2013 6:23 PM
A Quickie Tiki.
|
|
FTLOT
For the Love of Tiki
Posted
posted
on
Fri, Jun 28, 2013 7:37 PM
Just posted a new tiki carving video on YouTube. |
|
FTLOT
For the Love of Tiki
Posted
posted
on
Mon, Aug 12, 2013 3:49 PM
Here's my latest Tiki Carving video on YouTube:
|