Tiki Central / Tiki Carving
Balhi Ha'i sign
Pages: 1 20 replies
|
H

Humuhumu
Posted
posted
on
Thu, Jul 2, 2015 10:24 AM
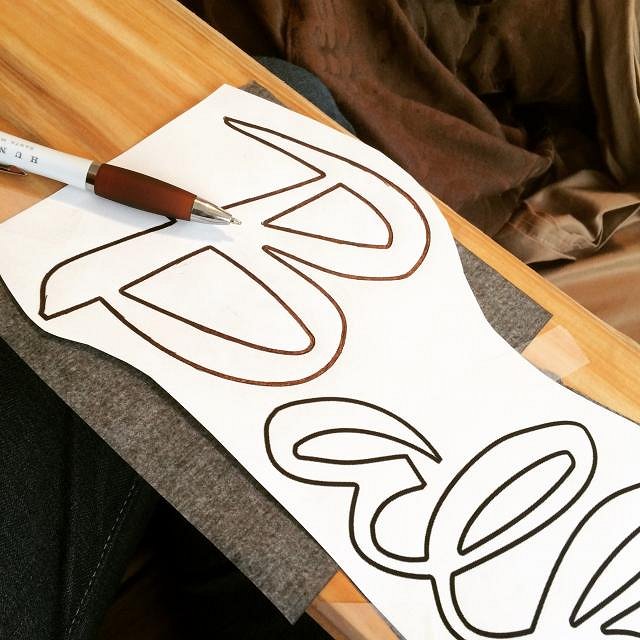
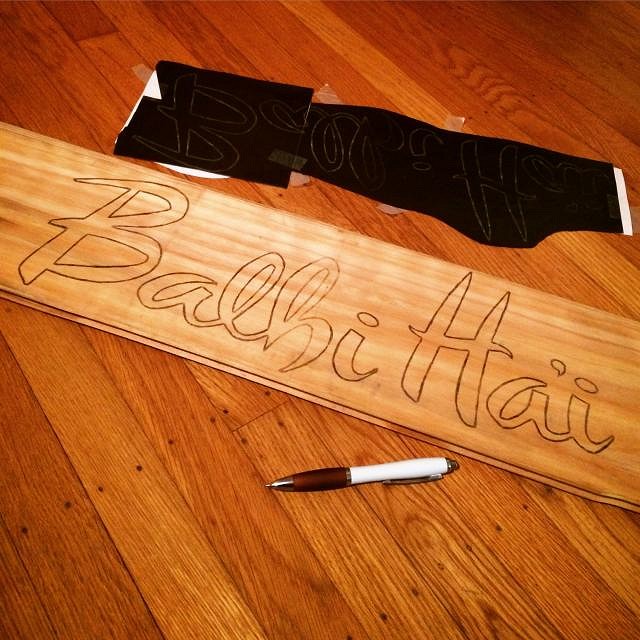
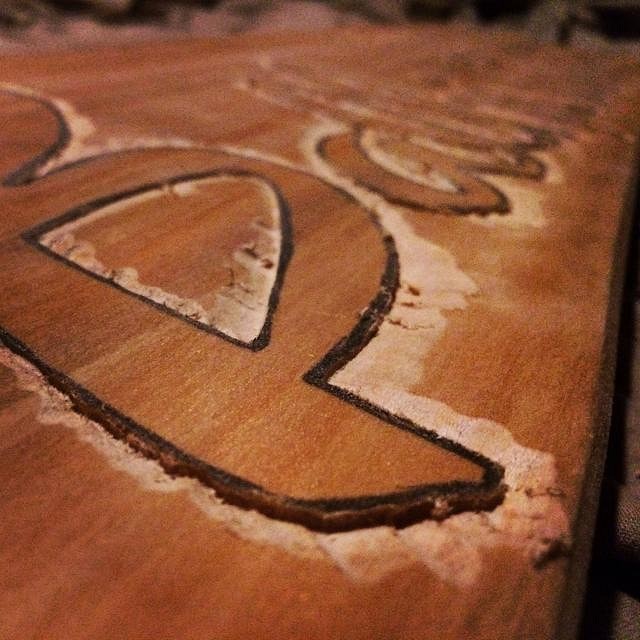
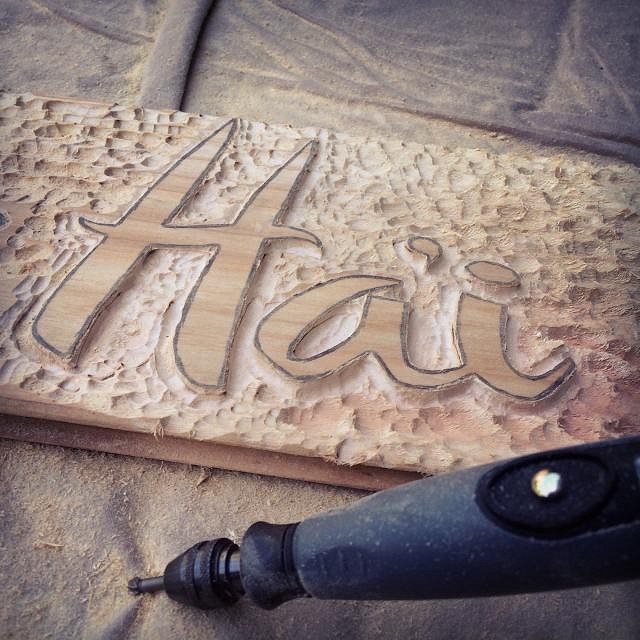
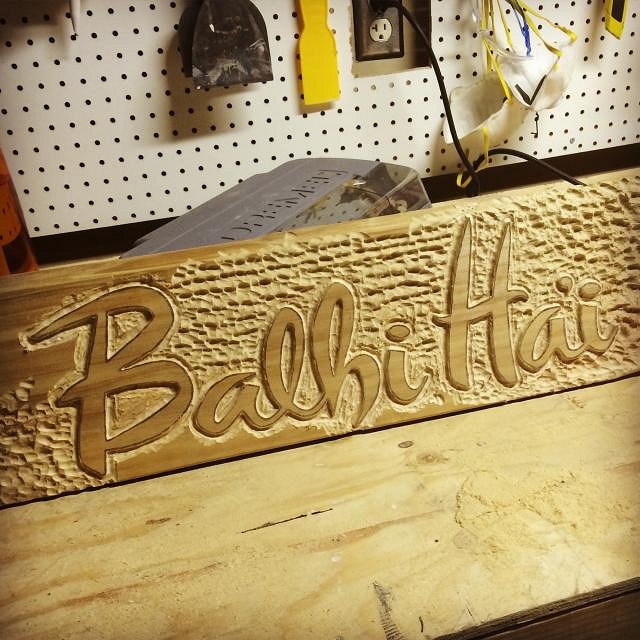
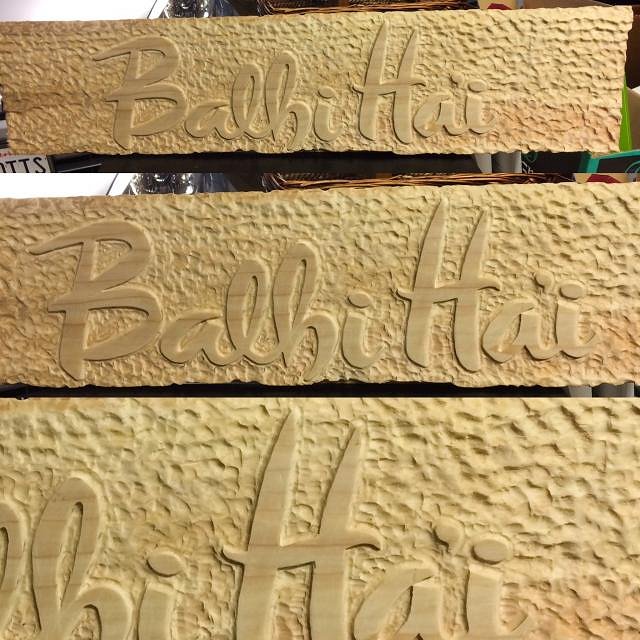
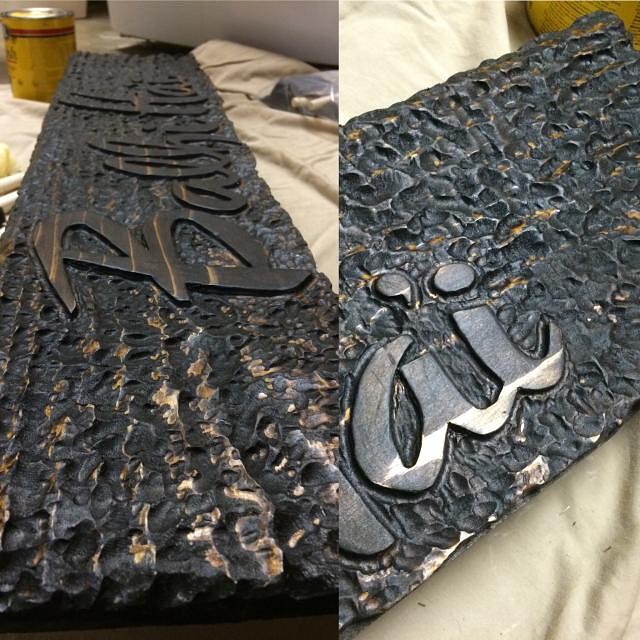
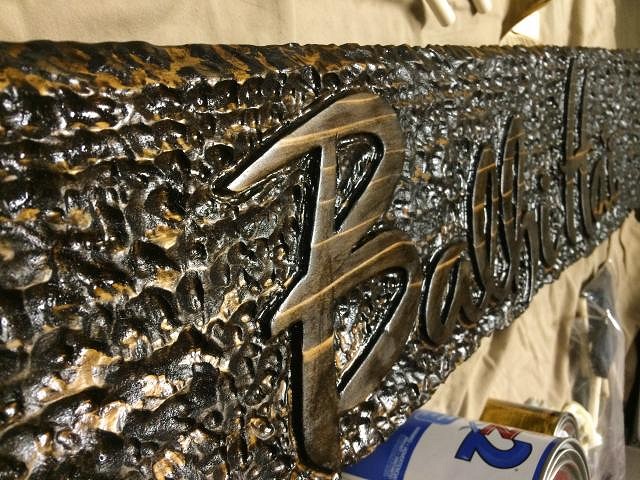
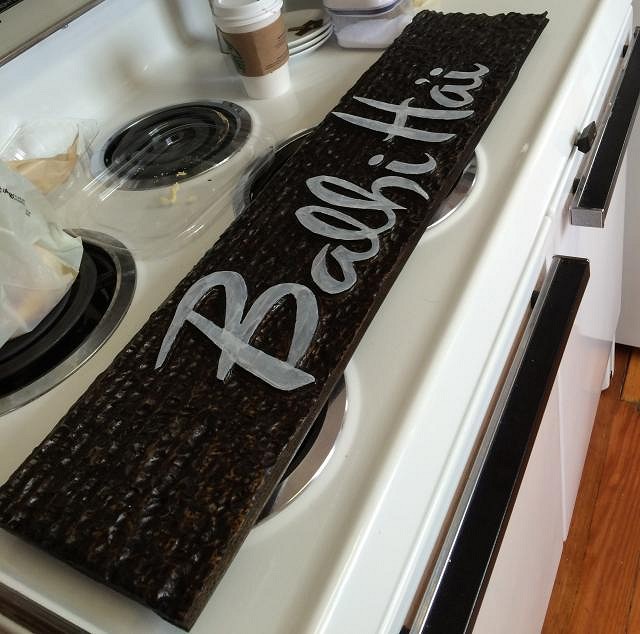
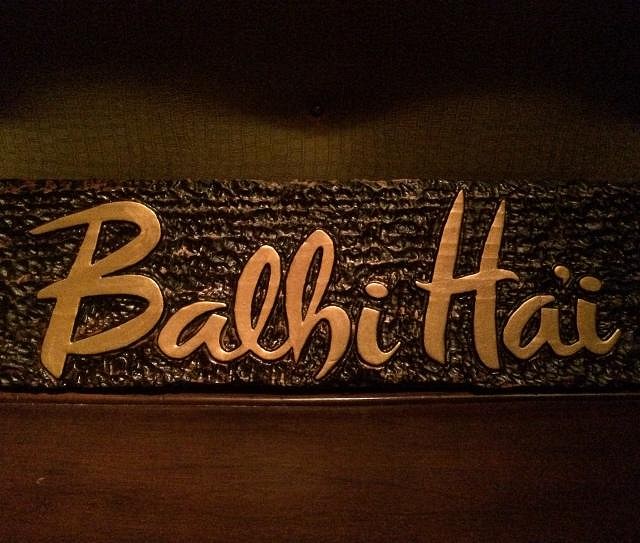
I just finished my second carving project -- a sign for the tiki bar. The wood is a hunk of mystery meat pulled out of a dumpster by a kind employee at a landscape supply yard, a bit of scrap left over from trimming some sort of plank. Alder? Unusually pale redwood? I dunno. The grain was subtle. Didn't seem at all like pine or oak. All the carving was done using a Dremel tool with a flex shaft attachment. Here's photos of the project as it progressed: :down: I created the logo years ago, it's based on lettering from a vintage menu of a place called Bali Ha'i. I drew the lower case "h". I printed it on the inkjet, and then traced it onto the board using carbon paper. :down: I used a pointy triangle bit to edge a smidge around the letters. :down: I used a nice, big oval bit to get this fun, rough-hewn texture all around the background... until my bit came flying out of the Dremel and landed somewhere in the yard. Whoops! :down: While my bit was lost, I switched to cutting out deeply and carefully around the letters using some smaller bits. :down: Found my bit! Here's the sign after all the carving was completed, and after sanding. :down: Two coats of Dark Walnut stain. :down: Three coats of satin finish polyurethane. :down: One coat of primer on the lettering. :down: Three coats of gold paint, and the sign is finished! Next comes getting the sign hung. I need to do some work in the stairwell where the sign will live, mostly mounting lighting directed at the sign. For my next carving project -- I think I might carve the handle on my ice pick. |
|
H
Humuhumu
Posted
posted
on
Thu, Jul 2, 2015 10:46 AM
A step I didn't elaborate on, that may be worth mentioning in case someone wants to do this themselves: after polyurethane and before applying the coat of primer, I sanded the lettering thoroughly with 220 sandpaper. That smoothed the surface a bit (particularly important since the cleanness of the lettering is supposed to contrast with the roughness of the background, and the metallic gold paint would have made uneven bits really obvious), and also probably improved adhesion of the paint. You should sand between poly coats, too, but the can of poly will tell you that. |
|
H
Humuhumu
Posted
posted
on
Thu, Jul 2, 2015 10:48 AM
Oh! Also, in the photo above where I talk about the "big oval bit" the bit in the picture is not that bit -- it's a smaller round bit I used for doing the lettering. The big oval bit was about the size and shape of an unshelled peanut. |
|
C

cy
Posted
posted
on
Thu, Jul 2, 2015 12:13 PM
A great looking sign Humu, nice work! |
|
R

RIOTURBAN
Posted
posted
on
Thu, Jul 2, 2015 3:10 PM
Really nice looking sign! |
|
T

tikitonyd
Posted
posted
on
Thu, Jul 2, 2015 5:20 PM
Loving this... and totally stealing the process. Thanks! |
|
W

Woodtiki
Posted
posted
on
Thu, Jul 2, 2015 9:12 PM
Looks awesome! |
|
M

MaukaHale
Posted
posted
on
Thu, Jul 2, 2015 9:16 PM
The letters really jump off the board! |
|
HOK

HOUSE OF KU
Posted
posted
on
Fri, Jul 3, 2015 2:17 PM
Beautiful Work! Can't wait to see the Ice pick! :0) |
|
A

amate
Posted
posted
on
Sat, Jul 4, 2015 6:04 AM
Well done! |
|
WP

Watango productions
Posted
posted
on
Sun, Jul 5, 2015 7:50 PM
Cool |
|
M

MadDogMike
Posted
posted
on
Sun, Jul 5, 2015 7:57 PM
I like it! Thanks for sharing |
|
A

AlohaTexasTikiCo
Posted
posted
on
Sun, Jul 5, 2015 8:42 PM
Wow that looks amazing. I'm a little stunned. |
|
TP

Tiki Phil
Posted
posted
on
Mon, Jul 6, 2015 6:49 PM
I like it! |
|
H
Humuhumu
Posted
posted
on
Tue, Jul 7, 2015 9:27 PM
Thanks for the kind words, everybody! I think I have all the pieces I need to get it hung, once it's in its spot I'll share more pictures. |
|
T

Thortiki
Posted
posted
on
Wed, Jul 8, 2015 4:53 AM
Mid Century SLICK. Please post a pic when you've hung it up! (-: |
|
KG

Kahiki Guy
Posted
posted
on
Wed, Jul 8, 2015 7:47 AM
Looks really good! Thanks for sharing and posting pics of the process. |
|
MB

Monkey Bizz
Posted
posted
on
Tue, Jul 14, 2015 1:02 PM
I Like it!! |
|
L

LoriLovesTiki
Posted
posted
on
Fri, Jul 17, 2015 7:12 PM
Very, very nice! Makes me want to take out our dremel. |
|
TS

Trader Scott
Posted
posted
on
Wed, Jul 22, 2015 2:42 PM
Thanks Humuhumu, you're instructions are wonderful! I'm working on my own version based off of your steps for my bar right now. I'll post pics of the process when it's ready to hang up :) |
|
F

Fugu
Posted
posted
on
Tue, Jul 28, 2015 12:06 PM
The sign looks wonderful. Very nice work, and thanks for sharing your techniques! |
Pages: 1 20 replies