Tiki Central / Tiki Carving
Blackwater projects
|
B

BlackWater
Posted
posted
on
Sun, Nov 26, 2023 5:32 PM
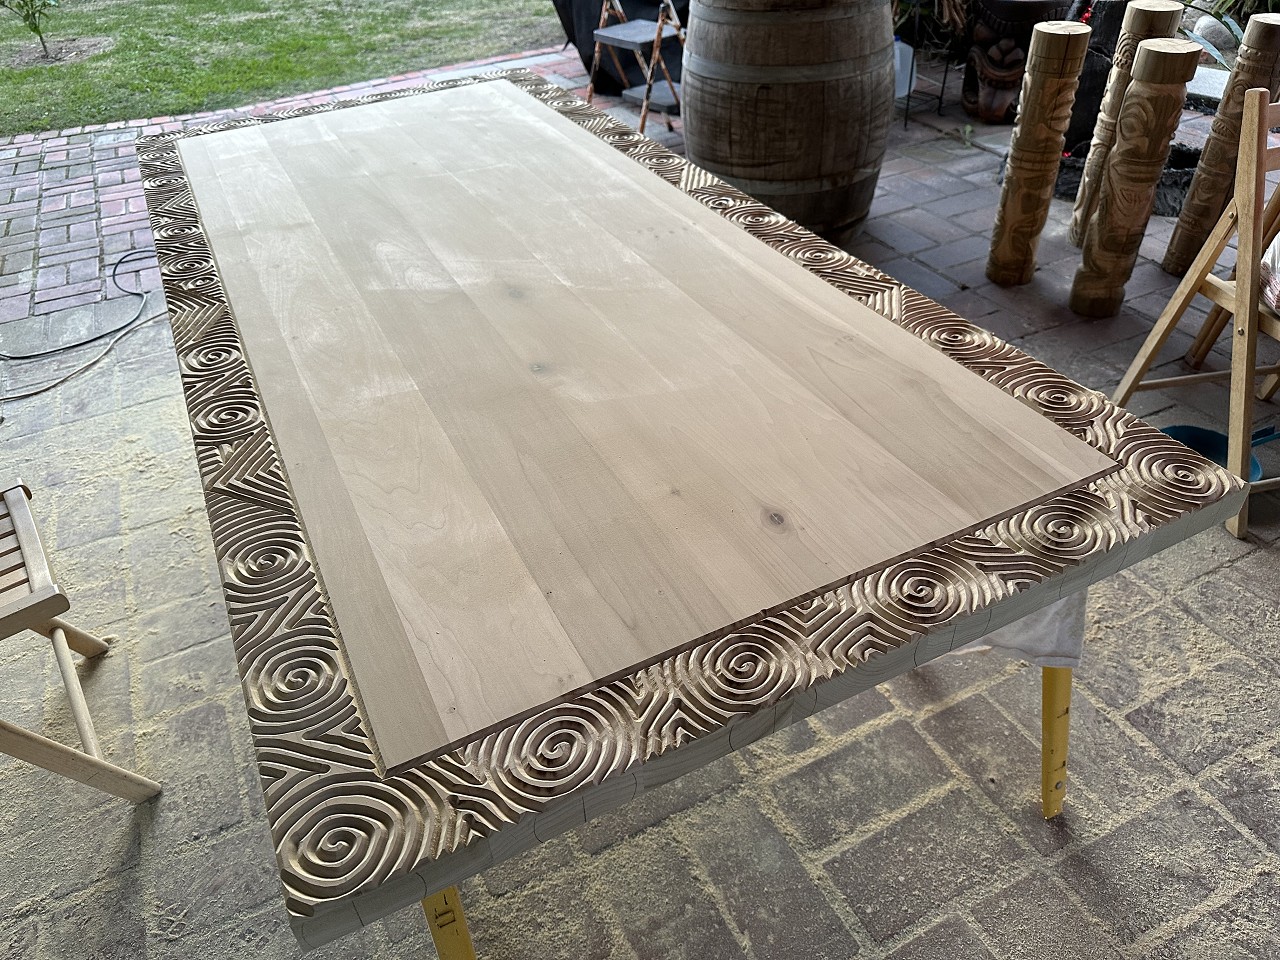
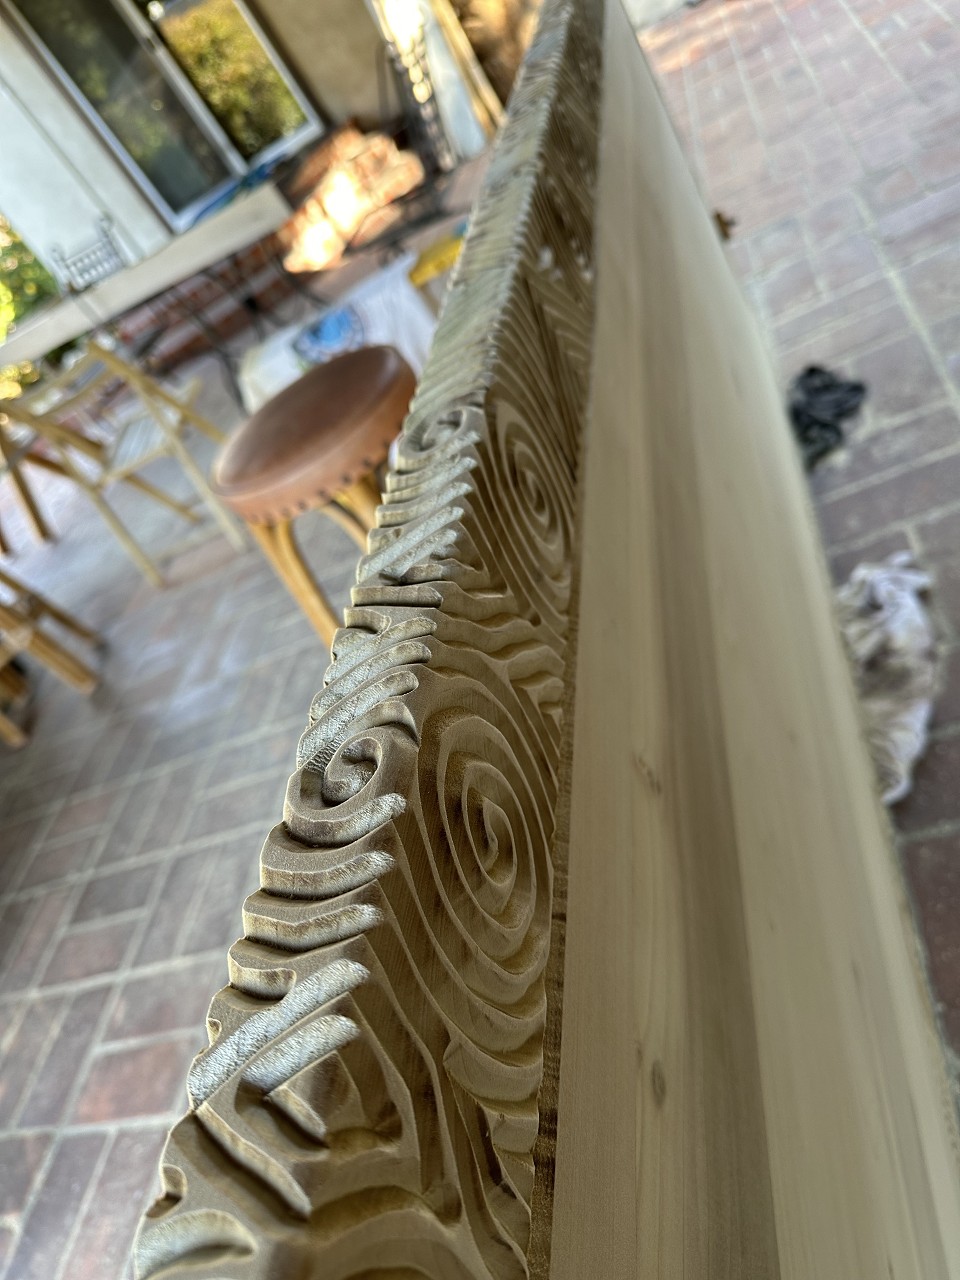
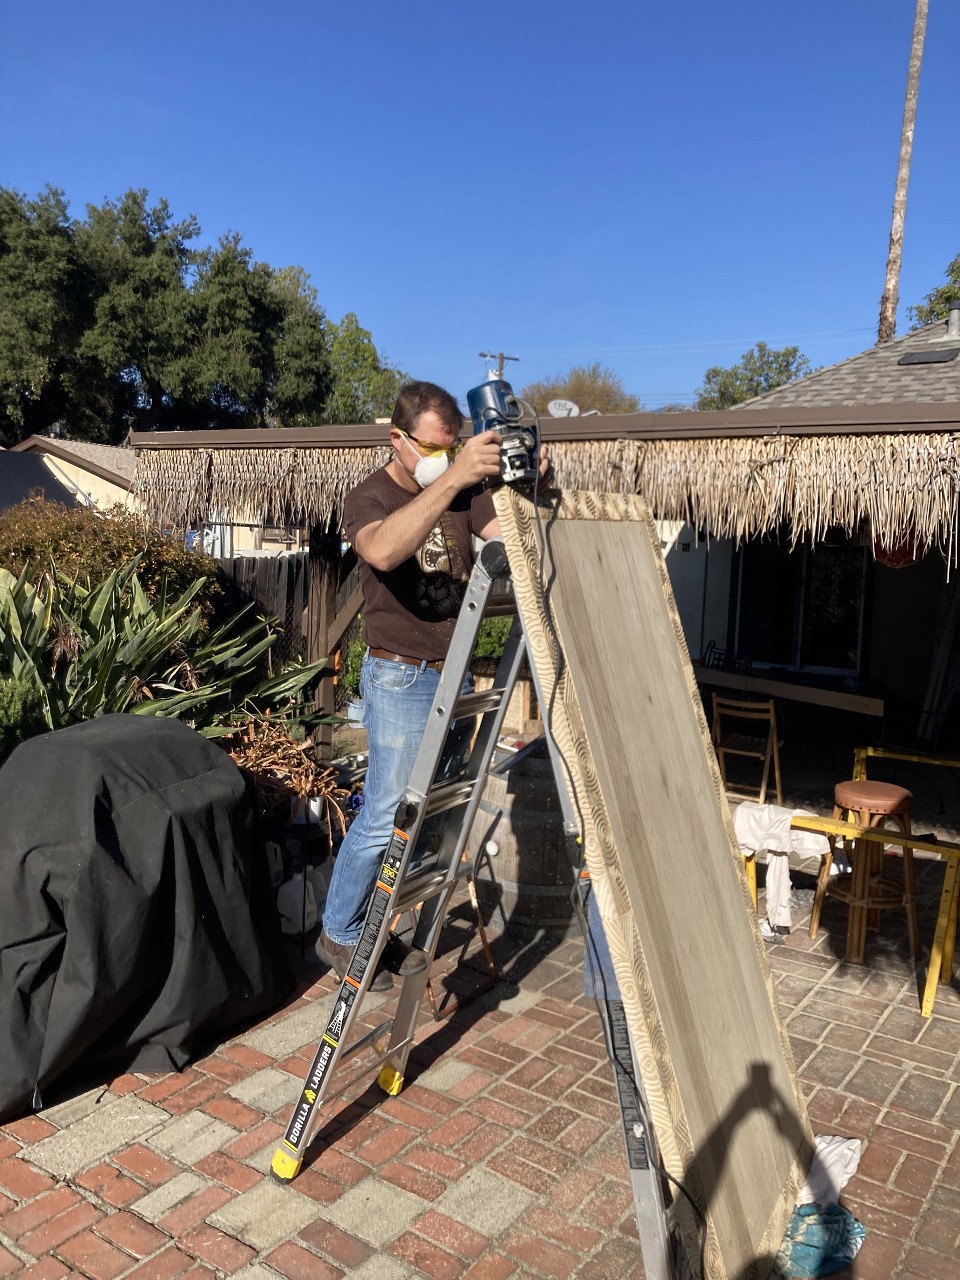
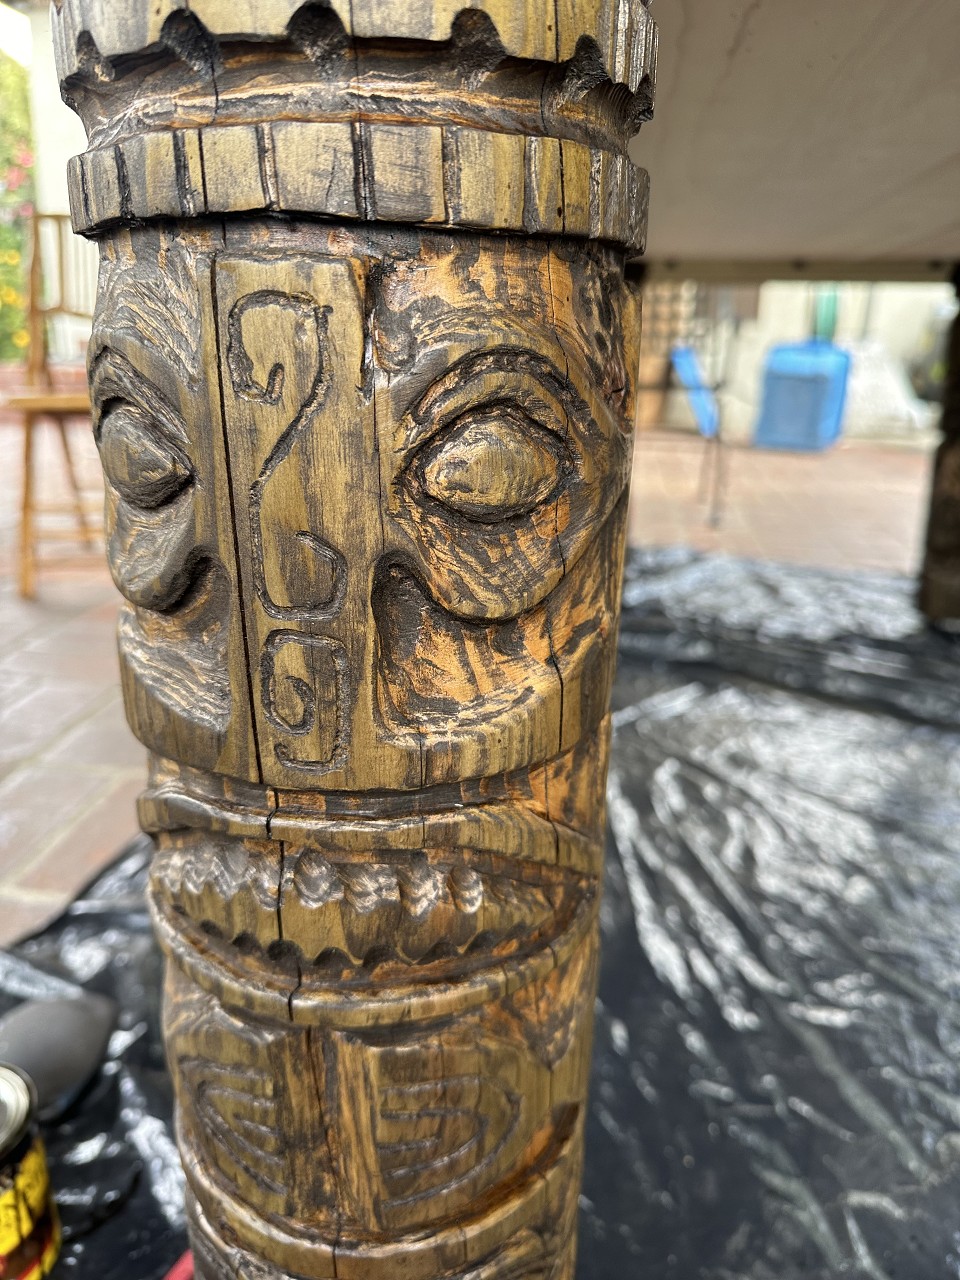
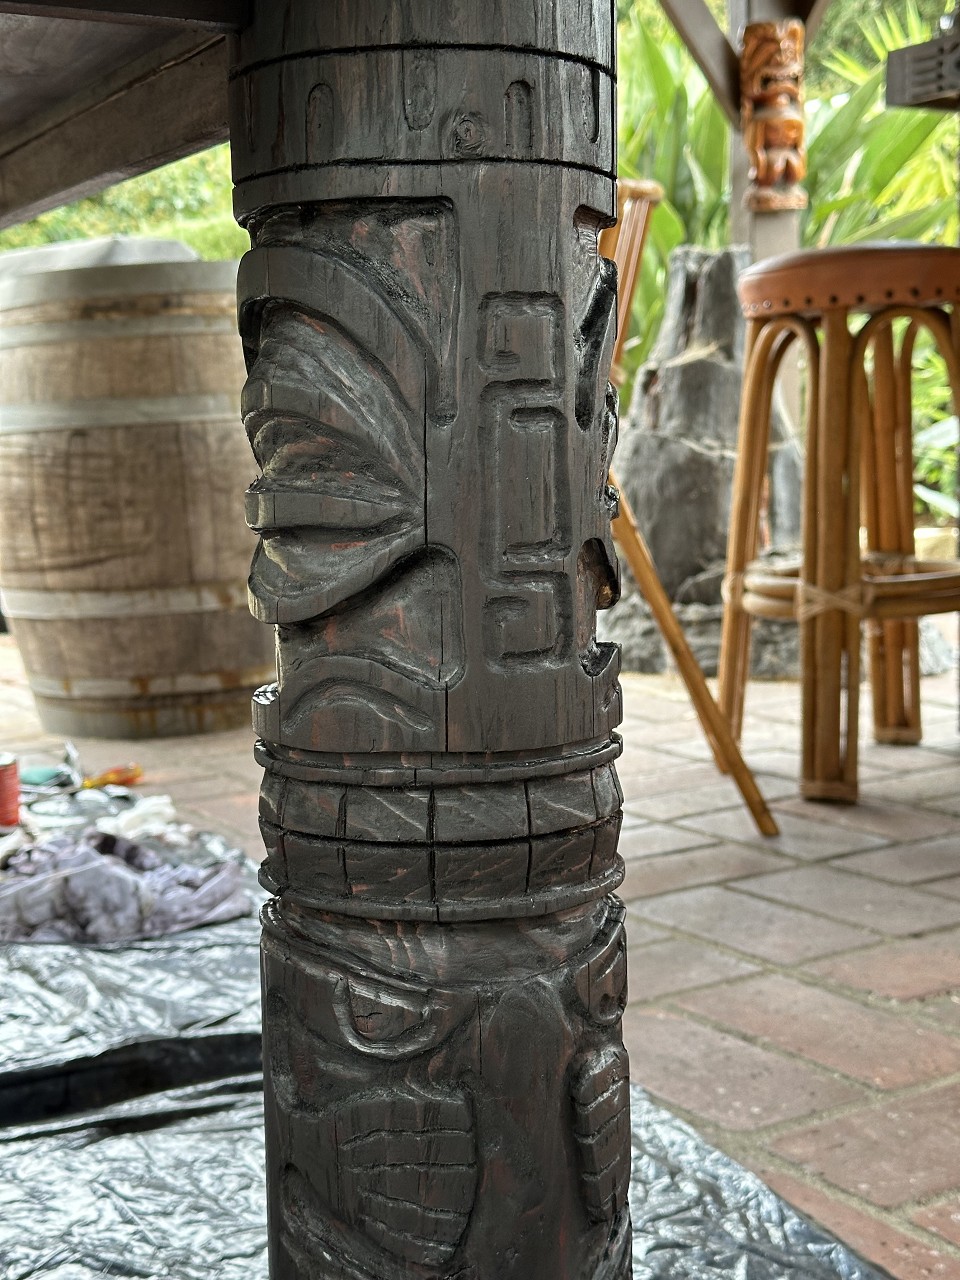
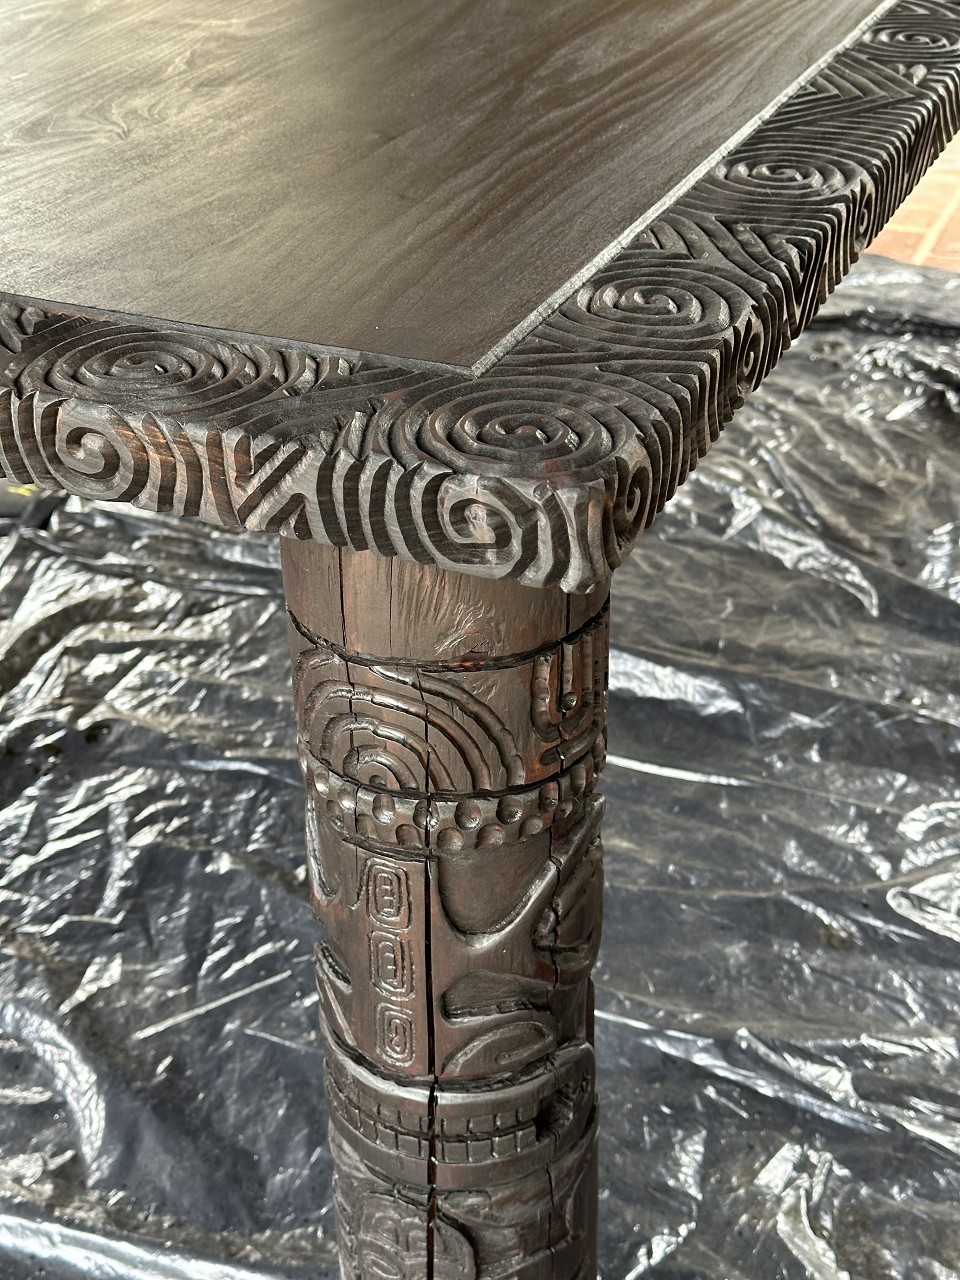
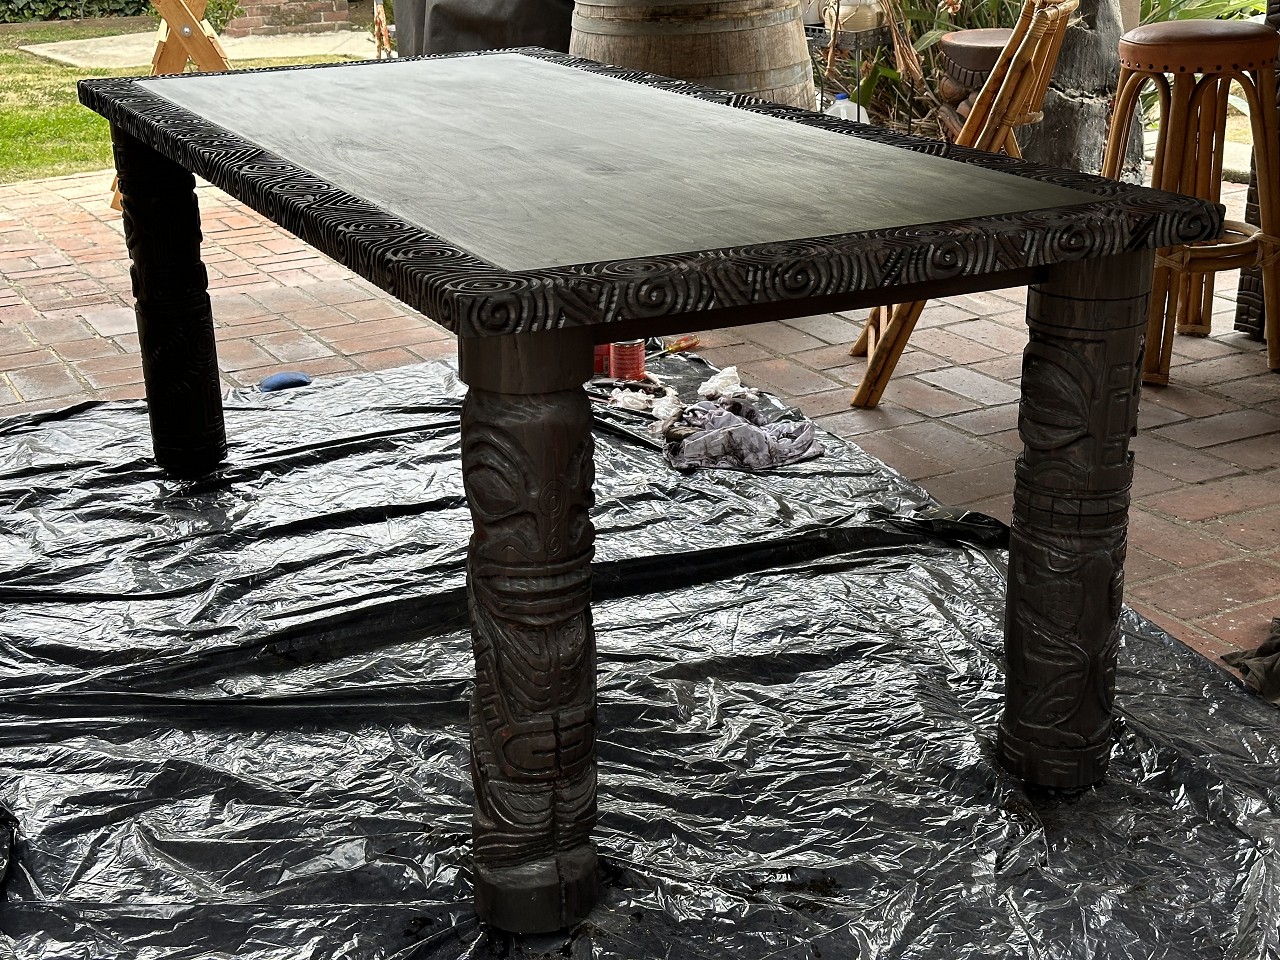
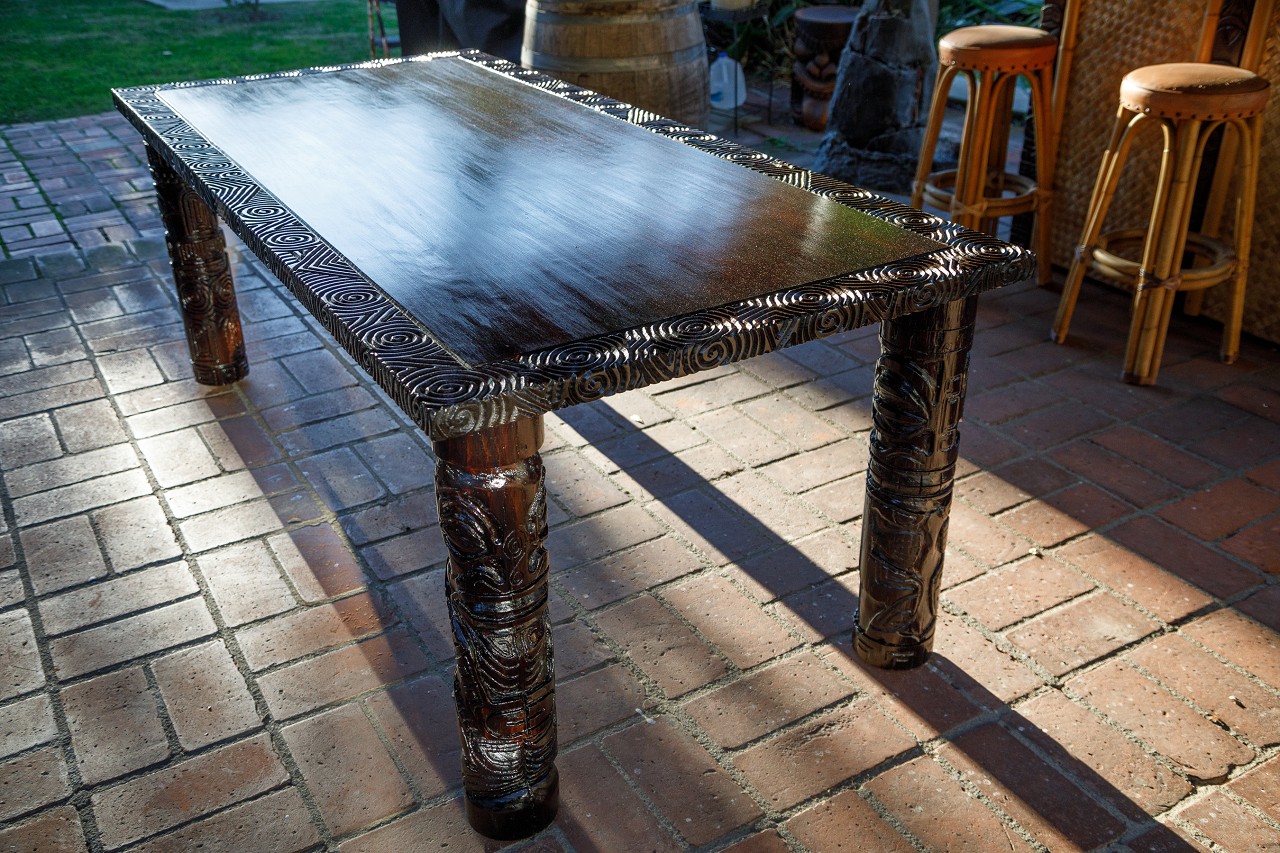
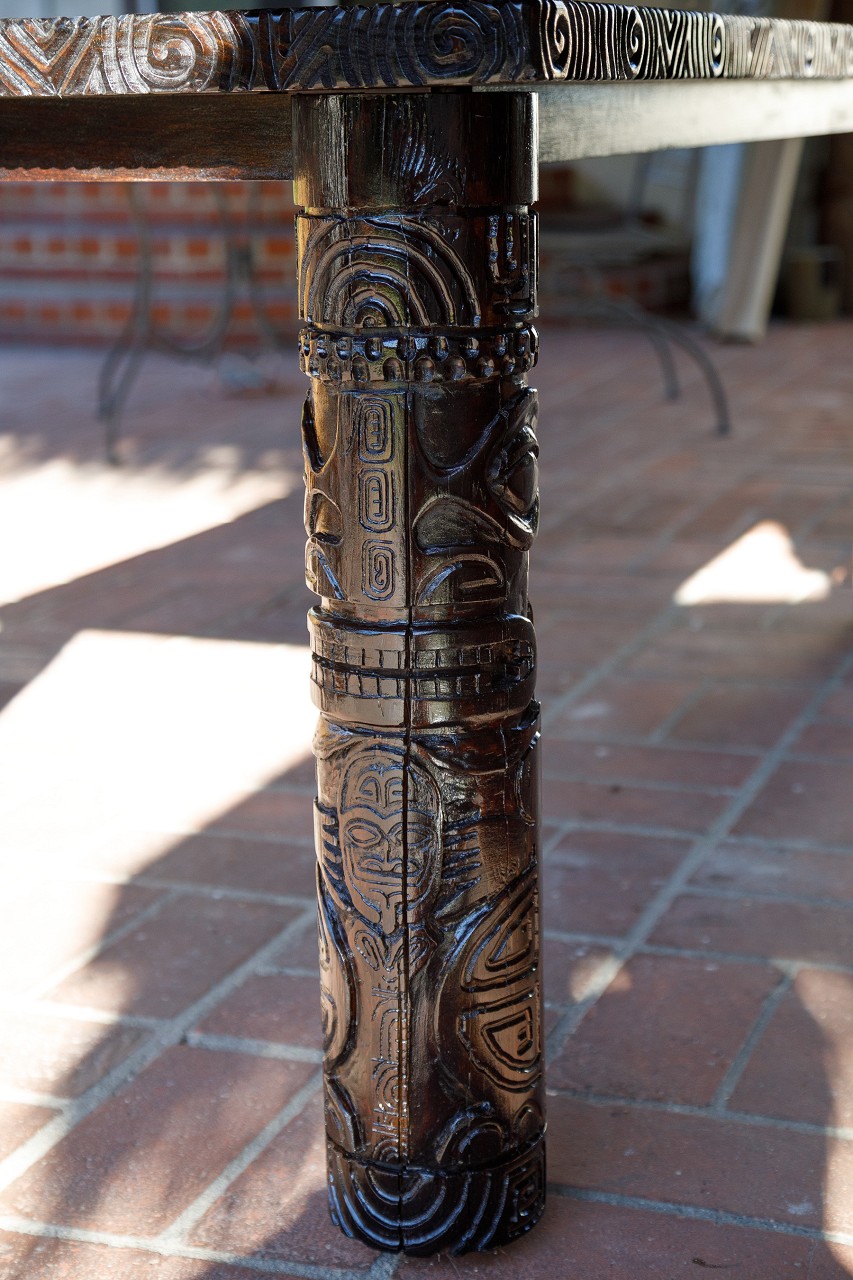
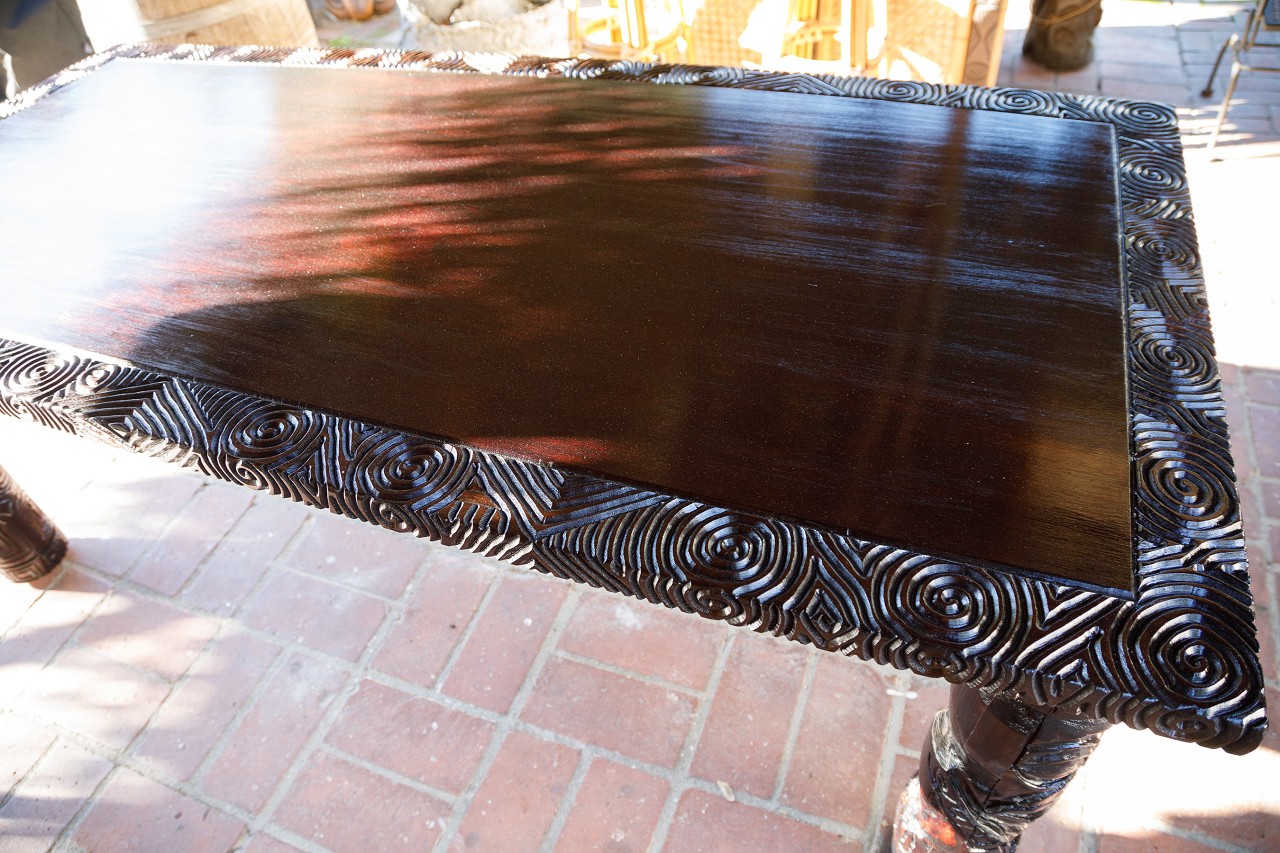
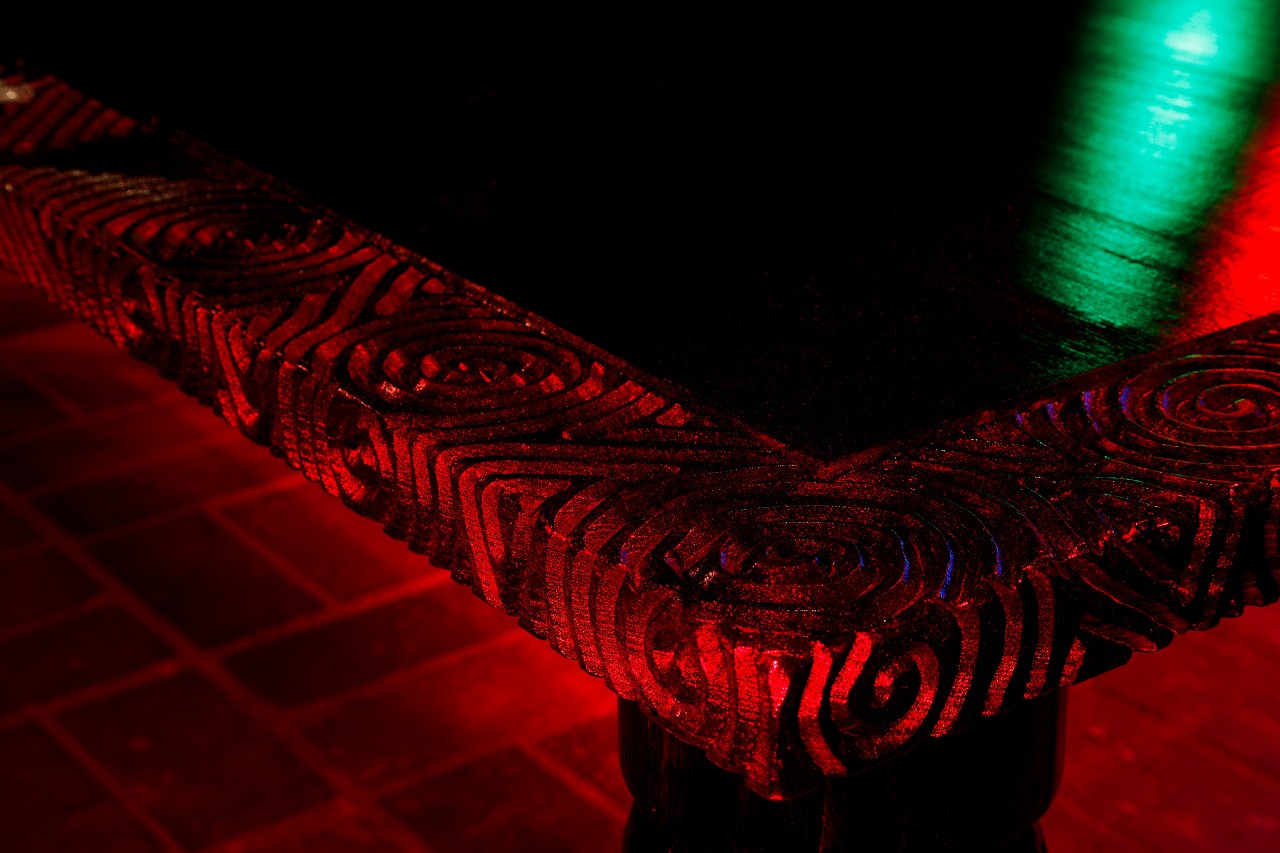
Long time no update. Tiki legs are done. I hope they don’t split in half under the weight. Tabletop has been delivered, and I spent the day carving the top. I’m pretty happy with how it came out so far. Still need to carve the sides, then I’ll do final assembly and finishing.
(Tiki Diablo is a huge influence obviously, specifically his work for Undertow.) [ Edited by BlackWater on 2023-11-26 18:24:30 ] |
|
WC

Will carve
Posted
posted
on
Mon, Nov 27, 2023 4:01 AM
Wow, nice job. Love it when a plan comes together. |
|
H

hang10tiki
Posted
posted
on
Mon, Nov 27, 2023 6:27 PM
Sweetness in the making |
|
M

MadDogMike
Posted
posted
on
Tue, Nov 28, 2023 10:29 AM
Glad to see an update, looks great! |
|
PP

Prikli Pear
Posted
posted
on
Wed, Nov 29, 2023 7:15 AM
That is definitely ambition on a grand scale. It looks absolutely top-notch thus far. My hands and arm are going numb just from looking at all of your router work! Seriously, I cannot wait to see the final stages once finish is applied and the entire table is assembled. The madman in me is thinking of all the ways a carved tabletop could be combined with resin... but that's for somebody else to attempt! |
|
B
BlackWater
Posted
posted
on
Wed, Nov 29, 2023 8:31 PM
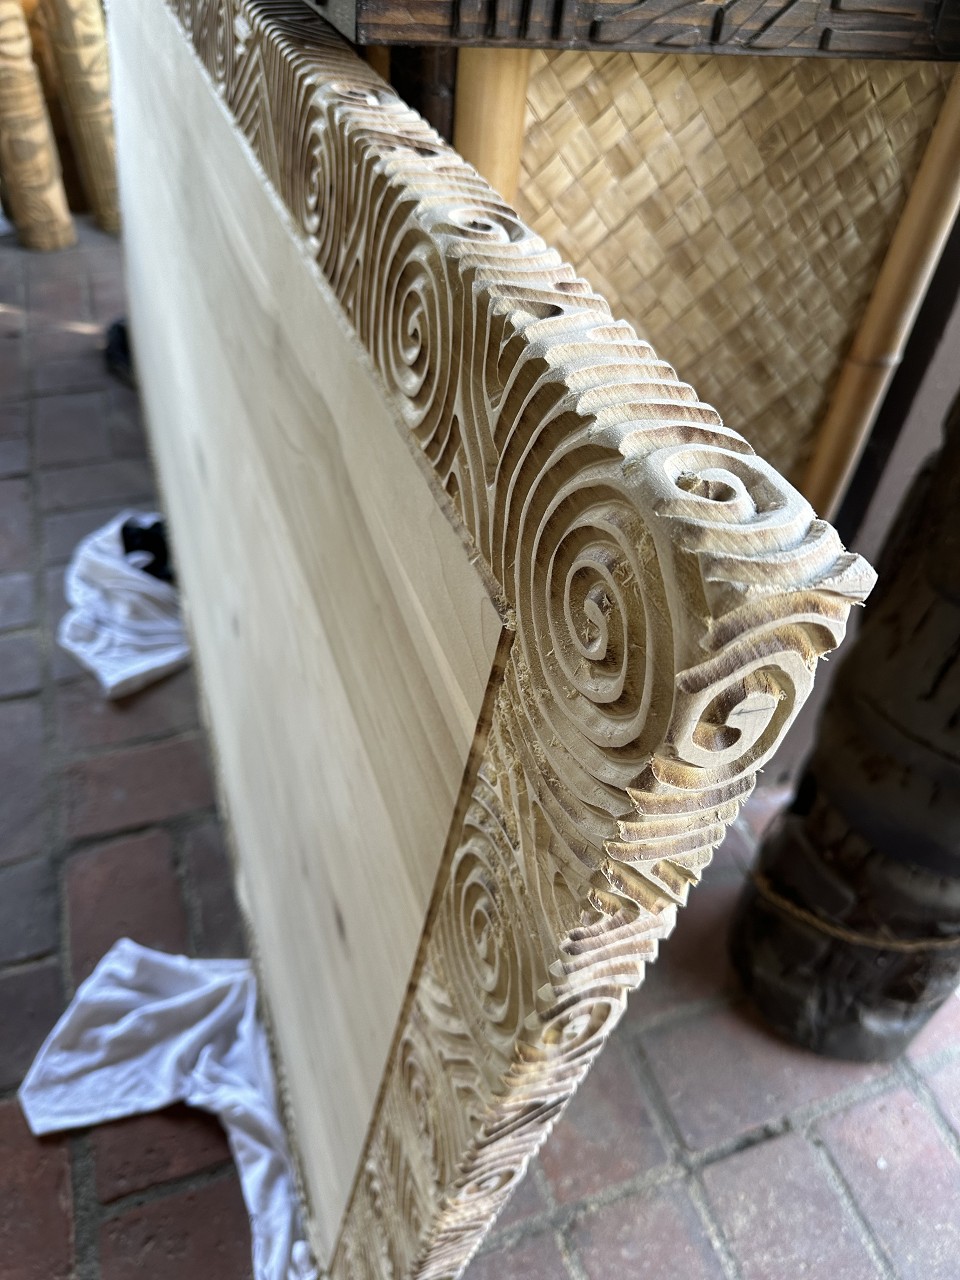
Thanks everyone. It is ambitious and has taken all summer. The router was tough, though actually the hardest part was making the straight, even lines. But I still had to keep the router controlled and constantly moving, and felt my arm muscles spasm a few times. I hope to finish the sides this weekend, then work on the frame and attaching legs. |
|
L

leevigraham
Posted
posted
on
Thu, Nov 30, 2023 3:52 AM
I wonder if some metal strapping around the top and bottom of the pole would add more support. Looks great so far! |
|
B
BlackWater
Posted
posted
on
Sat, Dec 2, 2023 8:46 AM
I was thinking about metal strapping but don’t know where to start. Maybe that will be plan B. |
|
B
BlackWater
Posted
posted
on
Sat, Dec 2, 2023 7:06 PM
Flipped the table to carve the sides today.
But the table is 7 feet long. How am I going to carve the ends?
If it’s stupid and it works, it’s not stupid. |
|
WC
Will carve
Posted
posted
on
Sun, Dec 3, 2023 5:36 AM
That's brilliant & the ladder looks like it was made for the job. Also, The mention of, "could be combined with resin..." Sounds like it would make it much EZer to clean after dinner. I don't see those legs splitting & falling in two but instead of strapping how bout drilling a hole thru it & gluing a dowel thru it. Like East & west & north & south, like a cross. |
|
H
hang10tiki
Posted
posted
on
Sun, Dec 3, 2023 9:00 AM
Awesome Great pics What Will said |
|
B
BlackWater
Posted
posted
on
Mon, Dec 4, 2023 11:25 AM
Ooh I like the dowel idea.
|
|
PP
Prikli Pear
Posted
posted
on
Mon, Dec 4, 2023 12:31 PM
Blackwater, when I needed a way of attaching the table top to my Tiki Bob (albeit a much smaller table top) I used a leg mounting plate. I sank a bolt into the Bob (leg in your case) and anchored it with resin. Then I just screwed them together. Gravity stabilizes it horizontally, so the plate and bolt only need to fight against vertical shear. Not sure how this would work for you but I wouldn't want you to have to mar the beautiful surface of your table to sink dowels through (although setting them partway through the underside may be an option) |
|
B
BlackWater
Posted
posted
on
Mon, Dec 4, 2023 12:44 PM
in reply to Prikli Pear
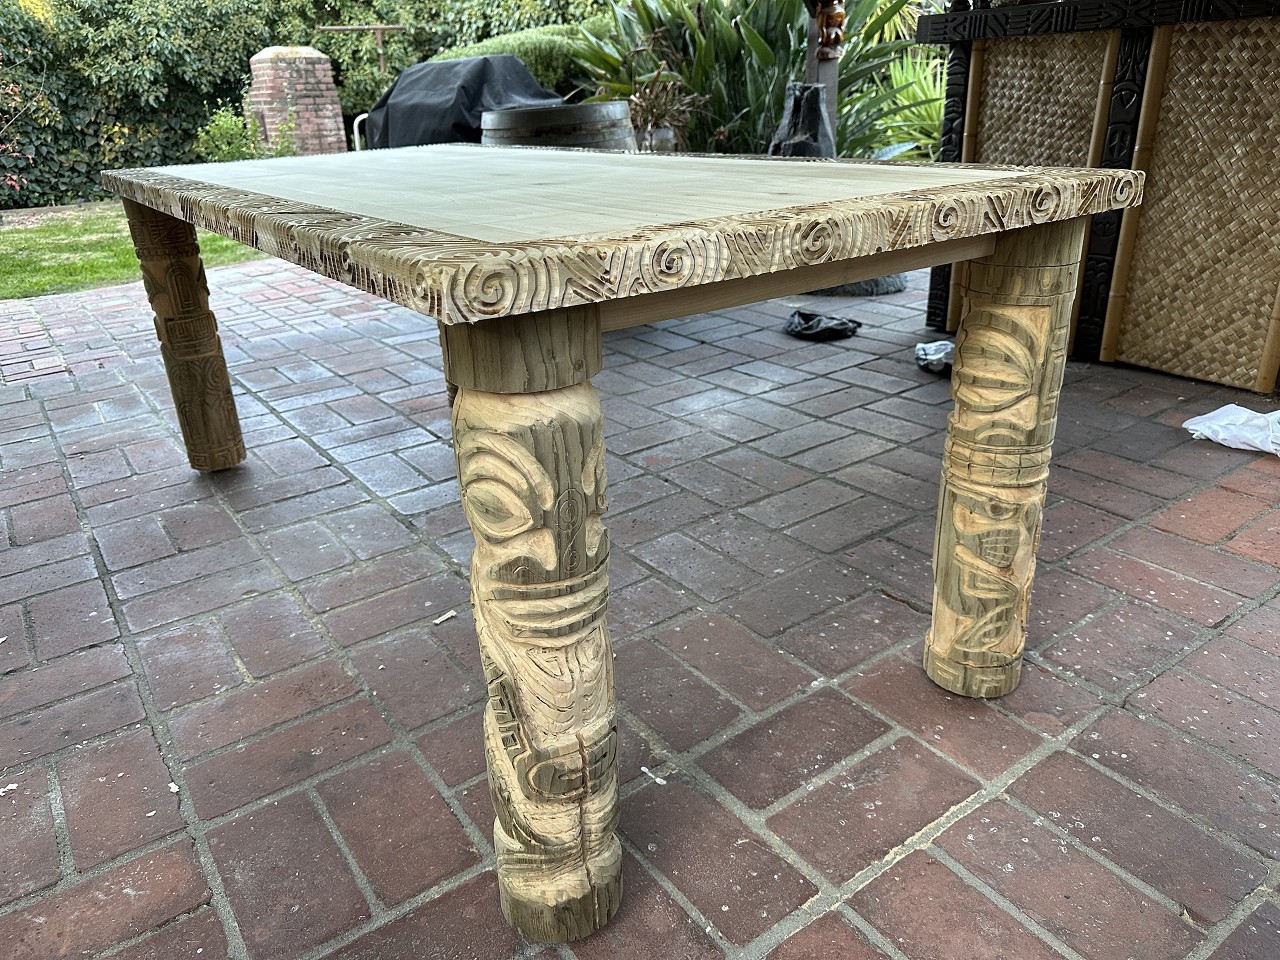
Thanks. I’m using a traditional table frame with Z-clamps to hold the tabletop. The frame has a groove for the Z-clips which then get screwed into the top. Probably overkill, but since it’s outdoors I don’t want to risk of splitting the top with wood movement. |
|
PP
Prikli Pear
Posted
posted
on
Mon, Dec 4, 2023 12:46 PM
Gotcha. That's probably for the best. |
|
B
BlackWater
Posted
posted
on
Thu, Dec 14, 2023 12:26 PM
Table is put together and ready for finishing. But while the top was propped against the bar, some #*%€! cat peed on it. Twice. I’ll try sanding it down, and I’m hoping dark stain will cover it, but any suggestions are welcome.
|
|
WC
Will carve
Posted
posted
on
Fri, Dec 15, 2023 4:48 AM
Let the cat live. It only adds to the character. |
|
WC
Will carve
Posted
posted
on
Fri, Dec 15, 2023 4:50 AM
BTW, the table is out standing. Never seen one like it. Great job. |
|
H
hang10tiki
Posted
posted
on
Fri, Dec 15, 2023 9:15 AM
Strong work 👍🏼 |
|
B
BlackWater
Posted
posted
on
Sun, Dec 17, 2023 1:21 PM
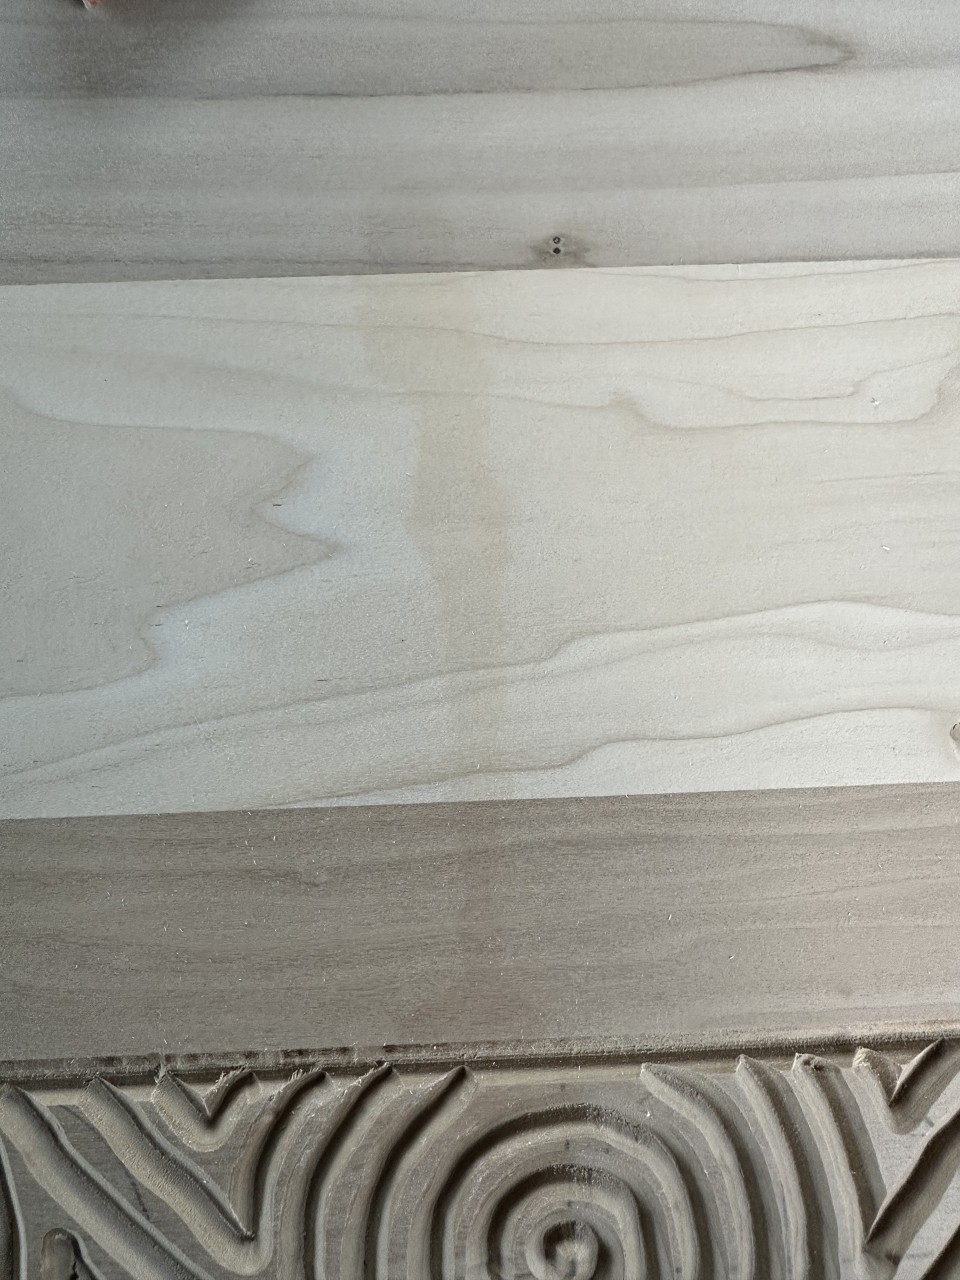
First coat of stain looks... not so hot. Some of the pine just didn’t take the stain at all. I’m going to try a dye stain next to hopefully get a more uniform color. Not panicking yet, just another challenge to overcome. And a reminder that pine sucks for tikis.
|
|
B
BlackWater
Posted
posted
on
Mon, Dec 18, 2023 10:33 AM
Oh yeah. Dye stain FTW. That’s the look I was hoping for. Giving it two days to fully dry before spar urethane so it doesn’t fog.
|
|
M
MadDogMike
Posted
posted
on
Mon, Dec 18, 2023 1:00 PM
Looks AMAZING!!! |
|
H
hang10tiki
Posted
posted
on
Mon, Dec 18, 2023 3:48 PM
Perfect Drink time |
|
B
BlackWater
Posted
posted
on
Fri, Dec 22, 2023 4:28 PM
Rain in LA all week, so the stain still isn’t dry. I hope to urethane next week and put this project to a close with a cocktail. |
|
D

danlovestikis
Posted
posted
on
Fri, Dec 22, 2023 7:55 PM
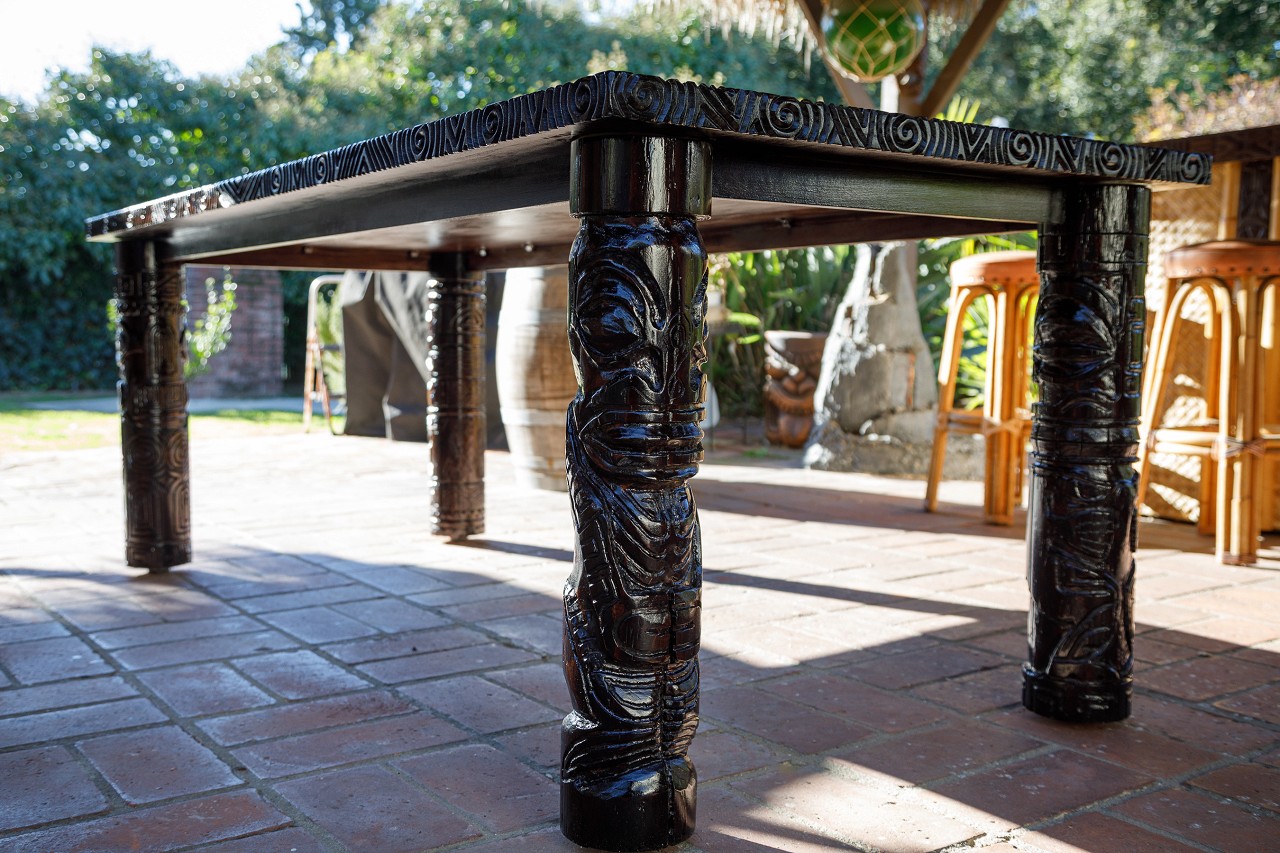
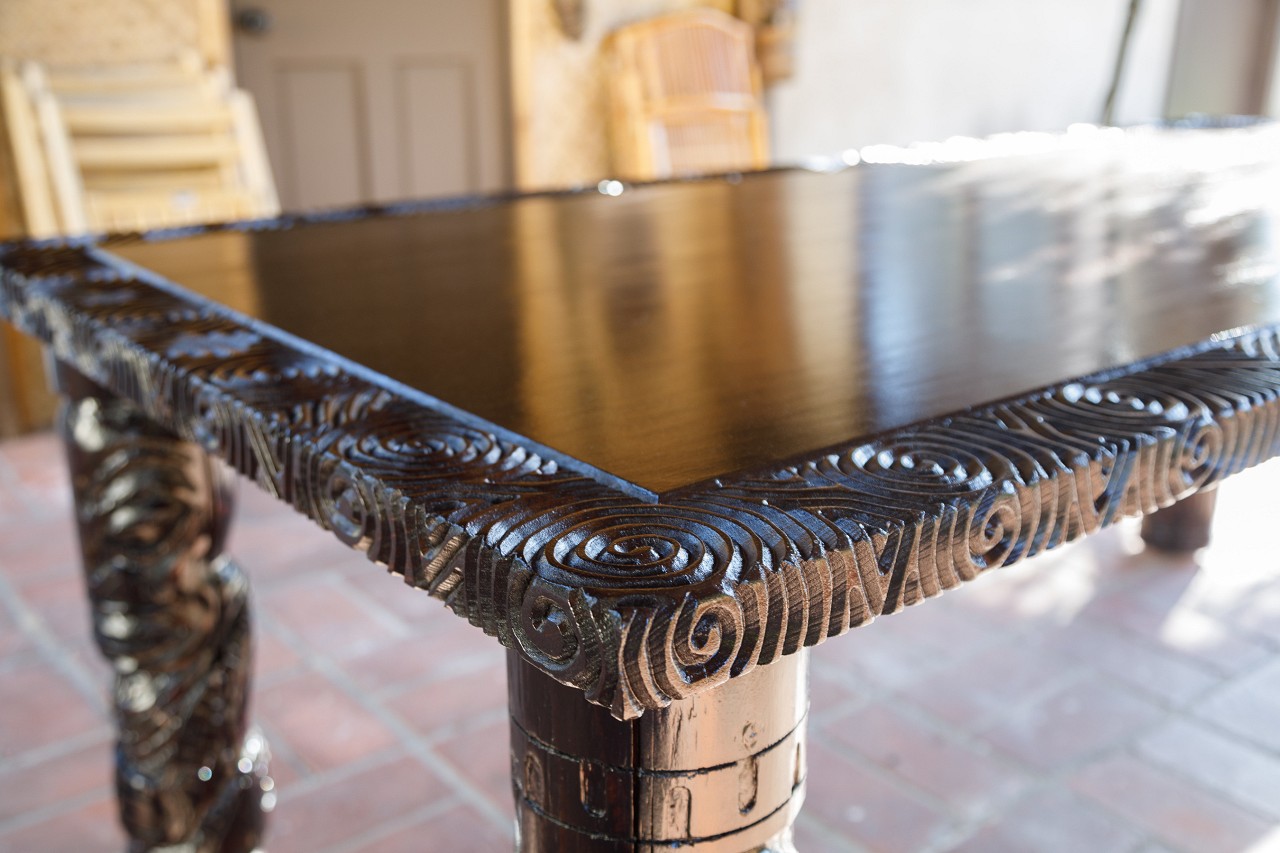
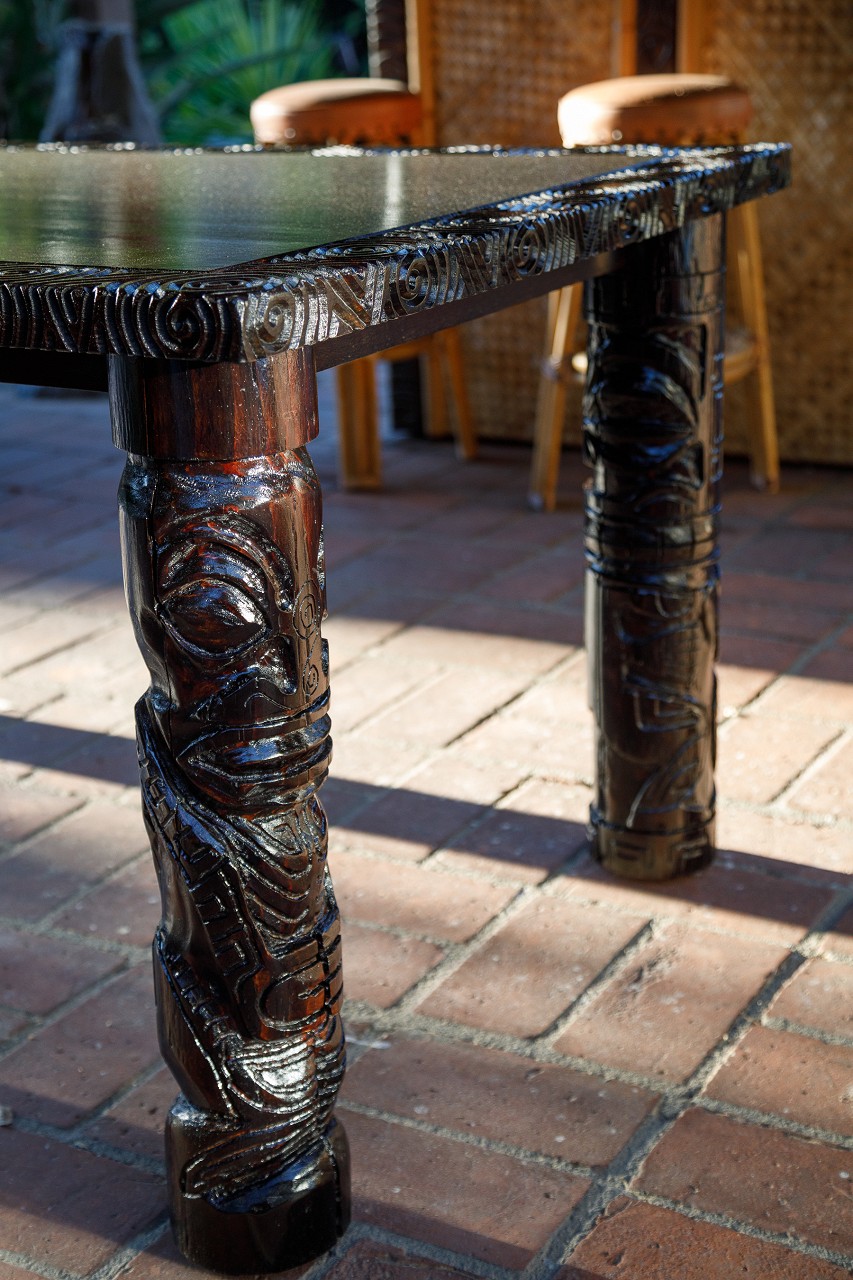
I love deep carving. The table edge is just so incredible I could stare at it for hours. Love the legs too. Well done! |
|
U

UnkleChewie
Posted
posted
on
Sat, Dec 23, 2023 12:41 PM
Fantastic job on this, looks amazing! |
|
B
BlackWater
Posted
posted
on
Mon, Jan 8, 2024 7:40 PM
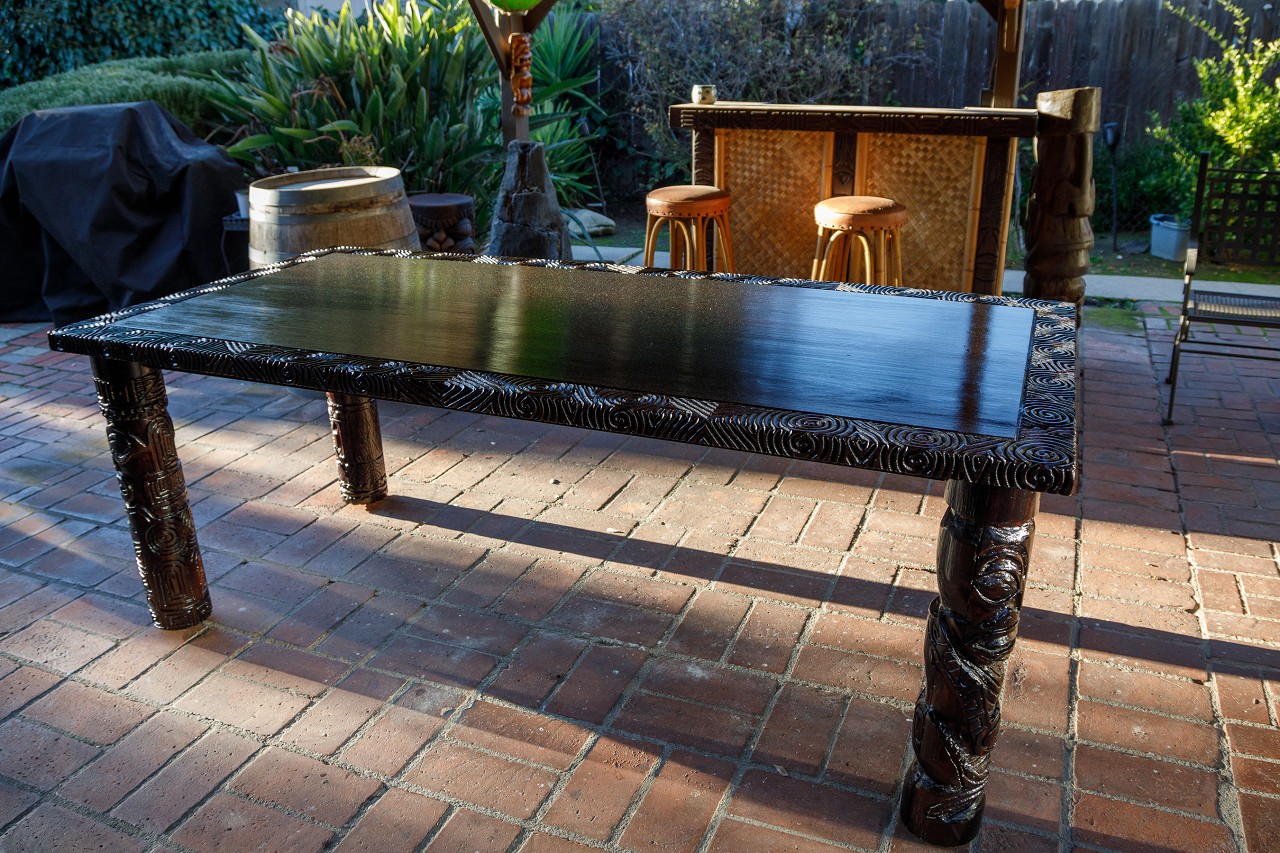
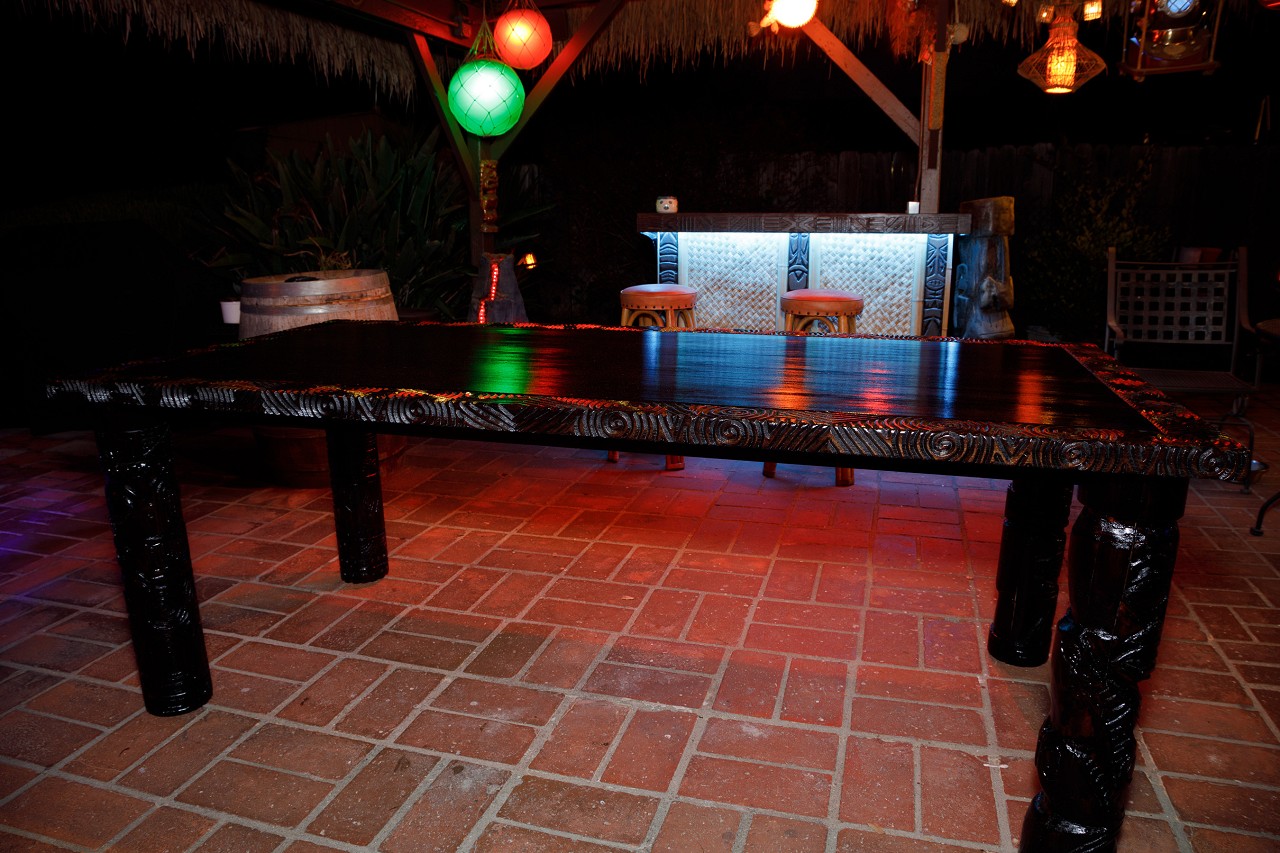
I'm declaring this finished. Thanks for your help and encouragement, everyone. A few photos of the finished piece to follow.
|
|
B
BlackWater
Posted
posted
on
Mon, Jan 8, 2024 7:41 PM
in reply to BlackWater
Time for a Jet Pilot.
|
|
C

coldwarspacemonkey
Posted
posted
on
Tue, Jan 9, 2024 4:03 AM
Fantastic! Beautiful work. |
|
WC
Will carve
Posted
posted
on
Tue, Jan 9, 2024 5:20 AM
A jet pilot ? That deserves a squadron of them. Good job. |
|
H

Hamo
Posted
posted
on
Mon, Jan 15, 2024 8:30 PM
Table turned out great. I love the carving on the top and edges. Well done. |
|
H
hang10tiki
Posted
posted
on
Tue, Jan 16, 2024 8:41 PM
Outstanding job, love the reflection pics |
|
D
danlovestikis
Posted
posted
on
Wed, Jan 17, 2024 8:39 AM
This piece of art will be treasured by many people throughout the years. It will still be used when we are all gone. It is a masterpiece. |
|
B
BlackWater
Posted
posted
on
Wed, Jan 17, 2024 9:13 AM
Thank you, everyone. |
|
B
BlackWater
Posted
posted
on
Sat, Aug 17, 2024 2:34 PM
Latest project, I covered an ugly white wall with bamboo. With a few progress pics since people seem to like those. I used reed fencing, my final purchase from Oceanic Arts. They showed me the wall behind the register was painted yellow under the bamboo for a warmer look. I tried construction cement against the stucco but that didn’t work at all. Both surfaces are too rough I guess. So it was a lot of screws to hold it up. Then some larger bamboo framing to hide the rough edges. #nowhitewalls
|
|
B
BlackWater
Posted
posted
on
Sun, Mar 23, 2025 9:03 PM
Spring is here, time to make sawdust.
[ Edited by BlackWater on 2025-03-23 21:04:18 ] |
|
D
danlovestikis
Posted
posted
on
Tue, Mar 25, 2025 9:26 AM
Yes, progress photos are wonderful. I love how deeply you carve in your detail. The bamboo wall its beautiful. Great work. |
|
H
hang10tiki
Posted
posted
on
Mon, Mar 31, 2025 8:35 AM
Beast of a log |
|
B
BlackWater
Posted
posted
on
Mon, Mar 31, 2025 9:10 AM
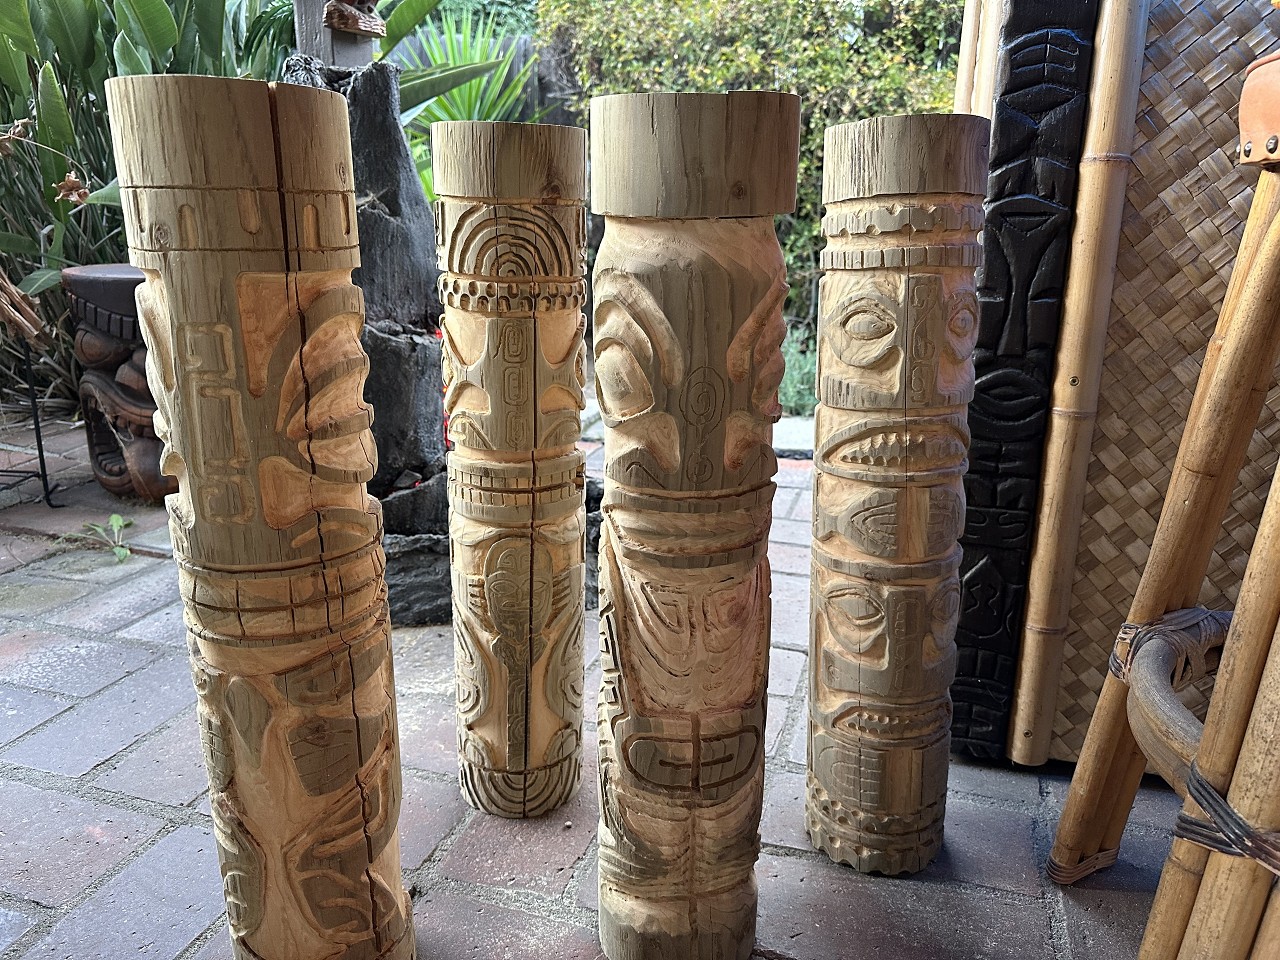
I know a guy who works for the city clearing trees and mentioned I’d like a palm log to carve into a tiki. He showed up with a front end loader and dropped this enormous thing in my driveway, the ground shook. I let it sit to dry for almost two years and there’s still some wet wood on the bottom (between the legs.) So yeah, much bigger than I expected but I got to teach myself to carve with a chainsaw. Mostly cleanup and sanding this weekend. A few last details to carve next weekend. Based on by Al Evans’ design.
|
|
T

TikiReno
Posted
posted
on
Tue, Apr 1, 2025 8:20 AM
Most impressive!! |
|
B
BlackWater
Posted
posted
on
Mon, Apr 7, 2025 9:12 AM
Trip to the salon
|
|
H
Hamo
Posted
posted
on
Sat, Apr 12, 2025 9:54 PM
Glad to see you're still working on new pieces. The tiki is marvelous. |
|
B
BlackWater
Posted
posted
on
Sun, Apr 13, 2025 7:49 AM
Thank you. Ready for finishing.
|
|
H
hang10tiki
Posted
posted
on
Mon, Apr 14, 2025 7:11 AM
Outstanding (Hate waiting 2 yrs or more for Palm to dry but it’s fun wood to carve) |
|
B
BlackWater
Posted
posted
on
Mon, Apr 14, 2025 8:56 AM
Thanks, love your work. I'm debating staining before sealing with Spar Urathane, anyone with palm experience stain their work? I'm happy with the color, but a more uniform color might look more finished. |
|
B
BlackWater
Posted
posted
on
Sat, Apr 19, 2025 4:04 PM
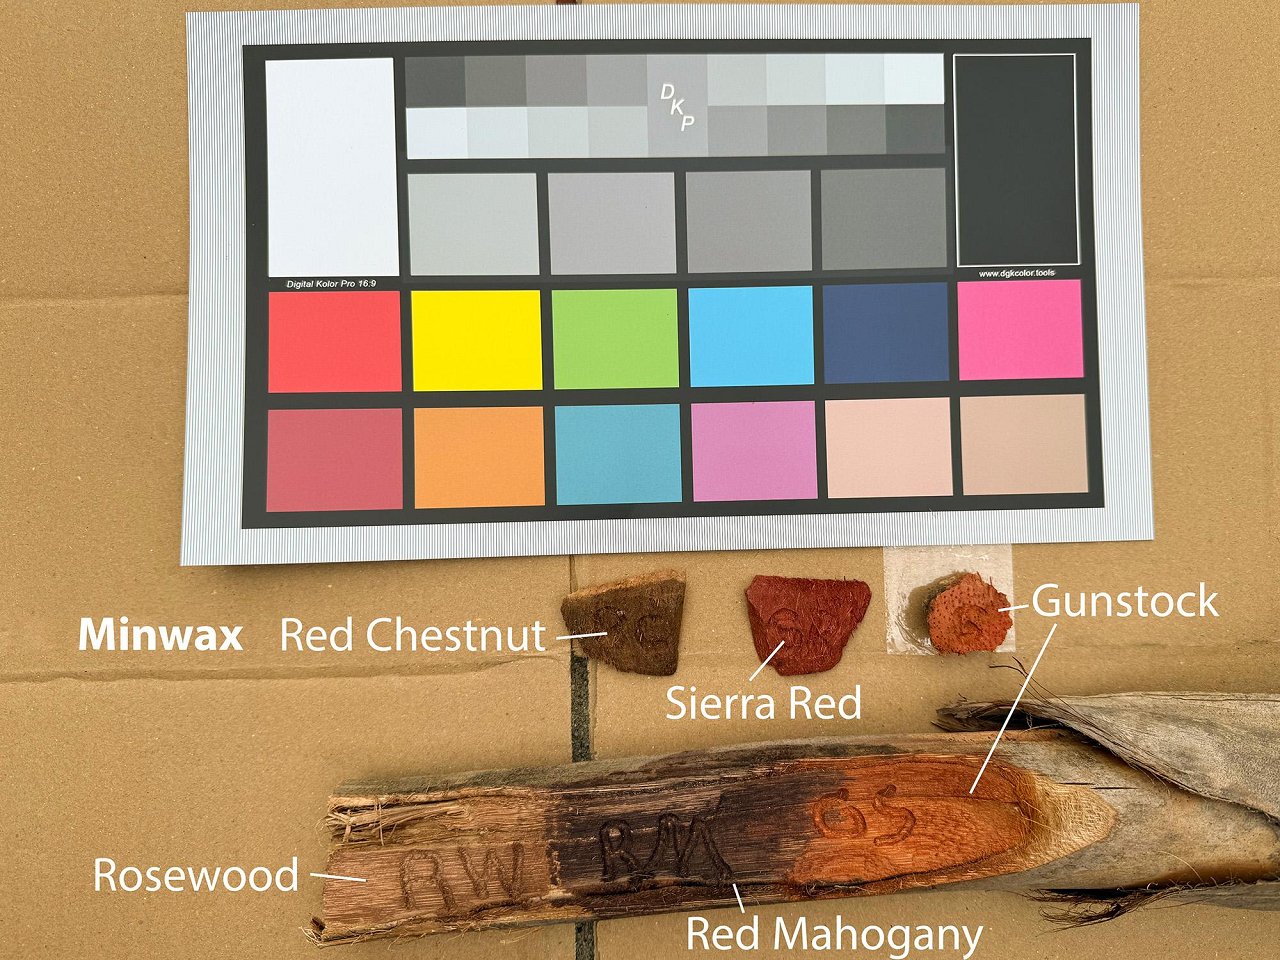
I still want to stain but I’m having trouble finding what I want. The OA Mauri seems right, a medium reddish tan. But all of the stains I’ve tried are super saturated on that palm.
(Minwax Rosewood, Red Mahogany, Gunstock, Sedona Red, Red Chestnut, Gunstock again. Leaning towards red mahogany.) [ Edited by BlackWater on 2025-04-19 16:22:27 ] |
|
B
BlackWater
Posted
posted
on
Sat, May 24, 2025 3:25 PM
I wanted a light to medium finish on my tiki. I bought three cans of Minwax for color samples. They seemed similar enough that I felt a bit wasteful buying all three, but I'll use them up eventually.
Well, when applied to palm wood they look completely different, even if treating with pre-stain first. Sierra red becomes RED, gunstock is ORANGE, red chestnut is BROWN:
I found a stain called Cutek. It's an Australian stain designed for decks, but it protects as well as color. Better still, my hardware store had free samples. So I loaded up a bunch of them and they are much more reasonable when applied to palm:
You buy a can of the main sealant (over $100!) and then mix in a tube of color tint (around $20.) Not cheap but I like the look so far. Once I put on a second coat I'll post my progress. |
|
H
hang10tiki
Posted
posted
on
Mon, Jun 2, 2025 2:30 PM
How did it come out? |


 !
!