Tiki Central / Tiki Carving
Blackwater projects
|
B

BlackWater
Posted
posted
on
Mon, Jun 5, 2023 7:05 PM
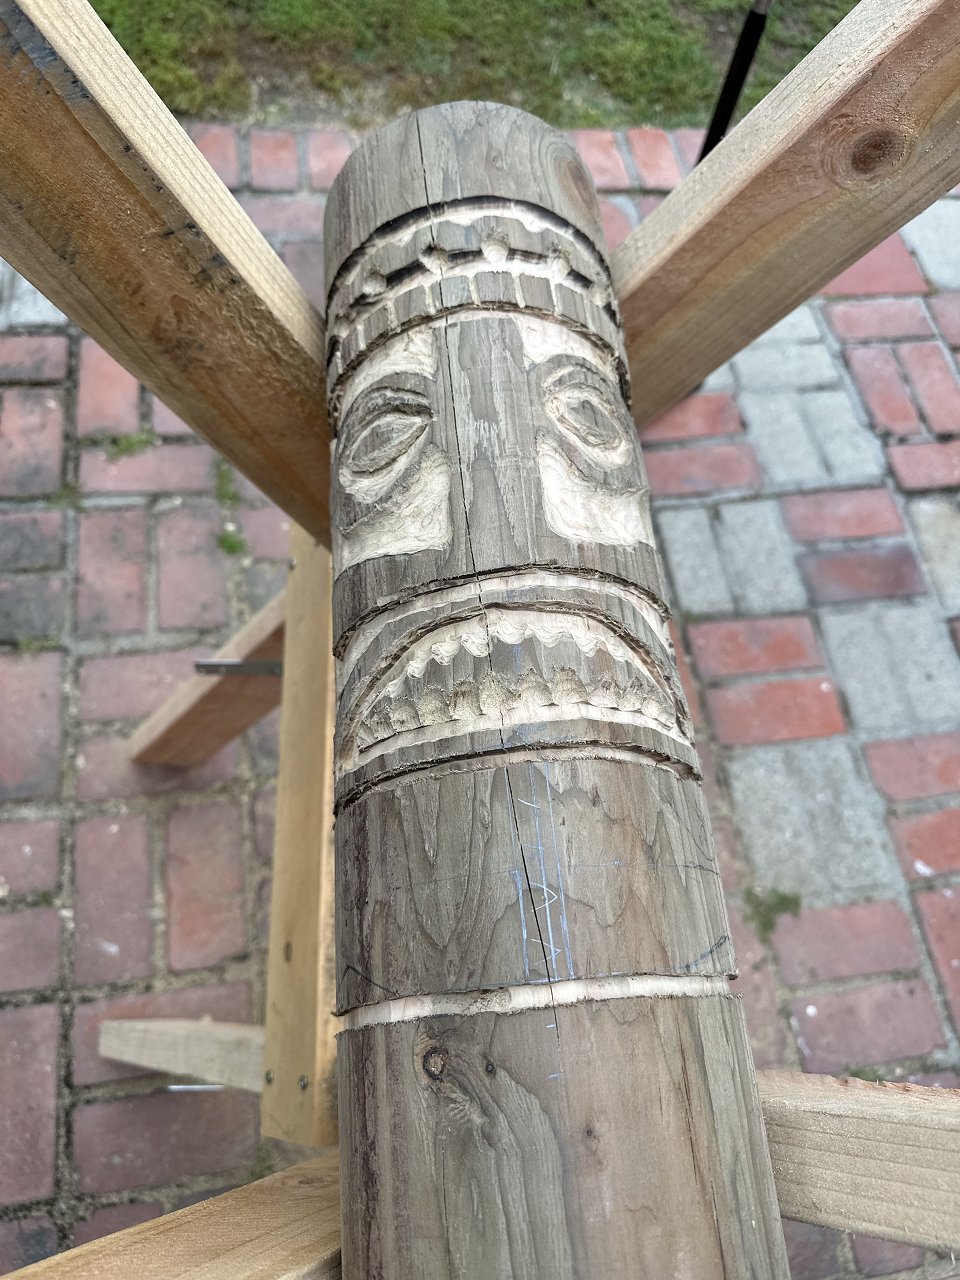
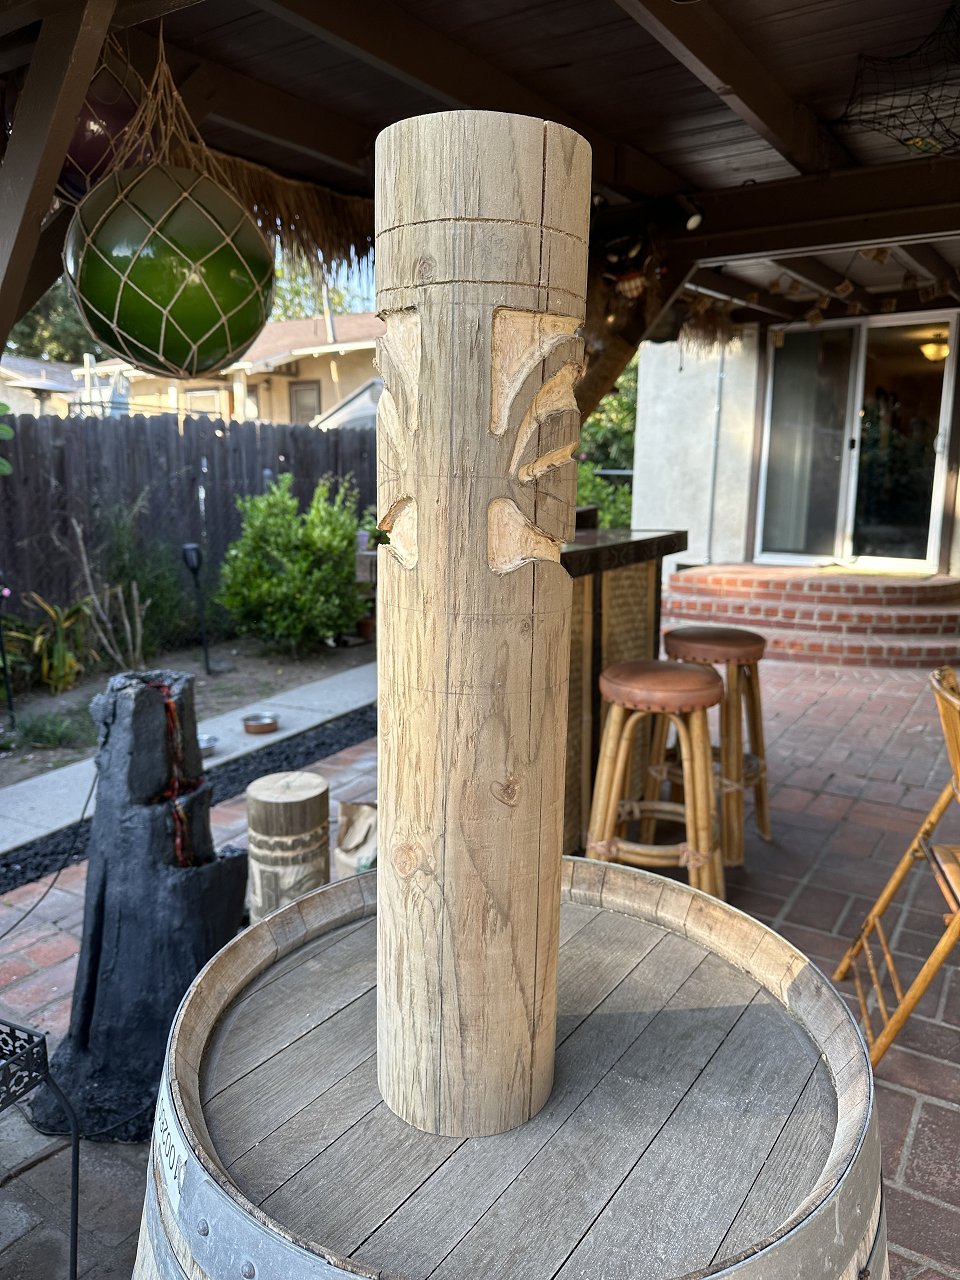
I was going to wait until I was further along to document, but what the hell this might keep me going and maybe someone can give me advice along the way. Most of the time I'm hosting people in my home tiki bar, they're sitting at a crappy old folding table, possibly with a tiki tablecloth thrown over it. A long time goal of mine has been a tiki dining table and that's going to be the summer project. Four tikis will form the legs, and the top will have some carving inspired by Tiki Diablo's bar design at Undertow. I'll start with the tiki legs and move on to the top when they're complete. I don't have a wood shop, just hand tools but I might need a table saw to finish this project. Fri 5/26/23 Bought two 6” x 8’ posts from Home depot. Split pine but pressure treated and I couldn’t find anything better after calling around to lumberyards all over for days. Someday I’ll try carving with wood that isn’t awful quality. Also bought 2x4s and hardware to create the X-shaped carving jigs. Made a stop at Rockler and got a new rubber mallet and honing oil. Sat 5/27/23 Used some pics of an OA Marquesan post and Photoshopped a carving guide. Cut the legs to 29” long with chop saw, not perfect but worked OK. Built the X-shaped carving jigs. Sun 5/28/23 Started carving the top head of the first post. Used a router where possible. Switched between chisel and dremel for the rest. I’m better with the dremel but it can cut very fast. I think the eyes are too small on this top one. I made my carving guide using a 2D pic of a 3D column and didn’t account for the eyes wrapping around the sides. I’m carving four legs for the tikis, and this one might end up on the back of the table. Got as far as roughing out the hands of the top one.
[ Edited by BlackWater on 2023-06-06 09:08:55 ] [ Edited by BlackWater on 2025-03-24 09:48:44 ] |
|
B
BlackWater
Posted
posted
on
Mon, Jun 5, 2023 7:08 PM
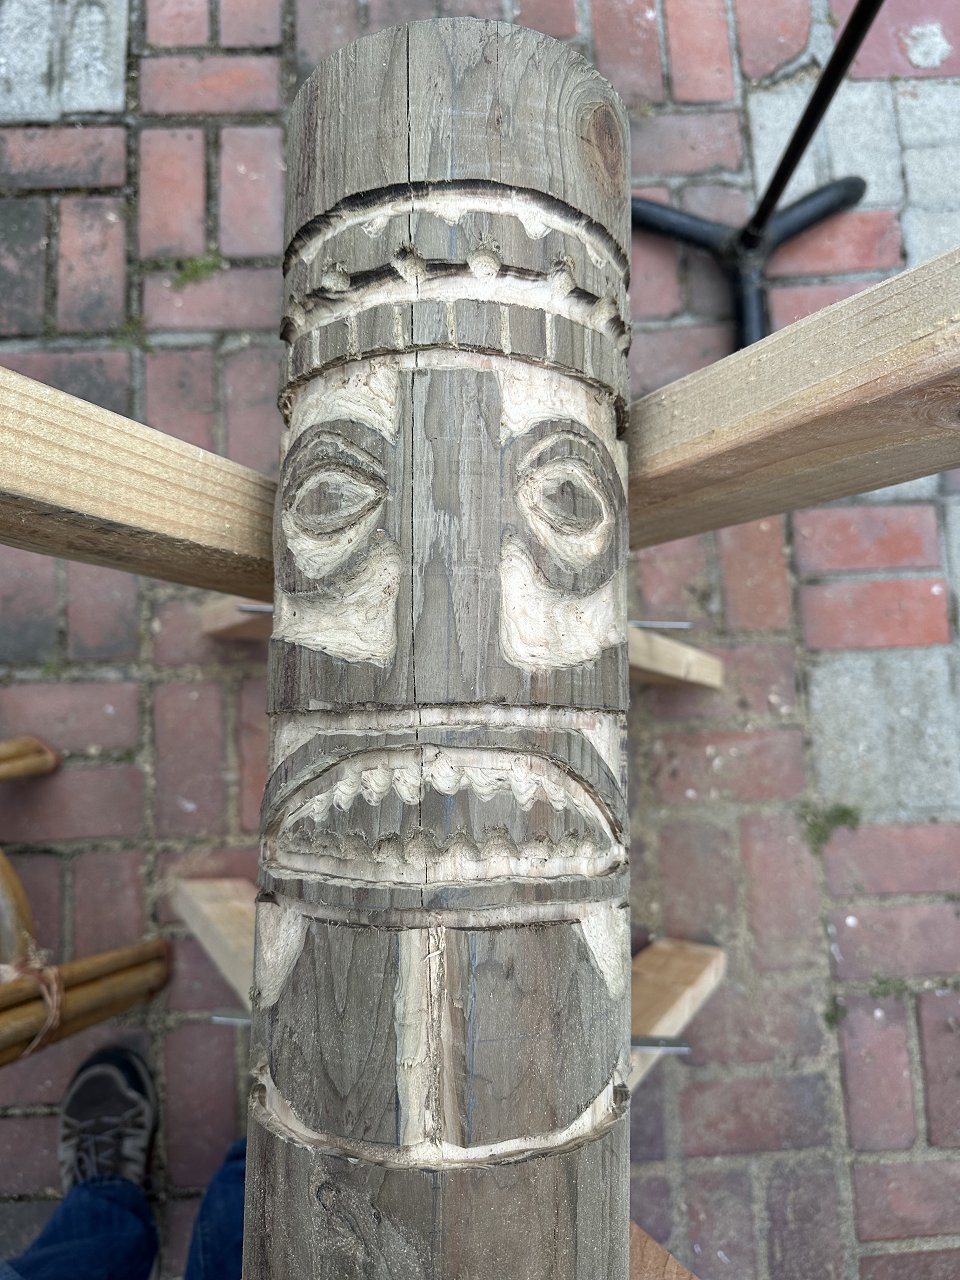
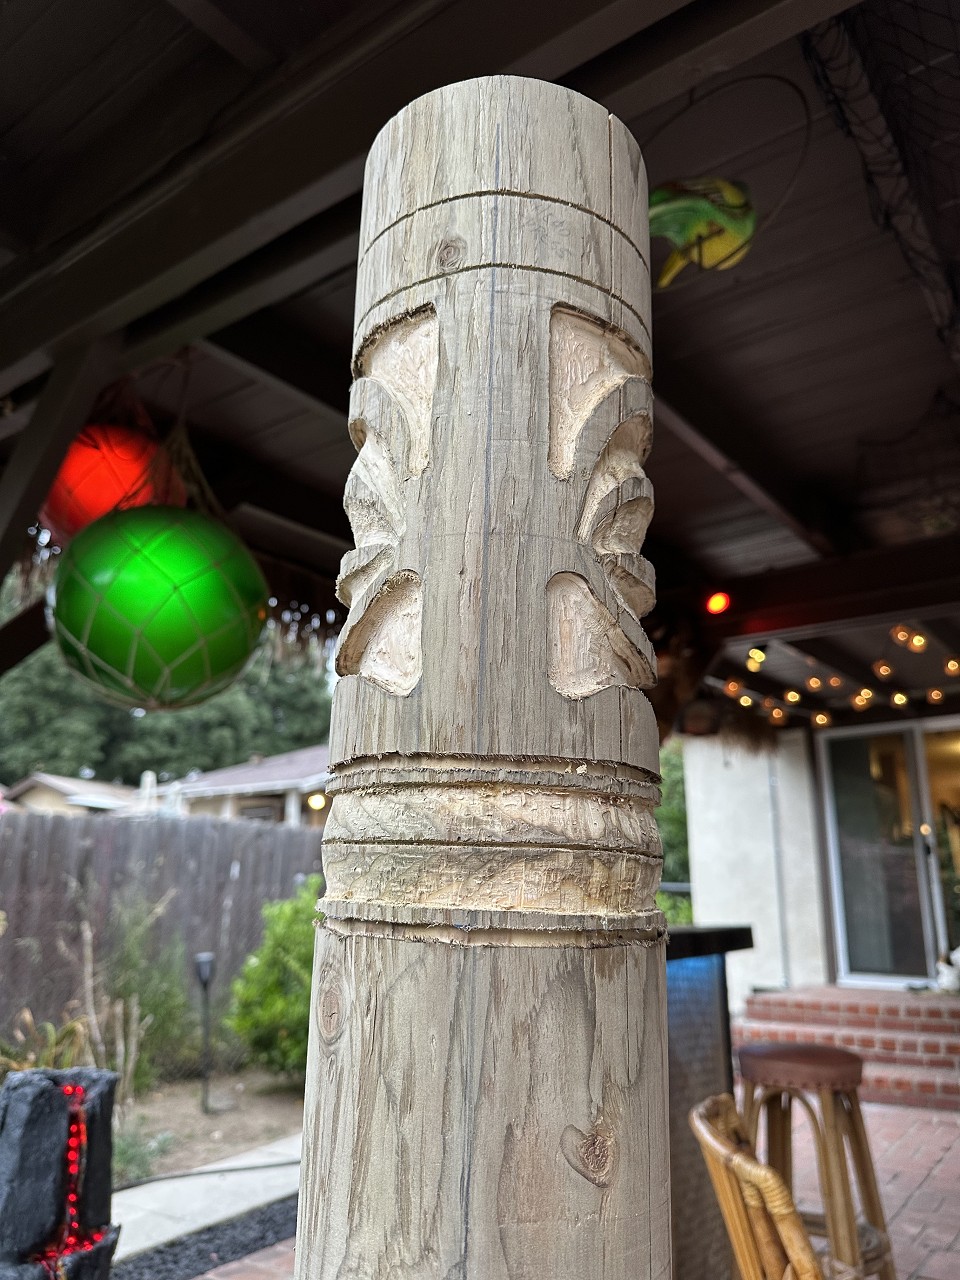
Mon 5/29/23 More progress. Getting more confidence with not measuring out every single thing and just sketching it out. And my measured guides weren’t perfect anyway, so I sketch one side and eyeball the other or measure a few things. Learning to use marker for router guide lines so I can see them. Mostly finished the bottom guy but the hands are too far apart and I’m not sure how to fix that yet. Still need to do the sides and back (?) but there’s less detail work involved there.
Sat 6/3 More touchup on the front and filled in the sides and back. screwed up a pattern but hopefully no one notices. Lots of sanding. Reminder to look at the work as it will be displayed, on the ground. Shows what details are unimportant (bottoms of things) and which are important (tops.) I think I’m finished with this one for now though I might come back to it. On the next one I want to sand off the ugly outside finish first, I’m not sure how that will look under stain. But I don’t want to sand away the thin poly patterns.
|
|
B
BlackWater
Posted
posted
on
Mon, Jun 5, 2023 7:09 PM
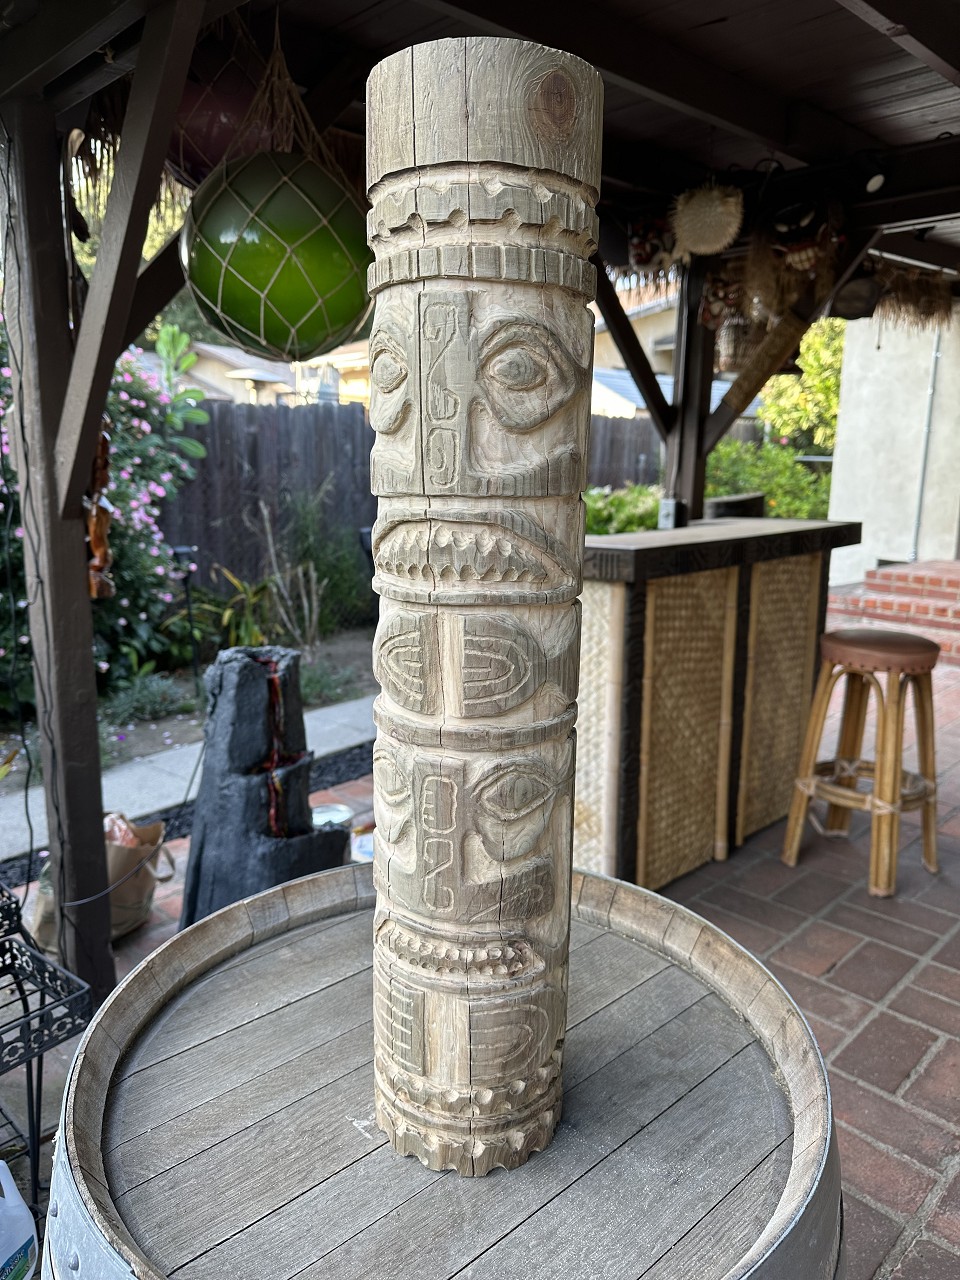
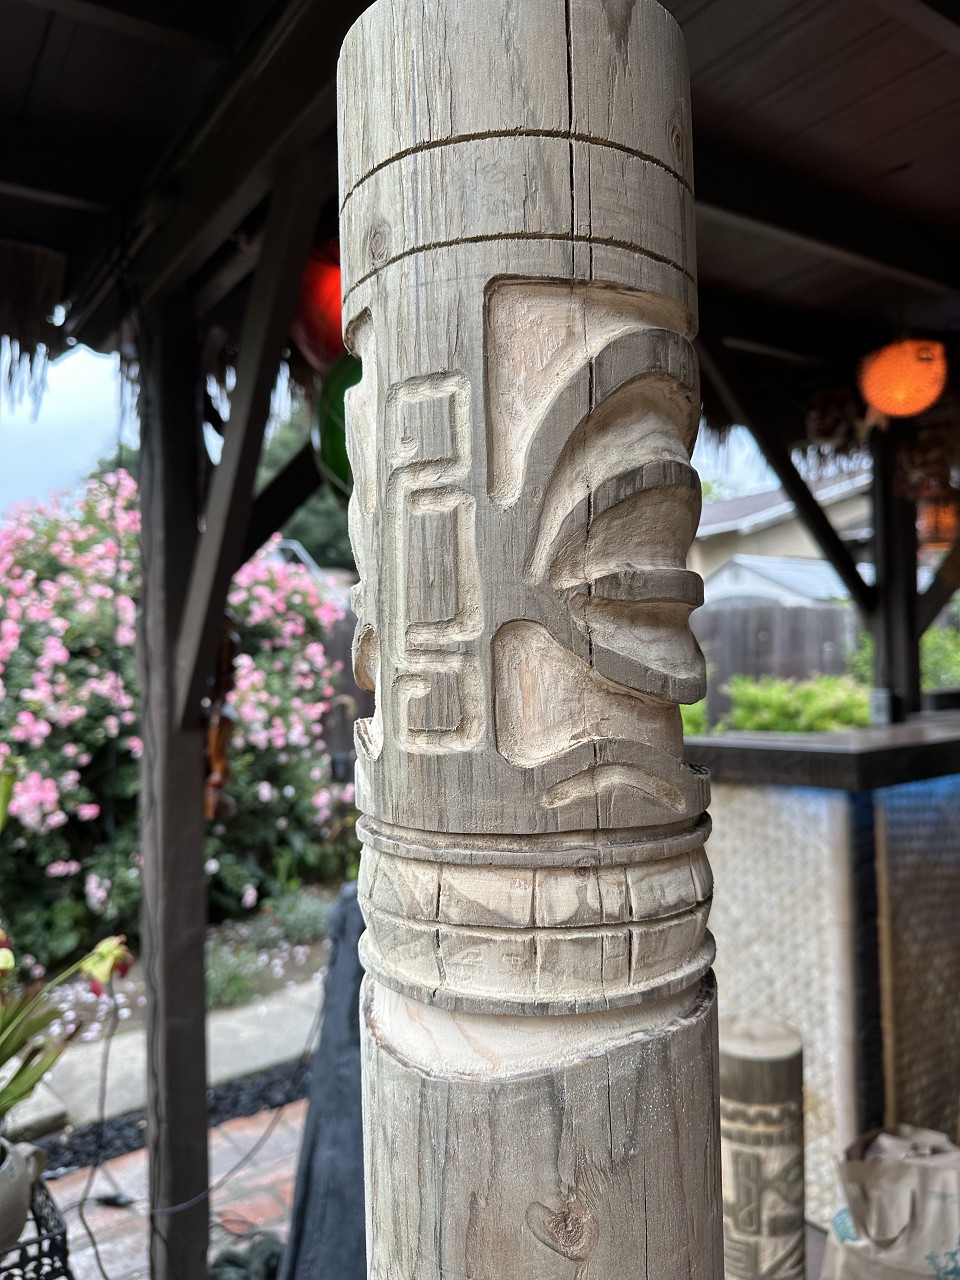
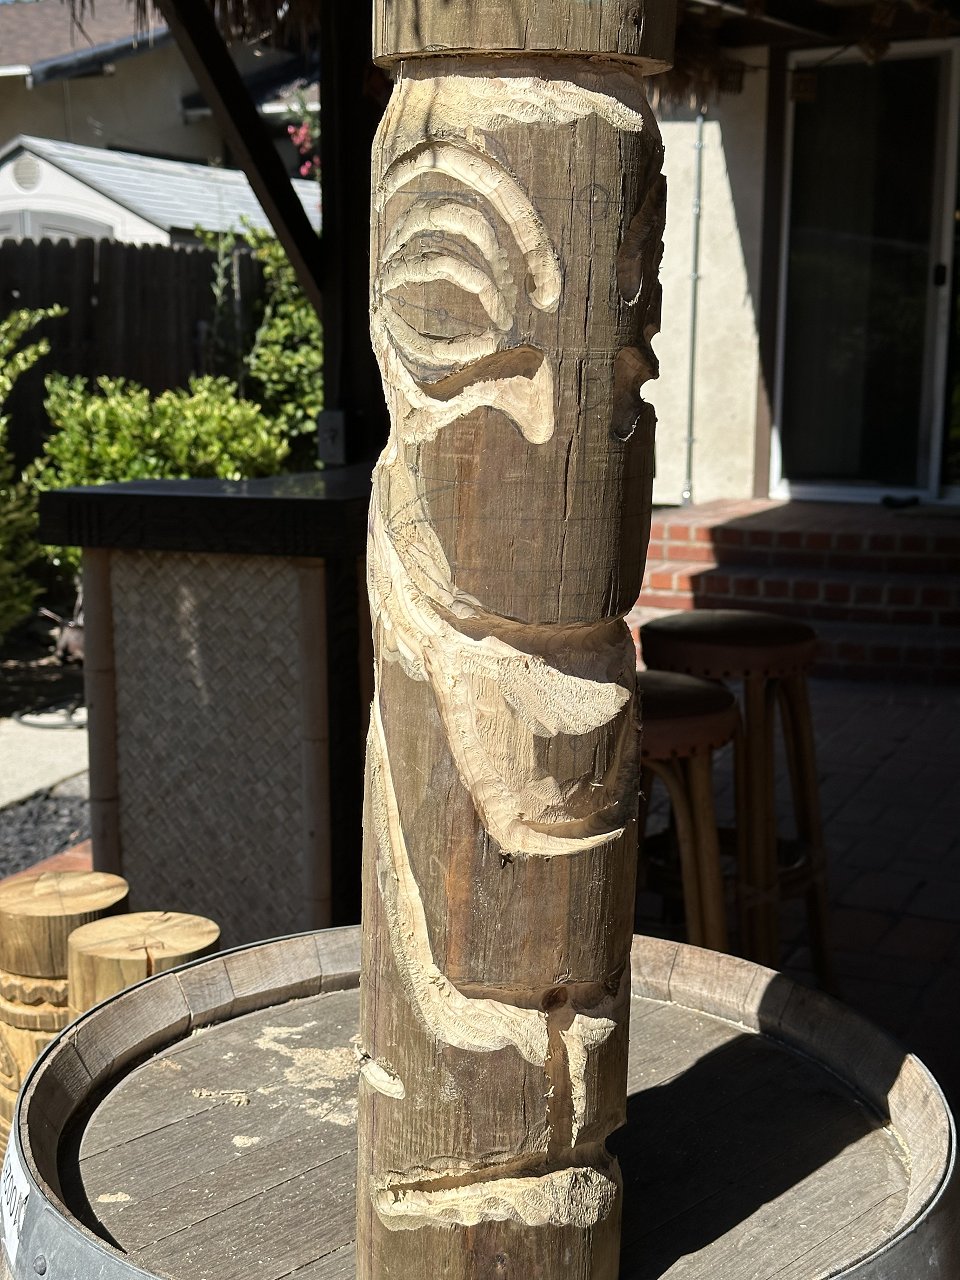
Sun 6/4/23 Started on leg 2, another Marquesan pole from the OA auction catalog. For the first one I took a bunch of pics of the source at OA in person, but this one I just have a 3/4 angle. Need to figure out what to put on the back but I’m not sure where to find pics of tiki pole butts. Step 1 this time was sanding the whole thing. I hope the weird greenish outside finish looks OK on the first one, I didn’t want to sand it and lose all the poly patterns I carved. I’ll find out when I test stain the test piece I cut. I drew a center line and side lines so I can measure things for symmetry using a measuring tape. I like to bring the source pic into photoshop, then I place an inch scale next to it as a rough guide. Then I can eyeball, the nose starts around 4.5” down or whatever. I’m carving deeper on this one. One cool thing about carving a pole is it’s easy to feather the cut using power tools. Even a router, just continue in a straight line and the cut feathers out. The top piece has a thin cut which I duplicated with a hand saw. Made some progress on the face in four hours. Carving in the backyard with my shirt off like a wild man.
|
|
S

swizzle
Posted
posted
on
Tue, Jun 6, 2023 1:51 AM
Why don't you just have one thread called "Blackwaters works" or whatever, which you can just add to any time you have something new to post? There's no need to start a new thread for every single project you post about. It will also benefit you because it will contain all your work in one place which is easy for you to add to, plus it means anyone looking at your thread will be able to see everything you've done instead of missing old threads that just get bumped down continuously. You can also edit the title of your thread each time as well which will indicate that you've posted something new. |
|
B
BlackWater
Posted
posted
on
Tue, Jun 6, 2023 9:08 AM
in reply to swizzle
OK, sorry |
|
PP

Prikli Pear
Posted
posted
on
Tue, Jun 6, 2023 11:26 AM
Great progress! Even at the rough out stage your work looks better than many at the finished stage. I do like your eye for detail and I don't think the hands are going to be an issue worth fixing--any attempt to make them closer together will likely make matters worse. Have you carved pressure treated lumber before? Make sure you're wearing a filter mask and try not to let the sawdust (if power carving) settle on exposed skin. They don't use arsenic anymore in this stuff but you still want to limit exposure. |
|
B
BlackWater
Posted
posted
on
Tue, Jun 6, 2023 12:31 PM
in reply to Prikli Pear
Thank you. I gave the hands a harder edge with a space between, I think they’re fine. And thanks for the tip about treated lumber, I wasn’t aware of the issues and will try to be safer about it. Not sure about “don’t let it settle on your skin” though, ten minutes of carving and I look like Chewbacca. Big fan of your YouTube series! |
|
PP
Prikli Pear
Posted
posted
on
Tue, Jun 6, 2023 12:53 PM
Thanks for the kind words! Yeah, the dust is tricky with power carving--it gets absolutely everywhere. I carved pressure treated outdoor posts a few years ago because anything else would likely deteriorate super-quick. I wore long sleeves much of the time and stopped often to dust myself off. The newer chemical formulations are supposed to be safer than the old arsenic ones, but then again thalidomide was supposed to be safe for pregnant women. Using gouges and chisels obviously eliminates most of the dust problems if you're comfortable using those tools (I'm not, but working on it). The important thing is to protect your lungs. Even untreated sawdust will cause problems after a while. Looking forward to seeing the finished table! |
|
T

TikiRobD
Posted
posted
on
Tue, Jun 6, 2023 4:21 PM
I'm diggin' it so far! Rob |
|
H

Hamo
Posted
posted
on
Tue, Jun 6, 2023 11:16 PM
Another neat project. Looking forward to more updates. |
|
M

MadDogMike
Posted
posted
on
Fri, Jun 9, 2023 1:31 PM
Looks awesome BW! Doing fantastic especially considering the wood you are working with. swizzle is right about keeping everything on one thread, not that it's some kind of faux pas to have multiples, but it just lets us watch your projects as your skills get even better. I have a thread that I've been adding to since 2008, it fun to go through sometimes and see old projects and people's reaction. Let me know if you need help changing the title of your thread. [ Edited by MadDogMike on 2023-06-09 13:31:55 ] |
|
B
BlackWater
Posted
posted
on
Fri, Jun 9, 2023 7:12 PM
I was going to leave the subject line as it is, then change it to “Blackwater: Next Project” when and if I finish this one. If that works for everyone. |
|
M
MadDogMike
Posted
posted
on
Sat, Jun 10, 2023 11:38 PM
in reply to BlackWater
That's perfect! |
|
B
BlackWater
Posted
posted
on
Sun, Jun 11, 2023 5:25 PM
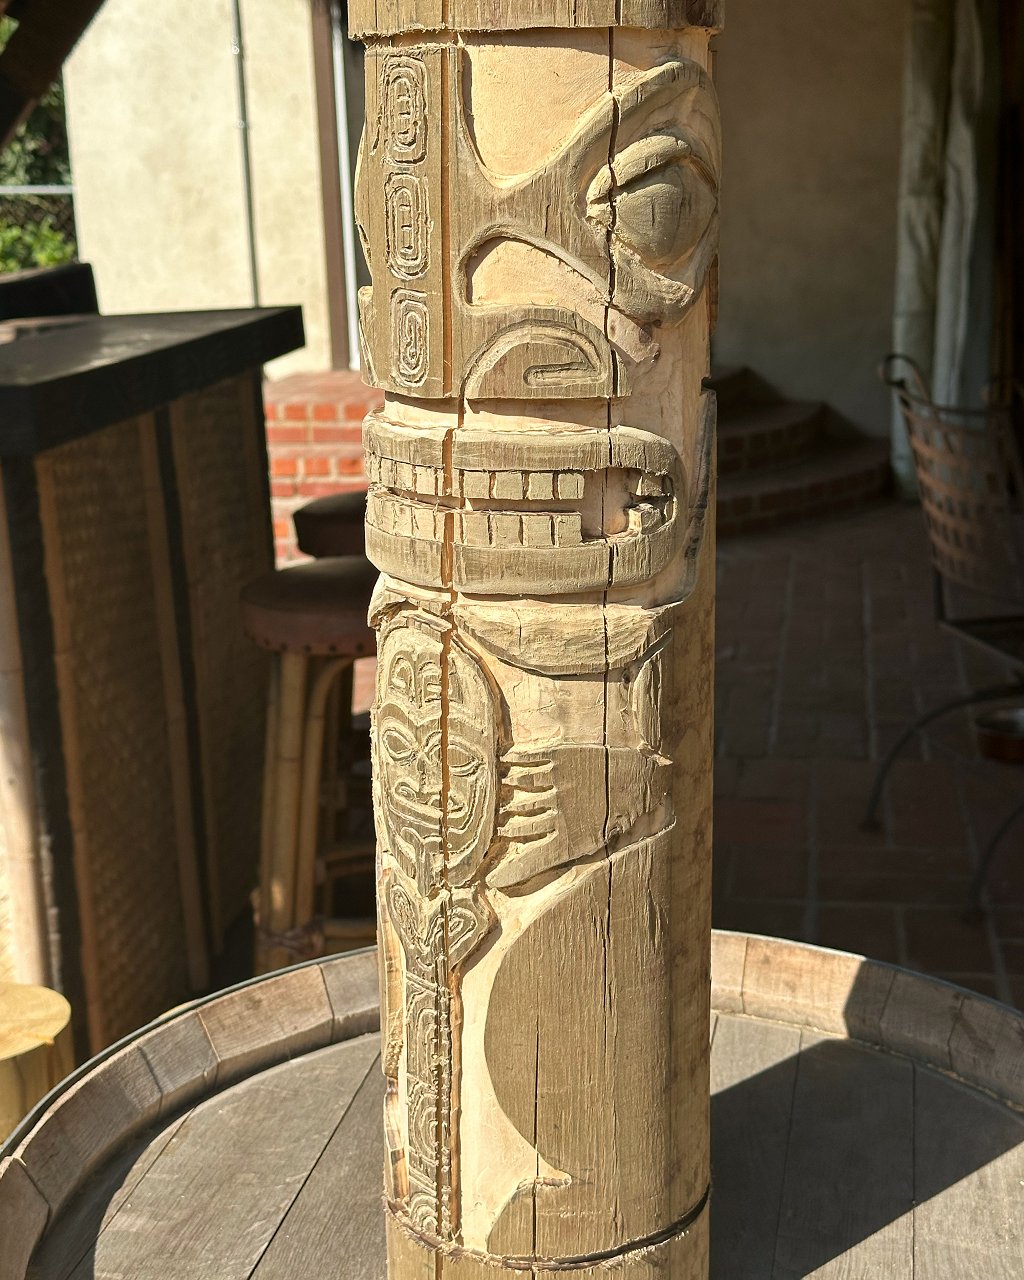
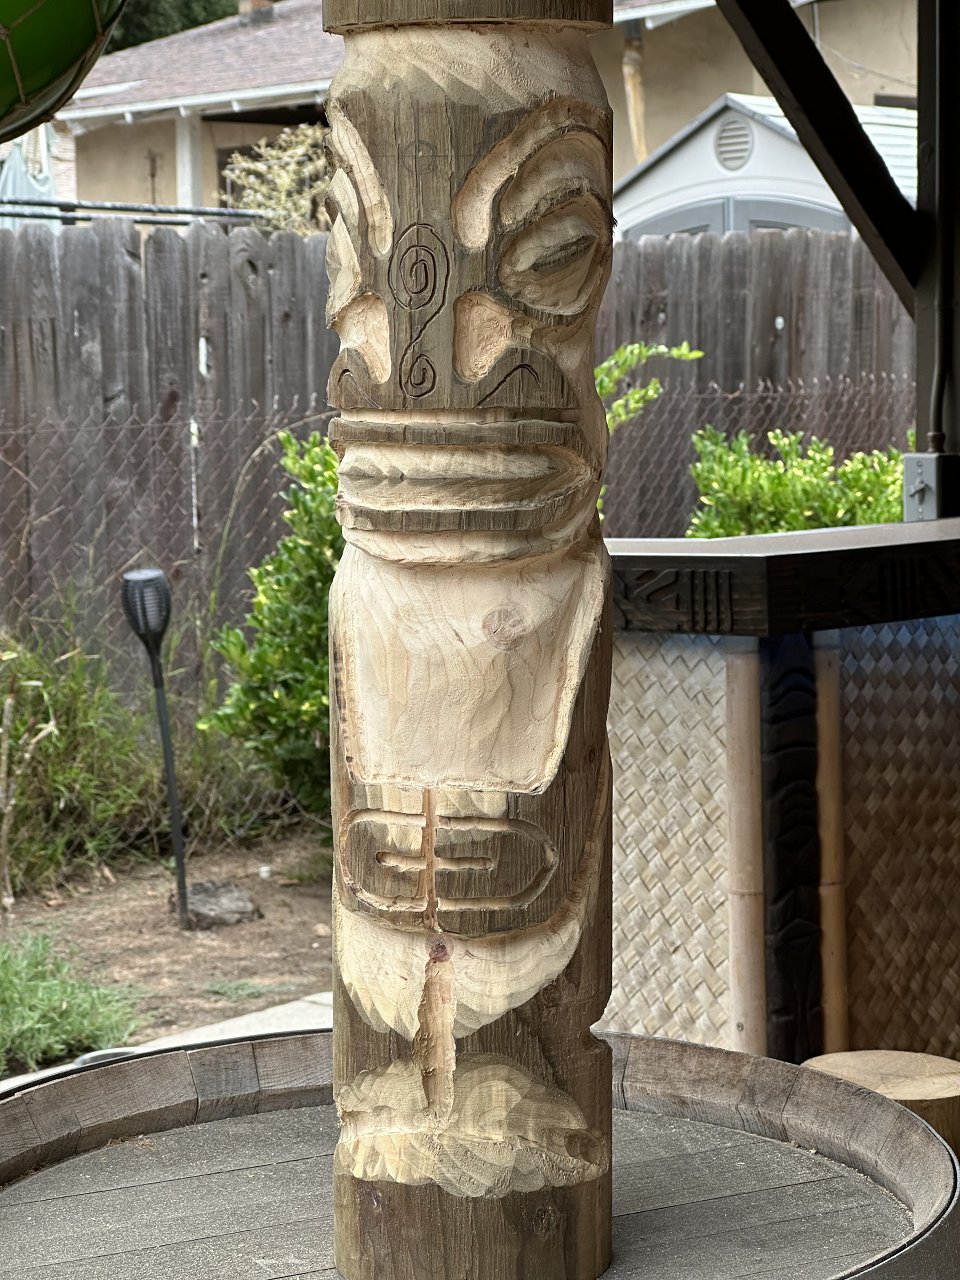
Sat 6/10 A bit of work this weekend. Eyes and mouth.
Sun 6/11 Teeth and neck.
|
|
M
MadDogMike
Posted
posted
on
Mon, Jun 12, 2023 10:37 AM
in reply to BlackWater
Coming along quite nicely! |
|
D

danlovestikis
Posted
posted
on
Mon, Jun 12, 2023 7:43 PM
The deeper the carving the better it looks. Yours is looking really good! |
|
BB

Bam Bam
Posted
posted
on
Mon, Jun 12, 2023 8:58 PM
Superb! |
|
B
BlackWater
Posted
posted
on
Tue, Jun 13, 2023 8:25 AM
Thanks. Dan, I might do another pass on the first one. I went to the final OA sale and saw the original again. Mine’s not far off but I took pictures with my finger in the deepest part. And got a pic of the back! |
|
D
danlovestikis
Posted
posted
on
Tue, Jun 13, 2023 9:35 AM
Hi BlackWater, I'm Wendy aka danlovestikis, my husband is Dan. He loves tikis as we both do. His tiki name is wendylovestikis. However, he doesn't type so he is never posting here. Posting of your helper photos is appreciated too. Cheers, Wendy |
|
B
BlackWater
Posted
posted
on
Mon, Jun 19, 2023 8:50 AM
Sat 6/17
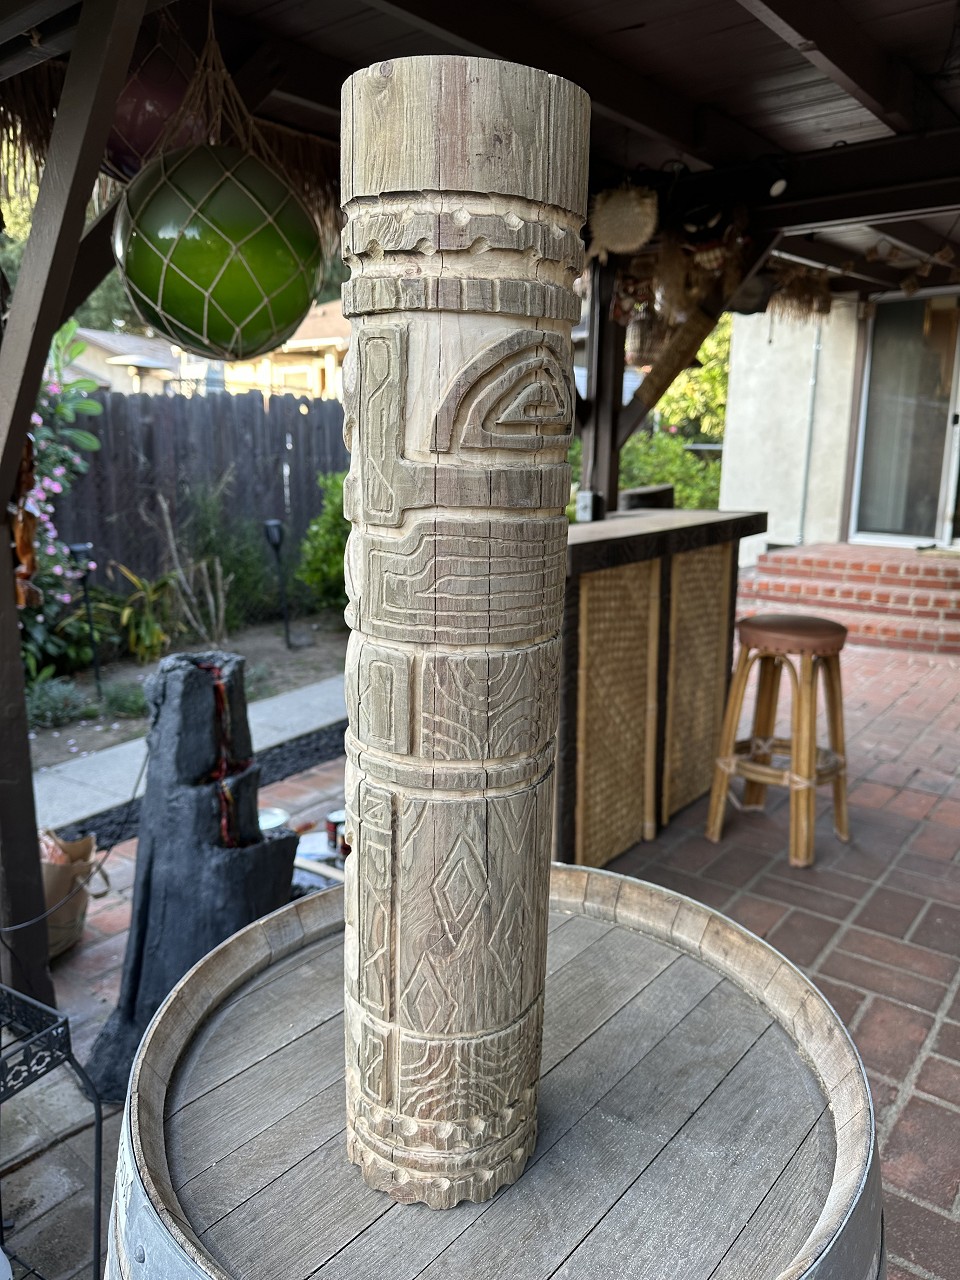
Finished off the body. Broke out the Arbortech carving system with the ball carving arm. Carves very fast but leaves grooves that need to be smoothed out later. I think I'm done with #2 for now, on to #3 of 4 next.
Sun 6/18
Worked on my art swap project. More pics in that thread.
|
|
M
MadDogMike
Posted
posted
on
Mon, Jun 19, 2023 8:53 AM
in reply to BlackWater
Lookin' good! "Arbortech carving system with the ball carving arm" Hmmm... I have to look that up |
|
B
BlackWater
Posted
posted
on
Mon, Jun 19, 2023 9:27 AM
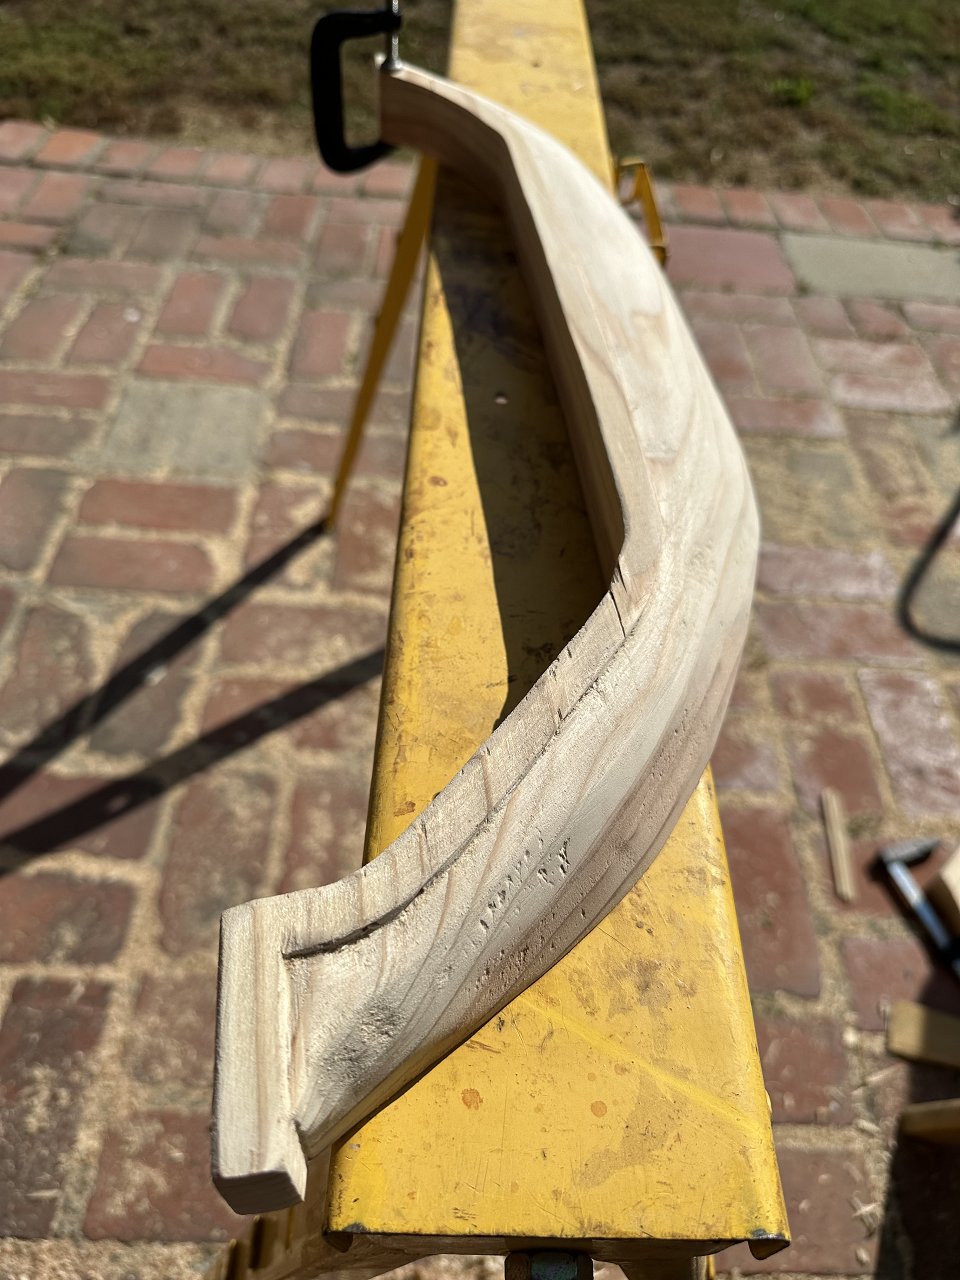
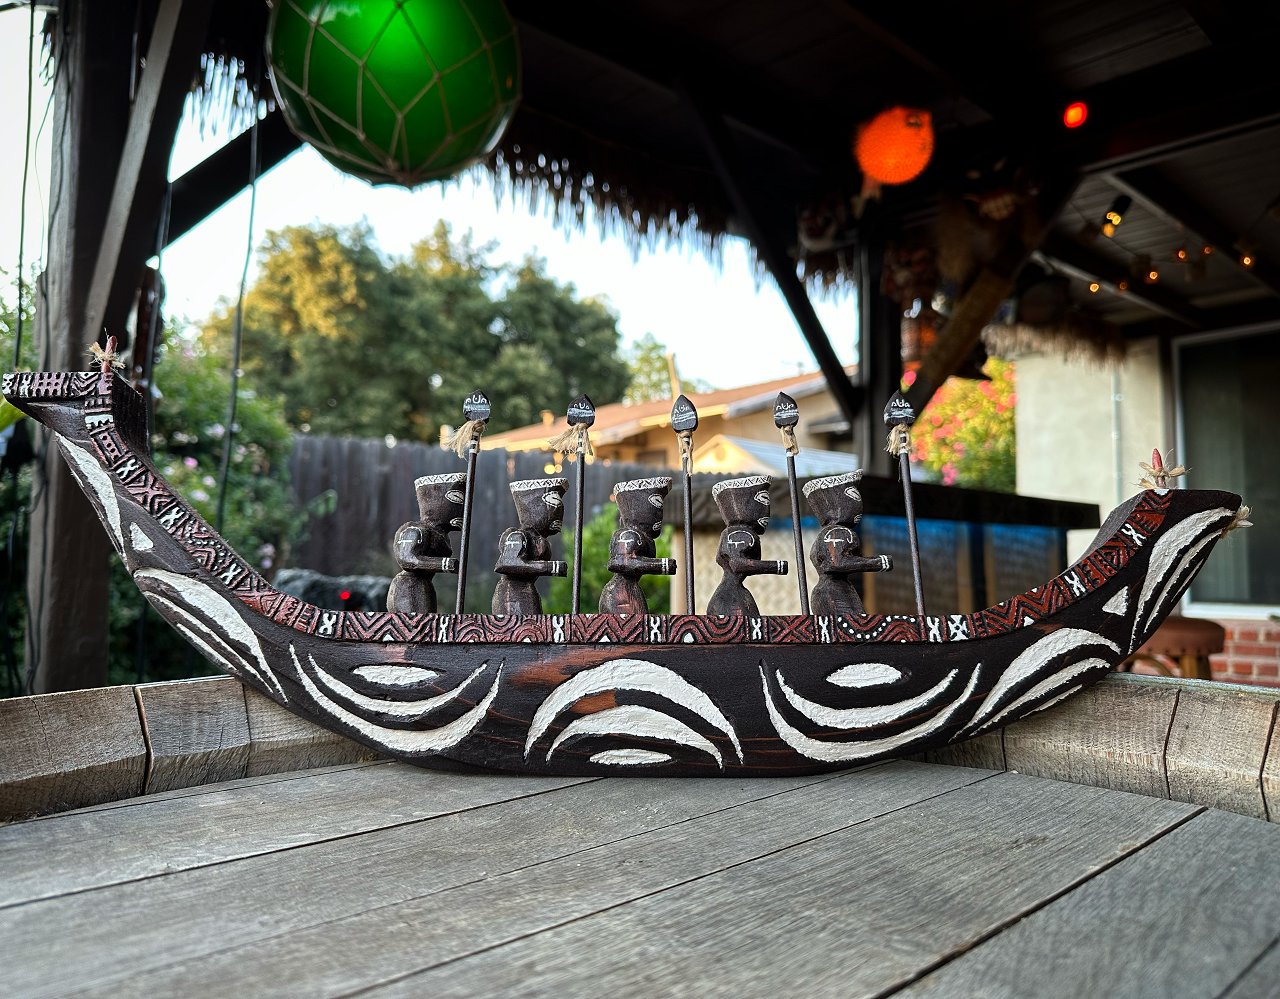
Arbortech stuff is amazing. Removes a lot of wood, but makes a gyroscope in your hand so you feel like you're in full control. I used the power carving unit with the precision carving system with the ball arm and the contour sander. I also used the Turboplane for the canoe basic shape, then sanded it smooth, chiseled the edging and patterned it with a Dremel. https://www.arbortechtools.com/us I think I posted this in the PNG mask project, but I love the textures you can make with these tools. An hour of zen: |
|
M
MadDogMike
Posted
posted
on
Mon, Jun 19, 2023 10:10 AM
in reply to BlackWater
Cool, thanks BlackWater! |
|
B
BlackWater
Posted
posted
on
Sat, Jul 29, 2023 7:01 PM
Side project on the art swap project.
[ Edited by BlackWater on 2023-07-29 19:02:09 ] |
|
B
BlackWater
Posted
posted
on
Sat, Jul 29, 2023 7:06 PM
Next leg underway. The router hit a crack and spazzed. So I guess this tiki is missing some teeth.
|
|
H

hang10tiki
Posted
posted
on
Sat, Jul 29, 2023 9:04 PM
Lookin good Keep it up Those will make some fine looking legs Cheers Jon |
|
B
BlackWater
Posted
posted
on
Sun, Jul 30, 2023 8:07 AM
Cracks are getting severe on one of the legs. Cheap Home Depot wood is all I could find for round posts. I’m going to try cutting some bowties to stop the crack but I’m worried.
|
|
M
MadDogMike
Posted
posted
on
Sun, Jul 30, 2023 12:39 PM
Your ArtSwap project turned out nice! If I had been in control of the Swap she would have been mine! LOL Unfortunately the fates are in control :) The table is coming along great! I wouldn't worry about the missing teeth, that adds character. I can see that the crack would be troublesome. Bowties should help. Maybe you can pull it together some with some large hose clamps before putting in the bowties? |
|
D
danlovestikis
Posted
posted
on
Mon, Jul 31, 2023 10:53 AM
I like the missing teeth. I'm against smoking or I would say add a cigar. |
|
H
hang10tiki
Posted
posted
on
Mon, Jul 31, 2023 12:54 PM
As CY once told me “the cracks are the evil spirits leaving” I like em |
|
B
BlackWater
Posted
posted
on
Mon, Jul 31, 2023 12:58 PM
I like the cracks, but I also want my table to stand up for a while. :/ |
|
WC

Will carve
Posted
posted
on
Tue, Aug 1, 2023 5:42 AM
Benz would say "carve deeper". |
|
B
BlackWater
Posted
posted
on
Tue, Aug 1, 2023 8:37 AM
in reply to Will carve
Yeah but this cracked log has to hold up a table so I’m scared to carve too much away. And they look pretty close to the Marquesan poles I’m basing them on. Maybe I should figure out a way to make them cosmetic only, like carve out a slot in the back for a more solid table leg to go through. But again I’m scared of them splitting in half… |
|
H
hang10tiki
Posted
posted
on
Tue, Aug 1, 2023 6:17 PM
Challenging fo sho |
|
B
BlackWater
Posted
posted
on
Fri, Aug 18, 2023 9:17 AM
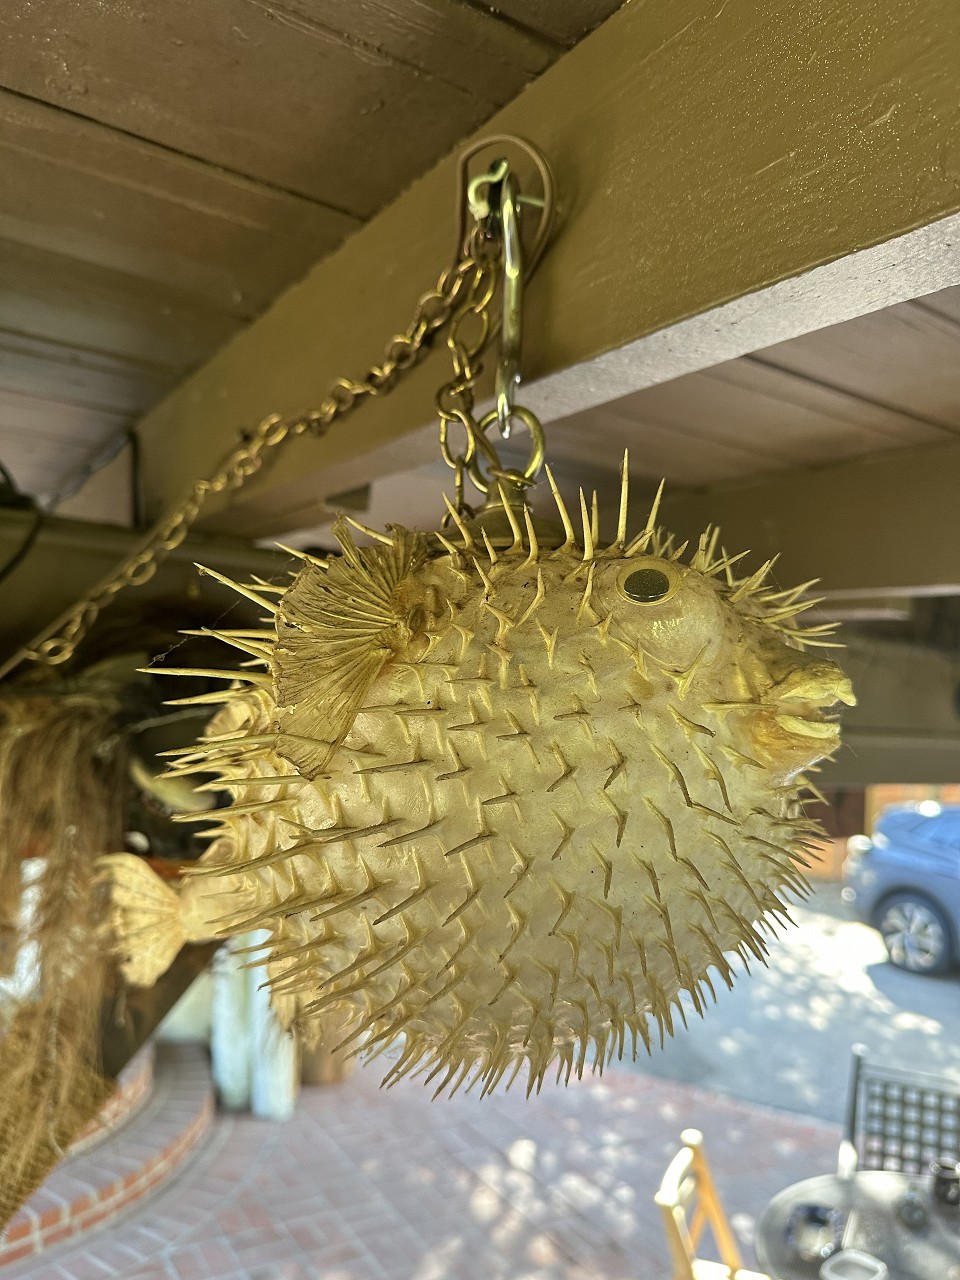
Hurricane coming. Batten down the pufferfish! I was going to re-seal the thatch this weekend. I set a calendar event for mid-August thinking it would be bone-dry. Guess that’s off… |
|
M
MadDogMike
Posted
posted
on
Fri, Aug 18, 2023 9:25 AM
I'm standing between you and the storm, hopefully it will lose steam before it gets to us |
|
B
BlackWater
Posted
posted
on
Fri, Aug 18, 2023 5:07 PM
Stay safe, keep your hurricanes in the glass |
|
H
hang10tiki
Posted
posted
on
Sat, Aug 19, 2023 6:06 AM
Then in your belly |
|
B

BeachcomberNC
Posted
posted
on
Sun, Aug 20, 2023 12:16 PM
Wow, this is an ambitious project, looks great so far. |
|
B
BlackWater
Posted
posted
on
Sun, Aug 20, 2023 5:20 PM
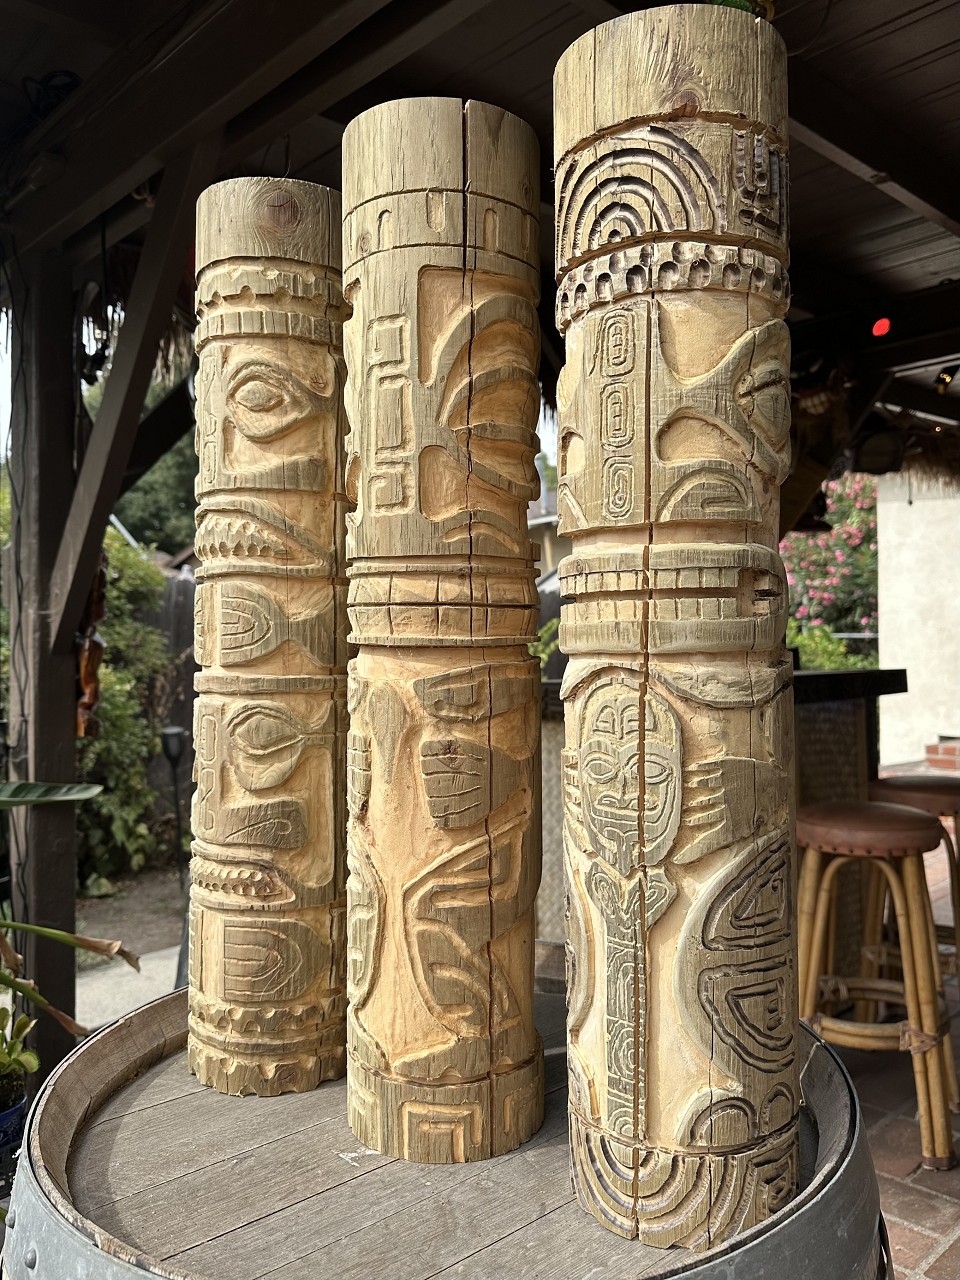
Thanks. Three legs done.
I’ve been thinking about the top. A slab top would be a few hours work for someone with a shop, a joiner, something to level the top, etc. And I have none of those. So I might cheat and get someone to glue up and level the top for me, then carve it up and finish it. |
|
H
hang10tiki
Posted
posted
on
Sun, Aug 20, 2023 7:40 PM
Awesome They look great |
|
M
MadDogMike
Posted
posted
on
Mon, Aug 21, 2023 7:46 AM
Those legs look great! (Nice gams LOL) I don't know how big your table will be but you can consider 3 legs. Easier to level and arguably more "primitive". Your local home improvement store may have some pine table tops available already glued and planned. |
|
B
BlackWater
Posted
posted
on
Mon, Aug 21, 2023 9:37 AM
Carving another tiki leg isn't a chore. 🗿 I asked Tiki Diablo for table/bar top suggestions, and he said alder or poplar. I'm going to attempt his pattern from the Undertow bar. And practice on a lot of scrap before I try the table. |
|
H
Hamo
Posted
posted
on
Tue, Aug 22, 2023 10:28 PM
Great work on those table legs! |
|
H
hang10tiki
Posted
posted
on
Wed, Aug 23, 2023 11:50 AM
Awesome |
|
B
BlackWater
Posted
posted
on
Sat, Aug 26, 2023 3:55 PM
On the last leg. Literally.
Carving deeper this time. Used the Arbortech Turbo Plane and Precision Carving System so far. Hopefully it dodn’t split and fall over. |
|
B
BlackWater
Posted
posted
on
Sat, Sep 2, 2023 5:30 PM
Progress on leg 4 until I gave up due to mosquito bites. I found someone to make the slab top, need to practice router carving the edge for the big day. |
|
M
MadDogMike
Posted
posted
on
Sat, Sep 2, 2023 8:33 PM
The last one looks great too. Good luck on the top, you can do it! |