Tiki Central / Tiki Carving
Swanky creates elaborate firewood
|
M

McTiki
Posted
posted
on
Thu, Nov 18, 2010 2:56 PM
Swanky, Don't give up! He's comin along fine man. I use lots of emery cloth and Steel Wools in a range of coarseness. I use wifflers now and Dremel sanding wheels and fine bits from Kutzall. Keep him coming along. Mahalo |
|
S

Swanky
Posted
posted
on
Tue, Feb 8, 2011 11:29 AM
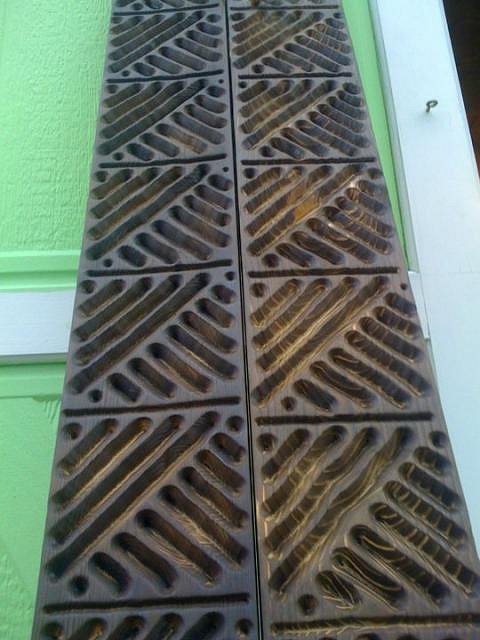
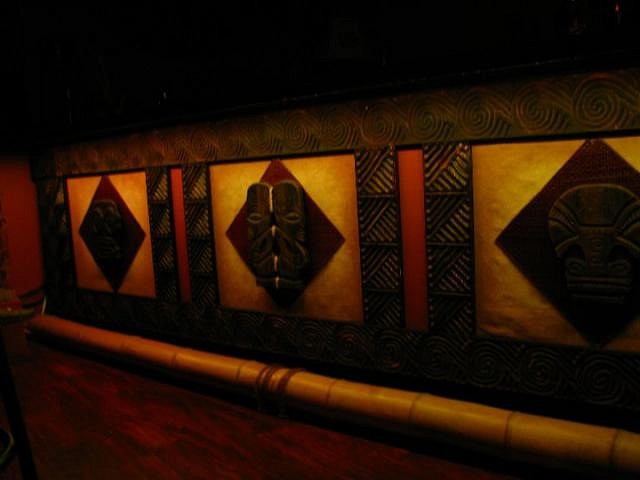
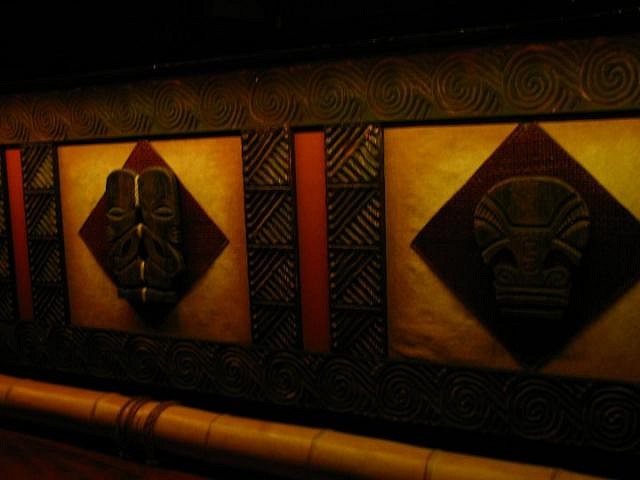
More carved trim for the bar front. |
|
TB

Trad'r Bill
Posted
posted
on
Tue, Feb 8, 2011 4:18 PM
That looks awesome! |
|
S
Swanky
Posted
posted
on
Tue, Oct 11, 2011 9:32 AM
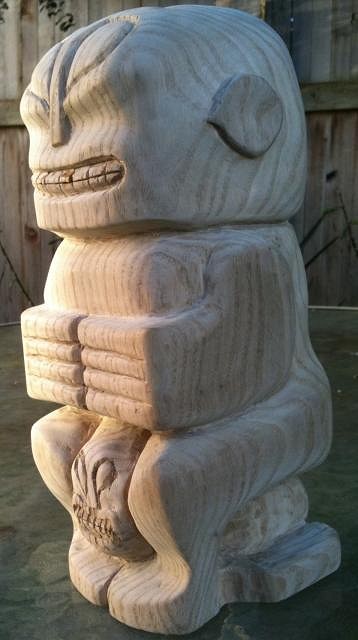
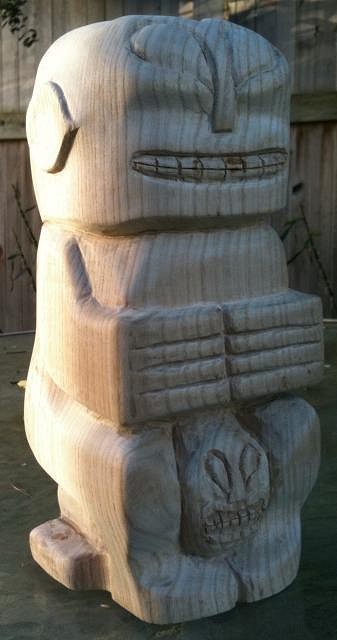
A little after these were taken I decided to call him done and started sanding. I may get back out the chisels and work the eyes a little deeper. Next step is to test my stain on a srap piece and if I like it, I will likely stain it and really be done this weekend. |
|
F

furball
Posted
posted
on
Tue, Oct 11, 2011 12:08 PM
WOW, Swanky! I love the detailed trim idea!!! It looks great, man! I am remodeling my kitchen and was trying to think of a way of working some custom carved crown molding into my design, without having to hand chisel the entire thing. I have a router and want to try this. Do you have any advice to offer on the subject? Bit style/depth, etc... also, routers are squirrely... how do you keep your panels so even? |
|
S
Swanky
Posted
posted
on
Tue, Oct 11, 2011 1:11 PM
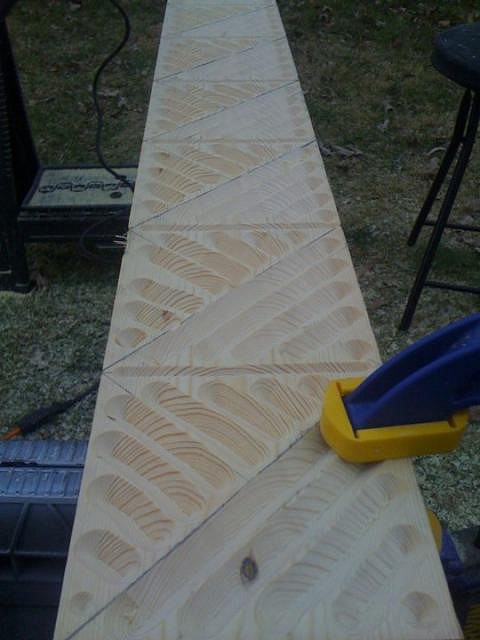
Furball, it is not as hard as you imagine. A little bi tof practice to start and then just rip it. For the straight line trim I used a large V bit and for the swirls a large round bit. The first line sets the piece. Once you hit it, you follow it with the next and so not. Only problems were when I hit a knot is would want to get out of line. If it isn't too basic, I also did not use a plunge base. Set your depth and roll the router down at the edges into the cut and back up on the other end. Remove the stuff that will keep you from seeing the wood and bit and wear safety glasses for sure. Clamps! Once you get going, it just rolls right out. Was easy. There are lots of ways to go with it. Torching will make sanding un-needed, although you will need to clean it up afterwards to get rid of ash. A tire brush first to remove most and then old towels and maybe a tack-cloth at the end or some other way to get the remaining charcoal dust gone. It take more time and trouble to design it and lay it out than to do the routing. |
|
S
Swanky
Posted
posted
on
Tue, Oct 11, 2011 1:15 PM
Here is the trim installed.
[ Edited by: Swanky 2011-10-11 13:16 ] |
|
CTIT

Chuck Tatum is Tiki
Posted
posted
on
Tue, Oct 11, 2011 1:25 PM
Looks great! |
|
F
furball
Posted
posted
on
Tue, Oct 11, 2011 2:08 PM
Thanks Dude! Also thanks for posting the finished pics, looks awesome! I'm stoked to try this! |
|
Q

Q-tiki
Posted
posted
on
Tue, Oct 11, 2011 2:38 PM
Holy cow!! That trim looks fantastic! Very swanky, Swanky. :) the carving looks good too, but that trim really looks great. Cheers! |
|
T

TheBigT
Posted
posted
on
Tue, Oct 11, 2011 7:46 PM
Killer trim! Tiki turned out pretty fine. Yes, I see the enemy now! :lol: |
|
S
Swanky
Posted
posted
on
Mon, Oct 17, 2011 9:31 AM
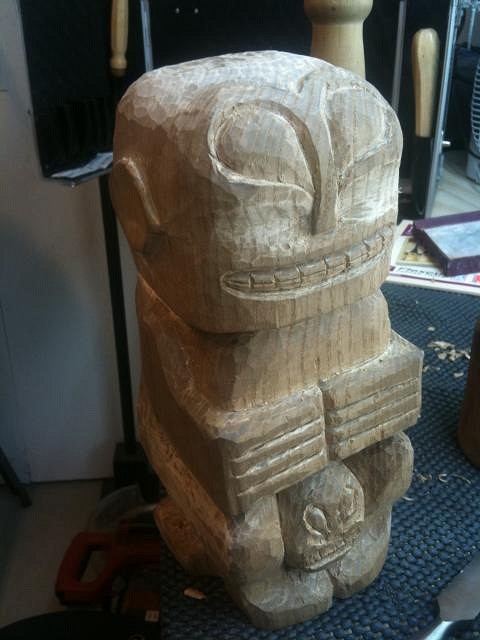
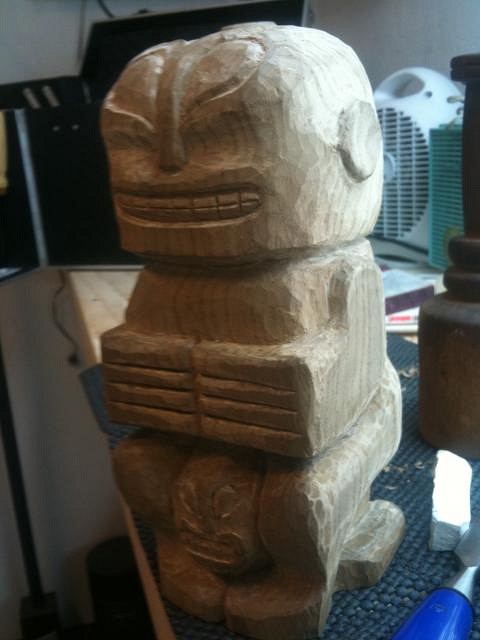
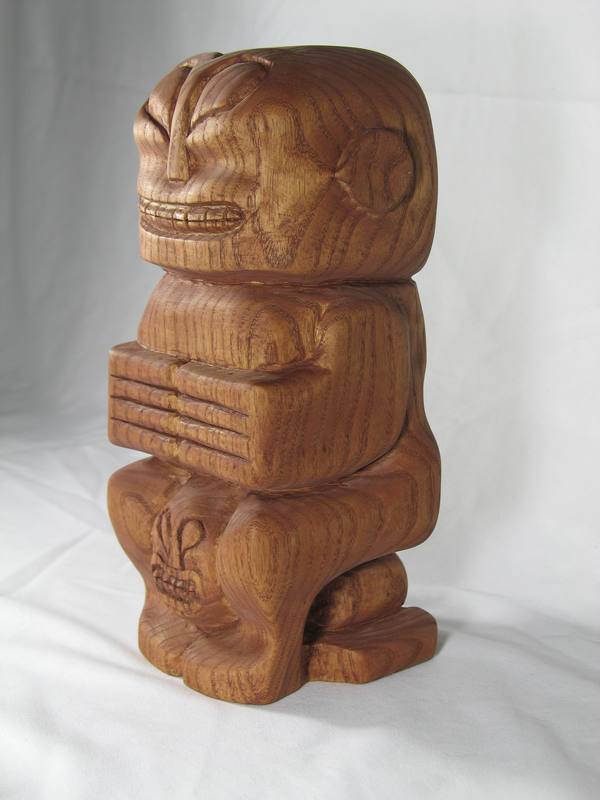
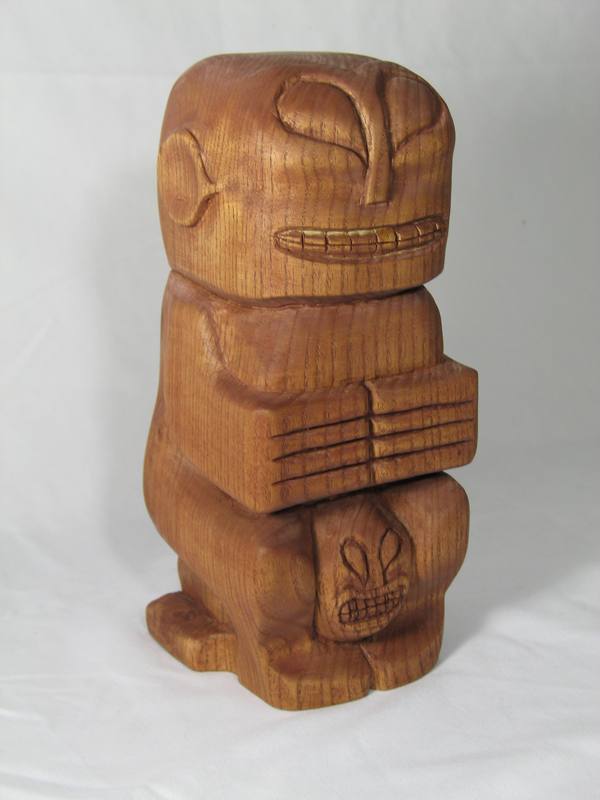
Here he is sanded. Had trouble on his teeth. Sanding caused chipped teeth which I superglued back. No telling how that will look when stained. I will do a tiny bit more clean up. Every time I pick it up I am unsatisfied with the sanding work and do more. I can never get anything finished! Soon. Very soon.
I started with 80 grit, then 150, 200, 300 and 400. That fixed up many issues, but also highlighted others that got out the chisels and knives and fixed. Added depth to cuts here and there and got rid of bad spots. Folding the sand paper allowed me to get in some crevices, but not completely. |
|
T
TheBigT
Posted
posted
on
Mon, Oct 17, 2011 9:43 AM
Lookin good. I use Dremel bits to get into the crevices where possible. |
|
S
Swanky
Posted
posted
on
Mon, Oct 17, 2011 11:45 AM
I will look at what I have for my dremel. Been reading and may try some emory boards too. In small deep cuts like the enemies eyes and in very deep cut areas like the top of his thighs way back near the body, I have not gottne in there well. Gonna try a few things this week when I have time to smooth out the rough stuff. |
|
P

pjc5150
Posted
posted
on
Wed, Oct 19, 2011 11:27 AM
get a tungsten burr. Andy (Mc Tiki) turned me on to 'em. He's the "burr guy". All the crap ones I ever used from home depot were burned & useless in no time. That Saburr demel bit is awesome. Got one a few weeks ago and it's still tearin' it up.... |
|
B

Benzart
Posted
posted
on
Sun, Nov 27, 2011 5:37 AM
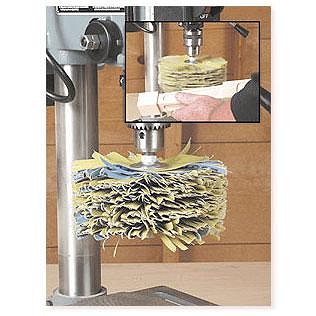
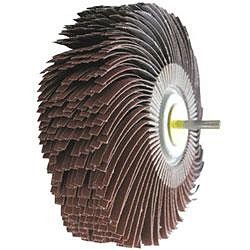
That "Firewood" is looking pretty good Swank. Thats what it's all about,,, carve it and sand it, clean up all the nooks and cranny's and sand it some more... Clean up all the nooks and cranny's, sand again and keep going until it's acceptable to you. Trouble is peeps usually think it's "Good Enough" because after all it's just a tiki and why spend time fixing all that small stuff. Well, that Small Stuff shows up more than the big stuff and will Always be there telling on you. Pack of 48 sheets
[ Edited by: Benzart 2011-11-27 05:43 ] |
|
S
Swanky
Posted
posted
on
Sun, Nov 27, 2011 8:01 AM
Good to know Ben. I have literally finished him, but not posted any pics. I wiped it down with a damp rag to raise the grain, sanded with about 400 grit, then did it over and over until no grain came up any more, then stained it. Didn't like the color, and stained it again... Pics soon. |
|
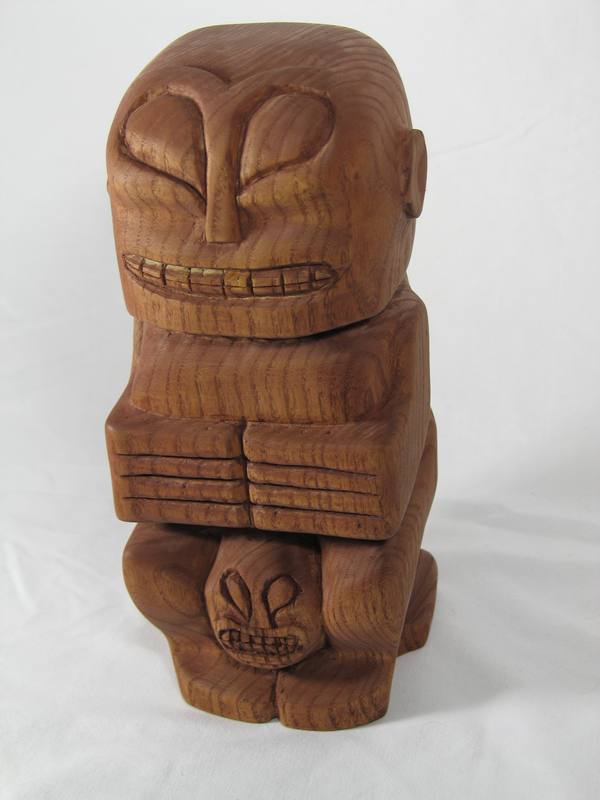
S
Swanky
Posted
posted
on
Sun, Nov 27, 2011 2:02 PM
As promised: 98-99% done with chisels. 1-2% done with knives. |
|
T
TheBigT
Posted
posted
on
Sun, Nov 27, 2011 4:38 PM
Came out great Swanky. Usually I get a small hobbyist paint brush and go over those little kind of spots that get missed when staining with a rag or larger brush. |
|
S

surfintiki
Posted
posted
on
Mon, Nov 28, 2011 9:57 AM
Very cool! A great piece that really shows off that grain. I've seen that sanding pad of Benz's, it's pretty magical! |