Tiki Central / Tiki Carving
How about some more "step-by-step" posts...
Pages: 1 11 replies
|
AA

Aaron's Akua
Posted
posted
on
Wed, Nov 16, 2005 10:37 PM
All of this recent heartfelt discussion seems to have had a galvanizing effect on the "Creating" Ohana. Here's my challenge for all of the artists here on TC (painters, sculpters, carvers, etc.): Let's try to share a little more of the process. Every one does things a bit differently. What may seem mundane to you may ignite a stroke of inspiration in another. Let's fire this thing up and see what happens. A-A
[ Edited by: Aaron's Akua 2005-11-16 22:38 ] |
|
H

hewey
Posted
posted
on
Thu, Nov 17, 2005 2:11 AM
Will do. |
|
PT

Palama Tiki
Posted
posted
on
Thu, Nov 17, 2005 5:40 AM
good idea A-A. i've got a palm log sitting in my garage that i started about a month ago, and haven't gotten back to it. hopefully this weekend i'll get back on it and post progression shots. |
|
P

PalmCityTiki
Posted
posted
on
Fri, Nov 18, 2005 4:36 AM
I'm setting up several of my carvings in the step by step manner. Its always the last thought on my mind, but my current project is setup that way. and now that I redoing ta moko I really want to document the change. So stay tuned. |
|
S

SilverLine
Posted
posted
on
Fri, Nov 18, 2005 6:04 AM
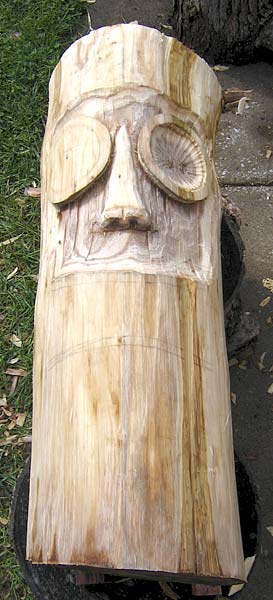
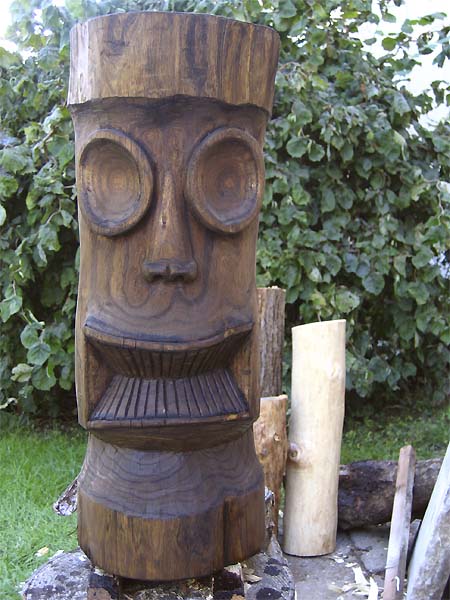
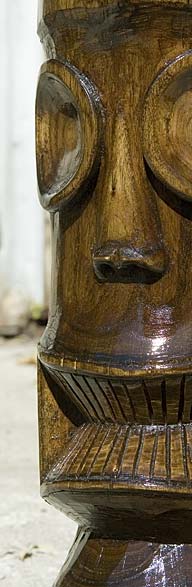
I'm certainly not a person to learn from, but maybe I can get some advice on how this could have been better. I started with a Catalpa log about 30" tall and an idea to copy the first photo in BOT. (I just copy stuff; I don't have the imagination to think things up outa thin air . . yet. Besides, I have no idea what I'm doing.)
I started buy drawing on the image on the log, then rough-in the cuts. I hadn't figured out how to make the nose stand out by trimming down everything else, so my noses always turn out small.
So here it is all roughed in. By this time I realized that I hadn't made the face broad enough (a recurring problem with me). I still think in 2D and always seem to put the face on the front 1/4 of the log only. Well, back to the draw-knife to trim him down some.
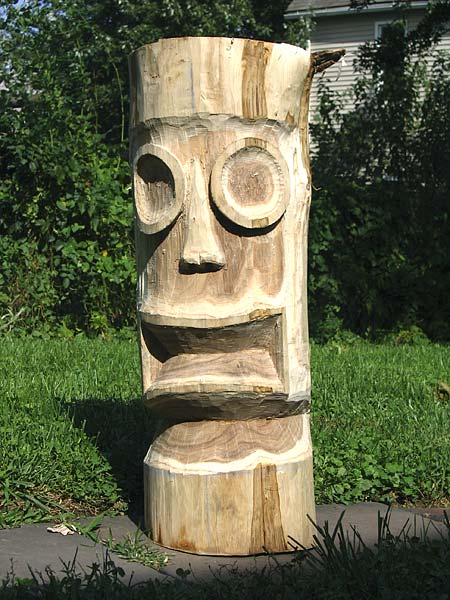
Not great, but better . . and on to the teeth and lots of sanding.
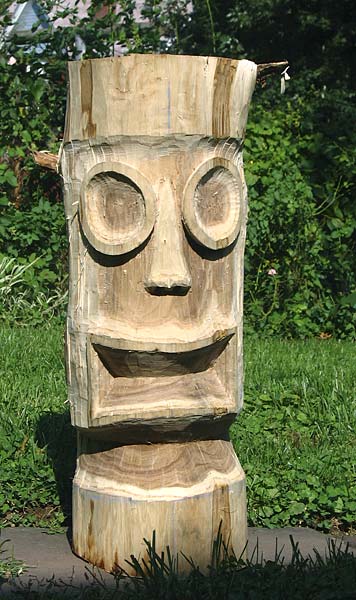
Catalpa has really dark, walnut-like heartwood so I had to go with a dark stain. I highlighted the eyes and teeth by lightly sanding after the stain. Then finished with spar varnish (had to be weather-proof).
It's a simple design, and I like it, but it doesn't kick me in the pants like I'd hoped it would and I don't know why. Oh well, on to the next one . . learning as I go. |
|
L

Loki
Posted
posted
on
Fri, Nov 18, 2005 6:31 AM
Thanks Silver for your walk through...i think its a great help to find out the pit falls that other carvers fall into. I am just about to start working on my first piece and hope i can avoid some of the mistakes of noobies...keep em coming... |
|
BK

Basement Kahuna
Posted
posted
on
Fri, Nov 18, 2005 9:46 PM
I agree...fixing to carve a taiaha, lots of spoke shave work involved, and will post as time permits. If we could bring it all back in the "Tiki Carving Methodology" thread it would be easier to find and more recognizeable along with the old info that's already there. Silver with your permission I'll move your step by step over to the thread and you'll be the first to get it alive again.. |
|
AA
Aaron's Akua
Posted
posted
on
Fri, Nov 18, 2005 9:57 PM
We all see flaws in our work that others don't seem to notice. I dig your vintage era replica though, Silverline. Personally I like to stick my neck out with the step-by-step posts. It makes it more of a gamble, but more of a challenge as well. I figure if I screw up in the process, we'll all learn together what not to do. And if it turns out well, all the better. Mahalo for sharing. It's awesome to see the finished product, but the process is fascinating as well. A-A |
|
TSW

The Sperm Whale
Posted
posted
on
Fri, Nov 18, 2005 11:54 PM
Thanks for sharing Silverline!!! I still think it looks pretty sweet!!! |
|
S
SilverLine
Posted
posted
on
Sat, Nov 19, 2005 6:06 AM
Fine by me; where ever you think it would be best. I'll have another BOT knock-off with progress shots in week or so. |
|
MR

Matt Reese
Posted
posted
on
Sat, Nov 19, 2005 7:54 AM
Thanx for the step-by-step. I think it turned out great. Sometimes it's more difficult recreating than originating. NICE! |
|
CC

curb creature
Posted
posted
on
Sun, Nov 20, 2005 4:53 PM
basically i let my palm dry out for about a month or so. draw a chalk line in the middle. hog most of it out with a chainsaw, ruff it in with a disc grinder/die grinder.torchit.back spray it then waterproof.. |


Pages: 1 11 replies