Tiki Central / Tiki Carving
Cheeky Girl's Carvings
|
C

CheekyGirl
Posted
posted
on
Sat, Sep 23, 2006 4:01 PM
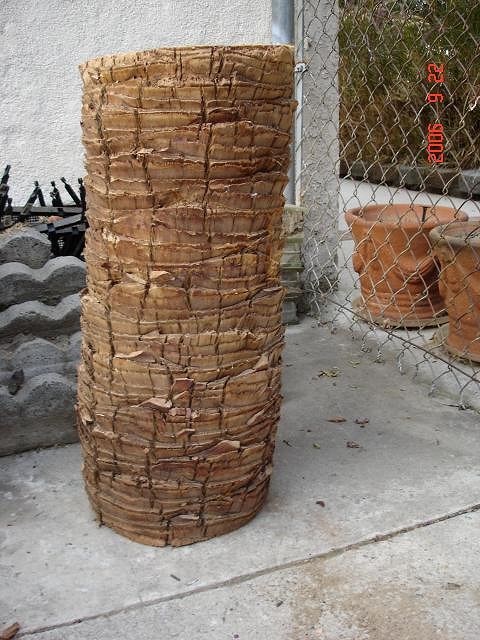
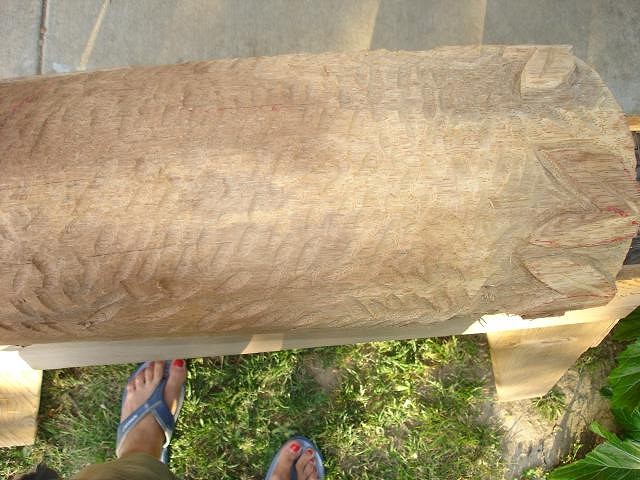
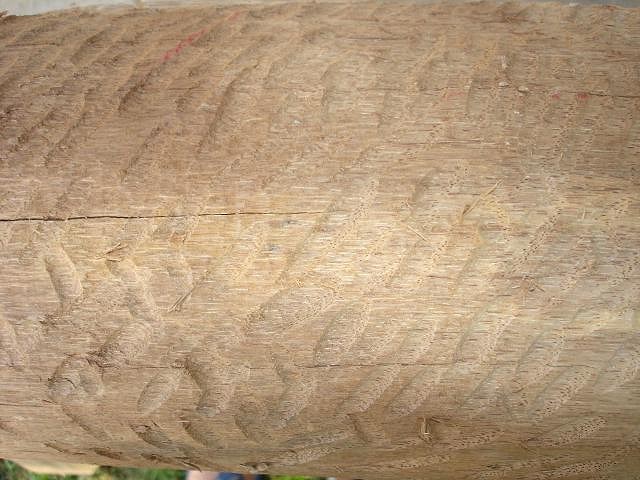
I didn't notice until it was too late that my neighbors were cutting down a palm tree, otherwise I would have asked them to save me a nice 5 or 6 foot section. I was able to salvage a couple of pieces. All a little over 2 feet (26" to 30" sections), I figured it's a good start. I'm not sure what species of palm it is as I couldn't find any foilage. It's time to "just do" Here's the beginning of my carving journey.
|
|
M

Monkeyman
Posted
posted
on
Sat, Sep 23, 2006 7:42 PM
GO FOR IT !!!!! Looking forward to the results.... :) |
|
W

WooHooWahine
Posted
posted
on
Sat, Sep 23, 2006 9:46 PM
WOOOOOHOOOO! Go for it. We can't wait to see the finished product. Make sure it is holding a Soccer Ball :wink: |
|
I

IsleConch
Posted
posted
on
Tue, Sep 26, 2006 8:11 PM
Hey Cheeky I'm also new to carving and I have two pieces similar to yours..can't wait to see your progress..I think I'm gettin' inspired. |
|
M

McTiki
Posted
posted
on
Wed, Sep 27, 2006 2:55 AM
Hey Cheeky, What tools are you attacking it with? Right on! Dive in. Mahalo McTiki |
|
C
CheekyGirl
Posted
posted
on
Sun, Oct 1, 2006 10:13 AM
Tools, right now a bit of rum and a hand-truck. Actually, I'm going to Home Depot to pick up some chisels today. Just checking out a couple of old thread on tools, but I've been sketching like crazy though! |
|
B

Bete
Posted
posted
on
Sun, Oct 1, 2006 11:13 AM
Looking forward to your carving adventure here, good luck with it! Cool looking table in the background by the way. |
|
C
CheekyGirl
Posted
posted
on
Sun, Oct 8, 2006 10:19 PM
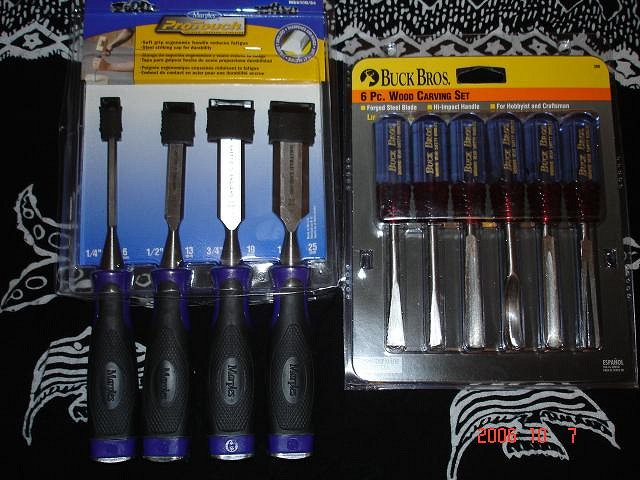
Since Harbor Freight is a store that specializes in tools, I figured they would have loads and loads of wood working tools. I was seriously disappointed! I ended up going to Home Depot. Here's what I found. I know I need to pick up lots more, but it's a start.
|
|
T

tikigap
Posted
posted
on
Mon, Oct 9, 2006 6:14 AM
Good start! I like buck bros. stuff. Look at FlexCut tools too. They are the cream of the crop. You might want to study the quality of product sold by Harbor Frieght. Most of their chinese-made hand tools suck. I've been seriously disappointed (but what did I expect? You get what you pay for). |
|
BK

Basement Kahuna
Posted
posted
on
Wed, Oct 11, 2006 10:43 PM
I have a Buck Brothers fantail from that set that is one of my main tools. It's good, old style tool steel. Go to smokeymountainwoodcarvers or Lee Valley for carver's heaven. |
|
C
CheekyGirl
Posted
posted
on
Thu, Oct 12, 2006 12:23 AM
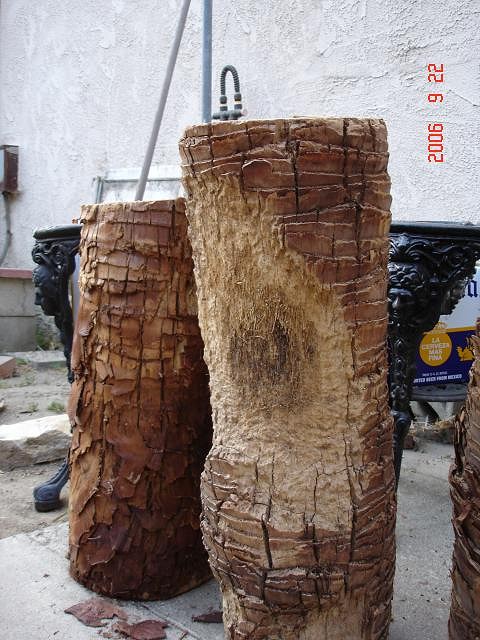
Thanks for the tips, I forgot to get a mallat, which I will do soon...can't work without one. I'm lugging a couple of extra pieces of palm that I noticed were left on the neighbor's curb. |
|
C

Clarita
Posted
posted
on
Fri, Oct 13, 2006 12:01 PM
What a challenge good luck!! Can't wait to see how evolves |
|
H

hewey
Posted
posted
on
Fri, Oct 13, 2006 3:21 PM
Ive got a similar size palm log and a similar carving artillery. Cant wait to see your progress :) |
|
C
CheekyGirl
Posted
posted
on
Tue, Nov 28, 2006 6:17 AM
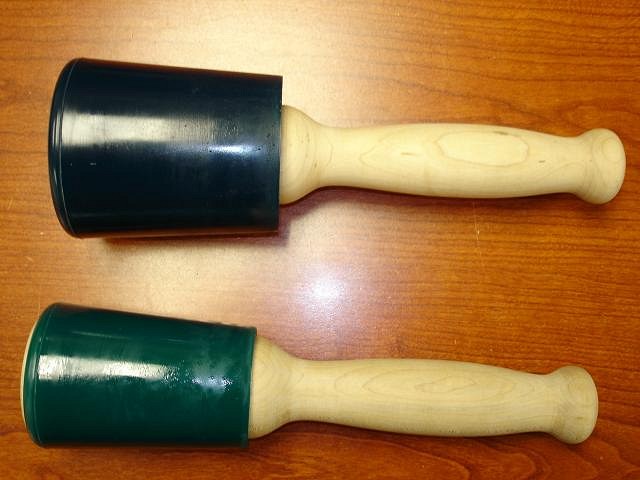
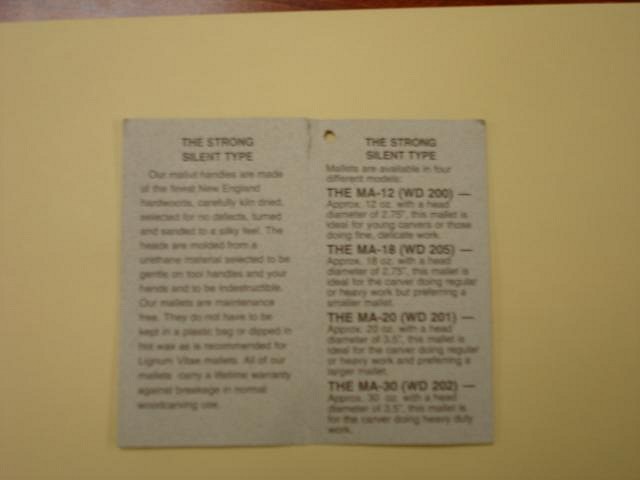
Just added some mallets. Wood is Good brand 12 oz. and 20 oz.
This is the tag that was attached to the mallets. It's either a little blurry, or I'm seeing double.
|
|
M

mieko
Posted
posted
on
Tue, Nov 28, 2006 9:49 AM
Woo Hoo! Now you should have everything you need to carve this weekend. :) I just picked up one of those mallets too. It's a little big for my hand, but I'll see if I can sand it down. |
|
C
CheekyGirl
Posted
posted
on
Wed, Apr 11, 2007 9:27 PM
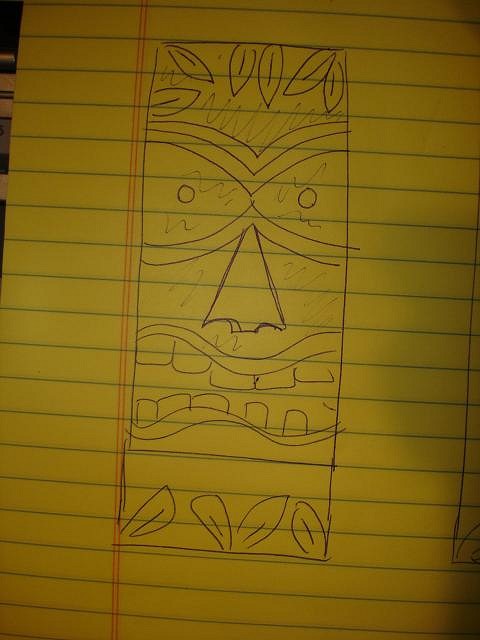
Here's the first attempt which was started at the San Diego Chop Chop at Mieko's in Dec. 2006. The initial sketch is on the yellow pad.
What I learned from this Chop Chop is that I needed better carving tools. It seemed like I was expending way too much energy with my crappy chisels. |
|
C
CheekyGirl
Posted
posted
on
Wed, Apr 11, 2007 9:32 PM
I received new FlexCut Chisels as a Christmas Gift. I worked a little bit on the Tiki in December 2006. The new FlexCut tools were like "butter", so I was able to dig a little deeper with ease.
[ Edited by: CheekyGirl 2007-05-06 22:57 ] |
|
C
CheekyGirl
Posted
posted
on
Wed, Apr 11, 2007 9:38 PM
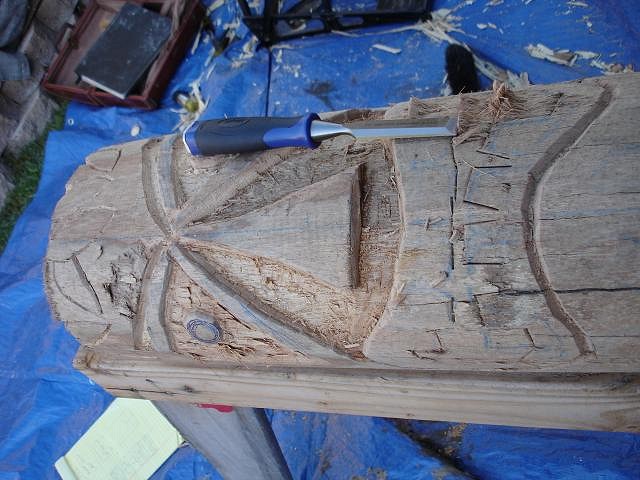
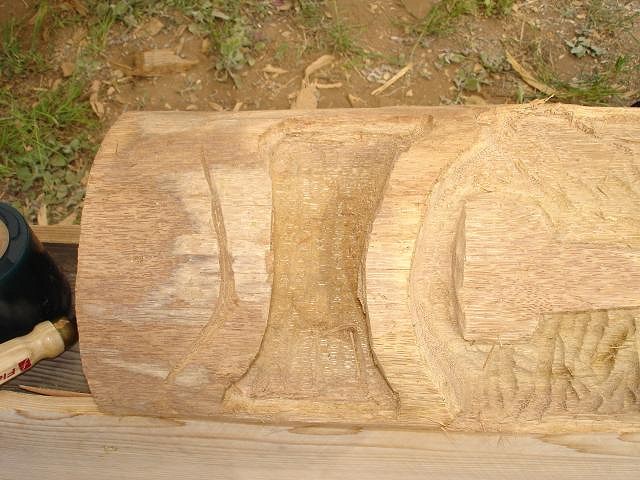
At the next San Diego Chop Chop (Feb. 2007), I started taking out the taking out the teeth. It was starting to look like a jack-o-tiki, so I was somewhat glad that the fiberous mouth area necessitated the gouging out the teeth.
|
|
C
CheekyGirl
Posted
posted
on
Wed, Apr 11, 2007 9:45 PM
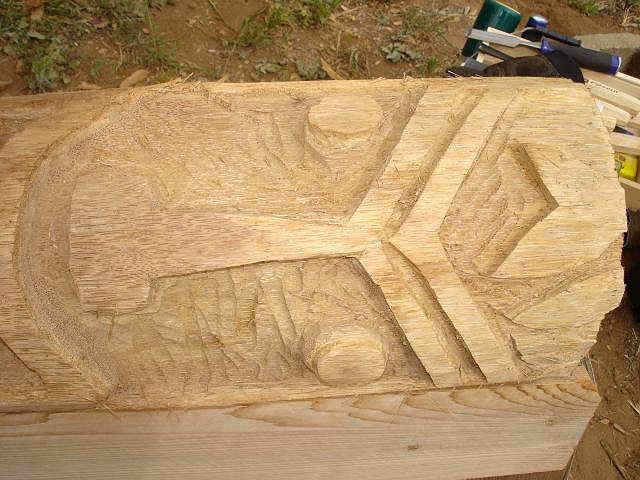
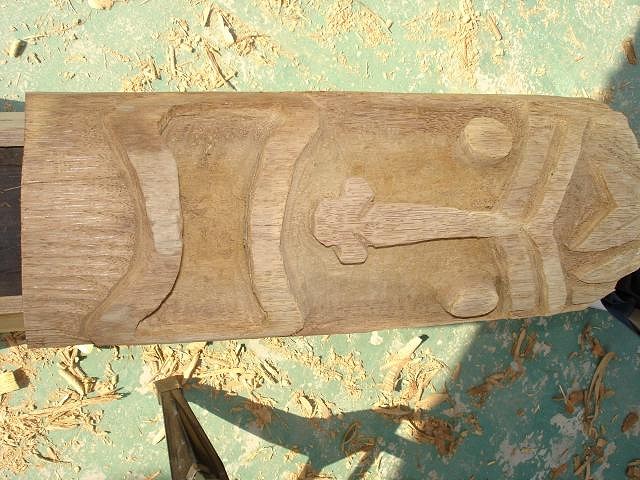
At the next San Diego Chop Chop I was able to make (April 2006), I really started gouging out the mouth area. I started to get a handle of what chisels to use.
Once again the wood determined the direction of the tiki. The area where I initially had a criss-cross pattern above and below the eyes became very fiberous, requiring digging deeper and ultimately the removal of the cross-cross pattern under the eyes. I also wanted to get rid of the jack-o-tiki look so I modified the nose.
|
|
BPB

Bay Park Buzzy
Posted
posted
on
Thu, Apr 12, 2007 10:38 AM
Hey Cheekygirl! Buzzy Out! |
|
B

Benzart
Posted
posted
on
Fri, Apr 13, 2007 8:55 PM
Cheeky, Excellent First tiki, Wish My first was that good, really!. can't wait to see the next one. Don't be afraid to go Deep! |
|
T

Tiki-Kate
Posted
posted
on
Mon, Apr 16, 2007 7:47 PM
One of my favorite things about our monthly Chop is seeing the evolution of this tiki. I really love the way the nose has changed. |
|
M

Moki
Posted
posted
on
Mon, Apr 16, 2007 9:37 PM
:lol: :lol: :lol: Great job! |
|
TJ

tyger jymmy
Posted
posted
on
Mon, Apr 16, 2007 9:44 PM
Lookin Good . Cheeky |
|
C
CheekyGirl
Posted
posted
on
Tue, Apr 17, 2007 11:07 PM
I need to post a picture of the current "nose". At the last chop chop it took a scary turn. 4WDtiki approached my tiki and said something like, "Ah, you know what that looks like?" I said, "I know, I need help!" In my panic I called Moki and TikiKate and SpamSandwich over to look at the problem. I didn't want to be the girl with the tiki with the "tongaroa" inspired nose, if you know what I mean. After a little pow-wow, Spam Sandwich aka TikiDave made a suggestion which salvaged the nose. Unfortunately, as I continued to work on the nose, I hit another fiberous area, necessitating the taking out of even more material. So long nose short...the nose has taken a kind of "Michael Jackson" quality. I'll post another picture soon. |
|
K

kroozzn62
Posted
posted
on
Wed, Apr 18, 2007 12:12 AM
looking good |
|
QK

Queen Kamehameha
Posted
posted
on
Wed, Apr 18, 2007 5:22 PM
really good.... Amy |
|
B

Bowana
Posted
posted
on
Wed, Apr 18, 2007 8:26 PM
Hey Cheeky G! Glad you got the nose figured out. Looking forward to seeing how it's coming along. Dave (AKA SpamSandwich) |
|
G

GiantRobotTiki
Posted
posted
on
Sat, May 5, 2007 1:11 AM
[ Edited by: GiantRobotTiki 2007-06-04 23:18 ] |
|
C
CheekyGirl
Posted
posted
on
Tue, May 22, 2007 9:14 PM
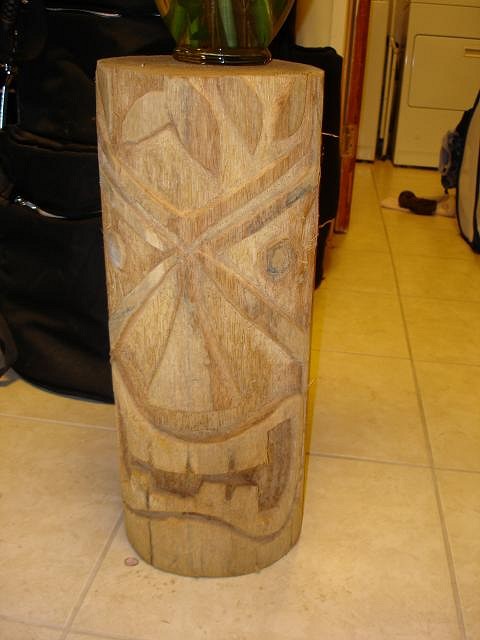
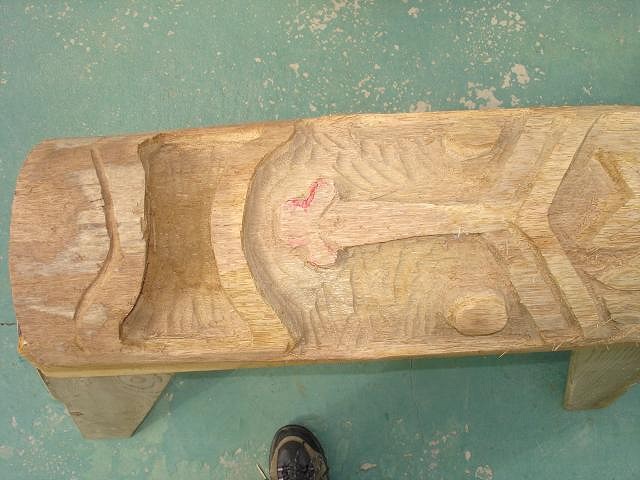
Here's a picture of the tiki before I started chopping this weekend.
|
|
C
CheekyGirl
Posted
posted
on
Tue, May 22, 2007 9:28 PM
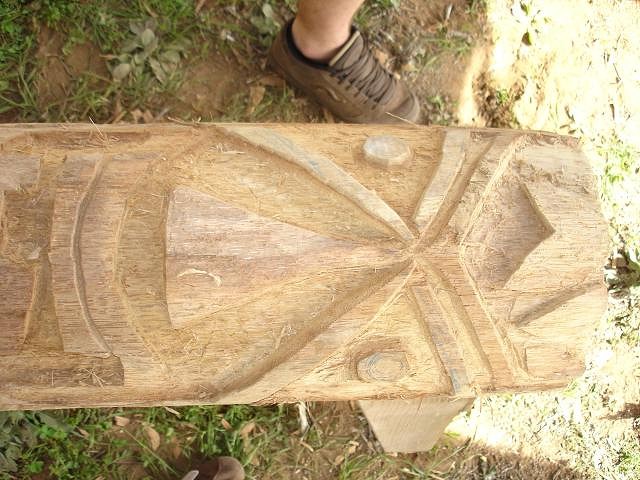
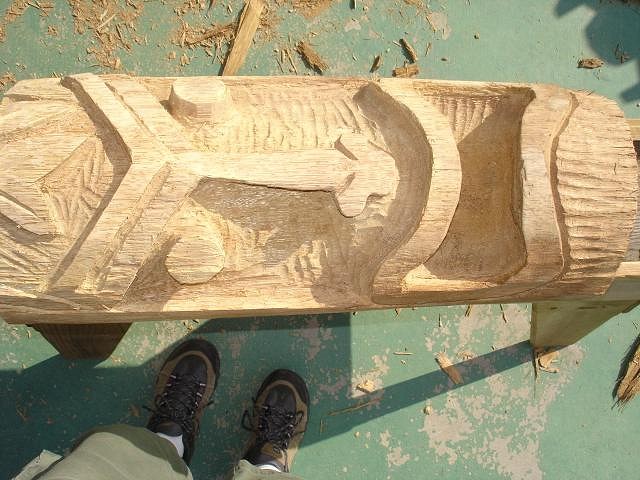
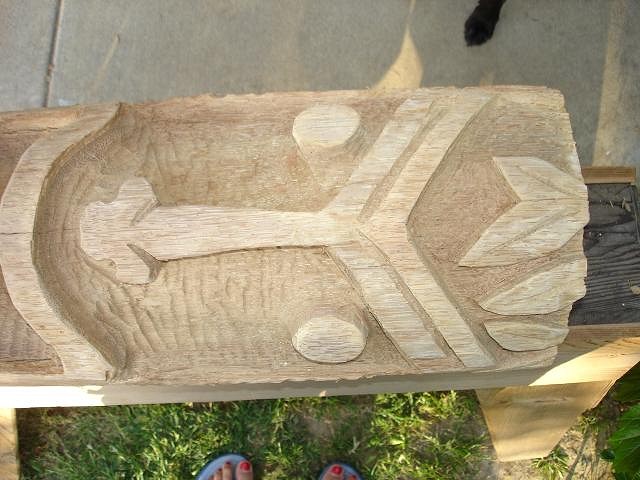
I really had high hopes of finishing my tiki this weekend. It's just about finished. This is what it looked like at the end of the day.
I continued to go deeper around the eye and nose area. The nose looks a lot better, but I liked how the nose looked back in April. I want to complete the texturizing of the tiki. I dig that gouged look. I'm going to continue the leaf pattern around the top and back side of the tiki. Then the plan is to sand and smooth the rough edges. Age it a bit with a mini butane torch. Then Ta-da, I will finally be finished with my 1st tiki! |
|
B
Benzart
Posted
posted
on
Wed, May 23, 2007 5:53 AM
Look at you Go TikiGirl, you are gonna be a tough carver to beat one day soon if you keep up the progress like this. Excellent detail, the mouth and noseare great. The eyes a bit small but fit perfectly. |
|
C
CheekyGirl
Posted
posted
on
Wed, May 23, 2007 10:21 AM
Thanks Ben. I agree with you on the eyes. If you look at the first pattern, it was supposed to have a triangular line on the bottom of the eyes. The eyes wouldn't have looked so small if they stayed framed within the original pattern. The finish, most likely a combination of dark and light, after I age it with the butane burner, I'll sleep on it and see what hits me. |
|
M
McTiki
Posted
posted
on
Wed, May 23, 2007 2:37 PM
Geez! How'd I miss these? I wish my "firsts" were so refined! (Hell, I wish my current ones were too, now that I think about it) Much Mana flowin there girl! It's gonna be a hot summer huh? Mahalo McTiki |
|
BPB
Bay Park Buzzy
Posted
posted
on
Wed, May 23, 2007 9:16 PM
Hey CheekyGirl. You gonna do this right away, or wait until the next chop gathering? Buzzy |
|
QK
Queen Kamehameha
Posted
posted
on
Thu, May 24, 2007 11:53 AM
looking good cheekygirl! Amy |
|
C
CheekyGirl
Posted
posted
on
Thu, May 24, 2007 3:10 PM
Buzz, I think I'm going to try and finish the carving part of the tiki this Memorial Day weekend. I'm going to burn it and wait until the next chop chop for the staining. I want to start a new tiki for the next chop also! |
|
C
CheekyGirl
Posted
posted
on
Wed, May 30, 2007 6:26 PM
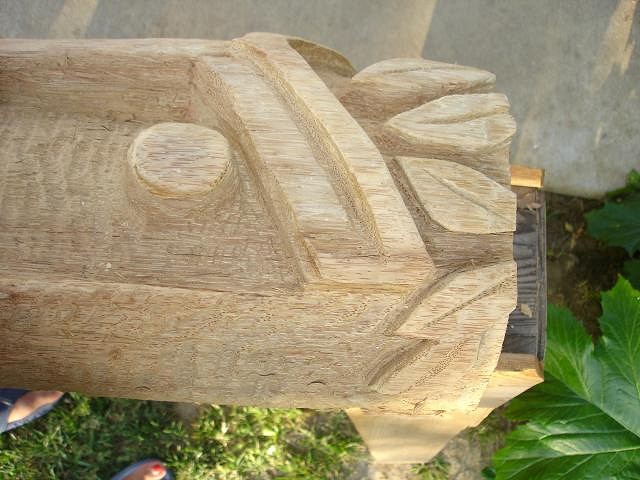
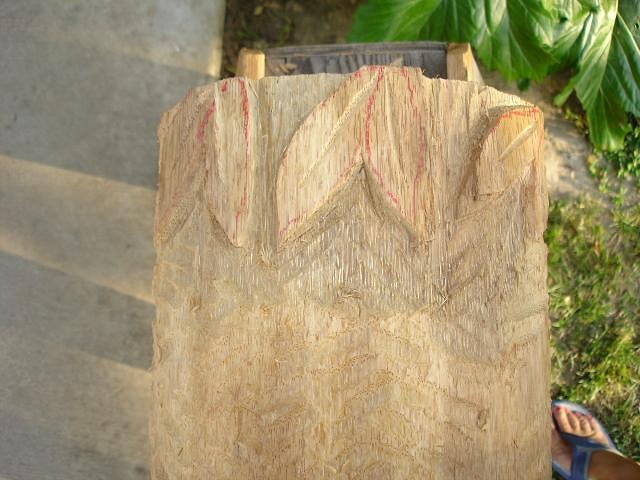
I'm hell bend on finishing up this tiki soon. So this is what I was able to accomplish this Memorial Day Weekend.
I started cleaning up and detailing.
Extended the leaf pattern on the back and around the tiki.
Added texture by continuing the "chisel/gouging" marks.
My latest "To Me From Me With Love" toy is a Black & Decker Mouse Sander. With my new sander, I plan on smoothing out the rough edges around the eyes, mouth and leaf pattern. "LEAF ME ALONE TIKI" |
|
T
Tiki-Kate
Posted
posted
on
Wed, May 30, 2007 8:13 PM
I really do love the way he's turned out. I'll miss the little guy though. I feel like I've watched him grow up. (We won't talk about that unfortunate puberty issue.) :blush: |
|
T
tikigap
Posted
posted
on
Wed, May 30, 2007 9:06 PM
Wow! You've come a long way and it shows! The style is really nice! The leaf pattern is really good. [ Edited by: tikigap 2007-05-30 21:08 ] |
|
C
CheekyGirl
Posted
posted
on
Wed, Jul 25, 2007 10:09 PM
Here's the old guy all burned up!
I'm in the midst of staining him right now! |
|
T

T_birdman
Posted
posted
on
Wed, Jul 25, 2007 10:22 PM
I like the haircut, nice look! |
|
H

hiltiki
Posted
posted
on
Wed, Jul 25, 2007 10:32 PM
Very nice, great job sista! :drink: |
|
T

tikidreams
Posted
posted
on
Wed, Jul 25, 2007 11:09 PM
nice touch with the leaves. |
|
B
Benzart
Posted
posted
on
Thu, Jul 26, 2007 4:39 AM
Definitely looks Great. I Love that you didn't Over burn him. Excellent job. |
|
C
CheekyGirl
Posted
posted
on
Tue, Aug 14, 2007 11:37 PM
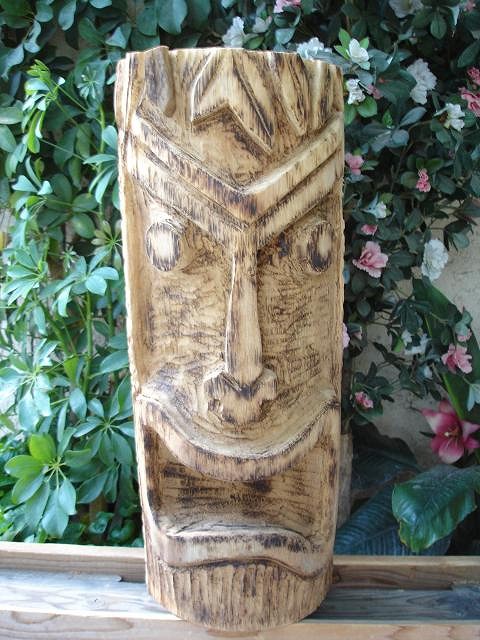
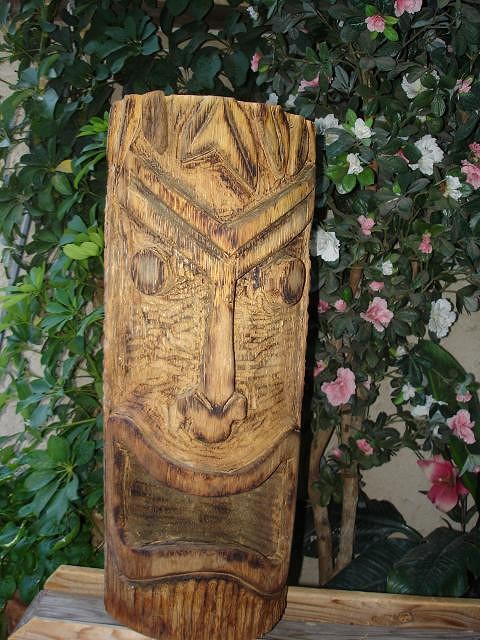
I finally stained and sealed the old guy. My First Tiki is now complete!
Quite different from the initial sketch.
|
|
B
Benzart
Posted
posted
on
Wed, Aug 15, 2007 7:25 AM
Congrats on a Successful #1 Tiki, Excellent job, right down to the finish. Every tiki you do will be better and better so get cranking on #2! Can't wait to see how it will turn out? |
|
KK

kaha kii
Posted
posted
on
Wed, Aug 15, 2007 11:39 AM
great work! Youre off to wikiwiki start so keep going and as Benz said, it will get mo bettah!!! back to work for you! |