Tiki Central / Tiki Carving
mrtikibar takes a class
Pages: 1 11 replies
|
M

mrtikibar
Posted
posted
on
Tue, Jun 8, 2010 9:44 PM
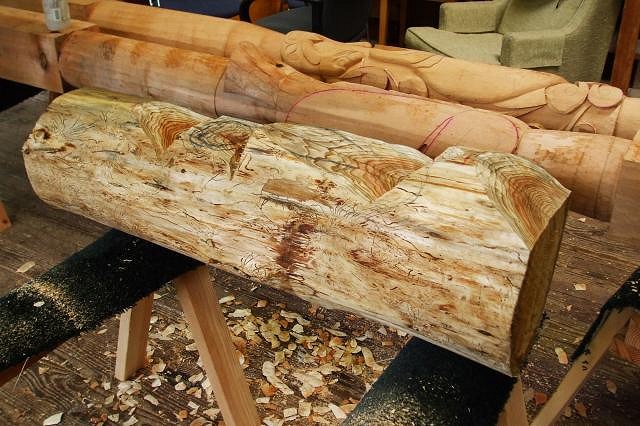
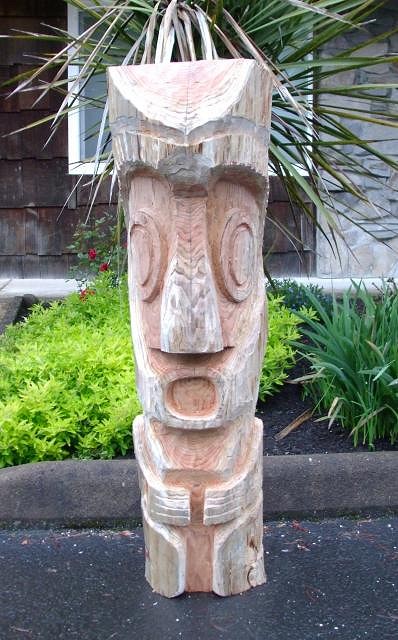
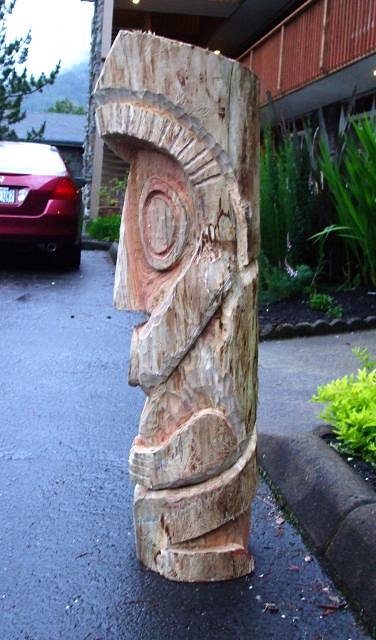
I signed up for an open carving class at a near by studio. Here is my project in progress. [ Edited by: mrtikibar 2010-06-09 20:26 ] |
|
S

swizzle
Posted
posted
on
Tue, Jun 8, 2010 11:07 PM
Good job so far. I like it with the big head personally. You could always screw it to a base to help with the balance. |
|
M
mrtikibar
Posted
posted
on
Wed, Jun 9, 2010 9:02 PM
Back home.
|
|
S

seeksurf
Posted
posted
on
Thu, Jun 10, 2010 6:18 PM
Great looking first tiki or so. Must be all the Mana in that building. |
|
M
mrtikibar
Posted
posted
on
Sat, Jun 12, 2010 8:51 AM
This isn't exactly my first tiki but it is the first one I have carved with a rational plan and some decent tools. |
|
4

4WDtiki
Posted
posted
on
Sat, Jun 12, 2010 10:17 AM
It's not common knowledge to me! I may try that technique, thanks. |
|
P

pjc5150
Posted
posted
on
Mon, Jun 14, 2010 12:54 PM
I make little templates out of cardboard 6-pack containers and such and trace around them, otherwise none of my stuff would be the least bit symmetrical....because my free-hand drawing totally sucks!!! |
|
M

mieko
Posted
posted
on
Fri, Jun 18, 2010 4:52 PM
I haven't used tracing paper either - I've done the little templates, but things still come out crooked cause I'll end up putting one up to high, or rotating the piece. The tracing paper sounds like it would fix that! The wood looks so nice, I'd think about no stain, but some shellac to finish it with. It should add just a bit of a warm glow to it, but not hide the grain. But then again, I've never touched a piece of cedar! :) |
|
B

Benzart
Posted
posted
on
Sun, Jun 20, 2010 8:35 PM
Congrats on taking a carving class and again for finishing the carving. That is the first real step to a long line of carvings. Thanks for sharing, I Know it's hard in the beginning. |
|
M
mrtikibar
Posted
posted
on
Sun, Jun 20, 2010 10:57 PM
Thanks for the encouragement. I have the next section of the same cedar log -- a bit longer and less thick. I will start carving this soon. The Stabilo pencil says paper, glass, plastic and metal on the side so it looks versatile. |
|
P
pjc5150
Posted
posted
on
Tue, Jun 22, 2010 8:34 AM
I wouldn't mind taking one of those carving classes myself. Being completely self taught I still don't know what half of the chisels and wood tools even are or what they do! Where did you take this class? |
|
M
mrtikibar
Posted
posted
on
Tue, Jun 22, 2010 4:10 PM
I took an open woodworking class at The Sitka Center which is about six miles north of Lincoln City, Oregon. http://www.sitkacenter.org/index.html [ Edited by: mrtikibar 2010-06-22 16:13 ] |

Pages: 1 11 replies