Tiki Central / Other Crafts
Concrete Moai
Pages: 1 8 replies
|
L

LoriLovesTiki
Posted
posted
on
Sun, Mar 27, 2016 7:13 PM
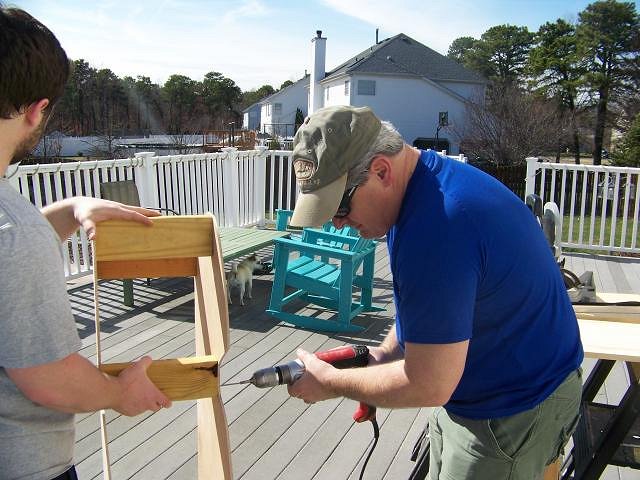
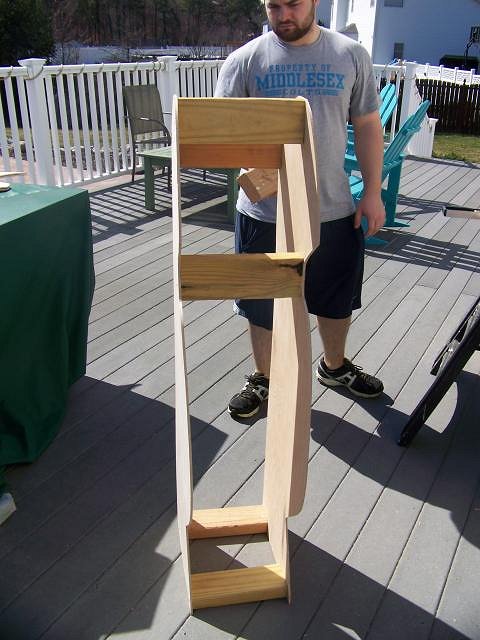
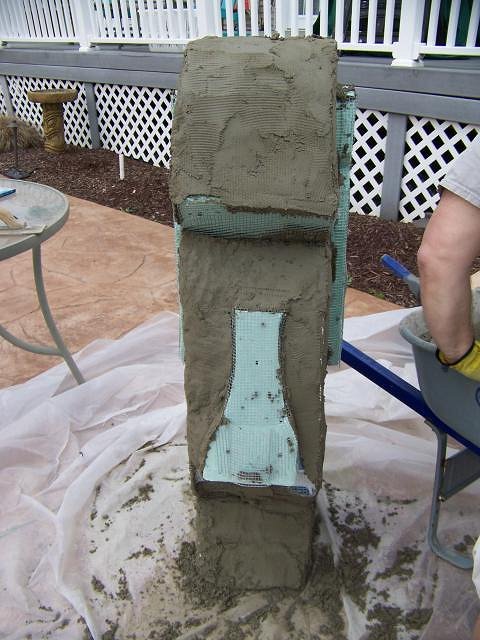
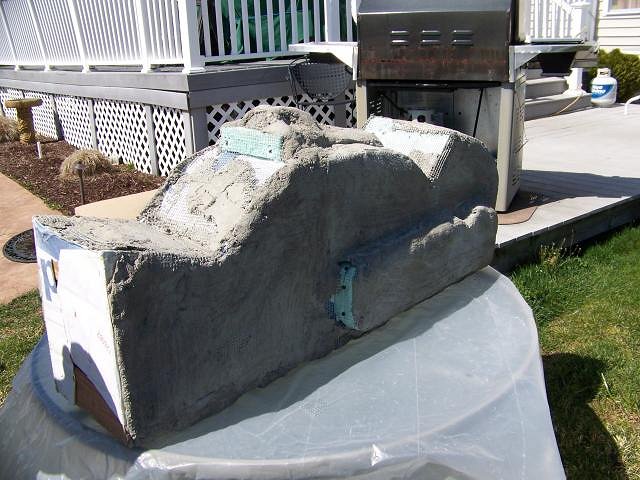
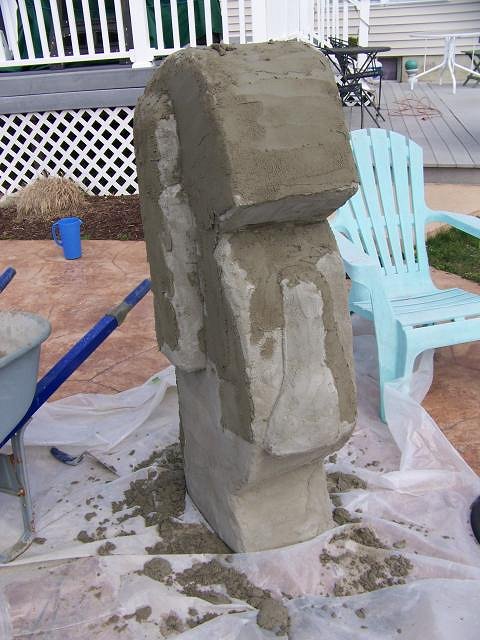
After reading this thread by Wavy Davy http://www.tikicentral.com/viewtopic.php?topic=48404&forum=18&hilite=hypertufa I really, REALLY wanted a hypertufa Moai of my own. I never got around to making one last summer. :( Then a couple of weeks ago my husband Jeff announced his plans to build a Moai statue for the backyard but his only stipulation was that I had to not butt in and let him do it HIS way. (Like I'd ever......lol) I guess he didn't appreciate me emailing him helpful links from TC. Oh well, each to his own. So here's what he did: He drew a Moai profile on a piece of plywood. Then screwed that sheet to another and used a jigsaw to cut them both out exactly the same. Once he decided how wide he wanted the Moai to be he cut 2x4s to length and screwed the in between the plywood sides.
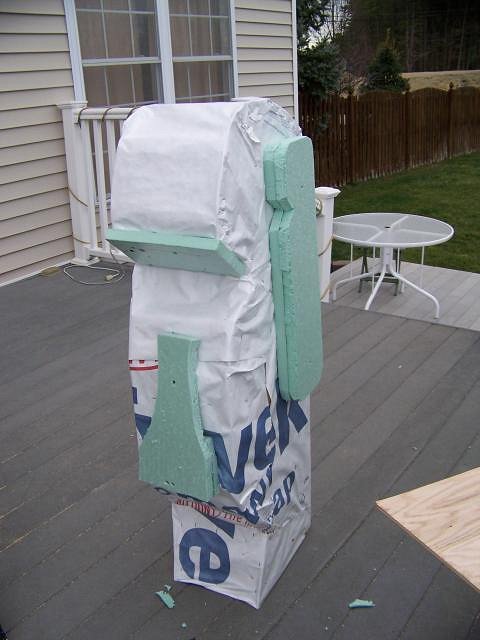
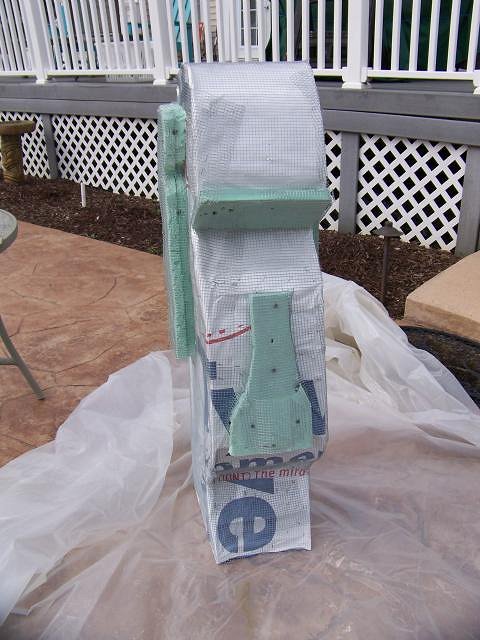
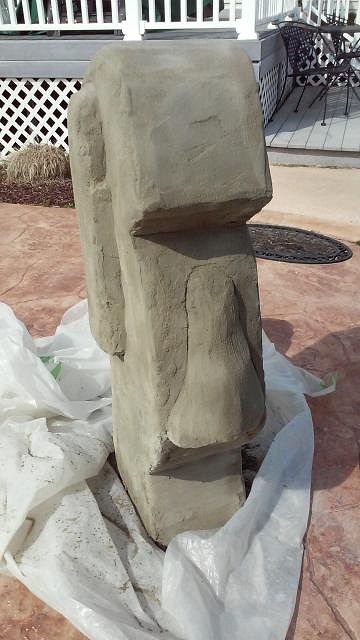
This weekend the concrete began. On Friday he mixed up an 80 lb. bag of concrete and started troweling it on, pushing it into the wire mesh. Today, he added a third coat with the remainder of the 2nd bag of concrete, stood him up and put on some more concrete. He needs something for a mouth but other than that he's almost done. We're thinking once we move him to his permanent location he'll get a mouth, a finish coat, some stain or tinted sealer and this heavy guy. He weights about 180 pounds - 2 80 lb bags of concrete and the frame. Materials cost $50 so he's quite a bargain and I'm already planning another style for a 2nd statue, most likely a tiki. Here's a picture at the end of today's work - Edited to add pictures from my other computer. :) [ Edited by: LoriLovesTiki 2016-03-27 19:51 ] [ Edited by: LoriLovesTiki 2016-03-27 19:53 ] |
|
D

danlovestikis
Posted
posted
on
Sun, Mar 27, 2016 8:16 PM
I always wanted to do one but I was going to use chicken wire. This looks much better. Thank you for the lesson. Wendy |
|
H

hang10tiki
Posted
posted
on
Sun, Mar 27, 2016 10:02 PM
Wow |
|
M

MadDogMike
Posted
posted
on
Mon, Mar 28, 2016 6:24 AM
Nice Lori! Your hubby is quite the handyman |
|
L
LoriLovesTiki
Posted
posted
on
Mon, Mar 28, 2016 3:52 PM
Thanks everyone! And yes, Mike he is very handy! Jeff does good work as evidenced by our backyard. :) |
|
T

TikiAno
Posted
posted
on
Mon, Mar 28, 2016 10:57 PM
Very cool, Lori! Look forward to seeing mo' Moai! |
|
H
hang10tiki
Posted
posted
on
Fri, Apr 1, 2016 7:35 AM
Did you get him all tucked in to his final spot? |
|
L
LoriLovesTiki
Posted
posted
on
Sat, Apr 9, 2016 7:36 PM
Hey Jon, He's in his spot but waiting out the CCCCOOOOOOLLLLLLDDDDD temps here in NJ for his final skim coat! When he gets it I'll post more pics. |
|
H
hang10tiki
Posted
posted
on
Sat, Apr 9, 2016 10:31 PM
:) |
Pages: 1 8 replies