Tiki Central / Tiki Carving / A-A… Some Stuff I'm Working On (16 years later... finally retired and carving again!!)
Post #166983 by Aaron's Akua on Mon, Jun 20, 2005 12:37 PM
|
AA

Aaron's Akua
Posted
posted
on
Mon, Jun 20, 2005 12:37 PM
Rodeo, it's funny - I see the same joggers, frisbee players, park workers, etc. all the time. Some stop by to chat once in a while & check progress on whatever tiki I'm working on. No crowds though - if anything I'll be running them off with my power tools now. You come to the park for a little peace & quiet, and hey... what the hell is this guy doing!!! Thanatos, It's hard to gauge. I started this post on 4/20. I haven't had much weekend carving time, and even during the week sometimes I'm out at meetings & whatnot so I can't carve then. I'm guessing maybe 20, 25 hours? It's not the most efficient use of time - setting up, carving, and breaking down all in about 40 minutes of so. Mahalo, Ben and Will. This tiki is taking way longer than I expected. But like Ben says, sometimes the tiki just doesn't want to be done yet. Swanky, I used a ½” or ¾” flat carpenter’s chisel to cut the grooves. I followed the line on either side cutting at an angle down toward the center of the “V”. I think the more experienced carvers would use a "V" chisel and go left to right, but I have only a 90 degree "V", which is no bueno for that. Ben mentioned a 70 degree V, which I think would work well for that method. I've got lots to learn on chisel technique. That's why I was so bummed to miss out on the recent carving party at Alnshely's.
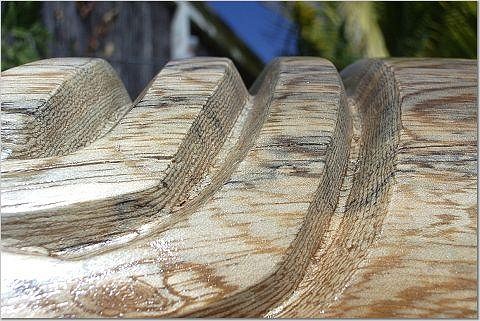
After the rough chisels cuts were done, I used a pointed burr with the die grinder to clean up the cuts and the bottom of the “V”.
Then I sanded the inside of the grooves with 60 grit using these rubber wedge things. Best 3 or 4 bucks I’ve ever spent. I sanded all the grooves using 60, 100, then 150 grit. Between each grit, I used a random orbital sander to do the top, bottom, and sides of the tiki.
Thank you Pariartspaul, Sam and Conga. Soon to be completed. Don't know what it's going to look like, I'm experimenting a bit with paint, which is a new medium for me. +++++++++++++++++++++++++++++++++++++++++++++++++++++++++++++++++++++++++++ Here’s what I got done this weekend. I checked with Will on whether this would be an inside or outside tiki. Since it will be an inside tiki, I decided to use another finishing method. Spar varnish took me 48 hours between coats to get it dry enough for sanding with 220 grit. This spray lacquer takes only 30 minutes to dry. And the drips just disappear somehow. So I was able to get this guy all lacquered and ready for painting in about half a day. So much easier! The brushed on spar varnish method would take me about 10 days total to get this far.
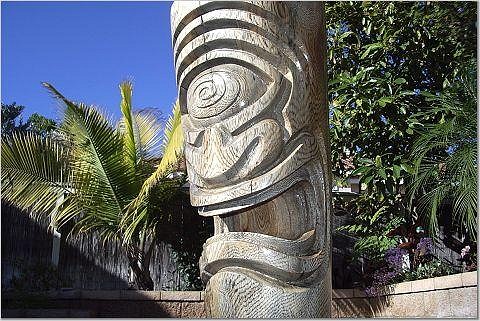
Here it is all sprayed up. I didn’t use any stain, because I didn’t want to hide the beautiful spaulted grain. It was almost worth all the cracking. This was the same log as my other Leroy tiki, which also cracked like a sumbeach.
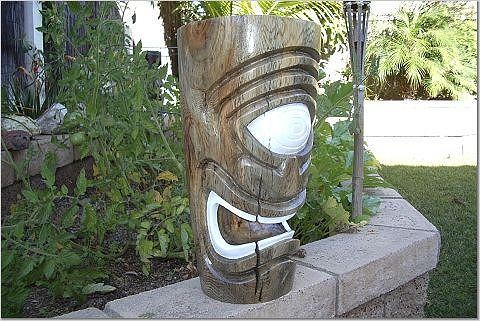
Next came some paint for the eye and teeth. I used some acrylic gloss paint and artist’s brushes. This was not easy. I’ve never painted a tiki before, and trying to get a clean line on the edges was tough. This has given me a real respect for Sam and the other painters who do this stuff all the time.
Here’s Hypno after a few coats of paint. I need to add a few more coats of the white, then clean up the edges with an exacto knife. After that, I’ll paint the crazy eyeball swirl “v” cut and the goatee with some bright red.
Once it all looks right, I’ll hit it with a few more coats of gloss and post the results. Thanks for the "EYEBALLIN'"!!! A-A
[ Edited by: Aaron's Akua 2006-10-31 13:07 ] |


