Tiki Central / Other Crafts / Shake Yer Booty update Jan. 22 Materials: Where to get 'em!
Post #273014 by Bowana on Sat, Dec 16, 2006 2:56 PM
|
B

Bowana
Posted
posted
on
Sat, Dec 16, 2006 2:56 PM
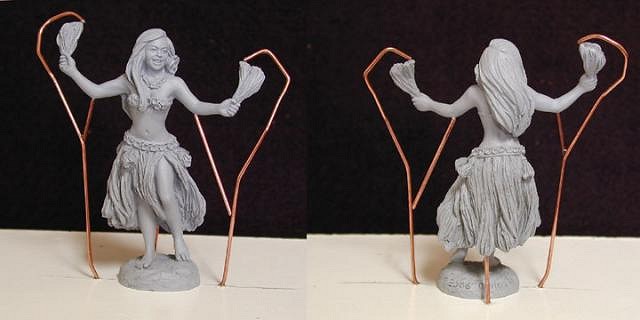
Here is the master casting of the figure primered and prepped for final mold making. The venting was done in a different manner this time. Wire was cut, shaped and put in place with Super Glue to represent the vents. Using this method as opposed to cutting vents into the silicone is far more tedious (I Superglued the vents to my fingers plenty of times before I got them to stick where I really wanted them), but is much more accurate. Another advantage is that the wires also serve as guides when cutting the mold open. Always make sure that vents as well as the figure are secured down to the board or else they could float off somewhere after the silicone is poured!
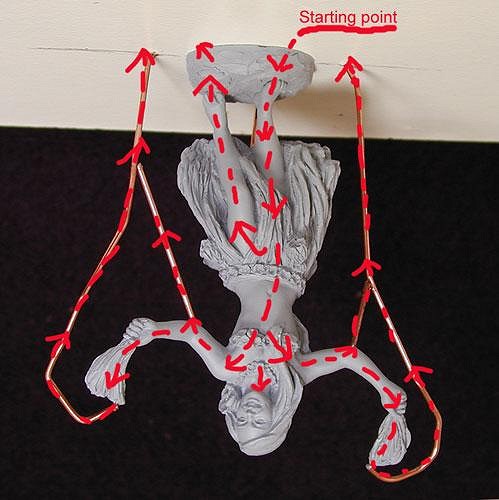
In this picture I've illustrated the path in which the resin will flow while pushing out the air inside the mold.
I put it upside down to better show the position of the mold when in the pouring stage. The resin is introduced into the right foot area of the mold where it will flow directly to the head, arms, hands and out the vents on pom poms and elbows. The elbows are a high spot that could trap air, and the ends of the pom-poms leave nowhere for the air to escape if not vented. The left leg also acts as a vent, so care must be taken to not pour resin down both leg cavities at once.
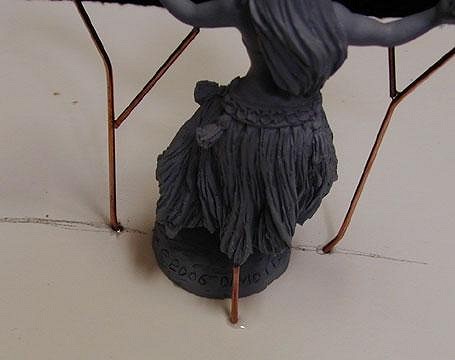
This vent on the back of the skirt was necessary to let air out also. Since this one is off the separation line (see pencil mark on board) a separate lateral cut must be made to free it from the mold. The pencil mark on the board serves as a guide when cutting open the mold as it transfers to the silicone after it has set. It's very easy to get lost when cutting open molds so anything that can be done ahead of time to make it easier is a good idea. More pictures later as the process progresses......... |