Tiki Central / Tiki Carving / Paipo's Stone Tikis - 1st Thread - Jun 06 - May 08
Post #370628 by Paipo on Tue, Apr 1, 2008 2:44 AM
|
P
Paipo
Posted
posted
on
Tue, Apr 1, 2008 2:44 AM
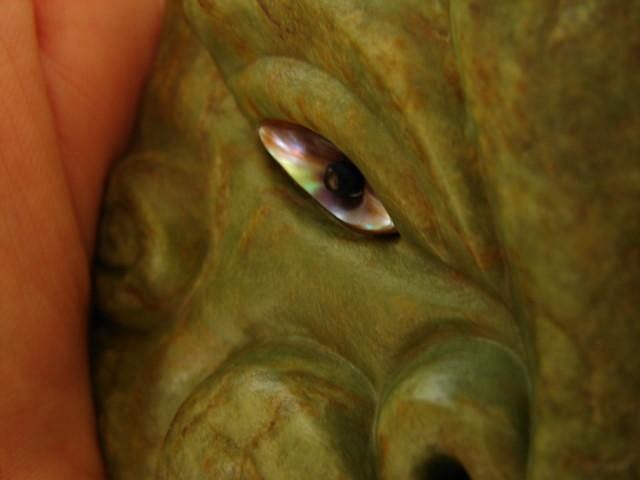
Whoa...lots of interest on this guy! I better get busy... Cheers Kinny, Jonesey, timid, Robin, JP, BenZ, harro, Babs, Polynesiac, keigs, Benjamin, hank and seeksurf...I really appreciate the feedback! I guess the eye worked out OK then? :wink: I spend a lot of time on doing the eyes on my carvings - they really are the finishing touch in terms of creating the right feel. I wanted this fella to be mischievous, but not too evil. The idea was to scale down the technique used on big carvings where a whole paua shell is set into the socket, with a raised peg in the middle to secure it and create the pupil. The concave shape really grabs the light and gives it life - so it's not really my idea, but another concept borrowed from the master artists of old. Question time:
Well, it's just a matter of improvising with what's at hand. Each time I go through a process I usually find a new and better way of doing it.
Yep - the silver leaves a smaller dot, so it looks very similar, but because it's shinier than the mop (and metallic) I decided to disguise it and keep the look more organic. I also obsessively put threes into my work, so I liked the balance the 3 MOP elements create.
It's a good question! It did hold it reasonably well as the hole was tapered to match the peg, but stone being what it is, I still put a dab of epoxy into the hole and around the edges where the low points of the shell sat in the socket. I 'm trying to move away from gluing at all wherever possible, but teeth are one thing that seem to always require epoxy. I figured out after I'd finished that I could've made a little ebony peg that would probably work without any glue.
At your service!
:down:You can see here where the piece came out of the bottom lip, but it created a great transtion from worked -> rough stone :down:This angle shows how the entire form was suggested by the top of the stone. All the work up here is already done!
OK, that will do for now - I'm off to make something really shitty so I don't have to type so much.... |


