Tiki Central / Other Crafts / Making a puffer fish lamp
Post #391834 by TikiTres on Sat, Jul 5, 2008 5:58 PM
|
T

TikiTres
Posted
posted
on
Sat, Jul 5, 2008 5:58 PM
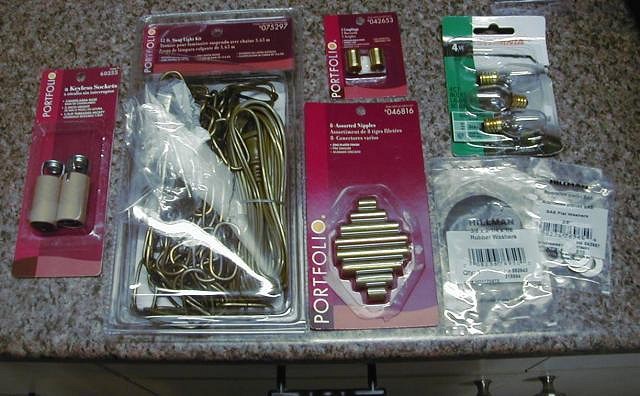
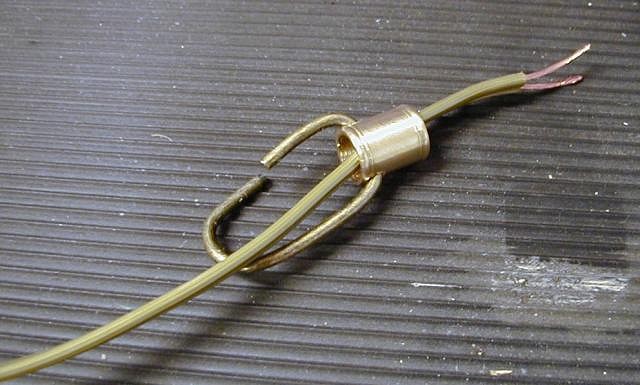
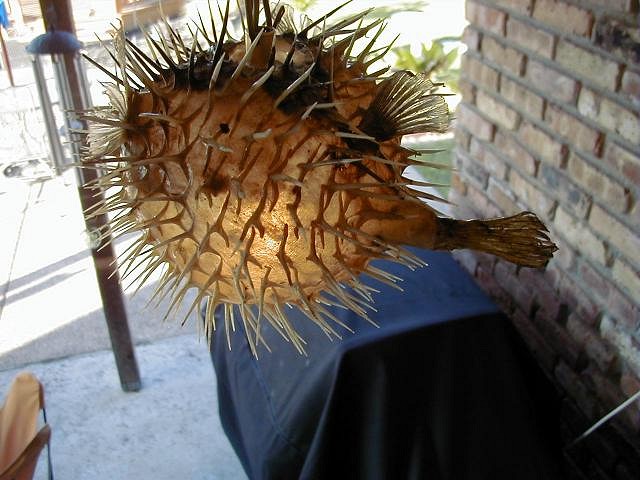
Well I've had one sitting here waiting for conversion for a while and had some spare time today, so what the heck :) Here's what I did, maybe you can adapt it for use with the swag kit you have... I bought the following parts to do the conversion (all from Lowe's): Candelabra base "keyless socket" The above parts were all in the ceiling fans area. The below parts are from hardware: 3/8" flat washer Here's a pic of the parts: This is the trickiest part, I took one of the couplings and clamped in my vise, then drilled a hole through it to accept a swag link: The parts get assembled in the following order-
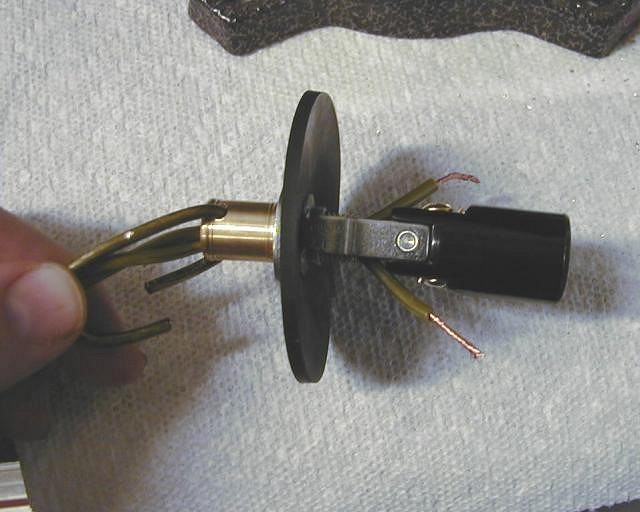
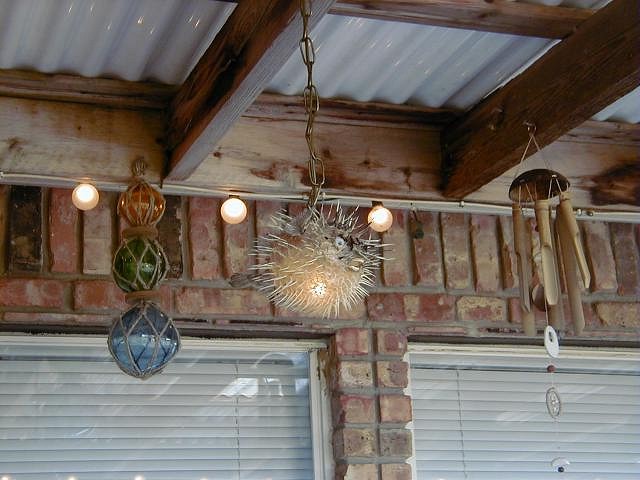
Here's a pic before the wires were lugged and the cardboard tube reinstalled: I didn't take pictures of the next steps because they wouldn't show much, but next up was to cut a hole in top of the fishy. After reading the hurl-inducing descriptions of dead-fish-breath I donned a respirator and saftey glasses and cut a 1-1/4" x 1-1/4" square hole using a diamond wheel (Which is what was in my moto tool). Good grief these things have a lot of cotton stuffed in them! I filled up one of those small plastic grocery bags full with the cotton, it was like 4 times the volume of the fish once removed. Crazy. I used a plastic fork to get it out using the previously mentioned cotton-candy-swirl technique. The last step is to flex the rubber washer so that it can be pushed through the hole in top of the fish. Then he can be hung in his new home: You can see in this photo that the washer isn't a tight seal against the fish, that's not desireable as it won't vent unless there's some space at the top. The mouth on mine is open (not sure if it is on all of them) so air enters through the mouth and rises out through the top hole to keep the interior cool: Hope that helps! There's no doubt many other ways to do this, but hopefully this will give you some ideas. By the way, I was at Home Depot today and noticed they have a candelabra base 4 watt LED light now. It's the same candle-shape as an incandescent, but inside instead of a filament it has 3 LEDs. That would be perfect for anyone concerned about heat build-up. |