Tiki Central / Tiki Carving / My first pieces . . . and pekapeka updates
Post #406822 by Tamapoutini on Tue, Sep 9, 2008 4:29 AM
|
T
Tamapoutini
Posted
posted
on
Tue, Sep 9, 2008 4:29 AM
Sorry for the delay Merran - I took these pics several days ago but have only just found time to post them! On 2008-09-02 03:15, Paipo wrote:
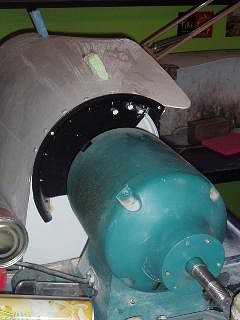
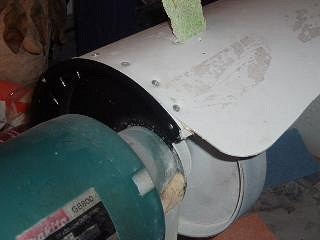
Heres a few shots of my water shield illustrating the method Paipo describes above. The first shows approximately how much needs cutting off the original spark-guard in order to minimise waterspray but also allow vision. As well as reshaping Ive also flipped mine backwards to flare away from the wheel (instead of enclosing it in two halves as they originally come) to allow that little extra room to work with when attaching the new plastic shield:
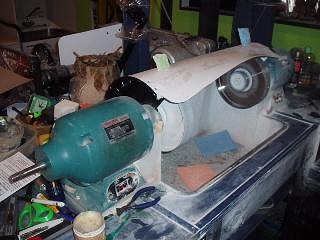
This shot shows how the flipped and chopped guard is now used to secure the plastic shield which reaches between two grinding machines and over the entire sink: I lined two identical machines up either side of the sink and attached the sheild the same way to each machine: Hope this helps. -- quoting myself:
I found the things I was talking about. A bit larger than I remember & most likely too big for your 21st key project, but I can see a smaller set of these being great fun for sculptural work. I did experiment with using these for limestone carving a few years ago, held in an ordinary electric drill. The shape of the drill and sideways rotation didnt really do it for me but if a grunty enough handpiece could be found.. Keep up the good work! |


