Tiki Central / Other Crafts / Fugu Lamp - Step by Step
Post #427216 by Chip and Andy on Mon, Jan 5, 2009 4:39 AM
|
CAA

Chip and Andy
Posted
posted
on
Mon, Jan 5, 2009 4:39 AM
OK, what is the one lamp that everybody wants for their bar? Fugu! A Blowfish Lamp. OK, where to start......
A Fugu, some key-less sockets, some lamp cord, and some night-light bulbs. You will also need some wire-cutters, scissors and exacto or razor blade. Some jewelers-wire or similar fine gauge wire will help. OK, first thing to know about working with a dried blowfish....
The spines are sharp. They may not seem it when you first pick it up, but you are going to be handling this guys extensively during the process of making a lamp. Lots of pushing and holding, it takes its toll on yor hands and on the spines of the fish. Gardening gloves are very helpful, or a pot-holder, a heavy cloth works if you haven't anything else. The second thing to know about working with a dried blowfish....
Get one that is big enough to work with. You are going to be shoving an electrical fixture with a small light bulb into the guy, it can't be too small. Also, get one that is lighter colored in the belly, it makes for a better quality light when done.
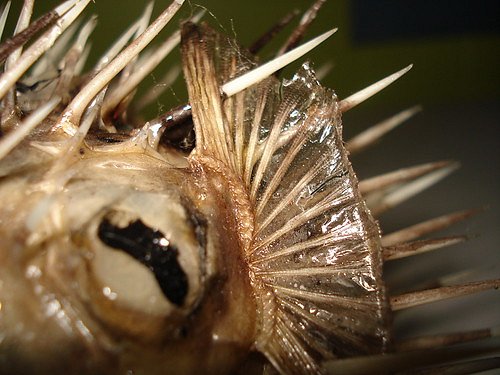
And, please, remove the googly-eyes. They are there for the tourists and children. Now, to business. Lets make a lamp!
First, on the top of your fish there will be a seam. This is where we are going to start.
Grab your socket and lightbulb to see how big a hole you are going to need to make.
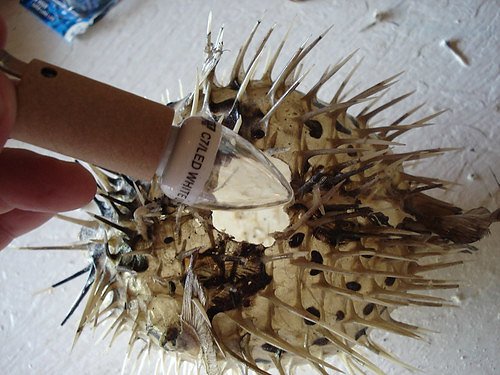
A sharp exacto or razor blade and lots of patience. Remember the gloves I mentioned, now is a good time to get them. Start slowly, do not rush it. The skin is thick enough to make it difficult, but not so thick you can be careless. I am going to use my new Dremel tool. Because I can. If you want to use your power-tools, you WILL need a dust mask. This is fish-skin you are cutting through, it is going to smell and make a kind of dust that will stick in your nose for far longer that you are going to be willing to smell fugu-dust.
Your final opening should be just large enough to fit the light into, not much more. Go slowly, you can cut the opening bigger if needed, but you can't glue it back if you go too far. OK, now the light.
I like the finished lamp cord because it already has the plug installed. You can find it in your local home supply, if you find a swag-lamp kit you can get really long cords.
Take the cord and push through the bottom opening of the socket. You need Key-Less sockets, they are the easiest to work with. And, make sure you get the candelabra set, that is the one with the smaller base for the night lights.
Tie a simple knot in the wires. This is called an Underwriters knot and will keep any stress on the wires from pulling the connections loose. For something this small and light it isn't really necessary, but it is still a good idea.
Wrap the wires clockwise around the screws on the socket. Wrap clockwise so when you tighten the screws it pulls the connection tighter.
Slide the sleeve back over the connections. Electrics are done. Now, a word about bulbs......
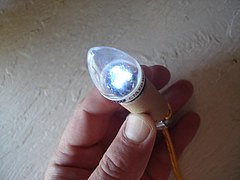
There are these really cool LED bulbs available now and logic would dictate that they are a good choice for a project of this nature. They are very cool operating, very low power, should be great.... Sorry, No. No good for a project of this nature. They are LED bulbs and the light is very blue and very directional.
They make your Fugu look like something out of Star-Trek and not like something you would find at your local Trader Vic's.
What you need is a standard 7 watt night-light bulbs. Frosted white is best, but the clear is good too. The light value is near perfect inside the Fugu, and at only 7 watts it will be cool enough that temperature is not an issue..
Remember the fine-gauge wire I mentioned. Go get it. You need to take a length about three times the width of your opening. I find it easiest to heat one end of the wire and poke it through just outside of the opening. Repeat on the other side. The wire should not be tight, you should be able to push it aside just enough to get the light through the opening. The Fugu will 'hang' on this bit of wire, it will wedge the light inside so it can't come back out of the opening. You can do the same thing with a bit of string, may I recommend you use dental floss, it will last a bit longer and the waxed kind is a bit easier to handle. Remember, the Fugu is only a couple of ounces so you don't need much to hold it together.
Now, you should have a spiffy new Fugu Lamp to hang in your bar or lounge. More pictures here Enjoy! If you make one, please share your pictures and any tips-and-tricks you have. |