Tiki Central / Tiki Carving / A-A… Some Stuff I'm Working On (16 years later... finally retired and carving again!!)
Post #473747 by Aaron's Akua on Sun, Aug 2, 2009 10:57 AM
|
AA

Aaron's Akua
Posted
posted
on
Sun, Aug 2, 2009 10:57 AM
Mahalo - Surfin', Watango, & Benz! :D TBT & laojia: All good points! I love discussing this kind of thing and getting everyone's ideas & opinions. I guess my own personal philosophy is that it doesn't matter how you get there - what matters is how the carving comes out when you're done. Everyone has a different approach that works best for them. I know a few guys around here use Adobe Illustrator to figure out their designs before they start carving. Some others use pencil and paper. I think Ben does it all in his head, which blows my mind. Whatever the method, the important thing is knowing what you want it to look like before you start carving. I'm pretty sure I'm the only one who uses CAD around here. It's my tool of choice because I've been using different versions of it at work for the past 20 years or so. These days, the architecture and engineering industry is moving towards Revit, which is a fully 3D building modeling program, and super complicated. For tikis I just stick with straight old 2D CAD. All you really need is lines, circles, and arcs. Any generic CAD shareware program will do these basics. Back when I first started carving, I really spent a lot of time trying to get everything exact.
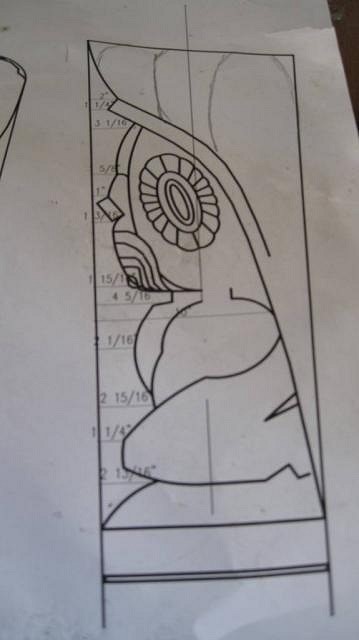
The carving came out pretty good, but the method was way too complicated! So, like everyone, my method is evolving as I go. I still use CAD because for me it's 10 times easier than trying to sketch by hand. Easy is good! What I'm doing different is this - I do it quick and I don't plot out full size templates anymore. The CAD drawing is just a map to figure out where I'm headed. Once the design is drawn up at any scale, I can turn all of the lines and arcs into a single entity and scale the whole thing to fit the proportions of my log. At that point it's in real life dimensions in the computer. Then I just throw some dimensions on it at the obvious cut points. The big difference is that I spend a lot less time trying to get things perfect in the computer. This was done on my lunch break one day:
From there I just transfer cut marks & stuff by hand using tape measure, sharpie & straight edge. The CAD drawing gives me the measurements that I'm trying to stick with to keep everything proportional. I try to keep centerlines on the log, marking it back up after cuts. Usually I'll draw one half on the log, then use some tracing paper to copy it. Then I cut it out, flip it, and draw the shape out on the other side. Cardboard templates are good if you plan on making several pieces from the same design, but this on-the-fly method works well for one-off's.
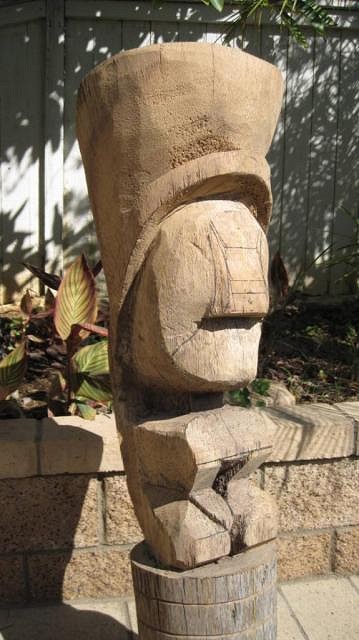
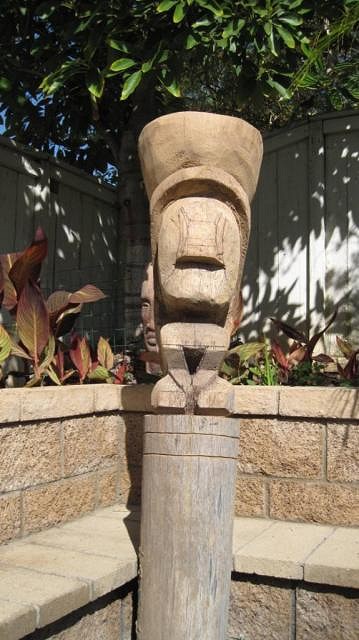
+++++++++++++++++++++++++++++++++++++++++++++++++++++++++++++++++++++++++++++++++++ Okay, this log is really starting to give me trouble. Turns out the core is rotten, and with this deep design, I'm starting to cut right into it. The middle looks and feels like grey styrofoam. Here's the neck...
I had to break out my secret weapon, the "BK Duckbill Chisel", just to keep the cuts sharp where I plunged down into the chest. It's really starting to get stringy on me.
The BK chisel is ground down to about 1/16" thick, and the sides are sharpened as well. This allows you to plunge deep into the wood without getting the chisel stuck. Not that that would be a problem with this soft stringy part.
I really wanted to copy the Tahitian, but it looks like I'll need to change the design a bit to deal with the wood. If I taper these arms back into the shoulders, it's gonna fall apart on me. And if I don't, it's not gonna look right.
Thinking.... :-? |


