Tiki Central / Tiki Carving / new tikiville light fixture therapy ! pg 6
Post #502683 by Bay Park Buzzy on Wed, Jan 6, 2010 6:25 PM
|
BPB

Bay Park Buzzy
Posted
posted
on
Wed, Jan 6, 2010 6:25 PM
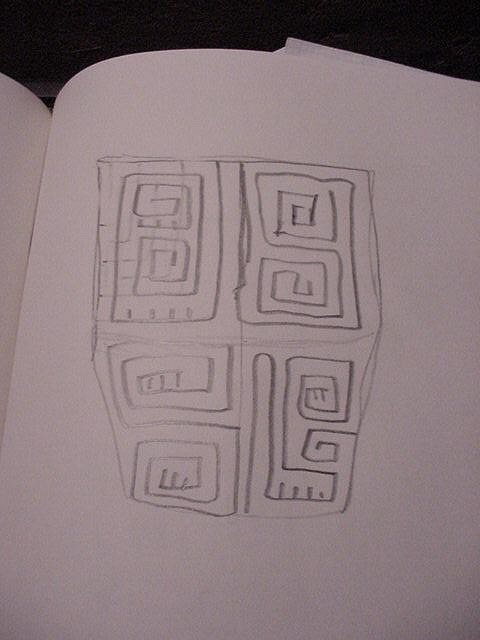
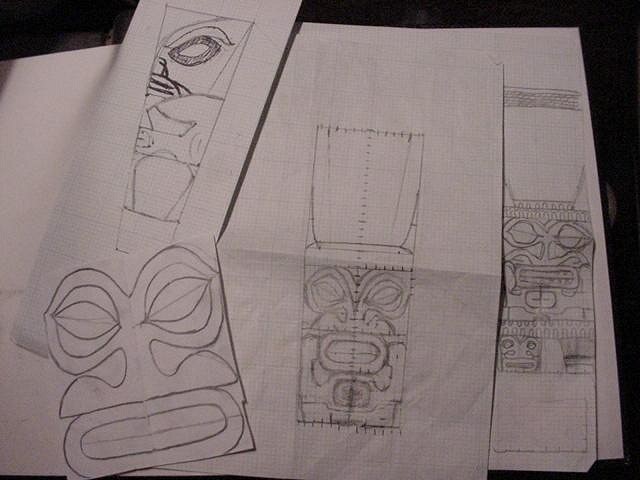
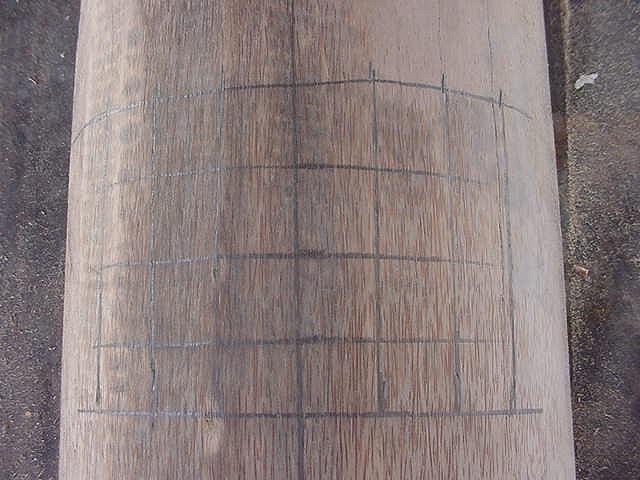
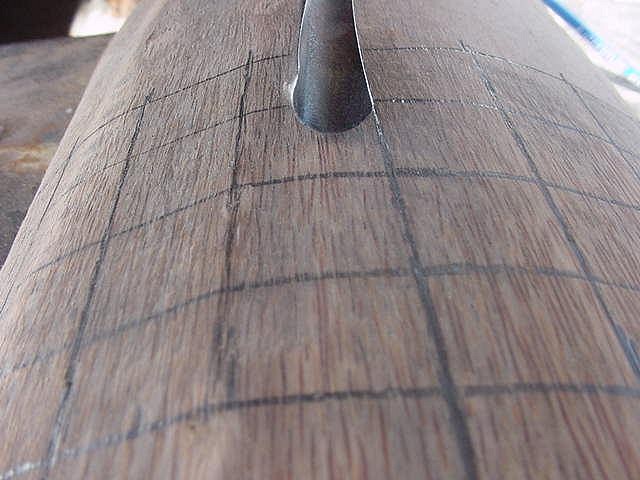
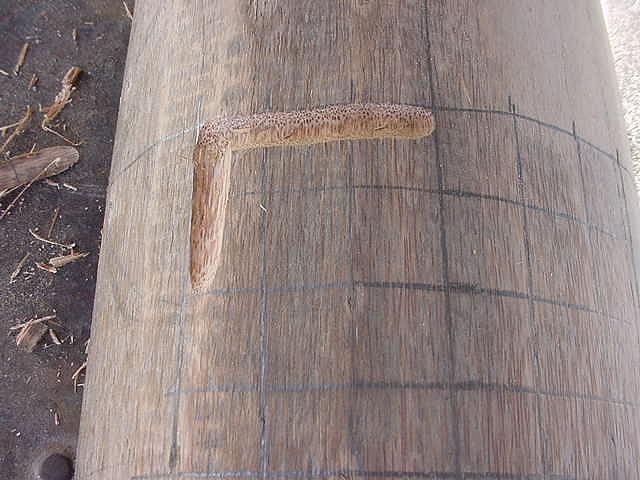
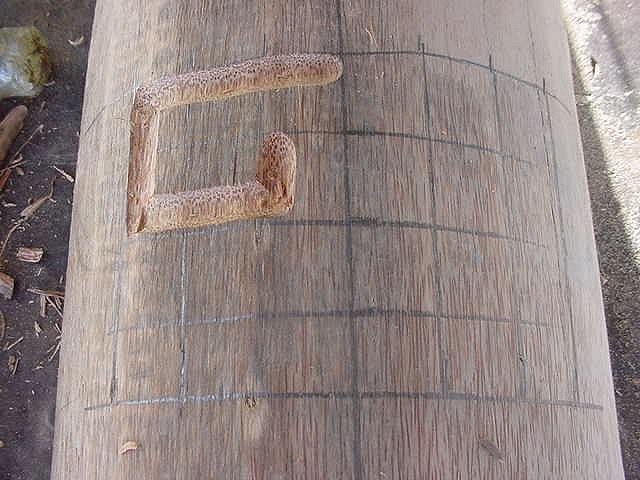
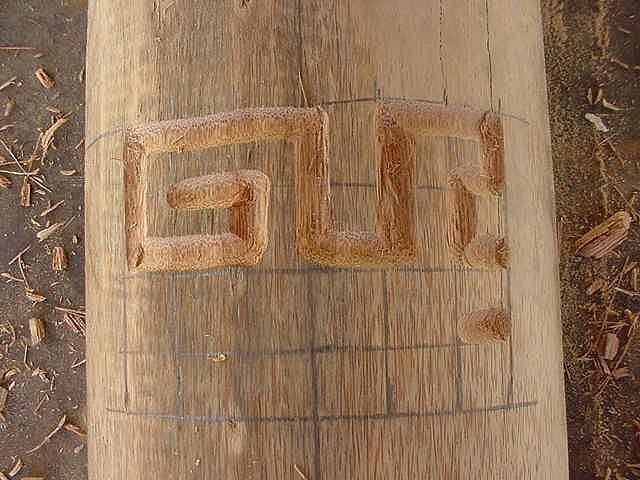
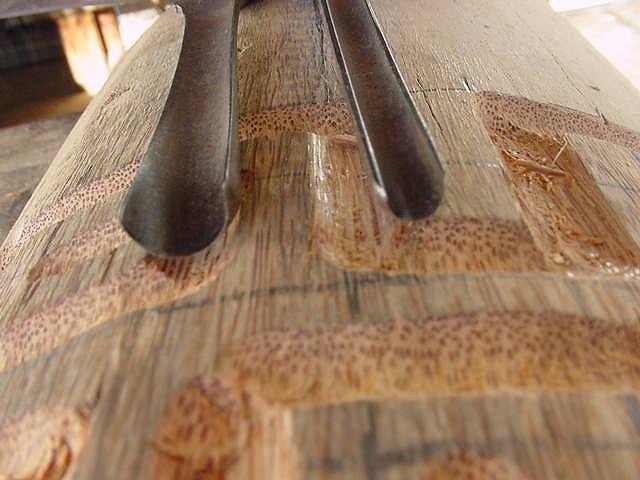
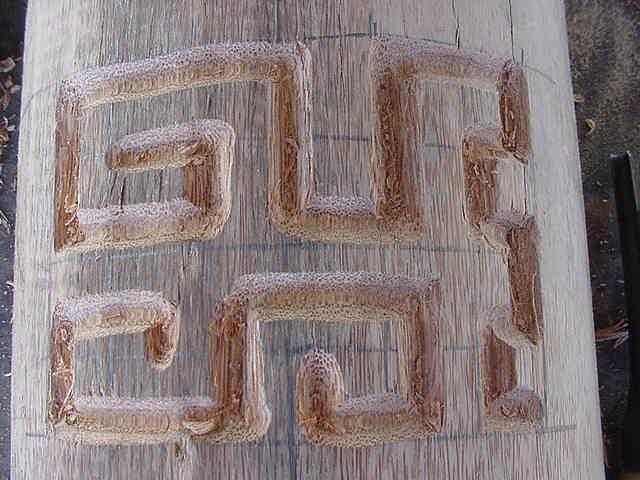
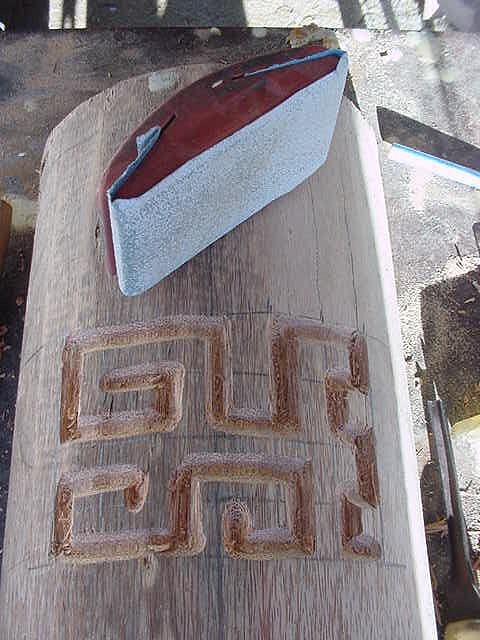
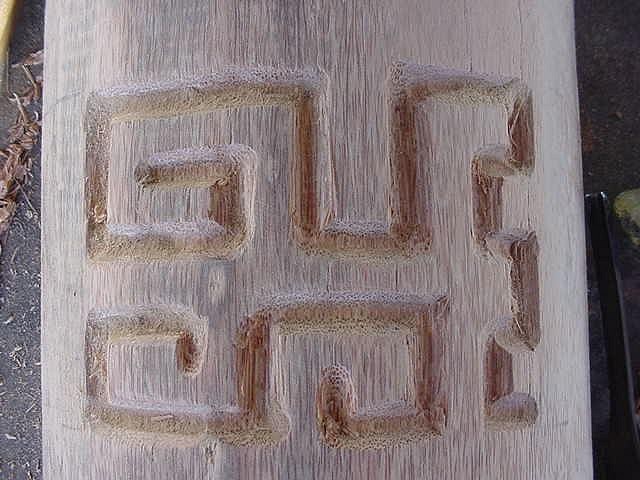
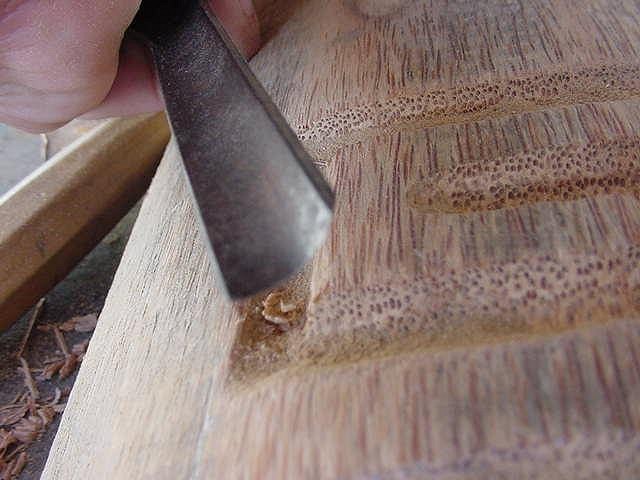
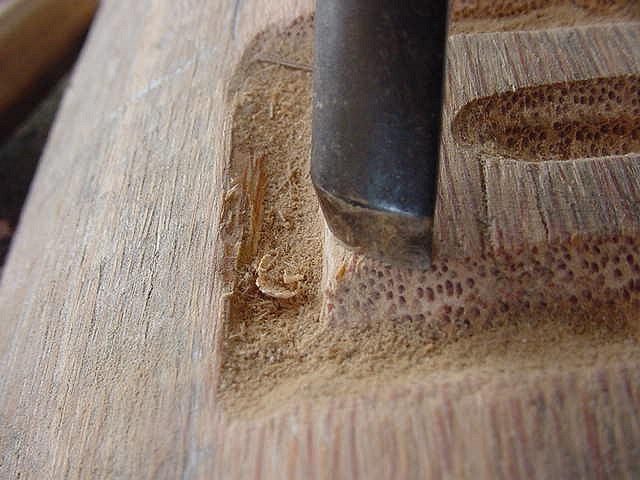
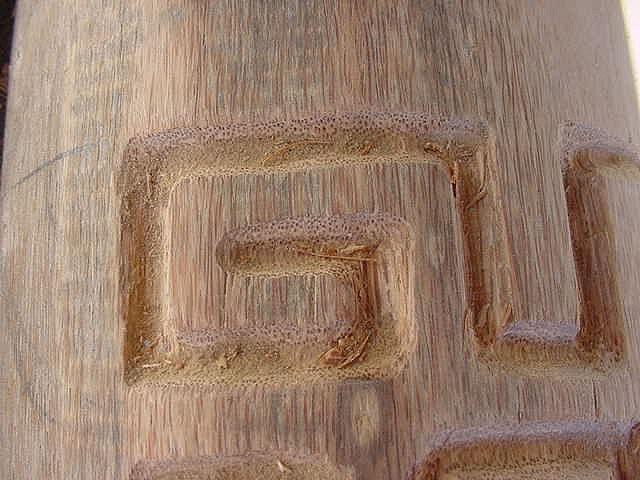
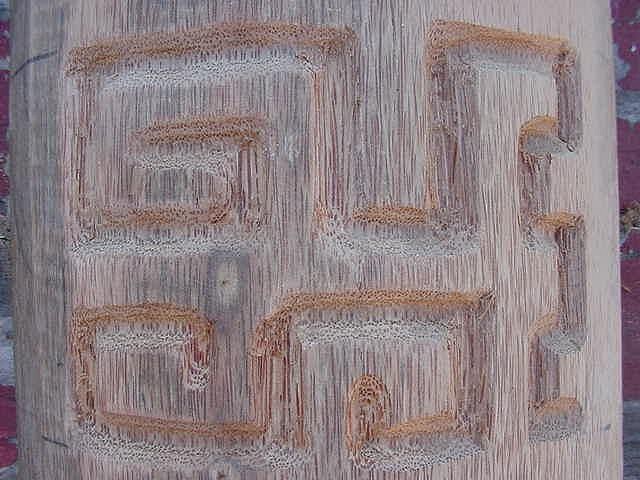
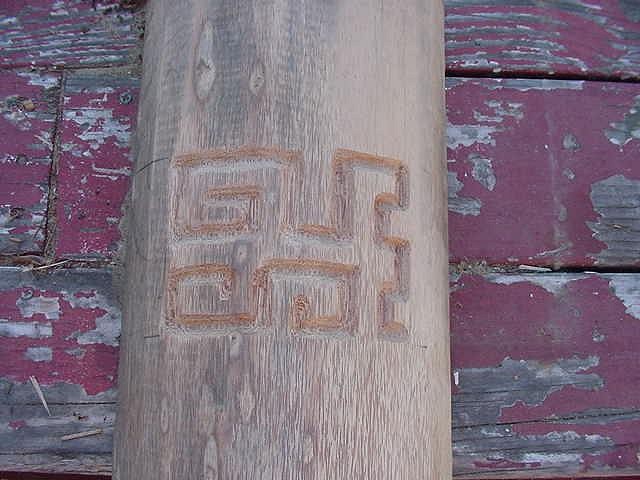
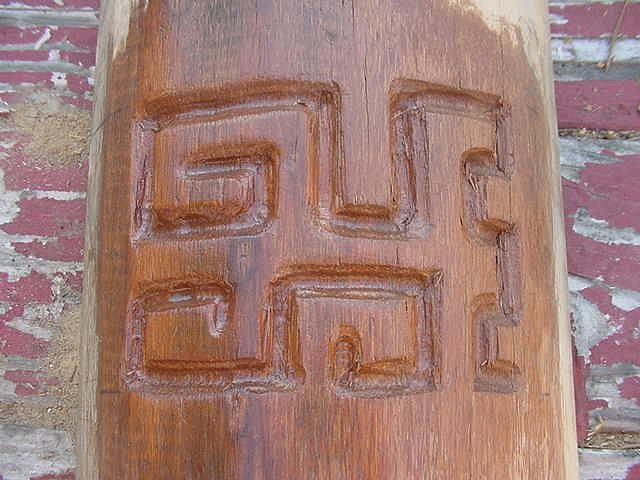
Hey Tikiville: Here's my step by step process for decorating up the drums. Hope you don't mind all this visual clutter on your thread. If you want me to take it off after you check it out, just let me know. First I just kind of get a general rough plan sketched out. Nothing too complicated, just enough for me to have an idea where I'm going before I start This one tries to suggest a hidden tiki face in the design. Not super apparent, just a subtle hint of an abstract tiki. The goal was to make it hidden until it's pointed out, then my hope is that it will be obvious: for the bigger drums, I do scale drawings down to the half inch of them before I start. the Tikiyaki drum is in the middle. On the left in this photo are a couple stencils I used for the legs of other drums: After all the paperwork is done, I do the carving part. I start with a grid of 1" squares over the surface I carve: The reason I do them in 1" squares is because I do the carving with a 1/2" veiner, as shown in the following picture. I'll call the space I carve the "positive space" and the uncarved "negative space" for this explanation. I want the + space to be as wide as the - space. The grid helps me keep those ratios consistent. Here I start carving out the design(this is just a quick one I did on some scrap wood for this educational endeavor) A little more progress: Once I do the whole design with the 1/2" veiner, I take my 1/4" one and make them deeper. I do this because the 1/2 tends to rip out the - space on the palm wood when I try to go deep with it. It's hard for palm to hold detail on the horizontal cuts without breaking off, so I find it's less frustarting to use the two tools to do this. Here's the little veiner next to the first one I used: Here it is after going over it a second time with the smaller tool: for this step I use a hand sanding block: Here's the surface cleaned and most of the edges softened Next, I round out the corners with a small rounded gouge: I just do his by hand like this: See how they are now round in shape? this helps to reduce the chance of splintering off: For that, I wrap sand paper around an emery board and sand away. this part will give you many under the fingernail splinter experiences: Here it is after a real qiuck cleanup In this picture,you can see all the defects and different tones in the wood surface. It still looks "messy", even though it's clean and smooth: All that mess kind of disappears and brings the design forward when you add a little stain to it: If this was a real piece I was working on, I would sand it by hand with emery boards until it was perfectly smooth. I feel it has to be so clean, that there is no chance that a splinter will break off of it when it is handled by the user. to me, that's a very important consideration. drums are differnt in that they will be used and touched, unlike a tiki that just sits there for decoration Here's the little one I just finished to show the quality of finishing on it. this drum is real small, so I used the 1/4" veiner on it with an even smaller one for the second pass: Here's a straight on view of one of the faces: Hope that helps!
[ Edited by: Bay Park Buzzy 2010-01-06 18:31 ] |