Tiki Central / Other Crafts / New work posted! Inexplicable business card holders! Tiki Bob keychains! More Islander! Pg. 15!
Post #527842 by tobunga on Tue, May 4, 2010 12:11 AM
|
T

tobunga
Posted
posted
on
Tue, May 4, 2010 12:11 AM
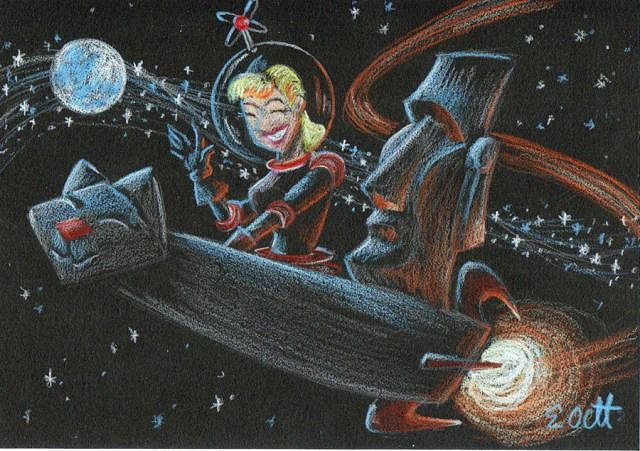
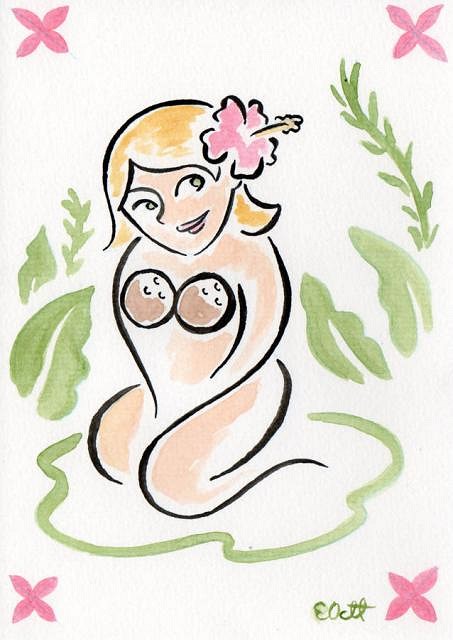
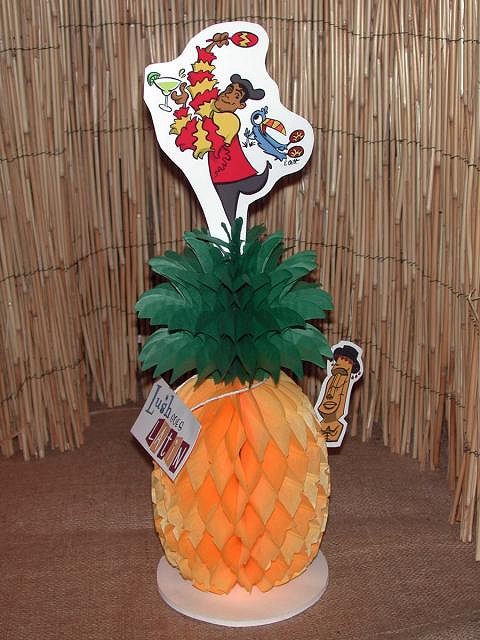
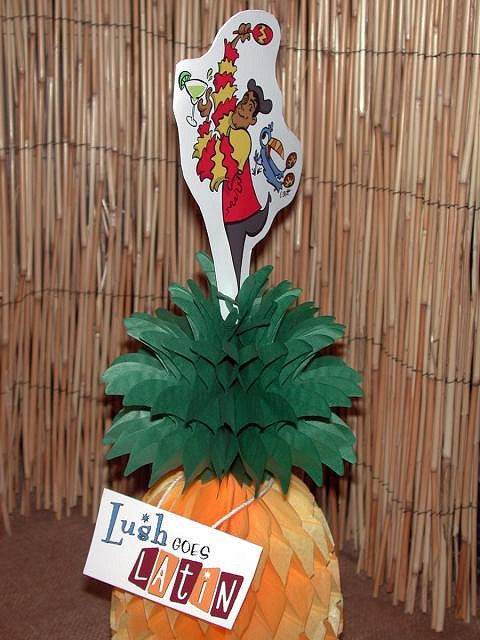
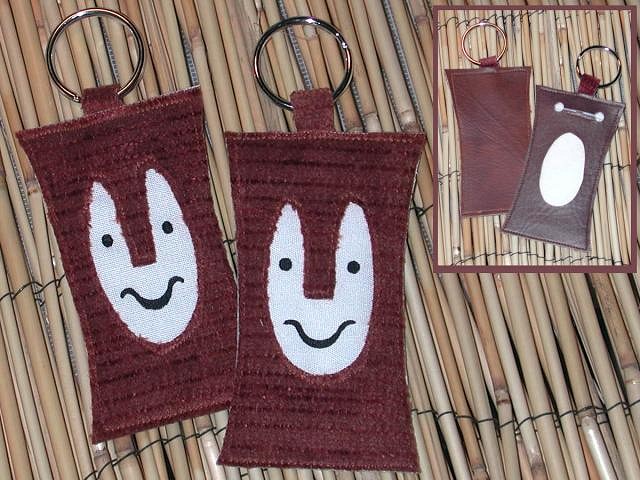
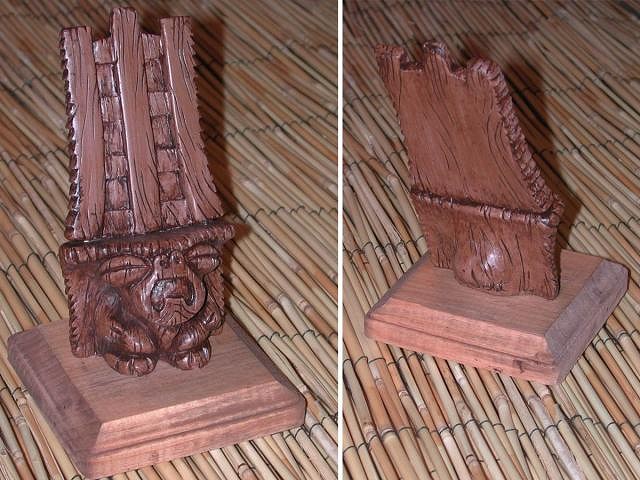
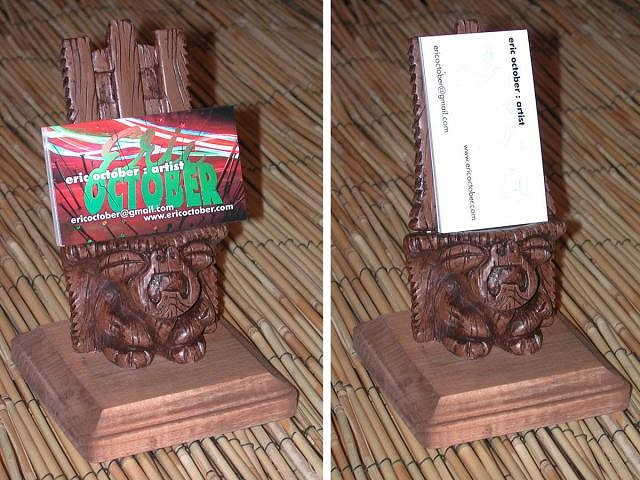
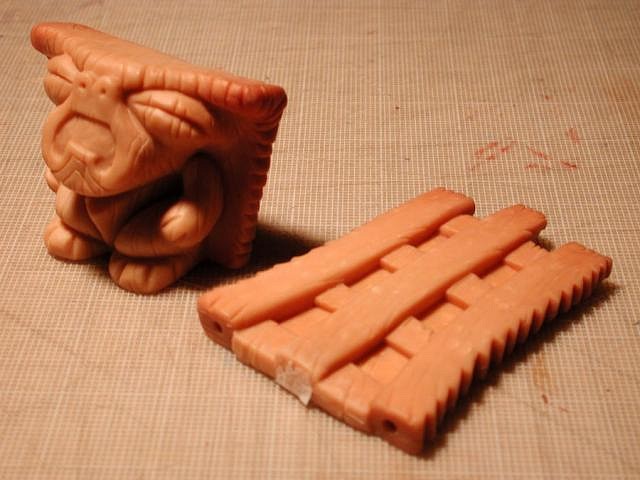
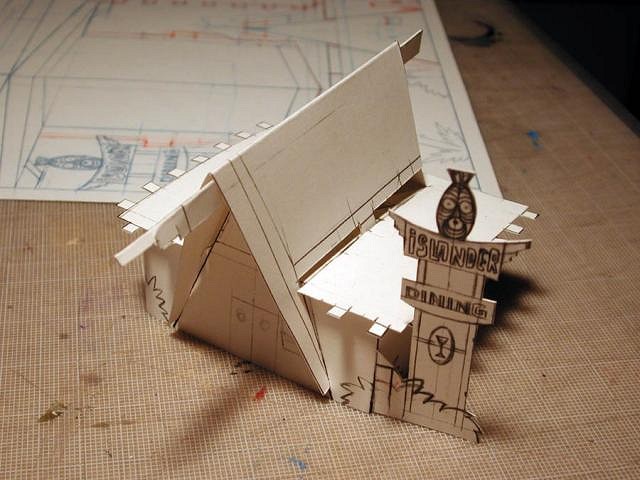
Yeah, their bar is pretty cool! Manuel's dad built it, and did the upholstery himself! So here's new stuff from the past month... I really want to get in progress shots posted while stuff is actually in progress, but I have not yet managed to find the time! But I'll post some here, plus some pieces I didn't finish in time for Bamboo Ben's garage sale (Caliente II, here they come!) Here is a Birthday Card I did for Atomikitty, Suzy Mosher, 4x6 colored pencil on black paper. I tried to picture what Atomikitty conjures in my mind! This is a 4"x6" Birthday Card for Polly, wonderful Rumpus Room hostess! I decided to do acrylic washes on watercolor paper of stylized Polly as a wahine... not really sure if Polly is into tiki, or is more tiki by association, so I didn't go full-on tiki with the image. I suggested to Marty Lush that he take the artwork I created for the Lush Goes Latin website and do something with it. I was out shopping and came across some honeycomb pine apple decorations. I look one look and said "hey, maybe I can do something with..." and before I could finish the sentence, this idea started to form in my mind... I grabbed several, and came up with this Table Decoration for the Tonga Hut performance on May 1st. Each one stands 18" high. Marty then mentioned that Hiphipahula was working on a special drink menu for the show, and Kelly and I collaborated on this 4"x5.5" tent card Lush Goes Latin Drink Menu. I wanted to have some new stuff for Bamboo Ben's garage sale, so I created these Tiki Bob Keychain and Luggage Tags 2"x4", vinyl and fabric. Here's an idea I was kicking around for almost as long as I've been making tiki art: TIki Business Card Holders. I figured they would be cast in resin, from an origninal sculpture. At the time, I had a basic grasp of resin casting, but had never done it. Now, over half a dozen resin pendant designs in, I decided to take a stab at it. This piece would be different in that it would be larger than anything I've done up until now, and more importantly, it would involve a pieces that would be almost completely enclosed in the silicon molds. The pendants I've done have flat backs, but this piece would have a front and back. I decided to make the sculpt in two pieces, the body and the headdress. The body was fairly easy, but I kept re-sculpting it, adding more bulk to the legs, then re-doing the face, then filling out the body. Here's an early point in the sculpting, before pretty much everything got re-sculpted. Here's the final sculpt. The molding of the body was not terribly difficult. Since it had a flat bottom, it was similar to the molds I've made in the past. The headdress was much harder, and in fact, I had to re-mold it twice, since the first time I positioned the sculpture in a way that didn't allow for the silicon to completely envelop it, which I didn't discover until I pulled it from the mold. I had to rethink how I was going to suspend the sculpt in such a way that would allow the front, back, sides, top and as much of the bottom as possible to be molded... but finally, success! And here's one of the things I'm doing now... Here is the drawing where I'm working out all the measurements and angles and stuff, making sure they'll all fit on the same piece of paper. The plan is to have it fit on an 11x17 piece of thick, acid-free paper. Here is the first test of the assembly. I'll be ready to test the recalculations soon, and hopefully, I'll have time to post in progress... got some other things in the works, so hopefully I'll have a new batch of stuff that will get regular updates (yeah, right!) Mahalo fer lookin'! [ Edited by: tobunga 2010-05-04 00:38 ] |