Tiki Central / Other Crafts / Digital art discussion
Post #603867 by Swamp Fire on Wed, Aug 24, 2011 5:45 PM
|
SF

Swamp Fire
Posted
posted
on
Wed, Aug 24, 2011 5:45 PM
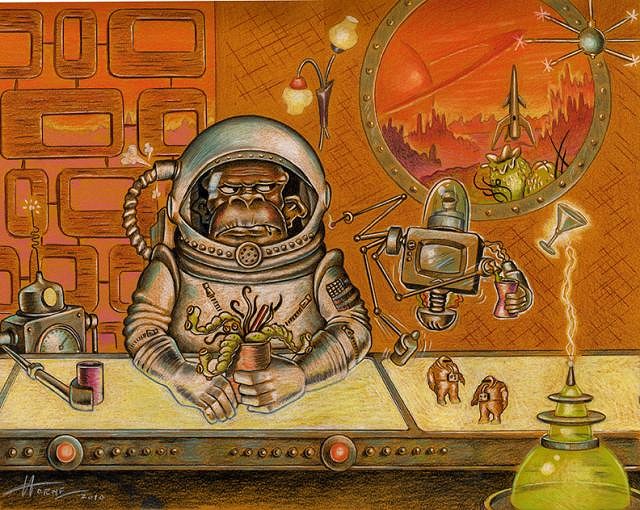
Always great to see some Digital work here on TC. I thought I would share how I create my digital pieces. There are so many ways to work in the digital medium like 3D modeling, paint outside of the computer and manipulating that in a paint program etc. etc. Below is a step by step on how I work. I'll try not to bore you with the details. I always start with sketches on paper, usually rough, developing the character and thinking about composition. Below is my rough sketch I started with.
Not all of the time but I sometimes will do a more finished drawing. It gives me an original to sell and I start thinking about color schemes at this point.
At this point I scan the drawing and bring that into Illustrator. I bring it in as a template, breaking it down to basic shapes, keeping it flat and graphic, thinking more about color scheme and adding more elements to the piece. Below is the illustrator file.
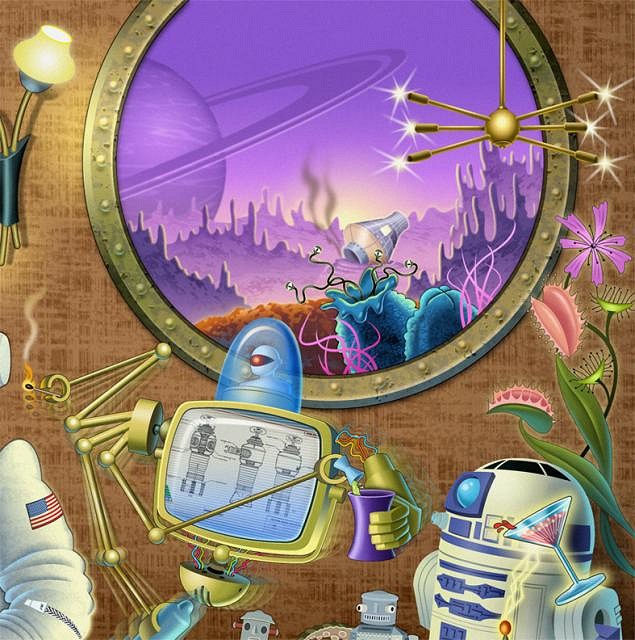
Now the fun begins! I like to separate the elements into separate files so all I have left are the background pieces. I work from the back forward bringing in pieces as I paint. If the file is getting too big I will sometimes paint an element in it's own file. Not a fan of doing that because you need to see how the element is working within the overall scene. Below is a detail of the overall piece.
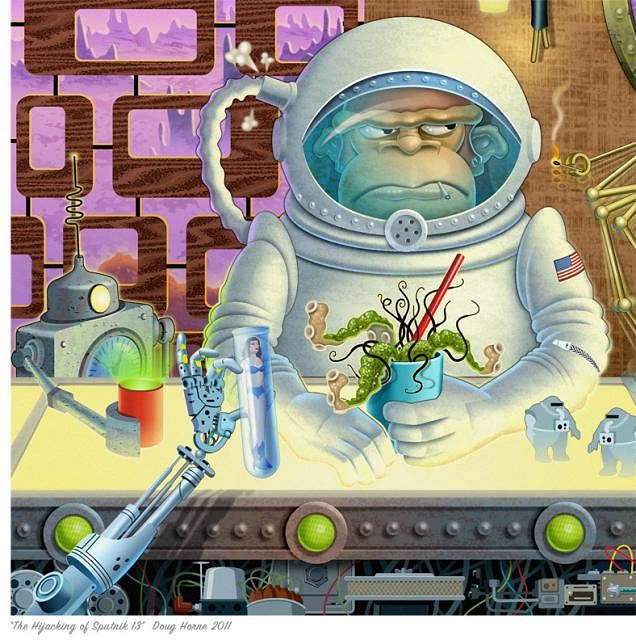
Another detail of the finished piece.
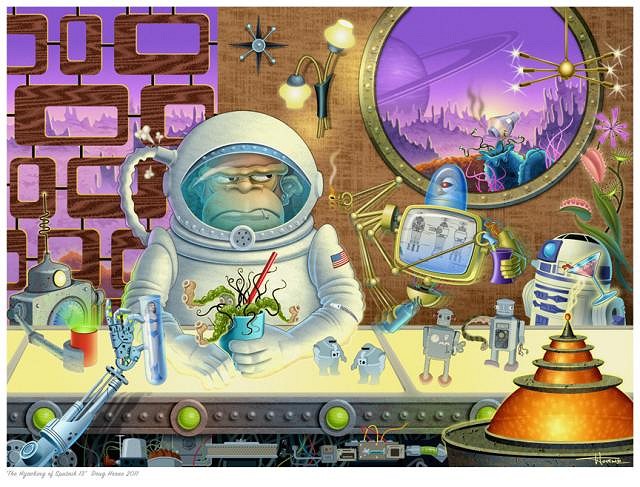
Here is the full image done and ready to go. Size is 16"X12", 300 dpi, 49meg, 11 layers and 25 channels. I use the channels saving off selections so I can easily load a selection to re-work an area. Otherwise it would be a nightmare to try and re-select an area after you have rendered it.
Hope you enjoyed my step by step process. |