Tiki Central / Other Events / Let's carve a large outrigger canoe and sail it (Kon-tiki like) to an island
Post #659423 by coconuttzo on Wed, Nov 21, 2012 6:43 PM
|
C
coconuttzo
Posted
posted
on
Wed, Nov 21, 2012 6:43 PM
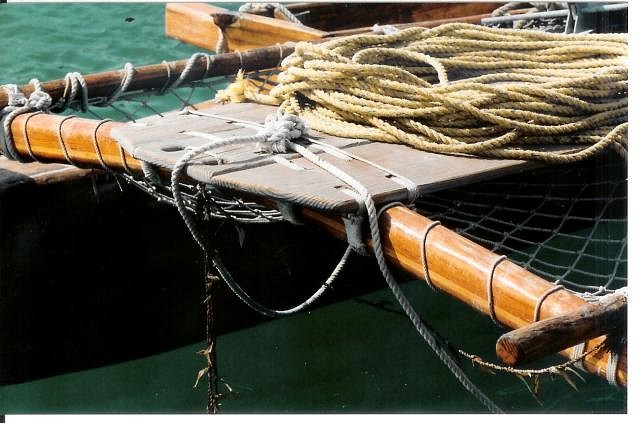
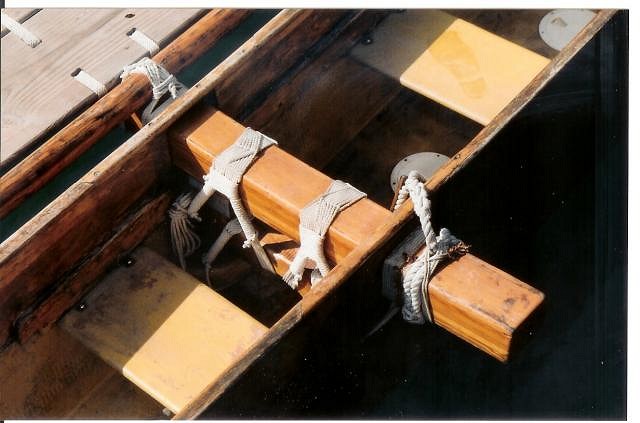
Wow, I just stumbled on this doing an outrigger canoe search. It's been a long while since the last post. Are there any updates so far? JohnnyP, did you ever get started on cutting the logs yet? If you want an easy test canoe project, I found a video on youtube which shows some locals here in Hawaii making a cheap double hulled sailing canoe out of plywood. Perfect for your testing needs. The video even shows them actually using it out in the deep Pacific Ocean. As far as nailing/screwing the plywood to form the hulls, I don't see a problem there. The hull is not supposed to flex at all. Just make sure that the seams are sealed and waterproofed properly. http://www.youtube.com/watch?v=K1TQuTbS3s8 Here are some important tips which you may or may not use to your discretion: I paddled for an outrigger paddling club here in Hilo & we were taught how to properly lash the outrigger with no nails/screws which was fairly easy with a little practice. The video shows a geometric patterned lashing, although beautiful to look at, it actually serves a purpose which is to secure the hitch multiple times over. However, it doesn't show the technique used to lash, hitching the 'iakos(cross members) to each hull. It's hard to explain. It's easier to watch a video explaining the process which I haven't any. Maybe next race season(Spring) if I remember, I'll make one for youtube. For safety reasons, nails or screws were never used at those connection points because they don't flex easily in the motion of the ocean as strong cords do. Traditionally nowadays, other then the individual seats in the hulls, no other screws are used in the construction of these canoes. From the cross members to the deck itself, every object is either pegged with wooden pegs(pivoting points) or lashed together very securely. The reasoning for this was so that if any part needed repairs, it would be removed, fixed and re-attatched. Also, it made it much more easier to breakdown the entire setup for ease of transport and storage.
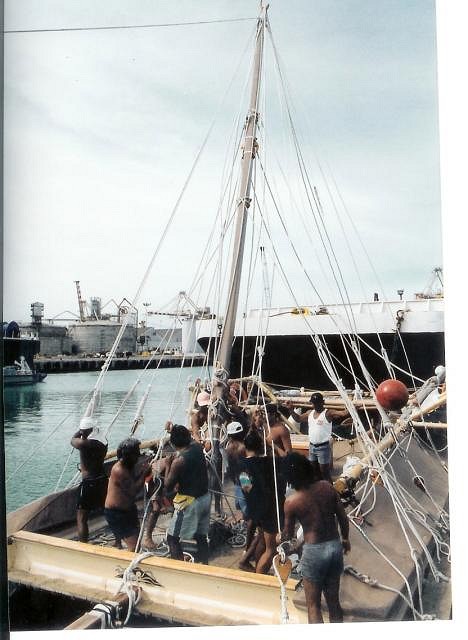
The mast is also able to fold down or replace for repairs when not in use. This makes it easier to transport to the hale wa'a(canoe house).
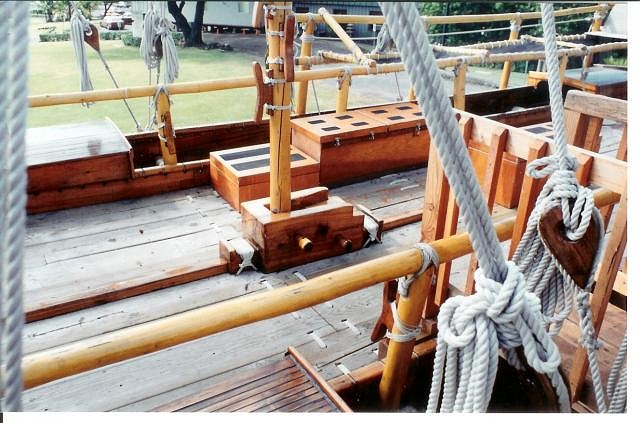
... It's raised with the help of others and fastening the kaula pa'a(stays/shrouds) to secure the mast in position. The bottom of the mast is secured in place against the front of the kumukia(mast step), locked with a wooden peg behind the bottom of the mast to prevent it from sliding backwards(see 2nd pic)...
I've got a lot more reference fotos if needed, especially for scale sized miniatures which are a favorite of mines. PM me if anyone is still interested. I know the coming weather won't help the Northerners but this is the perfect time to study the references. They're pretty self explanatory(pics worth a thousand words). Then you can at the very least, start by making a miniature scale model to test in your bathtub or sit on your mantle, in plain view as constant motivation to keep the ball rolling. Hope this helps you achieve your goal. Now get to work so we can see the progress pics or vids posted. |


