Tiki Central / Other Crafts / MadDog Mike's Platterful of Pupule - Pupu Pufferfish
Post #673050 by MadDogMike on Mon, Apr 1, 2013 8:02 PM
|
M

MadDogMike
Posted
posted
on
Mon, Apr 1, 2013 8:02 PM
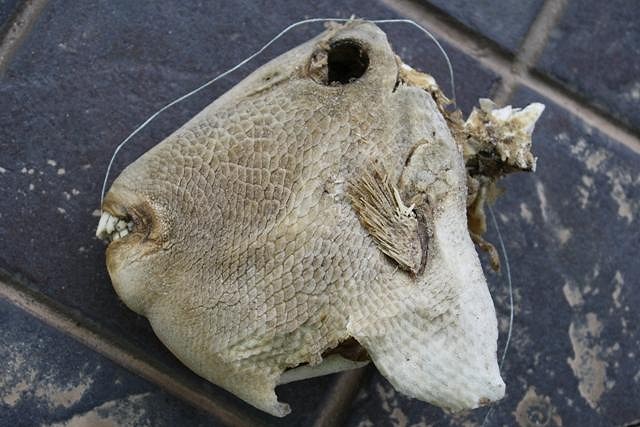
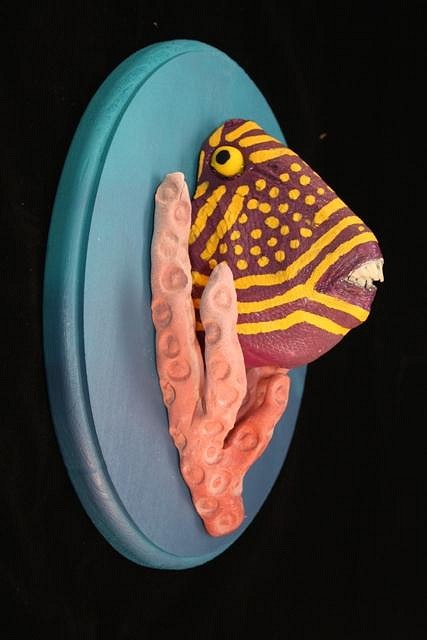
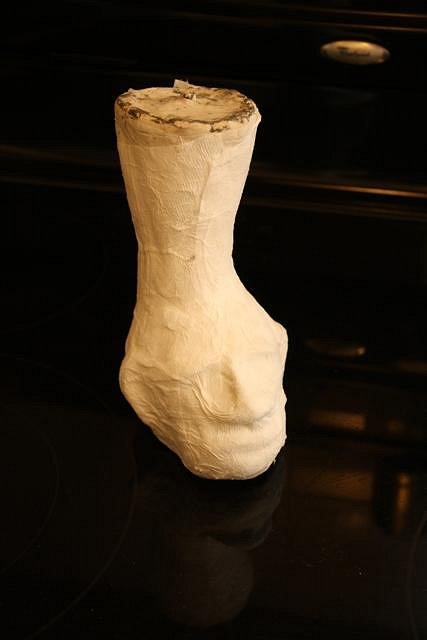
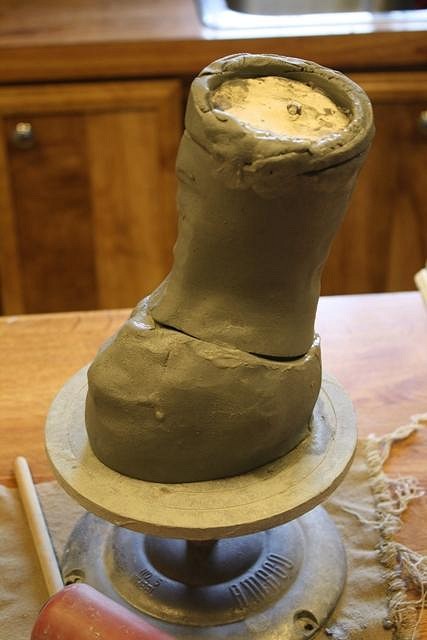
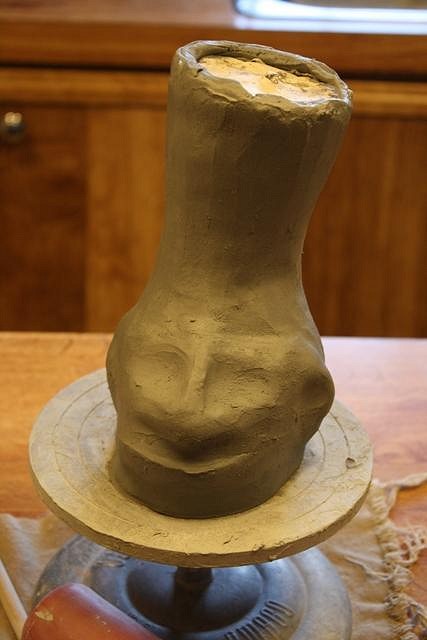
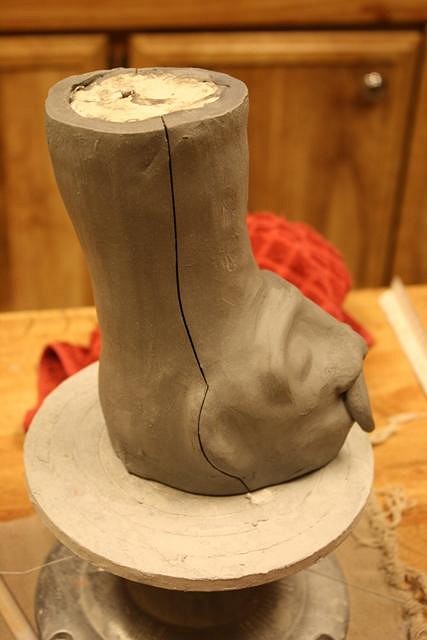
The wedding was beautiful and everyone had a great time. There is room in my lawn for 250 people seating AND dancing - good thing I water my grass with unmetered water :lol: I posted this in the Art Swap thread but don't think I posted it here: On my last trip to Mexico I brought back a beach find ~ a dead fish head. As more of a joke than a real Swap piece, I turned it into "art" with a plaque, polymer clay, ceramic clay and paint. Just got back from another 5 day trip to Mex, the eastern coast of the Sea of Cortez this time. I knew I would have plenty of downtime and wanted a clay project to work on. But it had to be done with minimal supplies since I was camping. I wanted a set of shrunken head mugs so some sort of mold/form was in order. But I was out of casting slip and didn't have time to make a plaster mold anyway. So I tried a new technique; I made a basic form out of Crayola Air Dry clay (40% off coupon at Michael's), let it dry for a day then covered it with wet tissue paper so the ceramic clay wouldn't stick to it. (I didn't take a camera to Mex so there are no pics of me "mudding" on the beach. But I know how Wendy loves progress pics so I started another mug when I home today :) ) I rolled out some clay and started slabbing it over the form. This gives me a basic size and shape, then everything else is just old fashioned sculpting. Nice thing about shrunken heads is that they are natually a bit misshapen so the sculpting doesn't have to be too exact. After it dries just enough to start to get firm, I slice the clay along both sides. This allows the gap to widen as it dries and shrinks so that it does not crack.
It occurred to me that only the losers in a battle get the dubious honor of having their heads shrunk, so I named the "Lil Loser #1" and so forth :D |