Tiki Central / Other Crafts / Painting and Sculpting Tiki on the iPad and other crazy stuff
Post #680153 by Gene S Morgan on Thu, May 30, 2013 6:39 PM
|
GSM

Gene S Morgan
Posted
posted
on
Thu, May 30, 2013 6:39 PM
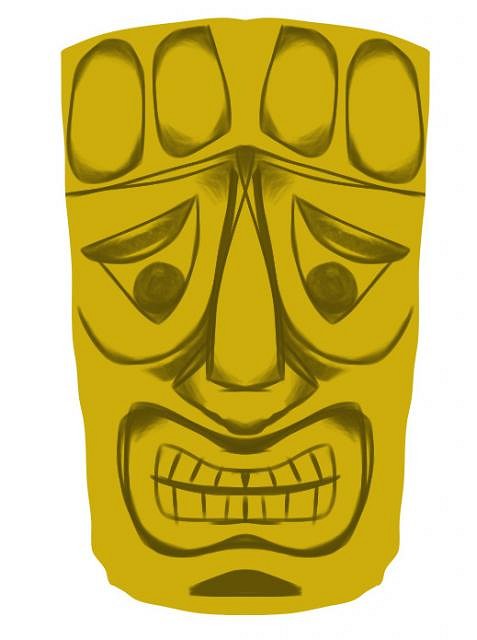
I know up until now I have used the method of starting in grayscale, but this tiki is what the cool kid artist call a speed sketch, so I started more simply. I used the vector method to create the basic head shape already the color I wanted. Then quite quickly I sketched in the features, eyes, nose, mouth, and some other stuff. It was sloppy but I find that you often come up with some fun images by just letting your hand go where it wants. You get some extra strange lines that way, but as they say in the music biz, we can fix that in the mix.
The eyes were kinda dorky and the nose was weird. With a brush I covered up some lines and added some shaping, coloring, and shading. Looks a little better.
Extra heavy dark shading around the eyes and nose adds a little drama. I smoothed pretty hard and blurred the image more than usual. I think it gives it a bit of a watercolor look.
Textured and highlighted the guy.
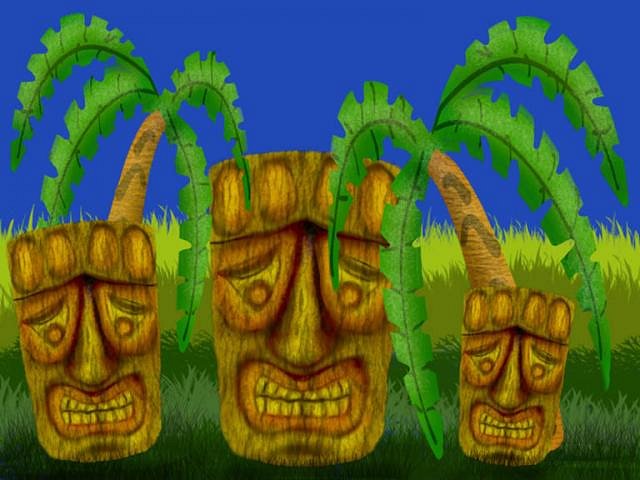
Gave the tiki some wood grain and made a couple of copies and resized them. Now I got a tiki family. Might as well add some palm trees. Notice that one of the tikis looks like it is behind the palms and the others in front. That is the magic of layers again. Each one and the trees are in different layers. You can shuffle the layers around any way you want to create your scene.
Added some background as always. Making grass brushes is fun.
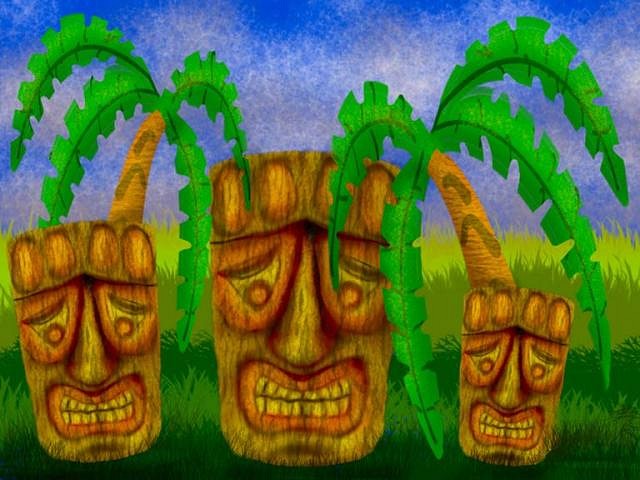
Added some sky and did some cleanup and extra shadowing. It is best to wait until you are sure you have done enough damage before you combine all the layers which is usually the final step. One example of that is you may notice in the first background image the bottom of one of the palms seemed to be sticking out of the baby tikis head. Since the tree was on a different layer, I was able to erase the part I did not like without affecting the rest of the image. This was a fun image to make.
|