Tiki Central / Other Crafts / Painting and Sculpting Tiki on the iPad and other crazy stuff
Post #685670 by Gene S Morgan on Fri, Jul 12, 2013 7:25 PM
|
GSM

Gene S Morgan
Posted
posted
on
Fri, Jul 12, 2013 7:25 PM
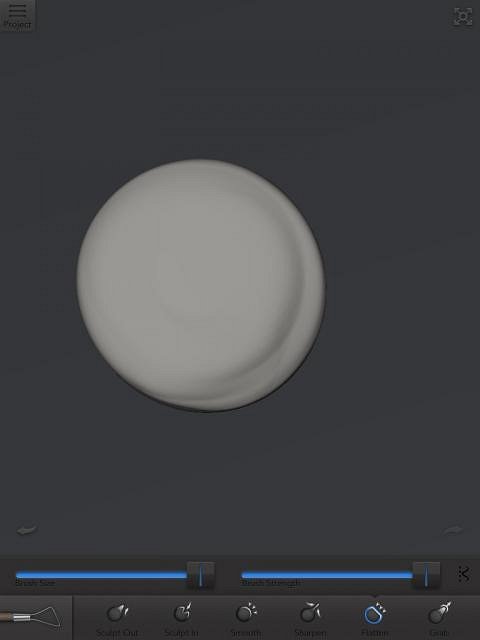
We have switched to the sculpting screen. With finger movements on the screen you can turn and twist the log around . Using the flattening tool we smooth out the bottom so it can stand up.
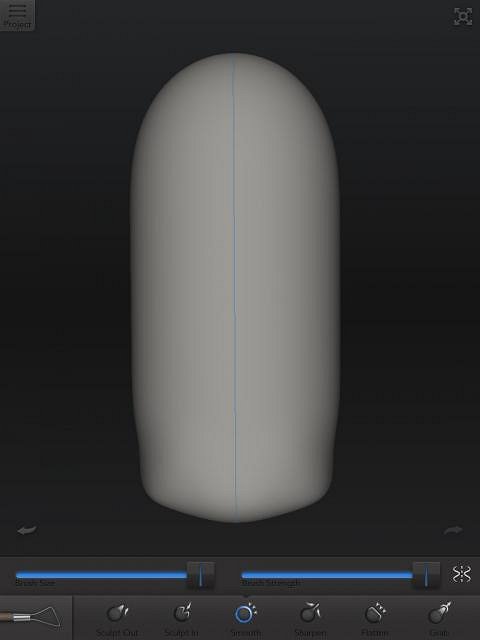
We use the smooth tool to refine the shape a bit. You may notice the blue line down the middle. That indicates I had symmetry turned on. That is done with the little squiggly line tool on the right ot the size and strength sliders. I almost always start with mirror carving because it gives you a balanced proportion to your image. We can and will shut it off whenever we want.
A great thing about digital sculpting is that it can either be clay or wood or stone or whatever material you are comfortable with. We could sculpt it like clay and add more clay to define our shape. This time we will start with carving to get the feel of carved wood. With the carving tool we cut some generalized shapes into our log.
We are just defining a general face shape by digging into the log.
After finding a shape we kind of like we use the smooth tool. Think of it as sanding without all the dust.
It is always important to often turn your log and look at the image from different angles to be sure things are going like you intend.
|