Tiki Central / Other Crafts / Wendy Cevola - NEW: Frankoma Widow Maker for sale.
Post #708551 by danlovestikis on Tue, Feb 18, 2014 10:19 AM
|
D

danlovestikis
Posted
posted
on
Tue, Feb 18, 2014 10:19 AM
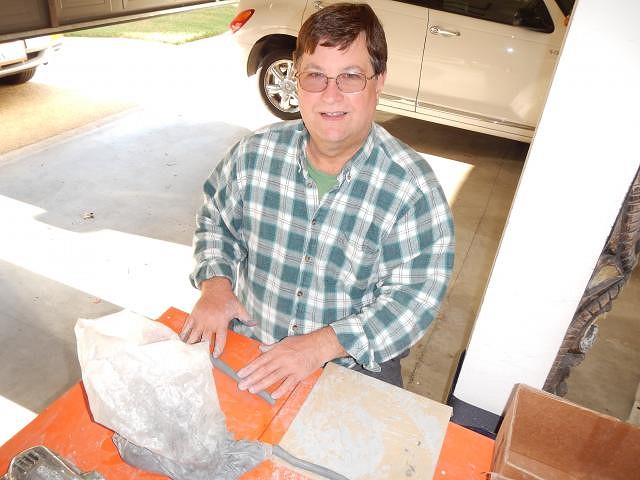
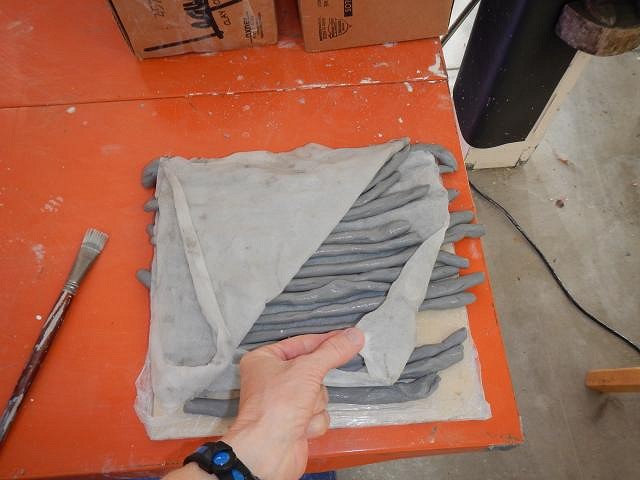
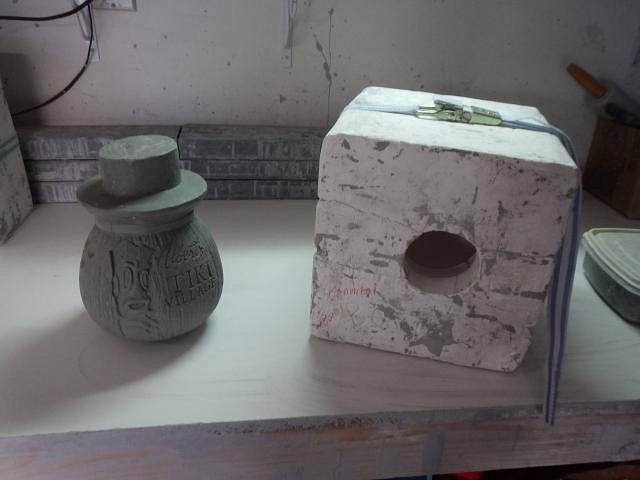
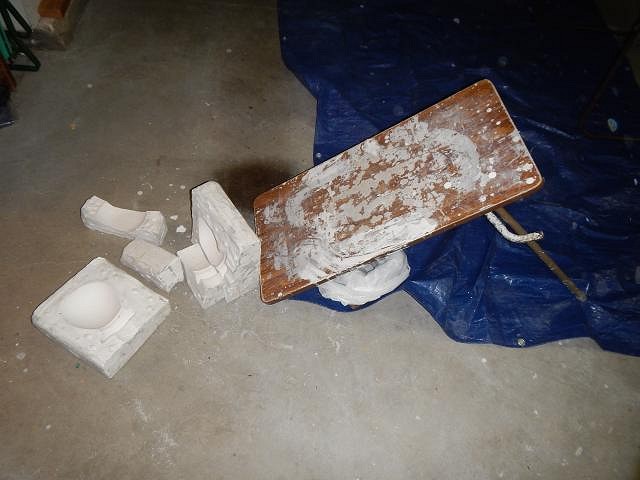
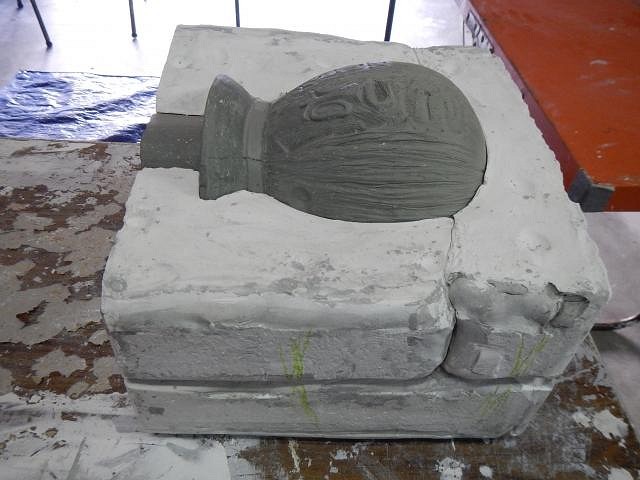
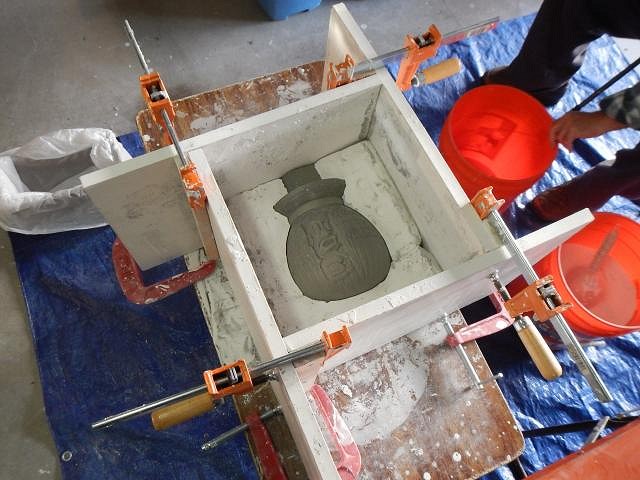
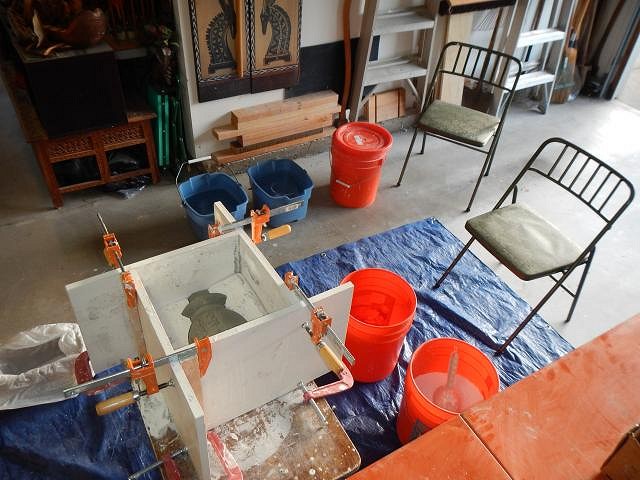
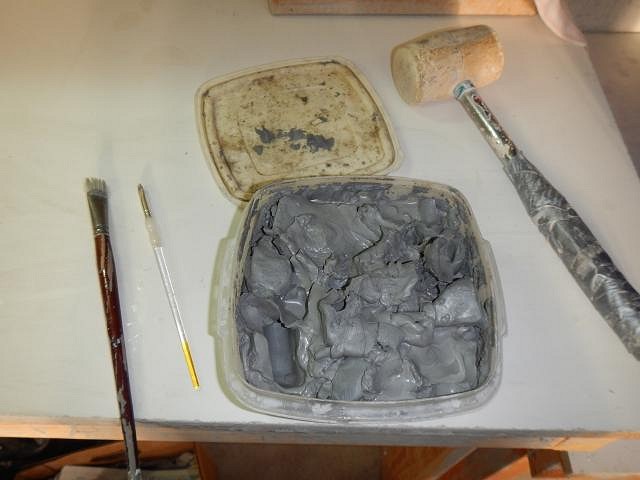
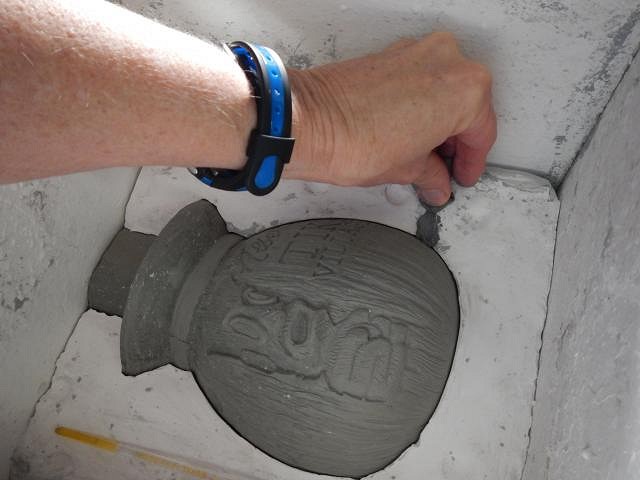
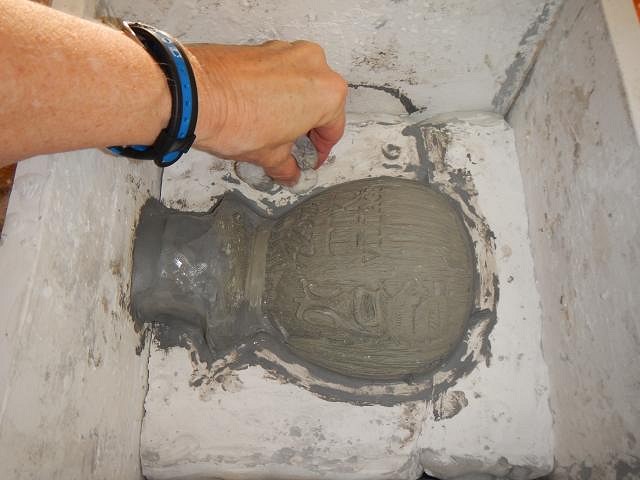
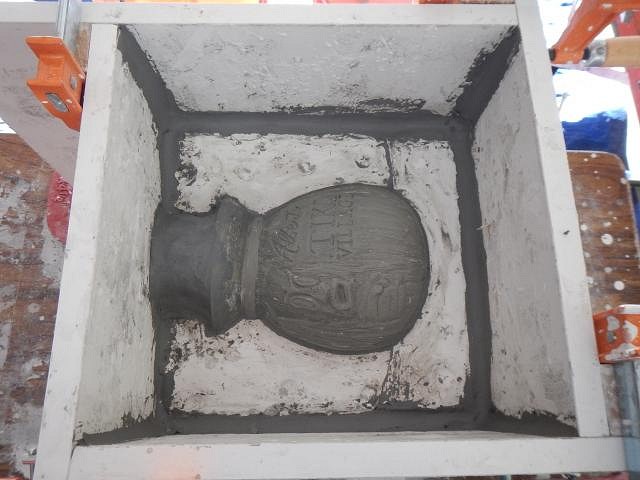
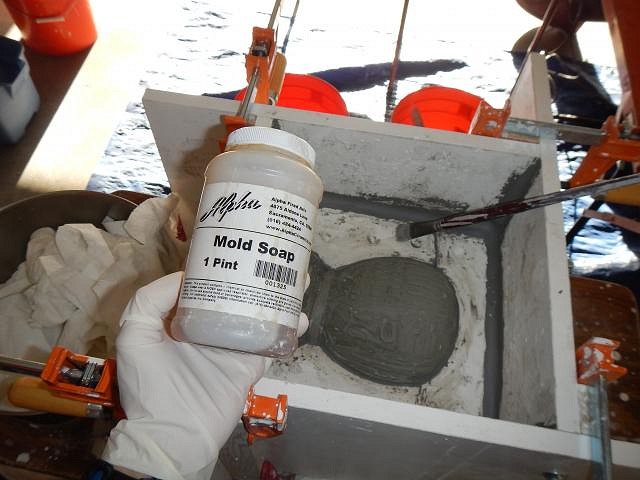
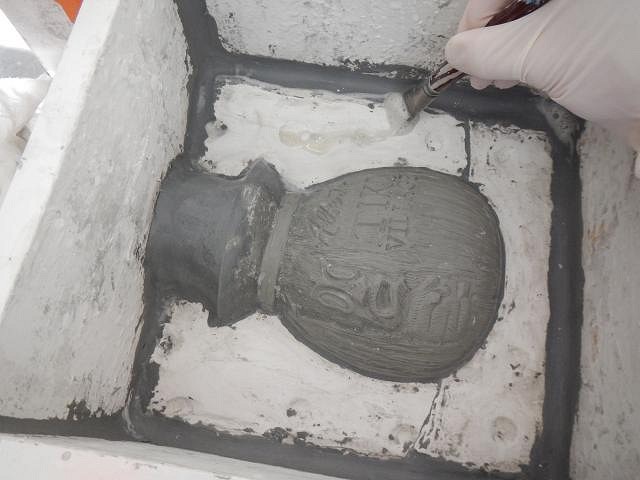
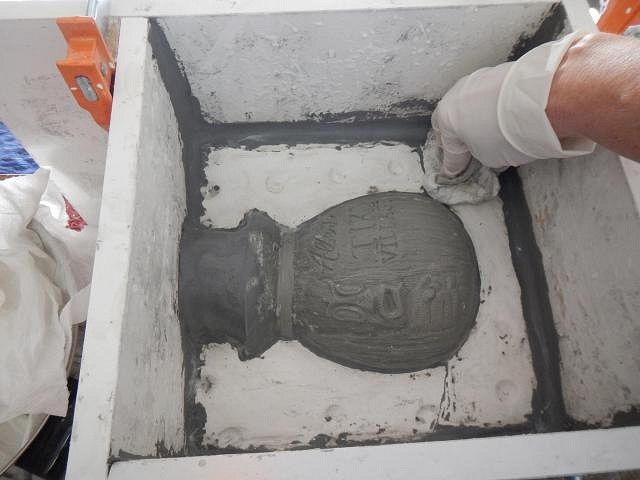
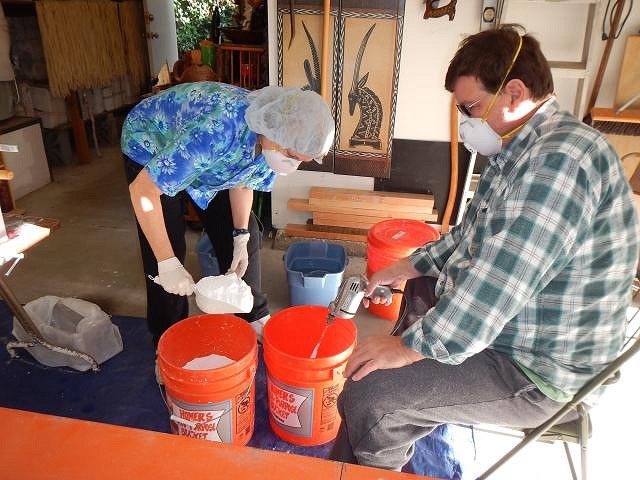
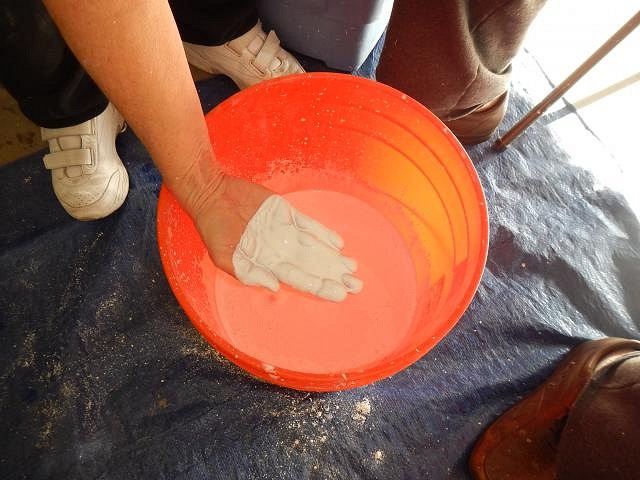
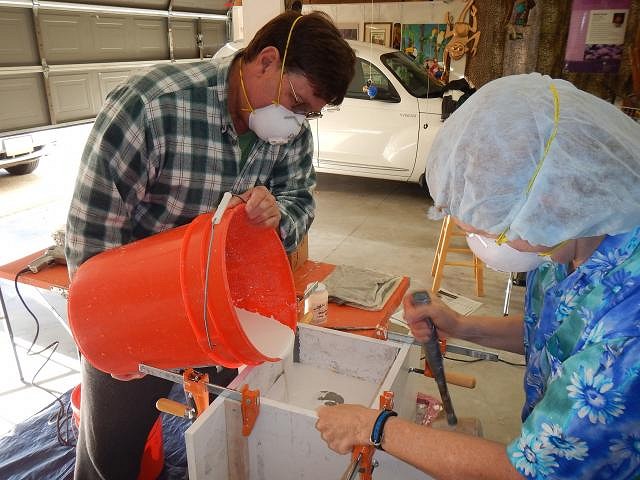
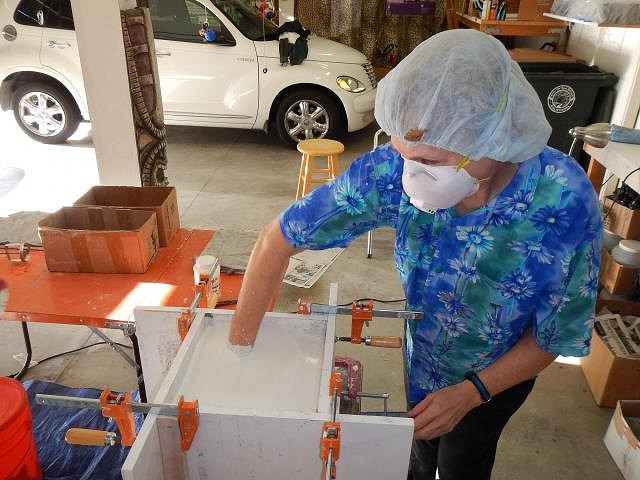
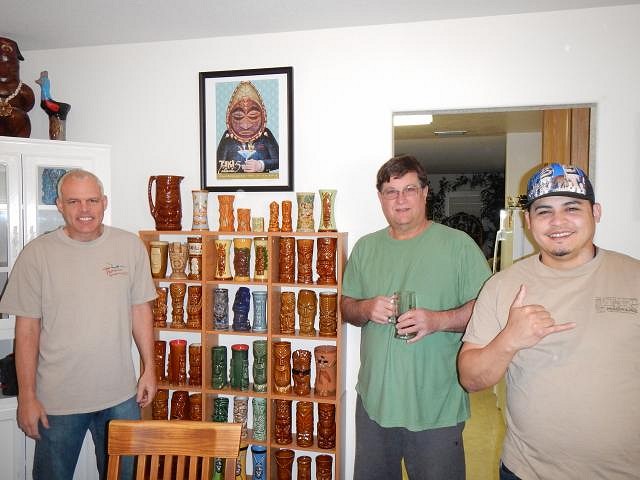
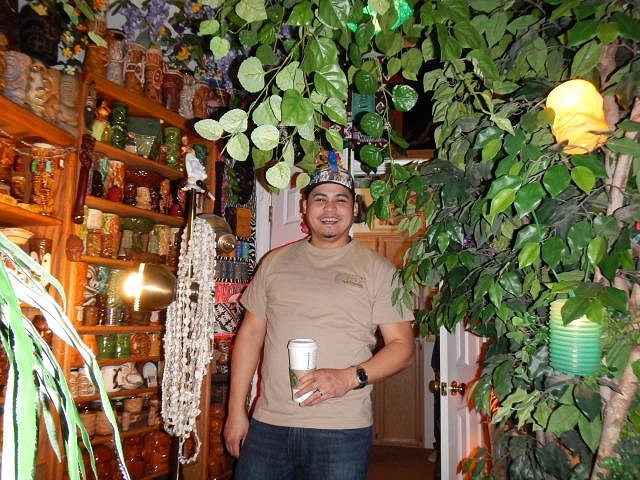
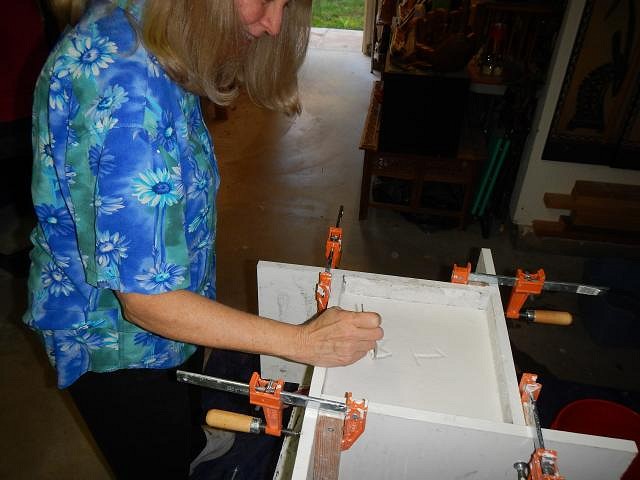
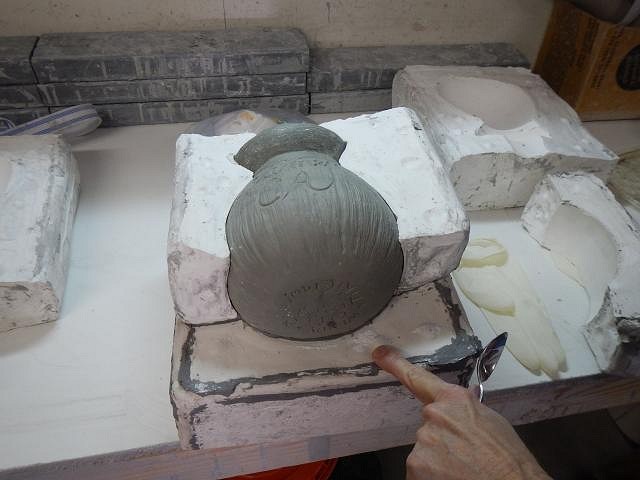
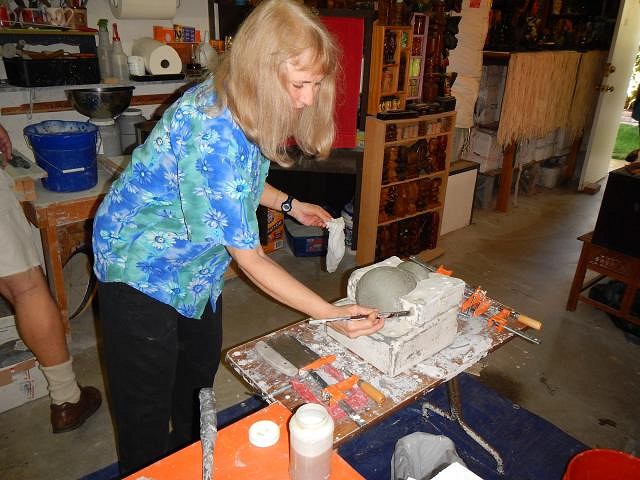
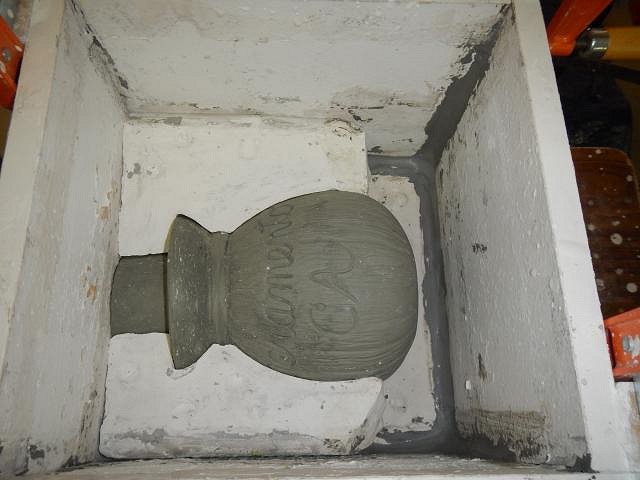
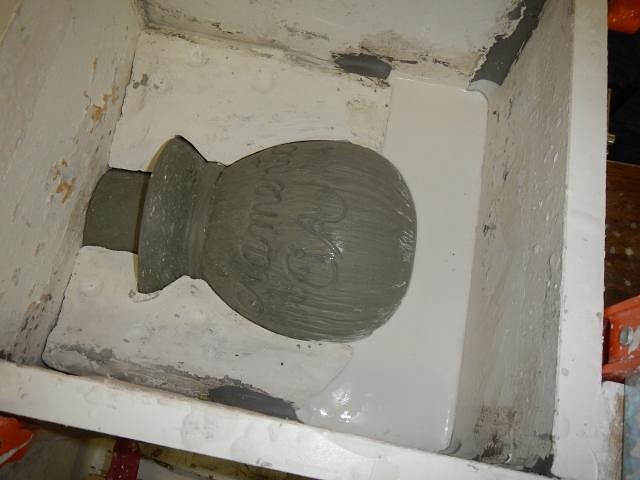
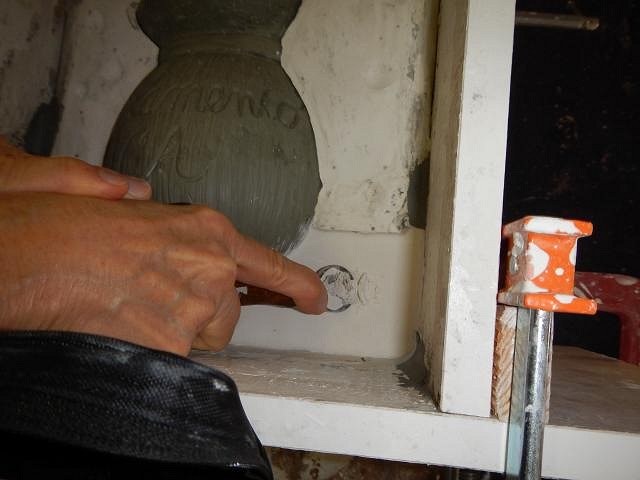
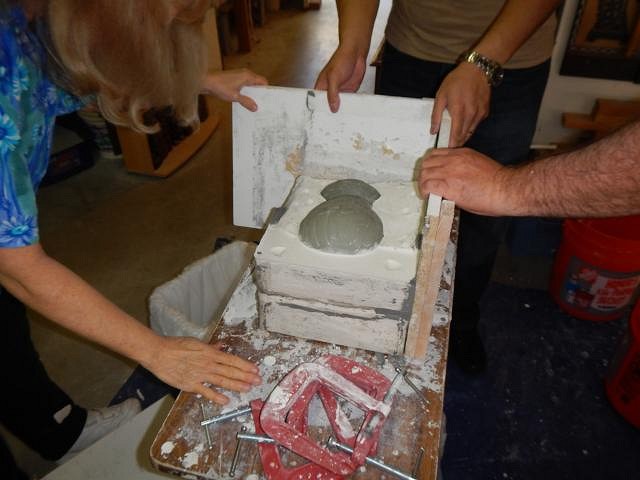
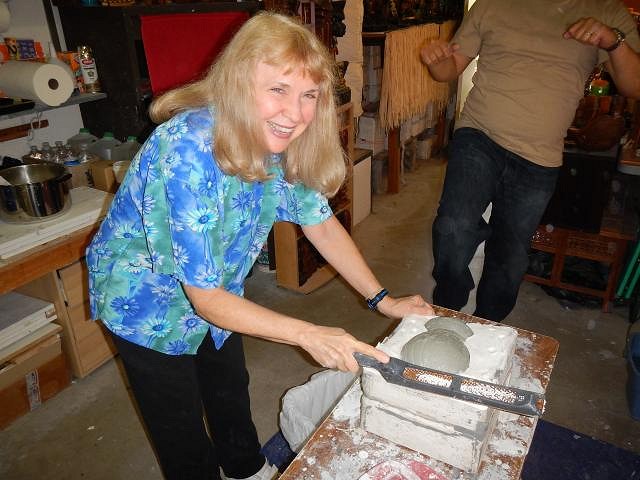
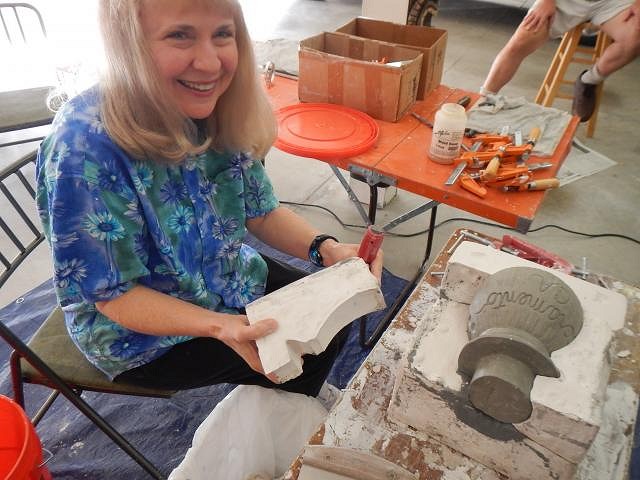
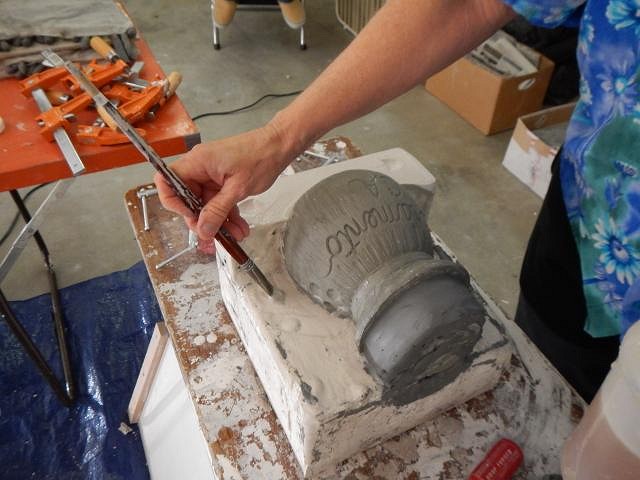
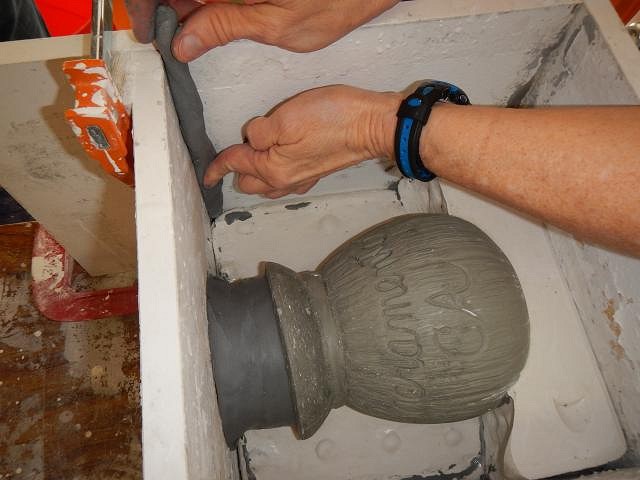
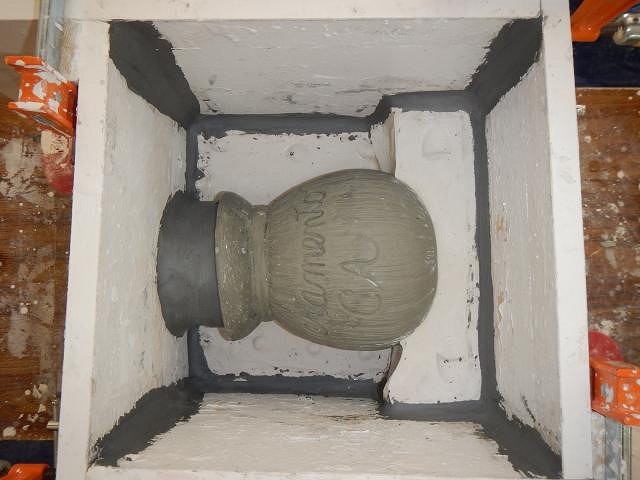
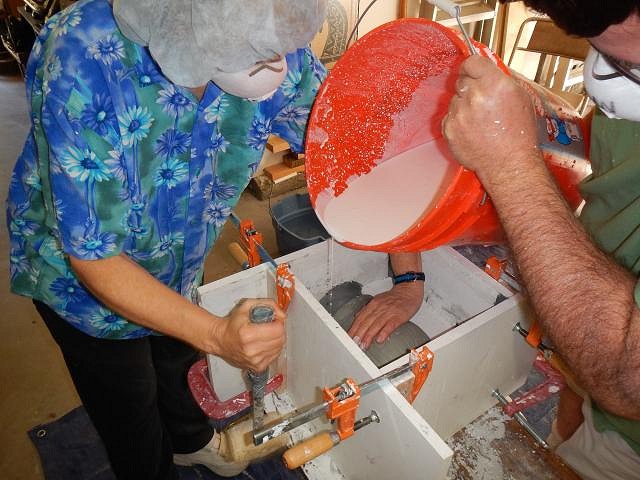
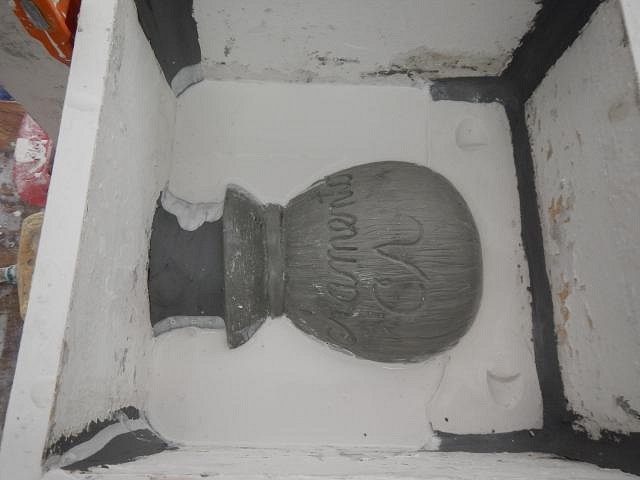
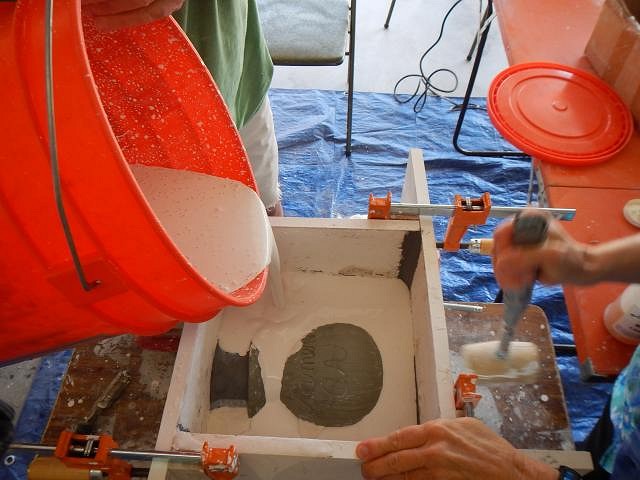
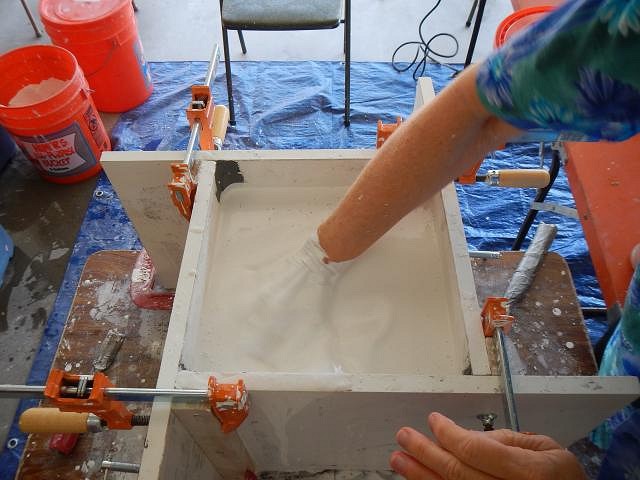
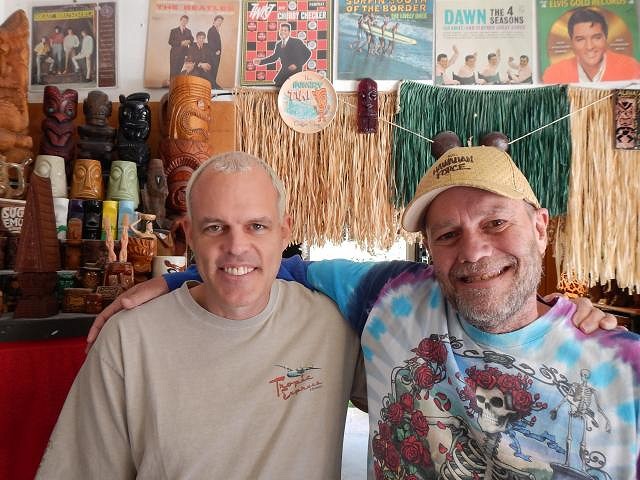
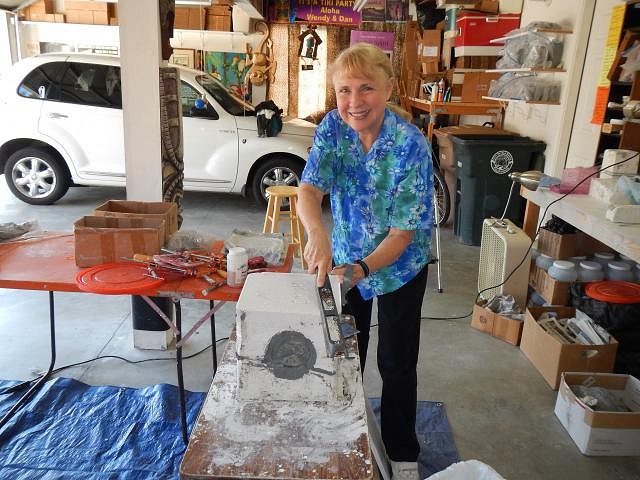
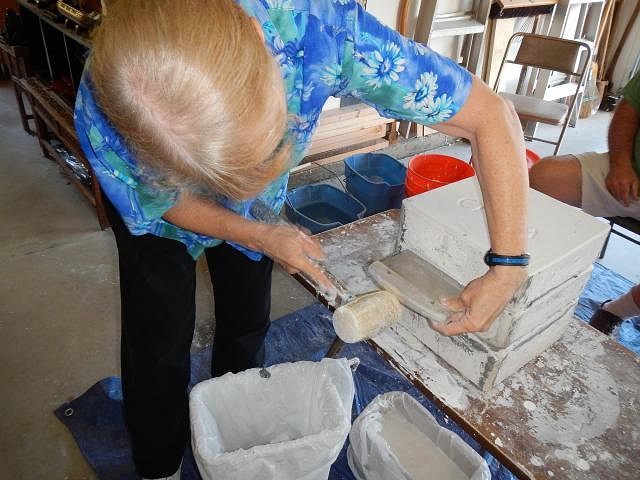
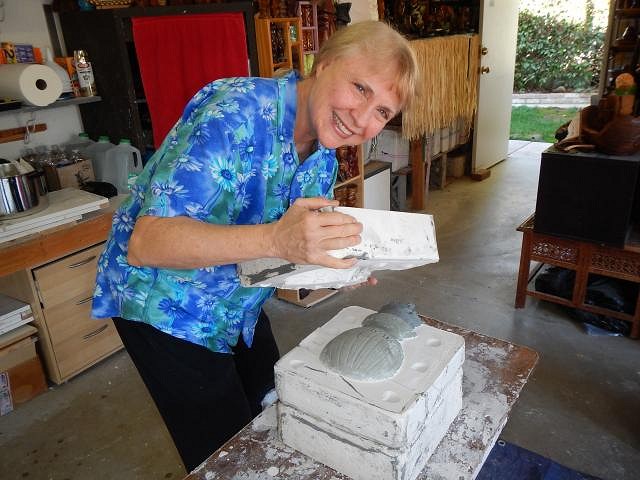
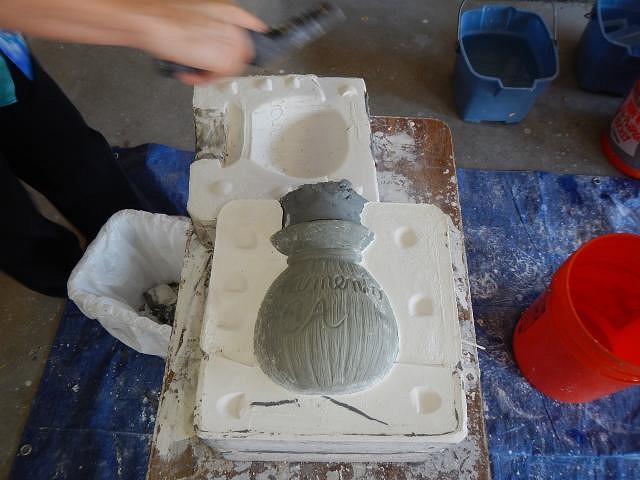
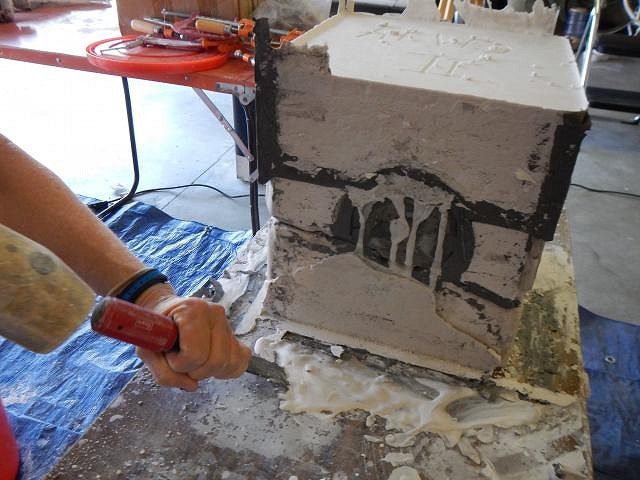
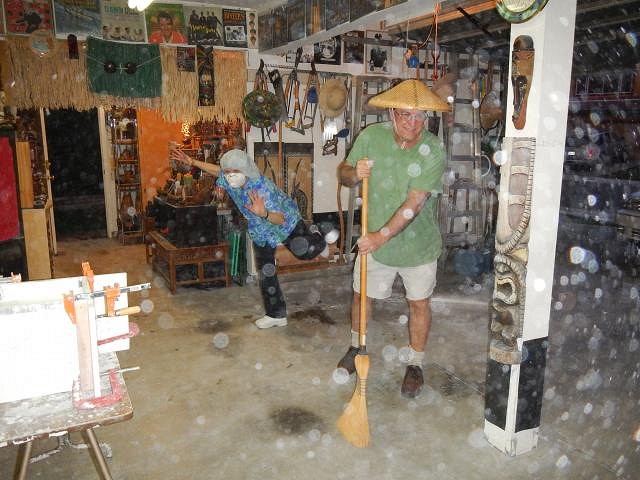
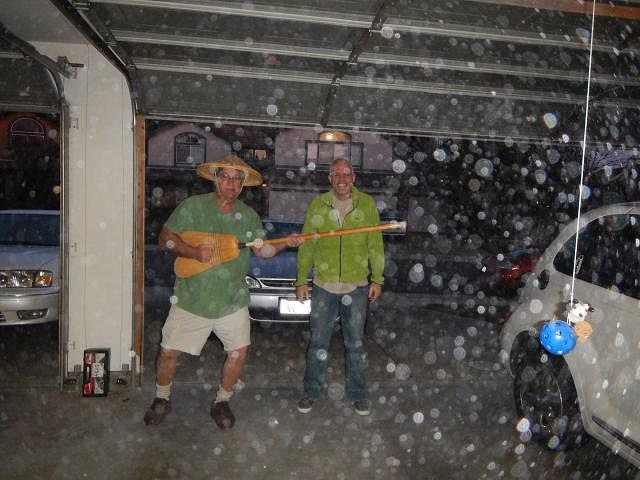
SACRAMENTO CRAWL MUG 2014 OCTOBER 3RD, 4TH AND 5TH. MAKING THE MOLD WITH Tiki Hula, KingsTieDye and LloydHHHA observing. After Dan set up the room with all the tables, tubs of water, mixer, wood, c clams etc.. I put him to work making snakes. I put these on a board with wet paper towels so that they stay sticky for patching inside the mold. This time I am able to use the mold I made for the Cannibal Bowl since I used that sculpt to make this coconut. Our first horror of the day was when the table collapsed but luckily it only chipped the corners of the mold. That's why I make them thick. I planned this out so that all the bottom pieces still fit. That way I didn't have to build up this amount of clay around the sides. We put the box in place and tightened the clamps. This is our set up for mixing the plaster. Now it's time to plug the leaks. For the small areas around the coconut I used sticky clay. I push it in around the coconut. Then I wiped the extra away with a wet washcloth. I also placed clay at the top to make the opening larger. Then I used Dan's snakes to close the gaps between the boards. Mold soap prevents the plaster slabs from sticking to each other. I paint it on and blot it off. This is done three times. Now it's time to mix the plaster. Always wear face masks. Plaster dust will harden in your lungs and it's permanent. and I stick in my hand. When the plaster has the consistency of buttermilk it's time to stop adding plaster. After a 2 second mix we pour it into the box while I pound the sides with a rubber mallet. This removes air bubbles. Next I stick in my hand and pump it over the coconut to knock loose any more air bubbles that may have stuck to the sculpt. It takes 20 to 45 minutes to harden completely so during that time we gave LloydHHHA a tour of Dan's tiki collection. Here LloydHHHA sees the jungle room for the first time. kingstiedye arrived for the show so here are all four guys together. I carved into the top I CM 2014 to identify the mold. Next we removed the box and flipped over the mold onto the new mold piece. I removed the next piece of the old mold that we will not mold. So that I could get under the coconut with the mold soap I painted it on before we put the box back together. Once the box was back on I used the snakes to block leaks between the boards. We poured in the plaster. Another break. This time after the plaster hardened I cut into the surface to make locks. These are just simple indentations. Again it's nice to have extra hands to remove the clamps and box sides. I clean off clay and plaster each time we take it apart. I use a rasp to smooth the edges of each new piece while Lloyd does his happy dance! No I removed the two side pieces. Yippy we get to pour two at the same time. I built up the opening to be larger with clay for this new side. Again I used the mold soap three times. With the box back in place I added the snakes. The snakes are all done. We needed to remember that we are only pouring to the top of the bottom mold piece. I covered the words on the sculpt while he poured in the plaster and I pounded the side with the rubber mallet. Both are filled. Time for a break. Back again I cut into the surface to make more locks. These keep the pieces lined up when using the mold. After putting on the mold soap we poured the last piece, the whole top slab. Again I put in my hand to pump out the air bubbles from the writing on the coconut. Tiki Hula and kingstiedye smiling for the camera and for all their friends. Rasping the edges. Using my favorite chopper to open the mold. Success the mold piece comes off easily. Here you can see that the locks and how they work. From set up until this point it took five hours. Now we started over again to make a second mold. After we put the box back on, did the snakes and mold soap we poured piece number one of mold II. Time for a well deserved break. kingstiedye and LloydHHHA had headed home. Tiki Hula, Dan and I headed to On The Boarder. Remember how much Tiki Hula likes deserts he still does. Back from lunch and another four hours later I have a second mold. When you are tired you make mistakes. I didn't make the seal around the top good enough and I had a leak. It didn't effect the mold other than to make a mess which I cleaned up with a chisel. HERE IS A HUGE LESSON. WE THOUGHT WE HAD FOUND A SPECIAL EFFECTS BUTTON ON MY CAMERA FOR SNOW. I DID A HAPPY DANCE (I LEARNED FROM LloydHHHA) BECAUSE I WAS THE ONE WITH A FACE MASK STILL ON. ALL THE RULES SAY MOP, DO NOT SWEEP, EVER, EVEN WITH A FACE MASK THERE WILL BE PARTICLES IN THE AIR THAT YOU WILL BREATH AND THAT WILL RUIN YOUR LUNGS. IT WASN'T A SPECIAL EFFECT IT WAS THE FLASH SHOWING UP THE PARTICLES. So be safe wear face masks. Dan mopped as soon as we figured out what the snow really was. Thank you for the visit. I hope this will help you all become mold makers in the future. Wendy |