Tiki Central / Other Crafts / Wendy Cevola - NEW: Frankoma Widow Maker for sale.
Post #710001 by danlovestikis on Mon, Mar 3, 2014 3:43 PM
|
D

danlovestikis
Posted
posted
on
Mon, Mar 3, 2014 3:43 PM
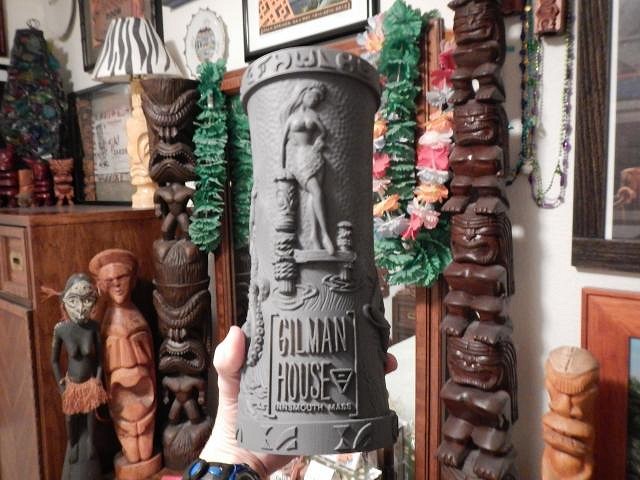
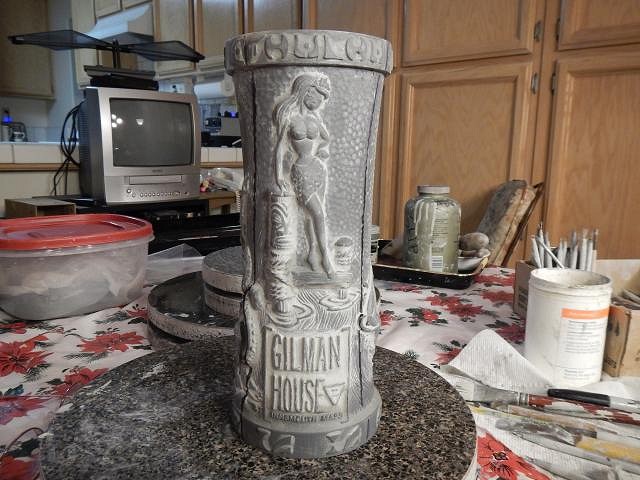
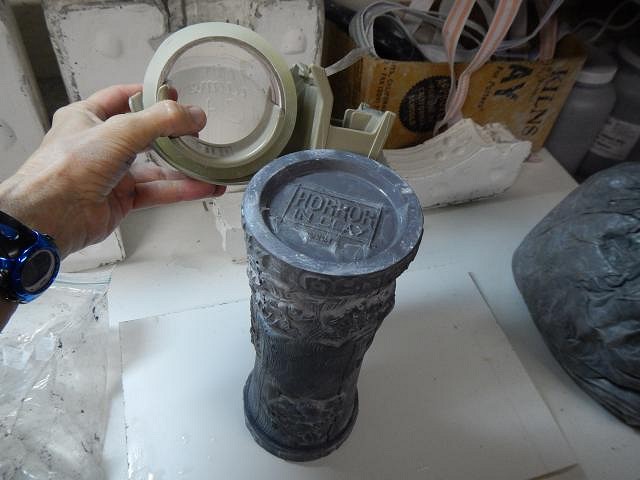
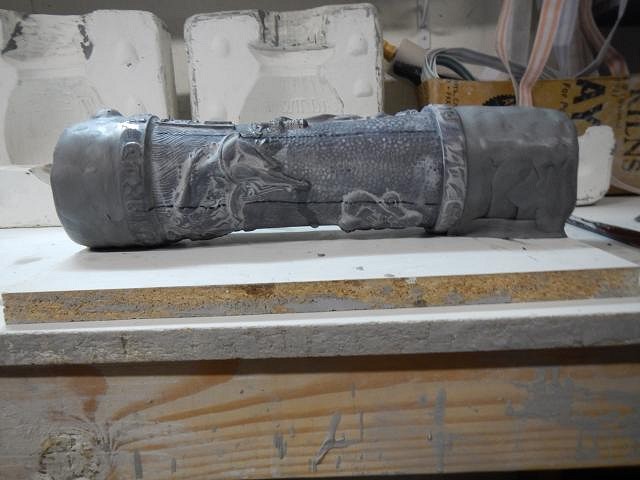
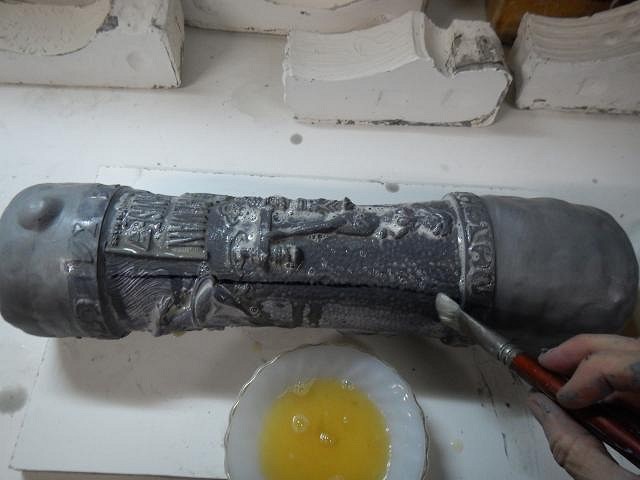
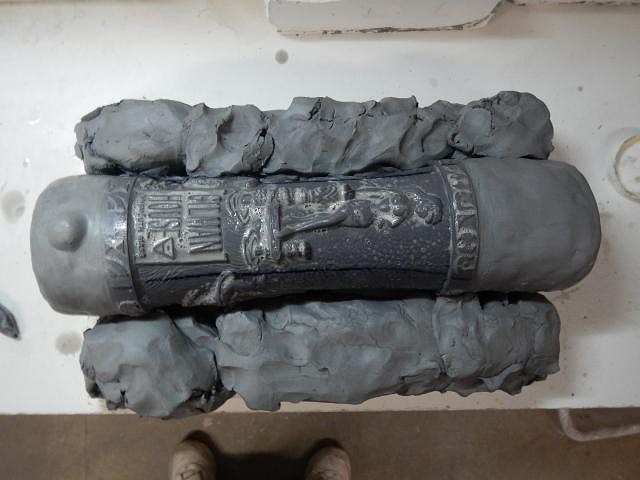
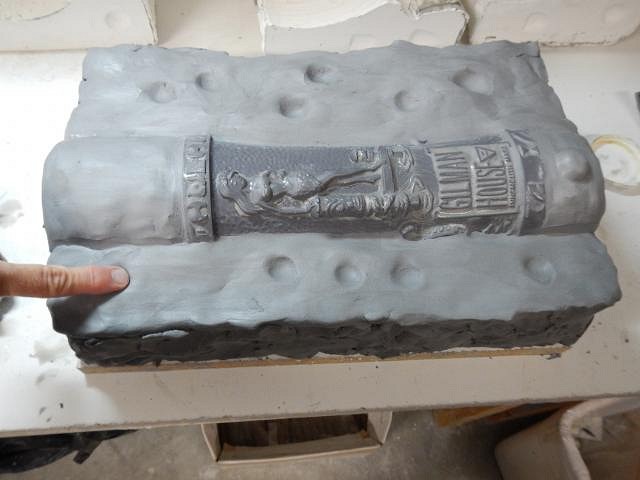
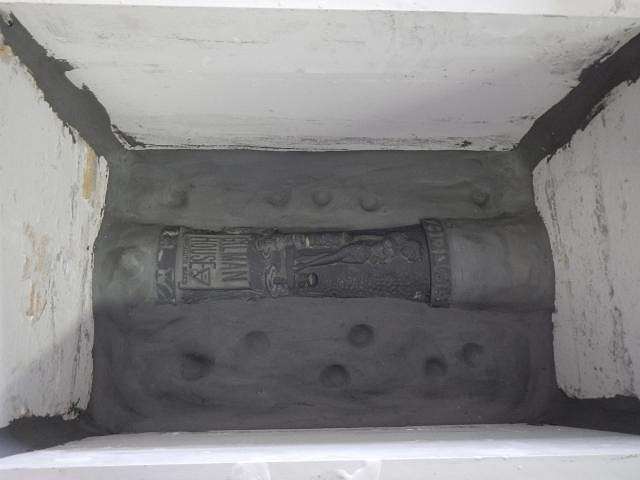
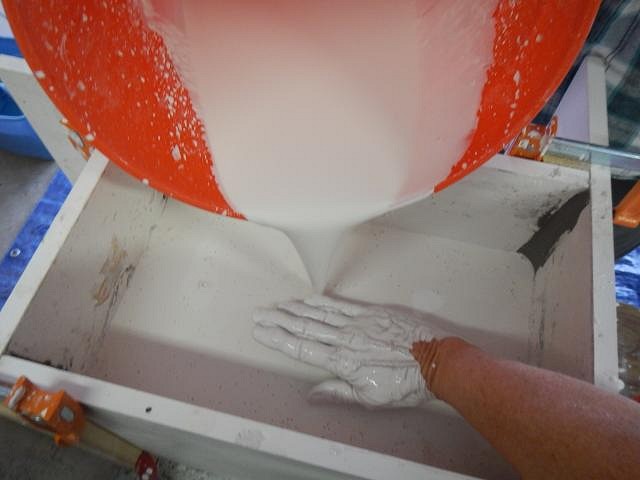
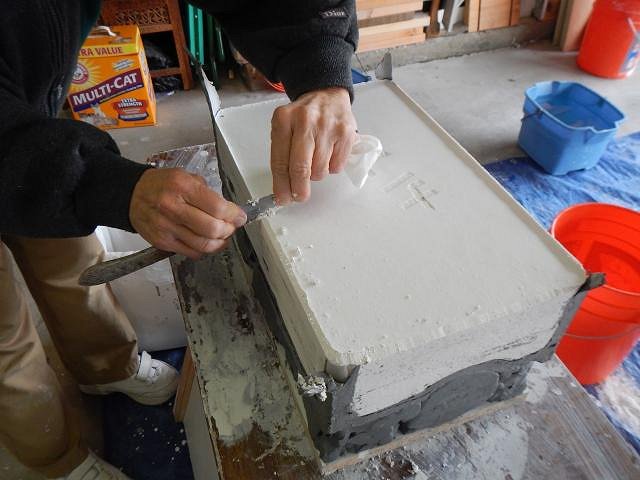
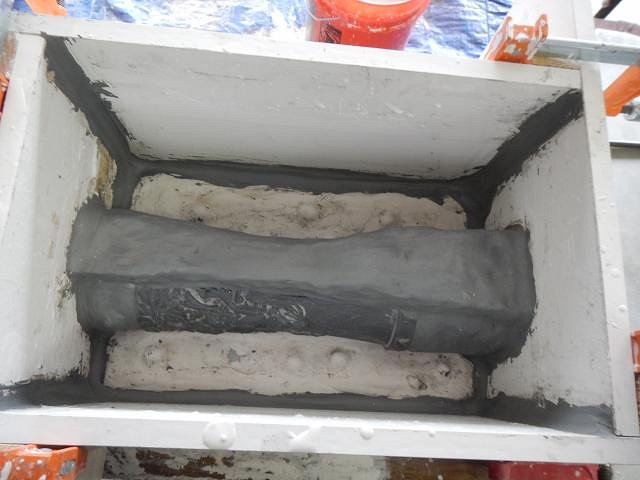
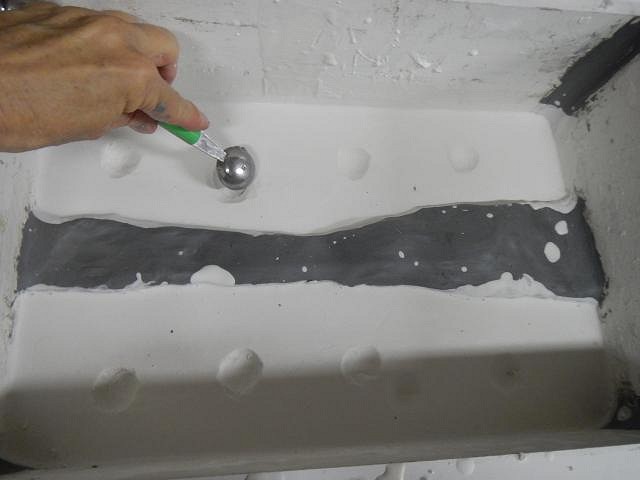
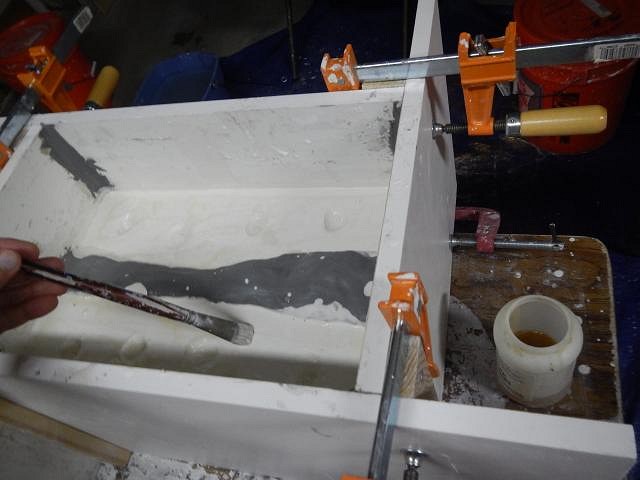
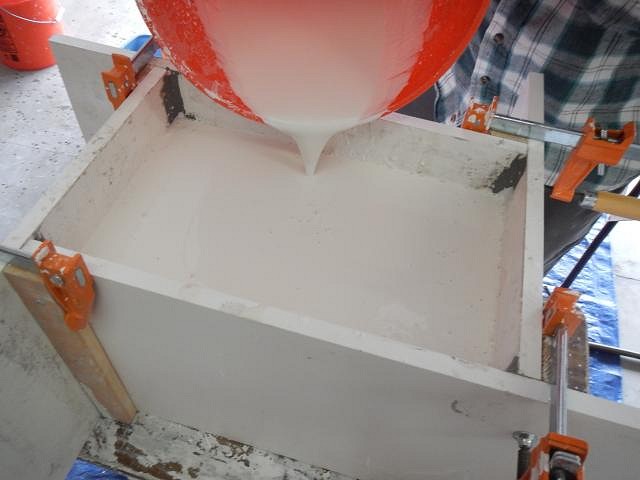
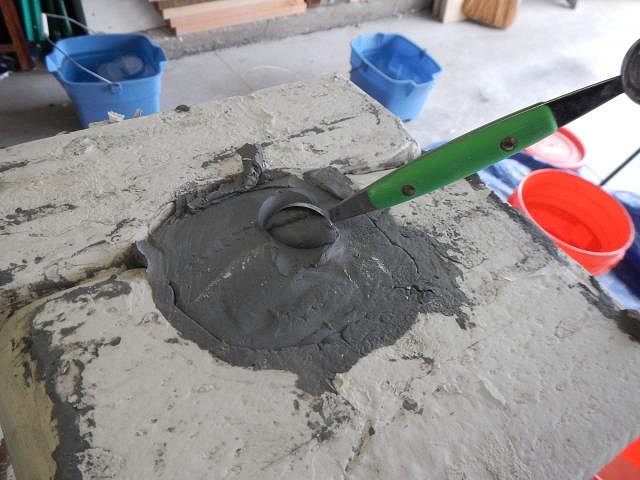
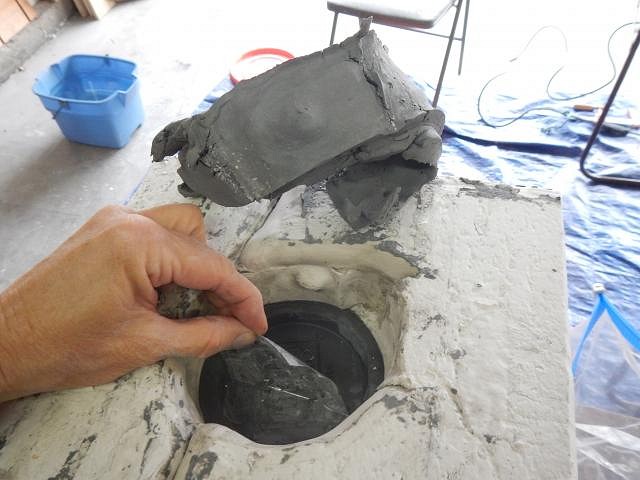
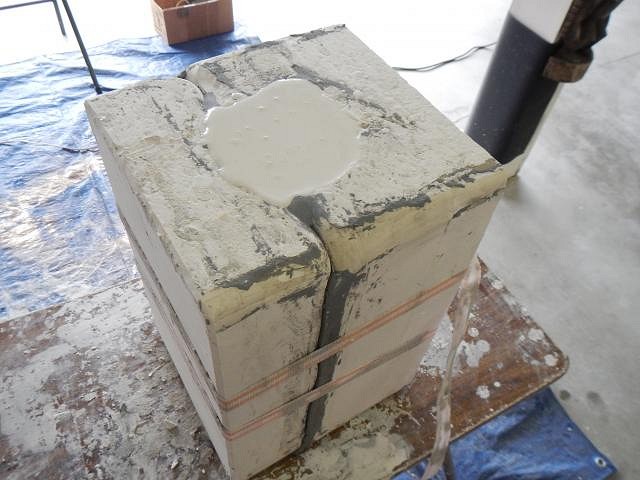
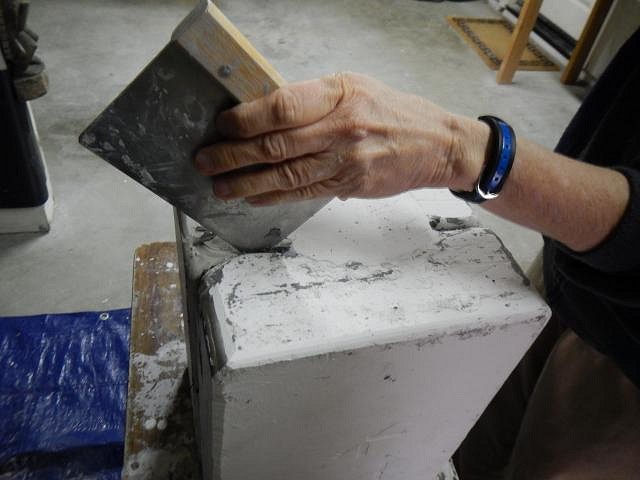
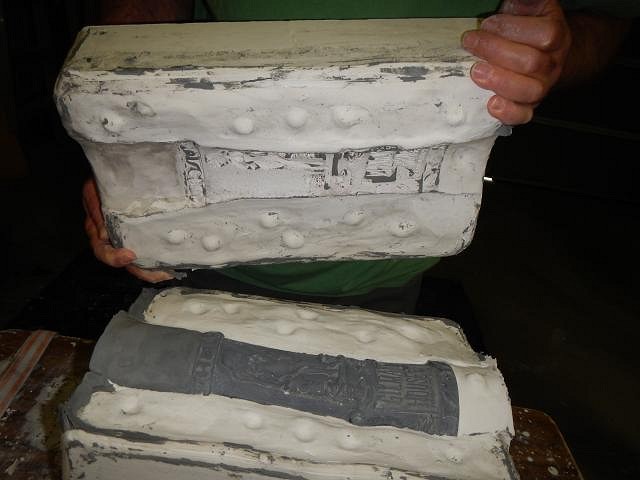
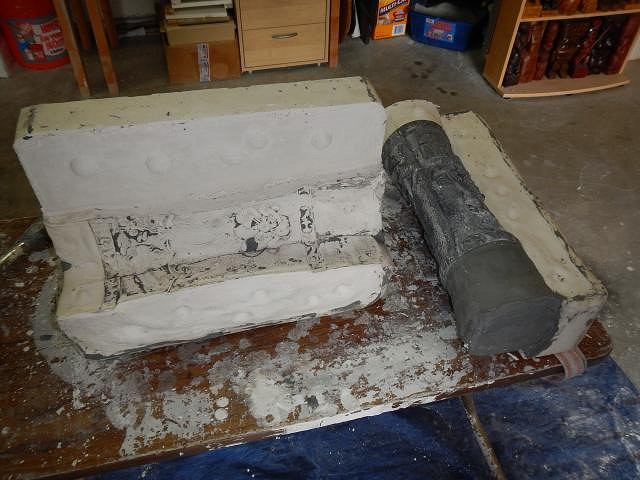
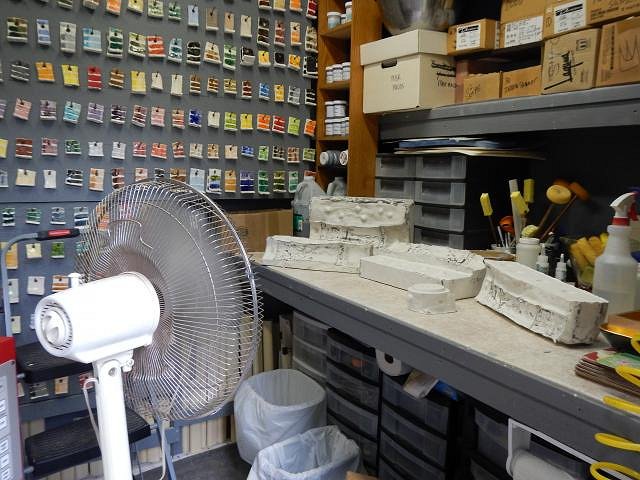
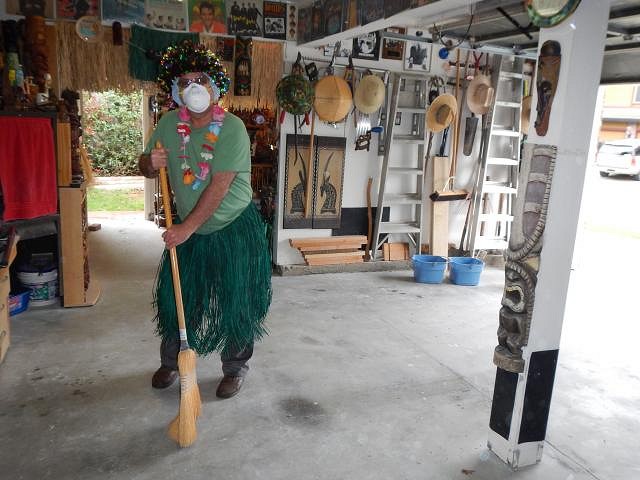
GROG I don't think so because with all that hair you looked fully dressed! ==================================================================================================== I've copied it here again to keep this post together. https://www.kickstarter.com/projects/jchaffin/the-innsmouth-fogcutter-tiki-mug-from-horror-in-cl/ Hi Friends, timing is everything and I like to keep tiki busy. So in addition to the Wish List I signed on to help out with Tiki Atari's innsmouth-fogcutter mug project on kickstarted. If you go to the link above you may read the entire story of how and why he designed this mug, how to purchase it and how to acquire rewards. I am a small part of it. I think he contacted me because of all the topless hula girls that have shown up in my work. Example of what I will be doing for him is that I'll change the girl so that she is topless. Another change will be in how they are glazed. I am only a part of his reward program and he is paying me the same as if each of these mugs were on the Wish List. I am not a company so he doesn't get any bargains. That is why I agreed to sign on for this project. He is paying me for the mold I had to make to do his special rewards. Thank you Tiki Atari for asking me to be a part of your project. This will not slow down all the Wish List projects I have in the works because his mold has to dry for a month. During that time I will be working on all the projects I have sculpted. ======================================================== Here is how I made the mold. Since I have posted so many series of making mold on my thread I cut down the number of photos. If I left you with a question please just ask. The mug arrived on Friday February 28th at 2 PM. I opened the box in the Buzzy bedroom and examined it closely. Tiki Atari's work is under the label HORRORS IN CLAY. That is a perfect description of trying to mold this mug. The detail is incredible. It was designed on-line and sculpted/manufactured in plastic by a 3D printer. There was nothing on this mug that was able to be molded in plaster. All of it had undercuts or was too deep for the plaster to be pulled out of so I contacted Jonathan and told him what I would need to do. He said go for it. On Saturday I began to add clay behind each part of the 3D parts either to eliminate the undercuts or bring it up so that it wasn't too deep. This shows how it looked after my clay additions dried. I then drew lines to show where each mold piece would be made. On Sunday we got started at 6 am so that we could make the mold in one day. First I found a bottom board the right length. It was a bit wide but at the early hour we couldn't wake our neighbors with a rip saw so it had to be fine. The lettering on the bottom was just right without any clay. To protect it from filling up I covered with letters with tape. I added a rounded piece of clay to the top and to the bottom of the mug. One will be the opening for pouring the mold the other will be removed and filled with plaster as a mold piece. I'll show that at the end. I saturated the mug with mold soap. I hoped this would prevent the clay I was about to add from pulling off the clay on the mug. I began to build up the clay on both sides to the lines for the first piece. Once I had covered everything but the part of the mug for the first piece I added dents/locks with my finger. We placed the box and added snakes to prevent leaks. We mixed (always wear a face mask) and added the plaster. I patted the mug to remove air bubbles. This also shows how thick to mix the plaster. It should look like buttermilk on your hand. Once the first piece was hard and warm we removed the box and I scrapped off the sharp edges. I removed the clay from the sides. I then built a wall of clay between the two sides and then we put the box on and snaked it. I did three layers of mold soap, letting is sink into the plaster each time before I blotted it off. We poured two sides at once and before the plaster was too hard I carved in the locks. Mold soap three times again. I then removed the clay wall. Scrapped the sharp edges and did 3 layers of mold soap inside the gap. This piece would be very fragile if only it was poured. So in addition to pouring where the wall had been we also poured a top slab. The slab will protect it. We removed the box put on straps and turned the mold so the bottom was up. I dug out the clay. I removed the protective tape and after three preparations with the mold soap we poured the last piece. I used my favorite kitchen tool to separate the mold pieces for the first time. You can see that some of the undercut clay was pulled off by the plaster. It will dry and be brushed off. I only missed one undercut and a 3 x 3 mm piece of plaster was pulled off. That area will just have extra clay and I will carve it down to match the mug. We moved all the pieces to the kiln shed. As soon as I've sanded the Wish List projects and start to bisque fire them the heat from the kiln will help the fan to dry out this mold. Dan's a sweetheart. He let me finish sculpting the last Wish List project while he cleaned up the entire mess. He even dressed up for all of you. I couldn't begin to do this work without Dan. Thank you darling. Wendy |