Tiki Central / Other Crafts / Wendy Cevola - Doing a major repair of a Tiki Diablo bowl.
Post #734974 by danlovestikis on Mon, Jan 12, 2015 10:20 AM
|
D

danlovestikis
Posted
posted
on
Mon, Jan 12, 2015 10:20 AM
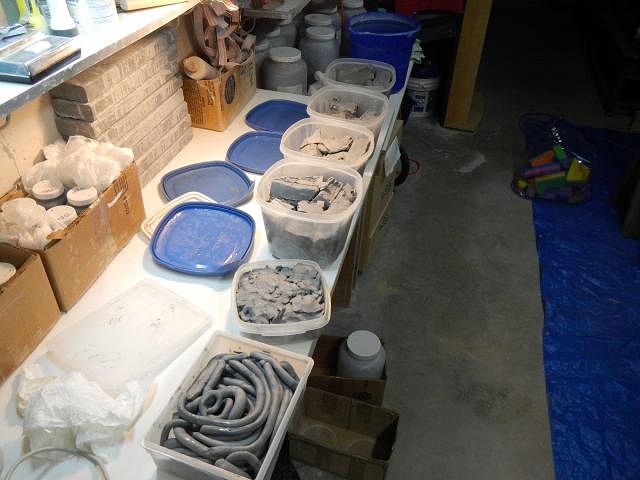
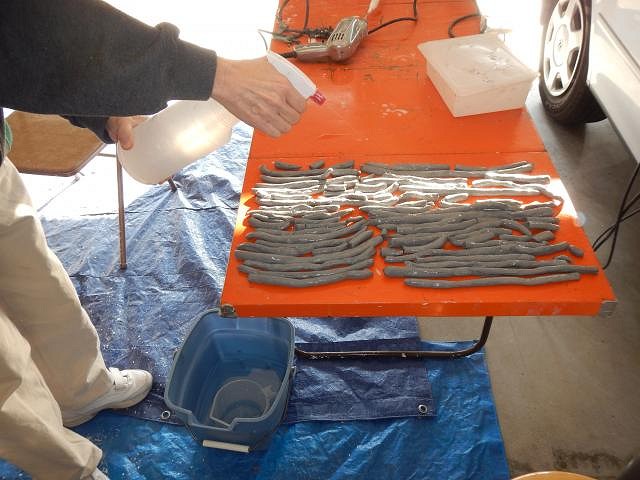
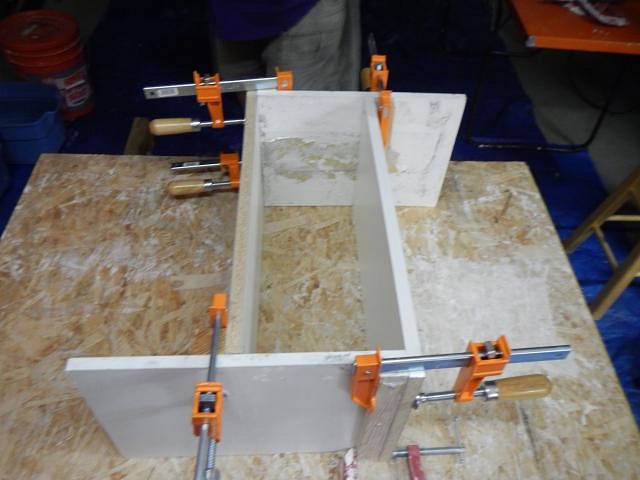
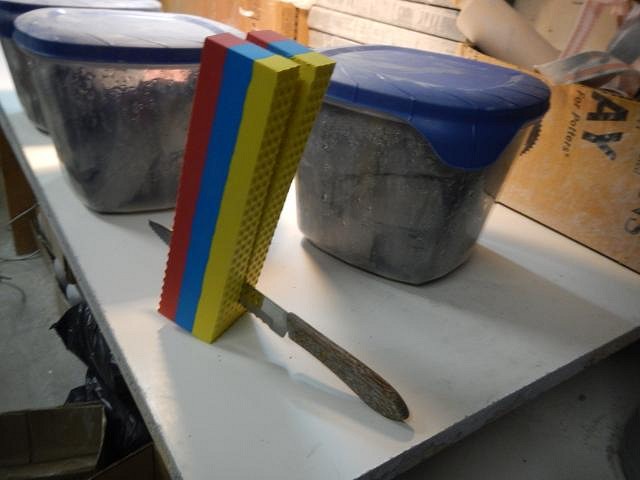
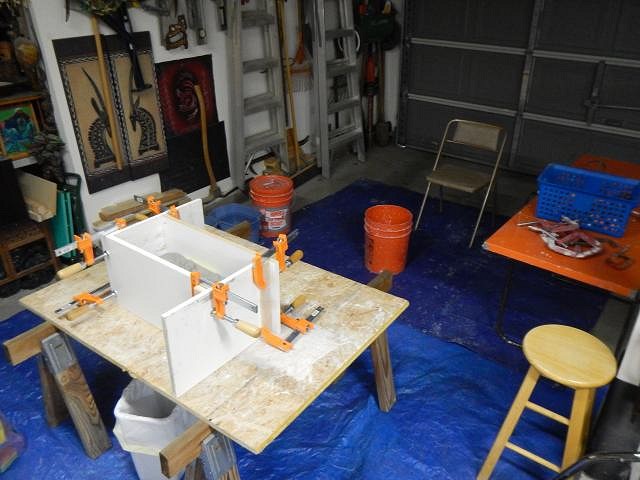
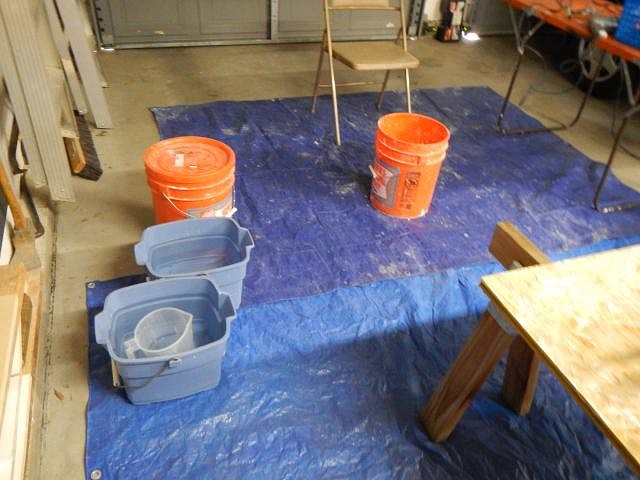
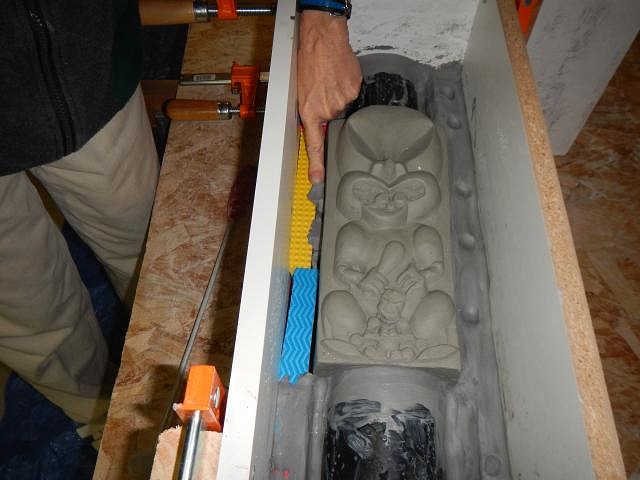
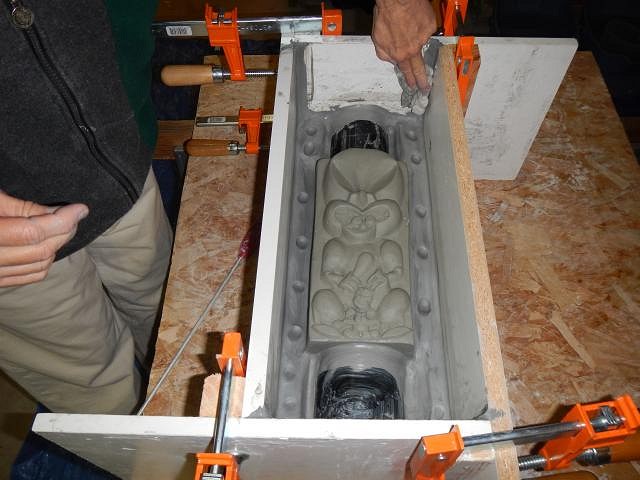
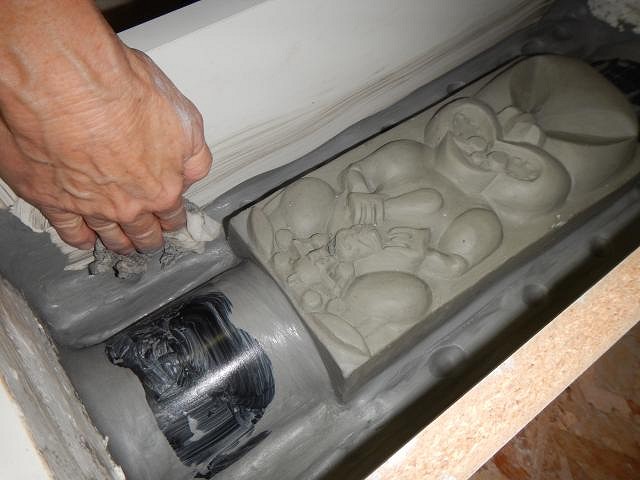
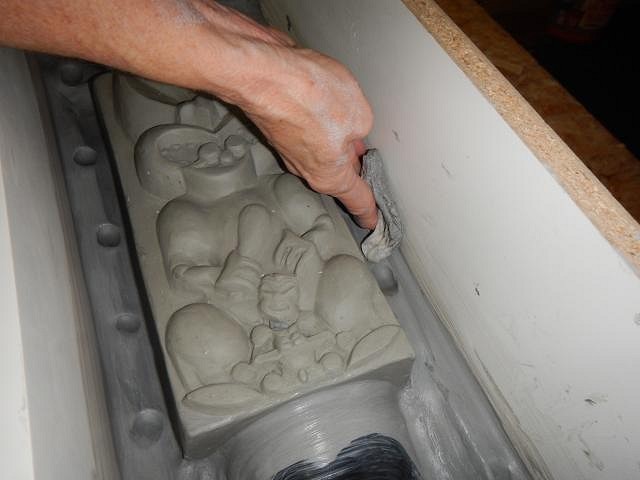
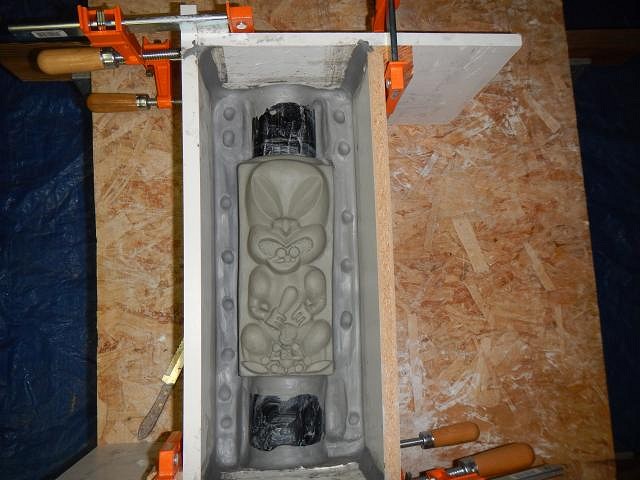
ebtiki you are a good friend. You are also on the Ohana Infirmary page started by Vampiress RN. Thank you for letting everyone know your whole story. Will you be in the case for 6 weeks or longer? I got one of those arm covers at the drug store so I could shower easily. I was so excited to see you start your room. Now you can just fine tune all your plans. Best wishes for a good recovery. LoriLovesTiki my favorit tool is a sharp wire in the shape of a triangle. I use a paint brush to clean up the carving lines or you can wait until it drys and run through the lines again and then sand it. The shirt looks wonderful. =============================================== It's time to mold Tyber Tiki's HUGE Maori mug/lamp. This is a base, all the fine carving will come after I begin to case these. This will be the largest we have ever done. I took many photos so I'll post a section each day until I finish. This will be a teaching tool for those of you wanting to make your own. Feel free to copy and paste these photos. I started by making a big card with photos on it so we didn't forget a step. Especially MOLD soap between the plaster pieces. Here goes Tyber Tiki. This is what I'm molding. Here starts the step by steps. After the last time we made a mold I stored all the used clay in these containers. That saves it all for the next time. We had leftover snakes saved so this time we just lay them on a table and sprayed them with water to keep them soft. I did this spraying every half hour as the day progressed. The day before Dan used the wood from Home Depot to build the side pieces for the mold box. We put it together here with clamps. There isn't a need for a bottom piece so we didn't cut one this time. I've eliminated that step from my mold making process. At Toys R Us I found the absolutely best children's toy block sets. They do not absorb water and they can be cut to any size needed. These blocks save me so much time and they are reusable. Instead of a layer of clay I use as many blocks as possible to hold the mug and to support the clay that seals the tiki for casting. Backing up a second the room has been set up with tarps and a plastic lined waste can in case I mess up and have a liquid plaster leak. Yes that has happened in the past. Each time we make a mold we learn a better way to accomplish each step. We also have the plaster, the water to mix in and a water bucket to clean the mixer in immediately after mixing. If not spun in water ASAP it will harden on the blades and is not fun to clean off. Now I start to press clay around the tiki. Using soft, not mushy, clay is best. The dents are locks to keep pieces from sliding sideways when you are casting in the future. I've run snakes up the corners of the box. Here's my best hint. To prevent leaks I take a very damp paper towel and I run it along all the places where the clay joins the tiki and the box. This makes the seal between the two much better. Since I started doing this I have not had a single leak when molding. I am very careful not to miss a place. Even up the corners of the box. I forgot to take photos of adding clay to the two black end pieces. They had to also have snakes to seal them to the box. There are a couple of things going on here that are strange to mold making. One is the top and the other is the bottom. A mold only has to be 2 inches thick to pull out water when casting. But the top and bottom here will have more like 6. First this doesn't hurt anything. This happened for two reasons.
Time will tell if these were good ideas. We are now ready to do the next step. Hopefully you all will be back here tomorrow. Any questions or comments so far? Cheers, Wendy PS hang10tiki you must be home recuperating from all the fun, we are missing your photos [ Edited by: danlovestikis 2015-01-12 10:30 ] |