Tiki Central / Other Crafts / Wendy Cevola - New colors of the Frank mug by Frankoma now available.
Post #745280 by danlovestikis on Sat, Jun 20, 2015 4:56 PM
|
D

danlovestikis
Posted
posted
on
Sat, Jun 20, 2015 4:56 PM
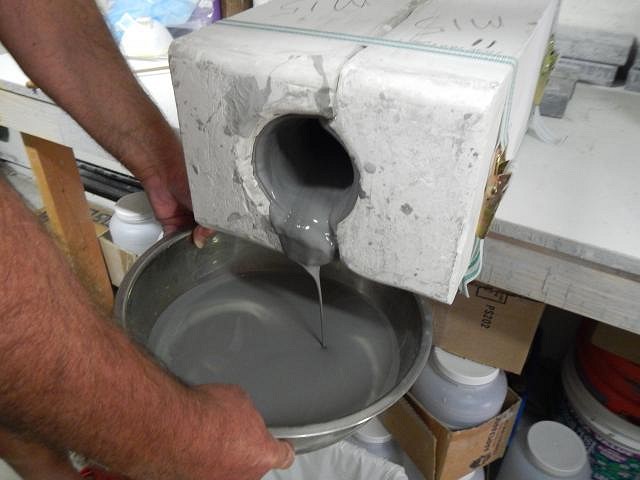
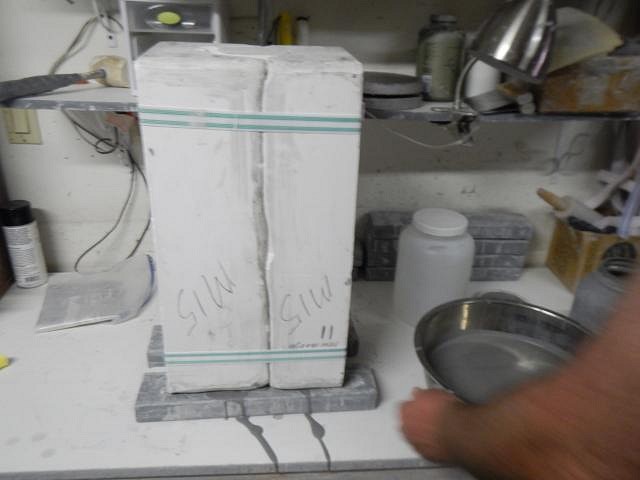
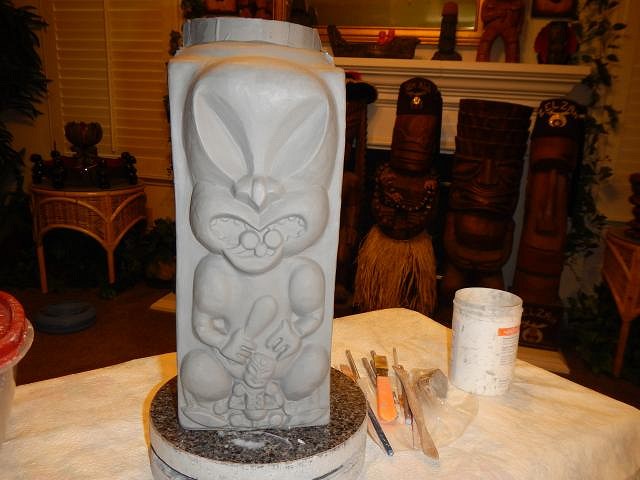
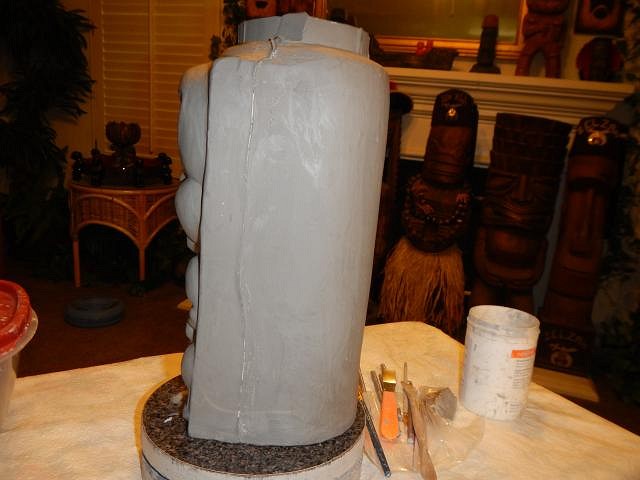
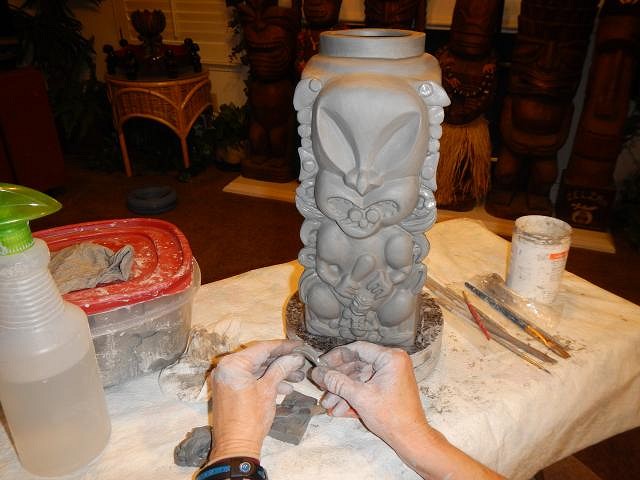
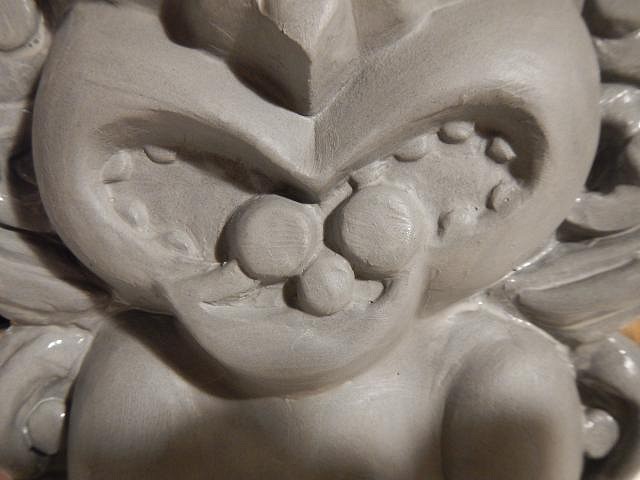
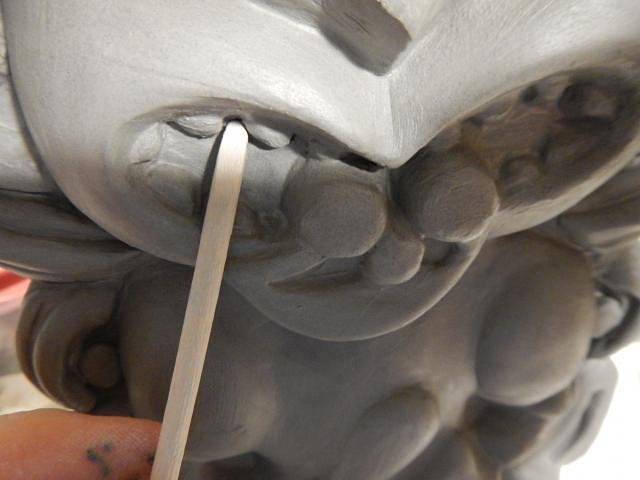
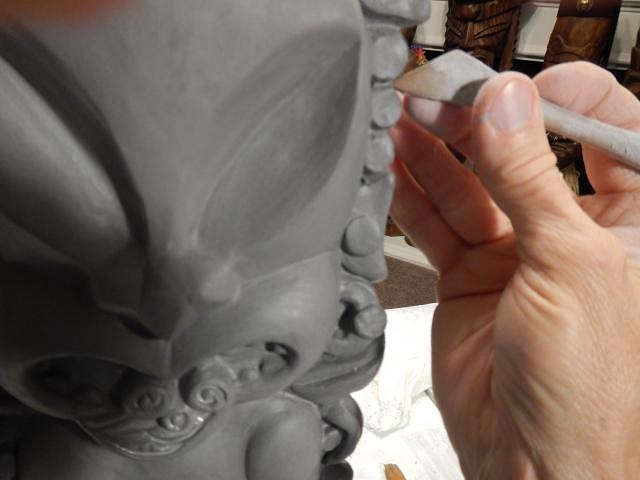
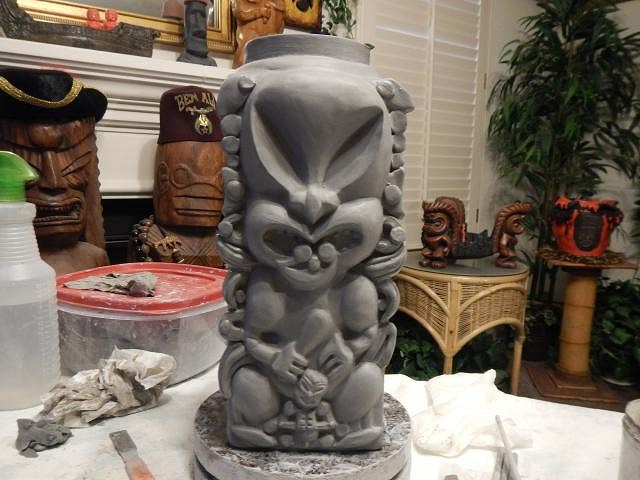
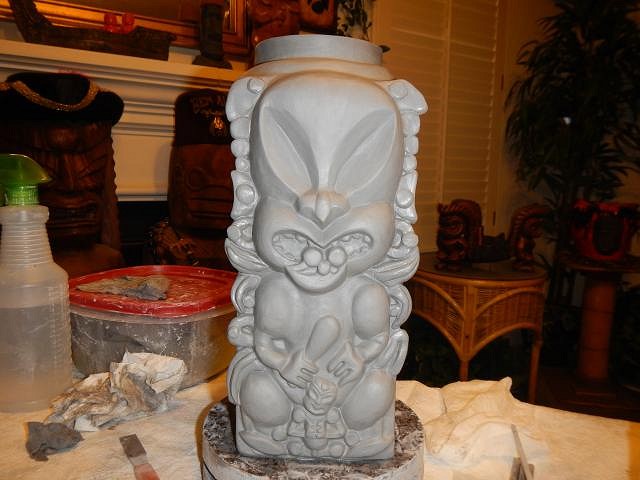
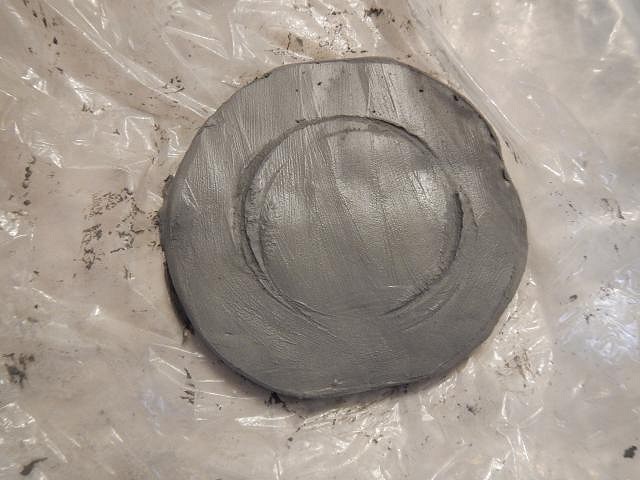
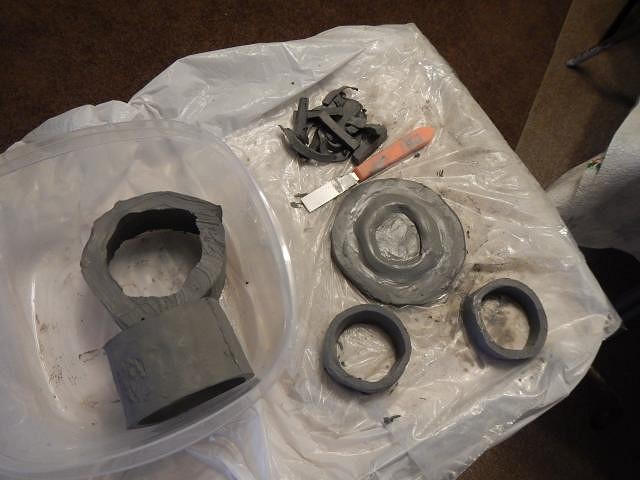
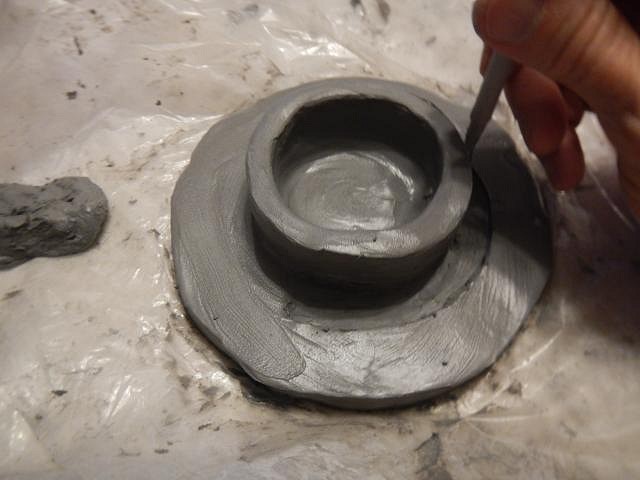
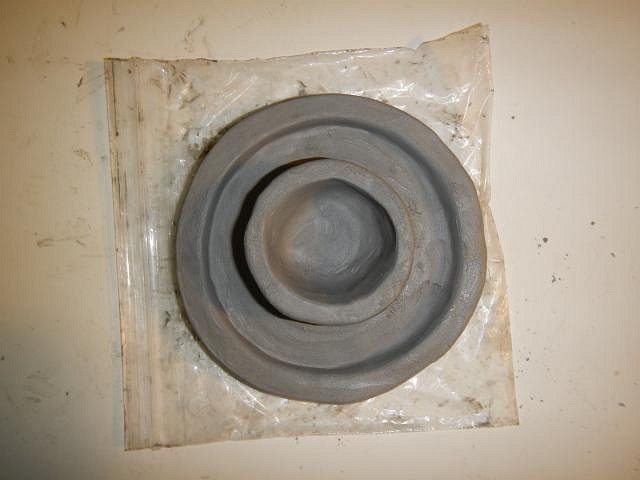
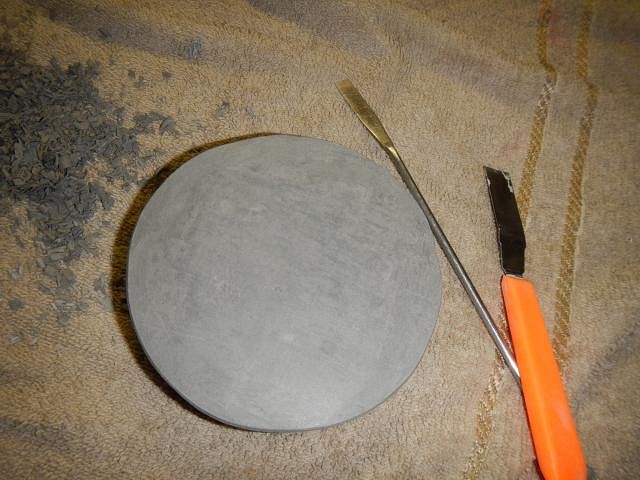
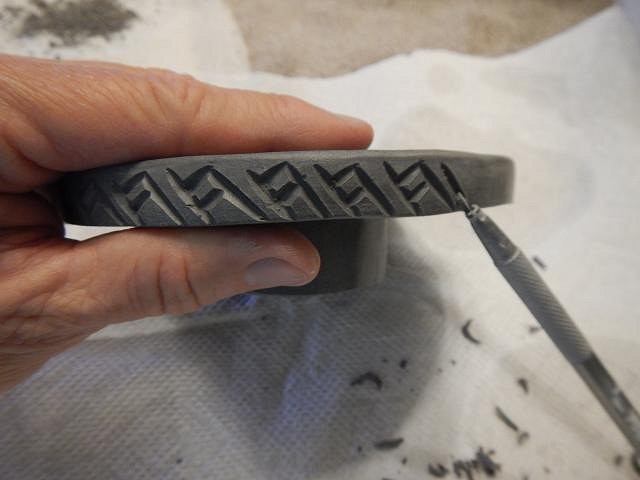
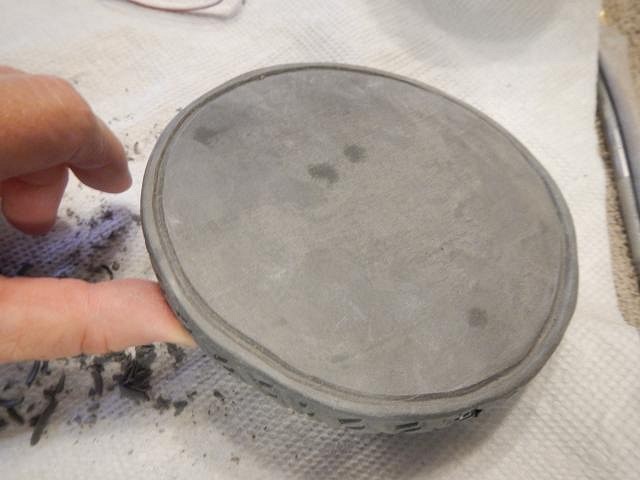
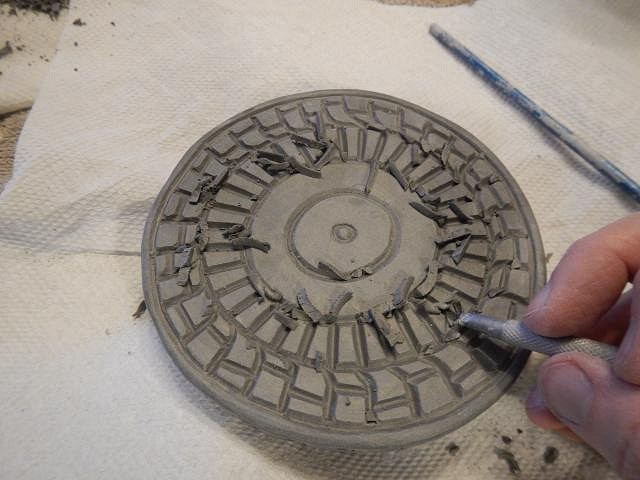
hang10tiki how hot was it? It's wonderful that Palm Springs has 2 tiki places with the Tonga Hut. Did you go there? Are there photos to share? I've always wanted to do the tram and your photos show that it's a fun time. Thank you for posting. I've been working hard and have been lax. I'll try harder. ================== Michael Sbicca aka Tiki Roots Rocka is working on a Tiki Ceramic Art show in Pasadena, California around August 29th. He was kind enough to ask me to make a piece for this show. What could I make that would be something special? I decided to make one of my HUGE Maori hand carved casts. This time as a jar rather than a lamp. We poured in the slip and THREE hours later poured it out and turned the mold upside down for overnight. I did it so long so that it would be very thick and heavy. Out of the mold I started cleaning off the mold lines that are mostly on the sides. I started adding shapes to the sides from top to bottom. Next because this cast is so thick I carved the mouth deeper. I didn't use a carving tool I used a stick whose end I had shaped. I used my favorite tool to fuse the added clay pieces to the sides. I was finished for this day and took a photo without a flash and with a flash. Then it was covered up so the clay pieces could equalize in water content with the whole cast. Now I started the lid. I cut a rough disk out of clay the same thickness as the rest of the cast. I save all the clay I cut off from cast mugs etc. as long as it doesn't have any plaster embedded into it. I get lots of clay tubes that I can use for lids or hats. I added a ring of sticky clay and I choose a ring of clay the right size to press into this clay. I began to carve the indented ring that will sit on top of the cast. I keep it moist so that it will be smooth and easy to work with. Both the tiki and the lid were kept covered for an hour then exposed for an hour. I did this day after day until they were firm. I was able to fine tune the shaping of the lid. Nice and smooth on the top with some help of my label scrapper tool. Next I began to carve the outer edge and then the top. This was fun to carve. No machine perfection just the best I could do. More soon. Cheers, Wendy PS Tyber Tiki thank you so much for your Wish List #5 project. This will be number 3 but each is unique [ Edited by: danlovestikis 2015-06-20 16:59 ] |