Tiki Central / Other Crafts / Wendy Cevola - NEW: Frankoma Widow Maker for sale.
Post #766779 by danlovestikis on Thu, Jul 28, 2016 1:07 PM
|
D

danlovestikis
Posted
posted
on
Thu, Jul 28, 2016 1:07 PM
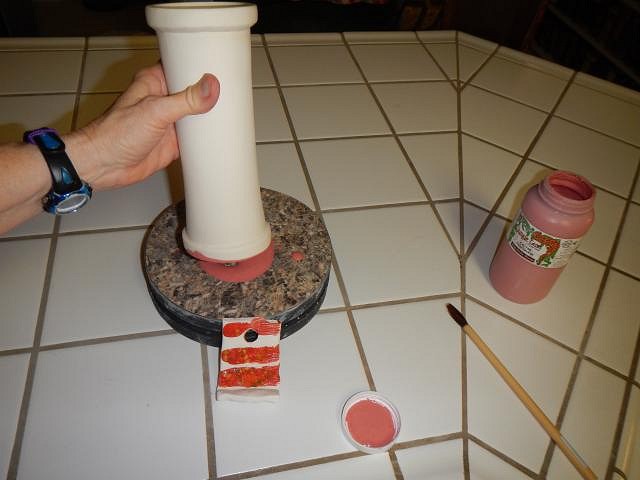
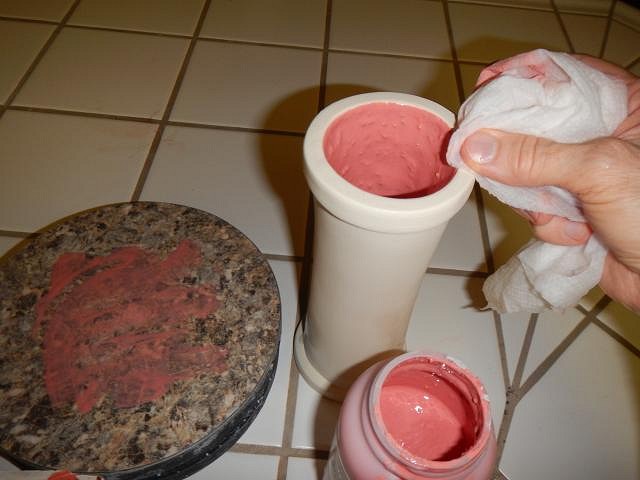
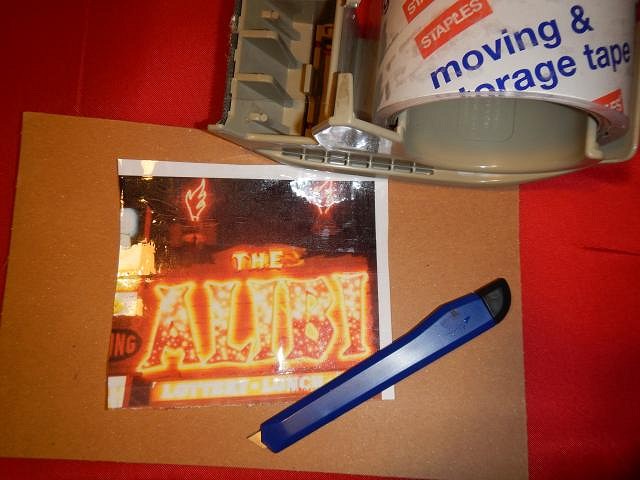
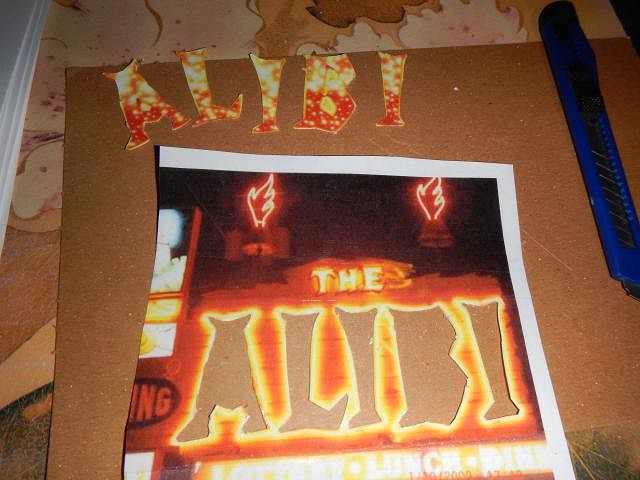
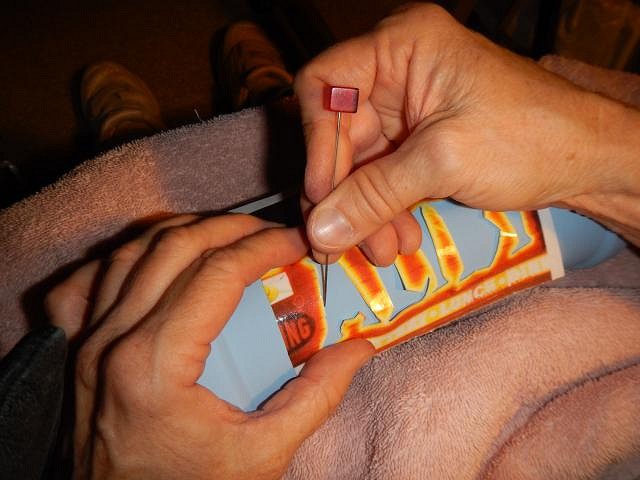
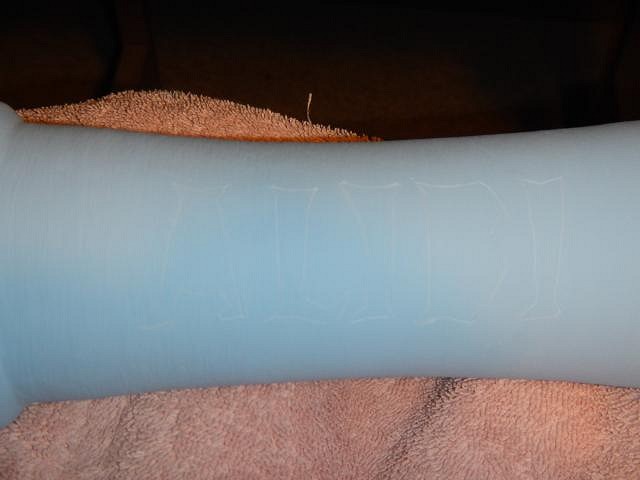
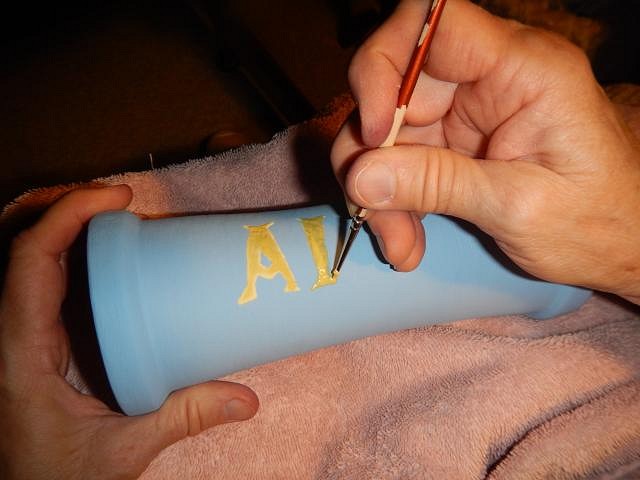
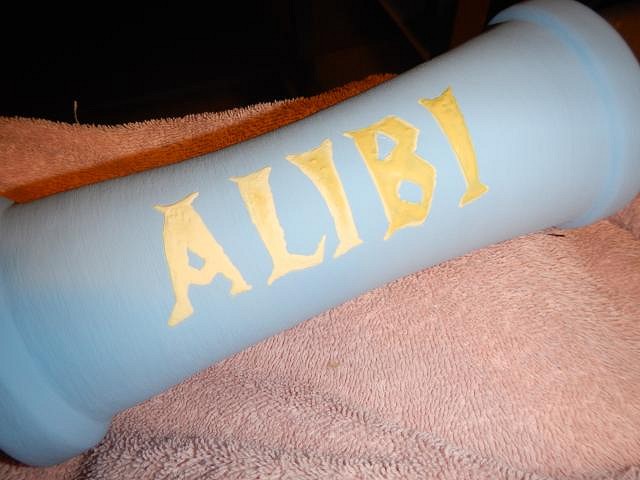
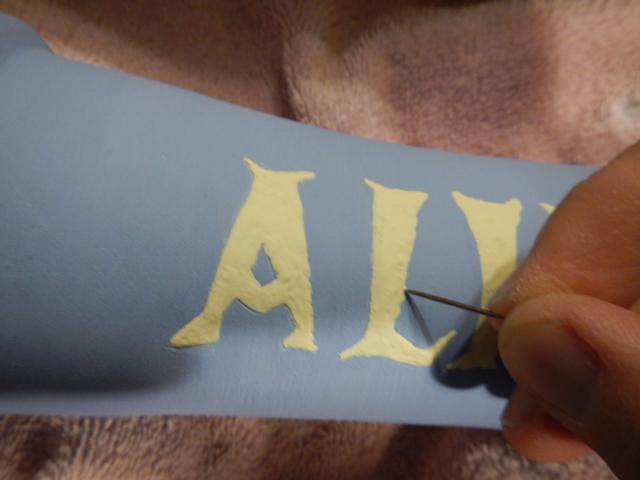
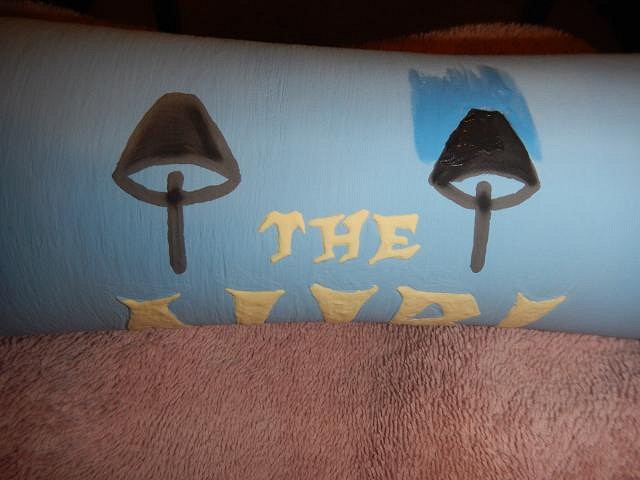
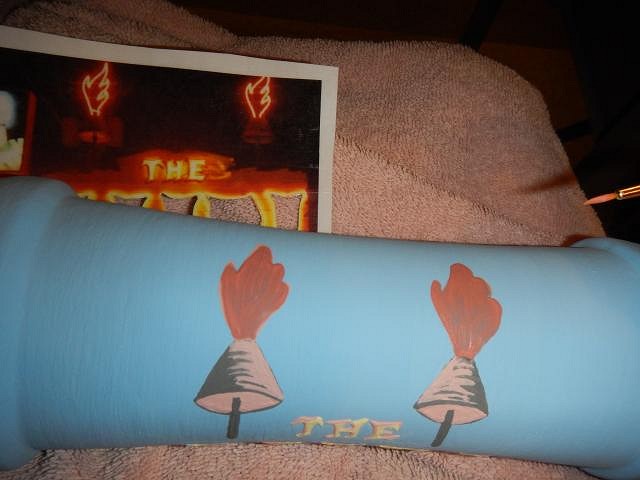
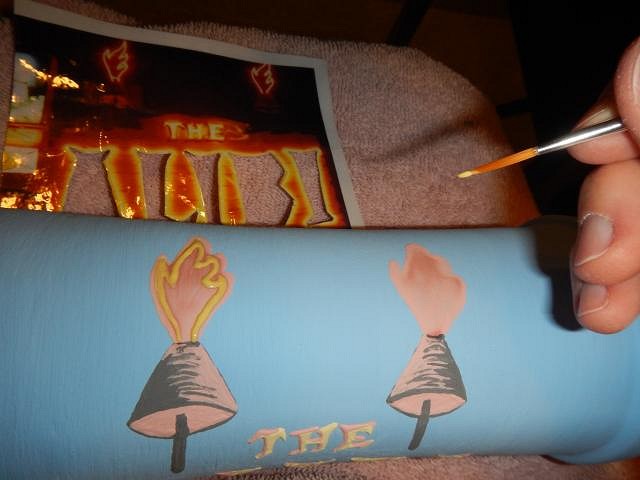
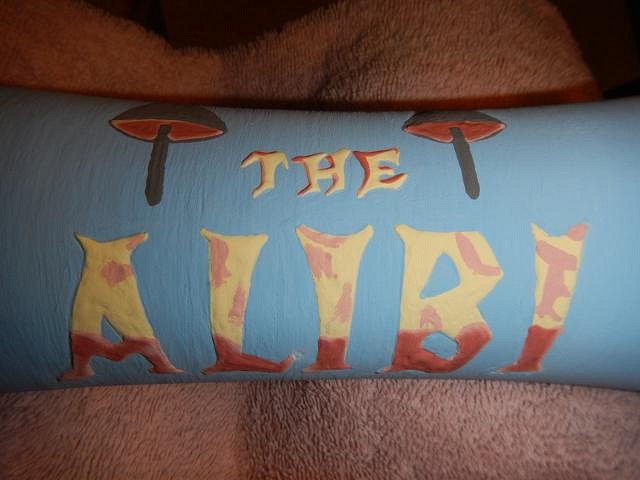
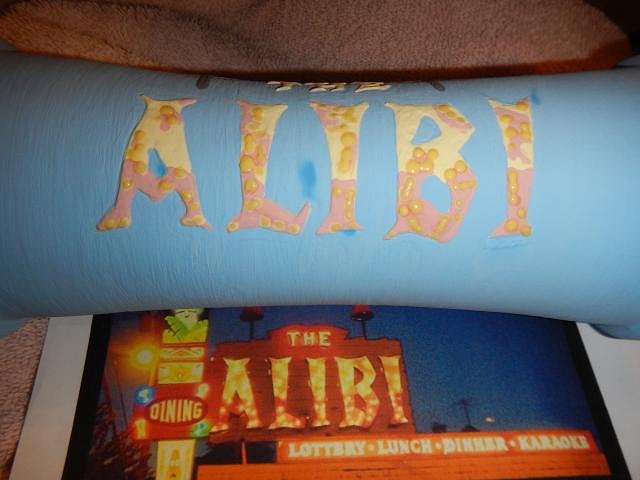
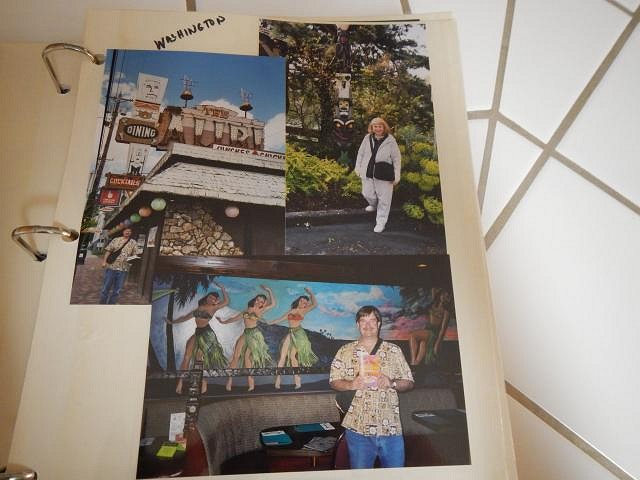
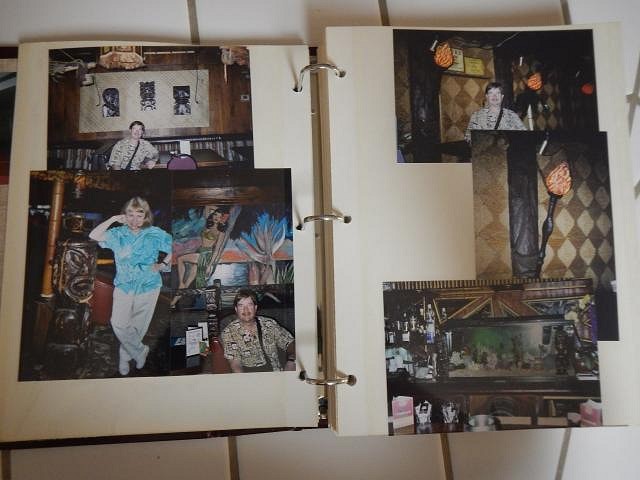
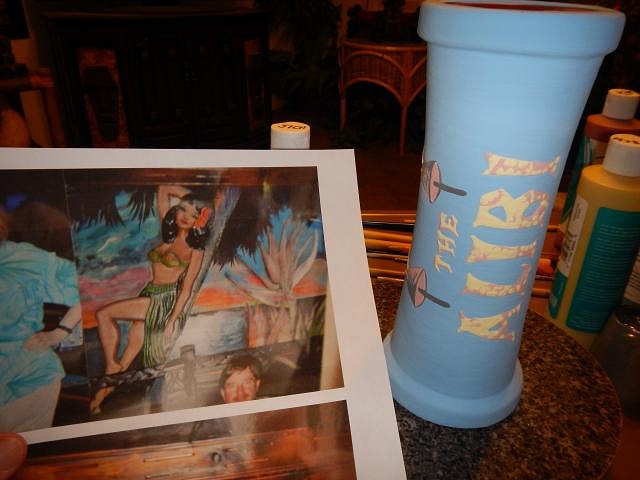
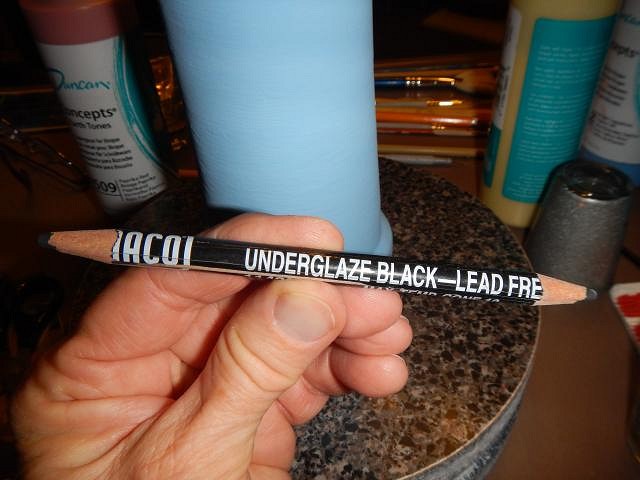
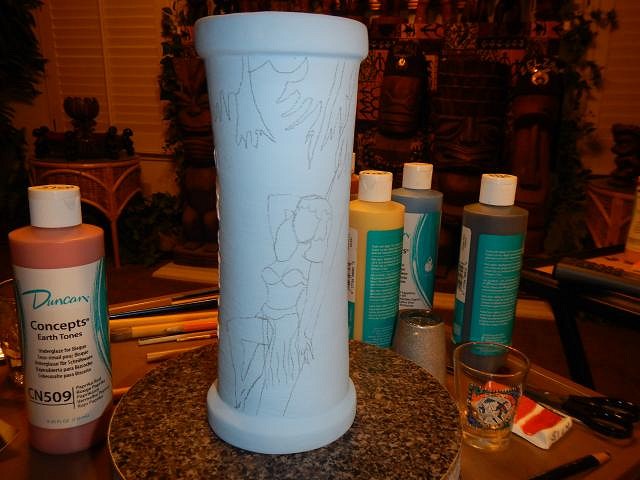
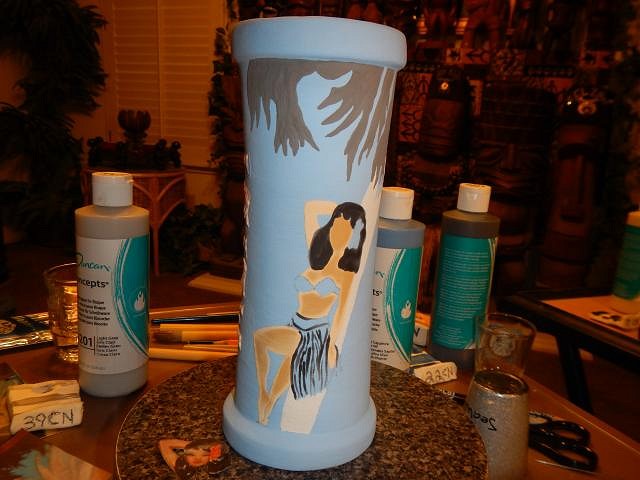
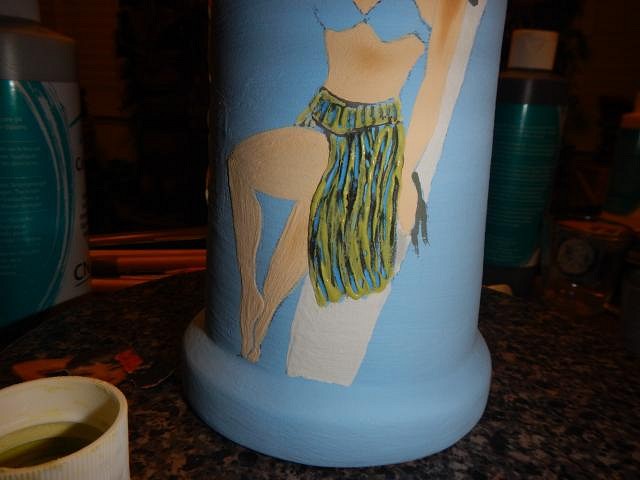
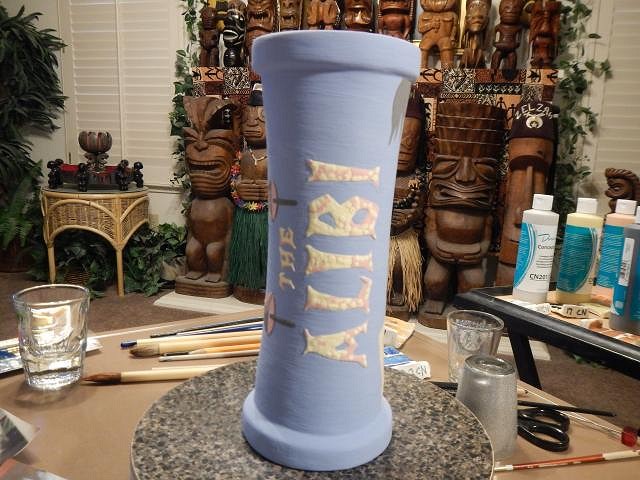
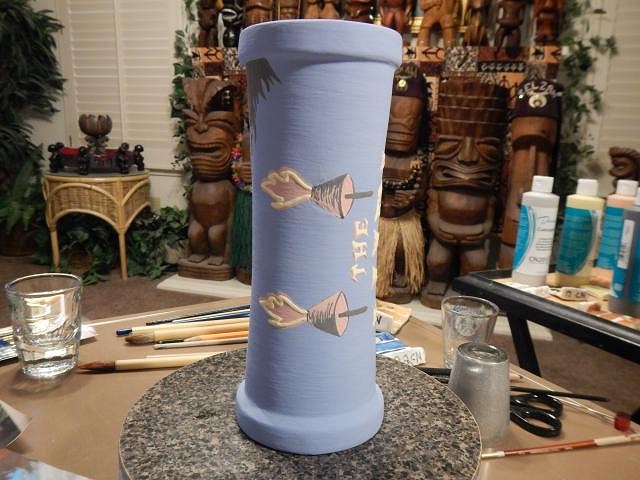
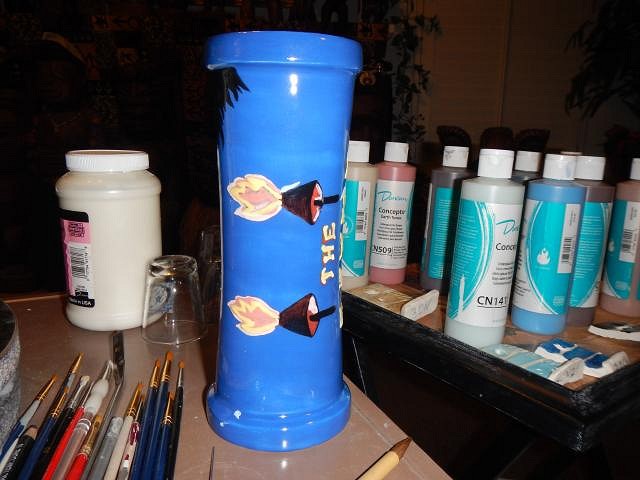
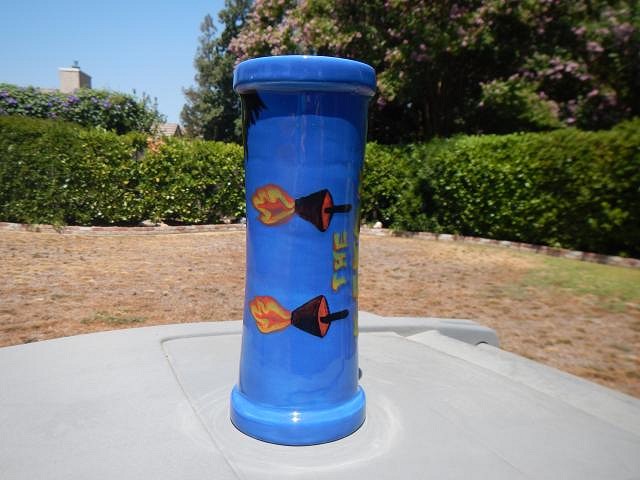
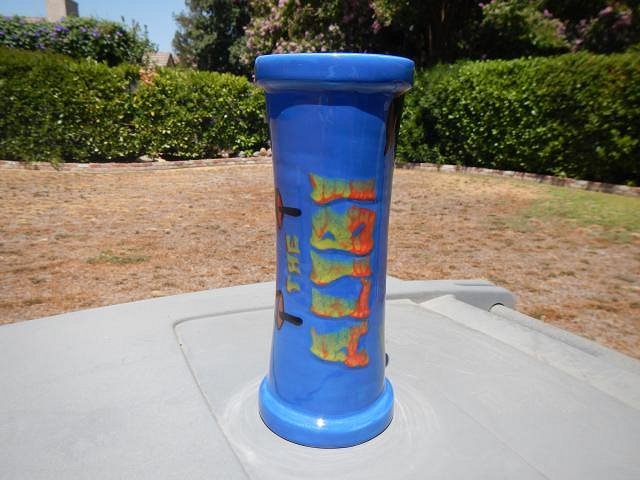
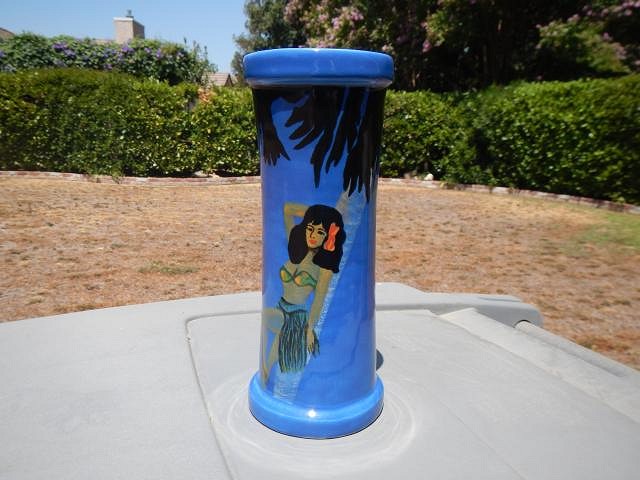
hang10tiki feeling great looking like a mess! Glazing hours on end. Wonderful photos. Brings back memories of Tiki Kon a few years back. hang10tiki you need another tiki room. Time to branch out!!! Danno you are so welcome. I need to go see that tower. I think I may make some Tiki Bob's with that design on the back! Thank you for the inspiration. TikiAno AH I'm blushing. Thank you. The swap is coming up soon. It's going to be fun to see if we swap at Oasis or we all are shipping. hang10tiki Oasis fun just around the corner. ============================= The next blank fogcutter was glazed for DixonAlibi for a birthday gift for the daughter of the owner of the Alibi. Here are the steps which took more than a week to complete. I always start with the inside of a mug. That way I don't mess up the outside with drips or runs. I used to let the fancy glaze be on the top of the rim until I had some of the crystals pop off onto other tikis. So now I wipe the top clean. A layer at a time drying outside between each one. I printed a photo of the sign and covered it with tape to make it strong. Then I cut out the name to make a stencil. I put it in place and used a pin to mark the name. Later on this post I will show you how I now use an under-glaze pencil. I try to keep figuring it out. You can hardly see the scratch I've put on the glaze for the name but it's just enough to follow. I got out the background color and went to work. First of three layers. I dried each one outside before doing the next. I used the pin to clean up the edges and I then added a bit of blue glaze...just in case. Trying to match shapes is really hard. So when it's not right I use a craving tool to remove glaze and then I touch it up. Red and then the neon yellow. I tried to match the neon lights and the red and yellow colors of the sign. I hope it works out. When I was asked to do this mug I was allowed to come up with the design. DixonAlibi mentioned adding a hula girl. I went to an old album from 2005 and found our photos of our trip to Portland. I used my own photos for the design.
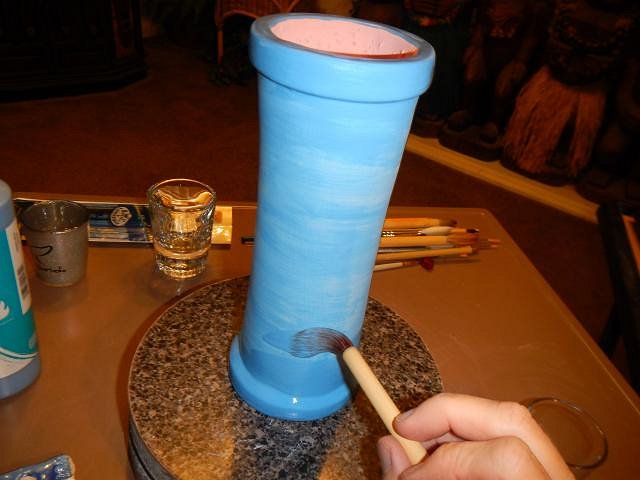
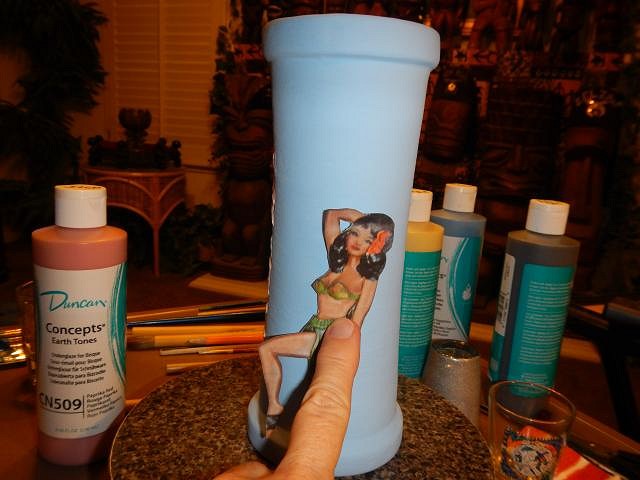
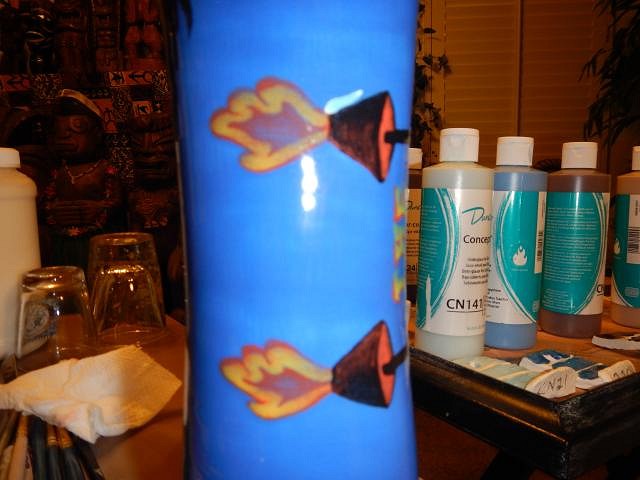
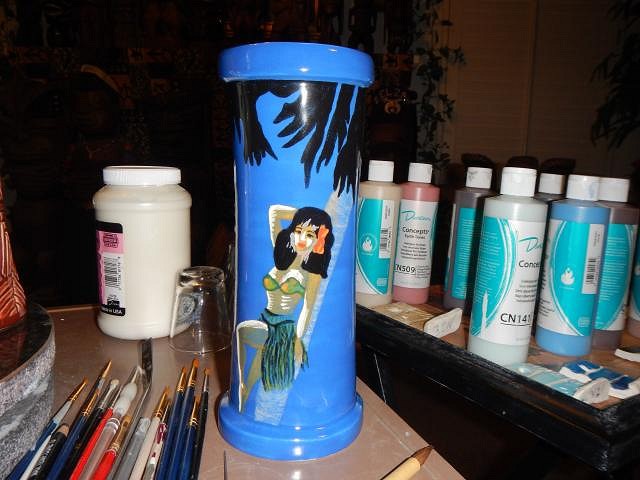
Here's a new technique. This is an under-glaze pencil. Since it fires the same as black under-glaze I decided to use it to outline my drawing. It should disappear under the next layer of glaze when it is fired. I cut out the Alibi hula girl and positioned her on the mug. Then I traced around the photo. Here's what it looked like. Slightly larger than the photo. Step by step I added the different colors of glaze. 3 layers of each color. I had to do the face several times. I would just wipe off the face with a wet paper towel. Any dark glaze left would show up so you have to remove it all. Finally the glazing is done and the mug is ready to fire. Will the glaze stay put or move? It moved. So after this first firing I decided to risk the mug and to add some more layers to see what would happen.
The mug is much darker than it shows here in the sunlight. No matter how I photographed it the darkness doesn't show up well. It has the ambiance of the Alibi. The words first fired a bit wavy and I tried to correct that problem but it remained the same. She's as close as I could get to the hula girl in the bar. As many hours as just one mug takes there is no way that I could ever support myself as an artist. I do it for the pure joy of creating tiki art. Cheers, Wendy PS DixonAlibi if it passes inspection send me your address [ Edited by: danlovestikis 2016-07-28 13:56 ] |