Tiki Central / Other Crafts / Wendy Cevola - Doing a major repair of a Tiki Diablo bowl.
Post #773091 by danlovestikis on Sat, Feb 18, 2017 7:31 AM
|
D

danlovestikis
Posted
posted
on
Sat, Feb 18, 2017 7:31 AM
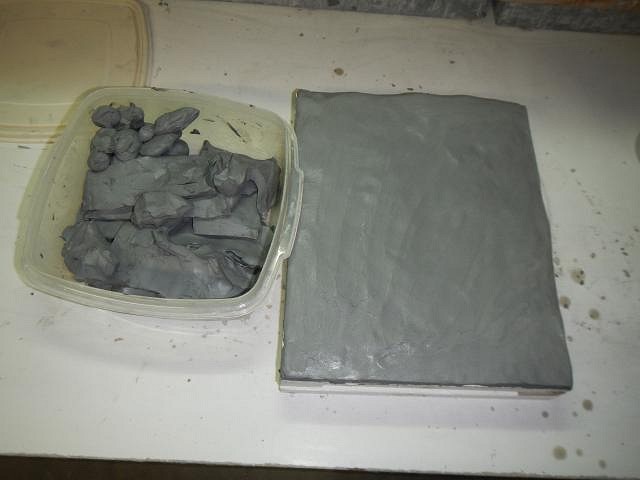
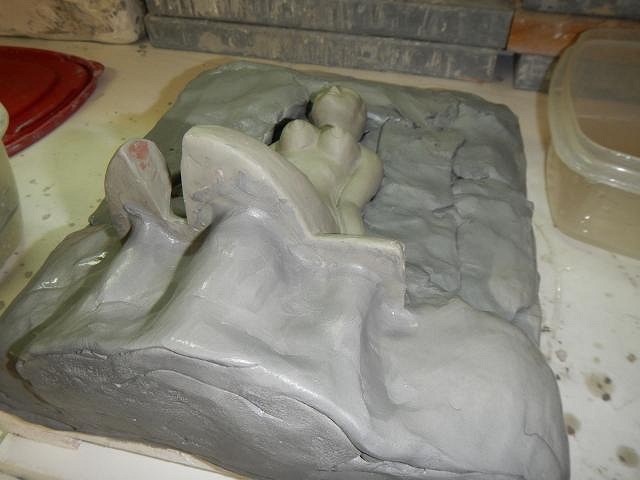
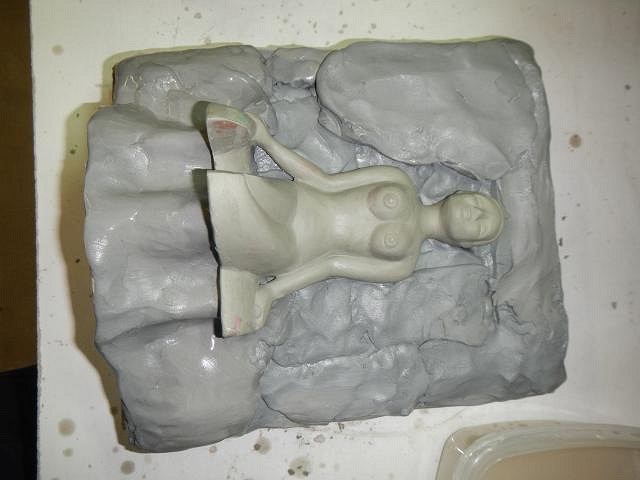
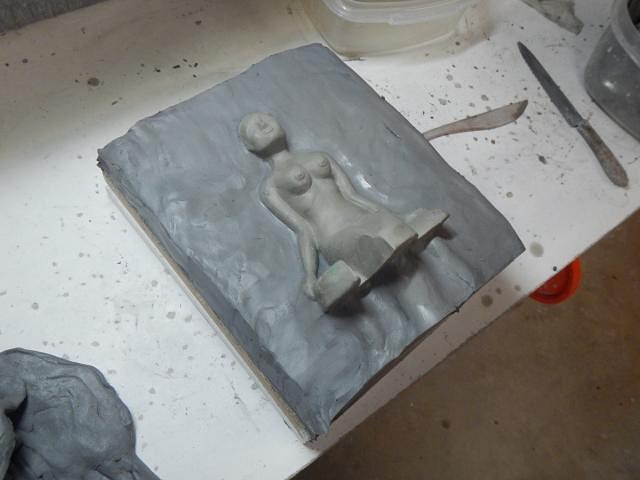
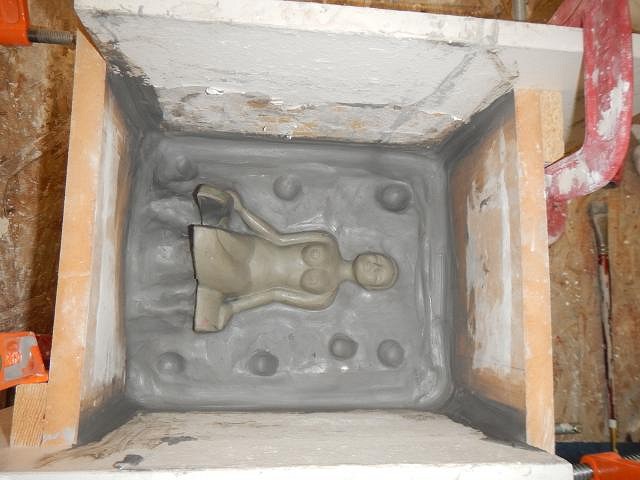
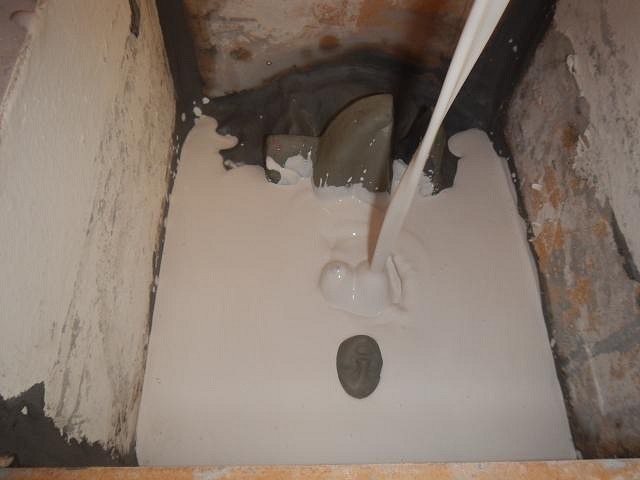
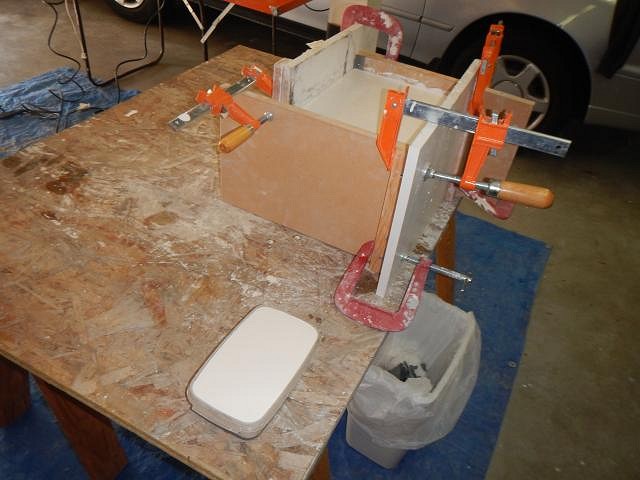
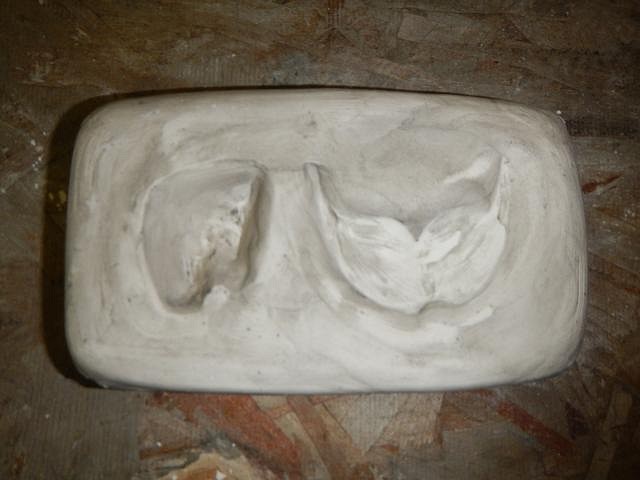
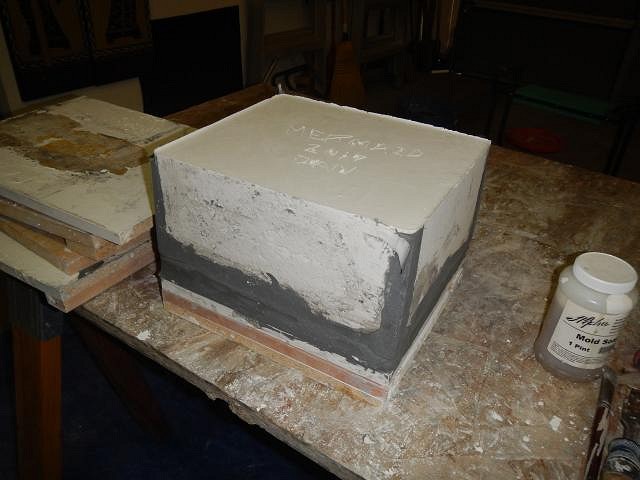
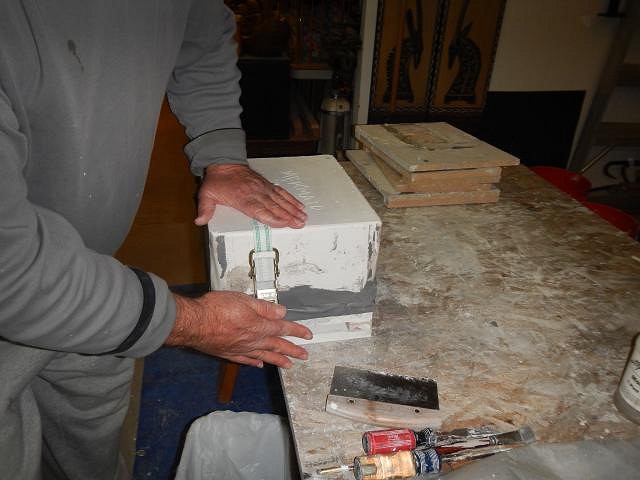
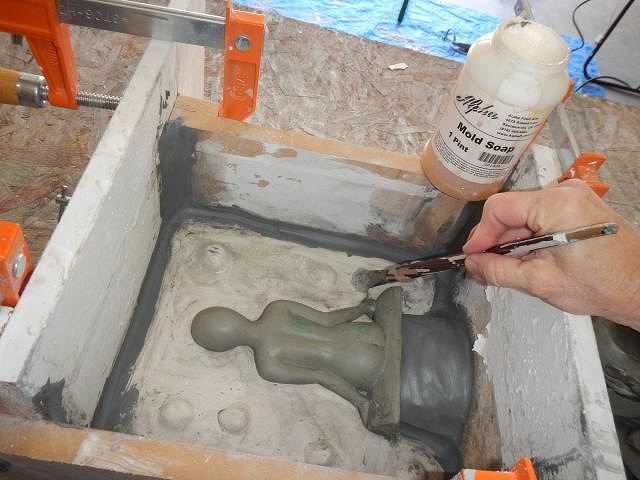
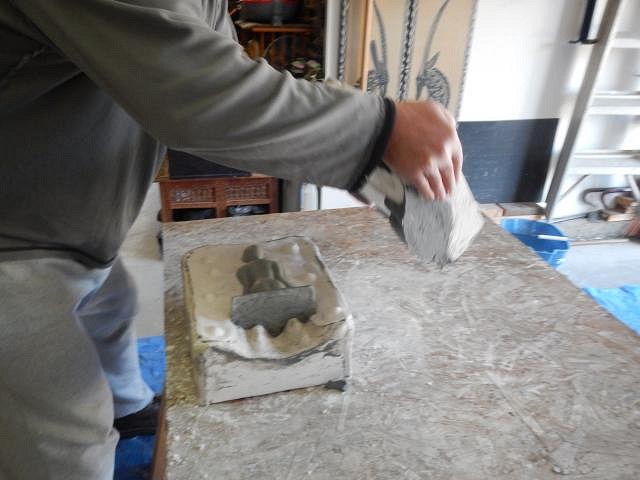
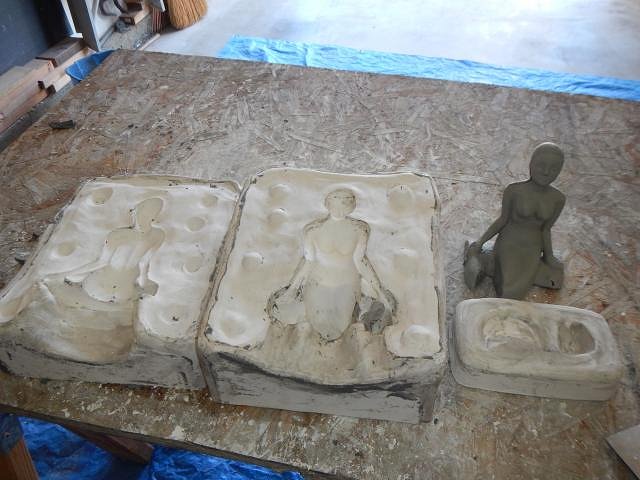
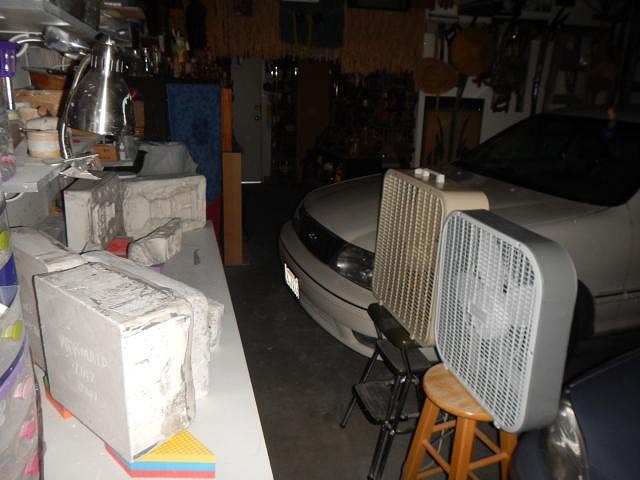
lunavideogames as Elvis would say, "thank you very much". hang10tiki ditto! ================================ Wish List #7 continues with the Tiki The Hut Mermaid mold for lunavideogames. Every time plaster is mixed there is clean up. You don't want to wait even five minutes or you will have plaster set up on your tools that has to be chiseled off. I started the day by putting a layer of clay on the bottom board of the mold. I put the mermaid in place so that she was level. and then I began to surround her with clay. I want to do a 2 piece mold so I have to stop the clay at the right place along the sides of her body. Otherwise she will stick inside the mold. I built up clay at the base where the opening to the mold will be. This is where the slip will pour into the mold. I used a knife to cut away any clay that was hanging over the sides of the board. It looks ready so I pressed into the clay to form locks between the two mold pieces we will make today. Snakes to seal the box joints and it's good to go. I do also seal it with a wet paper towel all the way around the bottom too. Wet T-shirt contest! The first slab is poured. I prepped the tail pieces in a little Tupperware container. It was poured at the same time. When it hardened I removed the sculpture and the mold was ready to start drying. The box was removed and the edges smoothed. Now we put on straps so the mold could be flipped over. I removed all the clay and so far it looks really good. I then put the box around the slab. No need for a bottom board because the slab is taking it's place. Snakes at the joints and mold soap 4 layers so now the last slab has been poured. Once the mold has set I carve into a side what the mold is and the year it was made. I clean up the sharp edges. It looks like I made another thick mold for Dan to lift. Now it is time to open the mold. The first piece came off without a hitch. Next I took out the sculpture from the second piece. No problems there. I put all the pieces on the table for drying. It took three weeks because it is winter and the slabs are so thick. 24/7 with two big fans. Drying the molds sets the plaster so it doesn't break down. It is wonderful to have reached this point in the process. Cheers, Wendy [ Edited by: danlovestikis 2017-02-18 21:51 ] |