Tiki Central / Other Crafts / Wendy Cevola - Doing a major repair of a Tiki Diablo bowl.
Post #776255 by danlovestikis on Thu, May 25, 2017 7:54 AM
|
D

danlovestikis
Posted
posted
on
Thu, May 25, 2017 7:54 AM
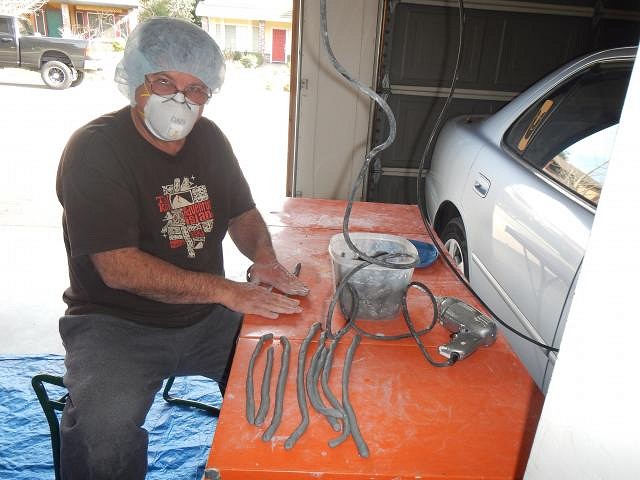
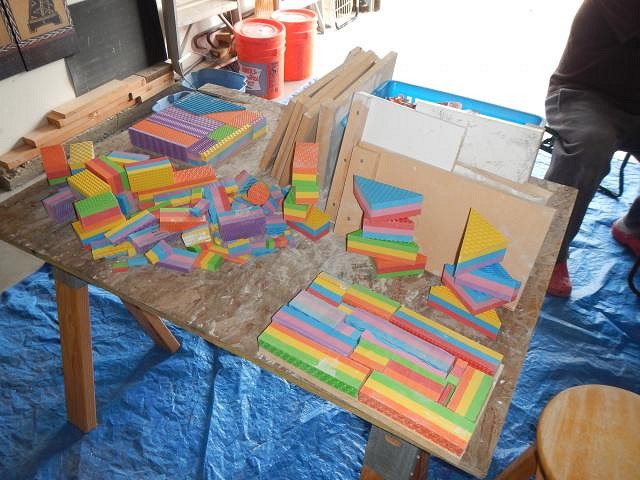
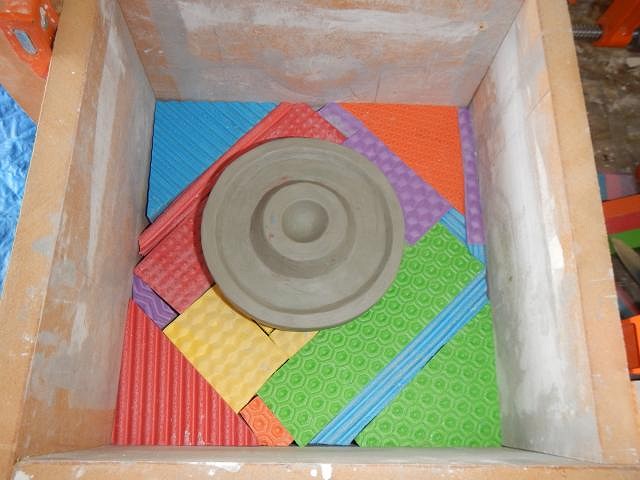
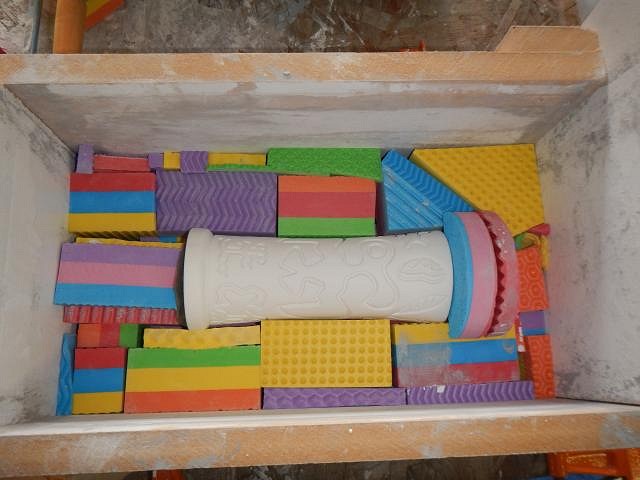
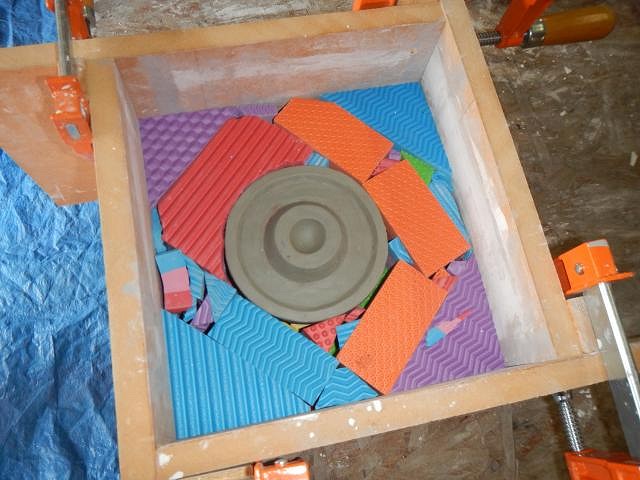
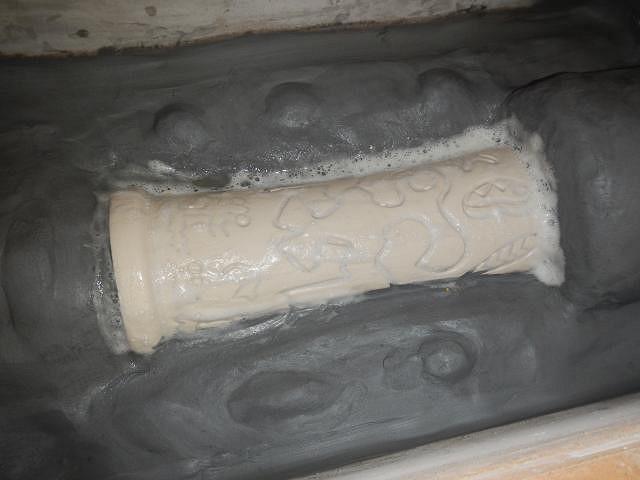
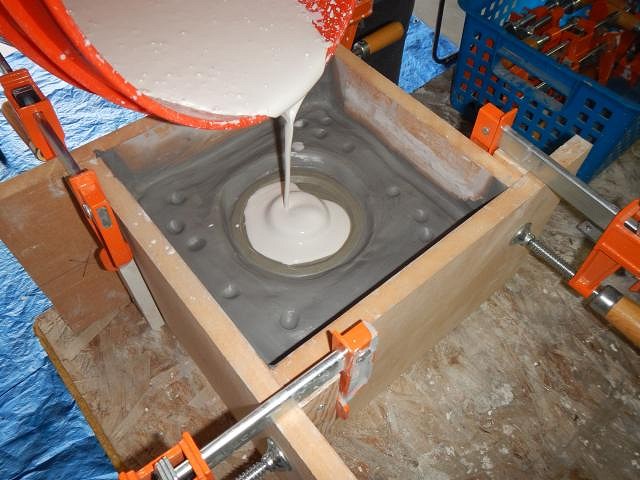
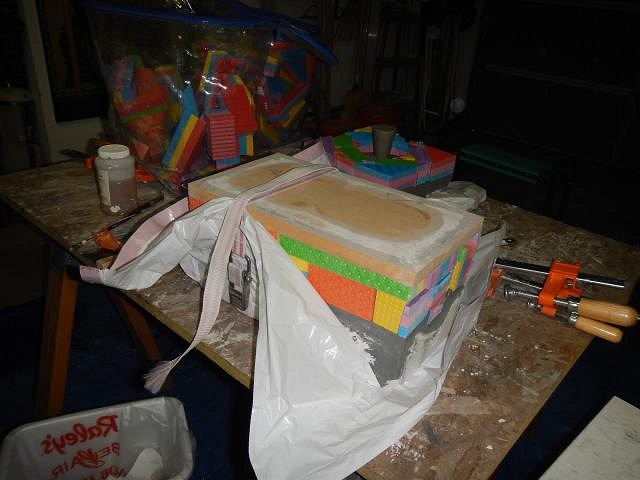
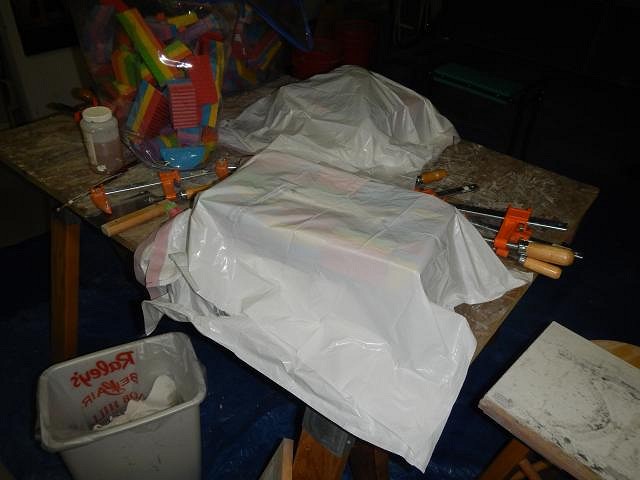
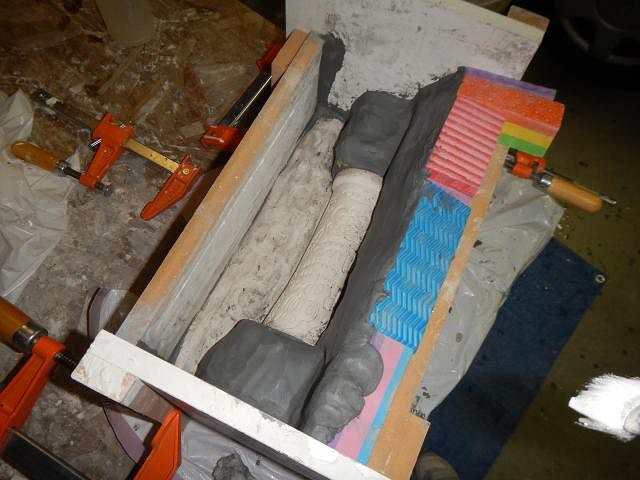
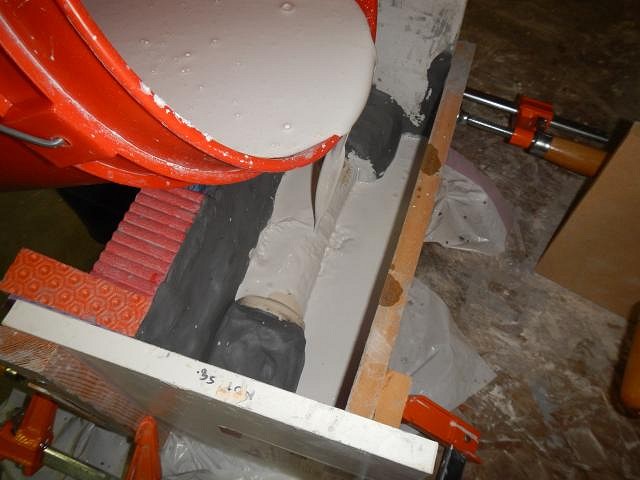
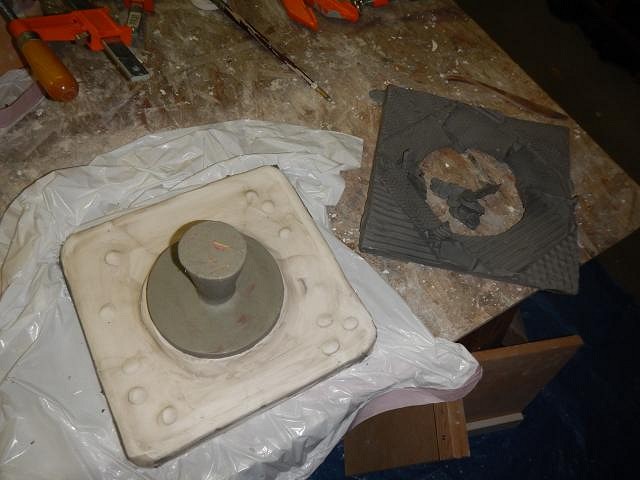
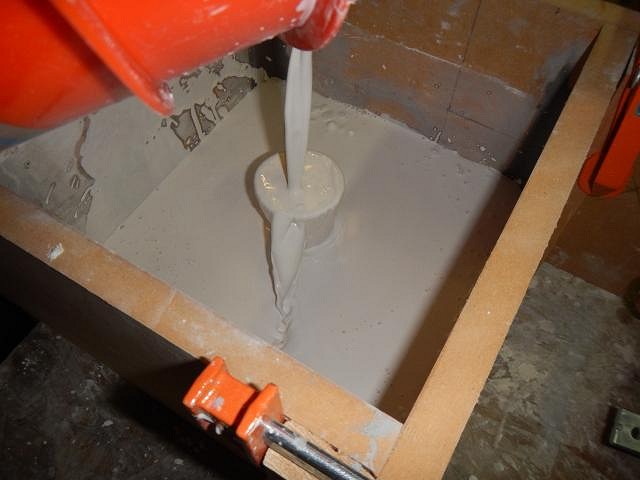
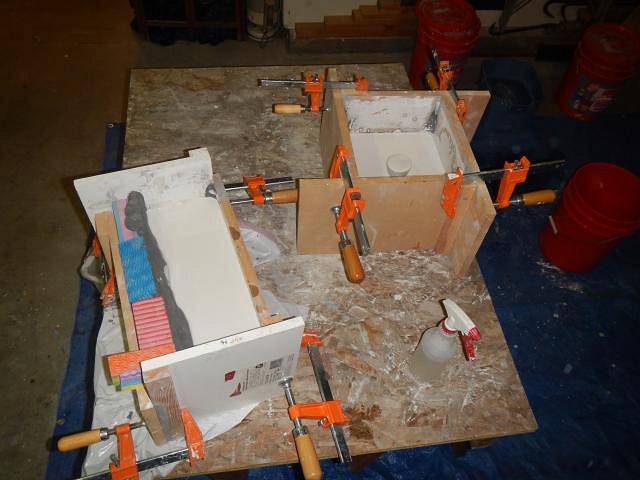
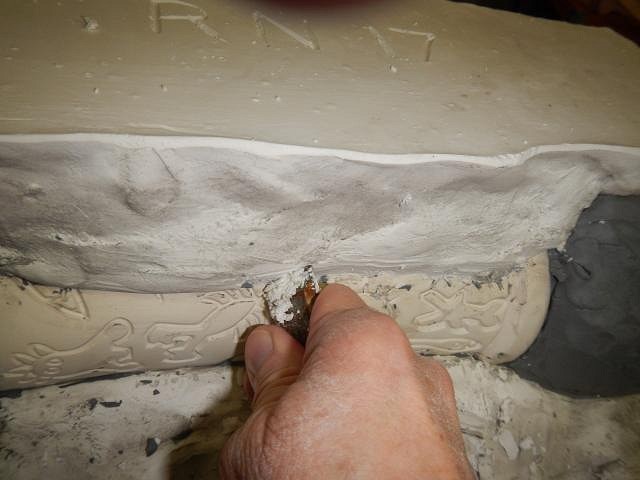
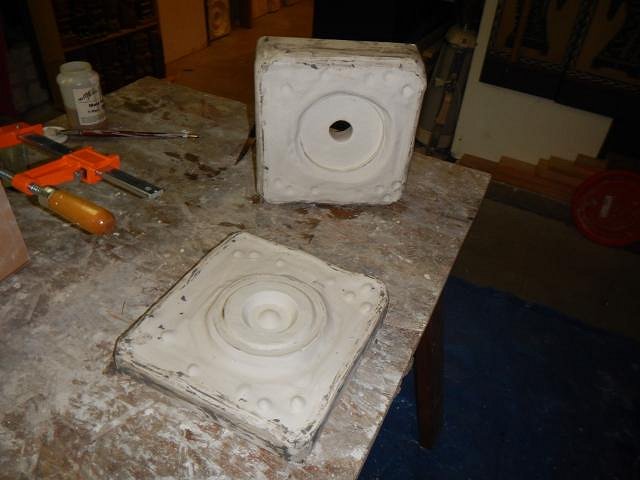
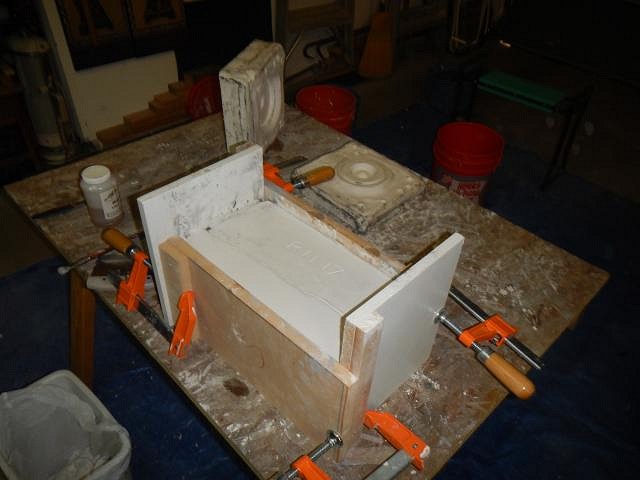
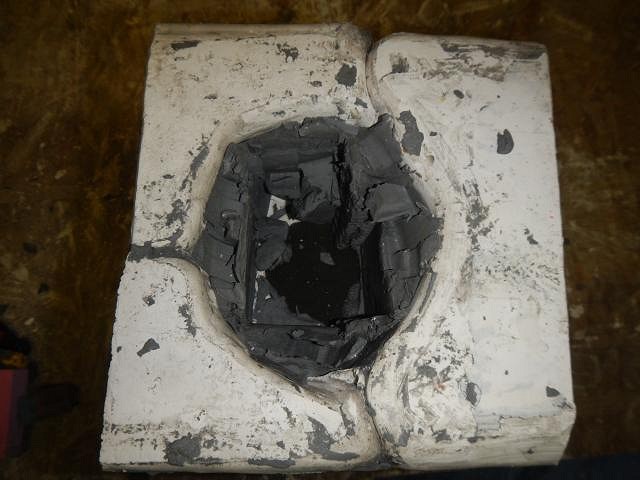
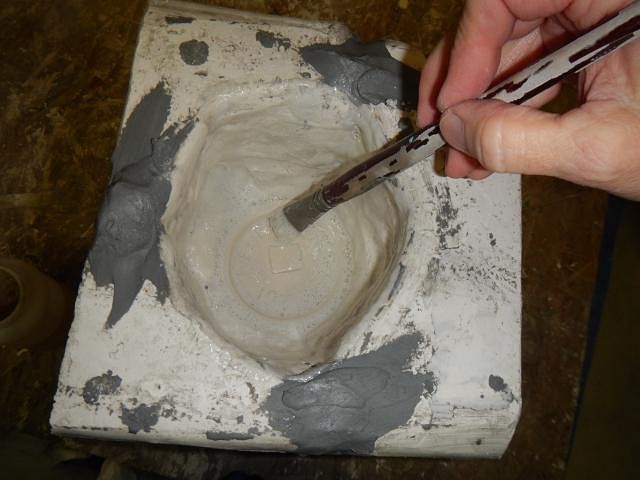
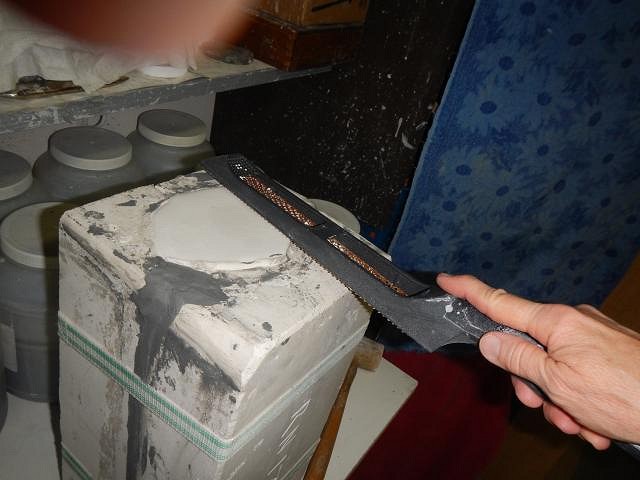
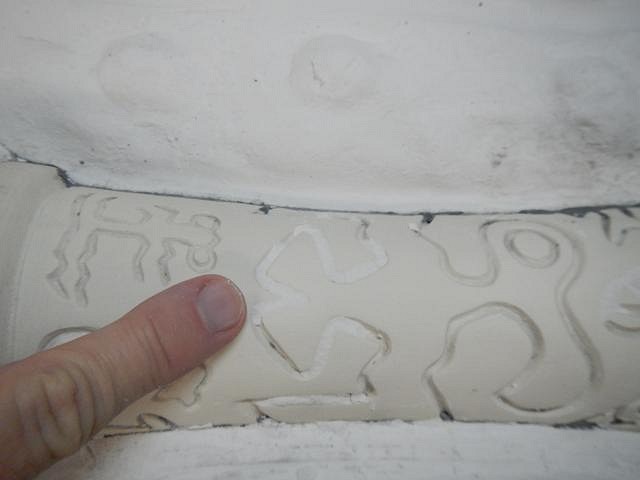
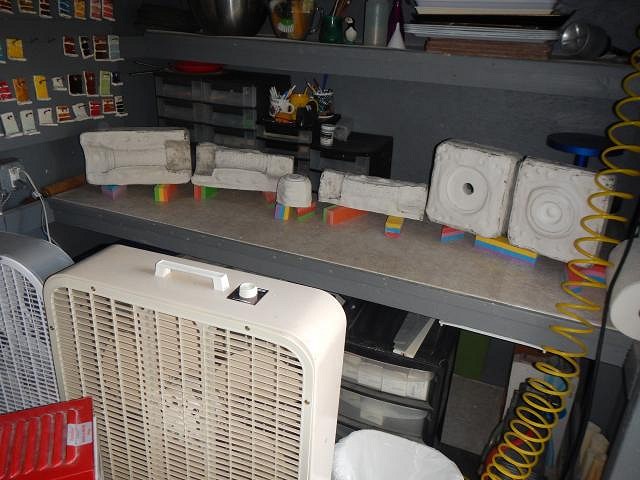
Wish List #7 back in time...this mold was made during the winter. WEAR A FACE MASK THE ENTIER DAY. THE SMALLEST PIECES OF PLASTER DUST STAY IN THE AIR FOR MANY HOURS. THESE ARE WHAT WILL GIVE YOU COPD. I always put Dan to work making the snakes that will seal the box sides from leaking plaster. Keep these sticky wet with a water spray bottle during the day and also keep a plastic bag draped over them. Here I am making the layer of blocks on the bottom mold board. This shows the layer under the sculpt of the lid. I had a layer of blocks under the sculpts and how I build a layer around each sculpt. Since I do it this way it saves time and clay. I will only need a quarter inch layer of clay on top of the blocks. TOXIC MOLD SOAP. Without this all the pieces will permanently stick together. I routinely do 4 layers letting it soak in and then lightly blotting. Wear gloves and a face mask. Each layer is like this then after a few minutes I blot it with a paper towel. The clay has been added to the top of the block and dents pressed in as locks. We were too tired to continue. Since I had already but the layer of clay on the blocks and along the seams I needed to wrap up the molds to keep the clay from drying out. The next morning the clay was still moist. I ran a wet cloth along the seams between the box sides to make sure the clay was still sealing these areas. Now after 4 Layers Of MOLD soap it was time to pour the last piece for the lid mold. The clay is removed and 4 LAYERS of MOLD soap is applied to the plaster. If I forgot this the mold would not come apart EVER! The box is put back together and the plaster is poured in to make the last piece. Two more pieces poured. The last one for the lid mold. Time to remove the clay and to prep for the next RN mug piece. If it looks like there is room for plaster to go under a mold piece I carve away some plaster so that there will not be any sharp fragile edges on a mold piece. This makes the pieces come together like a right angle or sides of a box. The lid sculpt is removed and the mold looks just right. The last piece of the Rapa Nui mold is poured. The last mold piece to make for the Rapa Nui mug will be the bottom. I dug out the clay. 4 layers of mold soap on the mug and the side mold pieces. If plaster touches plaster you must have this barrier. The plaster was poured in and after it became hard I used a rasp to make the bottom of the mold flat. Even with four layers of mold soap that I allowed to soak in before blotting some areas still stuck and broke off. It will just take some time to recurve these for each mug I make. Out in the kiln room they will dry with fans blowing on them 24/7 for several weeks. If it were hot weather this would go faster. I have step by steps for dozens of molds posted on these pages. So little by little I back off from showing some steps because of the time it takes to post each photo. But if you are starting out with mold making you can find many examples on this thread. I will also answer questions posted here. Cheers, Wendy |