Tiki Central / Other Crafts / Wendy Cevola - Doing a major repair of a Tiki Diablo bowl.
Post #792547 by danlovestikis on Sun, Jan 20, 2019 8:35 AM
|
D

danlovestikis
Posted
posted
on
Sun, Jan 20, 2019 8:35 AM
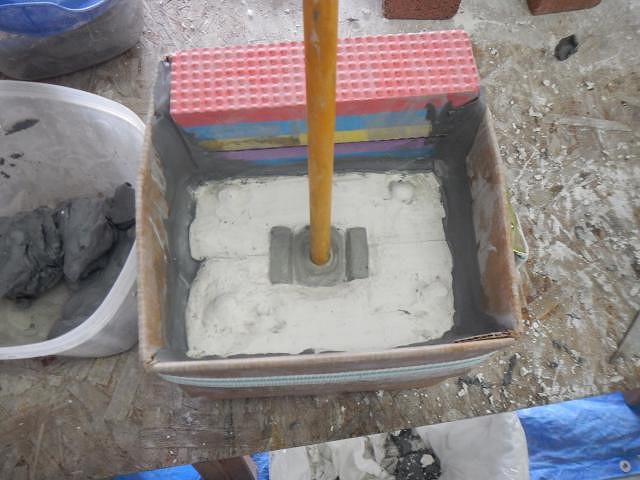
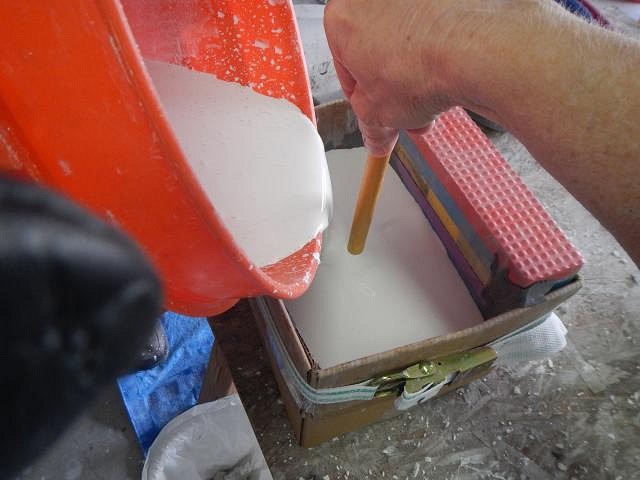
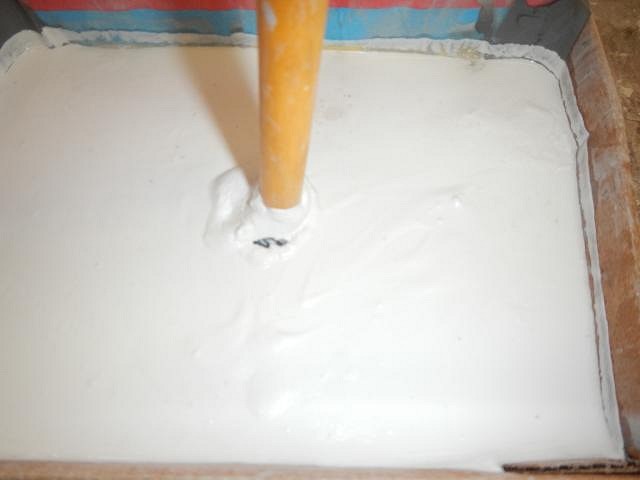
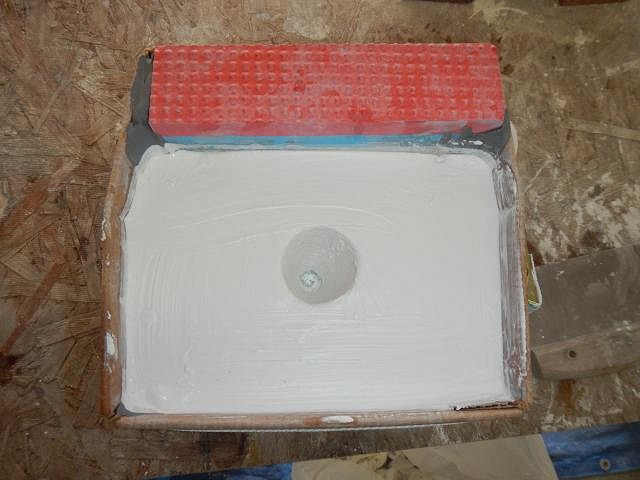
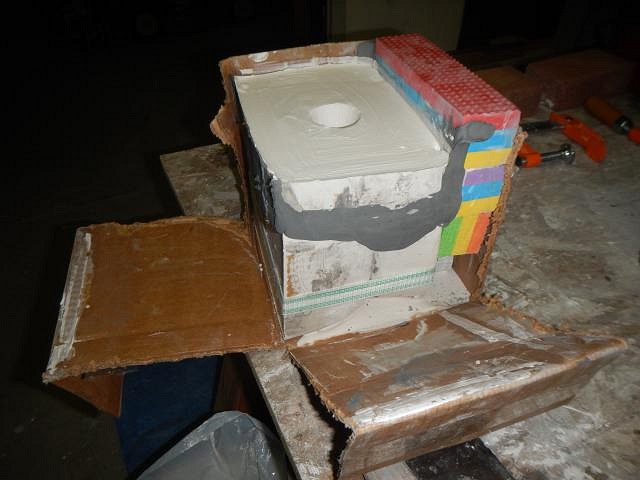
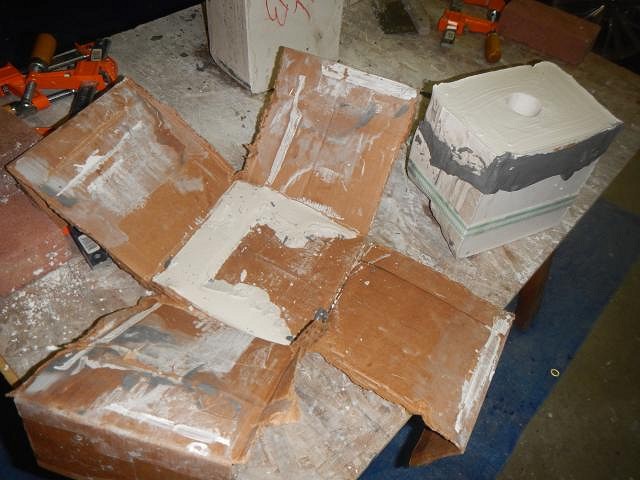
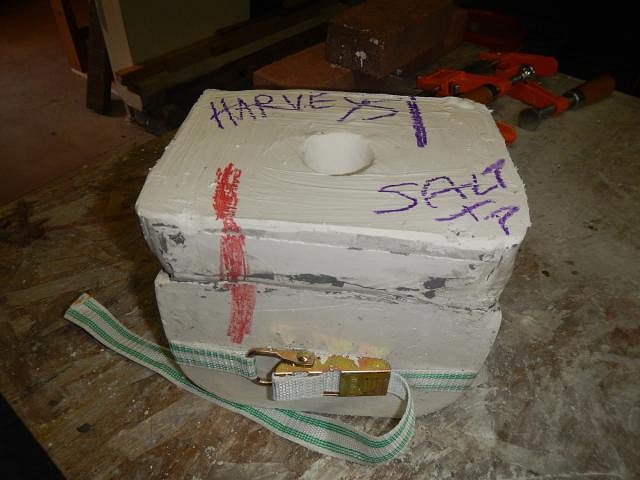
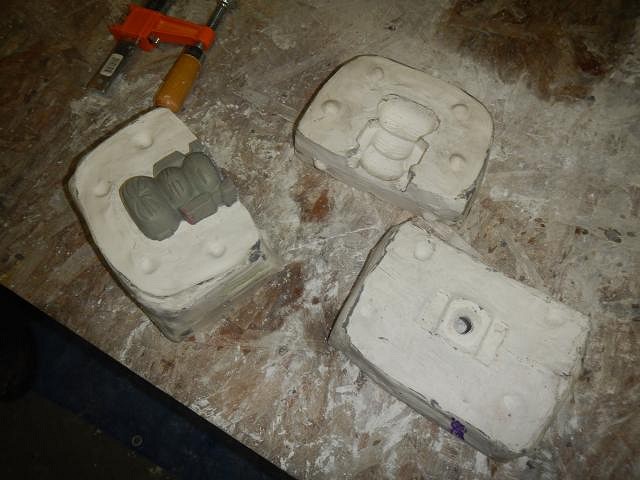
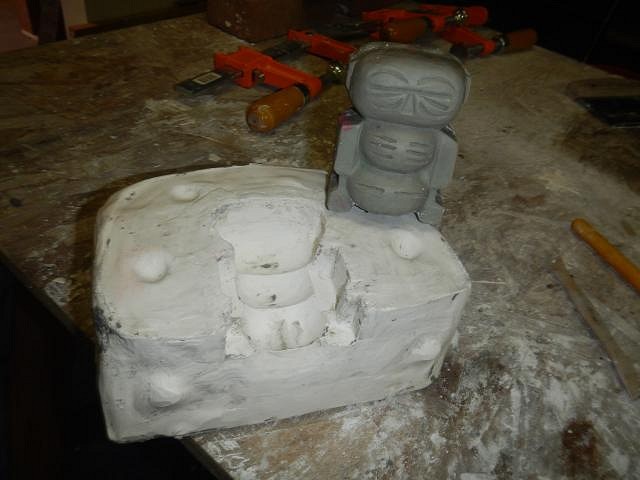
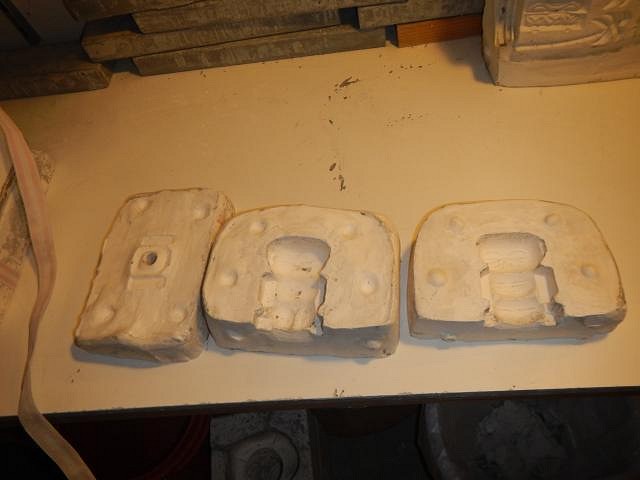
hang10tiki where are more photos? I can tell that yesterday you two were still in Seattle. Or is that the Stratosphere? Sandbartender I put you on the list. I did one set with 4 and 5 holes. I'll make them larger if possible and then the bizarre cinnamon can fit in both. One shaker for each end of the bar, no fighting. Should work for coffee too. Should I put a C on the backs? It's fun to hear new ideas. Hamo that works too. So many projects and just one pair of hands. I'll just keep on putting one hand in front of the next, mucking clay! ================================= Now it's time to pour the last piece of the mold for the Harvey's shakers. I will need a hole at the bottom of each shaker for a cork and also a hole through the plaster in which to pour the slip. I am again using a cardboard box as my mold box. I use clay to seal it so that it will not leak. I then put a stick right where the cork will go at the bottom of the shaker. I will hold it in place while Dan pours in the liquid plaster. He does this very nicely. He's a wonderful helper. Once the plaster is firming up I can let go of the stick. It is at this time we notice that the box is leaking and that plaster is coming out the sides. I just plugged it at the bottom with dry paper towels. This works because the plaster is setting up. You can also put a plastic garbage bag into the box to catch these leaks. Now it's time to twist the stick so that it isn't caught by the plaster. Also I'm going to keep it firmly set to the clay sculpt while I rotate the top to make the opening into the mold larger. I will have to clean this each time I pour a mold so larger is better. Once the plaster is warm and firm I can remove the box to see where the leak took the plaster. Most of it suck on the box. The part that stuck on my mold was soft enough to chisel off easily. No problem at all. I use crayons and mark the mold for easy assembly. Now it's time to open the mold. It came apart easily and the sculpt came out without a problem. No undercuts locking it in. Now it will need to dry for 2 or 3 weeks before use. This sets up the plaster. If you start too soon the mold will crumble. Thank you for watching, Wendy PS Dan just said to me, "I'm going to go dump now". If you are a ceramicist you know that means he'll pour out the excess slip because the cast has enough that has firmed up. [ Edited by: danlovestikis 2019-01-20 08:39 ] |